When you click on links to various merchants on this site and make a purchase, this can result in this site earning a commission. Affiliate programs and affiliations include, but are not limited to, the eBay Partner Network.
Replaced the two front struts this weekend at 55,000 miles, noticed there wasn't a write-up/DIY for the 2nd gen, so hopefully this will be of some help. Largely very much similar to Lexmex's 1st gen experience.
Basically we noticed a very bumpy ride with vibrations in the steering wheel, and eventually throughout the front seats, at anything more than ~20 MPH, so we went to a local tire place for balancing and rotation, thinking maybe a wheel weight broke off or something mundane. Immediately the techs showed me there was substantial inner tire wear on the front two tires (tread life was otherwise fine at ~30k miles on these tires).
Tire shop advised replacing at least the front two tires and getting a wheel alignment, so after swapping out all four tires (the rear two were approaching end of life, so we opted to replace all four), I found a reputable local alignment-only shop from Yelp and went in. He measured things and said the camber and toe were largely fine, requiring very minimal adjustment, suspecting it was the struts as the culprit, instead. (Great tech, no charge for the inspection, and I later returned after replacing the struts.)
Looked around Yelp for a few reputable mechanics, along with a diagnostic at Wheel Works, all three did a test drive and pinpointed the struts. (Their quotes including KYB strut replacements and alignment ranged from $600 to $1000) Bit surprised the struts wore out this quickly at only 55k, but reading the forums, it sounds like this may be somewhat symptomatic of the RX?
I was going to have the local shop do the repair, but in reading up through the ClubLexus forums, I understand many folks recommend replacing the strut mounts and rubber insulators/stoppers, as well, so it seemed these might be judgement calls that I wanted to make on the spot, rather than rely on a mechanic I wasn't certain about. Similarly, I wanted to implement Lexmex's rubber hose/tubing approach for the bottom of the coils, and thought explaining things to the mechanic might be a challenge. Ultimately, I just wanted the experience, so decided to do the work myself I have very limited car repair experience, the extent of it encompassing fluid/filter changes and replacing an old pick-up truck alternator, so thought it'd be fun to try this out
Before work, did a lot of research here on the forums, as well as on Youtube. Found two videos that are useful and recommended:
Read around and many folks here and at other forums, like the Bimmerforums, recommended the Sensen struts over the KYB and Monroe, so I opted for those. Everything else is OEM.
I was going to rent an impact wrench, largely for the coil spring compressors, but after reading advice that they may be too aggressive and potentially more so a hazard, I opted for manual tools instead.
Autozone loaned tools:
Strut coil compressor (2x sets, 4 in total)
Breaker bar 1/2in
Torque wrench 1/2in
~$250 deposit for everything, good for 90 days
On to the work:
Hydraulic jack at the front center wasn't quick tall enough, so ended up relying on the scissor jack to lift, supplemented by a jack stand.
Tires removed, started with the stabilizer bar bolt, 17mm or 11/16in with a breaker bar -- quite tight!
Once loosened, continuing the work with a ratcheting wrench for a bit before adding a hex key/wrench to secure the center bolt while loosening the nut. Learned this trick from the above RAV4 video, else I would still be attempting to loosen the bolt with the wrench alone
On to the two big camber bolts, 7/8in, or better yet, 22mm. Both were quite a beast to loosen, even after soaking in penetrating solvent. First mistake, as we can see in the below right, trying to use a 3/8in drive socket via adapter with a 1/2in drive breaker bar. Then using an old poor quality 7/8in socket that cracked. Went back to Autozone for a 22mm 1/2in drive socket for direct attachment to the breaker bar. Ended up extending the breaker bar with an old PVC pipe for additional leverage.
Finished loosening the camber bolt nut with another socket wrench on the bolt side to hold things in place. Note: on the driver's side, the nut's on the right (facing the vehicle rear) of the strut, while on the passenger side, it's on the left (also facing the vehicle rear).
Finally the last bolt attaching the brake line holder/bracket to the strut. I believe it was a 12mm. Much easier to loosen and didn't require the breaker bar. There are two thing metal plates sandwiched underneath the bolt. No nut required, the mounting hole in the strut is threaded.
Under the hood, the strut mount is accessible via a little cover plate. Used a flathead screw drive to release the cover and access the nuts. The three nuts were all 14mm, if I recall correctly, and required a breaker bar, as well. Here, also using a 6in extension.
With everything loosened, removing the camber bolt and stabilizer bar bolt took a bit of elbow grease. Placed the hydraulic jack under the rotor/knuckle a few times to elevate/drop the assembly a few times to loosen everything. Surprisingly, the stabilizer bar was the most challenging, but maybe it was just challenging as a one man job. My dad gave me a hand with the passenger side and it was much easier.
With the strut out, marked the whole assembly (strut, all plates, gaskets/insulators, coil, bellow, etc) with white-out. Started compressing the coil. After so much warning of how dangerous this was, we opted for 4 compressors, rather than 2, just in case 1 failed. My first time using the device, but very straight forward, although a few of the little locking pins didn't quite lock -- depending on the angle the holders were installed and the diameter of the coil, the pins didn't quite have space to be extended into the locking position. As such, having 4 compressors in place just gave me that additional peace of mind.
The white-out was really handy during the re-installation process to align things. A ratcheting wrench made compressing the coils substantially easier. My dad arrived home just in time as I was starting the compression, and it took us no more than 5 minutes to lock down all 4 compressors with two wrenches.
Loosened the strut's top nut with a breaker bar. I don't quite recall, but think it was 3/4in or 19mm? Used a pry bar against the strut mount bolt and the ground for leverage to really make the process a piece of cake. Rinsed off the accumulated dirt and crud from the coil.
Laid everything out in order during the dis-assembly for easier re-assembly. The yellow/orange stopper/bumper is the bottommost (left), while the strut mount is the uppermost (right). Everything looked in great shape, as expected with only 55k miles, so we decided to not replace the stopper or mount for now, while just cleaning everything. We'll have the extra parts on hand for the next replacement (hopefully these struts last us 100k miles!) After cleaning off the crud and gunk, reapplied lube to the bearings and strut mount. The bearings had a red inner ring on one side and black outer ring on the other, (see here) so I'd recommend being careful during dis-assembly/re-assembly.
Even for those who didn't mark things with white-out, the pieces really only fit one way. There are two notches in the strut and seat that will only align in one direction. Sorry for the blurry picture!
The Sensen strut ships compressed with a small wire holding things in place. When comparing the new and old, one can easily see the old failed one is not being to extend back into form after being compressed. Didn't notice any leaking or such, nor felt the car dipping, so if it weren't for the vibration and worn tires, we would have had no idea these failed.
Finally, Lexmex's bottom insulator replacement. The original bottom insulator was actually in great shape, so this swap was more so for fun (I'm holding on to the original insulators, just in case I need them down the road). I found the recommended rubber PVC tubing from Home Depot, but opted for some reinforced radiator/heater hose instead. 5/8in ID, 3/4 ODin at $1.40/ft from Autozone. Used about 18in. per coil, 3ft for both sides. Left the hose out in the sun for a few hours to soften them up and make them more flexible for installation. Also used a bit of silicone spray/WD-40 on the coil and tubing for lubrication. The coil has a thin sleeve installed on it, about 18in from the tip of the coil, so that's where the recommended 18 inch length comes from -- the 5/8in ID rubber tubing is a bit too snug to make it farther up the coil.
Assembly was basically just everything in reverse. Played around with the hydraulic jack under the rotor/knuckle to get everything into place. Didn't manage to get many photos of that process as it was all pretty straight forward. Tightened everything with a torque wrench, including tires to 76 ft-lbs.
Didn't quite have access to a 2nd gen manual, so used the torque specs from the RX330:
Pretty fun experience. I replaced the first strut myself for the most part. Trying to be safe and careful, including the extra trip back to Autozone, it took about 4 hours for the first strut. With my dad's help and experience from the first one, the second one took no longer than 1.5-2 hours
so how does the ride feel, was there a noticeable difference? My RX400 h has 165k miles and I am going to change the control arms on from with ball joints, and will probably do the struts also.
I am doing this job now. I actually have the floor model strut spring compressor, but it will not work on my springs. It looks like my springs are miss formed, They are asymmetrical and go from large ring to the top where it is a small ring. I tried my regular spring compressor and I cannot compress them enough. I ended up using my floor compressor and had to keep the shock straight with a belt strap at the bottom. I looked at your compressed spring in the picture and when I get them compressed like your picture the top turn on the spring is not over the rest of the spring so I cannot make the mount work. I have to redo them twice due to I did not get the mount seated correctly. I just finished one shock correctly and will do the other again.
Thanks for the great write up! Came in very handy doing this last weekend on my 2006 RX 400h. I found the job pretty straight forward. I got hung up in two places, both involving the compression of the springs.
One was I didn't pay close attention of where I placed the strut compressors and had to start over because either the bolt head or the bolt end ran up against the strut mount or part of the spring. From your photos it didn't look like you ran into that problem.
The second thing was that I initially compressed the spring to where I could remove the strut mount and disassemble the strut. When I went to put everything back together at first I couldn't figure out why the mount would not seat on the flat "notch" at the top of the new strut (I could tell since I could rotate the mount but the strut piston wasn't moving - they will move together when it is seated correctly). Turned out I needed to compress the spring another half inch or so for the mount to seat on the notch and allow them to be tightened.
After that, getting the reassembled struts back in was relatively easy. I did use a floor jack under the strut to provide a bit of pressure before tightening the camber bolts. Read somewhere else that was recommended to get the spring re-seated.
For anyone looking here with future problems, I should note that the tried and true test for failed struts of pushing down on the front sides showed nothing. The car would bounce right back up and stop. No continuous bouncing. Same thing going over speed bumps. The main symptom was a kind of thumping at low speeds (< 10 mph) in front of the firewall, often while turning. Sounded like soccer ***** bouncing in a clothes dryer to me. It wasn't until the mechanic, who put sensors on the struts, heard significant noise from them that I decided to replace them. They were leaking slightly too, but since the "push" test didn't show anything I wasn't convinced at first. Noise was gone immediately after replacement.
The boots underneath the sprint covering around the struts of my Lexus RX 350 torn out. Should I replace it? I hear sounds when I turn the wheel about half way. Not sure if it is caused by those. Other than that my car has been bouncing fine with no continuous bouncing. Any recommendations?
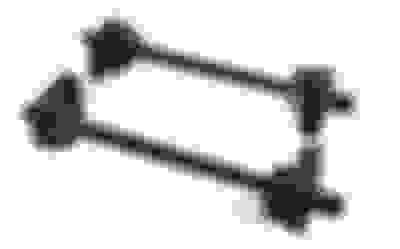
Are the suspension parts different for the FWD vs AWD?
I saw that this was done with SENSEN parts, I found the part catalogue, but for the 2009 Lexus RX 350, they only have the parts listed for the FWD variety.
Checking my vin on vehiclehistory.com shows that it is an AWD/4x4 - is there a difference in the parts now?
I just want the complete assembly so I can swap it out. I do not want to be compressing the springs etc.
ALSO, They all mention that they are not air suspension... Was the stock parts air suspension? (is there an option that has an air suspension system, but I do not believe my car has one... am I wrong?)
Pardon my noob questions
No you have spring coil. I have never seen any air suspension coil in lexus rx.
 08-03-15, 05:11 PM

 I have very limited car repair experience, the extent of it encompassing fluid/filter changes and replacing an old pick-up truck alternator, so thought it'd be fun to try this out