RC - 1st Gen (2015-present) Discussion about the new Lexus RC model

DIY Rear Deck Spoiler Install

Thread Tools
 
Search this Thread
 
Old 02-06-15, 01:40 PM
  #1  
Poqman
Lead Lap
Thread Starter
 
Poqman's Avatar
 
Join Date: Aug 2009
Location: Poquoson, VA
Posts: 647
Likes: 0
Received 23 Likes on 12 Posts
Default DIY Rear Deck Spoiler Install

I thought I would share my experience installing a rear deck spoiler. Here's the parts you need. I got mine from Sewell's Lexus with the Club Lexus discount.


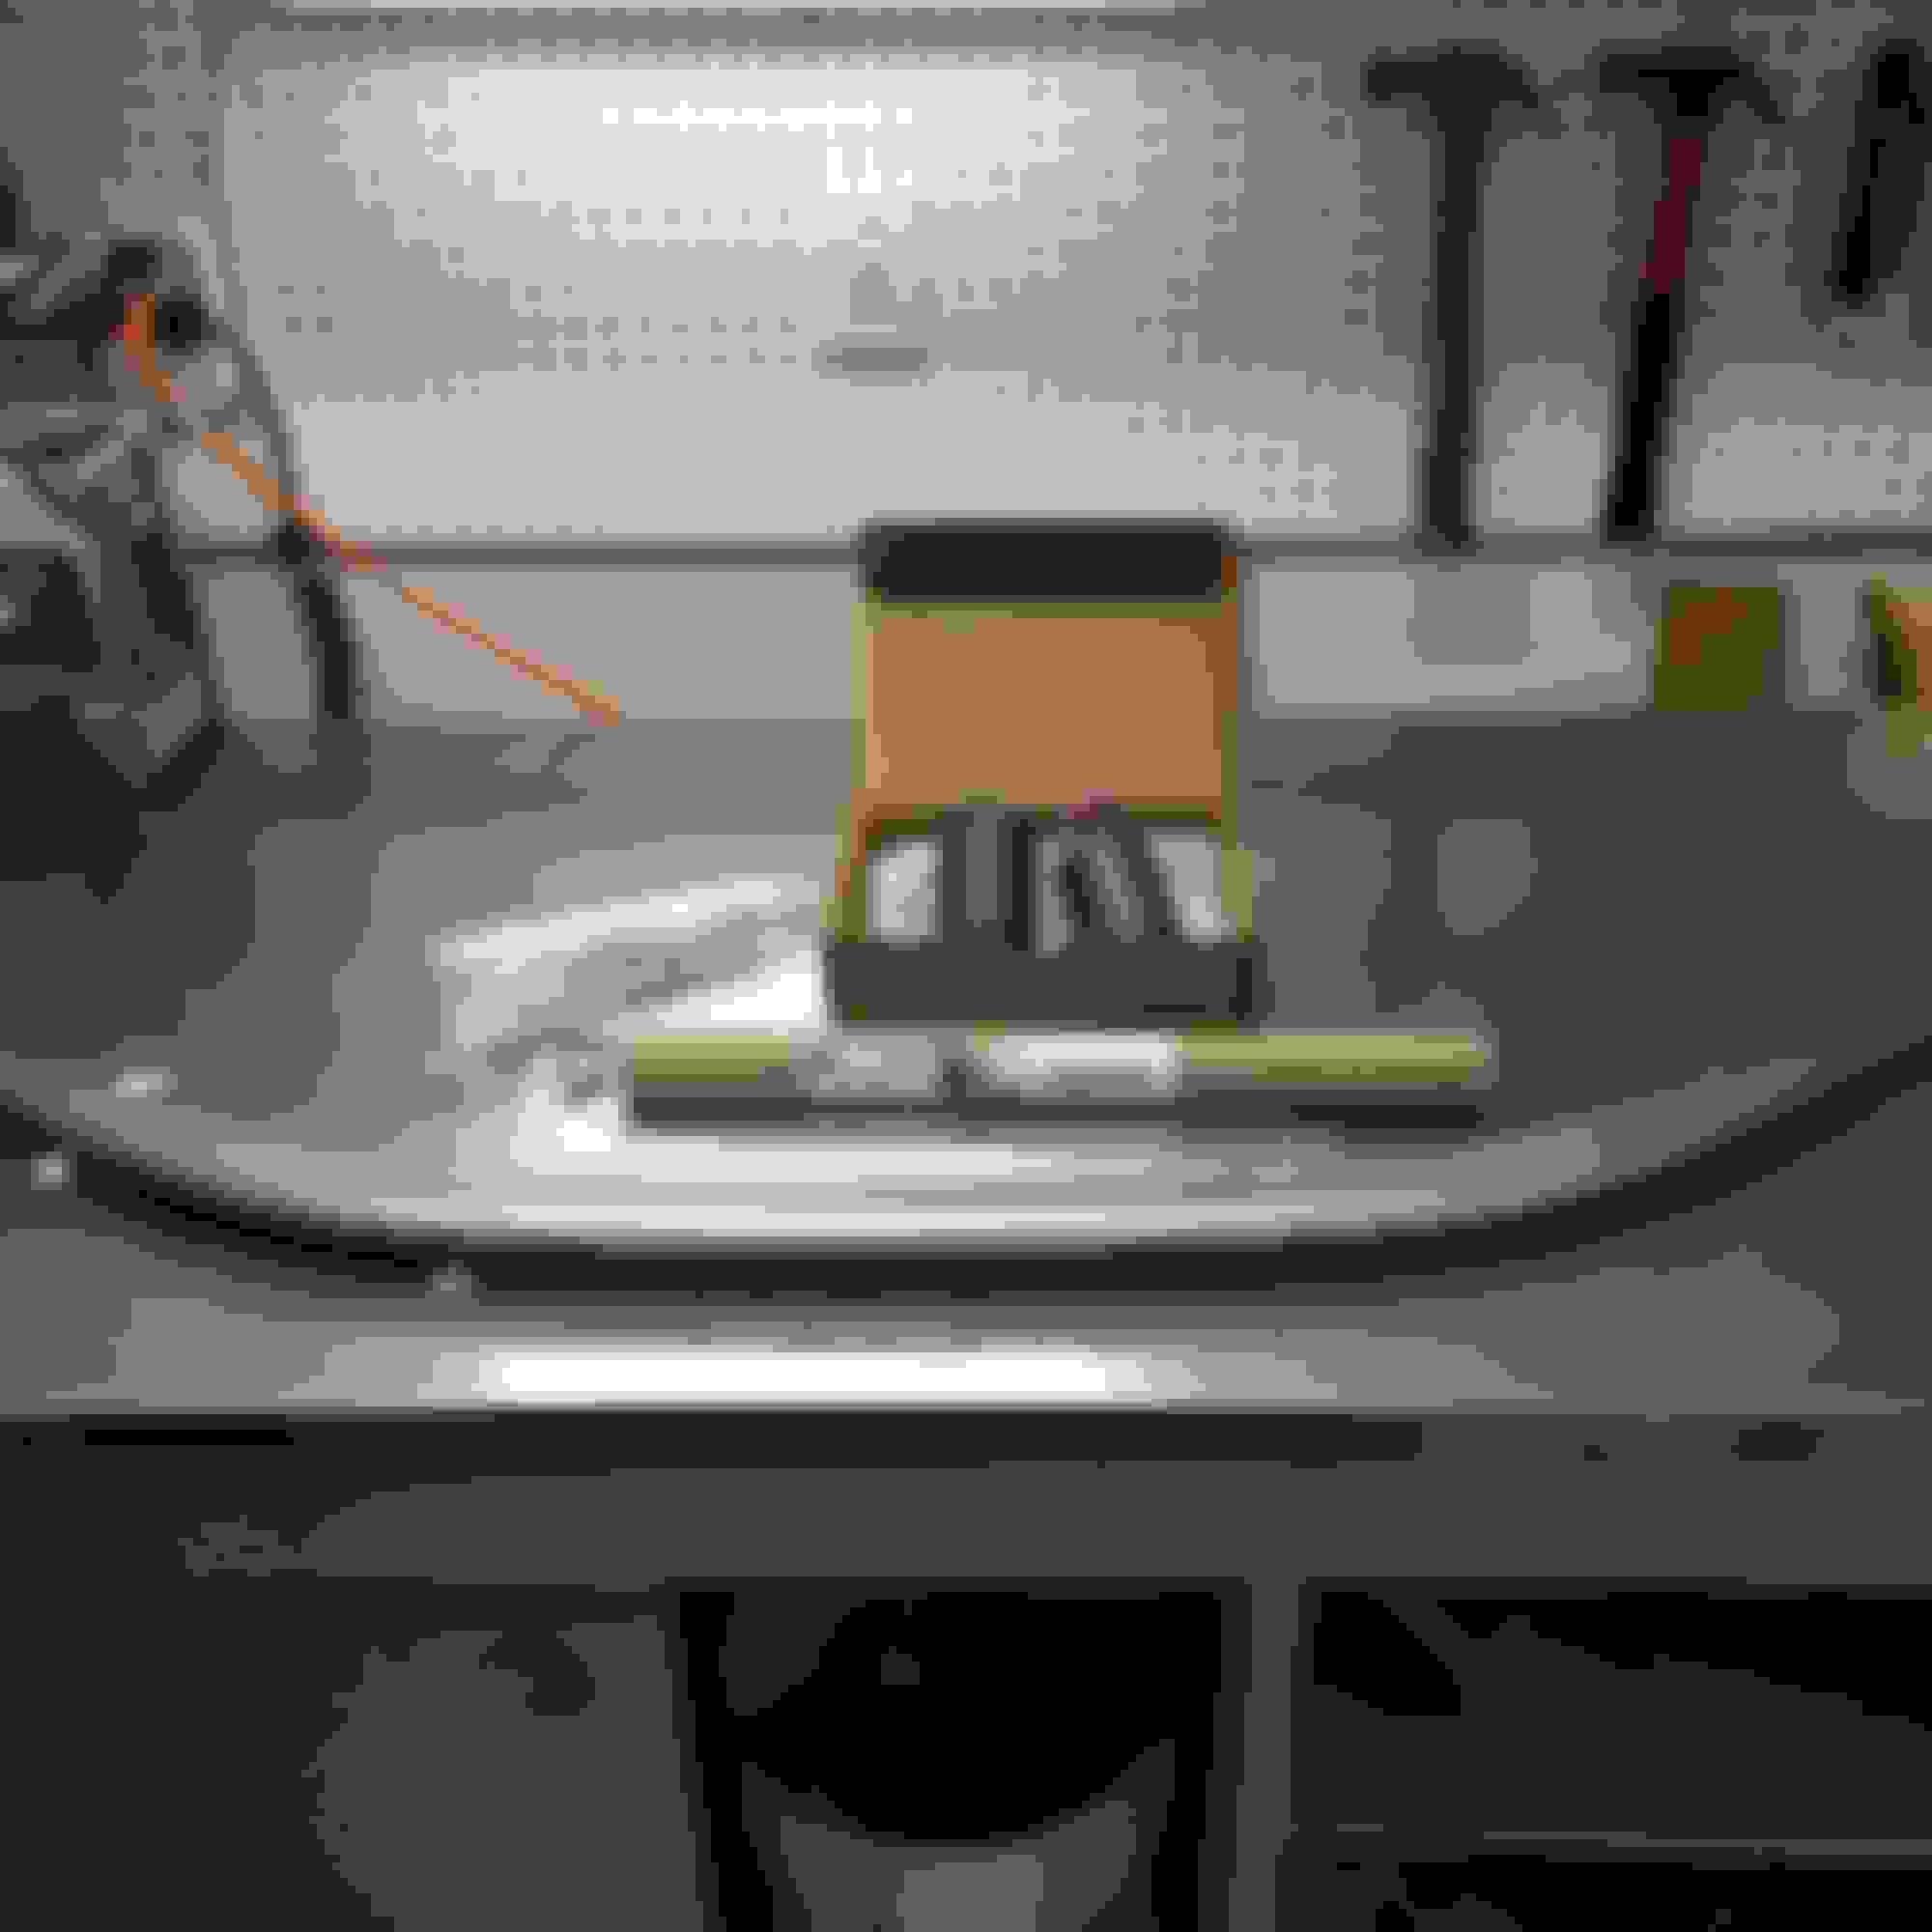
Here's what you get:


You get the spoiler, drill template, replacement springs, nuts, bolts, spacers.


Remove clips from top side of trunk so it can flex. You aren't removing this piece.


Remove clips from side trim panels so you can pull it out to access springs.


Prop up the trunk lip before removing the spring. Remove the old spring and discard. The new springs are shorter to offset the weight of the spoiler.


Install new springs and replace trim panels and clips.


Remove 14 clips holding the trim on the underside of the trunk. Remove trim.


Place tape on rear deck where the spoiler will be installed.


Install template by placing tape in the designated order of the template, smoothing the template as you go along.


When the left and right templates overlap in the middle, the alignment marks should be centered.


Using a center punch, tap the deck lid in the four locations so the drill has a starting point.


Remove the tape and de-burr the holes.


I painted the raw metal edges to assure the edges don't rust.


Vacuum the metal burrs before opening the deck lid. Also, open the deck lid and use a flexible magnet to clean the burrs from the inside of the deck lid.


Place 3M Ultra-Pro Body Sealant around the four holes just before installing the spoiler.


Install the spoiler and tape it to the deck lid. Once done, open the trunk.


Install the supplied spacer and bolt/nut to the left and right side. Do not tighten so the double-back tape tabs can be pulled out in a later step.


Once the bolts and nuts are installed, close the trunk, center the spoiler from the edges and pull the double-back tape tabs from the rear side first. Push from the rear and set the tape. Now pull the front tabs off and push down. Open trunk and tighten bolts/nuts to 23 inch pounds. Re-install trunk trim.. You're done.

Last edited by Poqman; 02-06-15 at 04:28 PM.
The following 3 users liked this post by Poqman:
bam4bam1 (05-25-17), BrianRC350 (05-04-22), natekunz4 (05-22-20)
Old 02-06-15, 03:16 PM
  #2  
GearHead69
Instructor
 
GearHead69's Avatar
 
Join Date: Dec 2011
Location: AZ
Posts: 765
Likes: 0
Received 18 Likes on 11 Posts
Default

Excellent write up and pics.
Old 02-07-15, 04:40 AM
  #3  
tmf2004
5% Club. Killing it!!!
iTrader: (15)
 
tmf2004's Avatar
 
Join Date: Nov 2004
Location: FL
Posts: 21,942
Received 63 Likes on 61 Posts
Default

Great DIY... better pics fr the RC owners...
Old 02-10-15, 08:11 AM
  #4  
LRCSALES
Lead Lap
iTrader: (1)
 
LRCSALES's Avatar
 
Join Date: Oct 2013
Location: na
Posts: 609
Received 71 Likes on 52 Posts
Default

excellent write. i will be installing the same wing buy i will remove the bolts and not drill into my decklid
Old 02-10-15, 10:52 AM
  #5  
tfischer
Moderator
 
tfischer's Avatar
 
Join Date: Feb 2001
Location: Cincinnati
Posts: 3,613
Received 191 Likes on 144 Posts
Default

Nice job. Your spoiler looks just like mine which was dealer installed. I think the little spoiler at the rear adds a nice touch.
Old 02-11-15, 02:16 PM
  #6  
Poqman
Lead Lap
Thread Starter
 
Poqman's Avatar
 
Join Date: Aug 2009
Location: Poquoson, VA
Posts: 647
Likes: 0
Received 23 Likes on 12 Posts
Default

Originally Posted by tfischer
Nice job. Your spoiler looks just like mine which was dealer installed. I think the little spoiler at the rear adds a nice touch.
Thanks tfischer! I was pleased with the outcome. It takes a strong heart and trust before making those drill holes.
Old 02-11-15, 05:20 PM
  #7  
tfischer
Moderator
 
tfischer's Avatar
 
Join Date: Feb 2001
Location: Cincinnati
Posts: 3,613
Received 191 Likes on 144 Posts
Default

When I bought my car, I did not even know a spoiler was an option, and it was not on the spec sheet when I bought it. But it was at an out of town dealer who had a buyer for the RC that my salesman had, so they agreed to swap. At that point someone said the red car was down in the shop getting a spoiler put on it. I found a photo of one in the options booklet, and it looked like the ones I had on my SC400 and SC430, so I said fine, and I'm glad I did, as it's a really nice look.
The following users liked this post:
bam4bam1 (05-25-17)
Old 05-25-17, 06:58 PM
  #8  
bam4bam1
Driver School Candidate
 
bam4bam1's Avatar
 
Join Date: May 2017
Location: VA
Posts: 6
Received 0 Likes on 0 Posts
Default

How much did the kit itself cost you with new springs? I already have the spoiler and was looking to install it myself as well..
Old 05-27-17, 05:49 PM
  #9  
Poqman
Lead Lap
Thread Starter
 
Poqman's Avatar
 
Join Date: Aug 2009
Location: Poquoson, VA
Posts: 647
Likes: 0
Received 23 Likes on 12 Posts
Default

Springs came with the spoiler. My total cost with the drill template was $284.77.
Old 05-27-17, 06:48 PM
  #10  
bam4bam1
Driver School Candidate
 
bam4bam1's Avatar
 
Join Date: May 2017
Location: VA
Posts: 6
Received 0 Likes on 0 Posts
Default

Finished mine today and forgot to take the pic before it got rained on..
Old 05-31-17, 01:13 PM
  #11  
lexual_rc
Moderator
 
lexual_rc's Avatar
 
Join Date: Jan 2016
Location: CA
Posts: 604
Received 73 Likes on 51 Posts
Default

Nice write up, it looks really good!
Old 12-02-18, 07:59 AM
  #12  
Mylex400
Driver School Candidate
 
Mylex400's Avatar
 
Join Date: Jul 2011
Location: WA
Posts: 24
Likes: 0
Received 0 Likes on 0 Posts
Default

Pogman. Thanks for the write up. I used it as a guided and got mine installed yesterday. I struggled a little bit with putting on the new speio but the rest of the installation went well. Thanks again.
Old 12-03-18, 04:34 AM
  #13  
Poqman
Lead Lap
Thread Starter
 
Poqman's Avatar
 
Join Date: Aug 2009
Location: Poquoson, VA
Posts: 647
Likes: 0
Received 23 Likes on 12 Posts
Default

Glad it went well. I always thought it added a nice look to the rear. I've sold my RC and entered the vintage car phase of my life replacing the RC with a 1966 Mustang 2+2 candy apple red fastback. Talk about a change in ride and quiet!
Old 04-24-19, 05:50 AM
  #14  
mpugeda
Rookie
 
mpugeda's Avatar
 
Join Date: Jul 2017
Location: Maryland
Posts: 51
Received 10 Likes on 9 Posts
Default

Just used this guide to install my oem spoiler. Excellent write up. If anyone has any questions regarding the install feel free to ask.

Last edited by mpugeda; 04-25-19 at 03:42 AM.
The following users liked this post:
JHouston (03-08-22)
Old 03-28-20, 07:46 PM
  #15  
natekunz4
5th Gear
 
natekunz4's Avatar
 
Join Date: Dec 2019
Location: MO
Posts: 5
Received 2 Likes on 1 Post
Question

What size of drill bits did you use? And did you use a smaller bit and then bigger, or just the first size to begin with?


Quick Reply: DIY Rear Deck Spoiler Install


All times are GMT -7. The time now is 05:26 AM.