DIY: Replacement of ECU SC400 - With pictures
 02-14-14, 10:08 AM
#1

This is probably popular knowledge here on CL but it's always nice to have a DIY with pictures for reference.
Difficulty rating: Easy
Time needed: 5-15 Minutes
Tools needed: Standard screwdriver, 10mm socket with extender and socket wrench.
The ECU is located on the left side of the passenger floorboard, underneath the carpeting.
[IMG]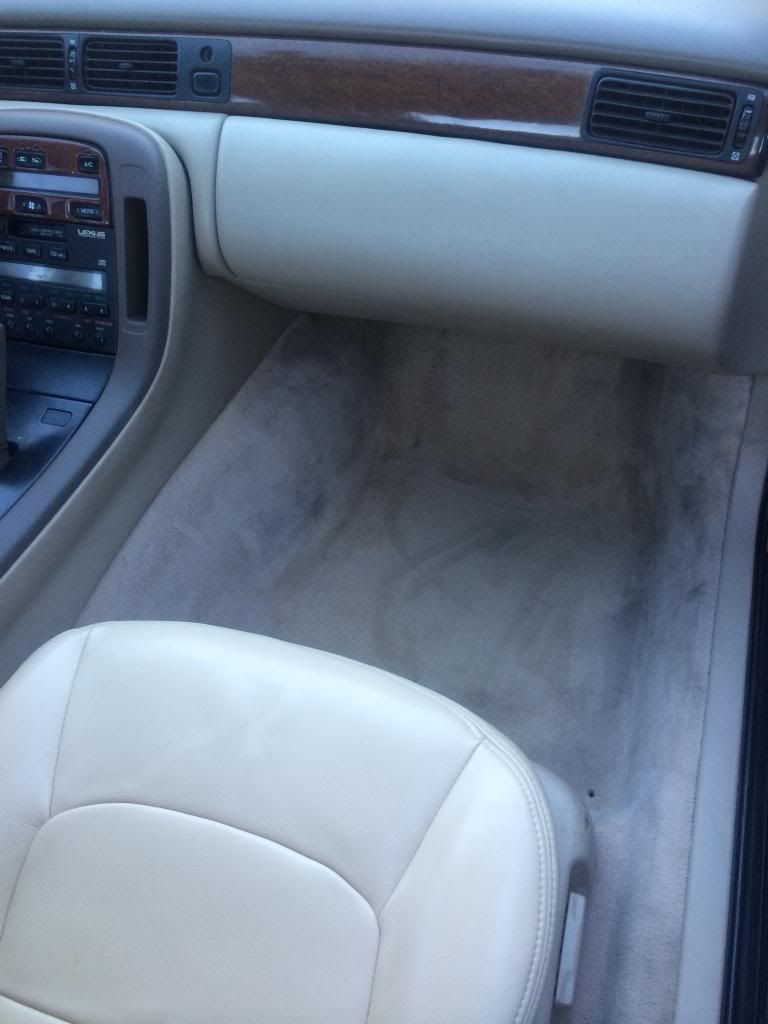 [/IMG]
Disconnect the negative battery terminal. (always) Pull the plastic trim completely off that holds the weatherstrip and carpeting. Then you're able to pull the carpeting back enough to access the nuts that fasten the ECU to the floorboards. Remove the plastic cover that houses the ECU. There are 2 10mm nuts holding it.
[IMG] [/IMG]
Remove the bolt that secures the ECU to the floorboard.
[IMG]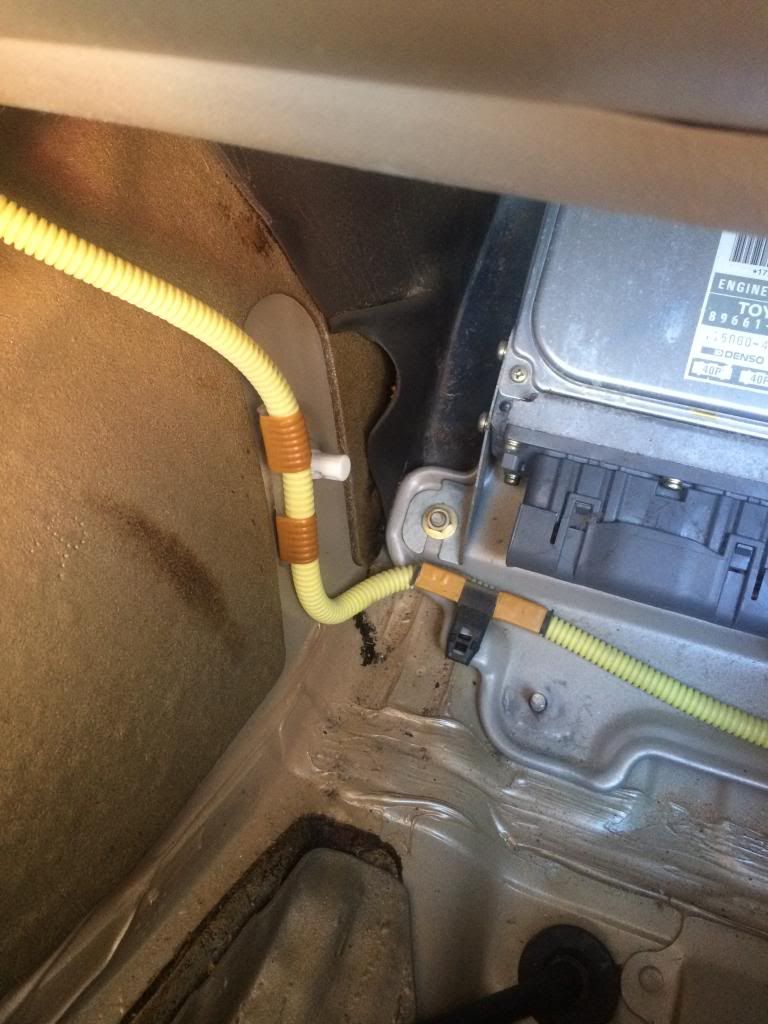 [/IMG]
Loosen the bolt securing the connectors to the ECU. Slide connectors off.
[IMG]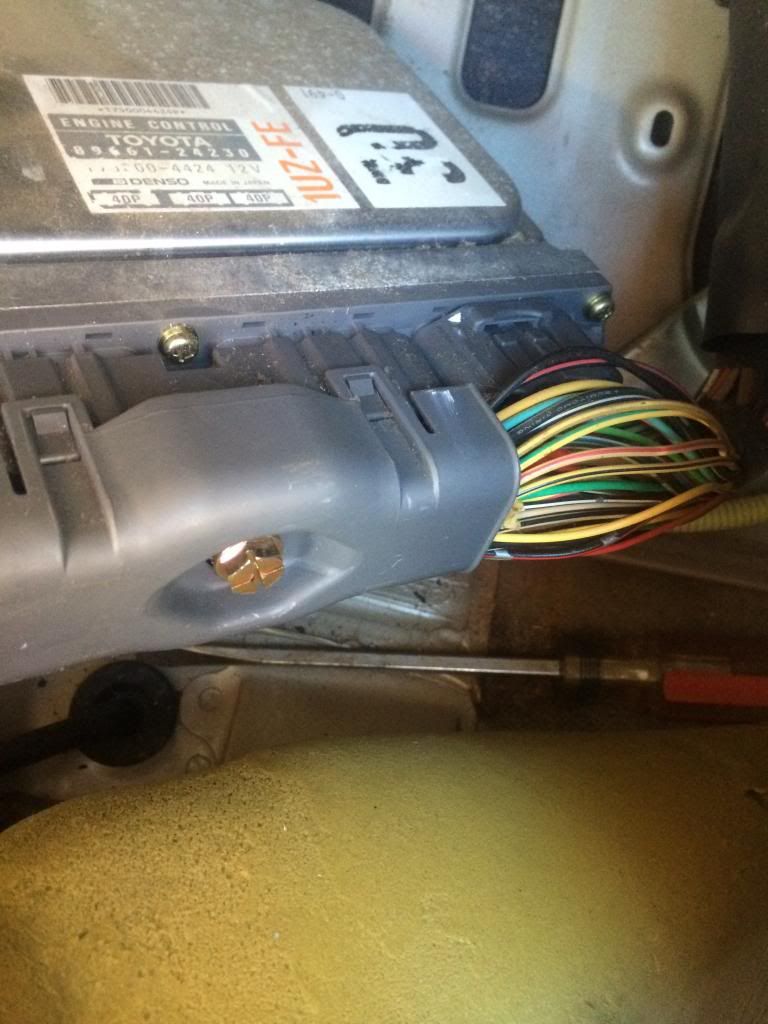 [/IMG]
The ECU is removed.
[IMG]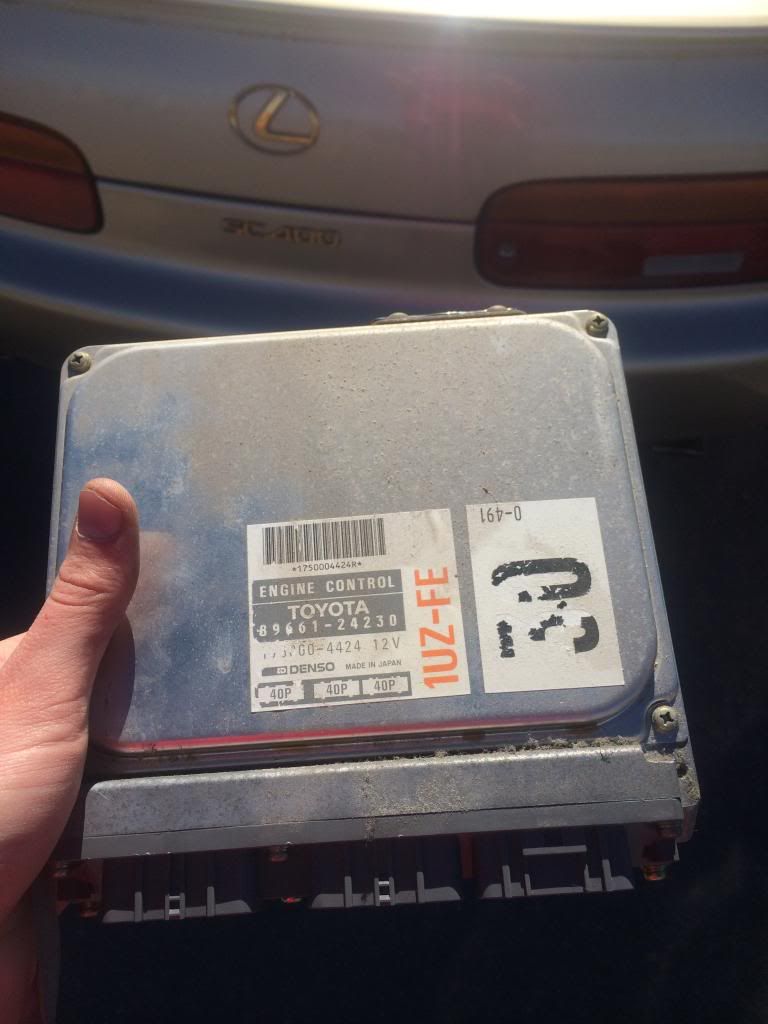 [/IMG]
7 minutes. ECU ready to be sent out for a rebuild.
Installation is is reverse of removal.
Difficulty rating: Easy
Time needed: 5-15 Minutes
Tools needed: Standard screwdriver, 10mm socket with extender and socket wrench.
The ECU is located on the left side of the passenger floorboard, underneath the carpeting.
[IMG]
 [/IMG]
Disconnect the negative battery terminal. (always) Pull the plastic trim completely off that holds the weatherstrip and carpeting. Then you're able to pull the carpeting back enough to access the nuts that fasten the ECU to the floorboards. Remove the plastic cover that houses the ECU. There are 2 10mm nuts holding it.
[IMG]
 [/IMG]
Remove the bolt that secures the ECU to the floorboard.
[IMG]
 [/IMG]
Loosen the bolt securing the connectors to the ECU. Slide connectors off.
[IMG]
 [/IMG]
The ECU is removed.
[IMG]
 [/IMG]
7 minutes. ECU ready to be sent out for a rebuild.
Installation is is reverse of removal.
Last edited by SC400slide; 02-14-14 at 11:04 AM.


Thread
Thread Starter
Forum
Replies
Last Post