Part II: Engine Upgrades: 2JZGTE T61 R154


 03-21-12, 08:15 PM
#92
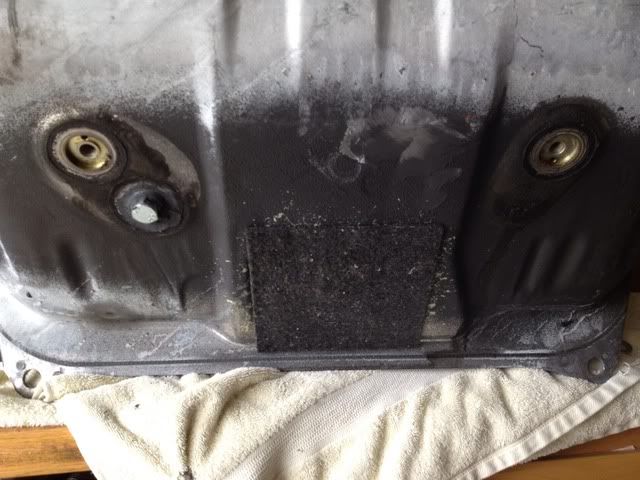
that bolt that the 90 degree angle is pointing to in my illustration was arcing. The power cable to the fuse box is on the same post (just on the other side). I did not realize I had the bolt backed out and not tight so the bolt was arcing to the head. So when I put power to the fuse box from the battery it began arcing and creating a glow from the top. Once I put the bolt all the way down it was fine since no where to arc. It is a live bolt since it is one of 5 attached to the power line coming in to the fuse box for constant power.
This is the "underneath" part of the fuse box that is under the hood. I moved it to the trunk. I was wondering if something was supposed to go there since I do not remember a wire coming off that post...but it looks like it is because I left it backed out for some reason.
This is the "underneath" part of the fuse box that is under the hood. I moved it to the trunk. I was wondering if something was supposed to go there since I do not remember a wire coming off that post...but it looks like it is because I left it backed out for some reason.
Last edited by ICONYQ; 03-21-12 at 08:19 PM.
03-22-12, 05:23 AM
#94
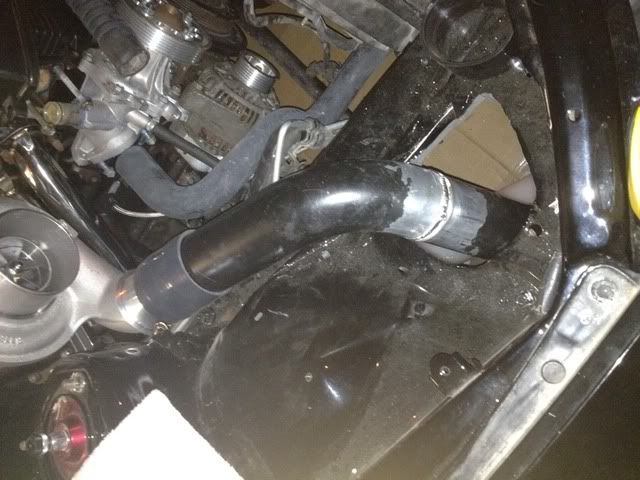
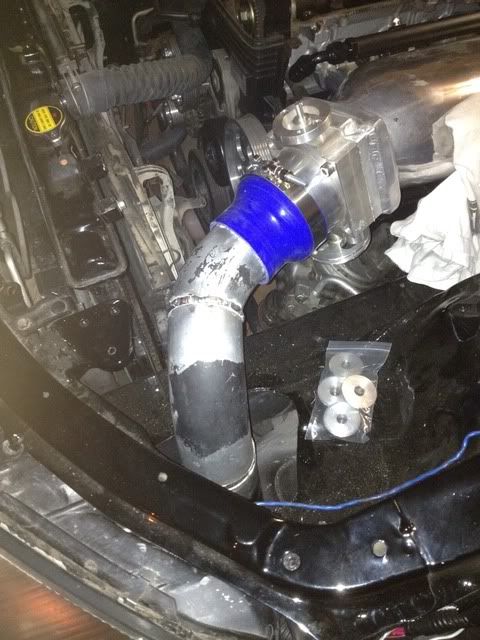
IC piping on turbo side is routed!!! BIG step since the bends were a pain in the ***. I have the piping coming through the side pans and not underneath the radiator and that added some complexity.
I have to go get paint thinner to clean the black off the pipes, make sure the cut ends are real smooth and then get over to Elite for spot welding for final test fit so I can get it welded. This is a major milestone as I will then be able to get powder coated and put bumper on and the only welding from here out is exhaust related.
I have to go get paint thinner to clean the black off the pipes, make sure the cut ends are real smooth and then get over to Elite for spot welding for final test fit so I can get it welded. This is a major milestone as I will then be able to get powder coated and put bumper on and the only welding from here out is exhaust related.
03-30-12, 05:42 AM
#95
pumps are installed and the tank is back in the trunk. I pulled it out to make it easier on myself. That was interesting. I put both pumps in the pickup side by side. One has the filter facing the front the other has the filter facing the rear and they take up the entire pickup tray. I will see how it goes - should not have any issues.
The bottom of the tank had the 3 ports coming out the bottom. I have closed up two since and only using the return port. I have closed up the other two with a bolt and metal sealant.
Well got the IC piping back. That was a big check item on my list. I will be sending them out to be powdercoated on Monday with the other parts. I am finishing up the interior and the wiring....
I will also be filling in the holes with some patch work later. They are obviously way too large.
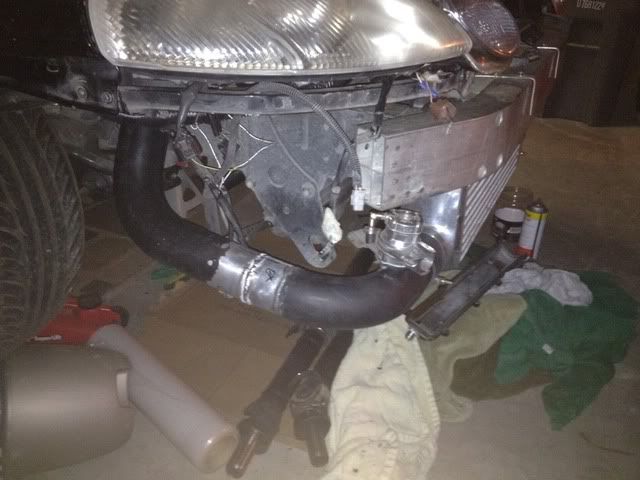
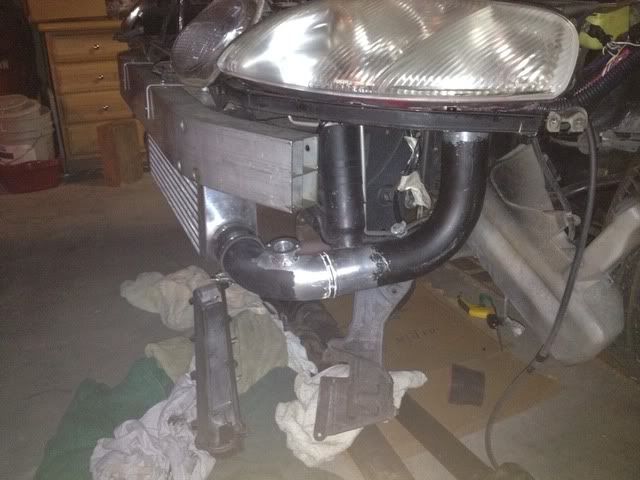
Just threw the cleaner on and wiped with rag. I will get out there and clean them off, polish them, and drop off with powdercoater on Monday for a clear coat.
The bottom of the tank had the 3 ports coming out the bottom. I have closed up two since and only using the return port. I have closed up the other two with a bolt and metal sealant.
Well got the IC piping back. That was a big check item on my list. I will be sending them out to be powdercoated on Monday with the other parts. I am finishing up the interior and the wiring....
I will also be filling in the holes with some patch work later. They are obviously way too large.
Just threw the cleaner on and wiped with rag. I will get out there and clean them off, polish them, and drop off with powdercoater on Monday for a clear coat.
04-10-12, 03:10 PM
#96
okay I have been stumped by an electrical issue that I am not conquering...
no lights
no a/c
no horn
trying to diagnose the lights first. I have power at the relay and power at IE1 (driver side kick panel) that is where the power stops. Power is supposed to come back out the R/B and R/W wire that splits. Each one has the one wire go to the fuse box in trunk (was under hood) to the correct fuse, and then to that respective headlight. The negative on the headlights are connected to each other. That did not look right and I am going to ground them out directly but they did work like this previously.
What else am I missing? I am missing the power connection of the relay to the fuse through the switch...but not seeing how I am not making that happen. I get ZERO volts to the R/B R/W wires coming out of the IE1 plug. So power is going in...not coming out.
04-12-12, 06:12 AM
#98
man the lights are pissing me off lol....
okay so I VM the headlight Relay and we are solid there.
Traced the yellow/Red wire to the IE1 plug by the kick panel. I have power to the plug. Now all the other "work" is done by the switch on the steering column. Nothing is happening when this is switched.
I know that the switch is working because I get lights on the AC unit and the lights change on the dash and a I get backlights on the clock controls. The question is why I am not getting power to the headlights. Can this all be Ground related? I am going to splice in a new ground to the light today to see if that helps. Is there anything else I am missing. Do all lights have to be connected (Hi, lo, corner)? I am not getting brights either.
08-17-12, 07:44 AM
#99


the driver blowoff valve is tilted wrong way and the piping needs about 1/4" added to it. I will do that when i PC the turbo and coat the hotside. I think I am going to change out the manifold as well. (that is all after it is running)
- Gas tank done and dropping back in.
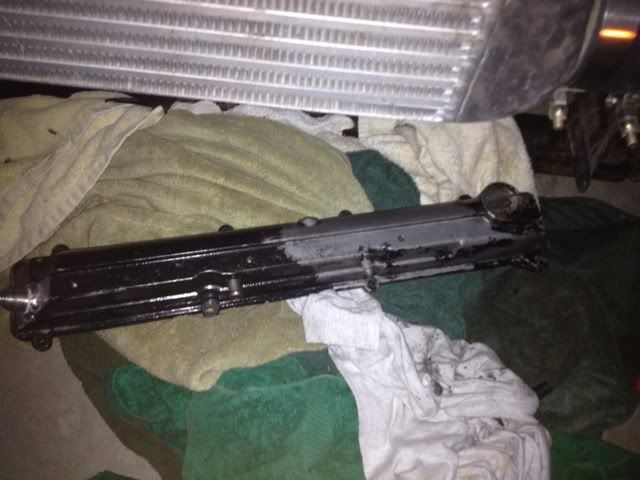
- Need to get VC welded for bandaid to start car
- Wiring harness is getting completed for AEM - removed all wires and injectors and coils are wired up and looking CLEAN. Now just need to finish off the right side of the B plug. A plug and body plugs are done
- Extend the fuse box wires from ECU to trunk
- Connect alternator and starter power wires to block in back
- Connect rear radiator hoses
- Put fuel in and prime pumps to test fuel lines
11-08-12, 05:31 PM
#100
Damn...looking back at this I have been doing this for a long time 
I am running into an issue with the car not giving spark.
https://www.clublexus.com/forums/per...ml#post7589082
I will update the thread with some pics and the setup. Car is in final stage of going back together. I have the wiring done (other than fuel pump trigger), the amps setup, the junction boxes for ground and power setup. Drive axle is in. Transmission bolted up. It is almost all ready!!!
Remaining items: need to get spark going, clean up wiring, setup Fuel pump wiring, and do the brake lines. Then I will begin the body work/paint. Just have to decide finish, car will be black (satin, matte, shine). After the paint and wheels will be the interior.

 11-26-12, 05:26 PM
#103
figured out the wiring issue with the igniter. it took awhile and of course I had no time. Well tonight something magical happened...IT STARTED!!! Loud loud loud. Running only turbo right now so I know it will quiet down a little but not much. I need to solder the wires and finish the fuel pump config on the AEM.
FINAL ISSUE (as of now). My headlights will not go on. I have it figured to the trigger wire going into the relay in the back. I know I can do a switch to pass inspection if I get to that point but hoping someone has the quick answer. I was getting a constant 12v to the trigger wire - no matter what was happening at the switch. So obviously I have that wire incorrect. Anyone know where the wire is coming from that goes back to headlight relay. I hear the dimmer click and the relays click. The switch is good. Lights are good (If i jump power to the fused I get lights)
FINAL ISSUE (as of now). My headlights will not go on. I have it figured to the trigger wire going into the relay in the back. I know I can do a switch to pass inspection if I get to that point but hoping someone has the quick answer. I was getting a constant 12v to the trigger wire - no matter what was happening at the switch. So obviously I have that wire incorrect. Anyone know where the wire is coming from that goes back to headlight relay. I hear the dimmer click and the relays click. The switch is good. Lights are good (If i jump power to the fused I get lights)
12-04-12, 05:45 AM
#105
anyone have any ideas on the fuel pump? I have AEM wired on LS9 and have it for ON = GRD. That is pin 68B I believe. That is going to the relay and then a fused 12v line, pump power, and pump ground spliced with a ground going straight to battery. Pumps are not working. I have tested the pumps and they work if I go straight power and ground...so why is the AEM, not turning them on. Any ideas