When you click on links to various merchants on this site and make a purchase, this can result in this site earning a commission. Affiliate programs and affiliations include, but are not limited to, the eBay Partner Network.
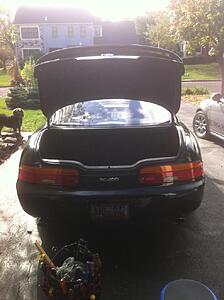
Figured I'd add these I took the other day in case some pictures go down.
Heat gun and wrench.(Note: my stock lexus tool set also had the proper wrench needed for this install).
Some people had problem with this bolt coming loose, heat gun does wonders here.
Some people have a little rubber clip to hold the lift support in place, mine did not. Instead you must bend the end clips and slide them off.
Bending the clip with small flat head.
Up close shot of old one after bending clip ends.
The new one just slides right on and clips in itself.
Now stick small flat head into the gap and push retracting bracket out, and slide on the mini ball hitch then remove flat head and it locks in place.
Done. Definitely recommend removing the back up wheel as it's a pretty tight spot to work.
These lifts were from Lift Support Depot, and not sure if I got a set with too much gas in it or something, or they just have to be broken in but they are fast! My previous set from Lift Support Depot on my other SC didn't swing this fast at all so be careful.
Update: Purchased a pair new from liftsupportdepot.com using part number 4508/10142 on January 2010 they are already failing having trouble holding my trunk open. Lasting 3-4 years in my opinion is pretty crappy.
I don't think the ones I purchased were Strongarm brand because I do not remember them being in Strongarm packaging. I think they were the website's brand.
Moral of the story, OEM is the way to go.
An update to my previous post, I replaced these supports with Strongarm brand and these literally open up the trunk by itself! The former ones did not do that. I also noticed that my former ones were made in Mexico...definitely not Strongarm brand which are made in USA. I have a feeling these Strongarms will last as long as OEM.
My pasnager side was tuff but i got it out and put the new one in, as for the driver side it wouldnt even bunge, i completly striped the living hell outof it , and even more with vise grips.i heated it up amd everything but now im stuck, how the.hell do i get it out now? Lol its freaking completely circular not even shaped anymore
Just replaced mine with Armstrong units as well, it was a cake for me, I even got them on sale at advace on line to store pickup free.
Couldn't be happier
The only thing I don't remember compared to stock is when you hit the button or pull for the release, did the trunk pop open all the way up with old shocks or not?
Because the new ones trunk stays down untill you give it a little pull on the trunk lid.
Other than that, for 22 bones I'm cool with it!
3. Using an open end wrench (11 or 12 mm) unscrew the ball portion of the ball and socket joint that is on the top part of the lift supports. It may be hard to start because it has Locktite on it.
I had a VERY hard time with this step. The damn thing wouldn't budge. I pretty much stripped the bolt on one side...
This is a 12mm bolt.
BTW, turn counter-clockwise
This is impossible in my car. The bolt won't move a bit and it bends the little frame around it when I tried to get it off. I have no idea what to do now
i stripped both sides and had to sawzall and use WD-40 and 12mm socket to remove the ball joint bolts. $33 for a pair off ebay. (new set came with new ball joint bolts)
remove the rubber stopper before reinstalling the new struts and take care not to drop anything into the back of the trunk...
Well, you're right- I did have good intentions.
But I forgot to make them idiot-proof.
Not all lift support manufacturers use the same sized bolt- yours must have been a different size. It happens.
If anyone is not savvy enough to feel the looseness of a 12mm wrench on a 11mm bolt, then a DIY project such as this one should be left to a qualified mechanic.
And, no I am not trying to break your Lexus- sounds like you won't need any help to do so yourself. I noticed this is not the first time you have had trouble following instructions on this forum: https://www.clublexus.com/forums/sho...12&postcount=4
I'm new to the forum and a first time Lexus owner. I just bought a 92 SC400 and I was aware of a few repairs that it needed, one being the trunk problem. I figured that it was probably a strut issue but came here to find out. These days you can't take a chance on not knowing that you might have to remove 'this' to get to 'that'. 'PERRYinLA', thanks for your pictures and explanation-it was absolutely helpful. Your rebuttals are also right on and pretty funny. Common sense is pretty much a must if you're a DIY'er. Thanks again!
Just done mine today using strongarm from lift depot. I was going to buy the spoiler version for stronger lift, but decided not to because I didn't want it to hit someone's chin as it seems like it comes up too fast,
I am happy with the result as it opens as factory should.
I took a lighter that was shown here for lighting grills and fireplaces, just like 15-20 seconds the come off without much resistance. Propane would be overkill.
As I pry off the first clip it fell down behind the abyss, that took a long time with inspection camera to find it. I didn't need it but just didn't want to leave something behind. I would recommend putting a towel or something to block the area. Also, as I took of the first strut the trunk immediately fell on my head. I thought I was going to hold it up with one hand but I forgot to ! Turns out the other side is the blown side and leaking oil!
I had to take off the clip on the new ones and use visegrip to turn re-orient the ball joint and rod ends.
I put a bit of grease on the ball joint as well. I couldn't get the rod end to clip on by pushing, then I took out a rubber mallet and it went right on very easily.
The quack noise is gone and it opens till the stopper. I no longer need to curse because I would try to load something and it bash into the trunk lid!
I uploaded the movie inside the zip file so you can see how it opens with the non-spoiler version on a non-spoiler trunk. Sorry if it's upside down and shaky.. long day
I think mine are getting weak, but hopefully other people who park on a fairly steep hill will chime in. When I'm on a level surface or mild incline, the trunk stays open fine. But when I'm on the steep part of my driveway, it's 50/50. Should the lift supports be strong enough to keep the trunk open in that situation, or will replacements be similarly challenged?
I just finished doing mine on a 2000 SC400. I was expecting the worst as far as removing the two bolts. It was surprisingly easy using a 6" 12mm wrench - no heat, no Liquid Wrench, nothing. Maybe by 2000, Lexus was using a less aggressive Loctite thread adhesive.
Anyway I purchased my set off eBay from Lift Supports Depot.com There were two listed for the SC's with spoiler: one was the standard model Strongarm 4508 (to be used with cars with spoilers and a second one "with added lifting force" (model no. P8670). I chose the latter after speaking with the sales rep who said that the standard one generally doesn't fully open the trunk as the latch is released although some people here say it does. The P8670 does open the rear hatch pretty briskly, but right before it's fully open, it slows down a bit (sort of like a ski lift chair before you get on). Good thing I have the rubber bumper/stoppers. BTW, It does take some effort to close the trunk as expected but it's a worthwhile trade-off.
I thought I'd also attach a picture of the rubber bumper stop which clamps onto the tubular metal hinge so y'all know what has been referred to at the beginning of the thread (12years ago). Just have to line up the little tab with hole in the hinge. It's the black thingy just to the right of the middle of the picture.
@t2d2 -- Once I put my replacements in, the trunk opened on its own with a flick of the button.
Also, I melted the Locktite by placing a soldering iron on the end of the bolt for about a minute. I was too nervous to use a lighter or heat gun next to the gas tank, although it likely would have been fine.

 10-13-13, 08:32 AM


 Turns out the other side is the blown side and leaking oil!