How-to: Replace front seat leather on LX470-PIC HEAVY
 06-05-16, 10:44 AM
#1
Driver School Candidate
Thread Starter

I was given a 1998 LX470 from my father-in-law, but it was in need of some TLC. It has 220,000 miles on it and was definitely showing some heavy wear:
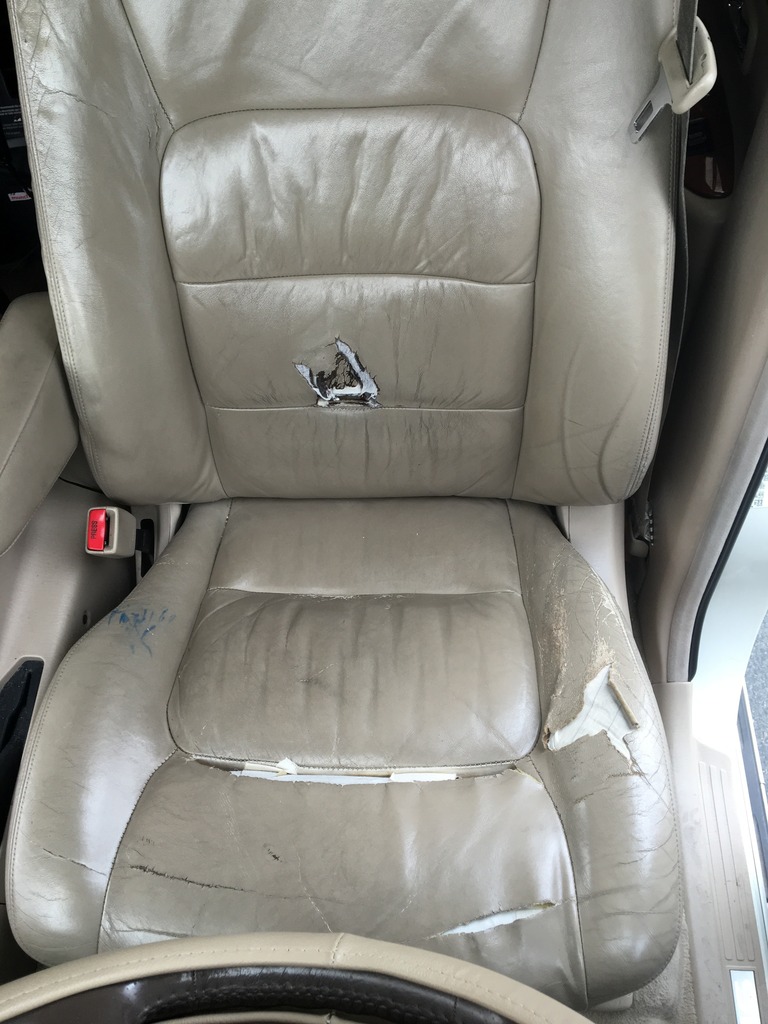
He had put some sheepskin seat covers to cover the tears, but living in an area where it reaches well over 100 degrees in the summer, they had to go. I did some research on various leather kits, but due to the age and value of the car, I didn't want to invest $1200+ to reupholster the entire car. I found an online company, lseat.com, that offered new covers for the front seats for around $300. They make the covers when you order them and advertise 15-20 business days for processing. I decided to take the gamble and ordered new covers in the color bisque to match my tan interior.
The color was a very good match, with a slightly different texture, but it was close enough to make me happy. Dealing with the company was a bit of a pain, and they never updated their order status page so I never knew how close they were to shipping the covers. After several days waiting for email replies, they finally got my order shipped on the 20th business day. When I received my order, I was a bit disappointed when I saw that they didn't have the perforated inserts that I paid for. I sent an email and they told me that they don't recommend perforated leather unless the vehicle had heated and ventilated seats. While I still wanted their perforated inserts, I didn't want to wait another 4-5 weeks for the replacement covers. I settled for a partial refund and kept the covers they sent.
The seat covers look to be pretty well made, but there were some places where you could see that they made a bad stitch and pulled them to resew the seam. The holes were in hidden places and I figured you get what you pay for. Now on to the how-to.
I'm going to update this post with different steps of the process, so bear with me while I get it uploaded.
Last edited by mh60sardog; 06-05-16 at 12:31 PM.

The following users liked this post:
DrHess (12-23-16)
06-05-16, 11:02 AM
#2
Driver School Candidate
Thread Starter
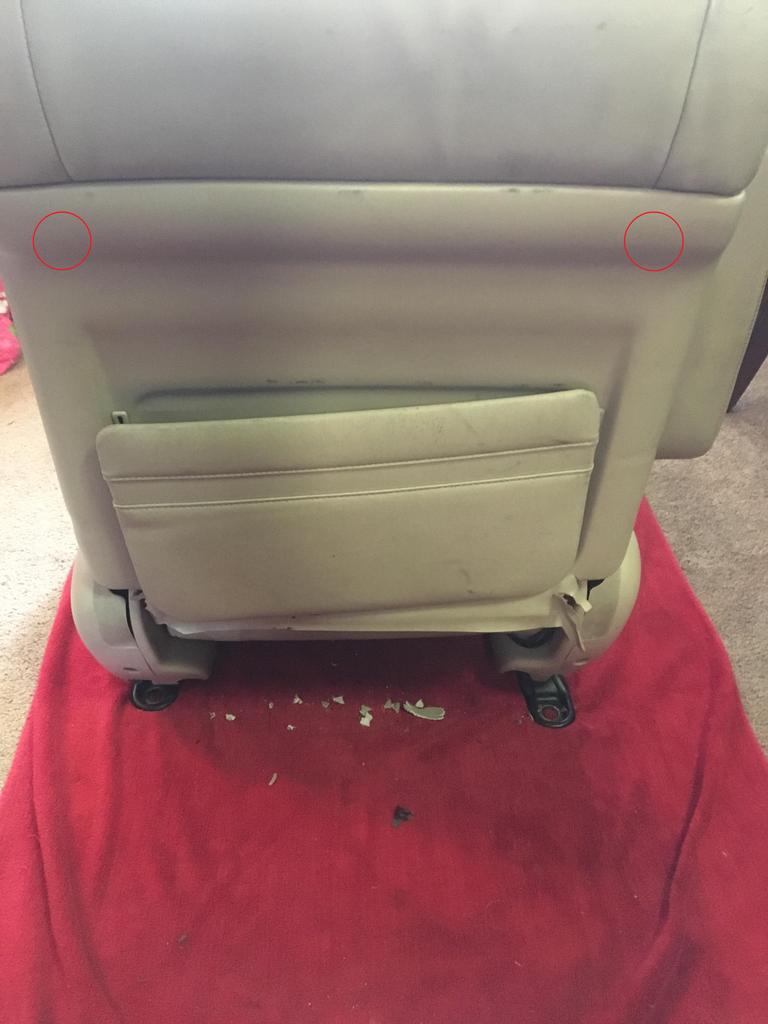
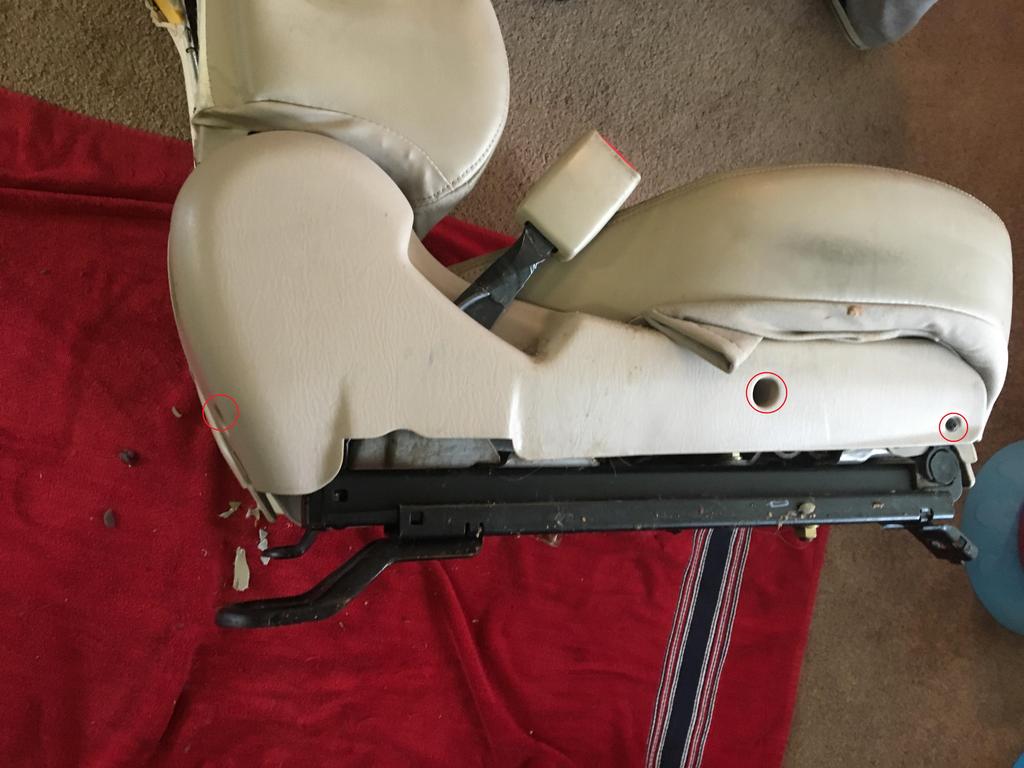
The removal of the seats was pretty straightforward, with two bolts on the front of the base: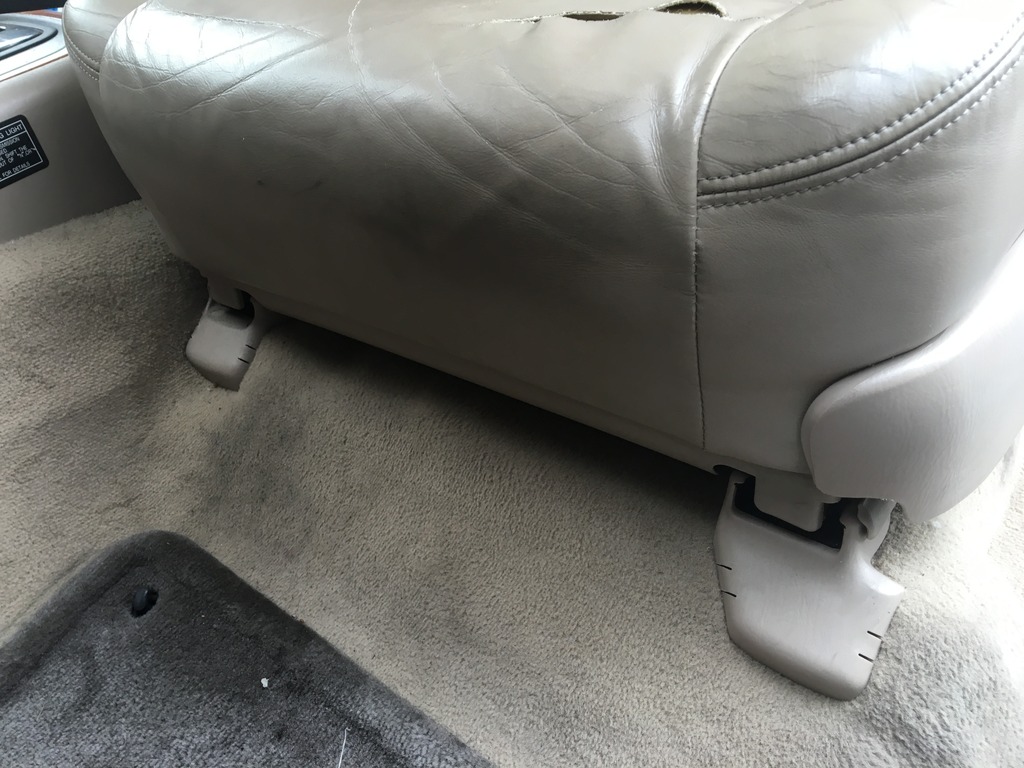
And two bolts on the base of the rear:
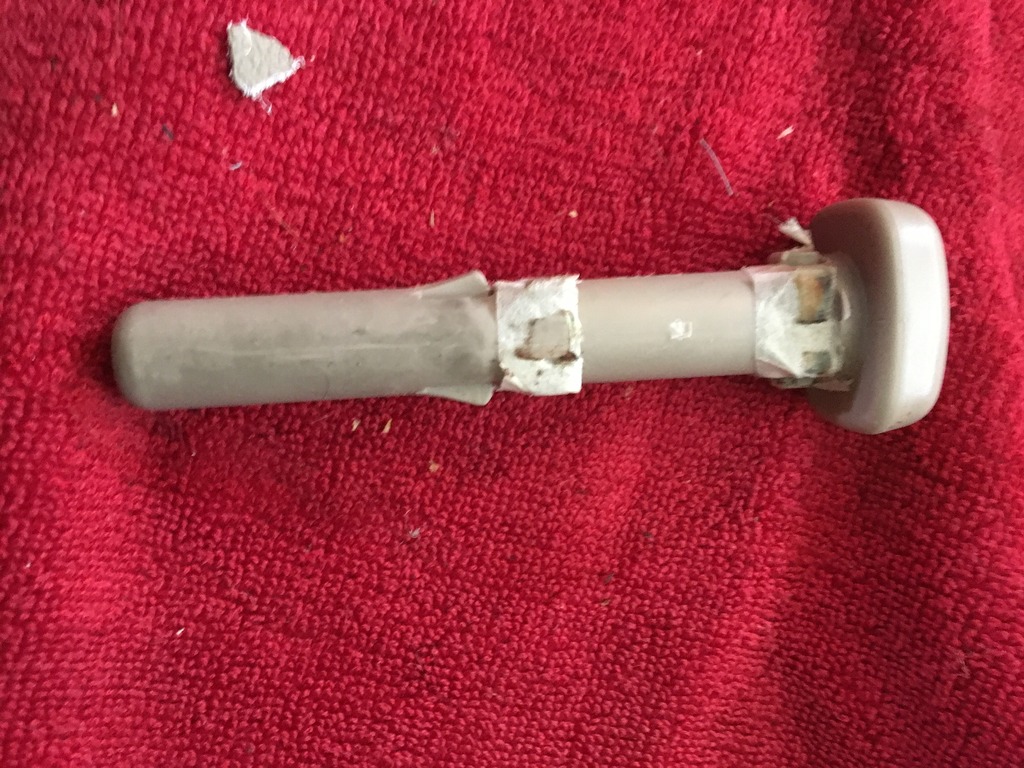
The bolt covers pop off pretty easily, but be careful not to break the tabs that lock the bolt covers on the slides. A close up of the removed bolt covers: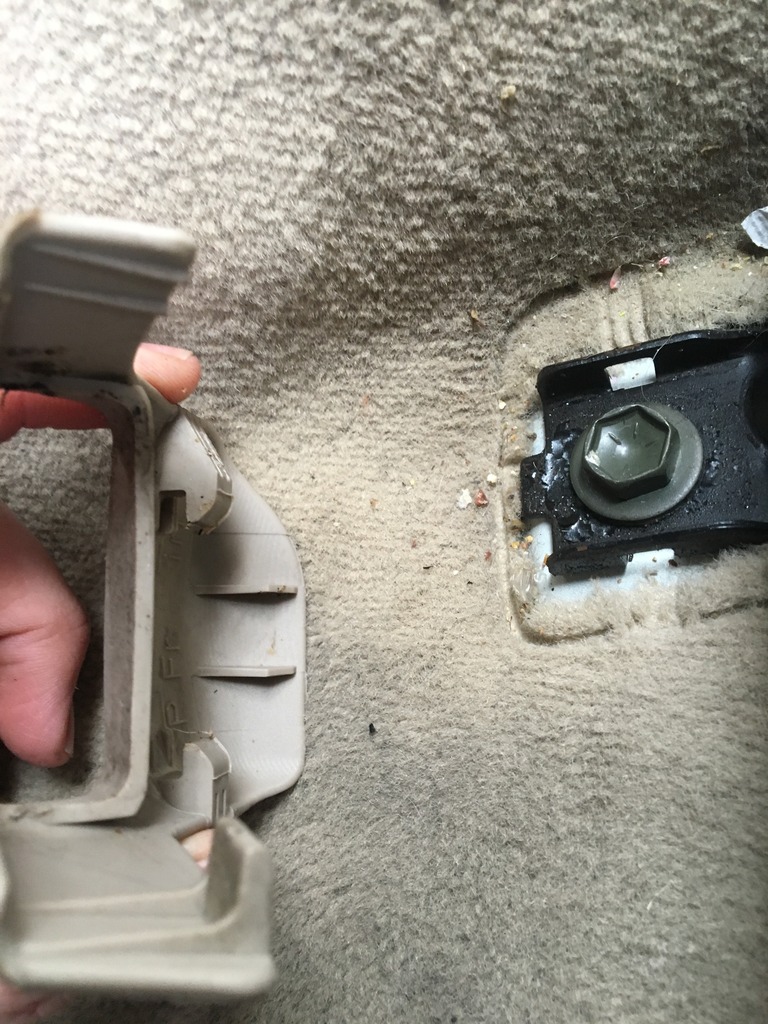
I kept the power connected and slid the seats forward and backwards to loosen the bolts. Once I had the bolts loosened to finger tight, I disconnected the negative lead of the batter to make sure that I didn't get any codes when I disconnected the airbag/seat sensors. There is a electrical connector that needs to be disconnected before removing the seat from the car: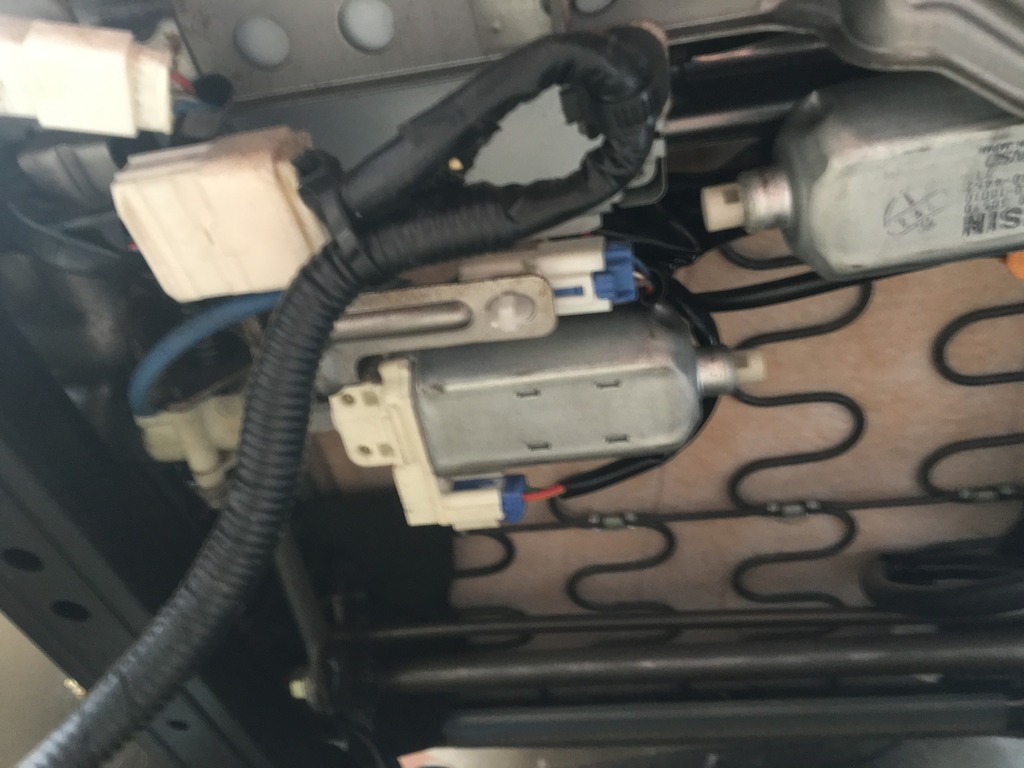
Once the large plug is disconnected, be careful as you take the seats out, as the sharp edges of the slides can damage other parts of your interior.
The passenger side is the same procedure.

And two bolts on the base of the rear:

The bolt covers pop off pretty easily, but be careful not to break the tabs that lock the bolt covers on the slides. A close up of the removed bolt covers:

I kept the power connected and slid the seats forward and backwards to loosen the bolts. Once I had the bolts loosened to finger tight, I disconnected the negative lead of the batter to make sure that I didn't get any codes when I disconnected the airbag/seat sensors. There is a electrical connector that needs to be disconnected before removing the seat from the car:

Once the large plug is disconnected, be careful as you take the seats out, as the sharp edges of the slides can damage other parts of your interior.
The passenger side is the same procedure.
Last edited by mh60sardog; 06-05-16 at 11:31 AM.
06-05-16, 11:59 AM
#3
Driver School Candidate
Thread Starter
The first thing you need to do before removing the old leather is to seperate the seat bottom from the seat back. Remove the headrest from the seat by pressing the tab and pulling the headrest up:
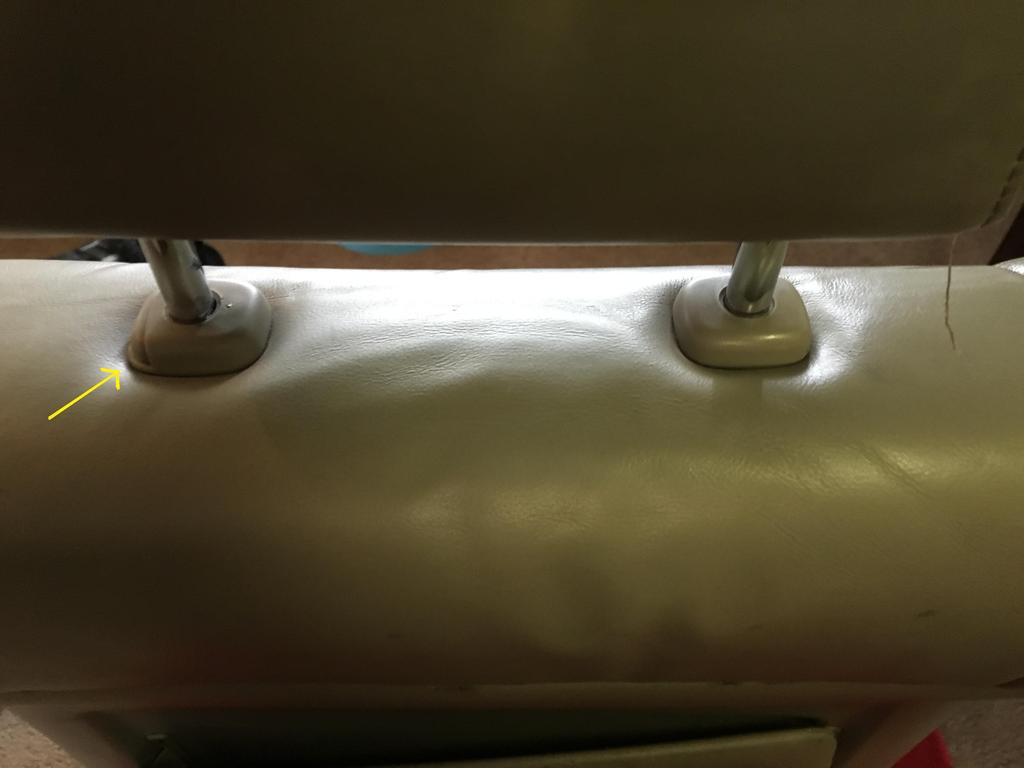
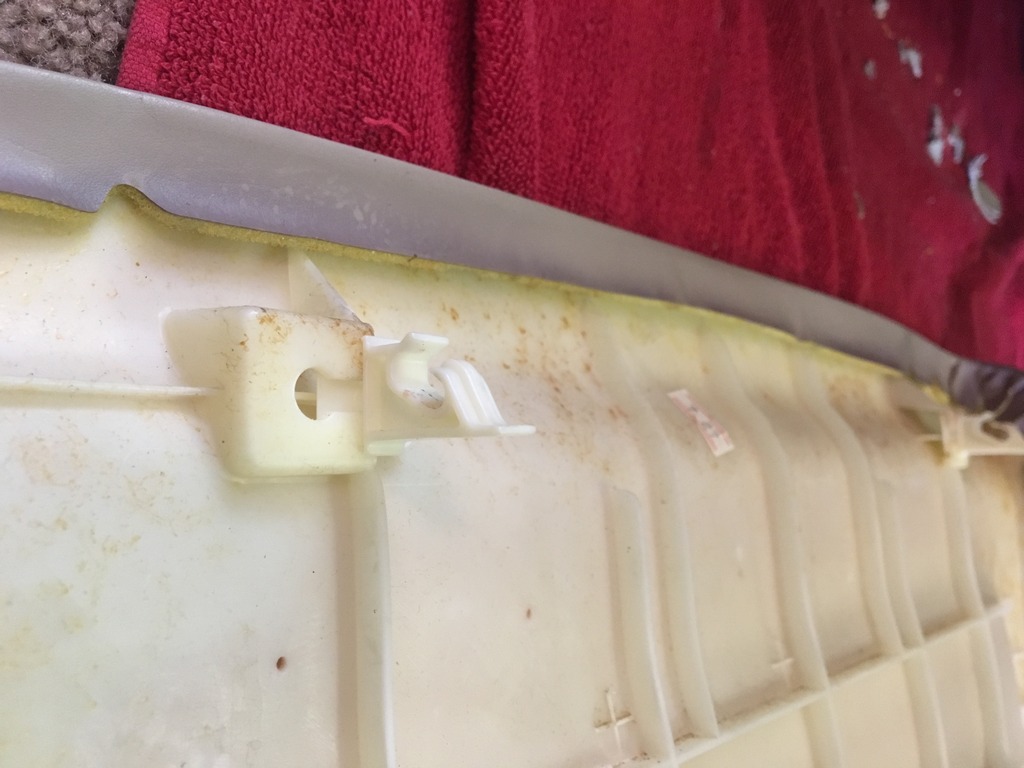
I removed the seatback panel next. There are two clips at the top of the panel and the bottom just hooks over a bar.
I chose to use a long screwdriver to push the clips toward the center of the panel until they came out of the seatback panel. You may be able to simply pull them off, but I didnt want to risk breaking the clips.
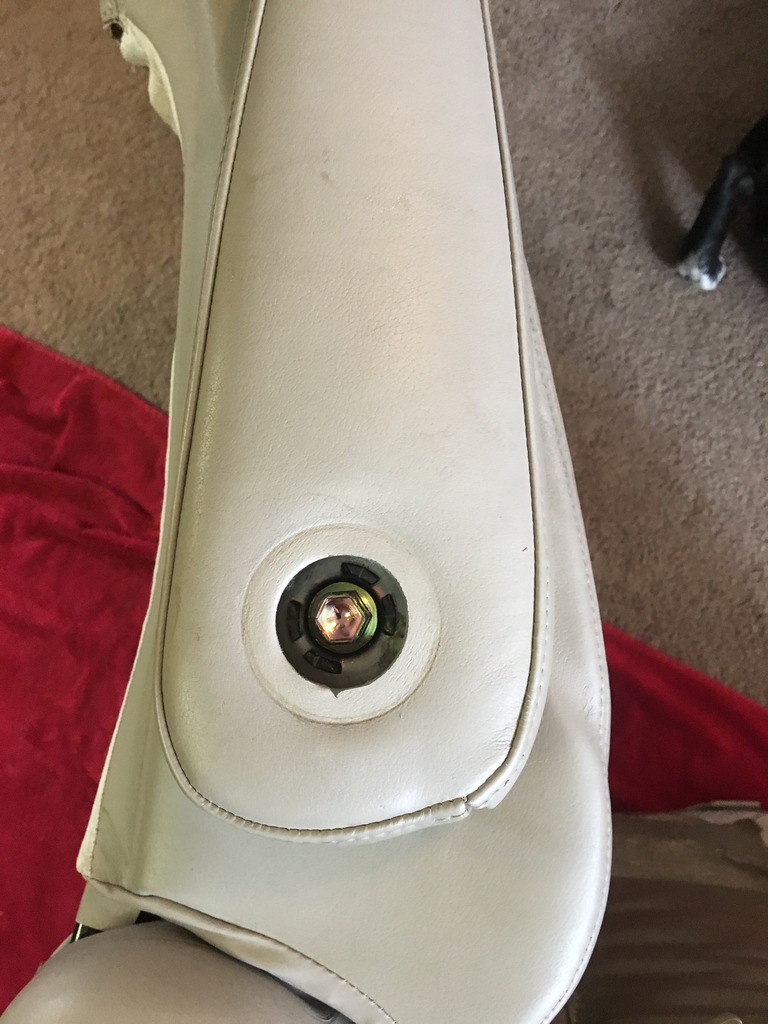
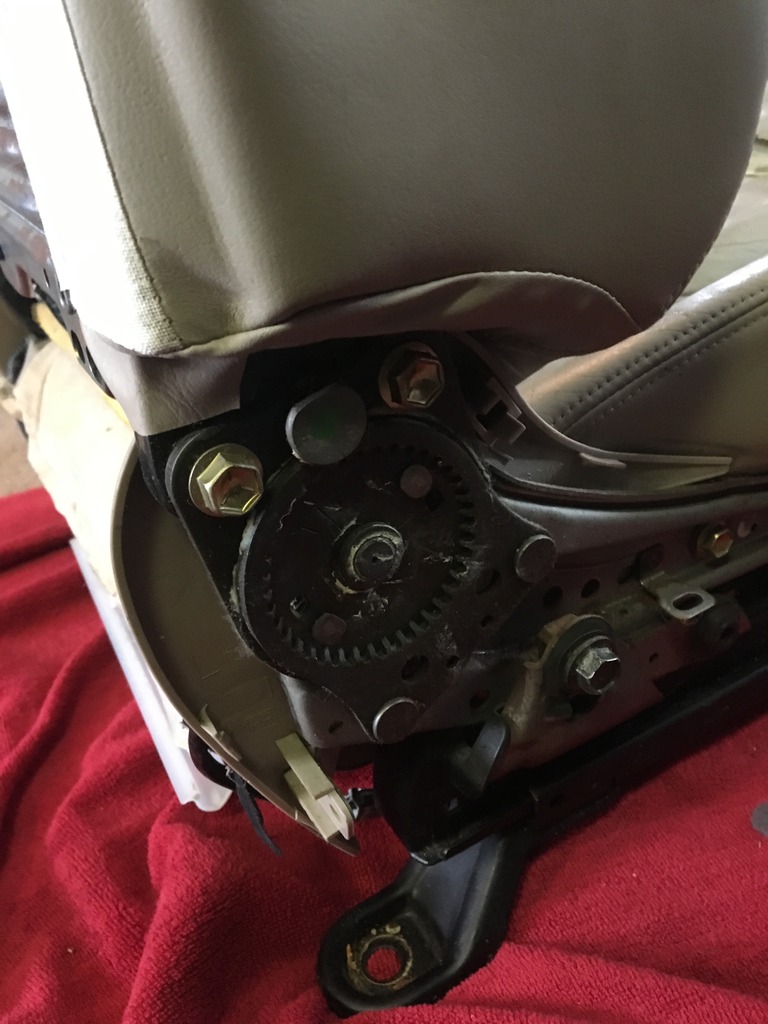
Next, I removed the arm rest. Use a plastic prybar or a flathead screwdriver to remove the round cover:
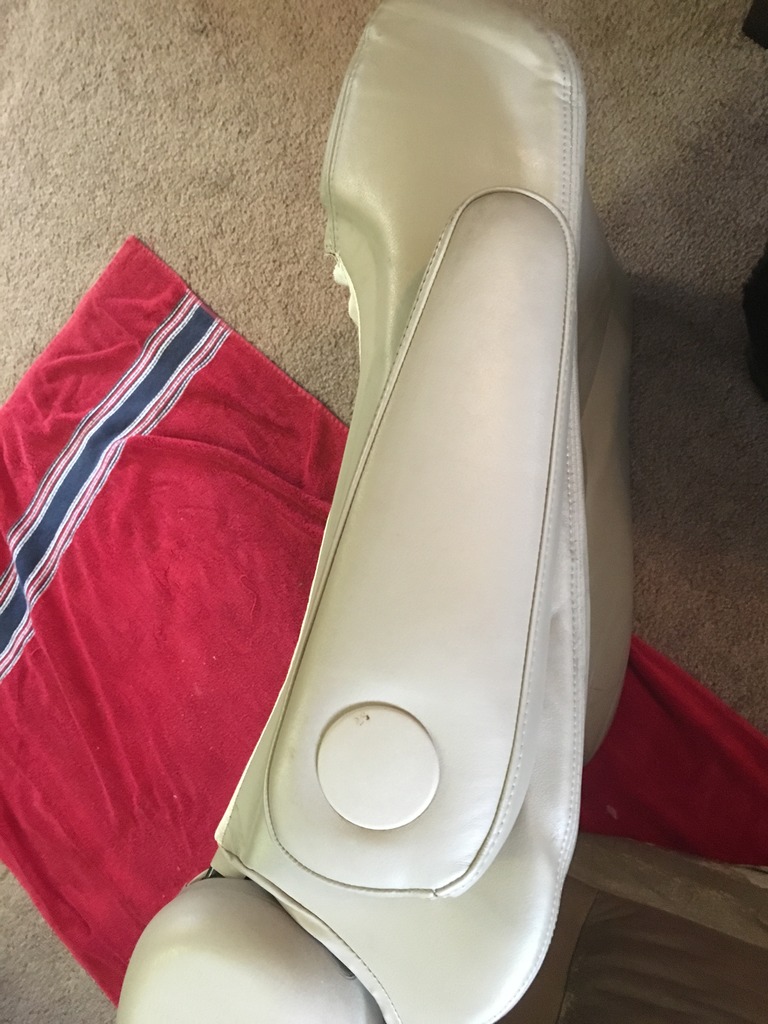
There is one bolt to remove and the armrest comes off. Make sure you retain the black spacer on the backside of the armrest for reinstallation.
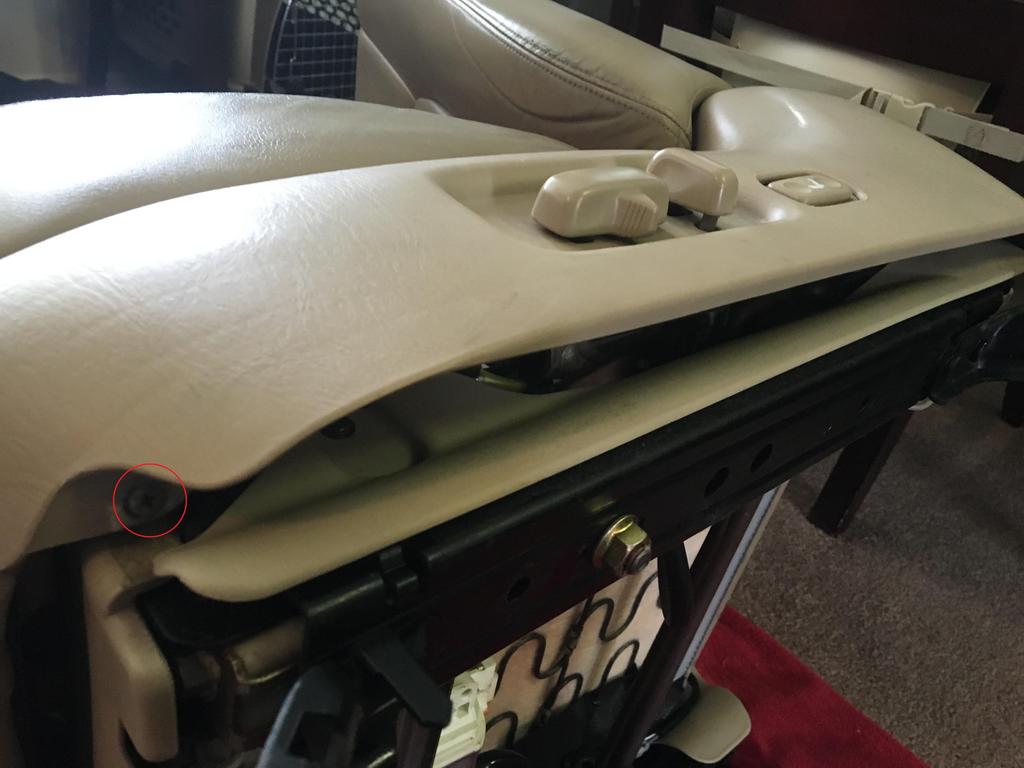
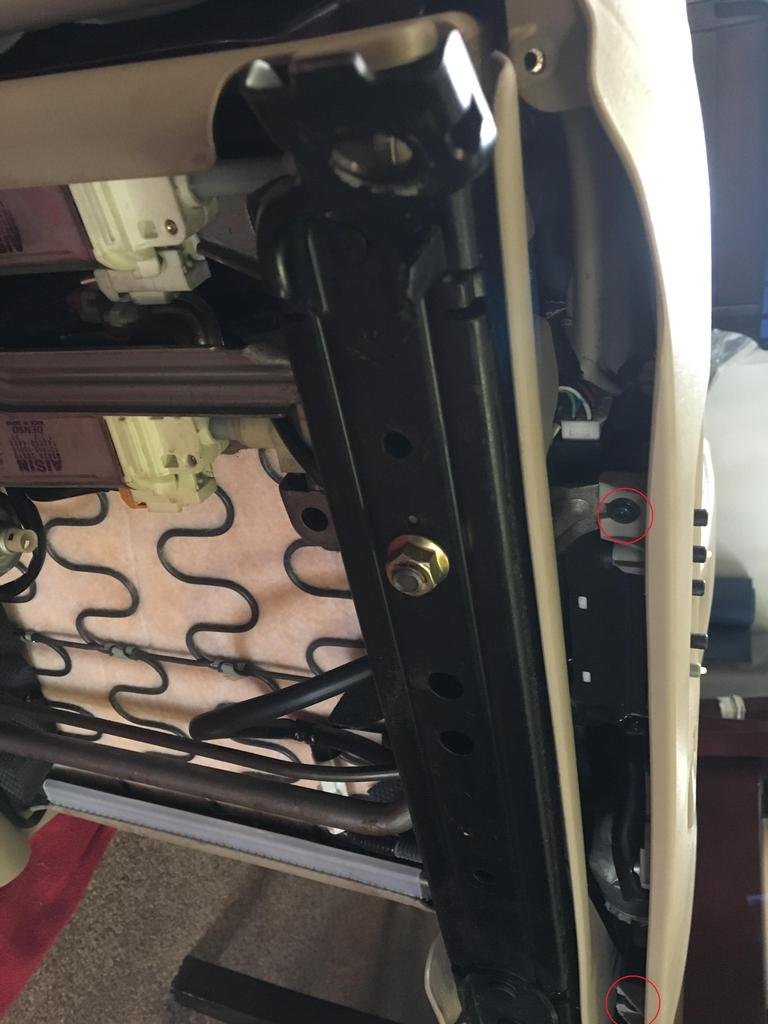
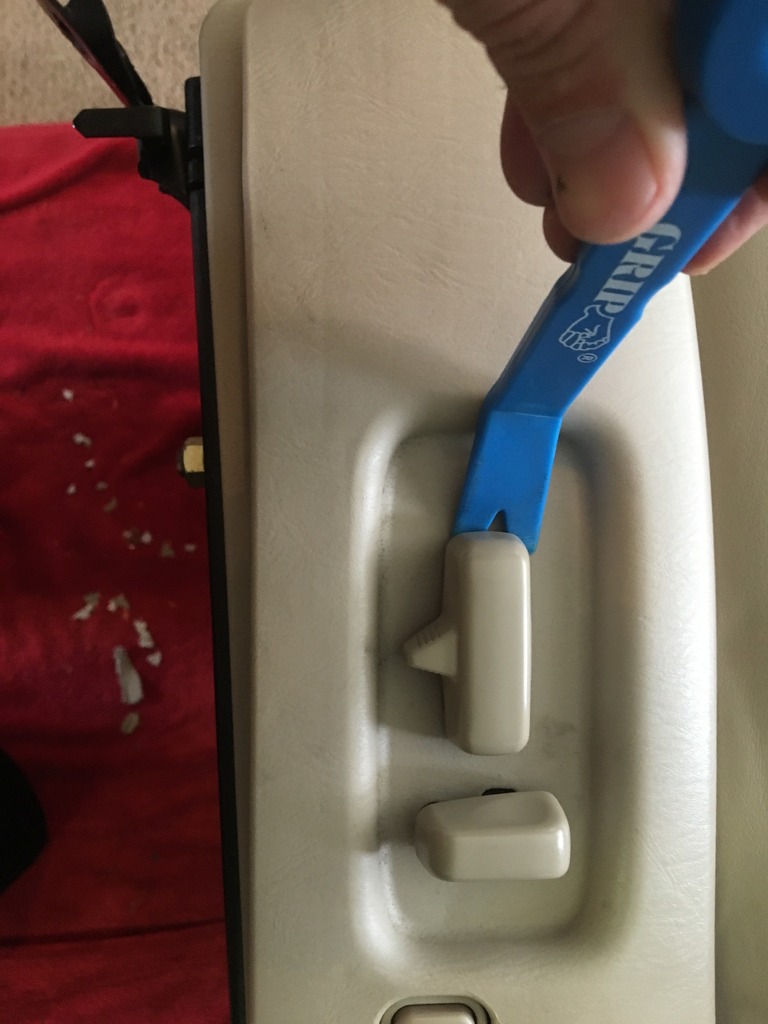
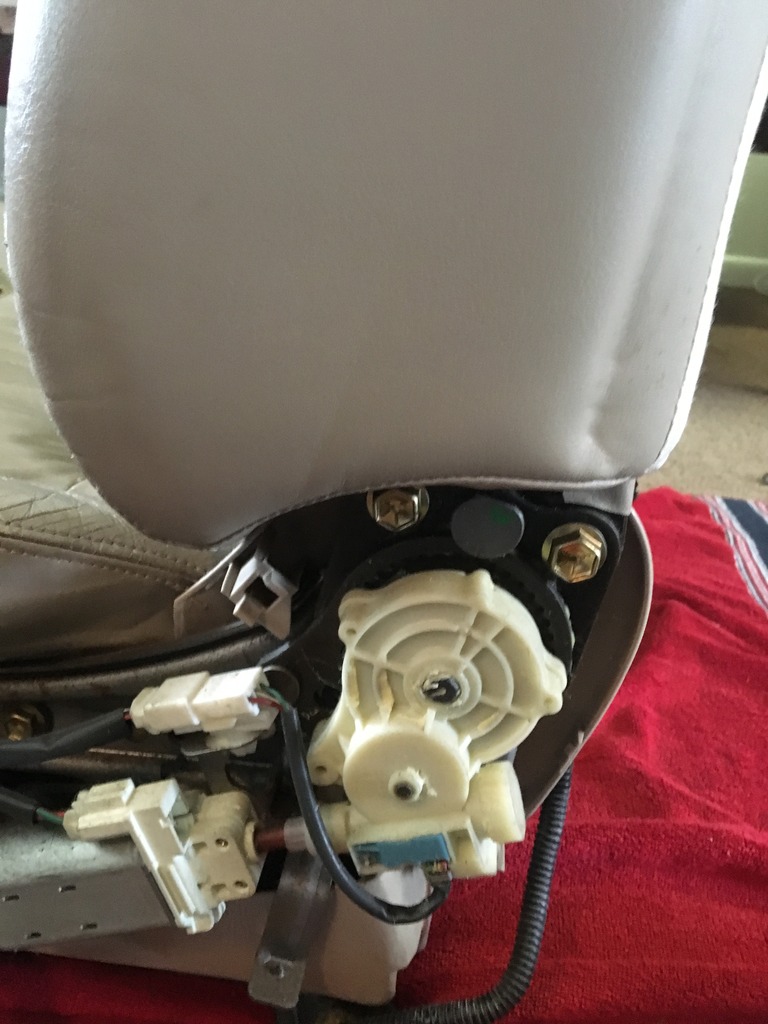
Remove the panels covering the sides of the seats (i.e. with the seat adjustment controls) by removing the screws. They are in various places depending on which seat and which panel, but they are all just phillips head screws.
To remove the seat adjustment controls, simply pull or pry away from the seat.
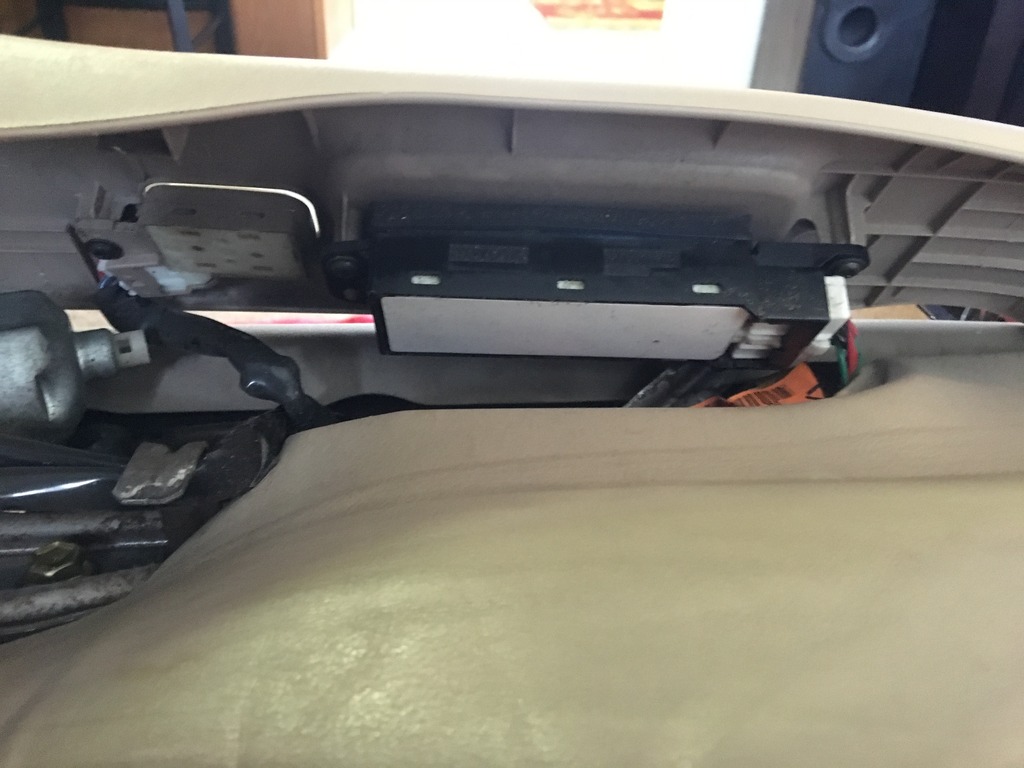
There are some electrical plugs that need to be disconnected before you can remove the panel with the adjustment controls:
Next is the removal of the seatbelt. There is only one bolt attaching the seatbelt, but it is torqued on pretty tight. You may need a breaker bar to get it off.
Remove the wiring harness attached to the seatbelt and the panel should come off.
The seat cover for the seat back wraps around the support bar on the seat bottom and needs to be removed. It is simply hooked onto a piece in the back and can be rolled off by hand.
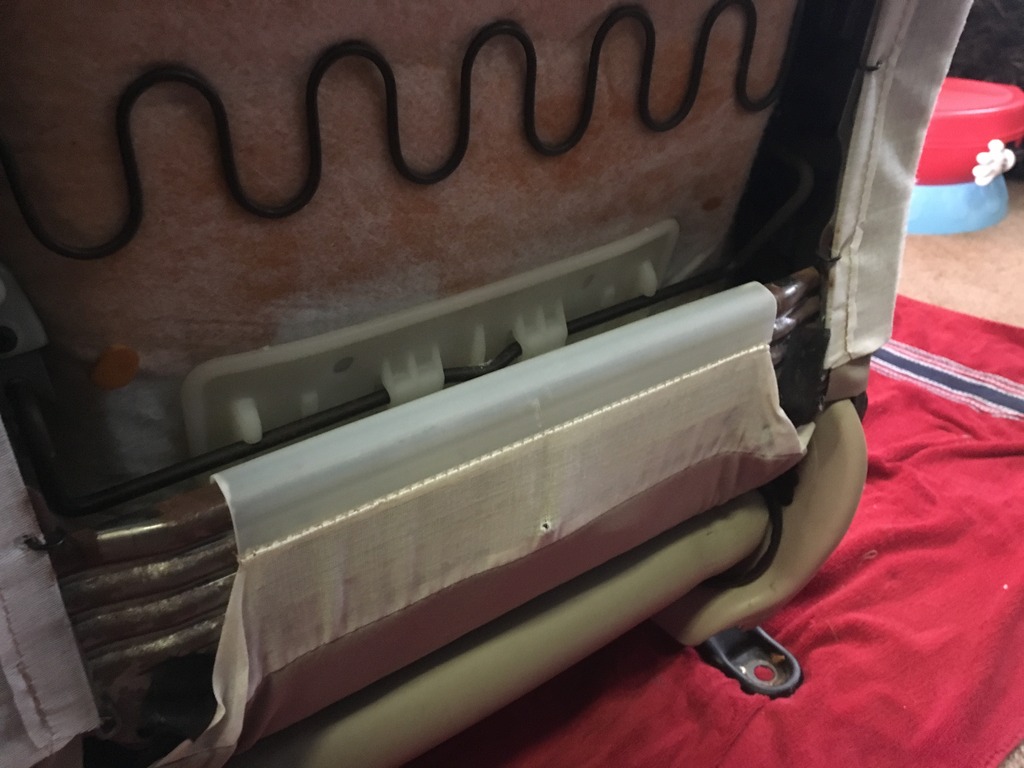
There are also some pieces of black fabric that need to be disconneced, but you will need to cut the hog rings attaching them to the seat frame. You can also see how the seat heater wiring is routed.
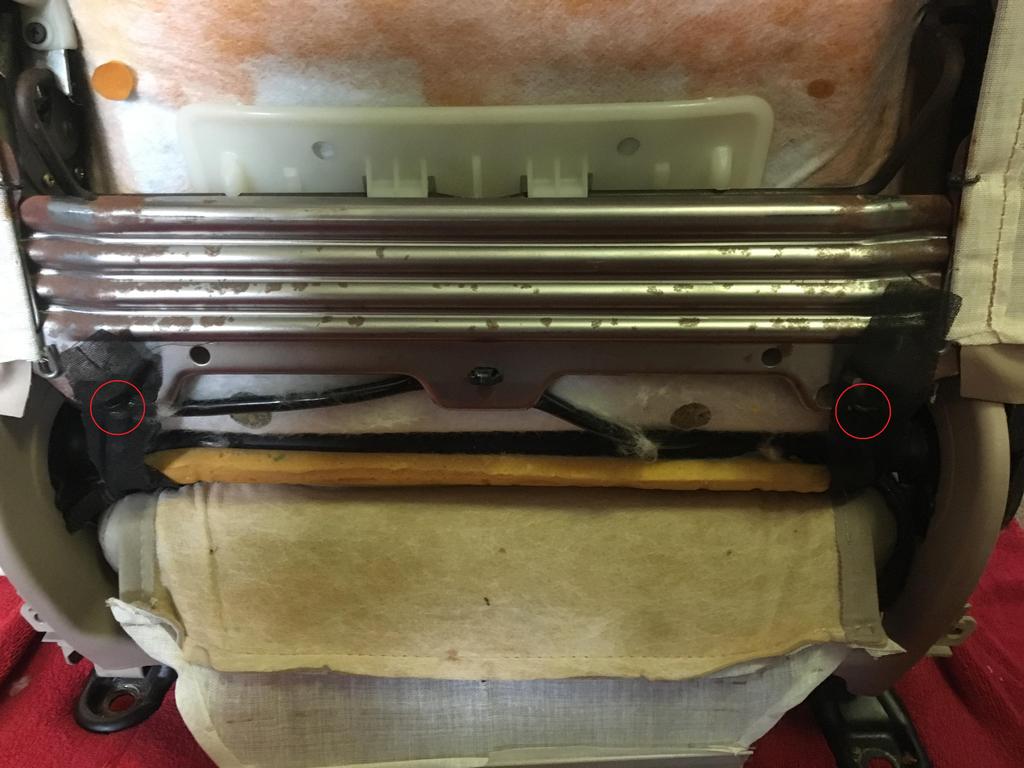
To remove the seat heater harness, you will need to remove the inside trim piece. For the driver seat, you will need to remove both trim pieces for the lumbar support harness too.
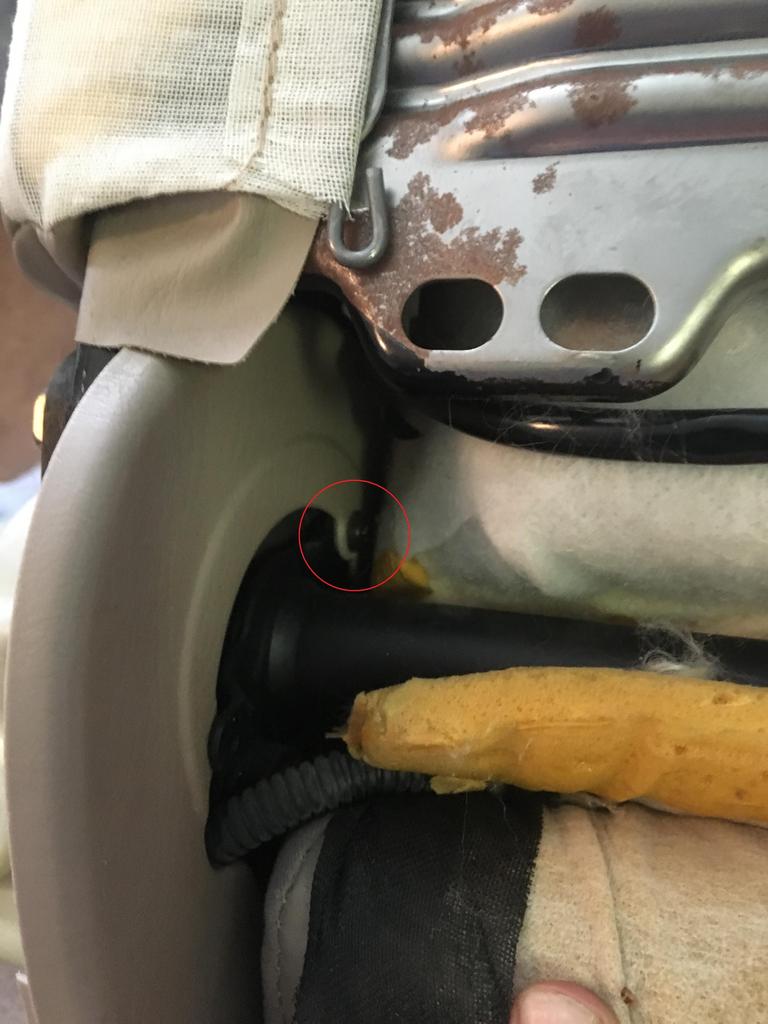
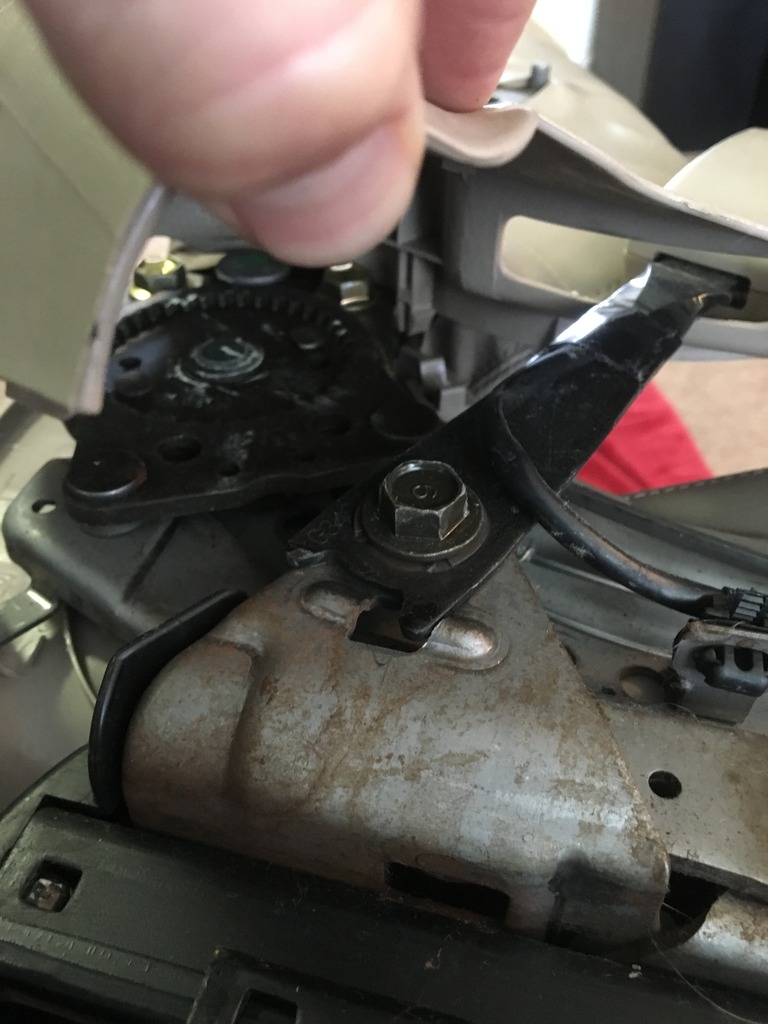
Next, you can remove the bolts on the seat hinge and remove the seat back.
The seat bottom and seat back should now be separated.

I removed the seatback panel next. There are two clips at the top of the panel and the bottom just hooks over a bar.

I chose to use a long screwdriver to push the clips toward the center of the panel until they came out of the seatback panel. You may be able to simply pull them off, but I didnt want to risk breaking the clips.

Next, I removed the arm rest. Use a plastic prybar or a flathead screwdriver to remove the round cover:

There is one bolt to remove and the armrest comes off. Make sure you retain the black spacer on the backside of the armrest for reinstallation.

Remove the panels covering the sides of the seats (i.e. with the seat adjustment controls) by removing the screws. They are in various places depending on which seat and which panel, but they are all just phillips head screws.


To remove the seat adjustment controls, simply pull or pry away from the seat.

There are some electrical plugs that need to be disconnected before you can remove the panel with the adjustment controls:

Next is the removal of the seatbelt. There is only one bolt attaching the seatbelt, but it is torqued on pretty tight. You may need a breaker bar to get it off.

Remove the wiring harness attached to the seatbelt and the panel should come off.

The seat cover for the seat back wraps around the support bar on the seat bottom and needs to be removed. It is simply hooked onto a piece in the back and can be rolled off by hand.

There are also some pieces of black fabric that need to be disconneced, but you will need to cut the hog rings attaching them to the seat frame. You can also see how the seat heater wiring is routed.

To remove the seat heater harness, you will need to remove the inside trim piece. For the driver seat, you will need to remove both trim pieces for the lumbar support harness too.

Next, you can remove the bolts on the seat hinge and remove the seat back.


The seat bottom and seat back should now be separated.
Last edited by mh60sardog; 06-05-16 at 01:03 PM.
The following users liked this post:
The Ikon (04-09-22)
06-05-16, 03:09 PM
#4
Driver School Candidate
Thread Starter
Starting with the seat bottom, before you can begin to remove the old leather, you will need to separate the cushion from the frame. First, remove the remaining plastic trim pieces.
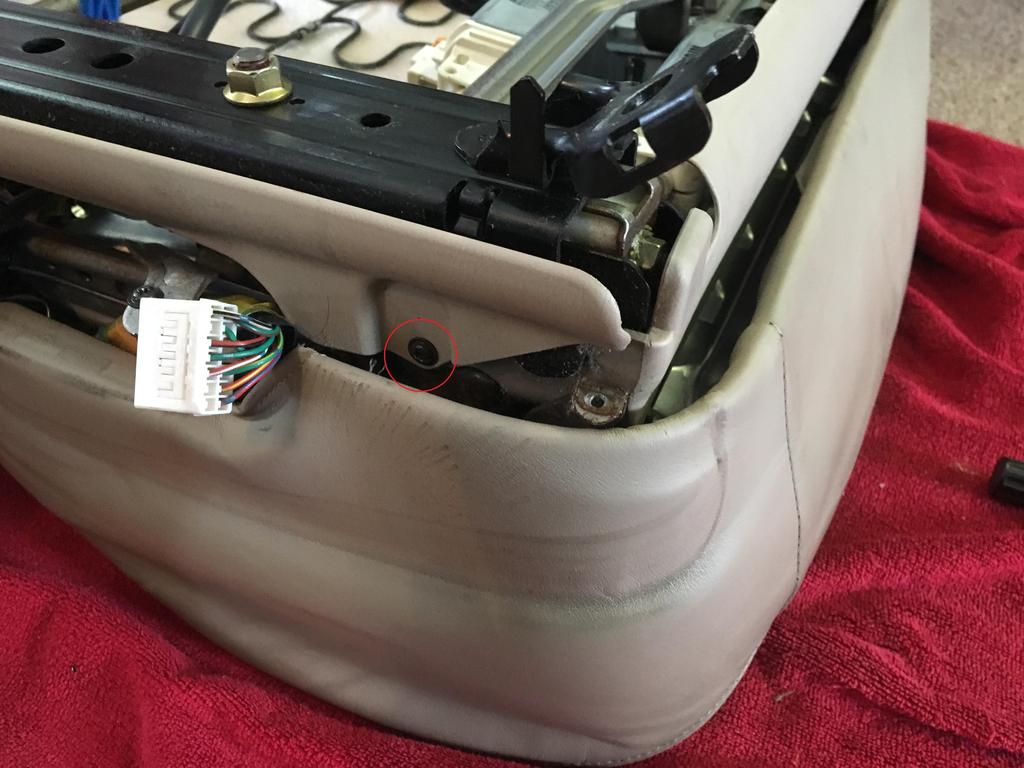
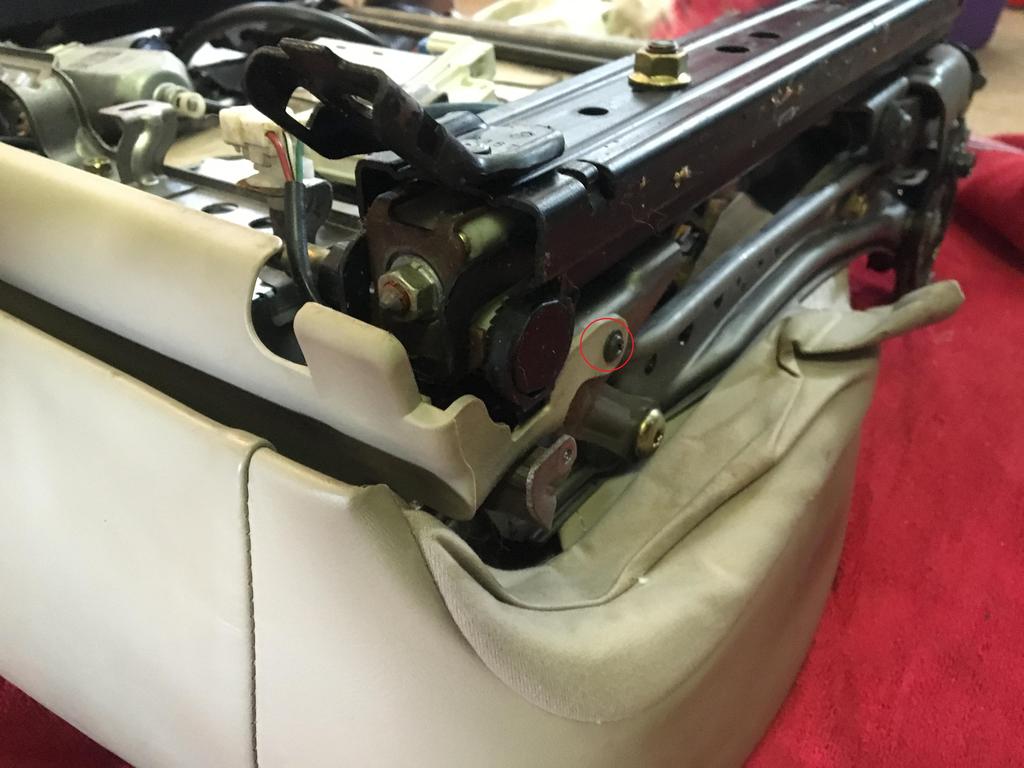
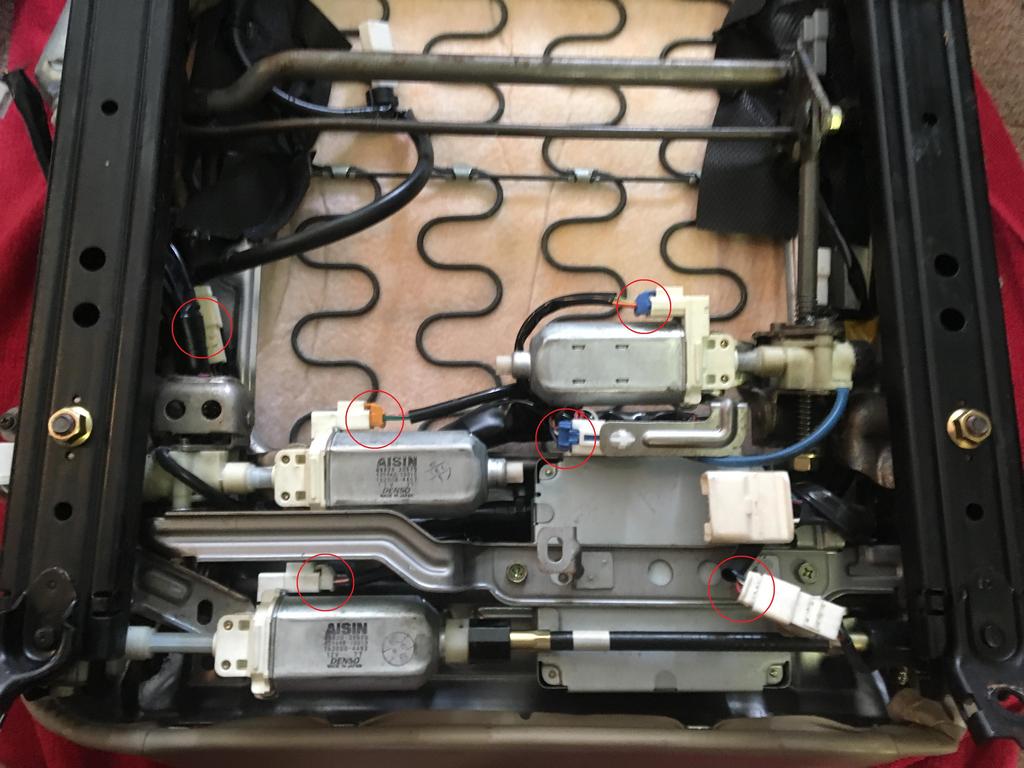
Then disconnect all of the wiring harnesses, taking note of where they all go.
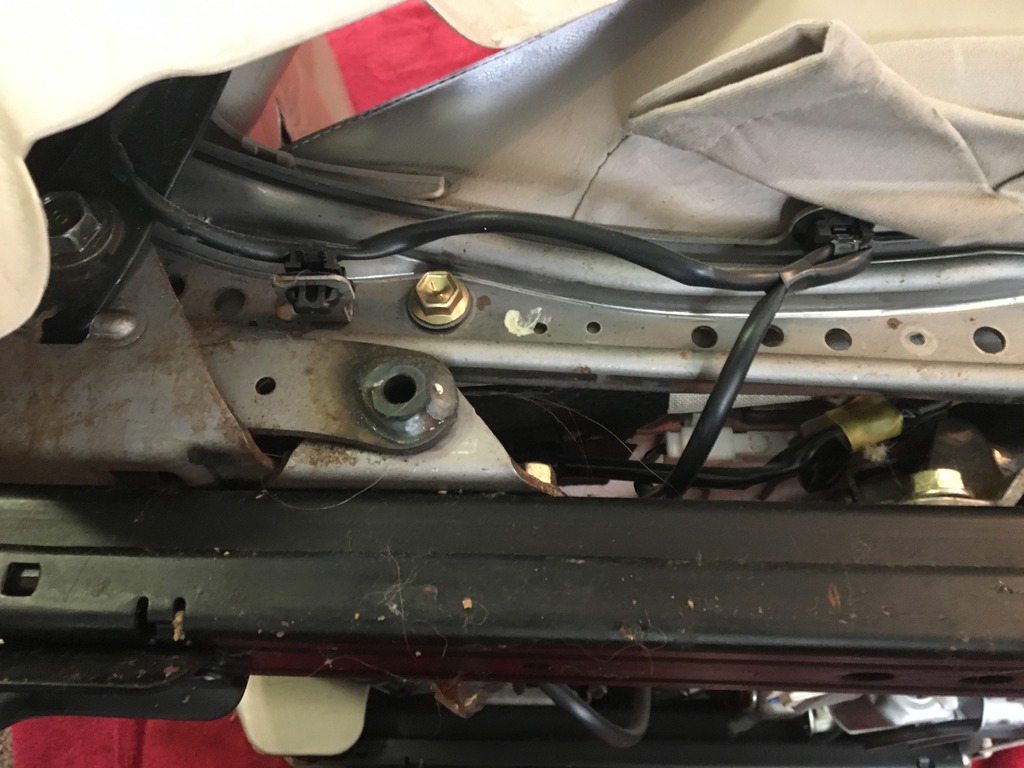
Remove the bolts securing the seat base to the seat.
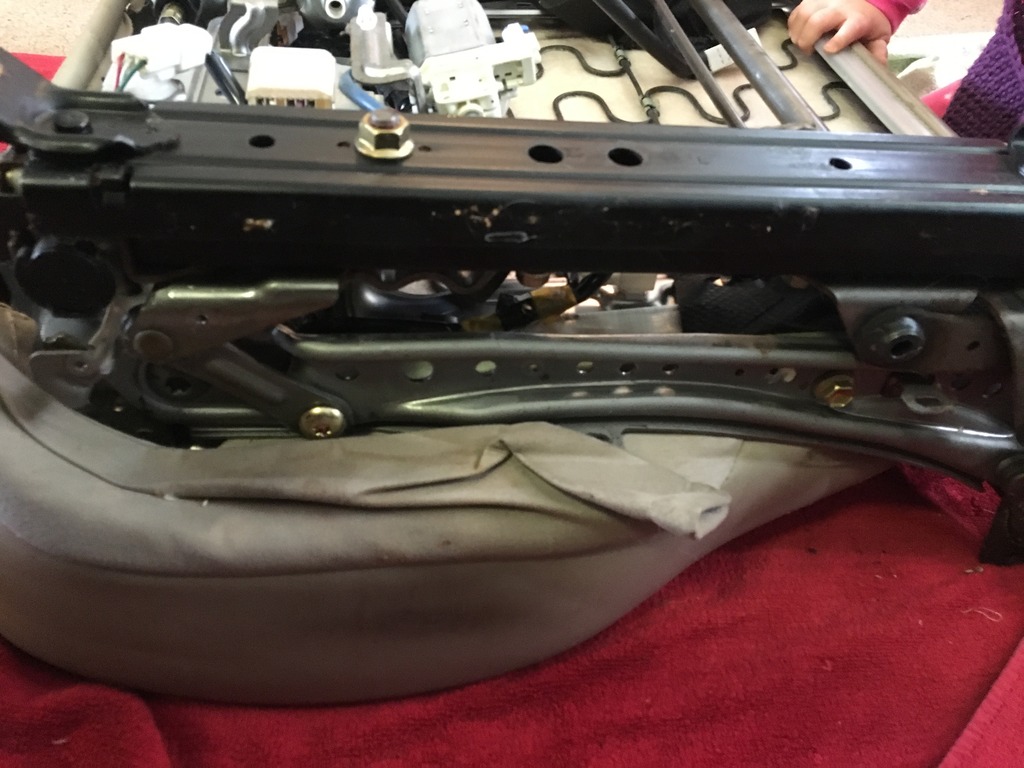
The seat cushion should come off now, but don't force it because there may still be a wiring connector that needs to be disconnected.
Now we get into the heart of the project. A lot of the steps will be pretty repetitive so I'll give you an example and you can repeat it as many times as necessary.
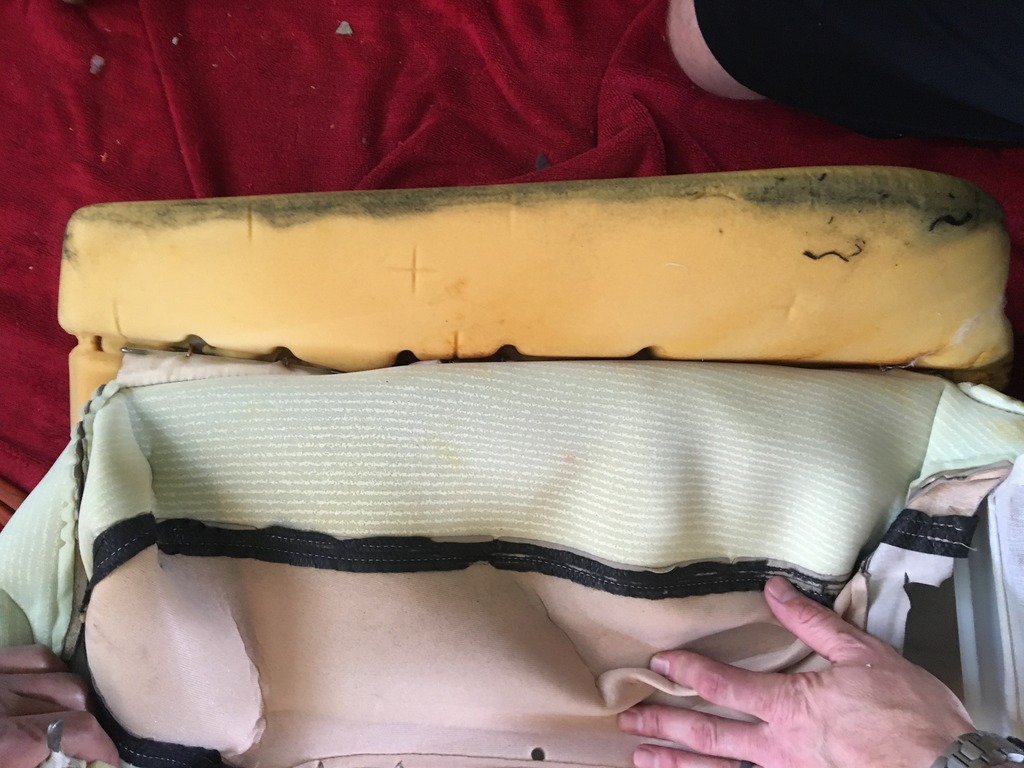
Starting from the bottom front of the seat cushion, you will see a lot of little metal tabs, sandwiching the leather.

I highly recommend wearing some gloves for this part, best use the metal is sharp. Gently bend the tabs down and you will need to pry/roll the leather out of that channel. There are a few separate areas, so take your time.
There will be some more hog rings that will need to be cut, holding the seat cover to the bottom of the frame. After the bottom edges are all free, you can slowly roll the cover and cut the hog rings from the top of the cushion.
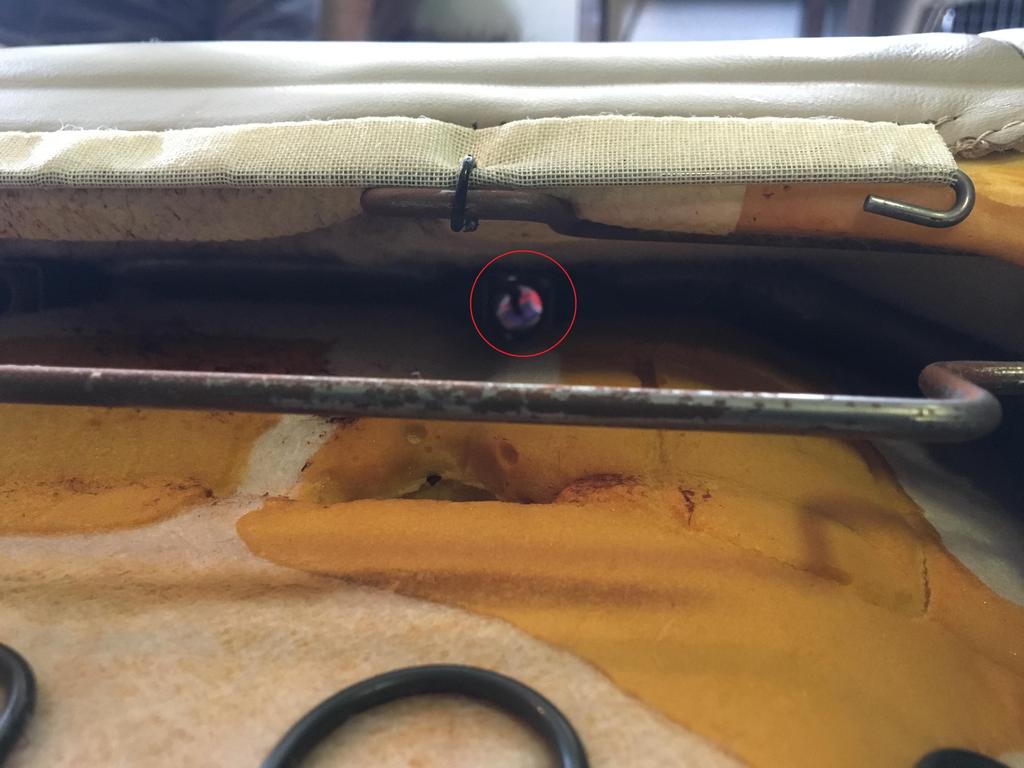
The hog rings will normally go around a thin rod in the cover, and connect to a thin rod in the cushion.
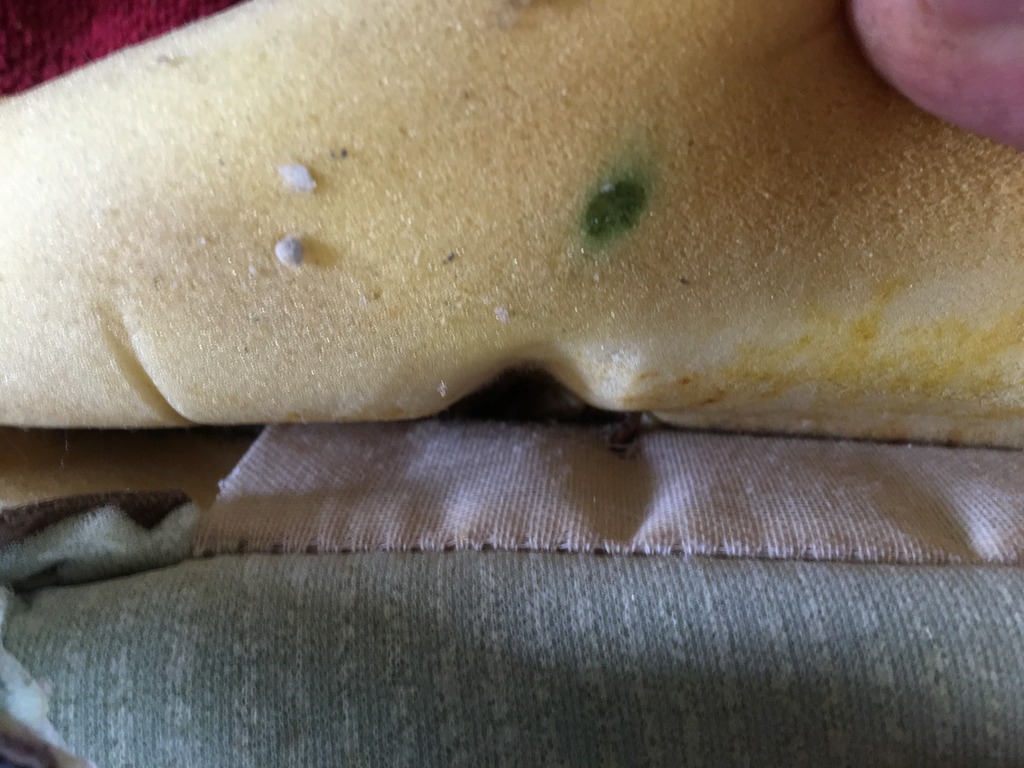
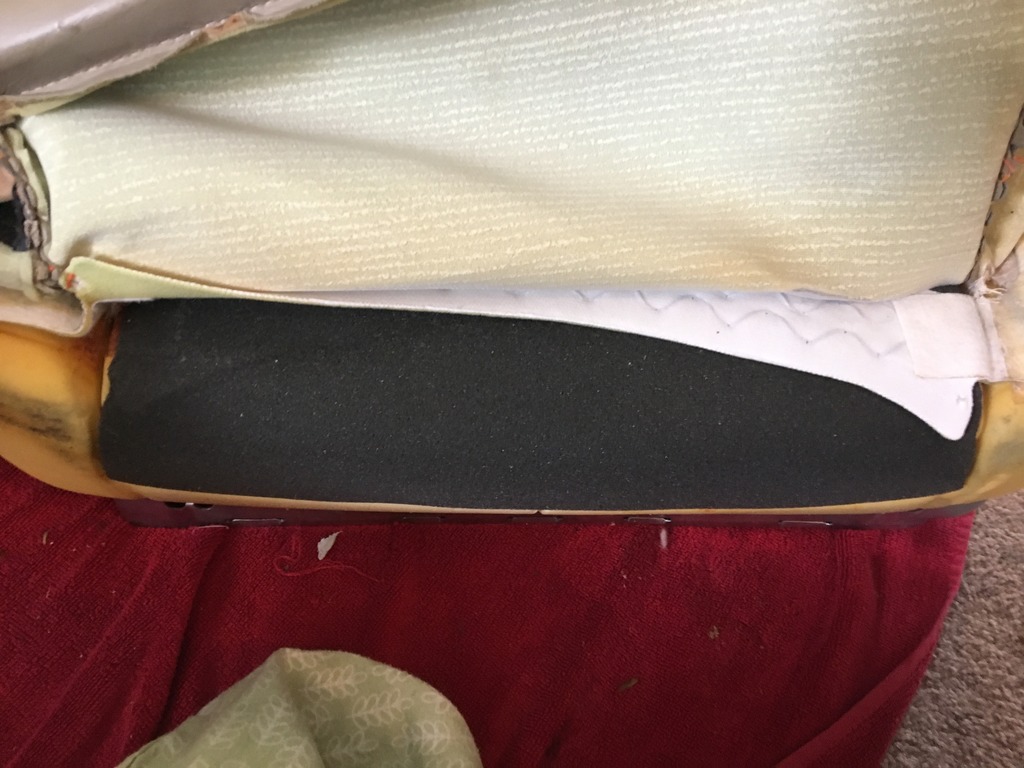
Be careful not to bend the rods, because they will be reused for installing the new covers. Also be careful not to tear the seat heaters, because they are attached to the seat covers. The heaters at the front of the bottom cushion are glued to the cushion, so carefully pry/tear it away.
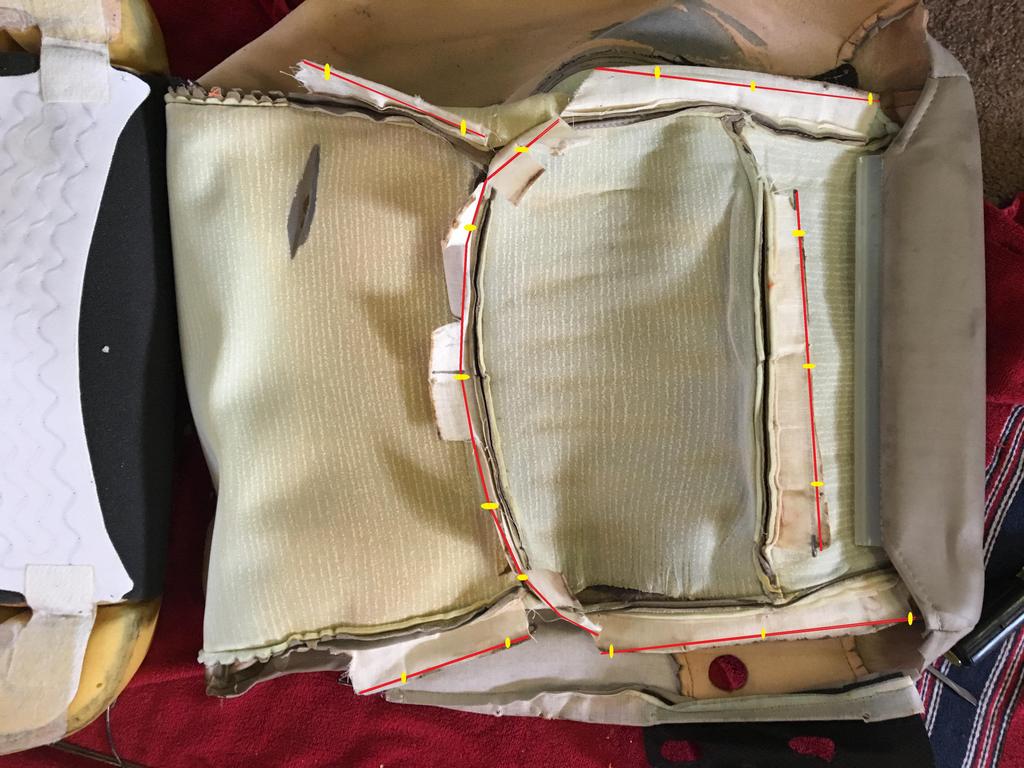
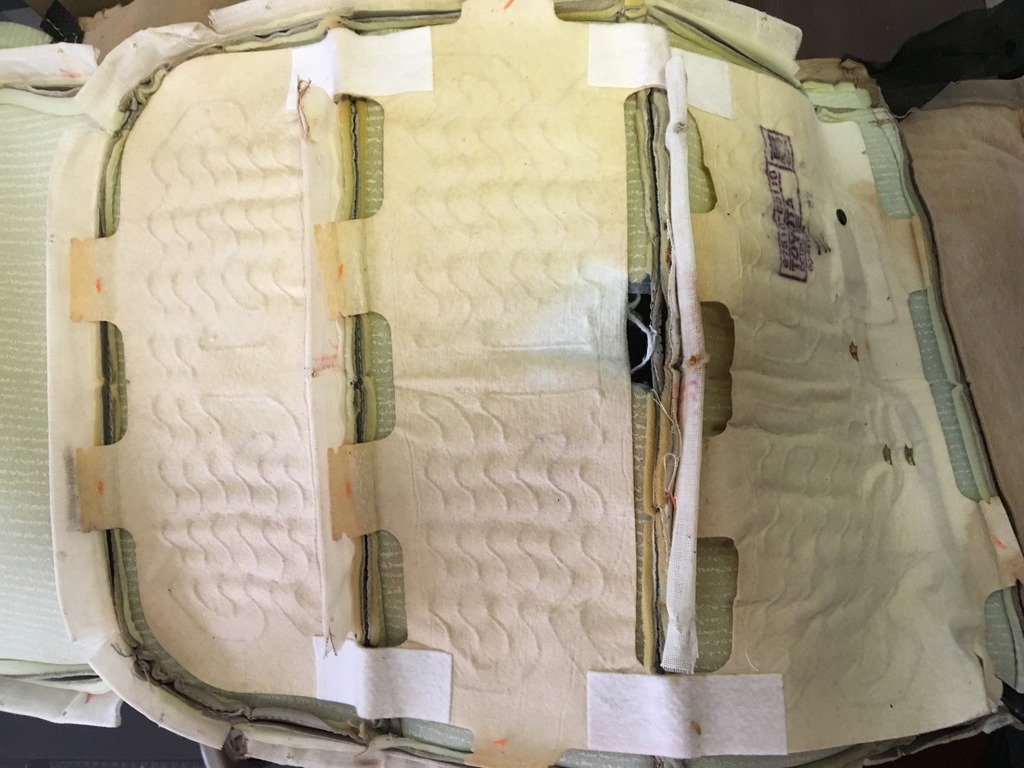
Here's an overview of how the rods and hog rings are placed.
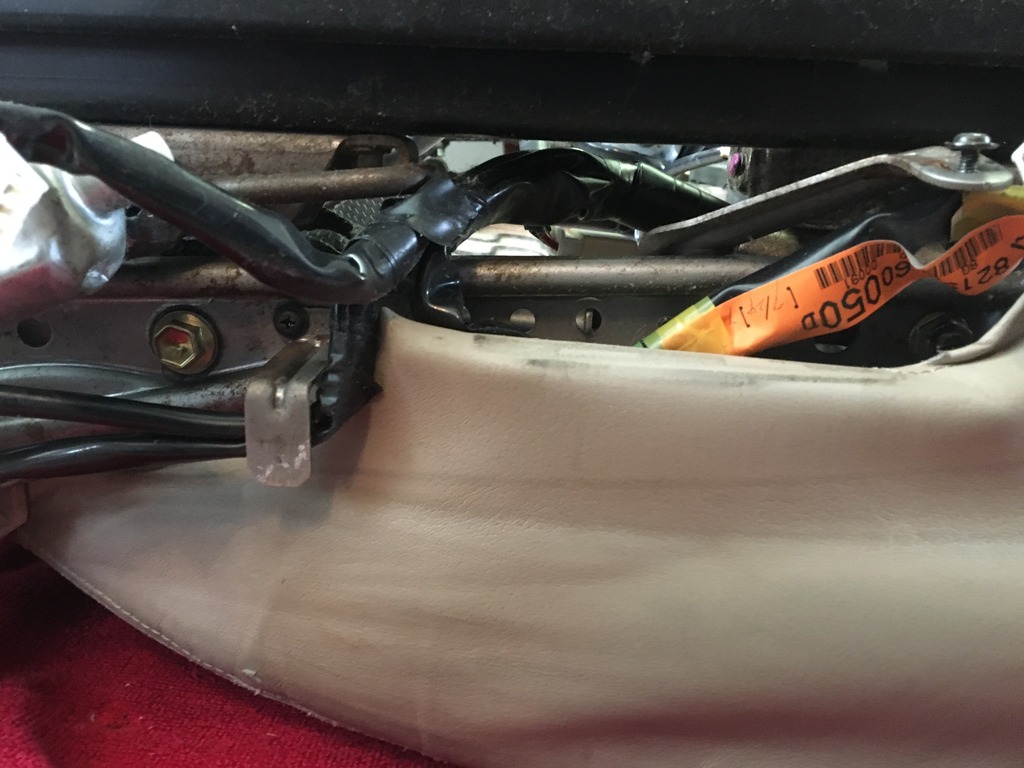
The seat heaters are attached to the seat covers with several of the little plastic pieces used to attach price tags. Clip them off as you go and you will be left with this. You can also see the indentions for the hog rings.

Removal of the leather from the seat back is essentially the same. Lots of hog rings on the back side and in the seams of the seats. However, before you start pulling the leather off, remove the headrest posts. To do this, use some long pliers to compress the retaining clips on the post and press them through the top of the seat.
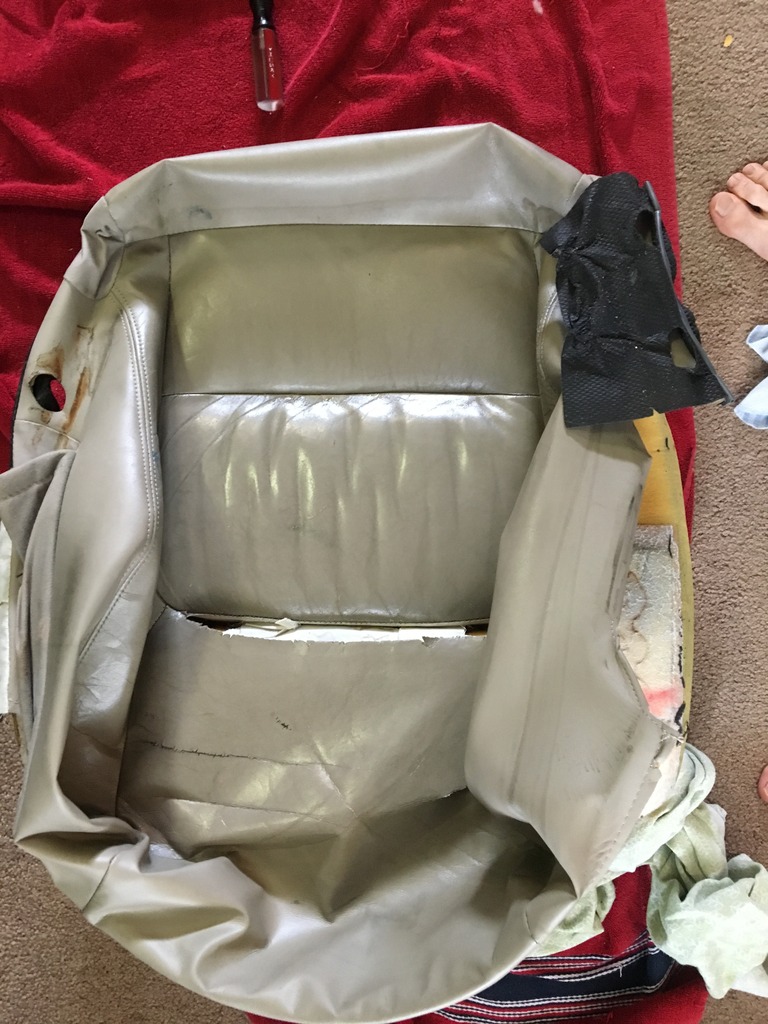
Follow the same procedure for the seat back and you will soon have both covers off your cushions.
You can see the seat heater retaining clips in this picture.


Then disconnect all of the wiring harnesses, taking note of where they all go.

Remove the bolts securing the seat base to the seat.


The seat cushion should come off now, but don't force it because there may still be a wiring connector that needs to be disconnected.
Now we get into the heart of the project. A lot of the steps will be pretty repetitive so I'll give you an example and you can repeat it as many times as necessary.
Starting from the bottom front of the seat cushion, you will see a lot of little metal tabs, sandwiching the leather.

I highly recommend wearing some gloves for this part, best use the metal is sharp. Gently bend the tabs down and you will need to pry/roll the leather out of that channel. There are a few separate areas, so take your time.
There will be some more hog rings that will need to be cut, holding the seat cover to the bottom of the frame. After the bottom edges are all free, you can slowly roll the cover and cut the hog rings from the top of the cushion.

The hog rings will normally go around a thin rod in the cover, and connect to a thin rod in the cushion.

Be careful not to bend the rods, because they will be reused for installing the new covers. Also be careful not to tear the seat heaters, because they are attached to the seat covers. The heaters at the front of the bottom cushion are glued to the cushion, so carefully pry/tear it away.

Here's an overview of how the rods and hog rings are placed.

The seat heaters are attached to the seat covers with several of the little plastic pieces used to attach price tags. Clip them off as you go and you will be left with this. You can also see the indentions for the hog rings.

Removal of the leather from the seat back is essentially the same. Lots of hog rings on the back side and in the seams of the seats. However, before you start pulling the leather off, remove the headrest posts. To do this, use some long pliers to compress the retaining clips on the post and press them through the top of the seat.


Follow the same procedure for the seat back and you will soon have both covers off your cushions.

You can see the seat heater retaining clips in this picture.

Last edited by mh60sardog; 06-05-16 at 07:55 PM.
06-05-16, 08:13 PM
#5
Driver School Candidate
Thread Starter
I didnt take any pictures of the cushion preparation, but it is pretty easy. First, I wanted to revive the foam in the seat cushions. I used a garment steamer and just slowly worked it over the foam and watched as the volume came back to original. There are lots of YouTube videos such as
that talk about and demonstrate how to do this. While the cushions were drying, I transferred the metal rods from the old covers to the new ones and tacked the seat heaters to the new covers.
Installation of the new covers is the opposite of the removal. I started with the hog rings in the center and worked my way out. A quick tip about using the hog rings; put the hog ring through the cover as close to the metaal rod as possible. I had a ring that was about .25-.5 inch above the rod and it pulled the cover tight enough to leave a low spot when looking at it from the outside. If you do mess up, just cut the hog ring and do it again.
I also used some steam between the cushion and the cover in a few areas that were creased or badly wrinkled. The steam helps make the leather pliable and shrinks it a little bit, just dont use too much steam in one spot or it can scald the new leather.
After the new leather is on the seat, you will have to cut holes for the headrests, armrests, and two bolts that attach the cushion to the seat frame (you'll see which ones I'm talking about when you reassemble the bottom). I used a phillips head screwdriver for the bolt holes and an x-acto knife for the headrest and armest holes. Cut smaller than you think you will need. You can always cut more, but can't uncut.
Reassemble the seatback to the seat bottom exactly the opposite of how you took them off, and reinstall the seat.
06-05-16, 08:24 PM
#6
Driver School Candidate
Thread Starter
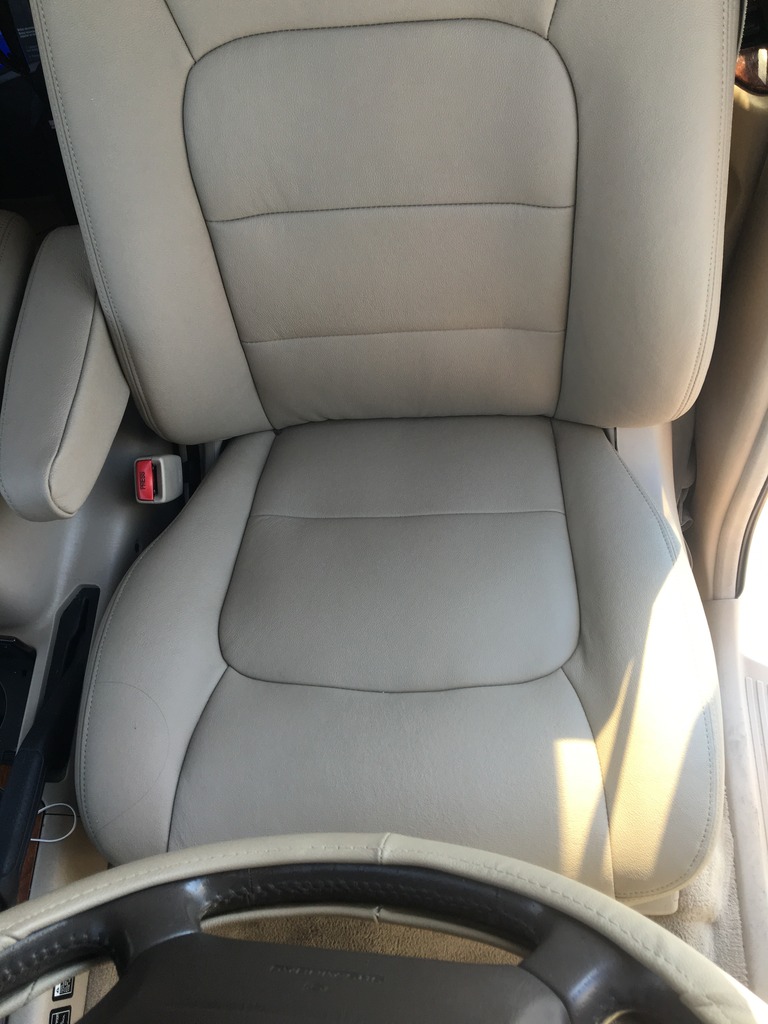
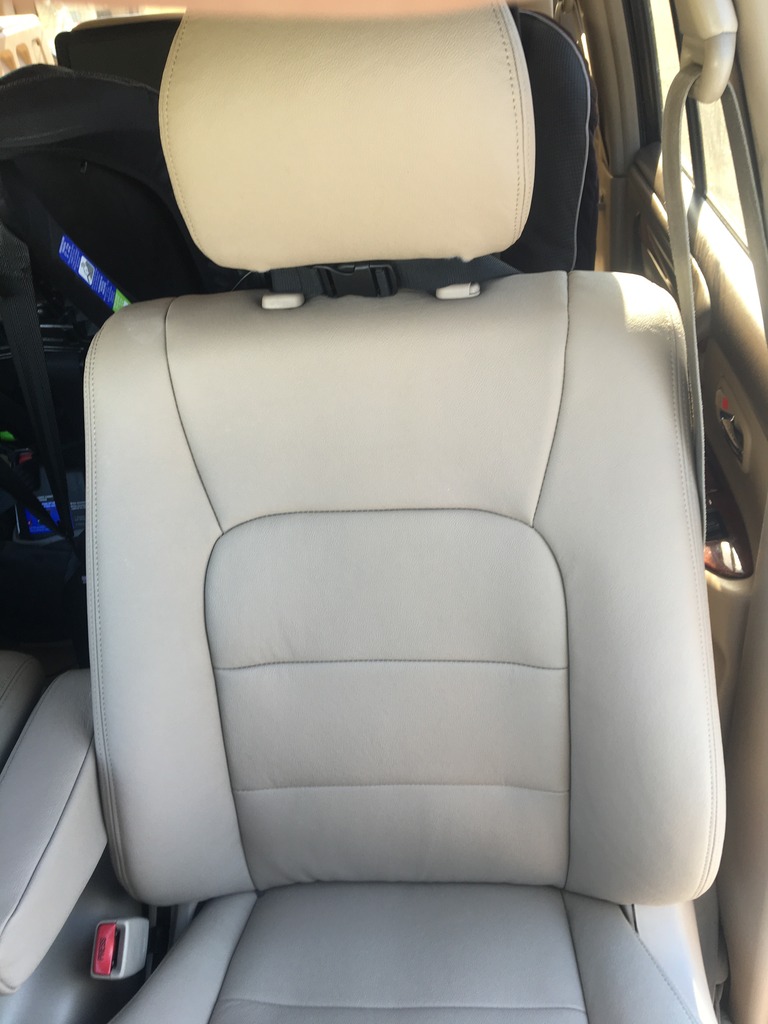
In summary, I am overall pretty satisfied with the way the seats came out. It was a pretty involved project and took a good 5-6 hours per seat. The quality of lseat.com was decent, but I wouldn't pay any more than the $300 price tag. The seats look like they did when they came off the showroom floor and I hope they last another 10-15 years. here is the final product.
BEFORE:
AFTER:
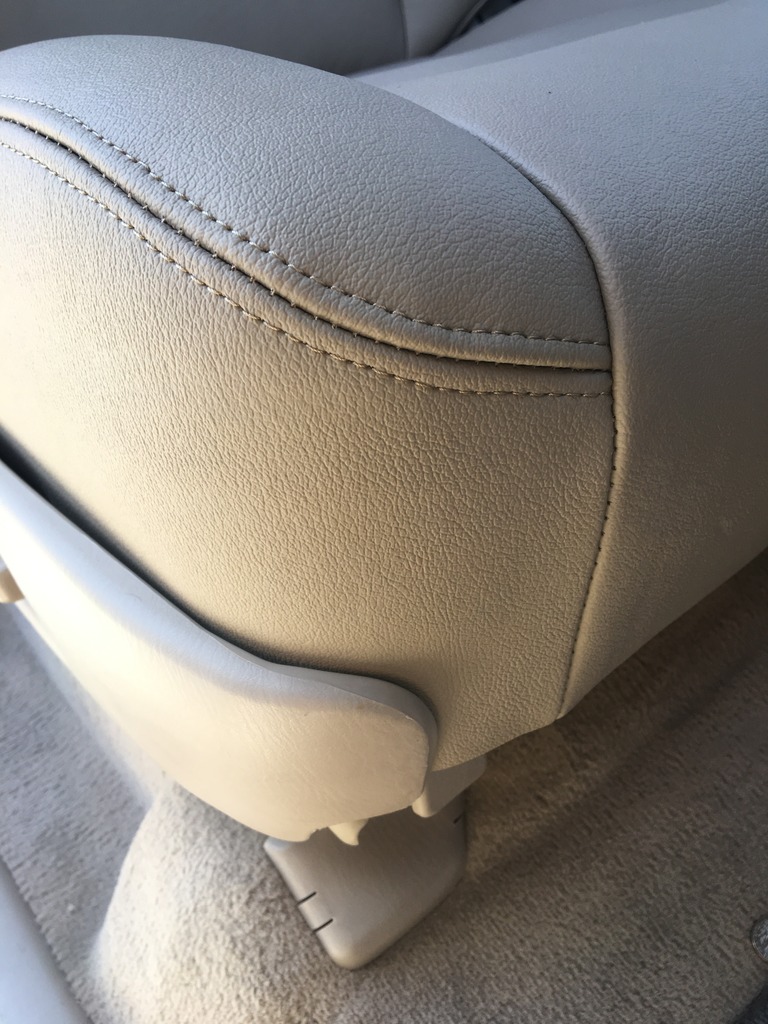
And a comparison of the new leather to the center console:

BEFORE:
AFTER:


And a comparison of the new leather to the center console:


Trending Topics


 12-23-16, 08:34 AM
#14
Driver School Candidate
Thanks for this. I'm getting ready to tackle the same job on the same truck with the same (exact, Bisque) seat covers from LSeat.com. A nice supplement to the FSM.
The following users liked this post:
The Ikon (04-09-22)
12-27-16, 06:04 PM
#15
Driver School Candidate
I'm about 85% through with the 2nd seat. Some notes:
* You don't have to pull the control ***** off the switches on the side.
* I number all the plugs with a Sharpie to make putting them back together easier.
* You don't have to pull the connectors on all the motors, just the connectors going to the seat back (2 on driver, 1 on passenger) and seat bottom heater, the seat belt, the controls on the side and one more that I think is the seat person sensor.
* The LSeat covers are made of good material. However, the labor has "issues." I would have gladly paid an additional $50 to not have to fix their screw ups. Seams that came loose because the ends were not properly terminated, interior pull down runs in the wrong place requiring me to cut them off and sew new ones on in the right place, and some minor symmetry issues. If I have to resew their stuff, they could provide some thread to do it with. FOR THE MONEY, you can't really complain.
The following users liked this post:
The Ikon (04-09-22)