DIY - Disk Brake Removal and Sanding with Garnet Paper to resolve Brake Problem.
 06-13-11, 03:20 PM
#1
Driver School Candidate
Thread Starter
Join Date: Jun 2011
Location: CA
Posts: 31
Likes: 0
Received 0 Likes
on
0 Posts
My wife and I recently purchased a 2007 LS 460 with 24,950 miles on it. On my drive home from Palm Desert to our home in Costa Mesa I experienced some severer brake pulsating at 80 mph to 70 mph while I was traveling through the mountains from Beaumont to Moreno Valley. If you have traveled this section of highway it’s a twisty road and has some steep ascents and descents. The pulsating of the brakes was quite severe but only at high speeds, the slower the speed the less pronounced it was. I did some research on line and found some great information on stoptech’s website. They identified the problem, what can cause it, some common misconceptions and how to fix it.
http://www.stoptech.com/tech_info/wp...akedisk.shtml#
“The obvious question now is "is there a "cure" for discs with uneven friction material deposits?" The answer is a conditional yes. If the vibration has just started, the chances are that the temperature has never reached the point where cementite begins to form. In this case, simply fitting a set of good "semi-metallic" pads and using them hard (after bedding) may well remove the deposits and restore the system to normal operation but with upgraded pads. If only a small amount of material has been transferred i.e. if the vibration is just starting, vigorous scrubbing with garnet paper may remove the deposit. As many deposits are not visible, scrub the entire friction surfaces thoroughly. Do not use regular sand paper or emery cloth as the aluminum oxide abrasive material will permeate the cast iron surface and make the condition worse. Do not bead blast or sand blast the discs for the same reason.”
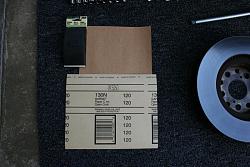
Armed with this information I decided to give it a shot and see if I could fix this problem by sanding our disks with 120 grit garnet sand paper from my local ACE Hardware store. I check Home Depot first but they did not carry it.
The information contained in this write up can be used for someone who wants to change their brakes and rotors too. This car is really easy to do a brake job on. Literally if you can change a tire you can change the brakes and rotors, it’s only two more bolts. The one thing that is not covered is the removal and installation on new brake pads. I just searched and found this thread that covers the removal and installation of new pads.
https://www.clublexus.com/forums/ls4...he-brakes.html
http://www.stoptech.com/tech_info/wp...akedisk.shtml#
“The obvious question now is "is there a "cure" for discs with uneven friction material deposits?" The answer is a conditional yes. If the vibration has just started, the chances are that the temperature has never reached the point where cementite begins to form. In this case, simply fitting a set of good "semi-metallic" pads and using them hard (after bedding) may well remove the deposits and restore the system to normal operation but with upgraded pads. If only a small amount of material has been transferred i.e. if the vibration is just starting, vigorous scrubbing with garnet paper may remove the deposit. As many deposits are not visible, scrub the entire friction surfaces thoroughly. Do not use regular sand paper or emery cloth as the aluminum oxide abrasive material will permeate the cast iron surface and make the condition worse. Do not bead blast or sand blast the discs for the same reason.”
Armed with this information I decided to give it a shot and see if I could fix this problem by sanding our disks with 120 grit garnet sand paper from my local ACE Hardware store. I check Home Depot first but they did not carry it.
The information contained in this write up can be used for someone who wants to change their brakes and rotors too. This car is really easy to do a brake job on. Literally if you can change a tire you can change the brakes and rotors, it’s only two more bolts. The one thing that is not covered is the removal and installation on new brake pads. I just searched and found this thread that covers the removal and installation of new pads.
https://www.clublexus.com/forums/ls4...he-brakes.html
Last edited by Newps; 06-13-11 at 10:55 PM.
 06-13-11, 03:23 PM
#2
Driver School Candidate
Thread Starter
Join Date: Jun 2011
Location: CA
Posts: 31
Likes: 0
Received 0 Likes
on
0 Posts
Step 1.
Chalk both rear wheels.
Step 2.
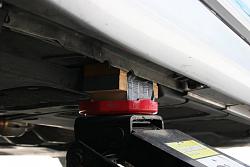
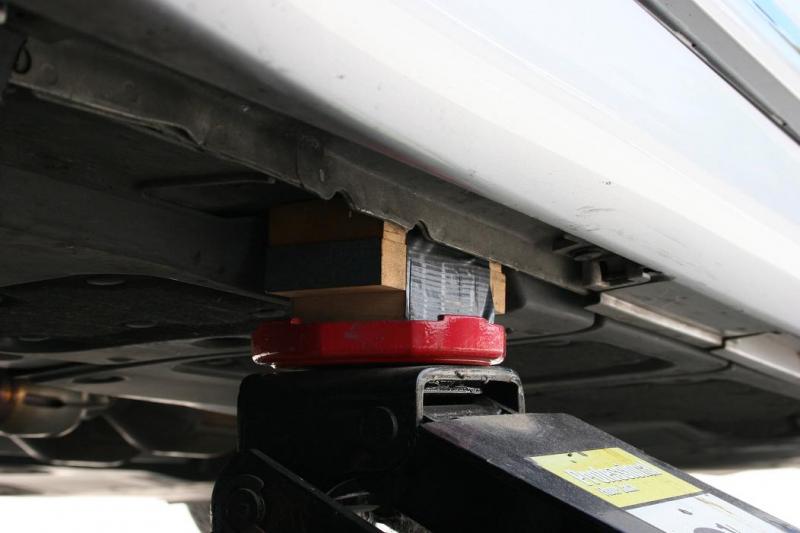
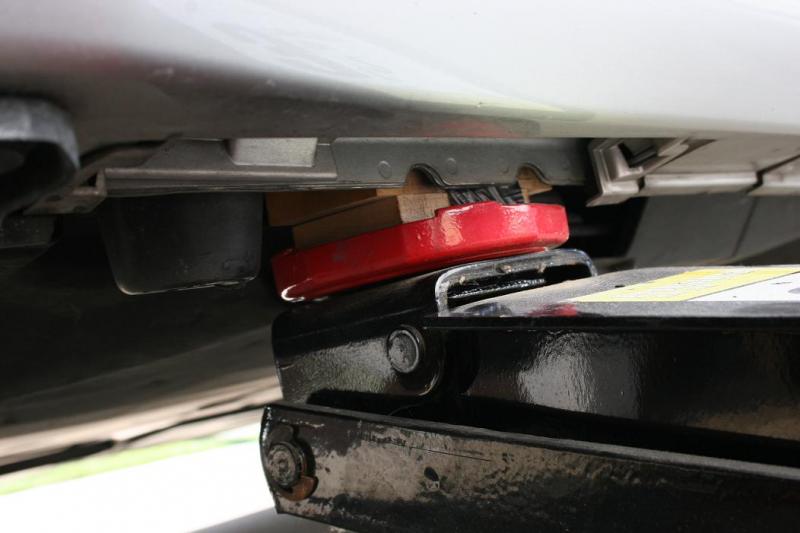
Jack up front driver�s side wheel. I placed my floor jack right behind the stock jack location. I placed a couple of pieces of hardwood on top of my floor jack saddle. Without it I would have damaged the pinch weld or plastic underneath.
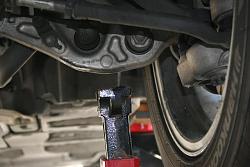
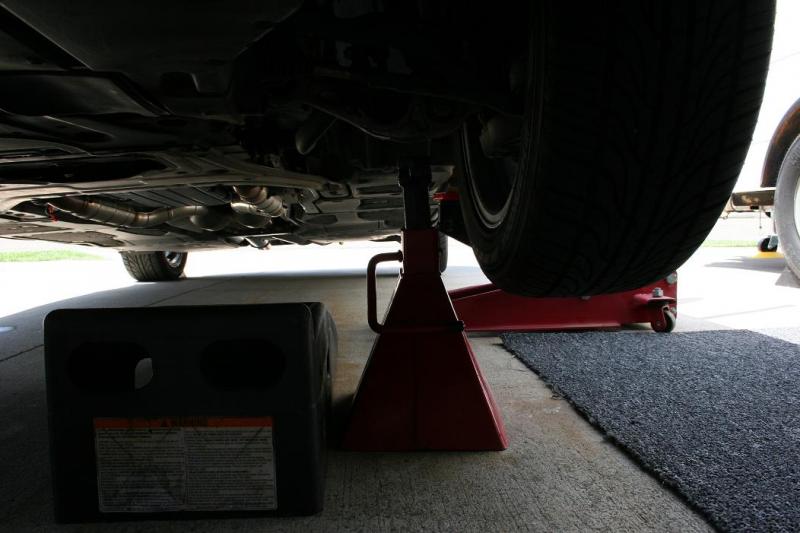
When I did the front rotors I used some wheel ramps. Although it gave me some extra work room it may not been necessary. The only other benefit of the wheel ramps, I was able to place a jack stand under the front control arm as a safety backup to my floor jack. I might have been able to do this without the ramps as well.

One thing I noticed when I removed both of the front wheels, the lug nuts were not torqued down. The rear wheels were torqued down but the fronts were just barely tight. Not sure if this played any part in my braking problem. The rotors are held on by the lug nuts so if the wheels were louse then the rotors were louse. Something that could have played a part in my braking problem.
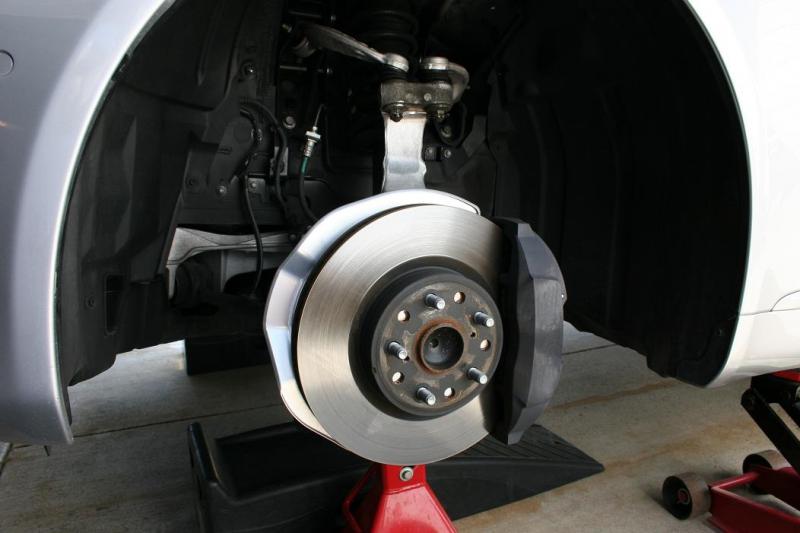
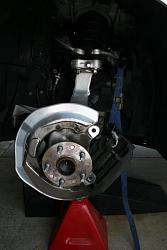
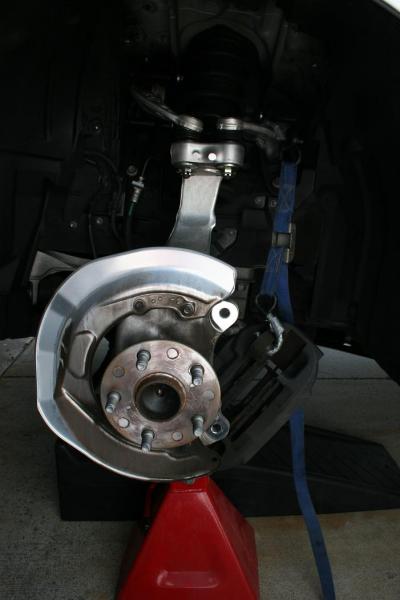
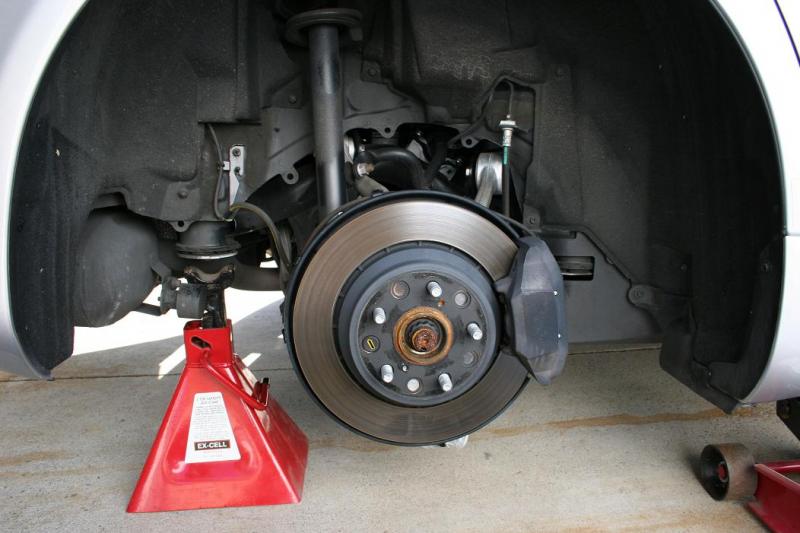
Step 3.
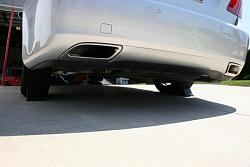
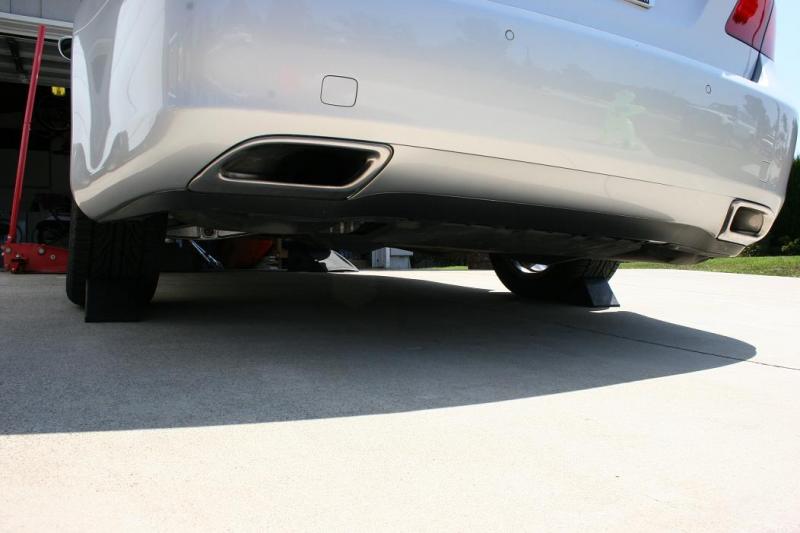
Here�s what you are looking at with the wheel off.
Chalk both rear wheels.
Step 2.
Jack up front driver�s side wheel. I placed my floor jack right behind the stock jack location. I placed a couple of pieces of hardwood on top of my floor jack saddle. Without it I would have damaged the pinch weld or plastic underneath.
When I did the front rotors I used some wheel ramps. Although it gave me some extra work room it may not been necessary. The only other benefit of the wheel ramps, I was able to place a jack stand under the front control arm as a safety backup to my floor jack. I might have been able to do this without the ramps as well.

One thing I noticed when I removed both of the front wheels, the lug nuts were not torqued down. The rear wheels were torqued down but the fronts were just barely tight. Not sure if this played any part in my braking problem. The rotors are held on by the lug nuts so if the wheels were louse then the rotors were louse. Something that could have played a part in my braking problem.
Step 3.
Here�s what you are looking at with the wheel off.
 06-13-11, 03:26 PM
#3
Driver School Candidate
Thread Starter
Join Date: Jun 2011
Location: CA
Posts: 31
Likes: 0
Received 0 Likes
on
0 Posts
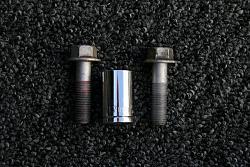
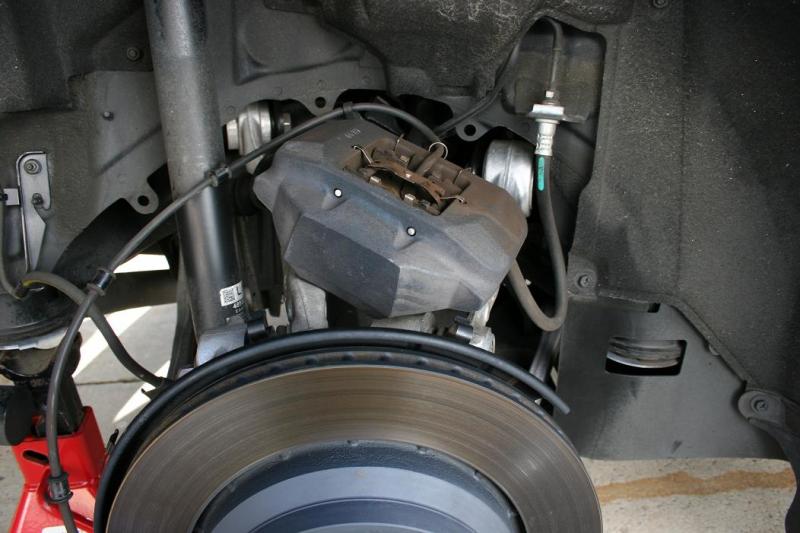
Next remove the two 19mm brake caliper bolts. I used a 1 1/2 foot cheater bar. Mine bolts had some red lock tight on them and the cheater bar made their removal a lot easer.

Slide the brake caliper off and secure it in place. Make sure you keep it at a height so that you are not stretching the brake or ABS lines. I used a tie down strap since you can adjust it to any length.
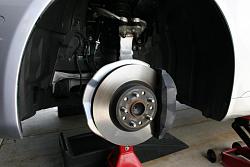
Step 4.
Once the brake caliper is removed the brake rotor will slide right off. If you have any problems you can hit it with a rubber mallet. There are also two 8mm bolt holes that you can thread a bolt into if it�s really stuck on there. You can pick these up at any hardware store I would get two 8mm bolts about 2 inches long with a 12mm bolt head. Alternate wrenching on them until the rotor comes free. I would also thread a couple of the lug nuts on a few threads to keep the rotor from falling on the ground while you are wrestling with it. Mine came off with no problems. You guys on the East Coast or wherever they salt the roads might have difficulties getting it off.
Step 5.
Now for the fun part, it�s time to start sanding. Set up a little work station with extra attention to the comfort of your knees. I took two old towels and folded them up for and extra soft work place. Cut the garnet sand paper in to 2 to 2 � inch wide strips. The length of these strips is not critical I think mine were about 10 inches long.
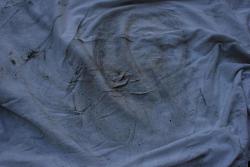
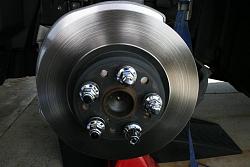
I tried using the sanding block on the first rotor but got much better and faster results with just my hand and the sand paper. It does not matter what direction you sand in. The garnet paper will not harm the rotor. I sanded up and down with the rotor and not in and out. Since I could cover more area this way and it was just easer. I removed a lot of brake pad material off the rotors. In one spot there was a large quantity of brake pad material. In another spot on the passenger side rotor I found an imprint of the brake pad itself. This is the exact type of thing that was described in StopTech article. Here is a shot of the material that was sanded off just one side of the rotor.
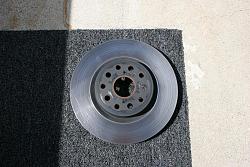
Here is a shot of the rotor after sanding before being hit with brake cleaner.

Slide the brake caliper off and secure it in place. Make sure you keep it at a height so that you are not stretching the brake or ABS lines. I used a tie down strap since you can adjust it to any length.
Step 4.
Once the brake caliper is removed the brake rotor will slide right off. If you have any problems you can hit it with a rubber mallet. There are also two 8mm bolt holes that you can thread a bolt into if it�s really stuck on there. You can pick these up at any hardware store I would get two 8mm bolts about 2 inches long with a 12mm bolt head. Alternate wrenching on them until the rotor comes free. I would also thread a couple of the lug nuts on a few threads to keep the rotor from falling on the ground while you are wrestling with it. Mine came off with no problems. You guys on the East Coast or wherever they salt the roads might have difficulties getting it off.
Step 5.
Now for the fun part, it�s time to start sanding. Set up a little work station with extra attention to the comfort of your knees. I took two old towels and folded them up for and extra soft work place. Cut the garnet sand paper in to 2 to 2 � inch wide strips. The length of these strips is not critical I think mine were about 10 inches long.

I tried using the sanding block on the first rotor but got much better and faster results with just my hand and the sand paper. It does not matter what direction you sand in. The garnet paper will not harm the rotor. I sanded up and down with the rotor and not in and out. Since I could cover more area this way and it was just easer. I removed a lot of brake pad material off the rotors. In one spot there was a large quantity of brake pad material. In another spot on the passenger side rotor I found an imprint of the brake pad itself. This is the exact type of thing that was described in StopTech article. Here is a shot of the material that was sanded off just one side of the rotor.

Here is a shot of the rotor after sanding before being hit with brake cleaner.
 06-13-11, 03:29 PM
#4
Driver School Candidate
Thread Starter
Join Date: Jun 2011
Location: CA
Posts: 31
Likes: 0
Received 0 Likes
on
0 Posts
Step 6.
Install brake rotor back on wheel hub. Getting the rotor to seat flush back on the wheel hub can be difficult. What I did was to use the lug nuts to press it back into place. They will also hold it in place while you reinstall the brake caliper.
Step 7.
Reinstall brake caliper, install two 19mm bolts and torque down brake caliper bolts.
Step 8.
Reinstall wheel, tighten lug nuts, lower vehicle and torque down the lug nuts.
Step 9.
Do the exact some thing 3 more times on each of the remaining rotors.
Step 10.
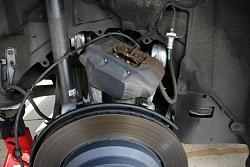
For the rear wheels almost everything is the same. I will high light some of the anomalies.
There is a large rubber bushing right behind the factor jack point. I lifted the car again right behind the factory jack point. I am guessing this rubber bushing is a lifting point for a car lift.

For the rears I did not use the wheel ramps and had no problems. I placed my safely jack stand below the body mount. I was not able to place them under the rear control arm like I was on the fronts. I investigated this area and it looked to have some added support and looked to be the best spot for my back up safety jack stand.

This is important; make sure you release the parking brake before you jack up the rear of the vehicle. Put the car in park release the parking brake, chalk the wheels then jack it up. You will not be able to remove the rear rotors with the parking brake on.
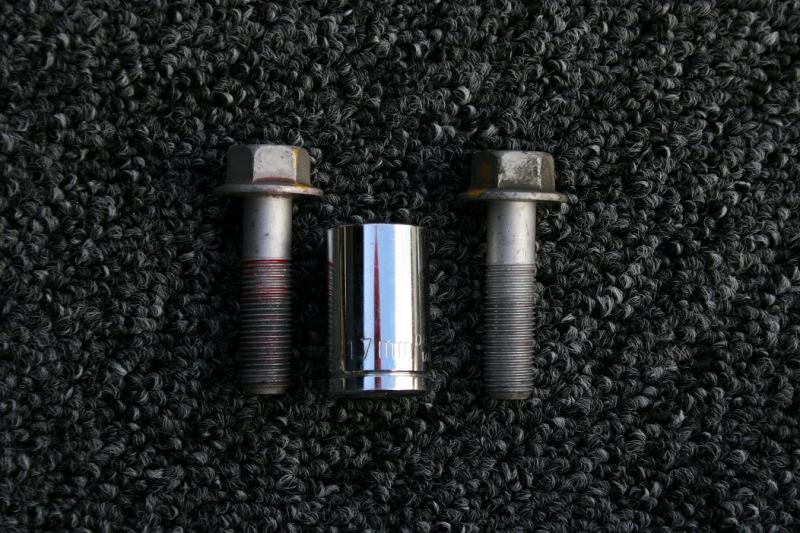
The rear brake caliper bolts are a 17mm bolt.
To secure the rear caliper after removal just set it on top of the upper control arm. You will find a position that will feel secure. On one side you will need to unclip 3 of the rubber line holders. This will give you the slack needed to be able set the caliper on the upper control arms.
The results, after all this was done I took the car out to embed the brakes. I thought 10pm on Sunday night would be a good time for the freeways in Orange County. Wrong, there was still a lot of traffic. It was hard to properly embed the brakes. Most importantly I never came to a complete stopped but did several increasing harder brake stops. Every time I completed one the brakes got better and better. The high speed pulsating was complete gone. The only thing that remains is a very slight pulse that you can feel at very slow speeds right before you come to a stop. I will drive the car again tonight and report back with my finding. I hope this write up helps some of you who are also experiencing the brake pulsation. I hope you tackle this job yourself and report back with your experience and results.
Tare
Install brake rotor back on wheel hub. Getting the rotor to seat flush back on the wheel hub can be difficult. What I did was to use the lug nuts to press it back into place. They will also hold it in place while you reinstall the brake caliper.

Step 7.
Reinstall brake caliper, install two 19mm bolts and torque down brake caliper bolts.
Step 8.
Reinstall wheel, tighten lug nuts, lower vehicle and torque down the lug nuts.
Step 9.
Do the exact some thing 3 more times on each of the remaining rotors.
Step 10.
For the rear wheels almost everything is the same. I will high light some of the anomalies.
There is a large rubber bushing right behind the factor jack point. I lifted the car again right behind the factory jack point. I am guessing this rubber bushing is a lifting point for a car lift.
For the rears I did not use the wheel ramps and had no problems. I placed my safely jack stand below the body mount. I was not able to place them under the rear control arm like I was on the fronts. I investigated this area and it looked to have some added support and looked to be the best spot for my back up safety jack stand.
This is important; make sure you release the parking brake before you jack up the rear of the vehicle. Put the car in park release the parking brake, chalk the wheels then jack it up. You will not be able to remove the rear rotors with the parking brake on.
The rear brake caliper bolts are a 17mm bolt.
To secure the rear caliper after removal just set it on top of the upper control arm. You will find a position that will feel secure. On one side you will need to unclip 3 of the rubber line holders. This will give you the slack needed to be able set the caliper on the upper control arms.
The results, after all this was done I took the car out to embed the brakes. I thought 10pm on Sunday night would be a good time for the freeways in Orange County. Wrong, there was still a lot of traffic. It was hard to properly embed the brakes. Most importantly I never came to a complete stopped but did several increasing harder brake stops. Every time I completed one the brakes got better and better. The high speed pulsating was complete gone. The only thing that remains is a very slight pulse that you can feel at very slow speeds right before you come to a stop. I will drive the car again tonight and report back with my finding. I hope this write up helps some of you who are also experiencing the brake pulsation. I hope you tackle this job yourself and report back with your experience and results.
Tare
06-13-11, 07:46 PM
#5
Driver School Candidate
Thread Starter
Join Date: Jun 2011
Location: CA
Posts: 31
Likes: 0
Received 0 Likes
on
0 Posts
Just back from a test drive, the high speed brake shudder is all gone. Did several brake tests from 80 to 20 with zero problems. I do still feel a slight pulse of the brakes at slow speeds coming to a stop but it is barely noticeable. Looks like the sanding of the disks had the desired effect. I will report back in 5,000 miles with a long term update.
Last edited by Newps; 06-13-11 at 11:00 PM.


Trending Topics
06-13-11, 11:12 PM
#8
Driver School Candidate
Thread Starter
Join Date: Jun 2011
Location: CA
Posts: 31
Likes: 0
Received 0 Likes
on
0 Posts
Thanks for the kind words cmasten.
03-13-14, 04:34 PM
#10
Driver School Candidate
Join Date: Jan 2009
Location: VA
Posts: 35
Likes: 0
Received 0 Likes
on
0 Posts
A lot of small shops will properly resurface rotors for $10-$20 each. Well worth it, IMO.
Sanding them is never gonna fix all of the pulsation and whatever pulse you get rid of Will probably come right back.
Sanding them is never gonna fix all of the pulsation and whatever pulse you get rid of Will probably come right back.
05-26-14, 12:39 PM
#11
Driver School Candidate

Join Date: Mar 2014
Location: California
Posts: 1
Likes: 0
Received 0 Likes
on
0 Posts

Yea I know it's not the idea set up but it's all I got. The top part of my drive way is actually flat. That is where I usually put the jack stands. The slop starts about halfway down. Gravity is pulling it a little but as long as the jack stands are level I feel safe. Working on the LS 460 is a whole other ball game very few places to jack from. Making it almost impossible to place a jack stand. Please chime in if there are additional places I can lift from. I would like place my jack stands where the factory lift point are. Only problem is now where do I lift from?
Thanks for the kind words cmasten.
Thanks for the kind words cmasten.
06-03-14, 08:53 AM
#12
Driver School Candidate
Thread Starter
Join Date: Jun 2011
Location: CA
Posts: 31
Likes: 0
Received 0 Likes
on
0 Posts
04-11-16, 12:53 PM
#14
Driver School Candidate
Thread Starter
Join Date: Jun 2011
Location: CA
Posts: 31
Likes: 0
Received 0 Likes
on
0 Posts
No it did not. We had the same thing happen on new cross drilled and slotted rotters and pads. Although it did take some time before it returned again. You will just have to have them turned ever so often. I've never seen this problem before on any of my cars. Something is not right with this braking system. Maybe it's due to under sized rotters for this vehicle.

Thread
Thread Starter
Forum
Replies
Last Post
audvid
LS - 4th Gen (2007-2017)
2
05-09-08 10:19 AM