Changing footwell LED
 09-21-14, 11:22 PM
#1
Driver
Thread Starter

Hi there, **Update, added how to change overhead LED by the sunroof area 09.22.14 oh and also if you mess up, it isnt my fault. Do this at your own risk**
Already looked through the FAQ and the how to's which were very helpful but couldnt find much on this topic. Already ordered $300 worth of bulbs to change all the typical bulbs in the interior and exterior including Osram CBI which im looking forward to. Still waiting on these to come in.
Anyhow, just got the car yesterday and decided to start working on the footwell lighting. Ive already read that they are soldered LED's so that should be fun.
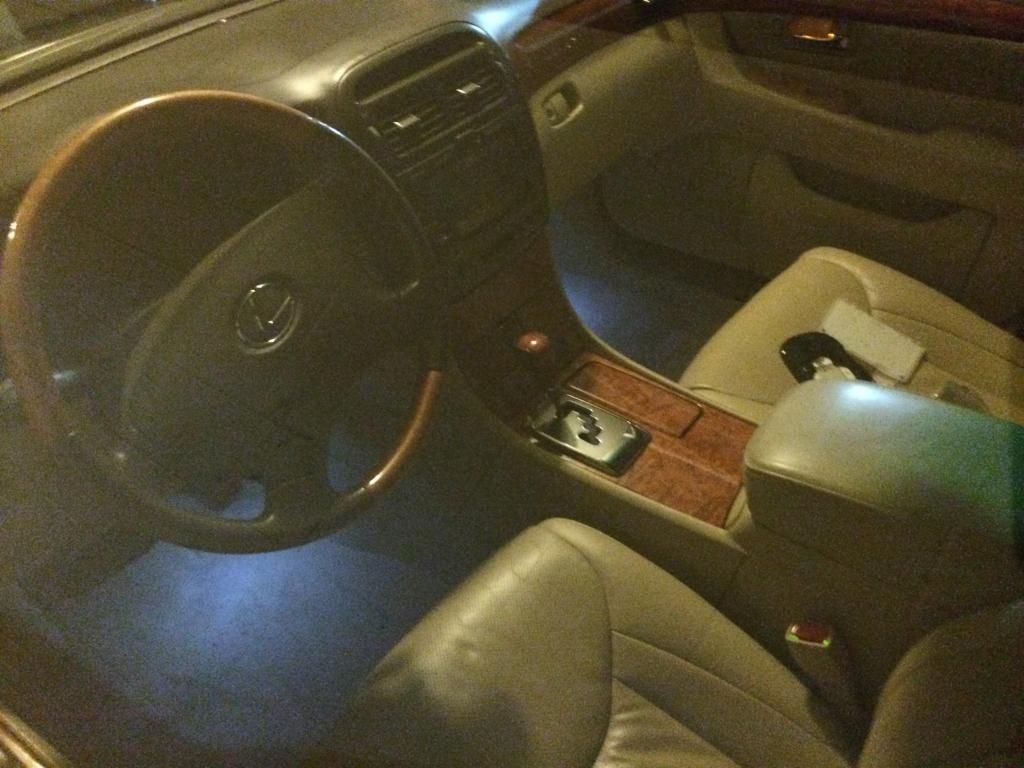
There are 3 mm (i think) in the front driver footwell and the front passenger foot well, both are a amber color that is soldered on to a board with a resistor (to reduce the 12v). These lights basically turn on when you unlock the door or when your car is running and in park, once you go to Drive or Reverse, they will slightly dim and always be on. When you shift out of drive, they will brighten up again. Who likes that stock amber yellow color, i sure dont so lets change it to white.
Lets start with the driver side, lie in the footwell and you will see the led and a white push slip right next to it, push the white clip in which just holds the wires, then twist the LED from the inside and it will come right out. Then unplug the harness. Super easy. Get a super tiny flat head and lift the cover off the black housing, you will see what i mean, i dont have pics of this part. This is what you will have then.
It looks like a 3 mm but its so tiny and i wanted a little bit more light so i used some of my superflux white LED i had from other projects. If you want to keep it even more cleaner, you can just solder a white 3 mm LED on there although not as bright. Here it is.
This thing fits perfect into the housing and since it has the black cap/cover on the housing, it holds it in place without needing anything. Had to use a 470 ohm resisitor on this.
Ok, so now that you got it all wired up, just solder it back to the OEM harness clip and just save aside the old one in case you want to change it back. Install is reverse.
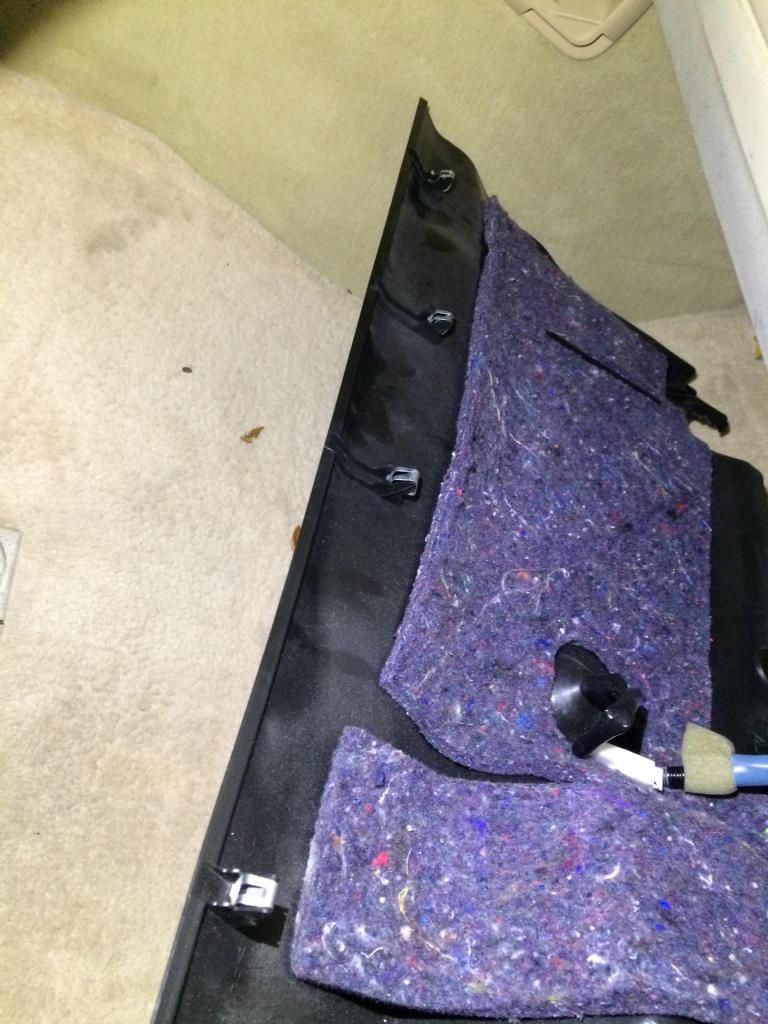
On to the passenger side, You will have to pull down the black panel that the LED is connected to. You will pull down the entire front side that is closest to the passenger seat. It is only held for 4 push clips like a lot of other panels. Its best to use 2 flat heads and pry evenly so you dont break anything or better yet, use a panel removal tool. heres a pic.
Same thing, take off the white clip that holds the wire harness and twist the LED out. Same exact LED housing as the driver side.
Thats about it. Here what it looks like.
Before:
This set up is super easy for anyone with basic soldering skills. The outcome is quite nice and it dims whenver you take it out of park and brightens back up when you place it in park.
Yes yes, i know the tan interior is not that sexy and i damn wish i had black interior but was tired of waiting for months and months for a black interior. Hawaii is too tiny to get the color combos i want.
Upcoming next is the rear passenger footwell lights.
So i took them apart but the LED housing is not separable Heres hot to get it off.
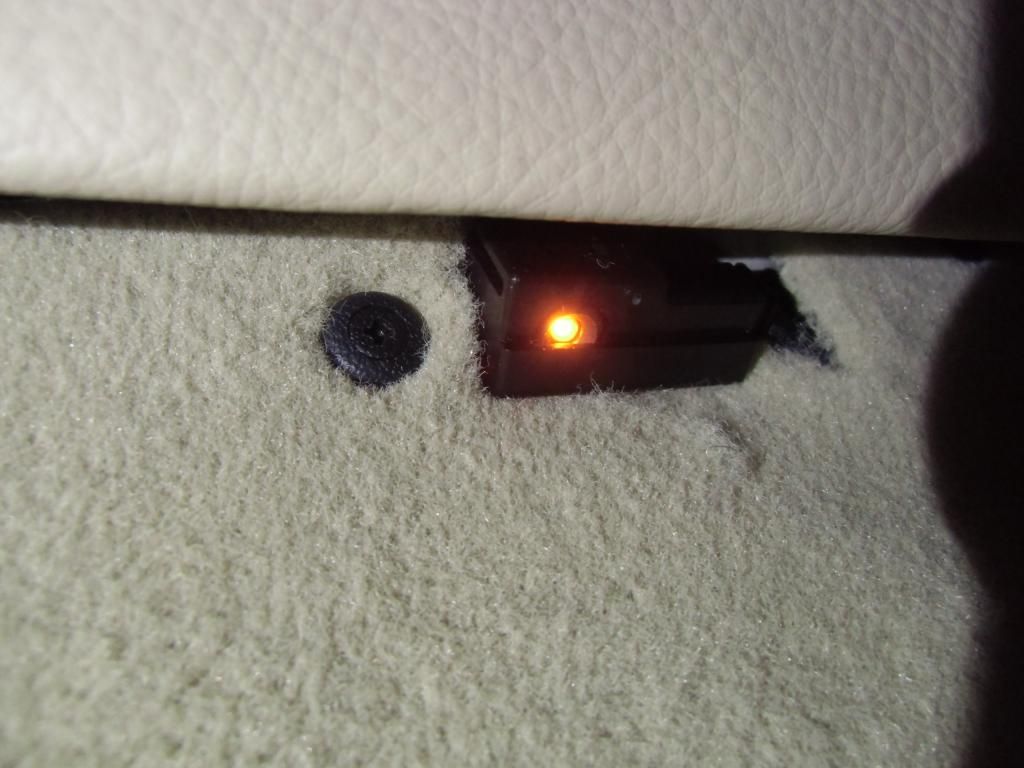
1. Lie on your back in a really really uncomfortable position and look under that compartment thats on the back of the driver seat. You will see the LED shining orange. Look even closer with a flashlight (not fleshlight) and you will see a black plastic clip with a phillips center. Take this clip off.
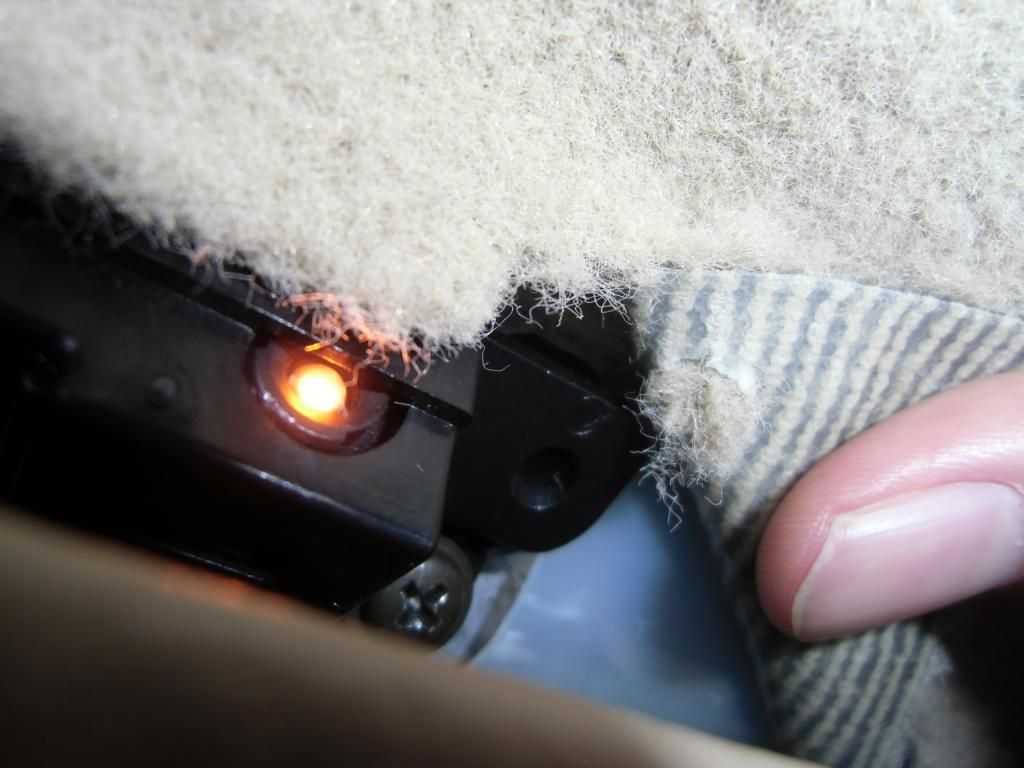
2. The clip holds the carpet on the LED housing, pull away the carpet sligthly and you will see a metal phillips bolt, this holds the LED housing into the seat. Take this off. You will have to angle your screwdriver a certain way.
3. Now the screw is out, the other side of the LED housing is just sitting in a groove, just wiggle it out nicely, dont break the hook looking thing.
4. Unplug the harness.
5. This is what you will have.
6. I dont have much pics but you will see the LED part is held be two plastic clips that you have to simply lift up with a tiny flat head screwdriver. Once you do this to both sides, you will have this.

Now ive tried to take this final piece apart but it seems impossible and i was starting to wear down the plastic trying to pry things open. This looks to be sealed unit and may be glued together to preven it from accessing the LED. I didnt want to break it and besides, utilizing this is already looking too difficult.
I already have an idea and will replace with another brighter LED similiar to the super flux. I will update this thread when it comes in. Its basically just another white led which i will just solder a resistor and get pins so that i plugs straight into the OEM harness as the leads from the OEM LED will be destroyed if i try to use it.
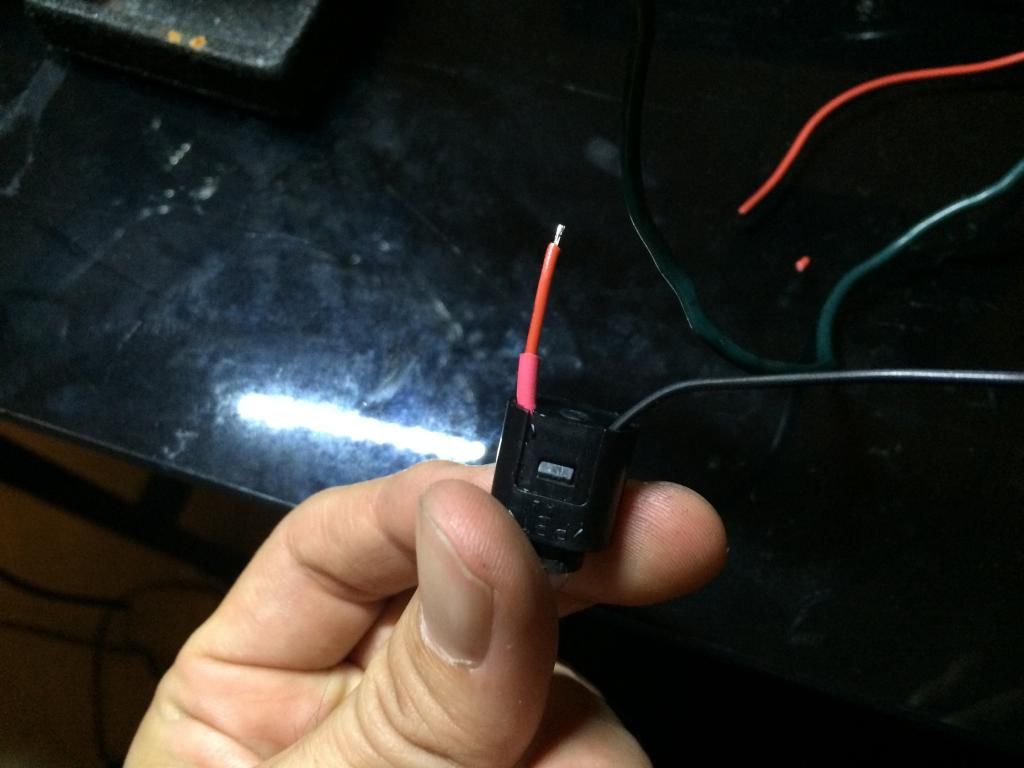
7. So i gave up trying to use the stock LED housing as i just cant even access the LED itself. I decided to just use a think LED such as this.
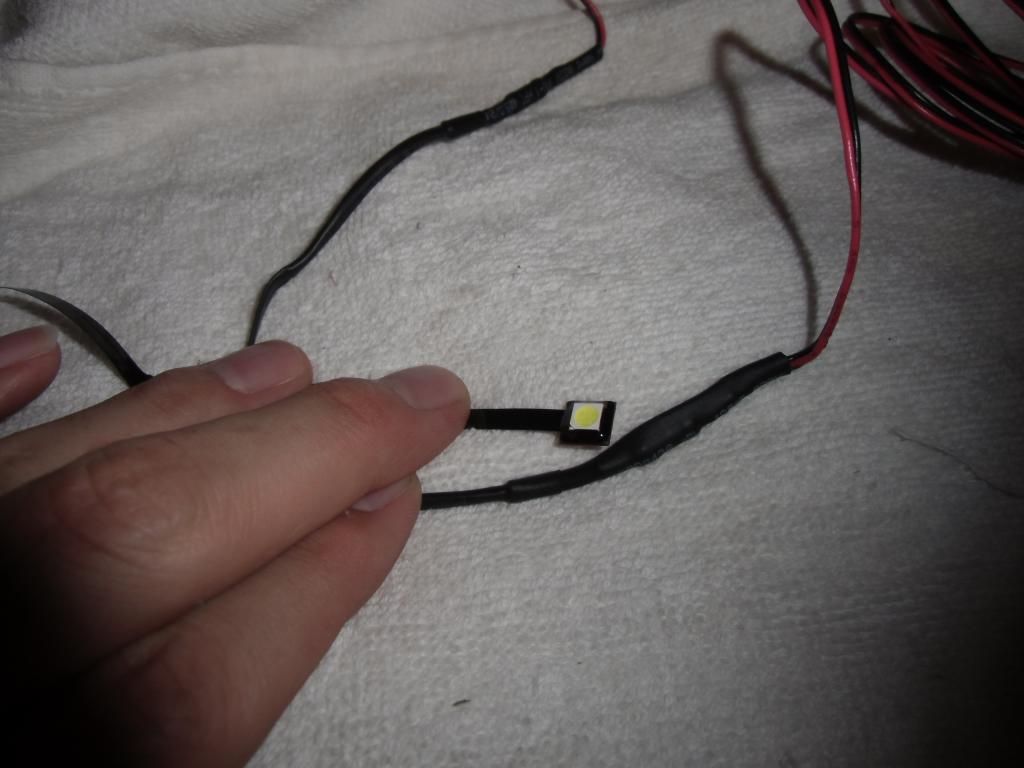
8. At this point, you just have to be creative to find a way to mount these things. There are so many variation of different LED products out there, just have to find a good realiable method. I stuck this on the the stock led housing and thats about it. Hope the pics help.
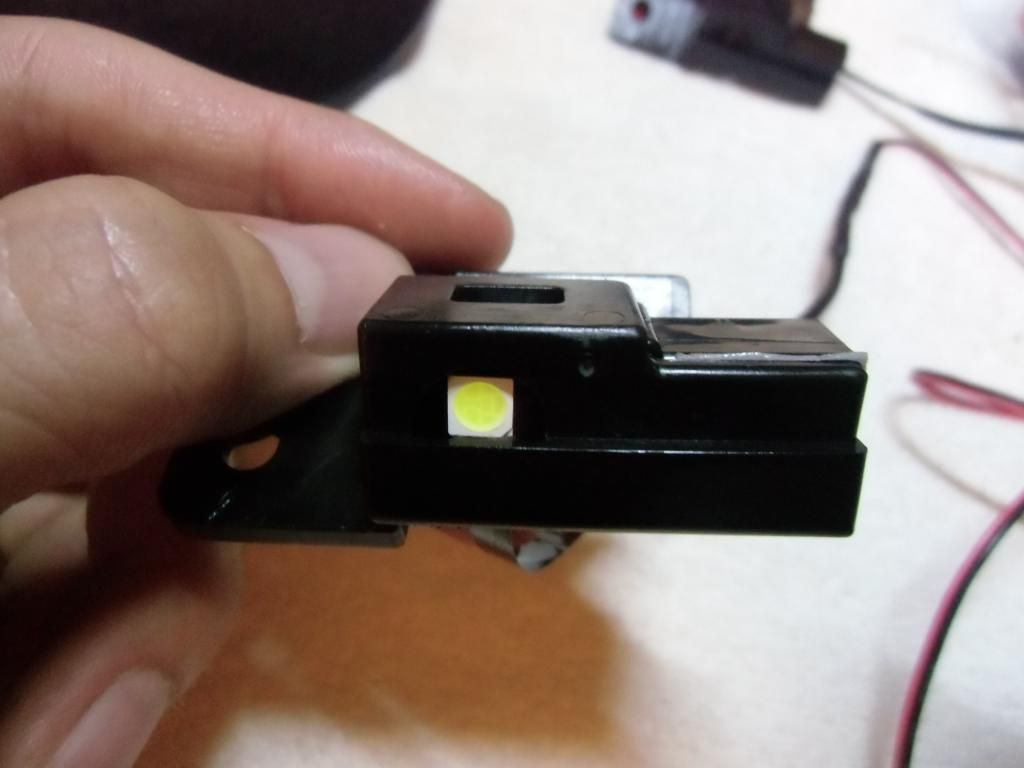
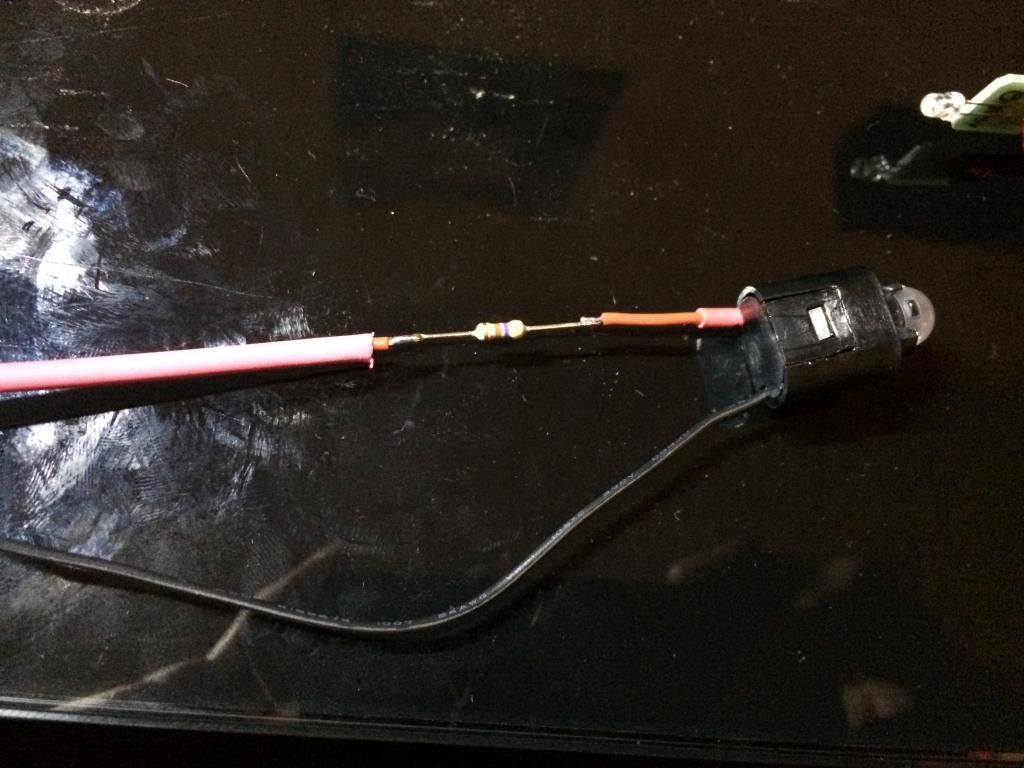
9. Had to use a little double stick tape to keep the LED housing from jiggling from the bigger housing.
10. so since the stock harness cant be utilizd, you want to find a pin to stick into the harness on the car side. I didnt have much so i used this.
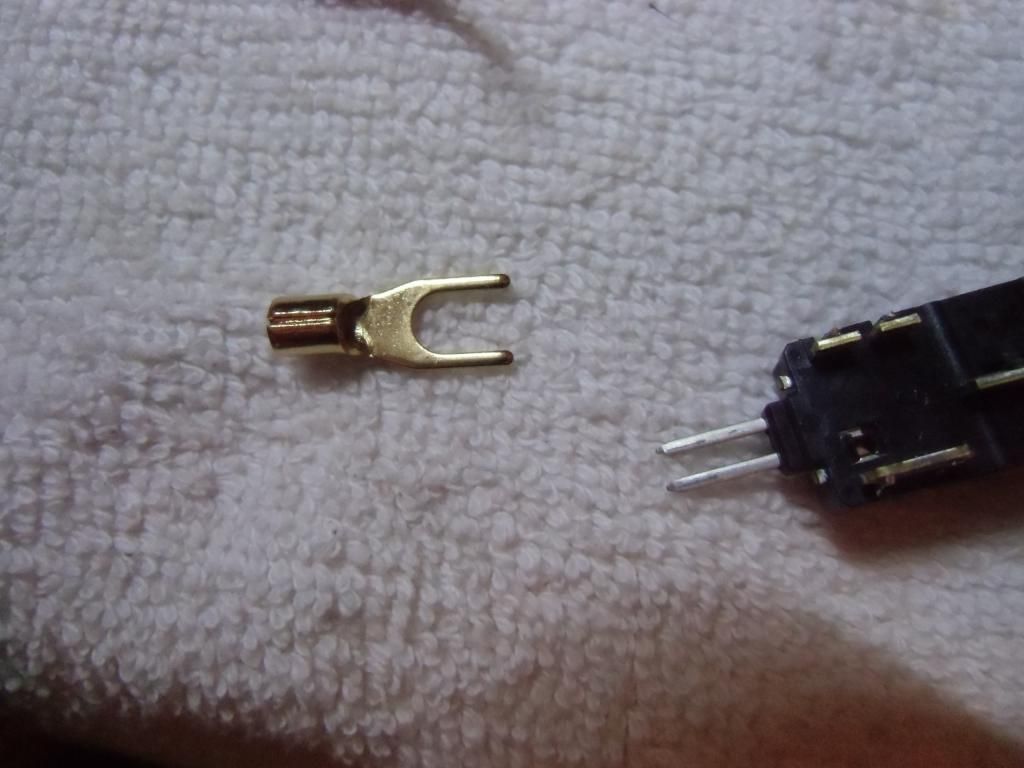
Always always solder and heat shrink tube, none of this twist and electric tape BS.
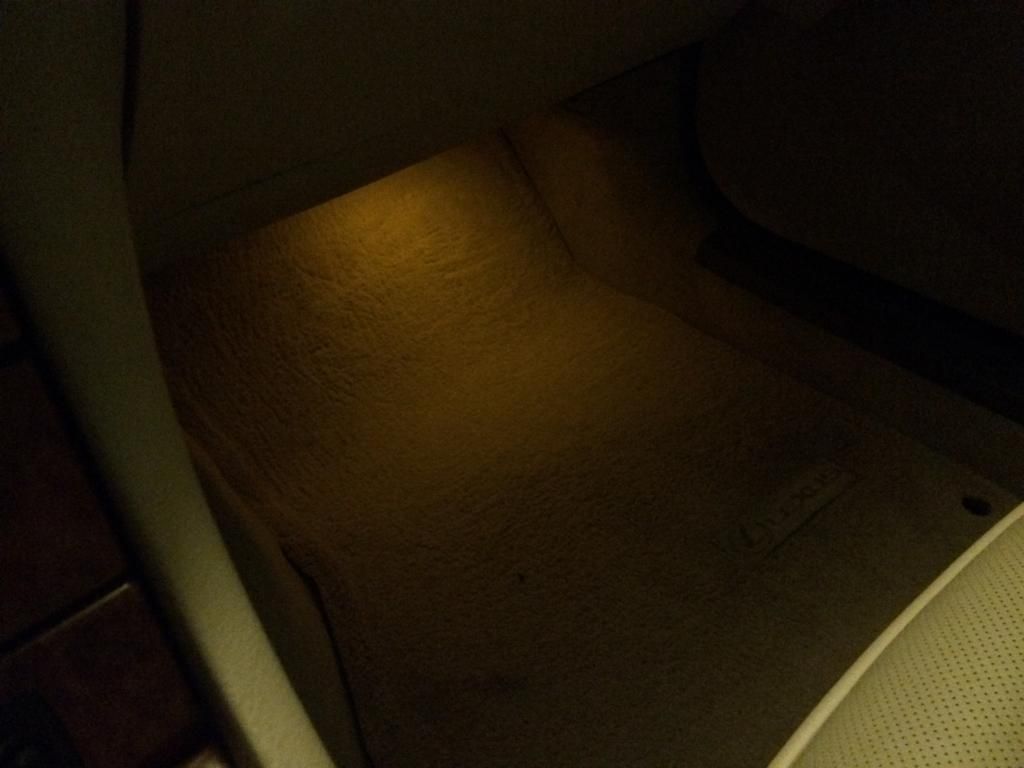
11. Here it is on the car.

All this stuff just comes down to being creative. Its always best to try and utilize the stock harness clips for simplicity sake but sometimes its not always possible. This is just my method and it will hold up solid for sure but theres so many other ways you can do this stuff.
Im not too sure i consider this a full success because the superflux LED is nowhere near as bright as these. I may have to look into using either a stronger LED bulb up front or using a weaker LED in the back. Another thing to keep in mind is that the design on the back one is angled so it covers more space. The design on the front one shoots straight down so it covers less space. I guess you could say its meant even from factory to be more luxury for the people in the back. But in the meantime, im so frickin tired already so ill finish others stuff before coming back to this. Lying down in the back seat taking these out is really sore.
Hope this helps for now! Thanks! Oh ya forgot to add, this is a 05 LS430, not sure if the 01-03 is any different, not my problem haha.
Already looked through the FAQ and the how to's which were very helpful but couldnt find much on this topic. Already ordered $300 worth of bulbs to change all the typical bulbs in the interior and exterior including Osram CBI which im looking forward to. Still waiting on these to come in.
Anyhow, just got the car yesterday and decided to start working on the footwell lighting. Ive already read that they are soldered LED's so that should be fun.
There are 3 mm (i think) in the front driver footwell and the front passenger foot well, both are a amber color that is soldered on to a board with a resistor (to reduce the 12v). These lights basically turn on when you unlock the door or when your car is running and in park, once you go to Drive or Reverse, they will slightly dim and always be on. When you shift out of drive, they will brighten up again. Who likes that stock amber yellow color, i sure dont so lets change it to white.
Lets start with the driver side, lie in the footwell and you will see the led and a white push slip right next to it, push the white clip in which just holds the wires, then twist the LED from the inside and it will come right out. Then unplug the harness. Super easy. Get a super tiny flat head and lift the cover off the black housing, you will see what i mean, i dont have pics of this part. This is what you will have then.


It looks like a 3 mm but its so tiny and i wanted a little bit more light so i used some of my superflux white LED i had from other projects. If you want to keep it even more cleaner, you can just solder a white 3 mm LED on there although not as bright. Here it is.

This thing fits perfect into the housing and since it has the black cap/cover on the housing, it holds it in place without needing anything. Had to use a 470 ohm resisitor on this.


Ok, so now that you got it all wired up, just solder it back to the OEM harness clip and just save aside the old one in case you want to change it back. Install is reverse.
On to the passenger side, You will have to pull down the black panel that the LED is connected to. You will pull down the entire front side that is closest to the passenger seat. It is only held for 4 push clips like a lot of other panels. Its best to use 2 flat heads and pry evenly so you dont break anything or better yet, use a panel removal tool. heres a pic.

Same thing, take off the white clip that holds the wire harness and twist the LED out. Same exact LED housing as the driver side.
Thats about it. Here what it looks like.
Before:


This set up is super easy for anyone with basic soldering skills. The outcome is quite nice and it dims whenver you take it out of park and brightens back up when you place it in park.
Yes yes, i know the tan interior is not that sexy and i damn wish i had black interior but was tired of waiting for months and months for a black interior. Hawaii is too tiny to get the color combos i want.
Upcoming next is the rear passenger footwell lights.

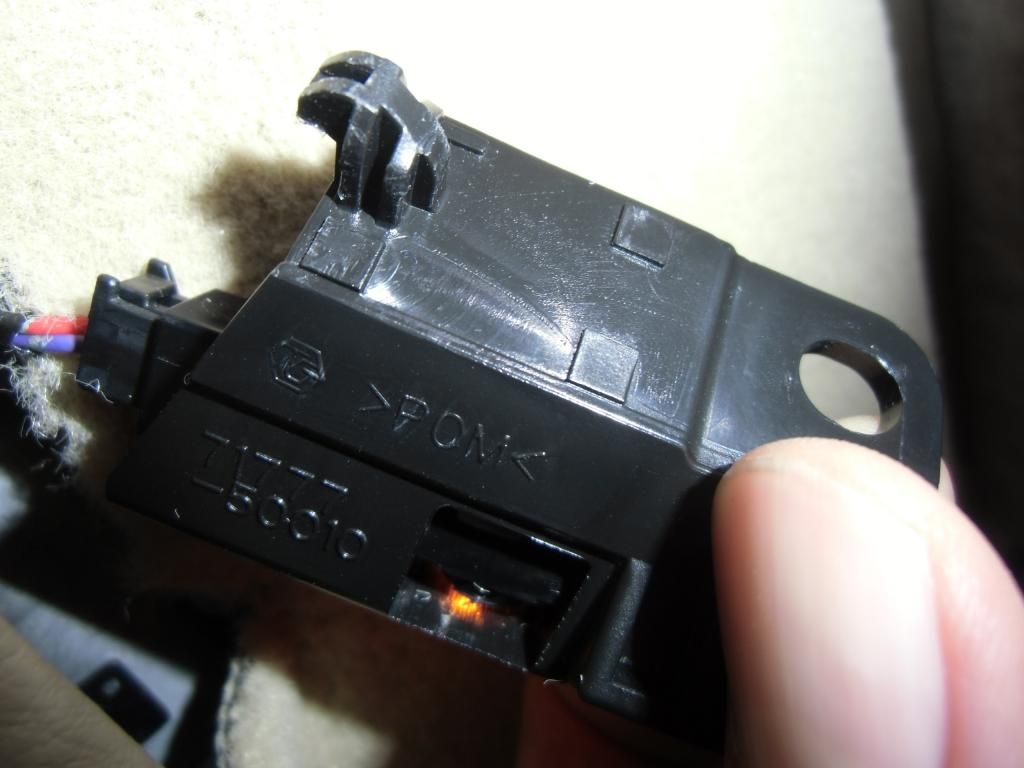
So i took them apart but the LED housing is not separable Heres hot to get it off.
1. Lie on your back in a really really uncomfortable position and look under that compartment thats on the back of the driver seat. You will see the LED shining orange. Look even closer with a flashlight (not fleshlight) and you will see a black plastic clip with a phillips center. Take this clip off.

2. The clip holds the carpet on the LED housing, pull away the carpet sligthly and you will see a metal phillips bolt, this holds the LED housing into the seat. Take this off. You will have to angle your screwdriver a certain way.

3. Now the screw is out, the other side of the LED housing is just sitting in a groove, just wiggle it out nicely, dont break the hook looking thing.

4. Unplug the harness.
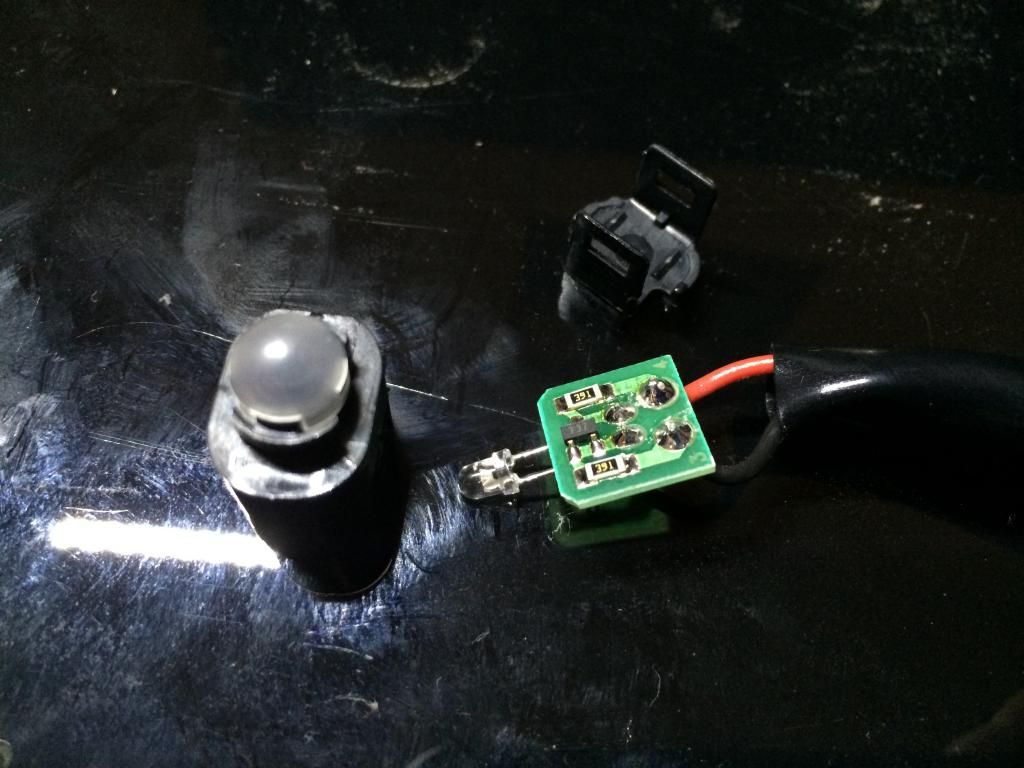
5. This is what you will have.

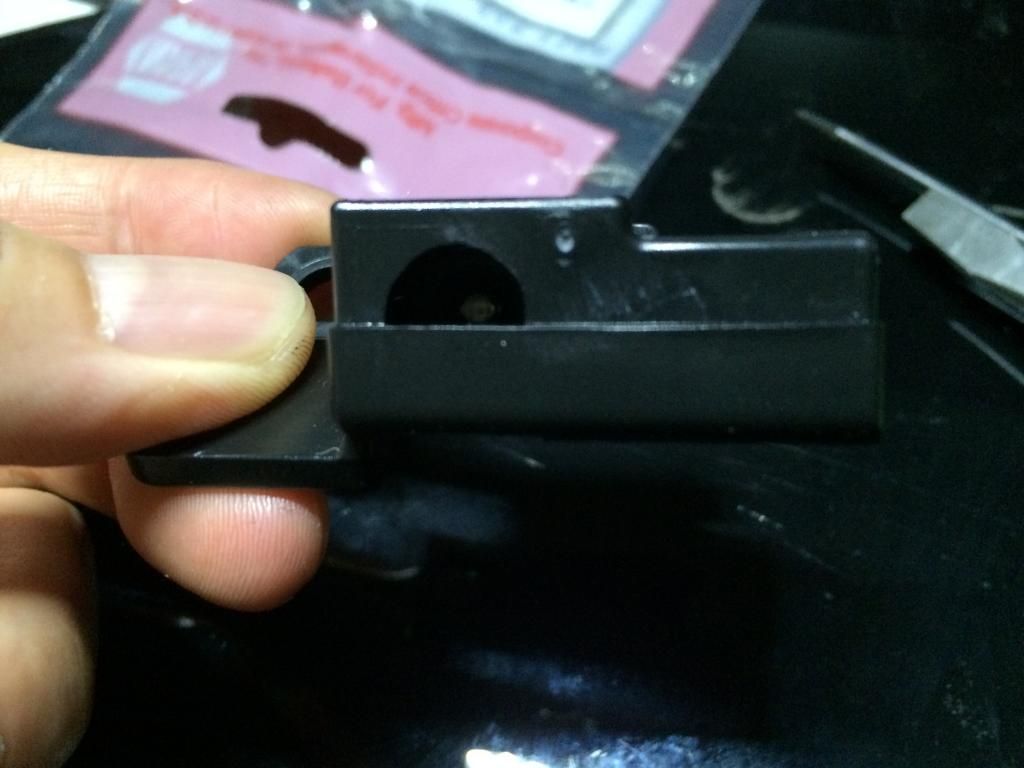
6. I dont have much pics but you will see the LED part is held be two plastic clips that you have to simply lift up with a tiny flat head screwdriver. Once you do this to both sides, you will have this.


Now ive tried to take this final piece apart but it seems impossible and i was starting to wear down the plastic trying to pry things open. This looks to be sealed unit and may be glued together to preven it from accessing the LED. I didnt want to break it and besides, utilizing this is already looking too difficult.
I already have an idea and will replace with another brighter LED similiar to the super flux. I will update this thread when it comes in. Its basically just another white led which i will just solder a resistor and get pins so that i plugs straight into the OEM harness as the leads from the OEM LED will be destroyed if i try to use it.
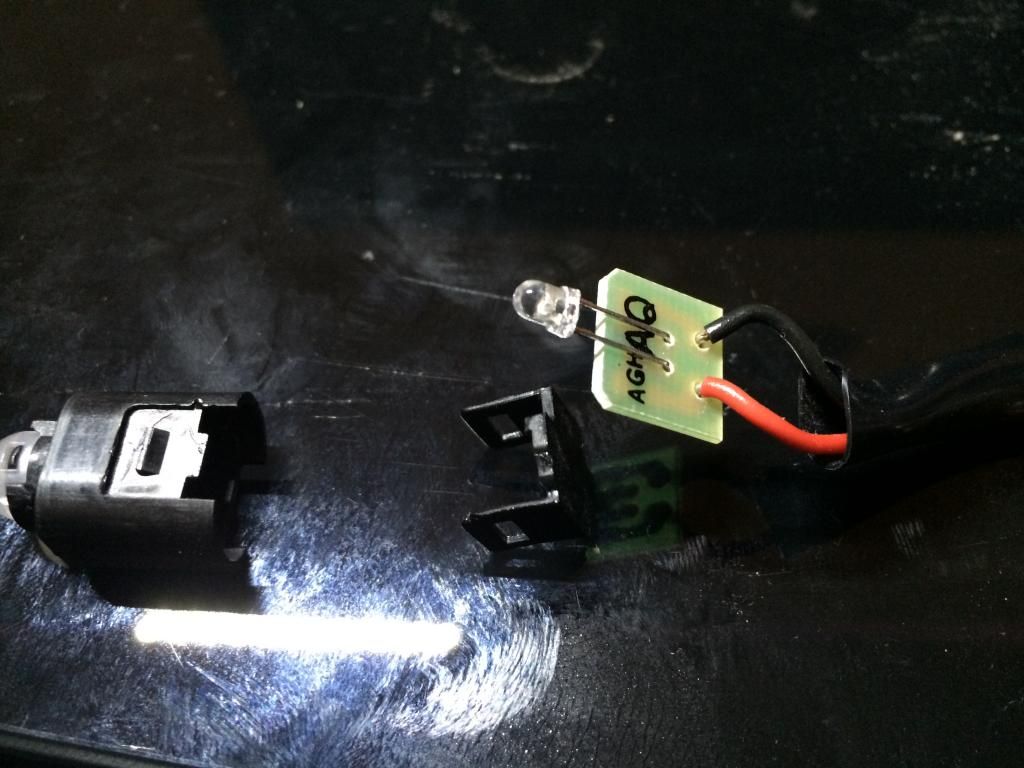
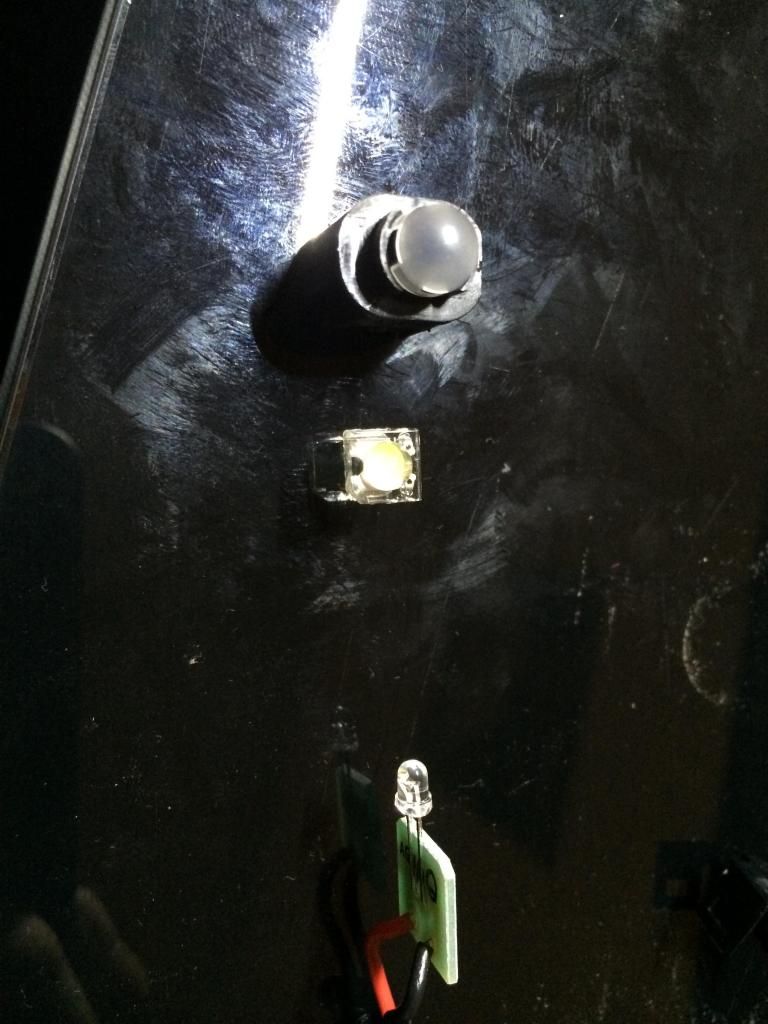
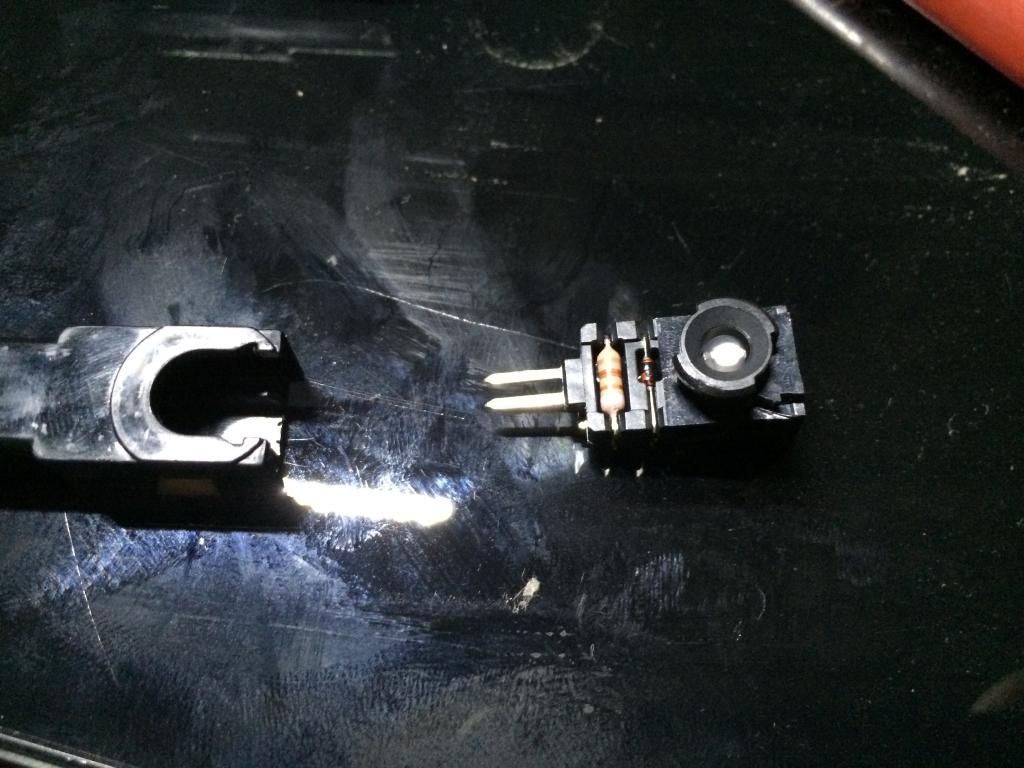
7. So i gave up trying to use the stock LED housing as i just cant even access the LED itself. I decided to just use a think LED such as this.

8. At this point, you just have to be creative to find a way to mount these things. There are so many variation of different LED products out there, just have to find a good realiable method. I stuck this on the the stock led housing and thats about it. Hope the pics help.

9. Had to use a little double stick tape to keep the LED housing from jiggling from the bigger housing.

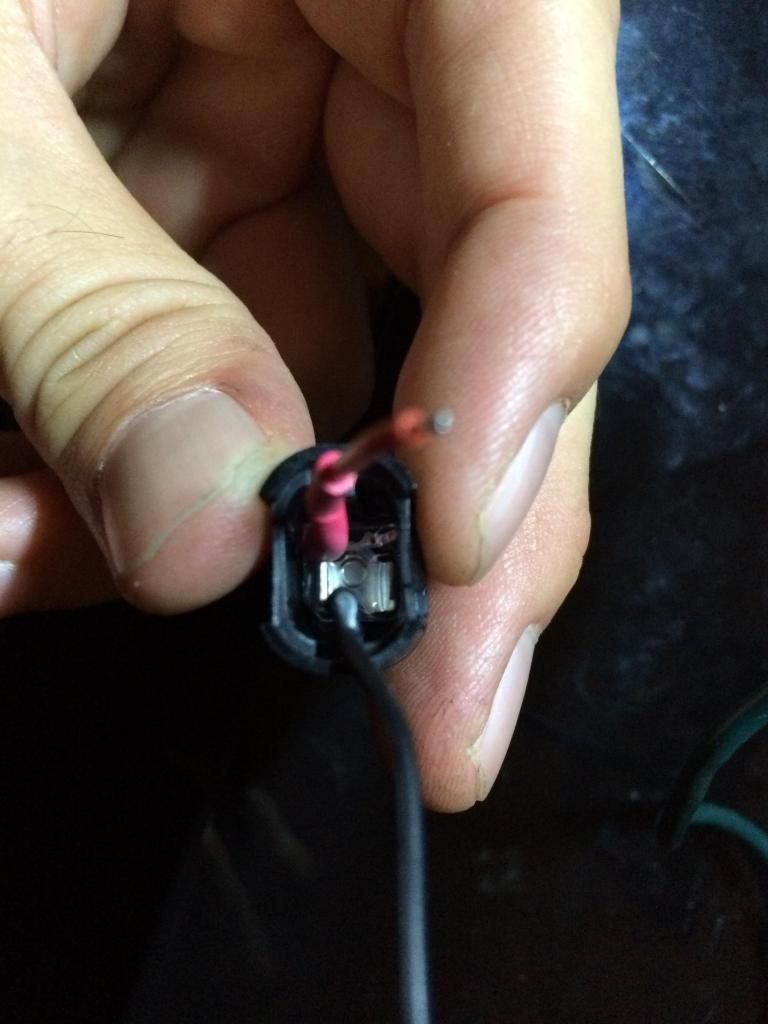
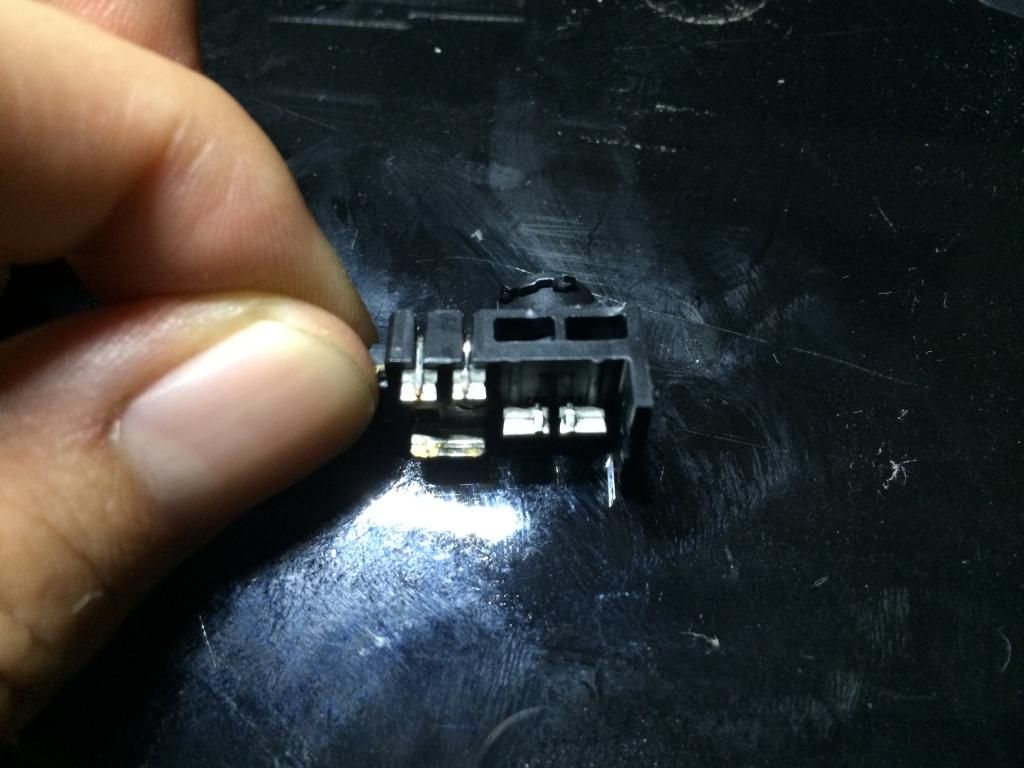
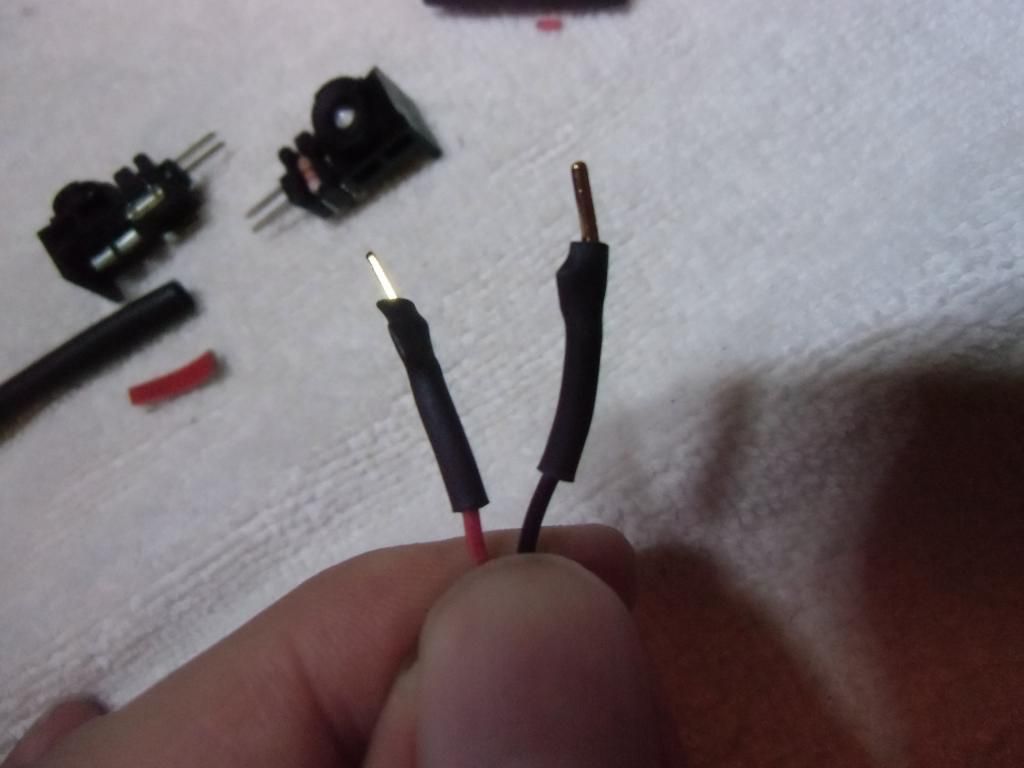
10. so since the stock harness cant be utilizd, you want to find a pin to stick into the harness on the car side. I didnt have much so i used this.


Always always solder and heat shrink tube, none of this twist and electric tape BS.

11. Here it is on the car.

All this stuff just comes down to being creative. Its always best to try and utilize the stock harness clips for simplicity sake but sometimes its not always possible. This is just my method and it will hold up solid for sure but theres so many other ways you can do this stuff.
Im not too sure i consider this a full success because the superflux LED is nowhere near as bright as these. I may have to look into using either a stronger LED bulb up front or using a weaker LED in the back. Another thing to keep in mind is that the design on the back one is angled so it covers more space. The design on the front one shoots straight down so it covers less space. I guess you could say its meant even from factory to be more luxury for the people in the back. But in the meantime, im so frickin tired already so ill finish others stuff before coming back to this. Lying down in the back seat taking these out is really sore.
Hope this helps for now! Thanks! Oh ya forgot to add, this is a 05 LS430, not sure if the 01-03 is any different, not my problem haha.
Last edited by daniel1235; 09-25-14 at 01:02 AM. Reason: Add on.
 09-22-14, 08:37 AM
#2
Thanks for taking the time to write this. This is the best first post I've ever seen on this forum. (with a bit of humor as a bonus) =p
I'm surprised you spent $300 for the LED upgrades. It cost me a fraction of that to upgrade to all LED bulbs except footwell. Then again you may have went with the high dollar/quality LEDs. I spent more money on my license plate light LEDs than the interior but they all look good so I can't complain.
I have zero soldering skills but I consider myself to be an intermediate DIYer. I want to at least upgrade my front two footwells to LED. Your post has given me the courage to finally tackle this project. I'll buy one of those solder kits on amazon ASAP.
Where can I buy the proper bulbs for the front two footwells? I tried searching for superflux LED and came up with all sorts of different bulbs. It's hard for me to tell what type of bulb it is?
Thanks my friend
09-22-14, 10:46 AM
#3
Driver
Thread Starter
Well I try to buy quality stuff instead of ebay. Then again it's so hard to tell these days who has quality products other than reviews.
The osram cbi bulbs alone cost $185 so that's why it was so expensive.
The super flux can be purchased at oznium and I am certain their price is a rip off but I've used them over the years for superflux led with good Long lasting results.
Shoot me a pm if you have questions. Again it's super easy.
You will need a 470 ohm resistor as well.
09-22-14, 08:31 PM
#4
Moderator
Soldering is super easy. There are small very cheap kits available that include soldering iron, some solder, instructions and a few electronic parts/wire to build a small buzzer or timer, The idea of the kit is to build the cheap little kit to get the hang of using the soldering iron before using it on any serious or expensive parts. Or check out utube for how to solder electronics. Also do not ever use plumbing style lead acid core solder for electronics or you will ruin the parts. For electronics you want to use the thin rosin core solder made for electronics and wiring.
09-22-14, 10:01 PM
#6
Thanks for the info daniel1235. I found the resistor easily but I'd just like to know if this four prong bulb work for this application?
http://www.oznium.com/four-chip-led
I also found these 5mm LED bulbs. What do you think of these?
jabberwock thanks for the soldering info. I'll be sure to get a cheap kit and use the thin rosin core solder. Very good info, I'll be sure to watch some videos first as well.
http://www.oznium.com/four-chip-led
I also found these 5mm LED bulbs. What do you think of these?
jabberwock thanks for the soldering info. I'll be sure to get a cheap kit and use the thin rosin core solder. Very good info, I'll be sure to watch some videos first as well.
09-23-14, 12:23 AM
#7
Driver
Thread Starter
Okay lets see, its monday, i hate mondays, work sucks on mondays, at least for me. So all my parts shipped out today, yay! Plus gotta get tint on wednesday, yay!
So i was cleaning the seat filters today and noticed more LED's, ugh. I noticed there are two amber led's right where the sunroof area is, damnit. You know what that means... Lets get started.
1. The sunroof/moon roof/dome light bezel is held on by 4 phillips screw. open up the sunglass holder and you have to take off the bolt cover with a flat head. See pics.
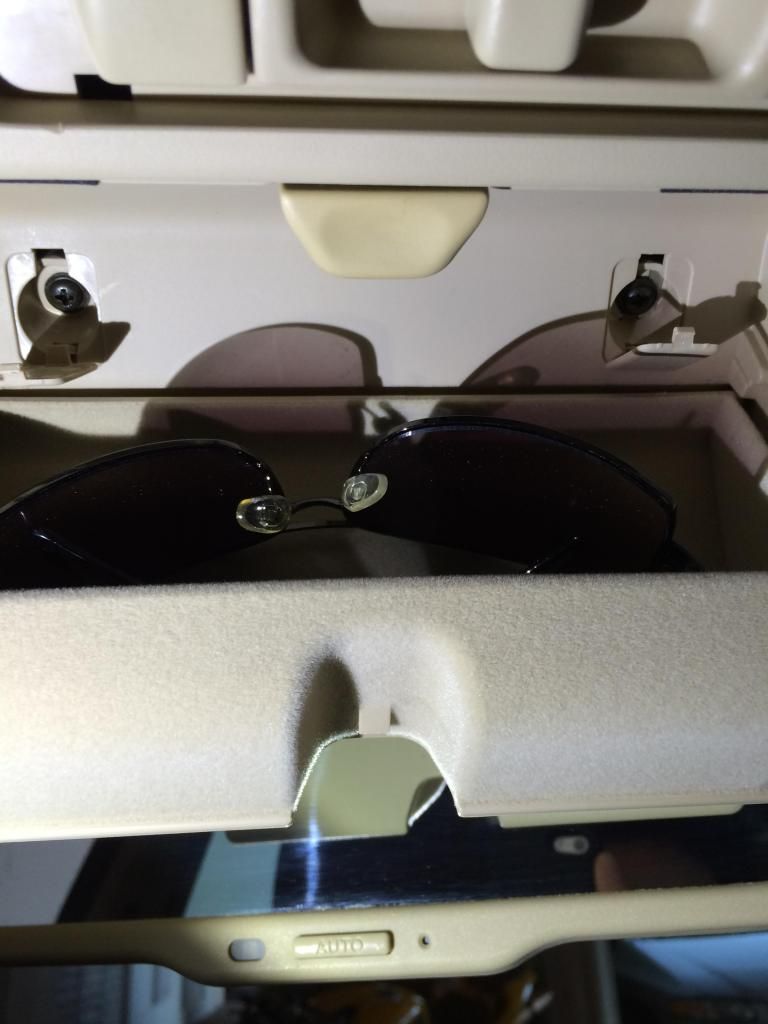
2. That was easy. Then take off the lens cover, use a tiny flat head and pry open the groove in the lens, piece of cake. I already have it off since im waiting for my bulbs. When you take this off, there are two more phillips bolts.
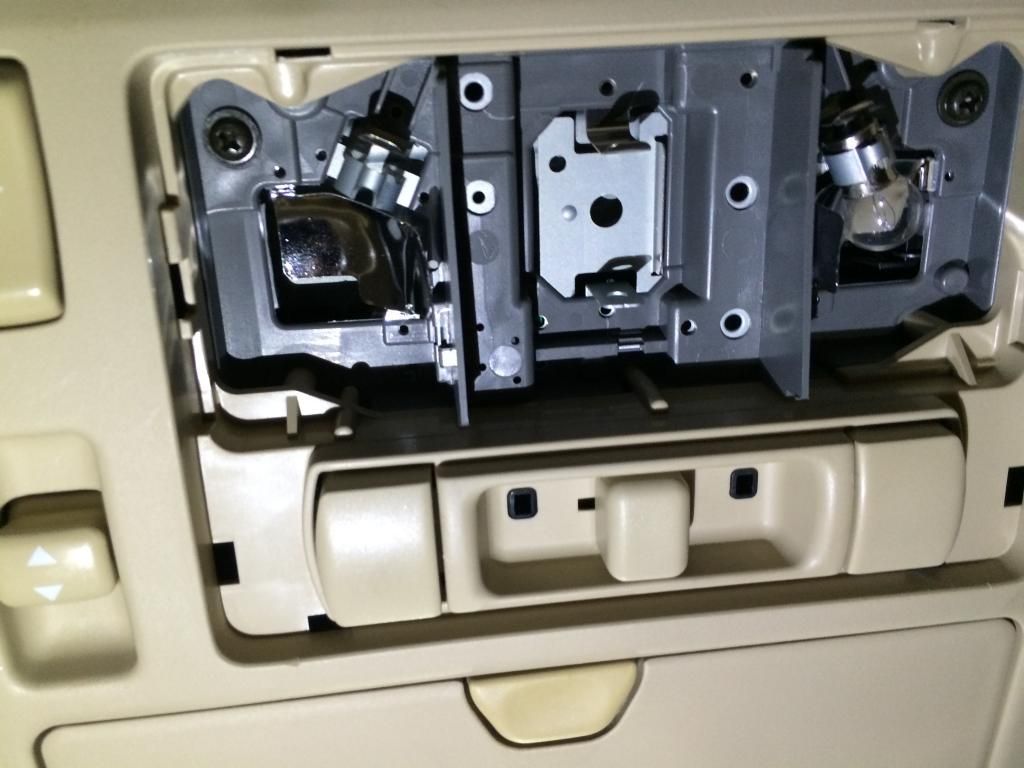
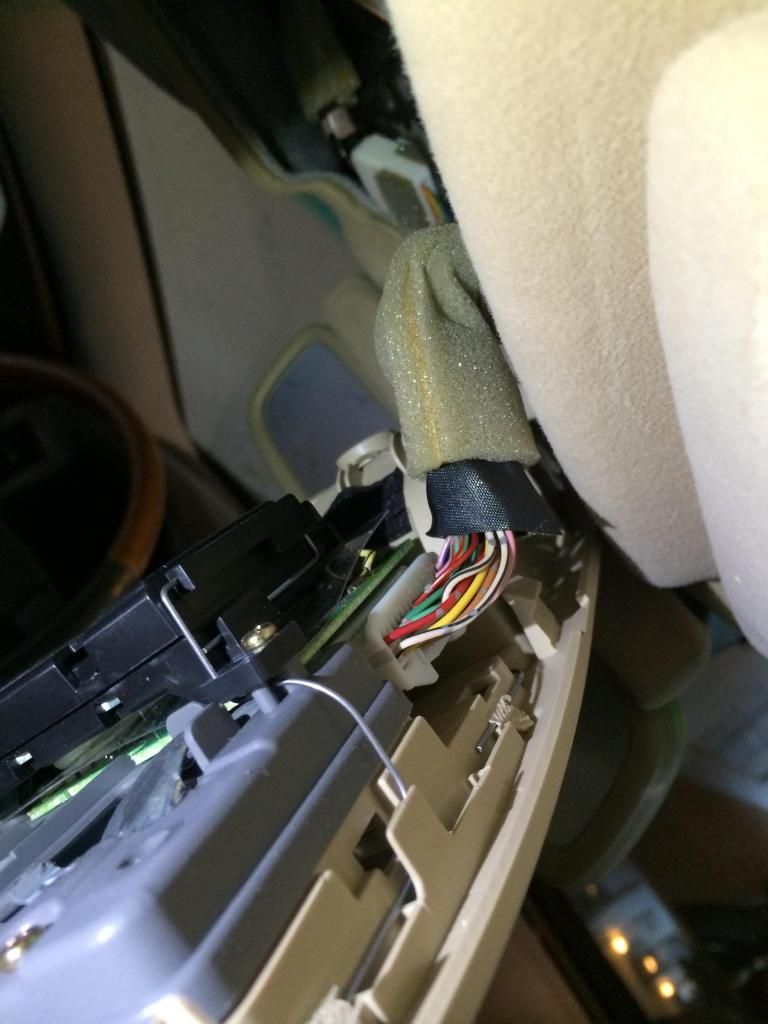
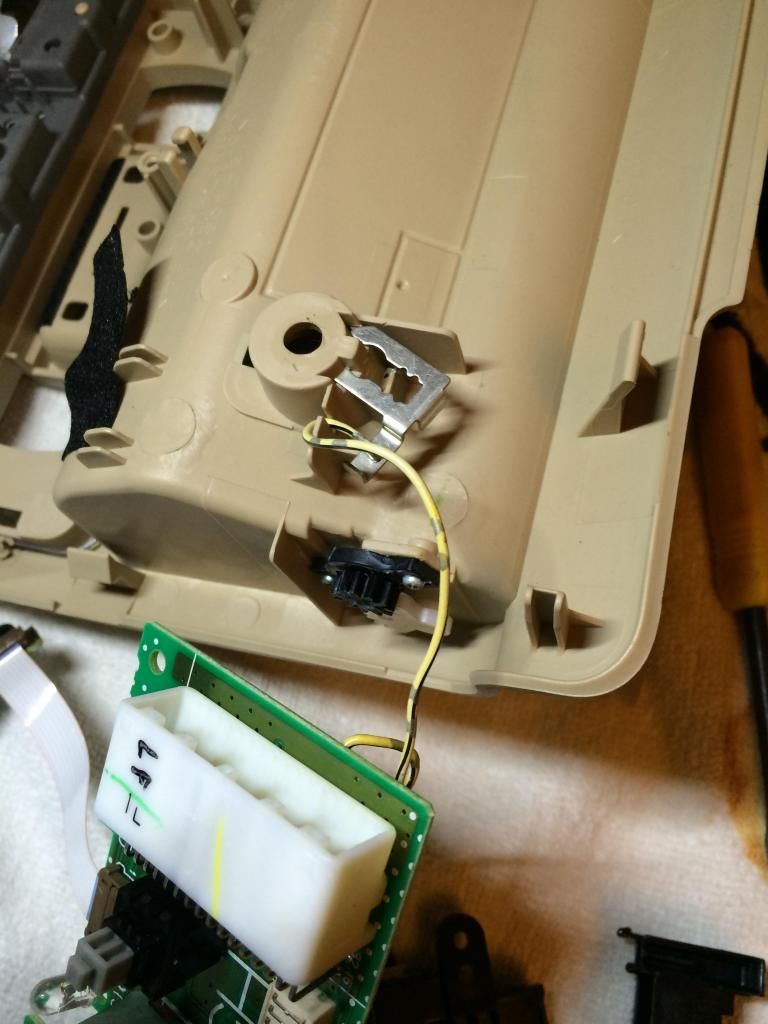
3. At this point the entire housing will come off. Slide it towards the rear of the car, theres little slots on the front, you will see. Ok, so unplug the one harness on the passenger side and head into your hut, or house, or apartment. Here is where the harness connects.
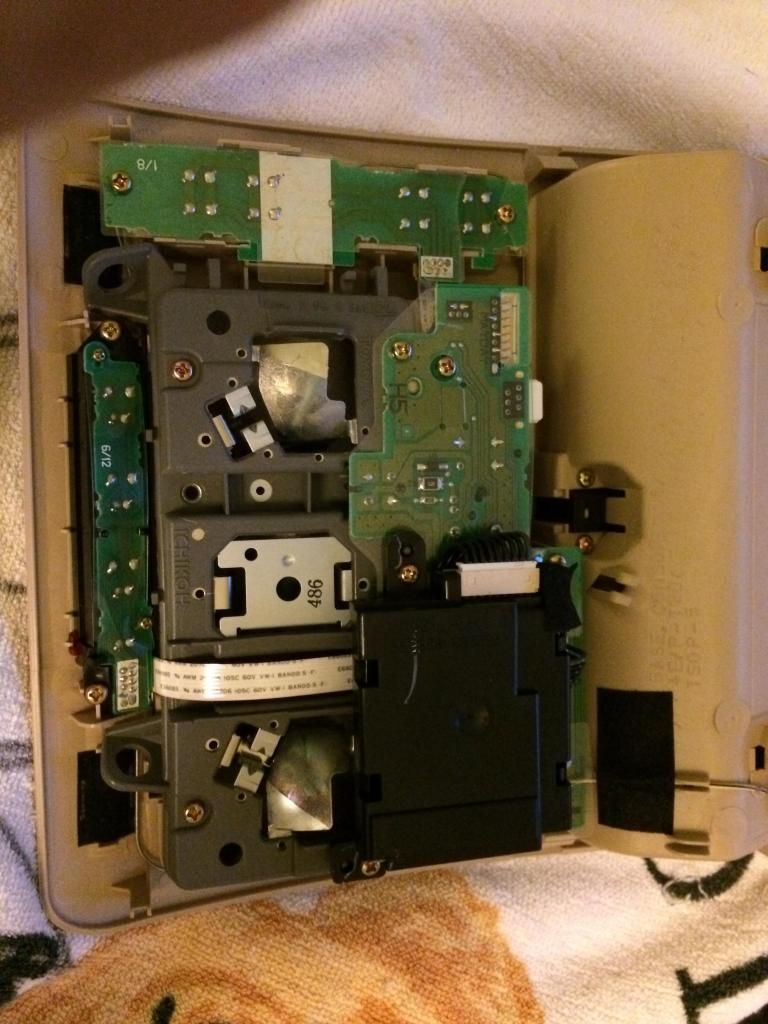
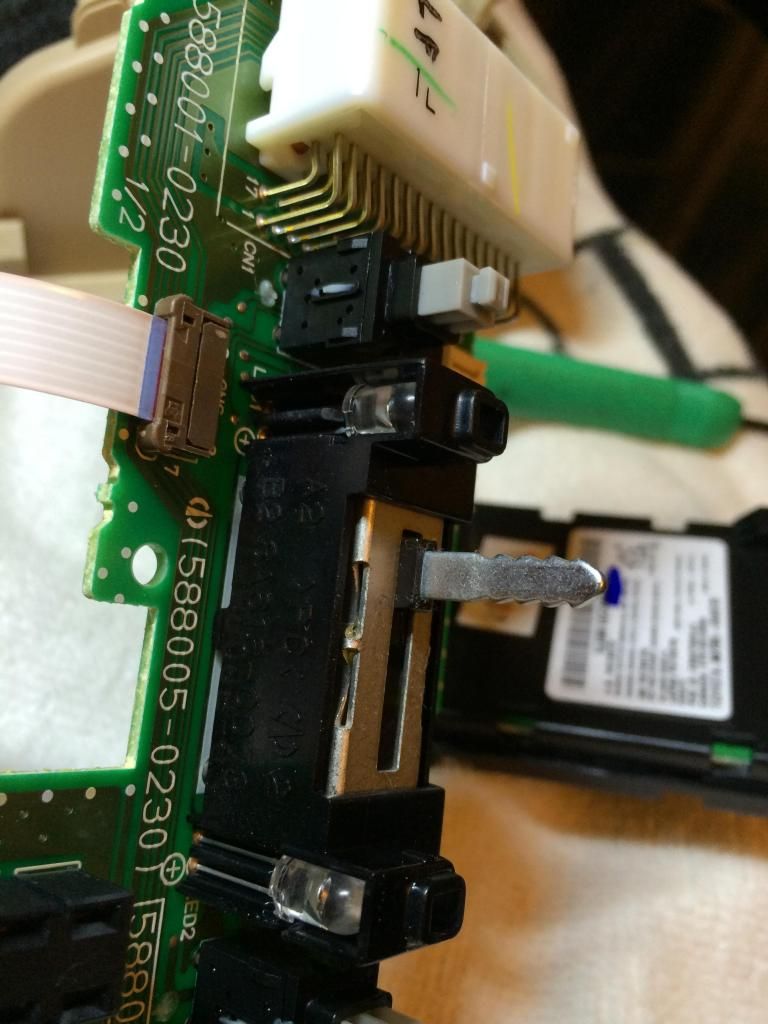
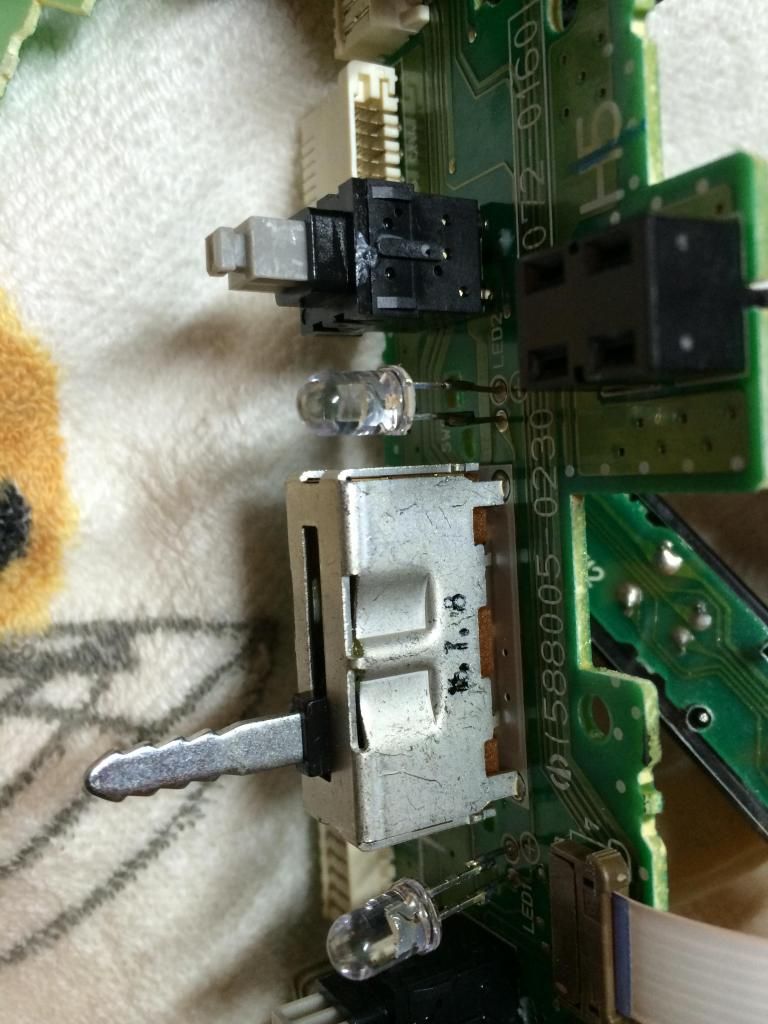
4. Place it on a table or something stable. Here is what you will be looking at. Dont be scared. There are numerous phillip bolts, all are the same size so no worries about remembering which is which. Take all of them off, you have to. The boards also have a transparent plastic over it, dont lose those, they just offer some protection... no no not that kind. When in doubt, then pull out.
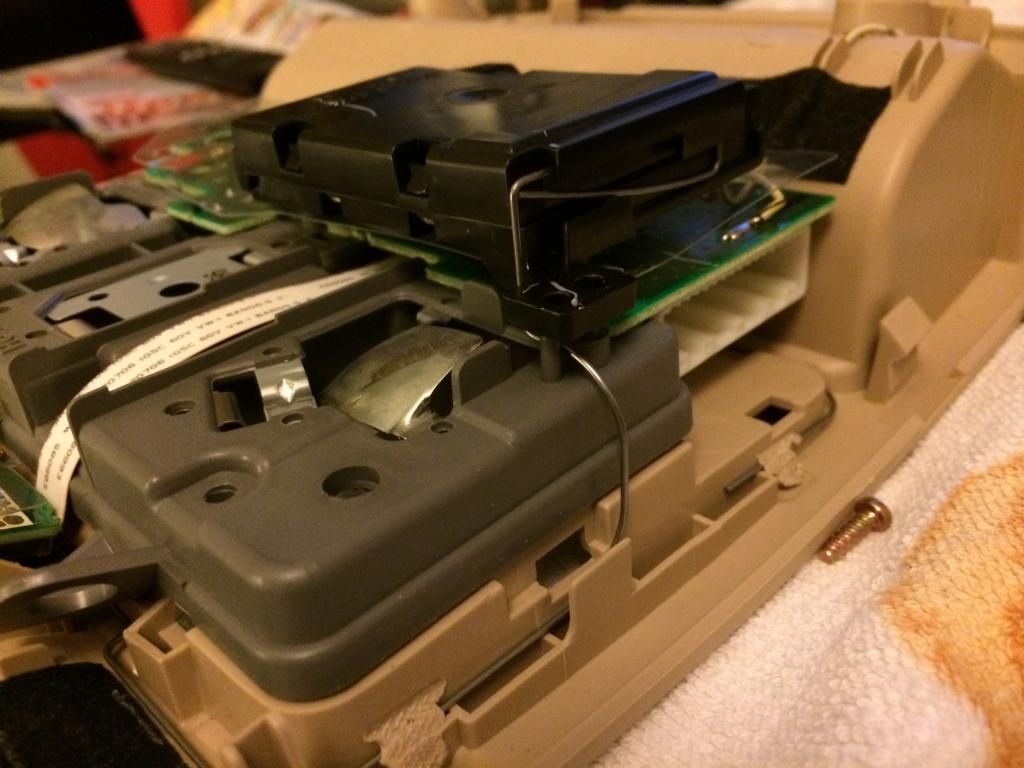
5. You guys still with me? That black box, it is blocking one of the phillips but there are only 2 bolts holding the box, take those off and you can access the other 2 phillips underneath. When you take this black box off, make sure to look at how the spring is in the groove of the box. Its hard to explain but when you get to this point, you will see how the wire spring slips into the side of the black box. You will have something like this.
6. Ahhh the yellow wire is still holding it on the trim. Get a tiny flat head and pry it out. It serves as a ground. nothing works without a ground ya know.
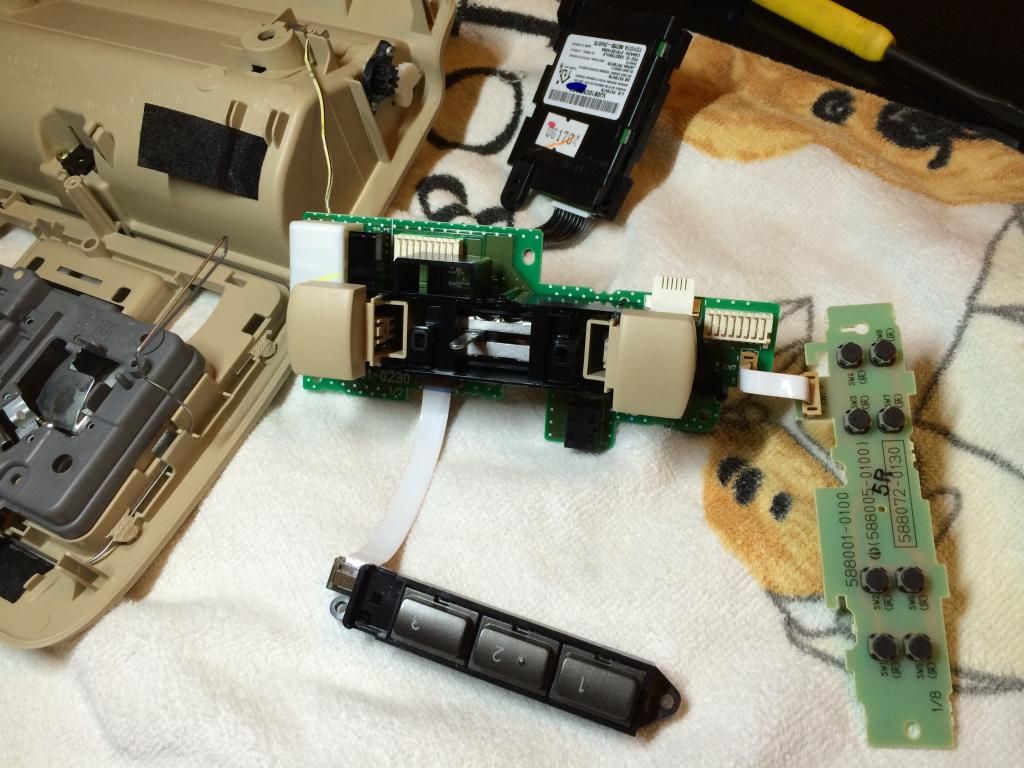
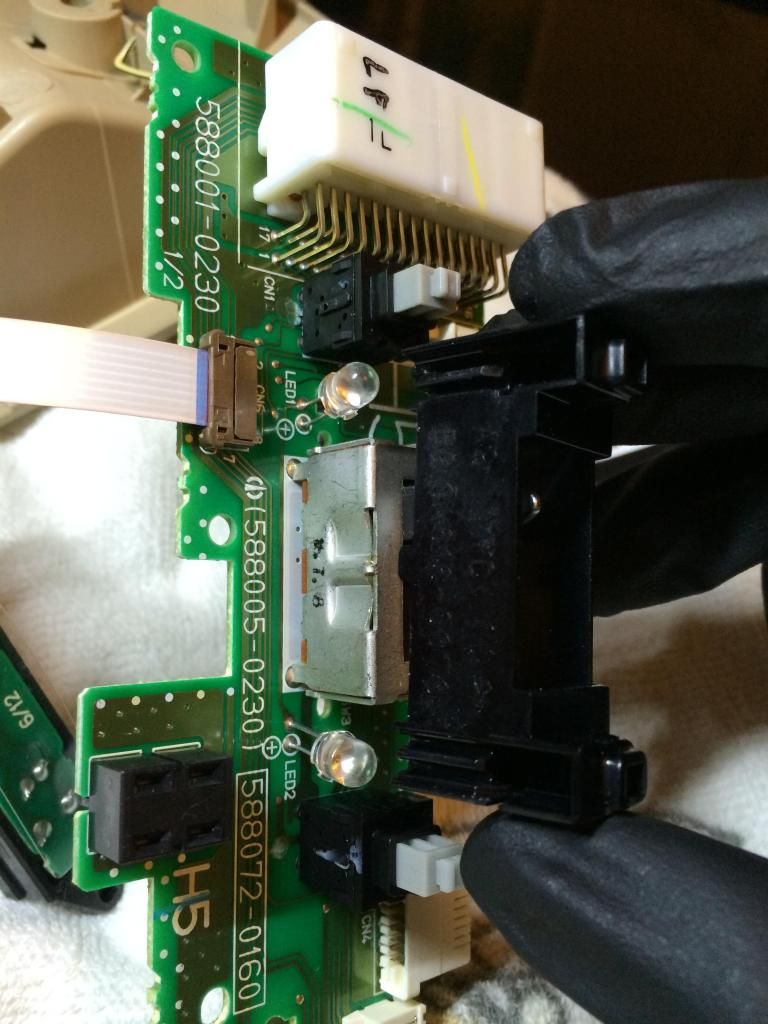
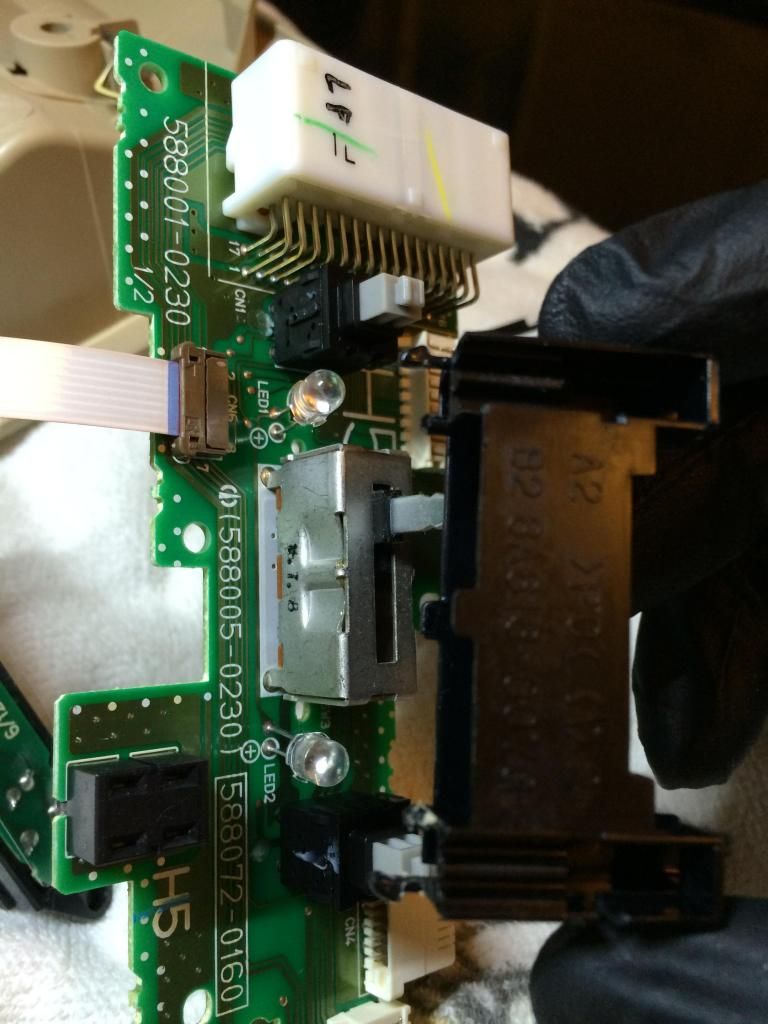
7. Time to bust out your tiny flat head drivers. So now the two pieces are separated. You know have to take off the two buttons. These are the buttons that turn on the overhead light , cant remmeber what they are called. these reading lights (ill call them that) buttons can be taken off by prying the plastic pieces outwards. Pictures speak a thousand words, take a look. Do this to both sides.
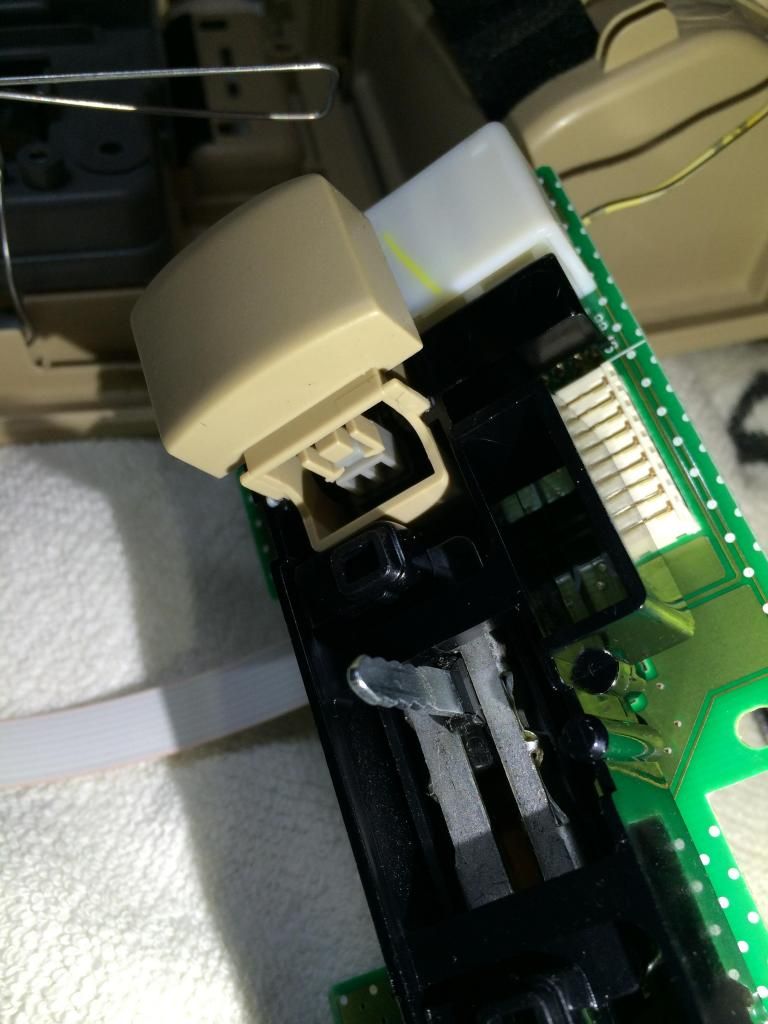
8. That key looking thing is the key to my heart, if your a hot asian girl. Its actually just a lever for the Dome Light OFF/ON/DOOR switch. Dont get so excited. So once you get these two buttons off, the black cover comes off. You have to use your flat heads and gently evenly pry it up.
Be gentle with me. this piece connect to a 4 prong pin on the board so BE GENTLE and pry upward evenly. Just get a fleshlight and look around okay.
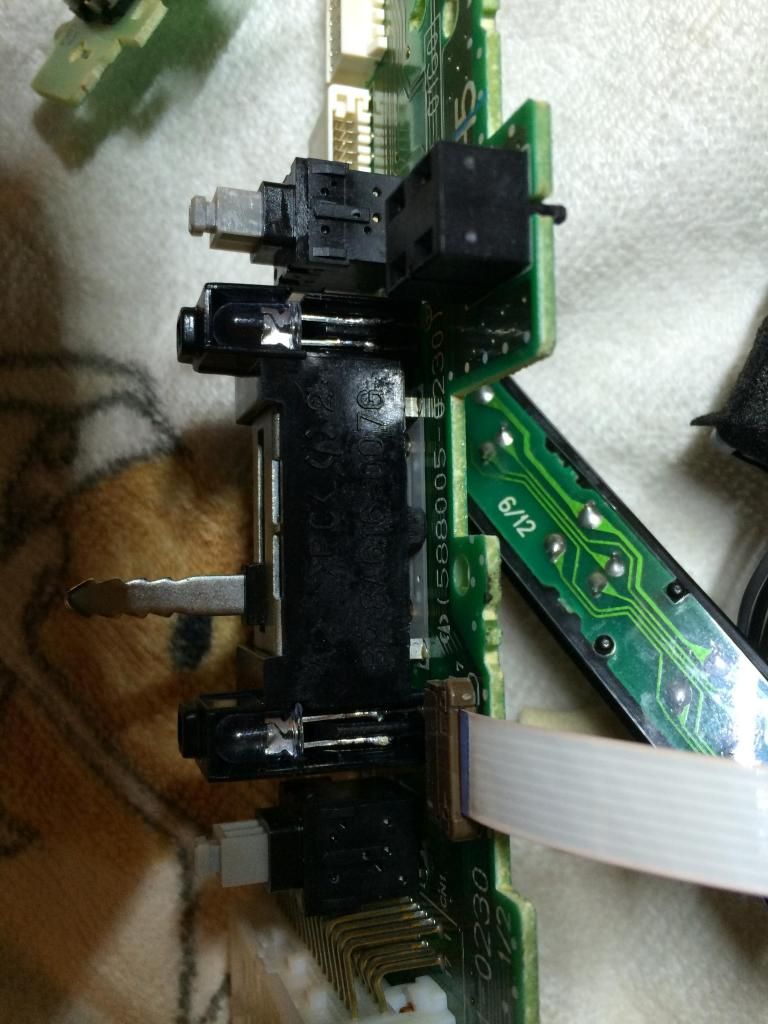
9. TADA! now you can finally see the 5 MM LED, what a troublesome process. Still cant access them though.
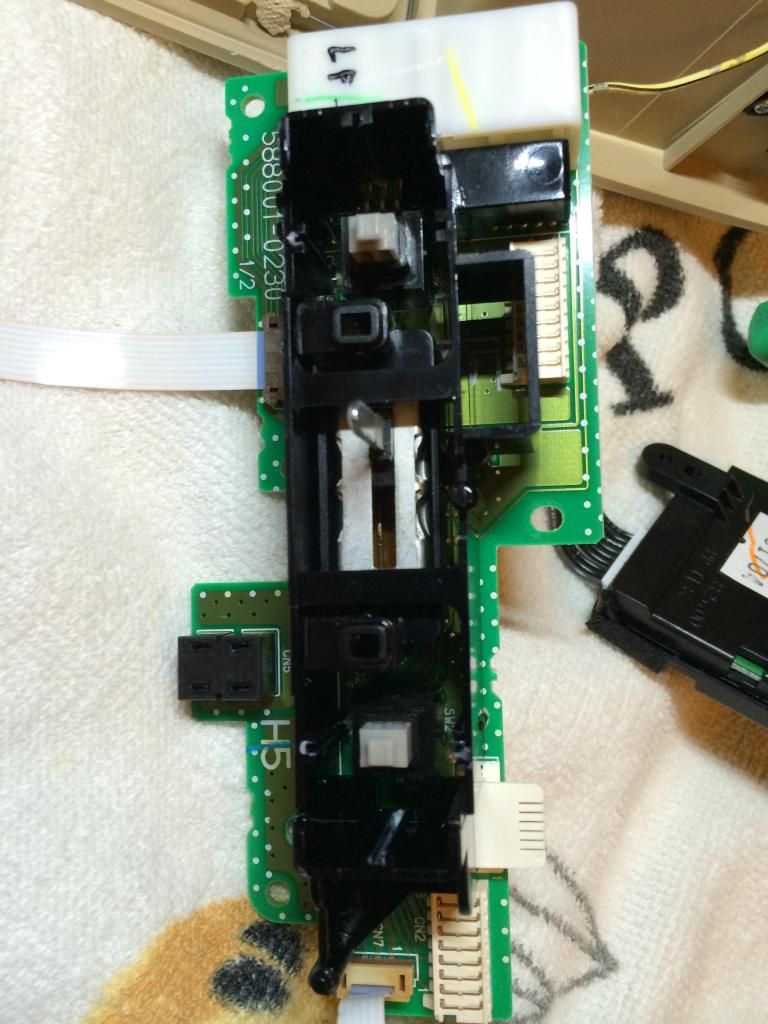
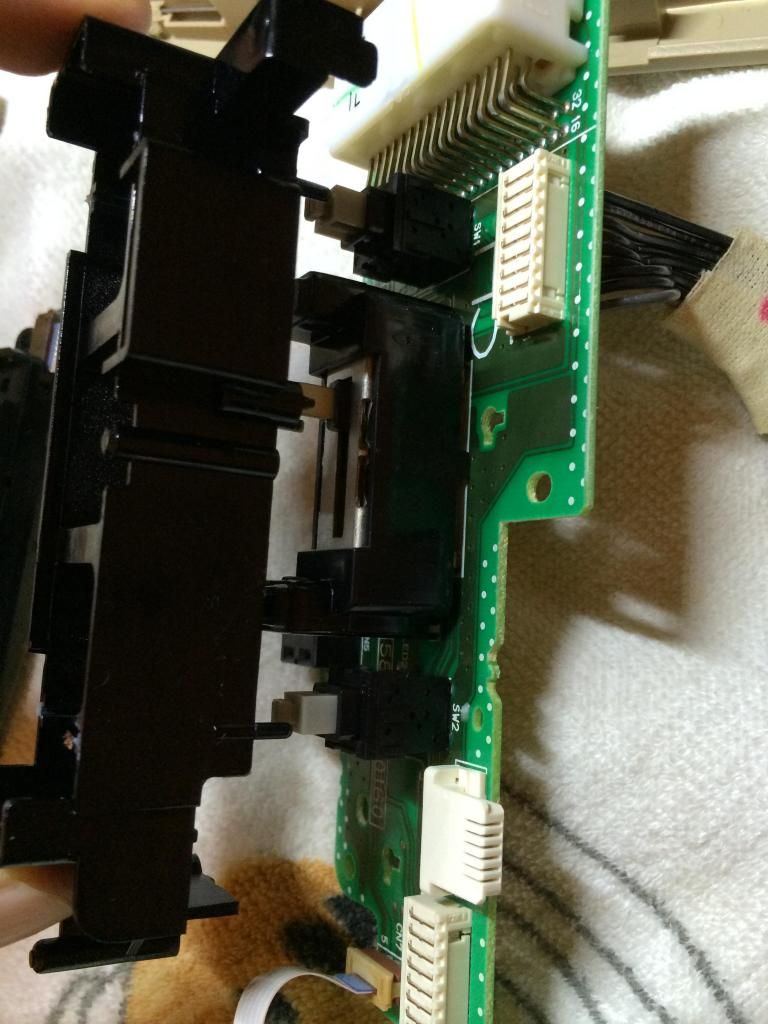
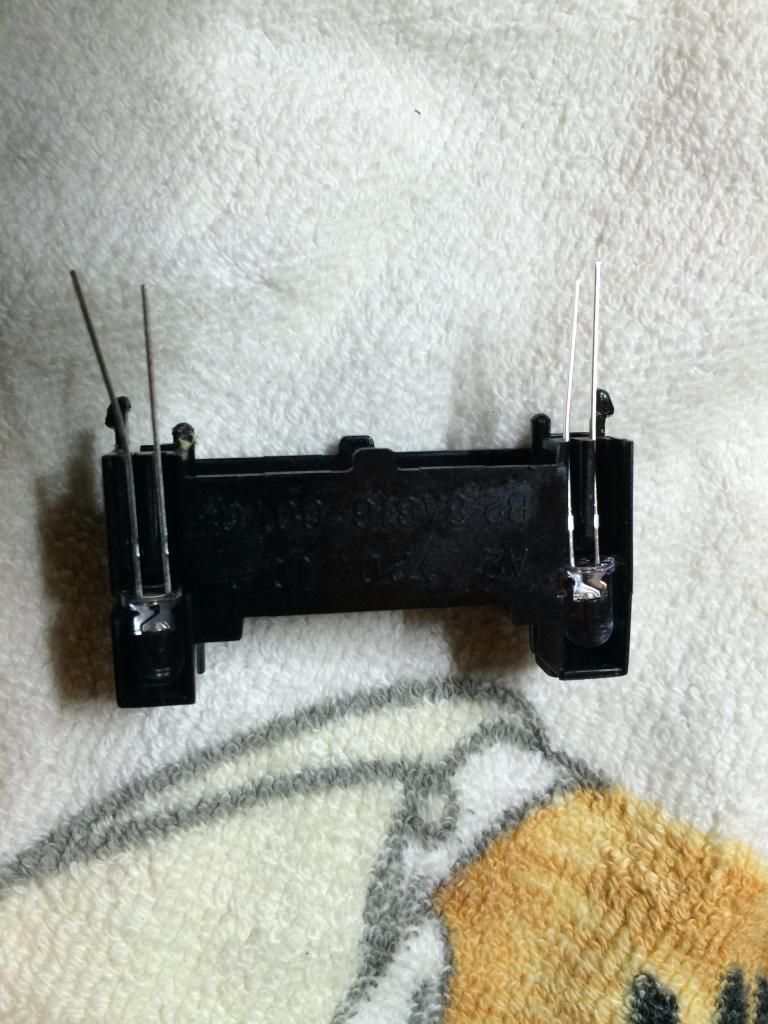
10. This black piece is just a cover that can come off. You have to push the LED's away from the groove they sit in, just like the pic. On the other side of the board, this black cover is just held with plastic clips you have to push in while you pull the cover out. Sorry no pics of the back. You will see what i mean. When you push the slips in and the LED is bent forward, the cover comes right off.
11. Here a better pic of the clips on the black plastic housing, its just one of those push in kind ya know.
12. bust out your soldering iron and hopefully you already have some 5mm white LEDs lying around, bet you dont. So to be safe, amber LED's use less voltage than white LED's. Soooo i got my tool and measured the voltage this led gets and it was about 3.7 volts which was rather strange since amber usually runs on less then that but whatever, this white 5 MM led runs on max 4v and ideal volt is 3.5 so its puurrrrrfect. You have to either cut these leads off the amber led or desolder them from the board on the other side. Im not familiar with soldering on boards too much so i cut the leads off the led. No pic, its basic stuff.
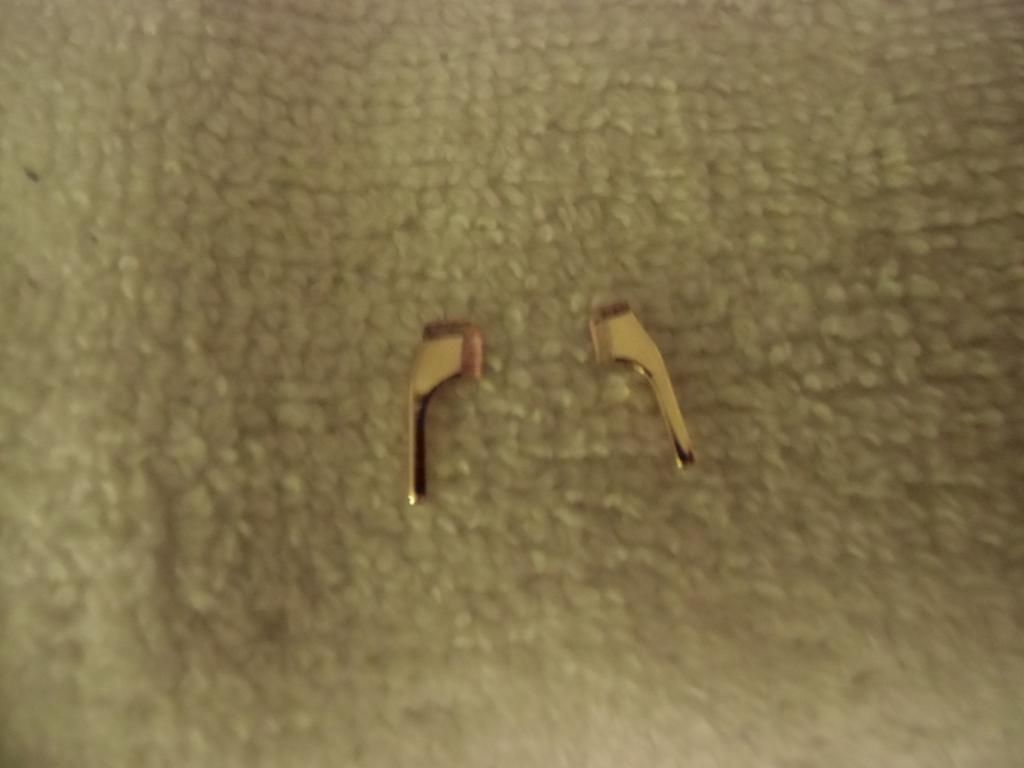
13. Alrighty, im tired of typing this stuff for you guys. Here is a pic of the 5MM white led sitting in the groove of the black plastic housing. The length must be the same as the stock ones because this black plastic piece has grooves the led sits in and also sleeves that the leds sit nicely in.
14. Cut the stock led off, cut the leads on the new white led to be the same length after you solder them on. Put some flux on the all leads from the new led and the 2 prongs on the board and solder your new white LED on. You will see on the board which lead is positive which makes it a piece of cake, i like red velvet cake and haagen daz.
15. sorry the above pic is so crappy but its basically the new leds with the black cover piece back on. Once you got this piece back on, you should test it on the car to make sure you did it right. you didnt unplug anything if you followed my direction so you can take this entire piece to your car with all those other boards hanging with it and plug in the harness. You have to GROUND the one yellow wire to the holes where you took the 4 srews out in the very very beginnning.
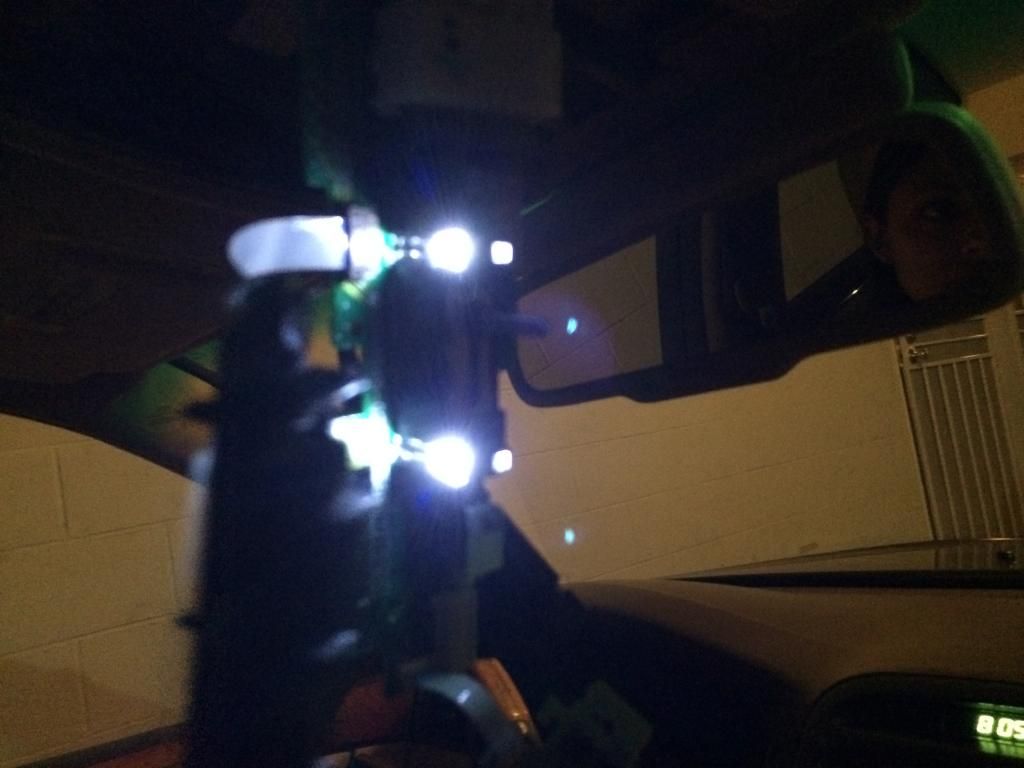
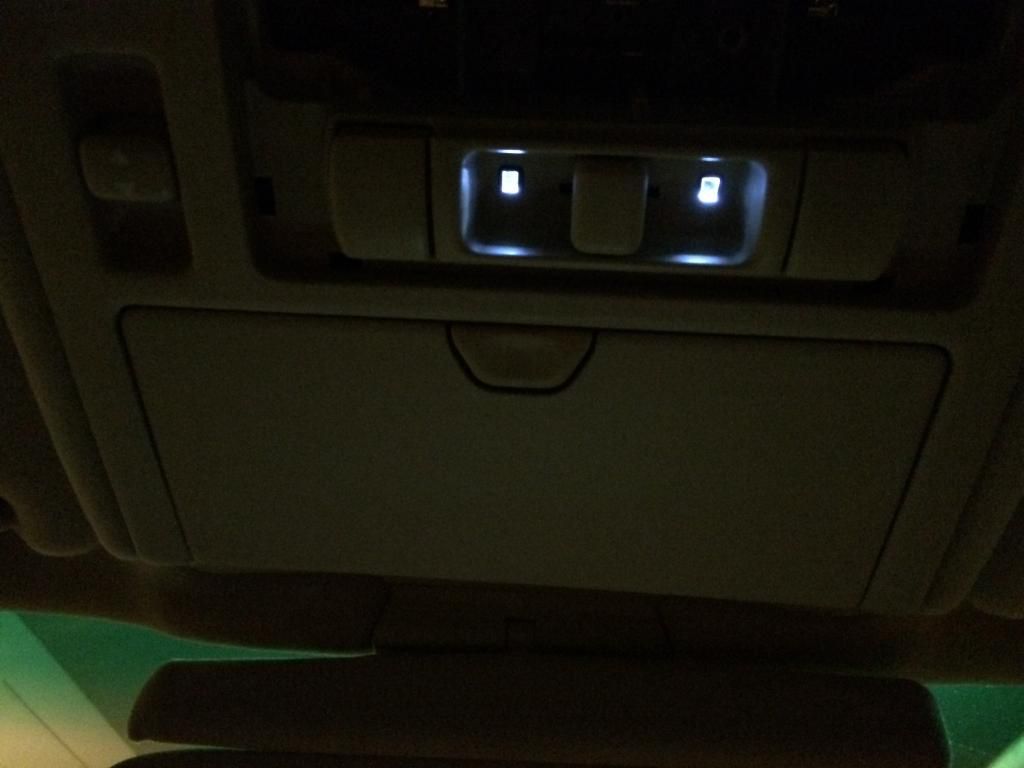
16. Heres another pic. Nice!
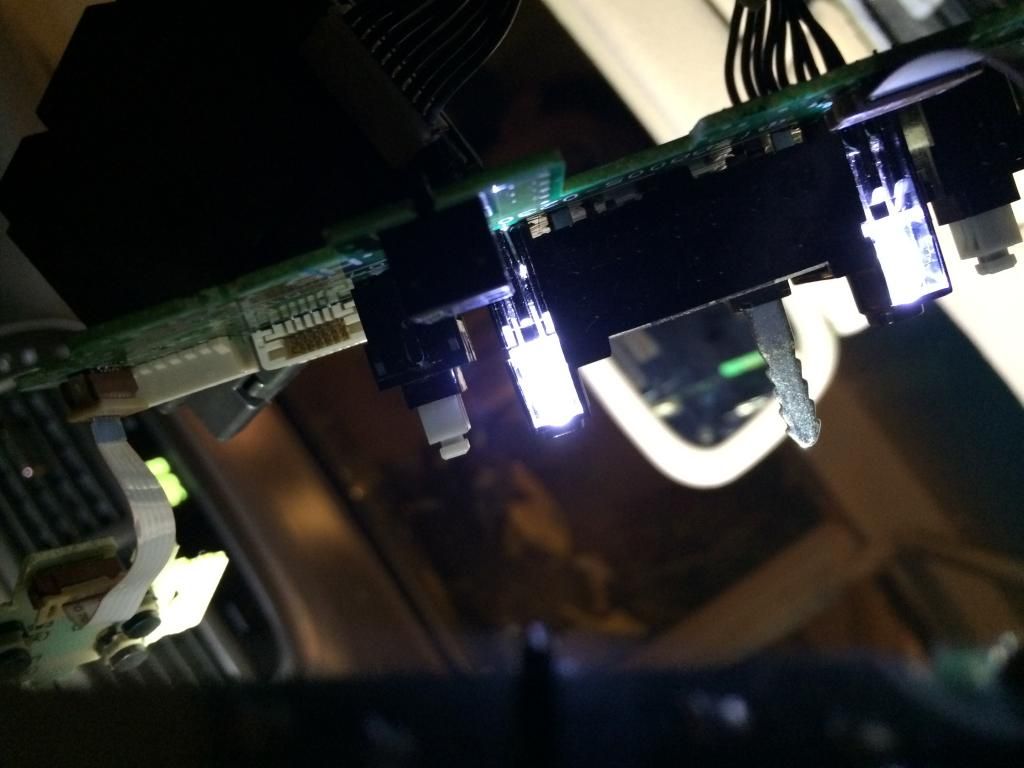
17. okay, unplug the harness and the ground. Put everything back together in reverse. Easy. Make sure you slip the spring into the black box thingy.
18. Install the trim back on te the car with the 4 screws. Heres how itlooks. Yes i use black gloves like michael jackson.

ugh im tired feels like im at work. Hope this truly helps other people. I can do this for you, oh wait im in Hawaii. Haha i guess not.
So i was cleaning the seat filters today and noticed more LED's, ugh. I noticed there are two amber led's right where the sunroof area is, damnit. You know what that means... Lets get started.
1. The sunroof/moon roof/dome light bezel is held on by 4 phillips screw. open up the sunglass holder and you have to take off the bolt cover with a flat head. See pics.

2. That was easy. Then take off the lens cover, use a tiny flat head and pry open the groove in the lens, piece of cake. I already have it off since im waiting for my bulbs. When you take this off, there are two more phillips bolts.

3. At this point the entire housing will come off. Slide it towards the rear of the car, theres little slots on the front, you will see. Ok, so unplug the one harness on the passenger side and head into your hut, or house, or apartment. Here is where the harness connects.


4. Place it on a table or something stable. Here is what you will be looking at. Dont be scared. There are numerous phillip bolts, all are the same size so no worries about remembering which is which. Take all of them off, you have to. The boards also have a transparent plastic over it, dont lose those, they just offer some protection... no no not that kind. When in doubt, then pull out.

5. You guys still with me? That black box, it is blocking one of the phillips but there are only 2 bolts holding the box, take those off and you can access the other 2 phillips underneath. When you take this black box off, make sure to look at how the spring is in the groove of the box. Its hard to explain but when you get to this point, you will see how the wire spring slips into the side of the black box. You will have something like this.

6. Ahhh the yellow wire is still holding it on the trim. Get a tiny flat head and pry it out. It serves as a ground. nothing works without a ground ya know.

7. Time to bust out your tiny flat head drivers. So now the two pieces are separated. You know have to take off the two buttons. These are the buttons that turn on the overhead light , cant remmeber what they are called. these reading lights (ill call them that) buttons can be taken off by prying the plastic pieces outwards. Pictures speak a thousand words, take a look. Do this to both sides.

8. That key looking thing is the key to my heart, if your a hot asian girl. Its actually just a lever for the Dome Light OFF/ON/DOOR switch. Dont get so excited. So once you get these two buttons off, the black cover comes off. You have to use your flat heads and gently evenly pry it up.


Be gentle with me. this piece connect to a 4 prong pin on the board so BE GENTLE and pry upward evenly. Just get a fleshlight and look around okay.
9. TADA! now you can finally see the 5 MM LED, what a troublesome process. Still cant access them though.

10. This black piece is just a cover that can come off. You have to push the LED's away from the groove they sit in, just like the pic. On the other side of the board, this black cover is just held with plastic clips you have to push in while you pull the cover out. Sorry no pics of the back. You will see what i mean. When you push the slips in and the LED is bent forward, the cover comes right off.

11. Here a better pic of the clips on the black plastic housing, its just one of those push in kind ya know.

12. bust out your soldering iron and hopefully you already have some 5mm white LEDs lying around, bet you dont. So to be safe, amber LED's use less voltage than white LED's. Soooo i got my tool and measured the voltage this led gets and it was about 3.7 volts which was rather strange since amber usually runs on less then that but whatever, this white 5 MM led runs on max 4v and ideal volt is 3.5 so its puurrrrrfect. You have to either cut these leads off the amber led or desolder them from the board on the other side. Im not familiar with soldering on boards too much so i cut the leads off the led. No pic, its basic stuff.
13. Alrighty, im tired of typing this stuff for you guys. Here is a pic of the 5MM white led sitting in the groove of the black plastic housing. The length must be the same as the stock ones because this black plastic piece has grooves the led sits in and also sleeves that the leds sit nicely in.

14. Cut the stock led off, cut the leads on the new white led to be the same length after you solder them on. Put some flux on the all leads from the new led and the 2 prongs on the board and solder your new white LED on. You will see on the board which lead is positive which makes it a piece of cake, i like red velvet cake and haagen daz.


15. sorry the above pic is so crappy but its basically the new leds with the black cover piece back on. Once you got this piece back on, you should test it on the car to make sure you did it right. you didnt unplug anything if you followed my direction so you can take this entire piece to your car with all those other boards hanging with it and plug in the harness. You have to GROUND the one yellow wire to the holes where you took the 4 srews out in the very very beginnning.

16. Heres another pic. Nice!

17. okay, unplug the harness and the ground. Put everything back together in reverse. Easy. Make sure you slip the spring into the black box thingy.
18. Install the trim back on te the car with the 4 screws. Heres how itlooks. Yes i use black gloves like michael jackson.


ugh im tired feels like im at work. Hope this truly helps other people. I can do this for you, oh wait im in Hawaii. Haha i guess not.
Trending Topics
09-23-14, 12:31 AM
#8
Driver
Thread Starter
Thanks for the info daniel1235. I found the resistor easily but I'd just like to know if this four prong bulb work for this application?
http://www.oznium.com/four-chip-led
.
I also found these 5mm LED bulbs. What do you think of these?
Amazon.com: microtivity IL051 5mm Clear White LED (Pack of 25): Industrial & Scientific
jabberwock thanks for the soldering info. I'll be sure to get a cheap kit and use the thin rosin core solder. Very good info, I'll be sure to watch some videos first as well.
5 MM will work too i believe they are not as bright. The superflux draw 80ma while the 5 mm led draw 20. That frosted lens on the stock housing (the car piece im talking about) diffuses the light and it seems to make it less bright.
09-23-14, 09:44 AM
#10
Thanks, that's exaactly what I needed to know. I'm sure this thread will prove invaluable to many LS430 owners. The humor is priceless as well, hah.
If you want to edit your title click edit in the bottom right corner of your original thread. Then after that click 'go advanced'. Then you can change the title to something cooler.
If you want to edit your title click edit in the bottom right corner of your original thread. Then after that click 'go advanced'. Then you can change the title to something cooler.
 09-24-14, 08:31 PM
#12
Driver
Thread Starter
lsdude,
Yes i will be changing them. I just need time right now, i had to cover a shift today ugh so here i am at work. I believe its a 3 mm led but i cant find the thread where i found that information. Im going to have to just take the panels off and take a look myself. I dont have any of these 3 mm white lying around either so will probably be next week sometime. Stay tuned.
Yes i will be changing them. I just need time right now, i had to cover a shift today ugh so here i am at work. I believe its a 3 mm led but i cant find the thread where i found that information. Im going to have to just take the panels off and take a look myself. I dont have any of these 3 mm white lying around either so will probably be next week sometime. Stay tuned.
09-25-14, 01:05 AM
#13
Driver
Thread Starter
Updated on how i did the back footwell lights int he original post. Problem is the LED colors dont match. I will have to probably change the front one to a different more wider and matching LED.
I ordered the 3mm white leds for the door handle lights so ill be adding that next week hopefully.
Gotta let my tint dry and get my timing belt changed soon.
I ordered the 3mm white leds for the door handle lights so ill be adding that next week hopefully.
Gotta let my tint dry and get my timing belt changed soon.
09-27-14, 08:27 PM
#14
Driver
Thread Starter
Herro! herro!
I changed the interior door handle lights and put it in a different thread so searches are easier to find. here you go.
https://www.clublexus.com/forums/ls4...dle-led-s.html
I changed the interior door handle lights and put it in a different thread so searches are easier to find. here you go.
https://www.clublexus.com/forums/ls4...dle-led-s.html
05-26-15, 11:31 AM
#15

Back from the deadZ.
So I jus wanted to leave this out here. I attempted to crack open the black plastic that emits the footwell lighting in the rear. I am afraid I have failed at doing so.
I tried to carve my way into it using a solder iron. But I ended up causing more damage to the plastic than needed. The original LED is complicatedly structured inside this piece so that nobody attempts to take it out I'm guessing.
Now I need to run over to my junk yard and grab one from there. It doesn't appear as a part that a distributor would have. Searched 71777-50010 with no luck.

Thread
Thread Starter
Forum
Replies
Last Post
Dreamcast
IS - 3rd Gen (2014-present)
18
02-13-18 09:02 AM