timing mark confirmation
 12-21-14, 08:15 AM
#1
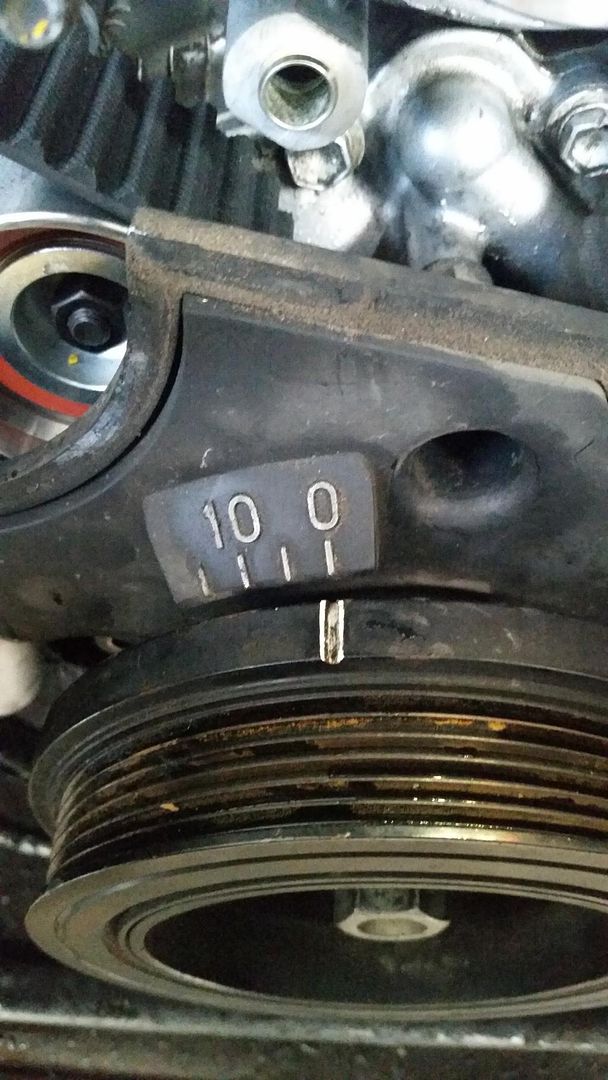
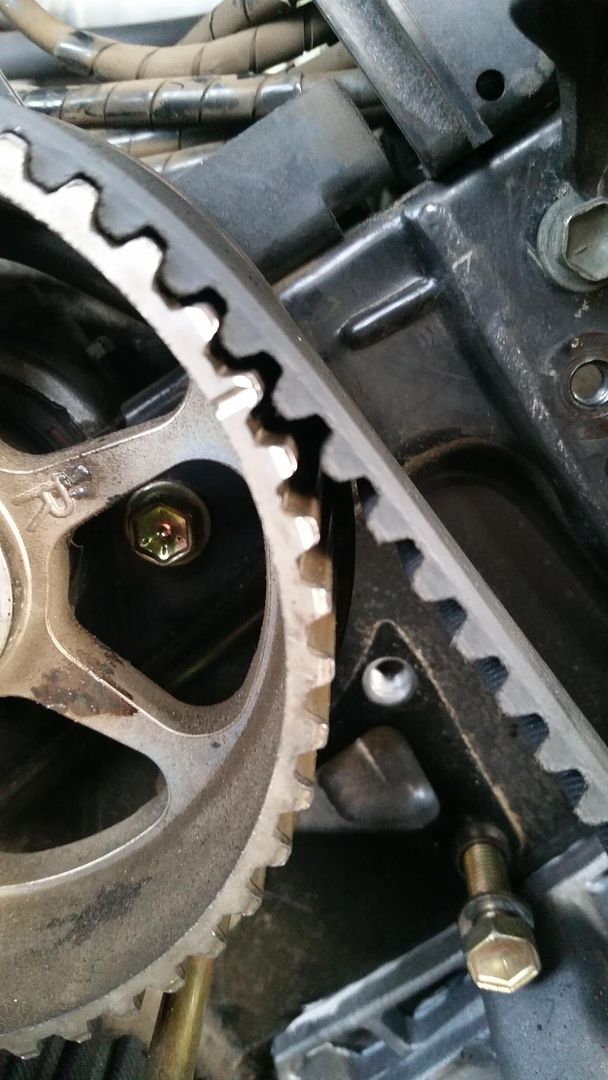
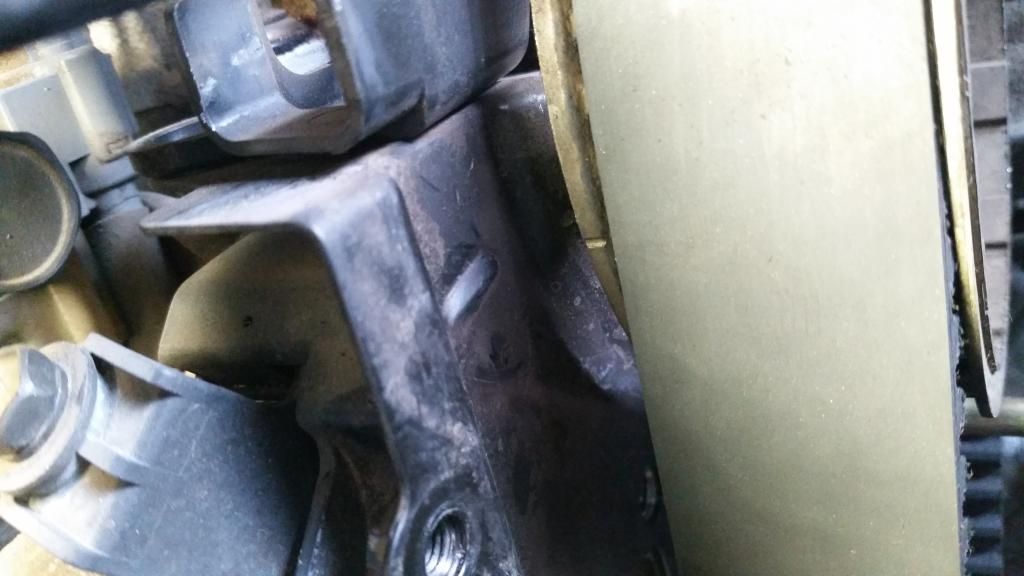
I'm doing the timing belt and water pump on a 96 lexus ls400 and in the process of putting everything back together. Can someone confirm the marking alignment I got shown below are correct before I pull the pin to release the tension. Also another question is on the idler number 1, where the tensioner pushes on it, does it suppose to be able to move freely when touch by hand? I have torque to specs (25lbs) but it is on tight and can't move freely when I touch it by hand. The old one I was able to move freely by just touching it. Now if I loosen the Allen bolt to where it move freely then the bolt is too loose. Thanks in advance guys
Right cam (passenger)
Left cam (driver)

Right cam (passenger)

Left cam (driver)

 12-21-14, 05:41 PM
#2

Hi SynicalVip, Yes, it looks correct but I cannot verify that last picture. As long as the LH cam is aligned with the extrusion mark as in the RH, then you are good.
Now, as concerns idler #1, I believe that there is a washer that goes between the block and the pulley. Did you put that back in? Some forget to do that and you might get binding without it.
Now, as concerns idler #1, I believe that there is a washer that goes between the block and the pulley. Did you put that back in? Some forget to do that and you might get binding without it.
12-21-14, 08:27 PM
#3
Hi SynicalVip, Yes, it looks correct but I cannot verify that last picture. As long as the LH cam is aligned with the extrusion mark as in the RH, then you are good.
Now, as concerns idler #1, I believe that there is a washer that goes between the block and the pulley. Did you put that back in? Some forget to do that and you might get binding without it.
Now, as concerns idler #1, I believe that there is a washer that goes between the block and the pulley. Did you put that back in? Some forget to do that and you might get binding without it.
Thanks for the reply, the LH cam marking is towards the back unlike the RH cam where it is in the front. I line them both up as close as I can get with CR at 0. As for the idler, yes there is a washer, even with it on etc it wasn't moving. Release the tensioner and it didn't push it, so loosen the idler a little until the tension was able to push it then I torque it back to specs. Now the belt is nice and tight

Trending Topics
12-24-14, 10:21 AM
#10
12-25-14, 08:36 AM
#11
Okay bad news, got everything out back on and started to pour in coolant fluid and it started leaking so didn't even get a chance to fire it up! Took it all apart again, now the paper like gasket on the water pump is no good, along with the gasket on the thermostat. Now does it require to use the gasket or some FIPG is all I would need or some high temp atv Wil do?
12-25-14, 09:45 AM
#12
When I did my TB/WB a fews years ago, I also had a coolant leak and was initially horrified, imagining the worst case...water pump gasket. However, I traced it to a hose clamp and put on a worn-gear clamp instead. Simple fix.
So, did you locate the source of the leak or just tear everything down believing that it was the pump?
So, did you locate the source of the leak or just tear everything down believing that it was the pump?
12-25-14, 10:04 AM
#13
When I did my TB/WB a fews years ago, I also had a coolant leak and was initially horrified, imagining the worst case...water pump gasket. However, I traced it to a hose clamp and put on a worn-gear clamp instead. Simple fix.
So, did you locate the source of the leak or just tear everything down believing that it was the pump?
So, did you locate the source of the leak or just tear everything down believing that it was the pump?
From what I can see, it was leaking right behind the plastic cover on the crank pulley. And only thing behind that is the pump and the idlers. All hose was checked several times as I do with everything else as well just to be that sure of it that everything is on correctly. So I have taken all apart already, but now need a gasket for the water pump and thermostat housing. The one it came with that kit was just paper like gasket and not metal. Would just putting high temp atv hold up? Can't seem to find the metal gasket at local part store.
12-25-14, 10:43 AM
#14
If your in a hurry you can use FIPG. Just make sure you apply an even bead uniformly across the pump and just snug fit the bolts/nuts. Let it sit for about an hour before you torque them up. You should be able to find a thermostat gasket at any parts store. Now if it was me I would go to the dealer and pay the Lexus tax for a metal gasket so I would not have to deal with the messy FIPG.
12-25-14, 10:48 AM
#15
If your in a hurry you can use FIPG. Just make sure you apply an even bead uniformly across the pump and just snug fit the bolts/nuts. Let it sit for about an hour before you torque them up. You should be able to find a thermostat gasket at any parts store. Now if it was me I would go to the dealer and pay the Lexus tax for a metal gasket so I would not have to deal with the messy FIPG.