Just replaced the starter in my 1995 LS400, brutal
 09-26-14, 07:54 AM
#1
Driver
Thread Starter
Let me just start by saying that this job is a SLEEPER in difficulty...It SEEMS easy but oh boy.. it isn't.
The issue that I was having was that immediatly after starting the car it would make a high pitched chime or high pitched grind for a half to 1 second that sounded exactly the same as when you turn the key on a car that is already running. Basically like the starter was not disengaging quick enough.
I read about it every day for the last week, thinking everything was going to be very smooth....
It started off very well
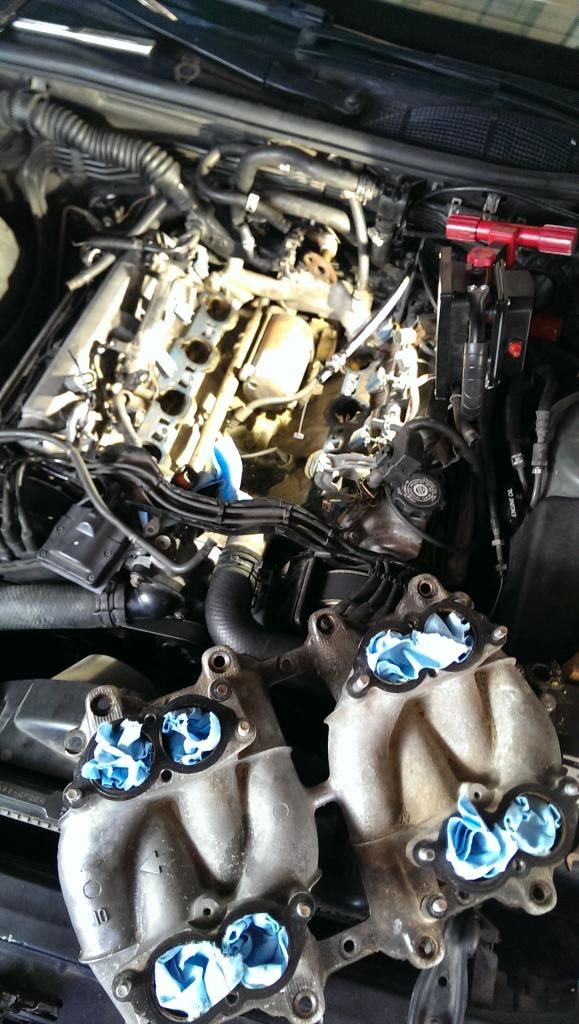
Here is the back of the throttle body, definitely in need of a good cleaning

The upper manifold/surge tank came off relatively easy. The EGR pipe on the back had 2 different sizes of bolts? one was a 12mm and one a 13mm?? This is when I began to suspect something was up.
My game plan was the take off the upper manifold/lower manifold and fuel rail off in one piece... failed
There was no way that was happening... I took them all off separately.
gaskets between surge tank and lower manifold is metal, i got new ones but i bet these would be fine to reuse.
As you can see in the above pic, the upper manifold is off
I removed the injector clips with a small U shaped pick/hook tool and didn't break any
I removed the fuel return hose and took off the rail mounting bolts then simply flipped the rail intact over to the driver side of the car.
Felpro manifold gaskets...as I suspected with the different EGR bolts. Someone had been in here before. I guess what do you expect at 172k... ?
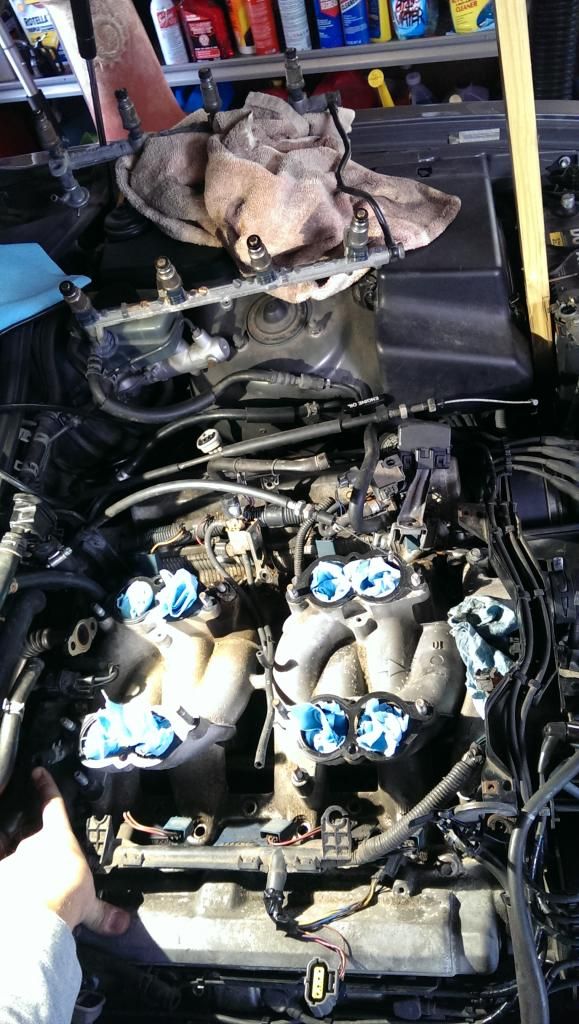
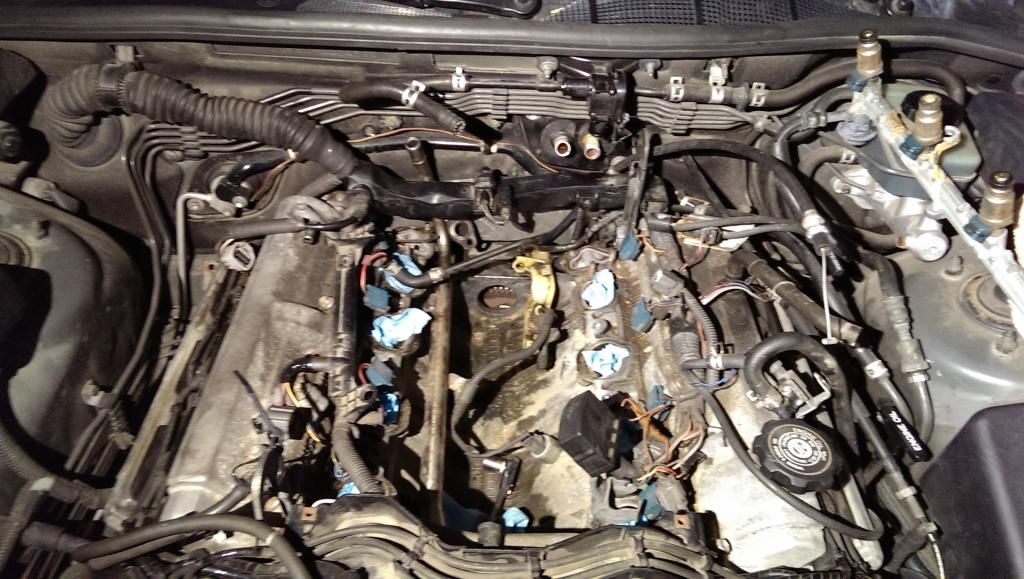
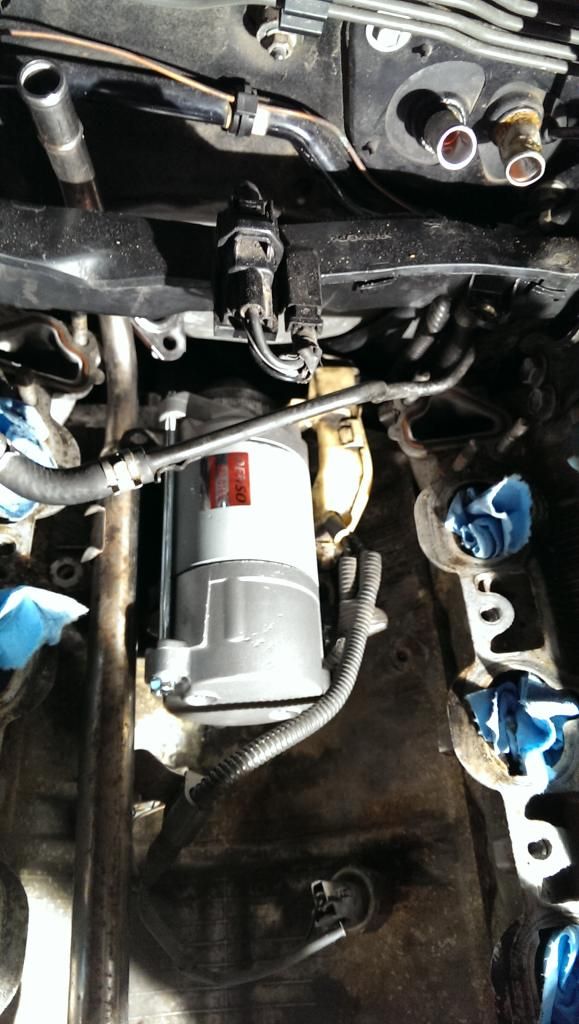
lower manifold off, starter in plain sight now, It had been about 3 hrs, but i was apparently just getting started
I thought i was going to use the harbor freight tool ratchet/t handle tool and remove the starter bolts without removing the rear coolant bridge... YAH... impossible, at least on a 95-97, you see that heater core and heat control valves up there? no way the tool is getting in there. After trying for 2 hrs, and numerous colorful words I was losing hope.
I removed the upper EGR pipe to try and get the HF tool in, nope.
OK so I guess Ill just take out the rear cool bridge... easy right? no
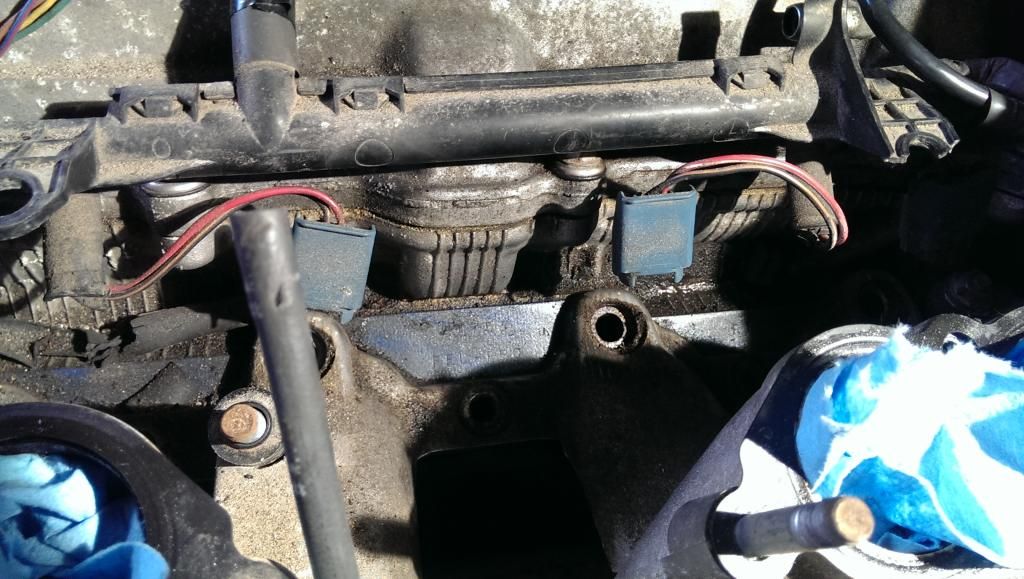
The lower EGR pipe is bolted to the back of the rear coolant bridge, those bolts cannot be accessed from the engine bay as the coolant bridge is in the way.
Ok then so I read online that I might need to remove the passenger cat to access the lower EGR pipe bolts on the rear coolant bridge,...not happening.... thought about it for 30 mins, impossible, not only were the cat bolts old and locked on there. There is no way for a socket(maybe a special sized swivel socket, i dont have one) to even get around them without hitting the cat and there is no way a simple box wrench is getting those suckers off.
After more words and tow truck contemplation i had genius idea, loosen the lower EGR pipe bolts on top of the exhaust pipe and then hope that it gives me enough clearance to pull up on the coolant bridge.
I used the harbor freight t handle thing to remove the 2, 12mm nuts on top of the exhaust freeing up the lower egr tube from below.
This allowed me to pull up an inch or 2 on the coolant bridge and then I could get the HF tool in there again to remove the bolts holding the lower EGR tube to the back of the rear coolant bridge.
finally the coolant bridge was free and I had much better access to the starter bolts.
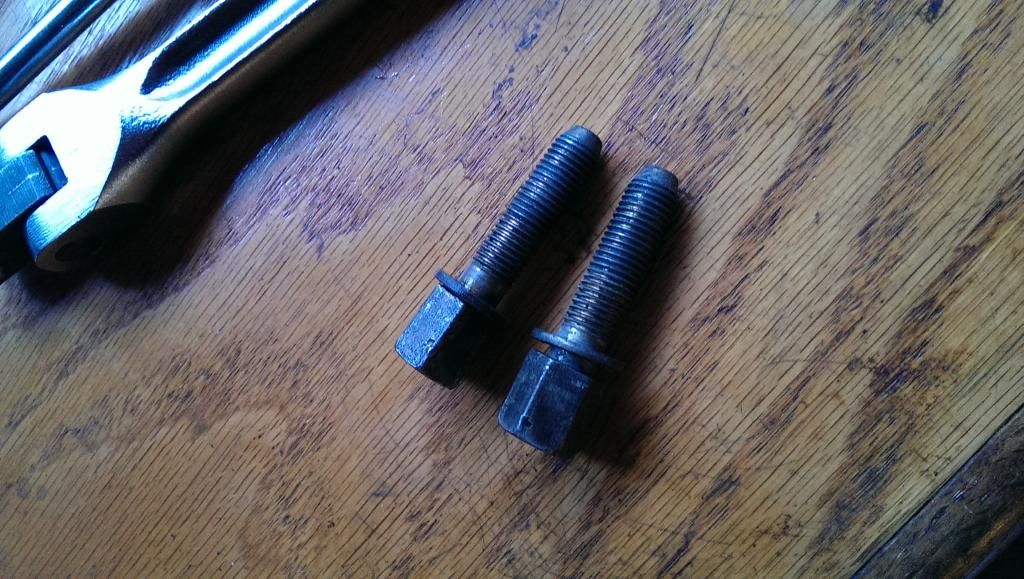
I put some serious torque on that HF tool to loosen the passenger starter bolt... It flexed and i thought it was snapping for sure but it thankfully broke the bolt loose, I removed it using the same tool while jamming a screwdriver against the bolt to keep tension on it so it didn't spin backwards. I broke the driver side bolt loose with a 3/8 breaker bar and shorty socket( nothing fits in there even with the bridge removed) then finished removing with the HF tool.
Finally got it out
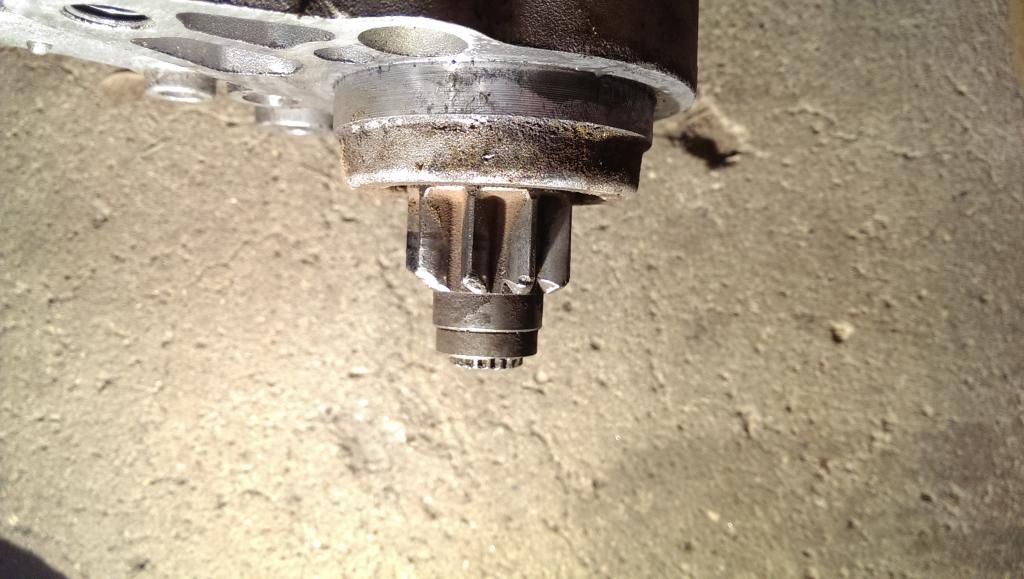
Some wear/chips on the bendix, this starter was definitely not a denso, probably a duralast (I found some pieces of autozone receipt down in the valley)
another shot, if you look closely the gear teeth look like the were only contacting the flywheel about halfway...?

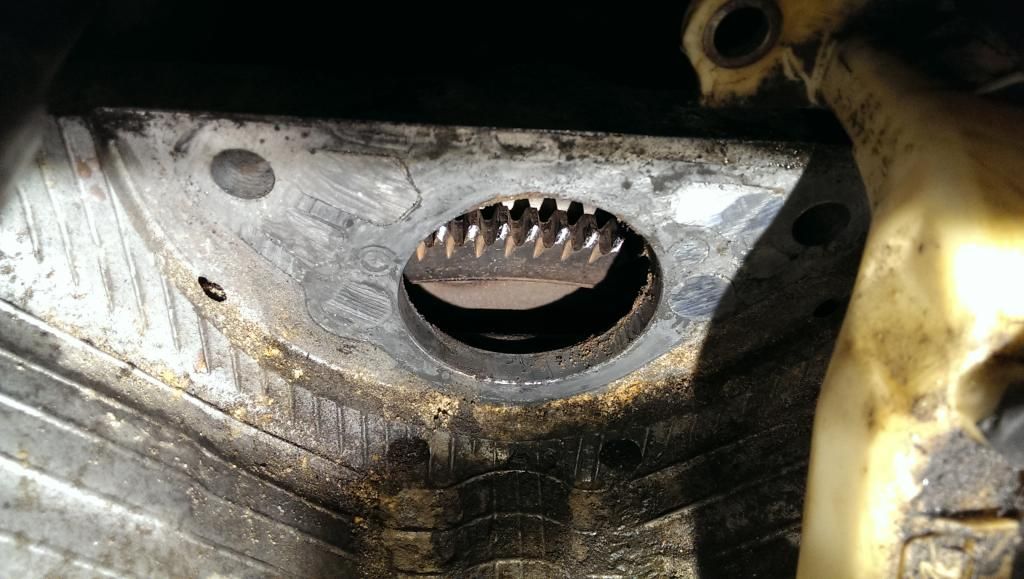
best shot I could get of the flywheel, there was a tiny bit wear but nothing like the starter drive, no chips, or missing teeth as i cranked the engine over via the crankbolt
I did manage to break the little connector for the starter solenoid signal, wrapped it up with a bunch of electrical tape... :/
new starter in, bolt reinstall was a breeze by hand, I had ran them through the new starter threads a few times to clean them up and tightened as hard as I could with a 3/8 shorty ratchet (all that would fit)
Now I need coolant bridge gaskets from the dealer and since i didn't plan on removing it i didn't buy them... dumb, if they dont have them in stock maybe I will add some rtv on top and reinstall? they are the same part number but different names on the sewell parts diagram.
Now i just need to put everything back, clean up mating surfaces and manifolds, and rebuild injectors with napa kits, then hope it starts, oh joy
Not recommended for the faint of heart, this really is a big job. I just did my timing belt and I think this was much more difficult.
In conclusion, that harbor freight 98484 "Tbar with flexible 3/8 ratchet" saved my **** many times.
The issue that I was having was that immediatly after starting the car it would make a high pitched chime or high pitched grind for a half to 1 second that sounded exactly the same as when you turn the key on a car that is already running. Basically like the starter was not disengaging quick enough.
I read about it every day for the last week, thinking everything was going to be very smooth....
It started off very well
Here is the back of the throttle body, definitely in need of a good cleaning
The upper manifold/surge tank came off relatively easy. The EGR pipe on the back had 2 different sizes of bolts? one was a 12mm and one a 13mm?? This is when I began to suspect something was up.
My game plan was the take off the upper manifold/lower manifold and fuel rail off in one piece... failed
There was no way that was happening... I took them all off separately.
gaskets between surge tank and lower manifold is metal, i got new ones but i bet these would be fine to reuse.
As you can see in the above pic, the upper manifold is off
I removed the injector clips with a small U shaped pick/hook tool and didn't break any
I removed the fuel return hose and took off the rail mounting bolts then simply flipped the rail intact over to the driver side of the car.
Felpro manifold gaskets...as I suspected with the different EGR bolts. Someone had been in here before. I guess what do you expect at 172k... ?
lower manifold off, starter in plain sight now, It had been about 3 hrs, but i was apparently just getting started
I thought i was going to use the harbor freight tool ratchet/t handle tool and remove the starter bolts without removing the rear coolant bridge... YAH... impossible, at least on a 95-97, you see that heater core and heat control valves up there? no way the tool is getting in there. After trying for 2 hrs, and numerous colorful words I was losing hope.
I removed the upper EGR pipe to try and get the HF tool in, nope.
OK so I guess Ill just take out the rear cool bridge... easy right? no
The lower EGR pipe is bolted to the back of the rear coolant bridge, those bolts cannot be accessed from the engine bay as the coolant bridge is in the way.
Ok then so I read online that I might need to remove the passenger cat to access the lower EGR pipe bolts on the rear coolant bridge,...not happening.... thought about it for 30 mins, impossible, not only were the cat bolts old and locked on there. There is no way for a socket(maybe a special sized swivel socket, i dont have one) to even get around them without hitting the cat and there is no way a simple box wrench is getting those suckers off.
After more words and tow truck contemplation i had genius idea, loosen the lower EGR pipe bolts on top of the exhaust pipe and then hope that it gives me enough clearance to pull up on the coolant bridge.
I used the harbor freight t handle thing to remove the 2, 12mm nuts on top of the exhaust freeing up the lower egr tube from below.
This allowed me to pull up an inch or 2 on the coolant bridge and then I could get the HF tool in there again to remove the bolts holding the lower EGR tube to the back of the rear coolant bridge.
finally the coolant bridge was free and I had much better access to the starter bolts.
I put some serious torque on that HF tool to loosen the passenger starter bolt... It flexed and i thought it was snapping for sure but it thankfully broke the bolt loose, I removed it using the same tool while jamming a screwdriver against the bolt to keep tension on it so it didn't spin backwards. I broke the driver side bolt loose with a 3/8 breaker bar and shorty socket( nothing fits in there even with the bridge removed) then finished removing with the HF tool.
Finally got it out
Some wear/chips on the bendix, this starter was definitely not a denso, probably a duralast (I found some pieces of autozone receipt down in the valley)
another shot, if you look closely the gear teeth look like the were only contacting the flywheel about halfway...?
best shot I could get of the flywheel, there was a tiny bit wear but nothing like the starter drive, no chips, or missing teeth as i cranked the engine over via the crankbolt
I did manage to break the little connector for the starter solenoid signal, wrapped it up with a bunch of electrical tape... :/
new starter in, bolt reinstall was a breeze by hand, I had ran them through the new starter threads a few times to clean them up and tightened as hard as I could with a 3/8 shorty ratchet (all that would fit)
Now I need coolant bridge gaskets from the dealer and since i didn't plan on removing it i didn't buy them... dumb, if they dont have them in stock maybe I will add some rtv on top and reinstall? they are the same part number but different names on the sewell parts diagram.
Now i just need to put everything back, clean up mating surfaces and manifolds, and rebuild injectors with napa kits, then hope it starts, oh joy
Not recommended for the faint of heart, this really is a big job. I just did my timing belt and I think this was much more difficult.
In conclusion, that harbor freight 98484 "Tbar with flexible 3/8 ratchet" saved my **** many times.
Last edited by brybo86; 10-14-14 at 09:11 PM.

The following users liked this post:
spuds (04-09-18)
09-26-14, 08:17 AM
#2
Driver
Thread Starter
I put everything back together yesterday and it works GREAT! Starter turned over strong and quietly and most importantly with any high pitched chime (delayed disengagment) of the old starter.
I went to the dealer yesterday and bought new coolant bridge gaskets, they were acutally cheaper local than from sewell even before shipping.
It took me FOREVER to reconnect the lower EGR pipe to the back of the coolant bridge. Like a few hours just for that one step. SO frustrating.
I used new gaskets for the head to manifold and manifold to surge tank, as well as a new throttle body gasket.
I used the reman DENSO from amazon . although the reman denso from rockauto was cheaper and they will take the old core back for like a $32 refund minus shipping.
I did not test before reintalling everything... :0 dumb/lucky me
I bought rebuild fuel injector kits for $2 each from Napa. worked great. The old injector grommets were rock hard and cracked each one
I changed the PCV valve, grommet, and hose. The grommet was literally rock hard, I used pentrating oil to loosen it and then stuffed a towel into the hole and then pryed/broke it out with some screwdrivers. THen pulled the towel out with all the pieces caught in it.
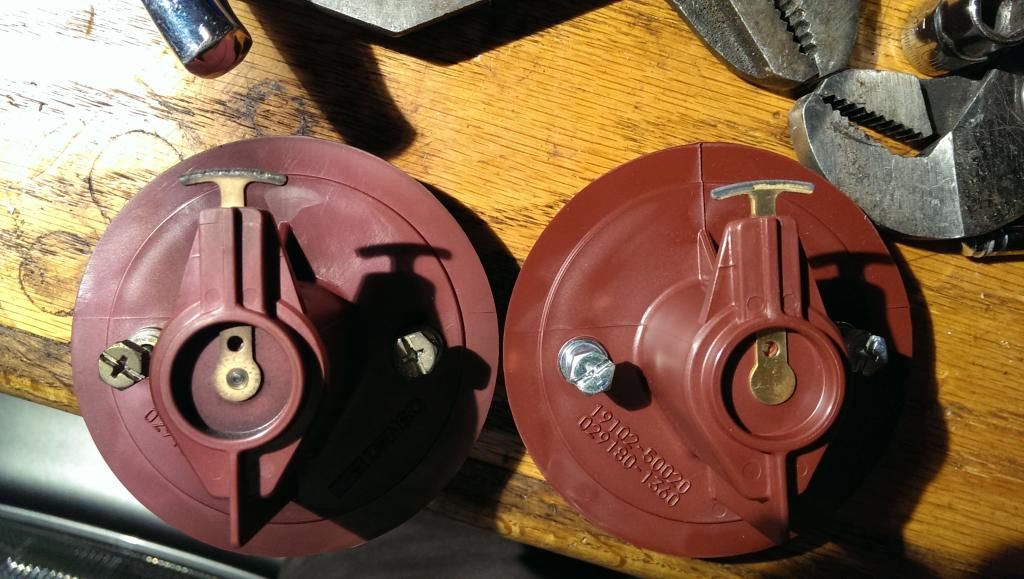
I bought another set of distributor rotors from sewell since if you recall I put the first set of new ones in backwards when doing my timing belt last month and have been using the old ones until I opened up the engine again.
So last night at 11pm I opened the "new" distributor rotor boxes and they look just like the ones I put in backwards last month. The rotors wiper friction material look to have been shaved off and it is missing the sandpaper like material. They are very smooth without grit.
I emailed sewell today,
Even so now I have to go in AGAIN with new rotors at some point, this will be the 3rd time I change them... I have it down to a science. I gently pull back the timing cover and slip the new ones in. Only requires draining a tiny bit of the radiator and taking off the bolts from the upper timing covers. I leave the serpentine belt on too.
old on the left and "new" on the right, someone must have returned the rotors and they repackaged them and gave them to me.... GRRRR. it was the icing on the cake of frustration yesterday.
I went to the dealer yesterday and bought new coolant bridge gaskets, they were acutally cheaper local than from sewell even before shipping.
It took me FOREVER to reconnect the lower EGR pipe to the back of the coolant bridge. Like a few hours just for that one step. SO frustrating.
I used new gaskets for the head to manifold and manifold to surge tank, as well as a new throttle body gasket.
I used the reman DENSO from amazon . although the reman denso from rockauto was cheaper and they will take the old core back for like a $32 refund minus shipping.
I did not test before reintalling everything... :0 dumb/lucky me
I bought rebuild fuel injector kits for $2 each from Napa. worked great. The old injector grommets were rock hard and cracked each one
I changed the PCV valve, grommet, and hose. The grommet was literally rock hard, I used pentrating oil to loosen it and then stuffed a towel into the hole and then pryed/broke it out with some screwdrivers. THen pulled the towel out with all the pieces caught in it.
I bought another set of distributor rotors from sewell since if you recall I put the first set of new ones in backwards when doing my timing belt last month and have been using the old ones until I opened up the engine again.
So last night at 11pm I opened the "new" distributor rotor boxes and they look just like the ones I put in backwards last month. The rotors wiper friction material look to have been shaved off and it is missing the sandpaper like material. They are very smooth without grit.
I emailed sewell today,
Even so now I have to go in AGAIN with new rotors at some point, this will be the 3rd time I change them... I have it down to a science. I gently pull back the timing cover and slip the new ones in. Only requires draining a tiny bit of the radiator and taking off the bolts from the upper timing covers. I leave the serpentine belt on too.
old on the left and "new" on the right, someone must have returned the rotors and they repackaged them and gave them to me.... GRRRR. it was the icing on the cake of frustration yesterday.
09-26-14, 08:19 AM
#3
Dang, must be "replace your starter" season, nice write-up though. Check out my thread from yesterday, this scares the c**p outta me even more. Oh, and I suppose the Duralast starter I was pricing may not be the way to go? Did you get the Denso from Sewell? Thanks.
Last edited by Hiroshi12; 09-26-14 at 08:22 AM.
09-26-14, 09:27 AM
#5

Thanks for sharing and good job at replacing the starter.  I recall fondly of past Toyota's where in those times the starter was placed on the bottom of the engine and a R&R was ~20-40 minute job. To place the starter under the intake and turn a replacement into 6-8 hour task is
  Luckily this isn't as common a replacement but most will need it at least once from 125K-250K.
I recall fondly of past Toyota's where in those times the starter was placed on the bottom of the engine and a R&R was ~20-40 minute job. To place the starter under the intake and turn a replacement into 6-8 hour task is Luckily this isn't as common a replacement but most will need it at least once from 125K-250K.
09-26-14, 11:15 AM
#6

Nice job. When i did mine i went over all the bits and pieces i might need and order them from Sewell. All together was around 400 plus 100 i paid a buddy of mine to assist. I wish my photos had come out but i left my cell phone setting wrong so it blurred most of them.
My thing was i knew my LS sat for a long while in a used lot i suspected something had made a home in the bay. And when we lifted the manifold i was right. Big old mouse house. We looked over all the wiring found no chewed wires just a big fluffy home.
The car had run fine for my first four years and continues to run great today.
Trending Topics
09-26-14, 12:11 PM
#8
Pole Position

Join Date: Mar 2014
Location: Oregon
Posts: 397
Likes: 0
Received 0 Likes
on
0 Posts
Toyota hates us all. 3VZE - half the passenger suspension has to come off to get it out. 5EFE - under the intake manifold as well, or you can go in from the bottom and take motor mounts and subframe **** off. 2VZFE, the list goes on.. .WHHYYY TOYOTA!!!
09-26-14, 01:23 PM
#9
Pole Position

Join Date: May 2008
Location: Alberta
Posts: 265
Likes: 0
Received 0 Likes
on
0 Posts
Holy crap dude, thats totally nuts!! I can so relate reading your story on just contenplating what to do can take so much time, let along turning bolts.
Mk3 Supra was a stupid pain too, 3ft extension from the tailshaft of the tranny to get the nut and bolt while friend lies on top of motor, often it turned into a 4hrs job.
I just did an F150 about 45min of taking it real easy. The Lexus one is totally insane, what a moronic place to put an item that will usually require replacement.
Toyota!!!!!!!
09-26-14, 02:26 PM
#11
Driver
Thread Starter
given the difficulty, i would consider it also....
The only thing that would worry me is that who knows if they are using a torque wrench on the things that really matter .
and
I mean If i was willing to spend countless hours to make sure that bolt got enough torque, would they go through the same headache?
The bolts/nut on a couple of my egr pipes were finger tight, which leads me to belive that the previous person put them on with their fingers only .... since using a wrench is such a pain.
The lower EGR to coolant bridge connection is ridiculous, it took forever to get the bolts to hand thread in
09-26-14, 02:32 PM
#12
given the difficulty, i would consider it also....
The only thing that would worry me is that who knows if they are using a torque wrench on the things that really matter .
and
I mean If i was willing to spend countless hours to make sure that bolt got enough torque, would they go through the same headache?
The bolts/nut on a couple of my egr pipes were finger tight, which leads me to belive that the previous person put them on with their fingers only .... since using a wrench is such a pain.
The lower EGR to coolant bridge connection is ridiculous, it took forever to get the bolts to hand thread in
The only thing that would worry me is that who knows if they are using a torque wrench on the things that really matter .
and
I mean If i was willing to spend countless hours to make sure that bolt got enough torque, would they go through the same headache?
The bolts/nut on a couple of my egr pipes were finger tight, which leads me to belive that the previous person put them on with their fingers only .... since using a wrench is such a pain.
The lower EGR to coolant bridge connection is ridiculous, it took forever to get the bolts to hand thread in
.Either way, when it comes to this for my ucf, I will happily throw my money at the dealer.
09-26-14, 02:46 PM
#13
Well you did admit you have big hands and not all the correct tools. I trust a dealer to, at the very least, have the proper tools to do the job (and maybe have a mechanic with small girly hands). Best case scenario, you happen to have your car worked on by a good Lexus mechanic who takes pride in his work and who has a good reputation and wants to keep it that way. Worst case.... they drop something in the intake .
Either way, when it comes to this for my ucf, I will happily throw my money at the dealer.
.Either way, when it comes to this for my ucf, I will happily throw my money at the dealer.
Yup. My mech shop is Lexus/Toyota/Scion only so they are legit...the wallet will still hurt tho
 09-26-14, 07:59 PM
#15
Driver
Thread Starter
I can squeeze into size small gloves at work, the only tool I didn't have was a 14mm swivel socket... Which in the end wouldn't have helped since the cat didn't need to be removed...