New to me 1995 LS400 172k

 08-25-14, 10:36 PM
#17
Driver
Thread Starter
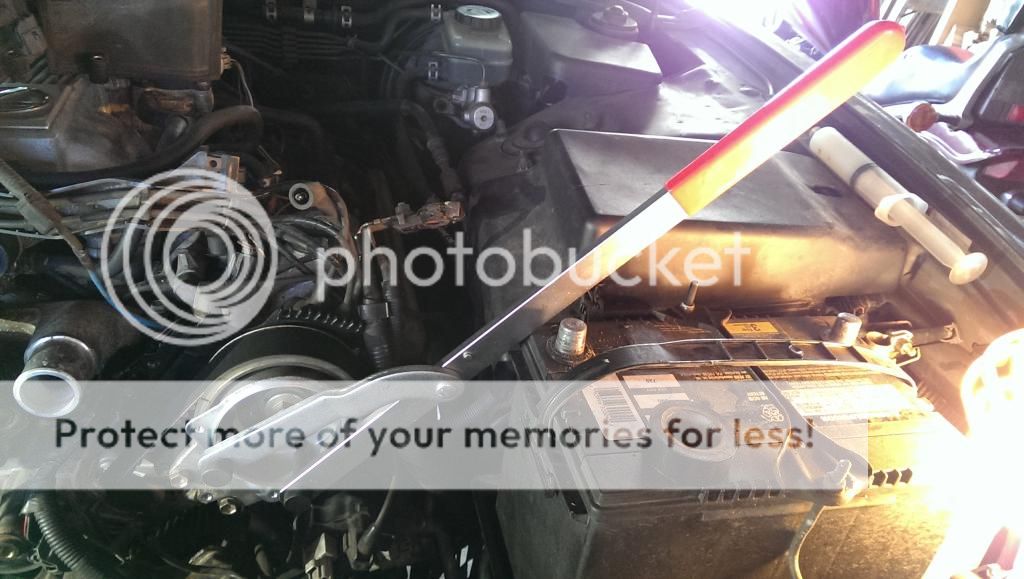
I finished removing the TB today and started putting it back together
Removing the old TB, not sure why the lexls tutorial has you remove the belt before removing the fan bracket?

There were a couple hiccups
the fan bracket was pain to get off, mostly because it is bolted to the AC unit, and the bolts are on the side and down like a few inches below the battery.
Then there are those tiny screws holding an electrical bracket on the top of the AC unit.... had to use a 2ft long extension and socket phillips bit to get at them so that the fan bracket would be able to pull out
I changed the PS reservoir o ring, the old one was very brittle and hard like plastic, I hope that solves my leak
I zipped the cam pulleys off with an impact and went at the seals using the genius special tool...
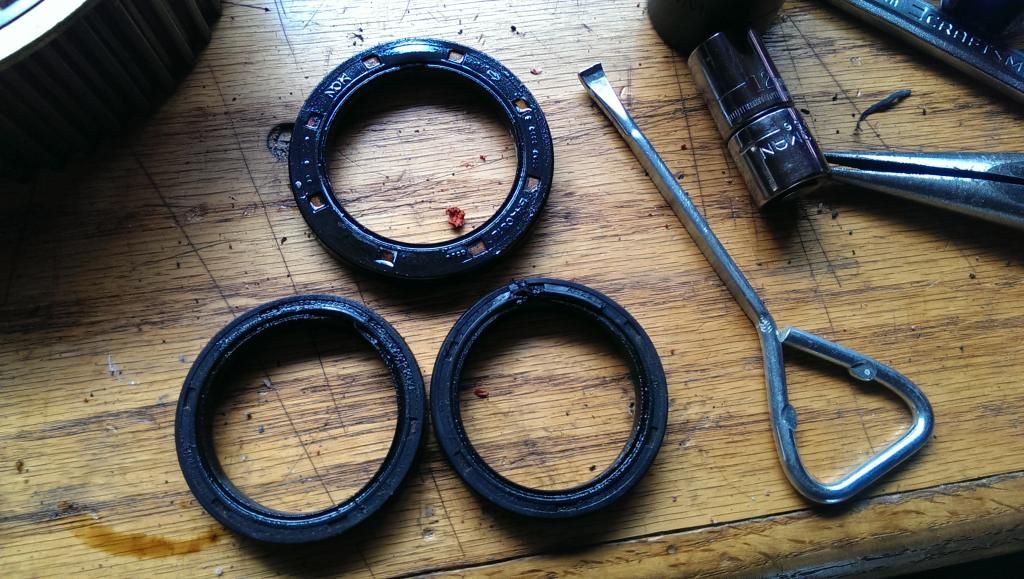
its crappy metal, kinda soft, which is good so that it wont scratch the shafts, I filed the back side of the paint opener using a rough metal file then used a finer grit sandpaper to get a nice flowing curve on the backside.
The RH camseal was the tightest, the LH was OK and the crankseal just popped out. The paint can opener worked great, I put the opener on top of the shafts just like when using it to open a paint can then got the sharp edge to cut into the seal as i pushed the handle down parallel to the shaft. No scratches.
I put the cam seals in using a huge socket, they went in fine.
I used a big piece of PVC to install the crankseal... until I noticed that I pushed in the bottom too far!!... DUMB. I was ticked, luckily there was a dealer 20 mins away that had one in stock.
The one they gave me was the exact same part number but it was black, not brown like the one I got from Sewell.
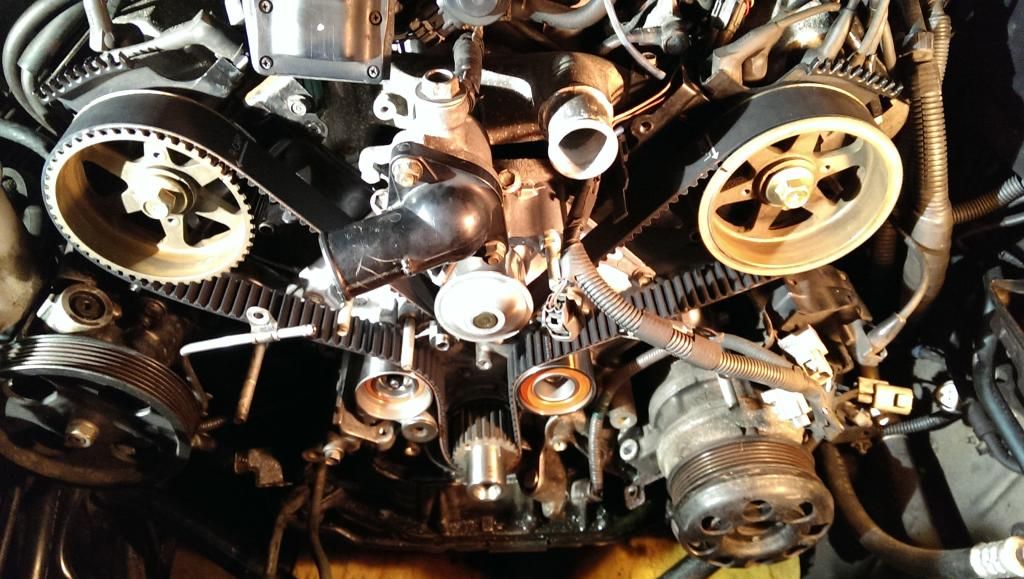
Water pump reinstalled using the OEM gasket only no RTV
water inlet housing reinstalled with new orings, RTV, new thermostat and oring.
idler #1 and #2 installed.
and she is ON!
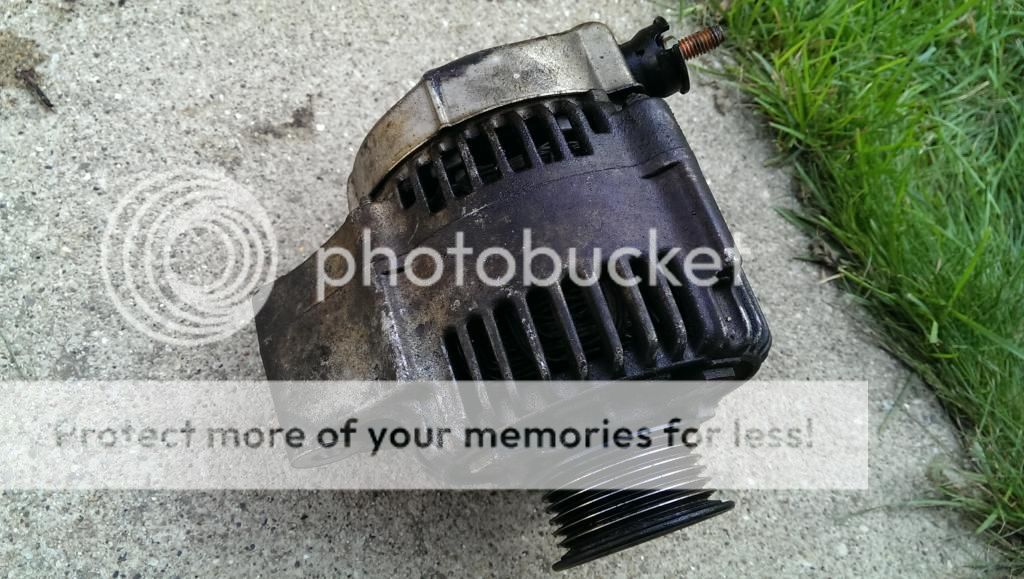
sorry i forgot the alternator pic,
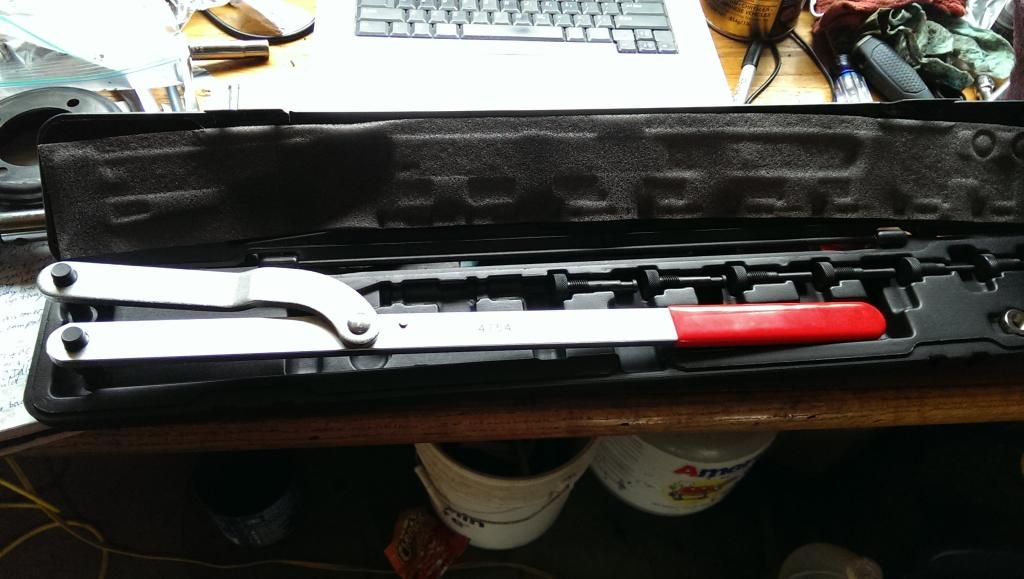
waiting for my adjustable spanner to torque the cams and crank
drivebelt tensioner is squeaky, I'll prolly buy the gates one tomorrow.
Removing the old TB, not sure why the lexls tutorial has you remove the belt before removing the fan bracket?
There were a couple hiccups
the fan bracket was pain to get off, mostly because it is bolted to the AC unit, and the bolts are on the side and down like a few inches below the battery.
Then there are those tiny screws holding an electrical bracket on the top of the AC unit.... had to use a 2ft long extension and socket phillips bit to get at them so that the fan bracket would be able to pull out
I changed the PS reservoir o ring, the old one was very brittle and hard like plastic, I hope that solves my leak
I zipped the cam pulleys off with an impact and went at the seals using the genius special tool...
its crappy metal, kinda soft, which is good so that it wont scratch the shafts, I filed the back side of the paint opener using a rough metal file then used a finer grit sandpaper to get a nice flowing curve on the backside.
The RH camseal was the tightest, the LH was OK and the crankseal just popped out. The paint can opener worked great, I put the opener on top of the shafts just like when using it to open a paint can then got the sharp edge to cut into the seal as i pushed the handle down parallel to the shaft. No scratches.
I put the cam seals in using a huge socket, they went in fine.
I used a big piece of PVC to install the crankseal... until I noticed that I pushed in the bottom too far!!... DUMB. I was ticked, luckily there was a dealer 20 mins away that had one in stock.
The one they gave me was the exact same part number but it was black, not brown like the one I got from Sewell.
Water pump reinstalled using the OEM gasket only no RTV
water inlet housing reinstalled with new orings, RTV, new thermostat and oring.
idler #1 and #2 installed.
and she is ON!
sorry i forgot the alternator pic,
waiting for my adjustable spanner to torque the cams and crank
drivebelt tensioner is squeaky, I'll prolly buy the gates one tomorrow.
08-26-14, 10:19 PM
#18
Driver
Thread Starter
SO...
here is the alternator, outside had some spray on it but the inside looked clean, i just cleaned it off a bit and reinstalled
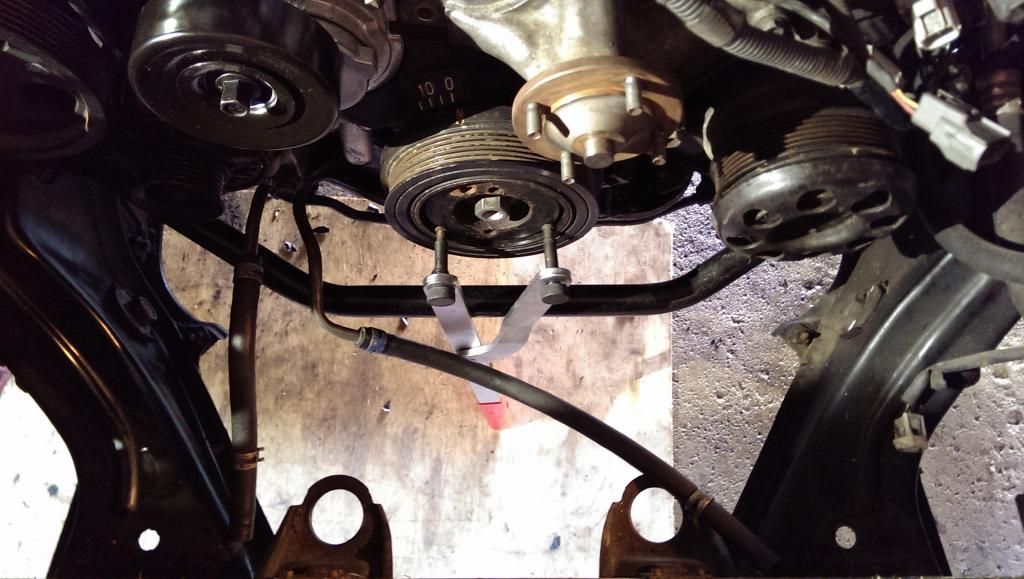
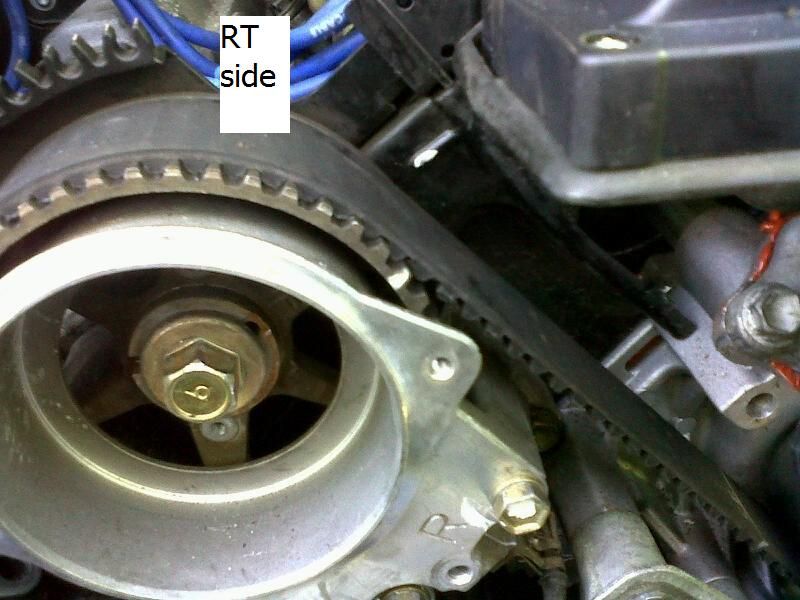
OTC 4754 universal pulley holder used to torque cams and crank, highly recommended
cam, not actual positioning but u get the idea
crank, again not actual position, i had the car on the ground and let the pulley holder rest against the ground
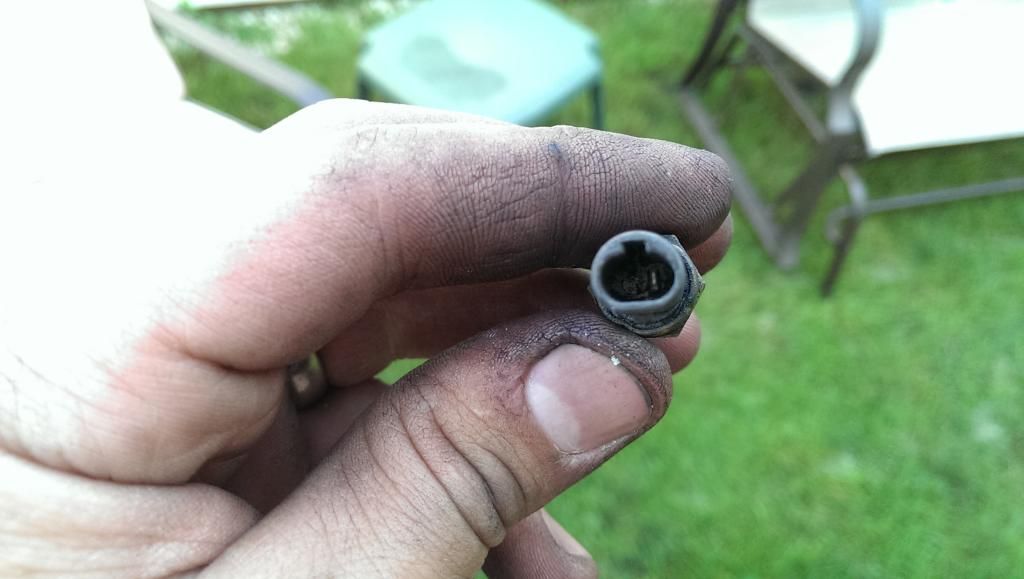
broken connector on coolant sender wire

I should have taken pics but I took a dremel and cut back the plastic on the old sender then soldered a piece of wire to the small tab inside, then twisted it together with the old wire... almost looked professional.
Now the BAD
I put everything together, filled with coolant, reconnected everything, turned the key and all I get is cranking...
it smells like gas, no codes, I am 100% confident the timing is set correctly.
Im thinking the ONLY part of the job that I wasn't 100% sure of my self was the distributor rotors,
"47) Install the distributor rotors. Align the protrusion of the rotor with the groove of the camshaft timing pulley. Torque the 2 bolts to 34 in-lb (39 kg-cm, 3.8 Nm); see step 12, then press backspace to return here."
HUH?
where is the protrusion is this pic? top or bottom?
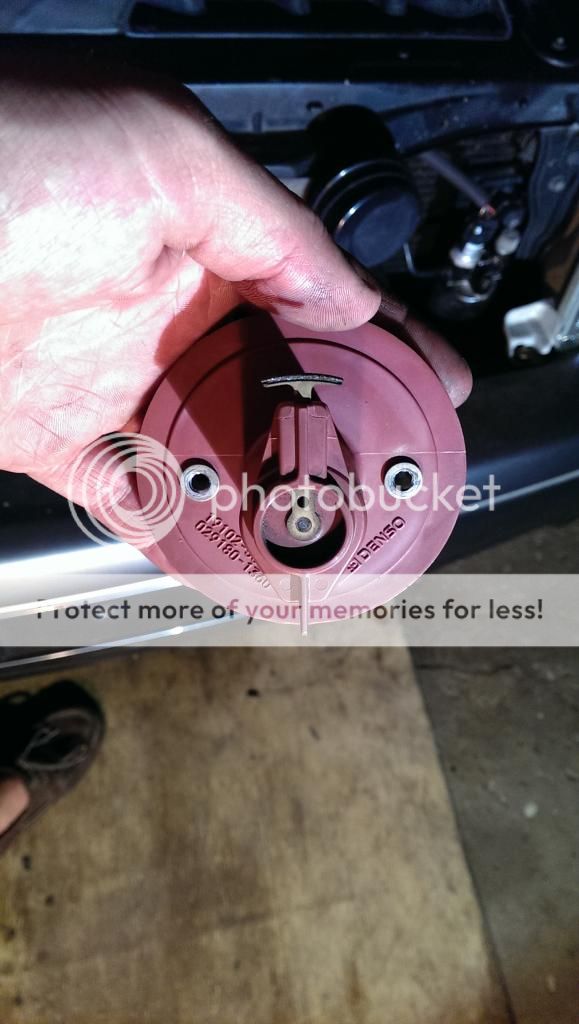
the groove on the back of the rotor is in line with the arrow side not the pickup/contact side
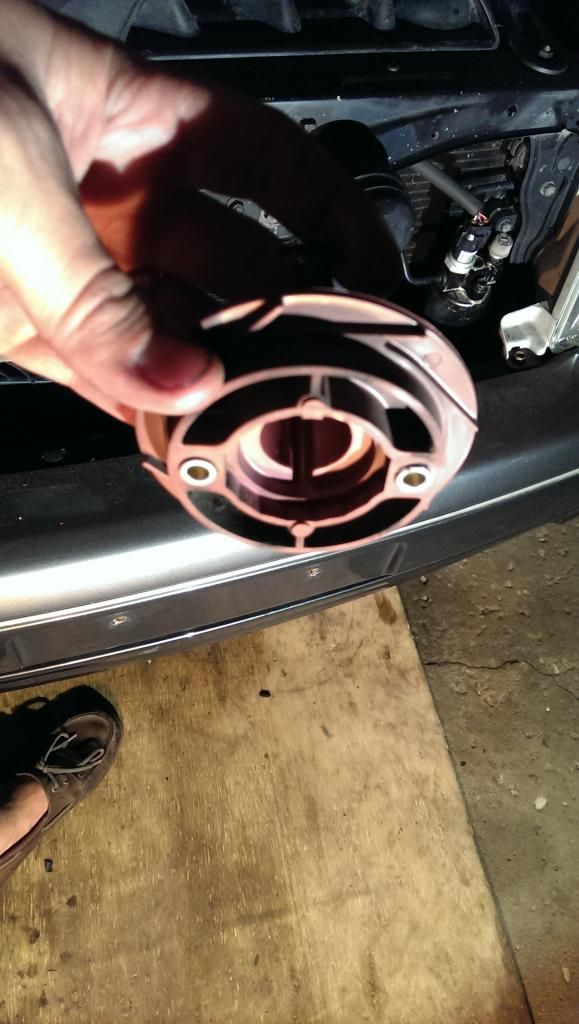
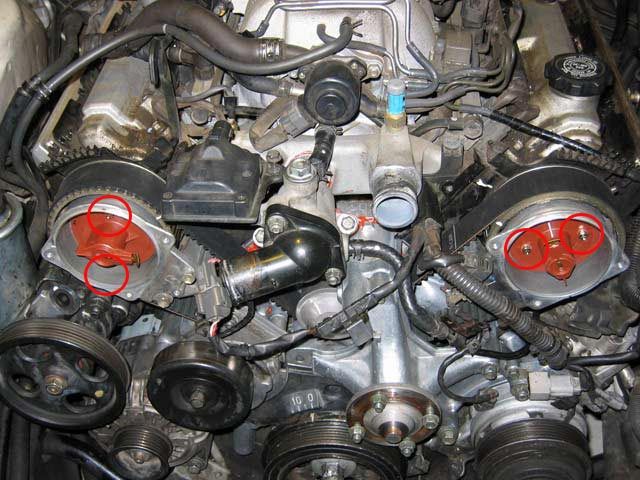
this isn't my pic but I aligned the rotor with the arrow side pointing to the left in this pic...... with the arrow lined up with the "groove" at the 9 o clock position behind the center bolt in this picture.
did I install them incorrectly?
basically is the "protrusion" the friction pickup side or the arrow side?
is this pic from lexls.com correct?
here is the alternator, outside had some spray on it but the inside looked clean, i just cleaned it off a bit and reinstalled
OTC 4754 universal pulley holder used to torque cams and crank, highly recommended
cam, not actual positioning but u get the idea
crank, again not actual position, i had the car on the ground and let the pulley holder rest against the ground
broken connector on coolant sender wire
I should have taken pics but I took a dremel and cut back the plastic on the old sender then soldered a piece of wire to the small tab inside, then twisted it together with the old wire... almost looked professional.
Now the BAD
I put everything together, filled with coolant, reconnected everything, turned the key and all I get is cranking...
it smells like gas, no codes, I am 100% confident the timing is set correctly.
Im thinking the ONLY part of the job that I wasn't 100% sure of my self was the distributor rotors,
"47) Install the distributor rotors. Align the protrusion of the rotor with the groove of the camshaft timing pulley. Torque the 2 bolts to 34 in-lb (39 kg-cm, 3.8 Nm); see step 12, then press backspace to return here."
HUH?
where is the protrusion is this pic? top or bottom?
the groove on the back of the rotor is in line with the arrow side not the pickup/contact side
this isn't my pic but I aligned the rotor with the arrow side pointing to the left in this pic...... with the arrow lined up with the "groove" at the 9 o clock position behind the center bolt in this picture.
did I install them incorrectly?
basically is the "protrusion" the friction pickup side or the arrow side?
is this pic from lexls.com correct?
Last edited by brybo86; 08-26-14 at 10:24 PM.
08-27-14, 10:53 PM
#19
Driver
Thread Starter
So...... Of course I thought about my no start all day at work.
I came home and decided that the only thing possibly wrong is the distributor rotors.
I changed the LH rotor by only removing the air dam and slightly twisting the upper rad hose up.
The RH rotor required the air intake to be removed as well as the top of the lower rad hose.
I removed tension on the serpentine belt and removed it from the power steering pulley and left it on the rest of the accessory pulleys.
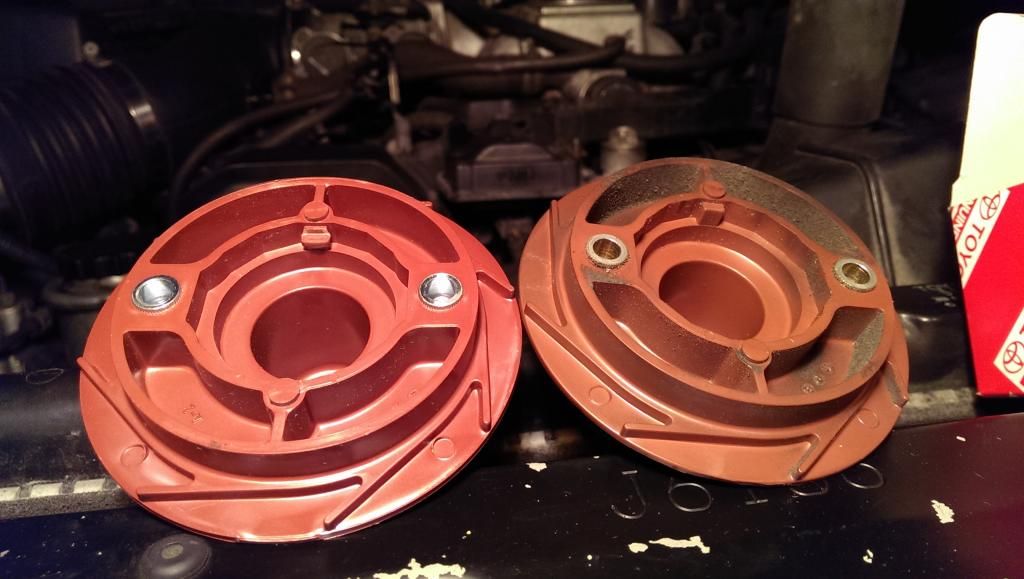
When I removed the rotors this is what I found. See the difference? New rotor is on the left and old is on the right. The tiny tab is smashed on the new/left rotor. I couldn't find this information anywhere other than calling a dealer in Milwaukee and talking to him. He described a small tab on the back of the rotor that aligned with the cam pulley. He also said the "protrusion" is the metal rotor wiper. I would recommend this be added to the timing belt tutorials. I also believe the lexls.com picture is incorrect. cams and crank are set at timing marks but the rotors are not in correct alignment/orientation.
I put it back together and VRROOOM! A bit rough for the first few seconds but then it settled down to the Lexus purrrr.... I was ecstatic.

My ghetto solder job worked on the coolant sender too. Amazing.
Thanks for all the advice and the tutorials helped a ton!
-Bryan
I came home and decided that the only thing possibly wrong is the distributor rotors.
I changed the LH rotor by only removing the air dam and slightly twisting the upper rad hose up.
The RH rotor required the air intake to be removed as well as the top of the lower rad hose.
I removed tension on the serpentine belt and removed it from the power steering pulley and left it on the rest of the accessory pulleys.
When I removed the rotors this is what I found. See the difference? New rotor is on the left and old is on the right. The tiny tab is smashed on the new/left rotor. I couldn't find this information anywhere other than calling a dealer in Milwaukee and talking to him. He described a small tab on the back of the rotor that aligned with the cam pulley. He also said the "protrusion" is the metal rotor wiper. I would recommend this be added to the timing belt tutorials. I also believe the lexls.com picture is incorrect. cams and crank are set at timing marks but the rotors are not in correct alignment/orientation.
I put it back together and VRROOOM! A bit rough for the first few seconds but then it settled down to the Lexus purrrr.... I was ecstatic.
My ghetto solder job worked on the coolant sender too. Amazing.
Thanks for all the advice and the tutorials helped a ton!
-Bryan

 03-12-15, 04:07 PM
#24

You did great job on the timing belt, I look forward to doing mines along with the seals and idlers in 30-40k miles. Judging from your alternator pic and from experience, you might want to fix that power steering leak above the alt. I am on my 3rd alt(thanks to lifetime warranty). Just replace the rubber o ring under the reservoir, I think over time the rubber shrinks.


Thread
Thread Starter
Forum
Replies
Last Post
marine1342
LS - 1st and 2nd Gen (1990-2000)
21
06-01-10 01:13 PM
ycao2
LS - 1st and 2nd Gen (1990-2000)
12
10-21-07 03:23 PM

