How to modify the tail lights failure sensor for UCF20/21
 06-26-14, 03:58 AM
#1
Moderator
Thread Starter

To those who are trying to find the way to stop the “tail lights failure light” for models after July 97. For UCF20/21 before July 97, see post #8.
Below is the way to disable the module. All you need is just to lift up or remove the resistor indicated by yellow letters “Lifted”. When you use LED tail lights, this is simple, easy and safe compared to use high wattage resistors that generates more than 150 watts of heat.
So far I have asked this by several people and I decided to open this here.
Last edited by RA40; 07-01-14 at 11:01 AM. Reason: to add UCF20/21 before July 97, see post #8.

The following 3 users liked this post by Yamae:


 06-30-14, 04:37 PM
#6
Moderator
Thread Starter

Trending Topics
06-30-14, 10:51 PM
#8
Moderator
Thread Starter
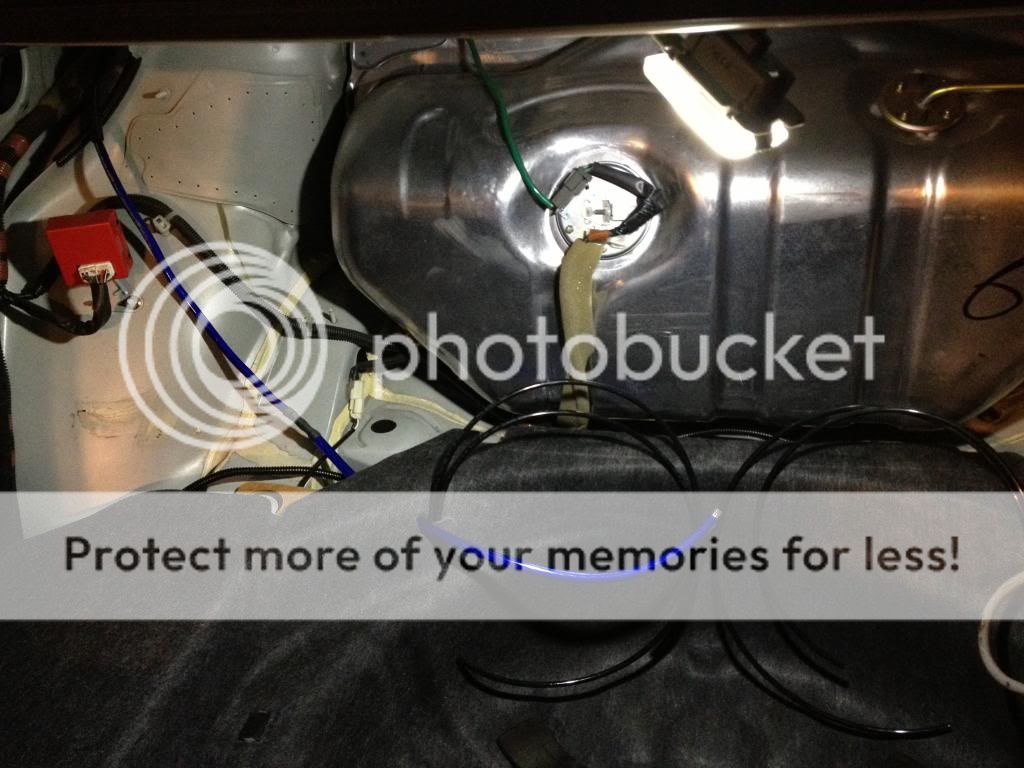
Here it goes. Lift or cut the leg of the resistor indicated by X. 
Now I think I'd better change the title, but I can't do that. Will a moderator or someone, please change it. May be "How to modify the tail lights failure sensor for UCF20/21" would be better.
Now I think I'd better change the title, but I can't do that. Will a moderator or someone, please change it. May be "How to modify the tail lights failure sensor for UCF20/21" would be better.
Last edited by Yamae; 06-30-14 at 11:02 PM. Reason: To request to change the title.
07-01-14, 09:14 AM
#9
Ok cool. Is this in the same little red box posted a few replies earlier?
And is the box easy to open, do I need to take care opening it?
And is the box easy to open, do I need to take care opening it?
Last edited by Caniac14; 07-01-14 at 11:11 AM.

 Thanks Yamae
 07-01-14, 07:32 PM
#11
Moderator
Thread Starter
Thanks for the change, Mike.
I only have introduced the way to disable the function to detect the open tail light or the reduced current.
There is also a way to modify without disabling the function. This can be achieved changing the current sensing resistors shown in the photo at my first post. There are 3 sensing resistors which generate the minor voltage drop. The voltage drops are monitored by window comparators and when the voltage is out of the range, the error signal is generated.
Changing those resistors can keep the function on, but you need to do some experiments. Depending on reduced currents, you have to use matched resistors. Some LED tail lights consume the energy 1/5th and some 1/20th like mine which has high efficiency LEDs for industrial use. Depending on the reduced current, you need to select and use matched resistors.
07-02-14, 11:24 AM
#12
sounds good yamae!
i would like to keep the function but you're right, it will take some current and load measurements to find the right resistance. my LED bulbs cause static on my radio when applying the brakes so i know they have a different load rating than the average units.
also the comparators may have a small window to sense the voltage drops. i was thinking of putting a potentiometer (adjustable resistor) and adjusting until the load is just right.
 08-05-14, 05:26 PM
#14
I did this and my tail-light out thing still comes up my dash.