When you click on links to various merchants on this site and make a purchase, this can result in this site earning a commission. Affiliate programs and affiliations include, but are not limited to, the eBay Partner Network.
I did it earlier today. The answer on the Schrader valves is it is the "Standard" ones, the GA1528 shown in the link where I asked for help. The receipt from the ones I bought (I guessed right) says PN 59346, which appears to be a good PN for Schrader valves.
I had some minor leaking from the Low side pressure port valve, and was hoping to do the high side as well. I did the low side very easily, but could not do the high side due to the bumper being in the way. Maybe one day when things are more taken apart I'll be able to get another crack at it.
Yes, the system was fully charged, and better yet, it still is! Virtually no refrigerant is lost in this process. Mastercool 58490 is the special tool kit needed to get this done. Whenever I have the choice, I'll almost always prefer to spend my money on a tool and do it myself than to pay someone else to do something.
Here are pic's
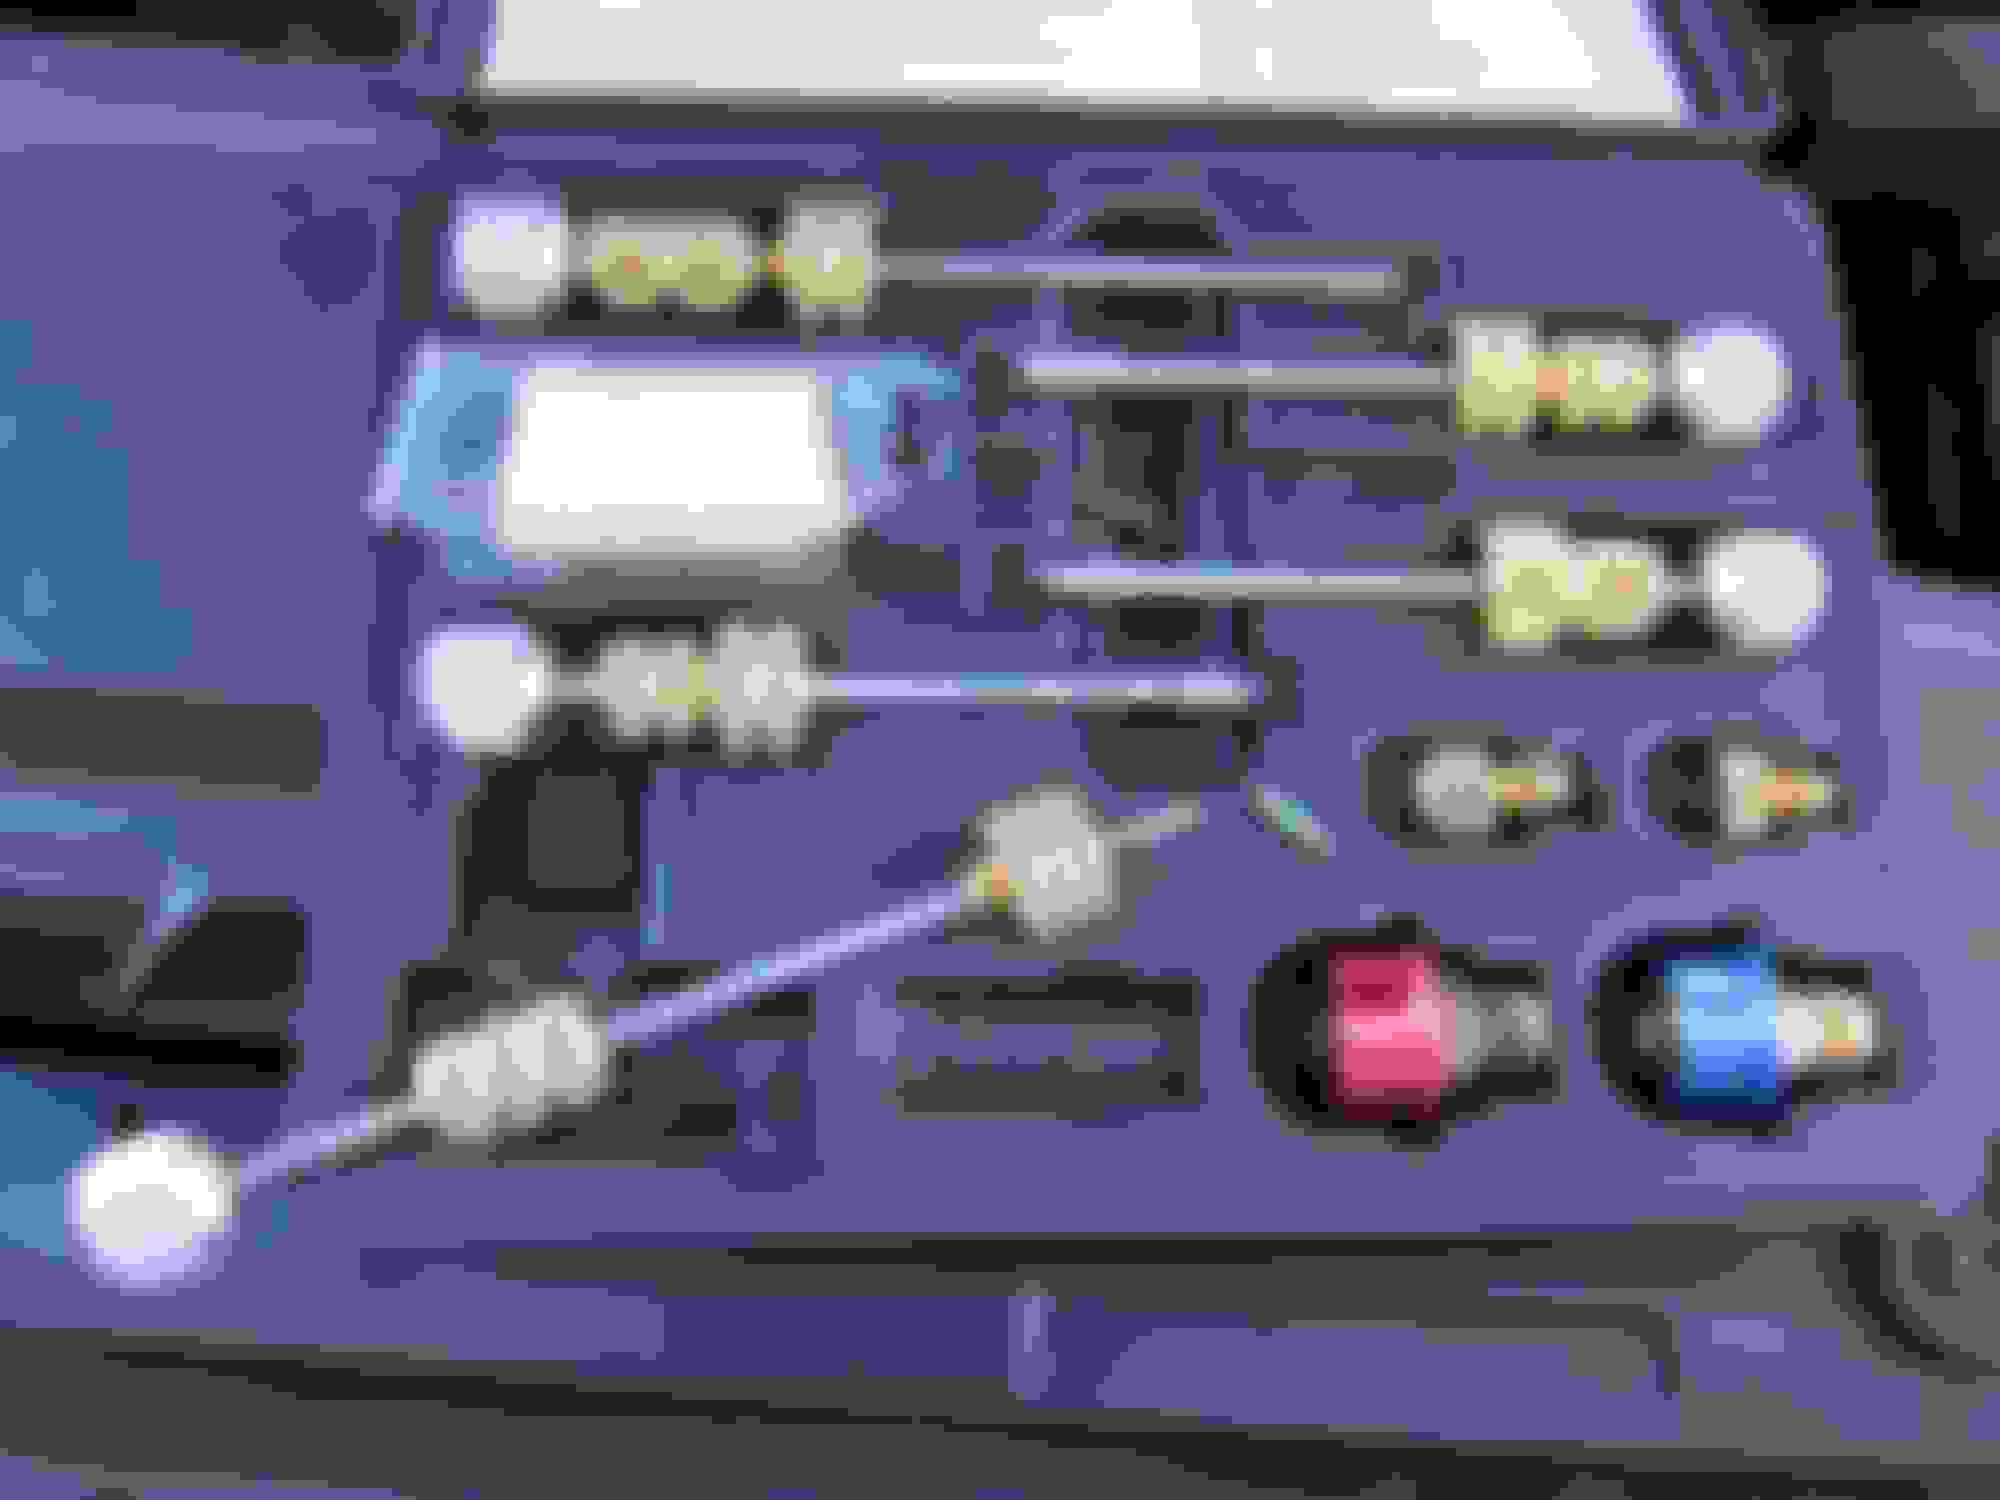
'91 LS400, still running with R12, low pressure port with tool attached
close-up of the valve core tool, screwed into the low-side pressure port. The ball valve (blue ****) is closed at this point, and the core has already been removed.
The kit. The old valve core is at the end of the rod. The new replacement is right next to it.
close-up of old vs. new Schrader valve cores.
High-side pressure port on the right side of the radiator. The valve part of the tool attaches, but the bumper prevents inserting the core-removal part, so it won't work ... yet.
Not sure where to post this - 1998 ls 400. Had the comp. clutch fail, so replaced the compressor with a reman. denso and replaced the dryer. Vacuumed the system down and held a vacuum just fine. Problem is that I can not get the system to take more than about 1/2 a can of 134. Had it vacuumed, released the first can, began to fill, then just stopped filling. Started the engine, turned on AC to see if that would help, but would still not draw it in. compressor engages for about 3-4 seconds, then the light starts flashing and the compressor shuts off. Any suggestions would be appreciated. Thx.
My guess is that the compressor is shutting itself off since it senses the system as being empty. There is a way to jumper the circuit to bypass this safety feature so you can do the initial charge. I'd look into that, but be careful.
pull another vacuum, run a bucket of HOT water, hold can upside down in the hot water while filling system.. dont burn yourself.. if you hold the can upright the freon goes in as a liquid, upside down it is a gas, the heat just forces it in the system... that is the cheap way without pro equipment..
I think you got it backwards on the can orientation. For refrigerant in a can, the liquid will of course be at the bottom, with the vapor at the top. You want to charge vapor, not liquid, so you don't hydrolock the compressor. You can do it small sips at a time if you're brave and careful, though.
But if you're charging oil, e.g., 2 oz oil plus 2 oz refrigerant in a can, the opposite is true. You want the can upside down so the oil/liquid refrigerant mixture (after shaking it up, they will mix) gets forced out the bottom by the refrigerant vapor. If you were to try charging an oil can right side up, you'd end up charging the 2 oz of refrigerant as vapor, and most of the oil would stay in the can.
As the vapor leaves the can, the gas expansion will make the can cold, reducing the vapor pressure in the can, and significantly slowing down the charging. So to keep it going, you can either wait a long time or heat up the can. The hot water method is one way. A simpler alternative that might be sufficient is to hold the can in the hot air flow that the engine fan is blowing. That should get the can hot enough.
Had no idea such a tool existed, great idea. I still think you may have a problem with your charging hose depressing the low side valve tip. It should take no more than a few minutes to get enough freon into the system to keep the compressor from cycling off due to low pressure, unless there is a restricted valve issue. I've had similar problems charging home systems, until I fixed my hose depressor.
Last edited by fixmiester; 10-11-14 at 07:51 PM.
Reason: Too much stuff
The tool I have to replace my shrader valve won't work. Are there different size tools for the shrader valves? I think mine may not be wide enough to catch
The tool I have to replace my shrader valve won't work. Are there different size tools for the shrader valves? I think mine may not be wide enough to catch
Yes, there are many sizes. See the photos I posted earlier - both of the actual tools and the instructions that go with them.
 10-11-14, 03:43 PM