When you click on links to various merchants on this site and make a purchase, this can result in this site earning a commission. Affiliate programs and affiliations include, but are not limited to, the eBay Partner Network.
I bought the LS, and one of the four things that needed attention was the passenger mirror. It was flopping and moving around.
I searched the threads here, and found a couple of threads, but nothing was quite as clear as I wanted to see. nonetheless, I dove in.
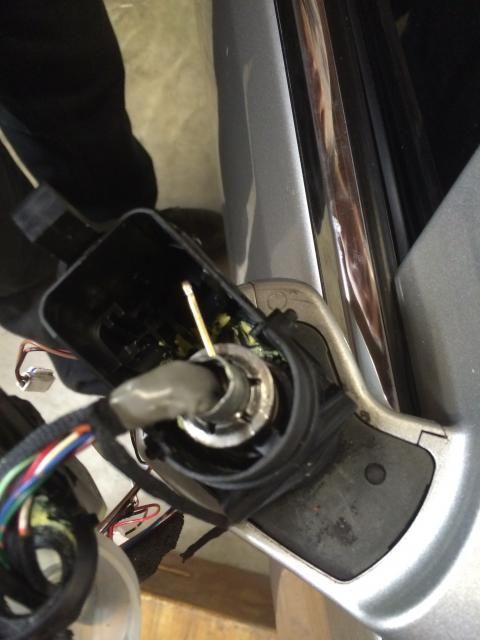
The mirror glass is held in with two clips about 1/4 way up the bottom. The clips are plastic. I had a hard time to get them to release. So I brought out the heat gun (it was about 50*F in the garage) and heated the mirror for a few minutes from 12-18" away. Once the plastic was up to temp (probably around 100*F), I was able to use a screwdriver (protecting the mirror case with a towel) and pop the two latches off the back of the mirror. Once you pop the two latches at the bottom, at the top of the mirror, there are two plastic guides that slide into the backing plate. Rotate the mirror up, and then pull out - the mirror glass will pop out. On the backside, you will find two connections - one black - one white. remove those - they just pop out. Guide the wires out of the plastic guides.
Once you've done that, the mirror glass is free.
You'll be looking at a plastic white square that is the mount for the mirror, and it is this square that moves with the motors. Remove the center screw, and pull this center part out. There will be resistance from the plastic retainers that the motors use to push/pull. Don't worry, just tug on it firmly.
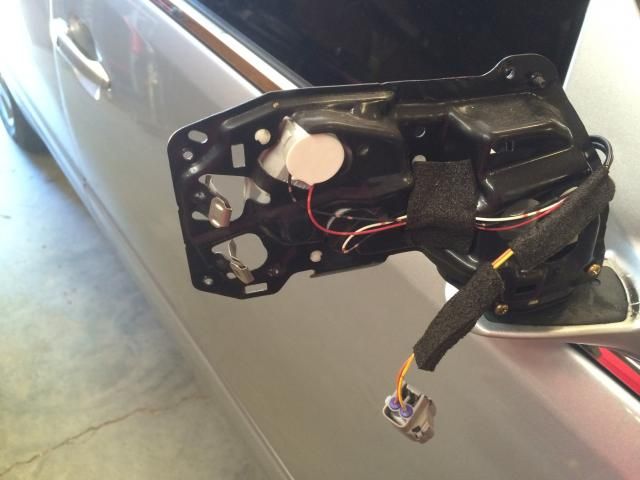
Once that's free, there are 4 screws that hold the rear mirror casing (the part facing the back of the car) of the mirror body casing to the metal. Unscrew those screws, and place the rear casing to the side.
Then you will find that the puddle light on the bottom is easily removed (if it didn't fall out, it's just captured between the two halves. You can unplug the electrical connection.
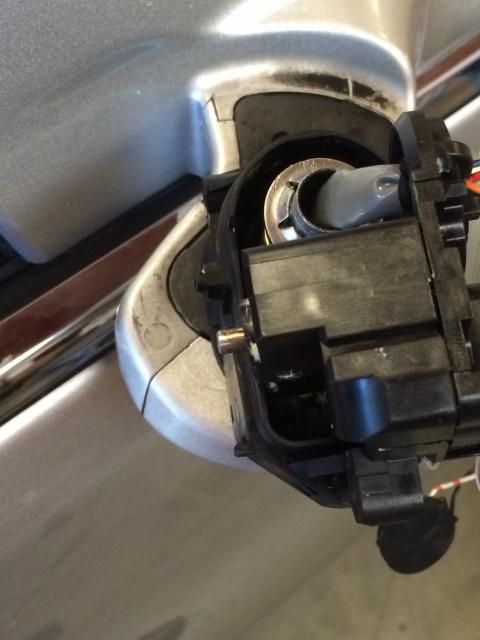
Then you will need to remove the front mirror casing. It is held in by three plastic clips that snap into the metal frame. Grab a pair of needle nose pliers, squeeze the clips together, and the mirror will push off the back. I had to do each clip individually and push the casing out with each one.
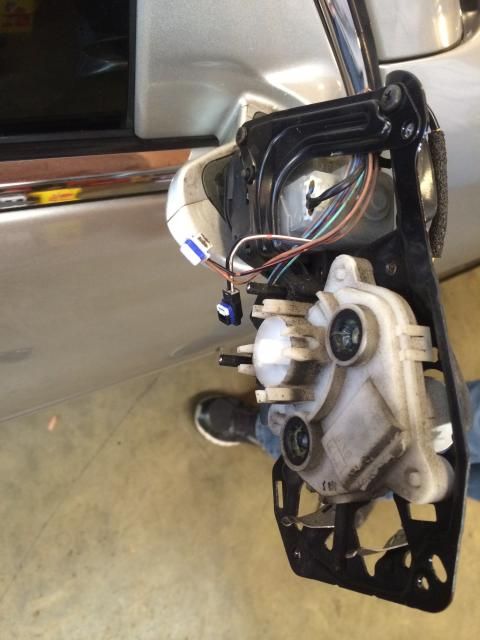
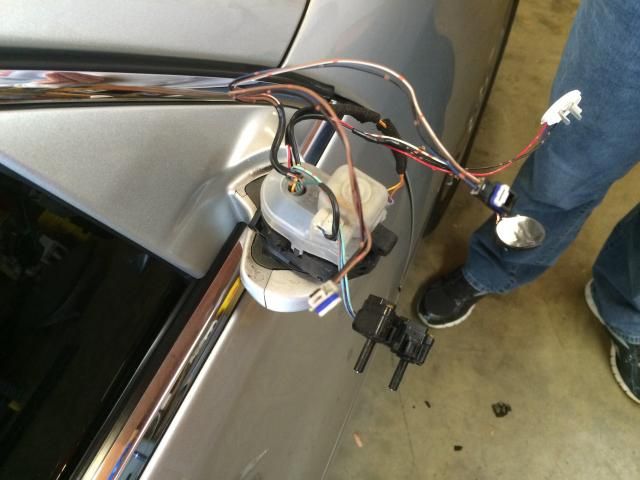
Congrats. Now you've gotten to the guts of the mirror. And it should look something like this
At this point, pull the two mirror motor plugs out - they just pry out of the back with a screwdriver. One is black, the other white, as you see in the above pic.
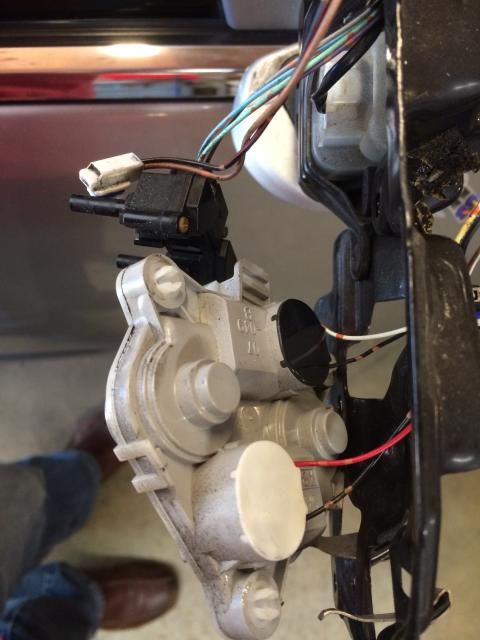
Now - see that white motor housing. We have to remove that. It has 3 pins that hold it in place. Take a phillips screwdriver or a punch, and push from those plastic center pins out. Once the pins are out, you can squeeze the plastic tabs a bit on each one, and it will press through the holes and out of the metal bracket. It looks like this... notice the three tabs that are now free, and the pins removed.
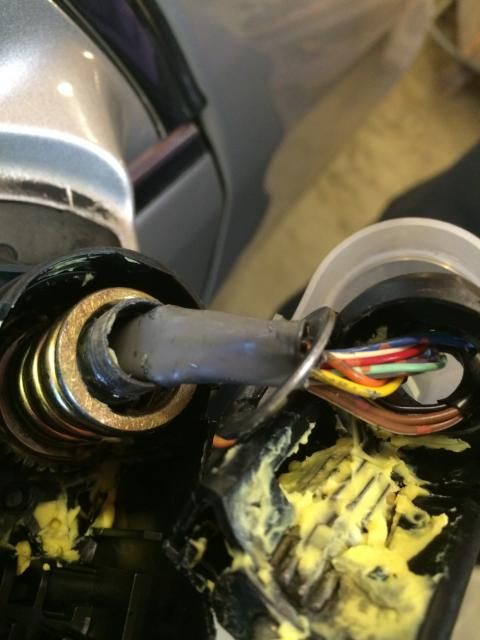
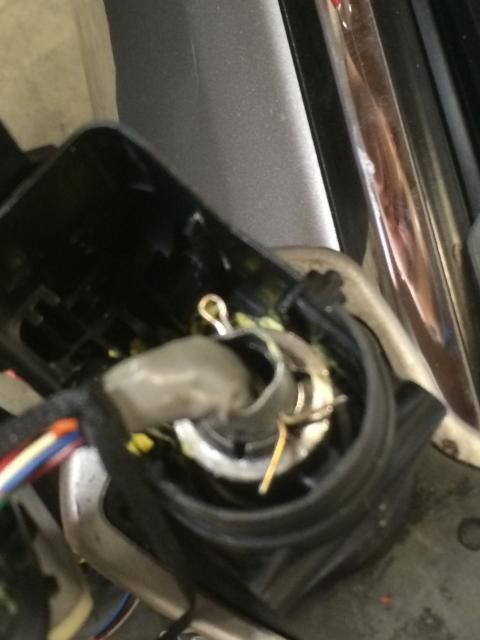
This plastic spring clip - which holds the mirror glass steady when you're moving down the road, and does something electrically (not sure what) slides off the white motor plate you just removed.
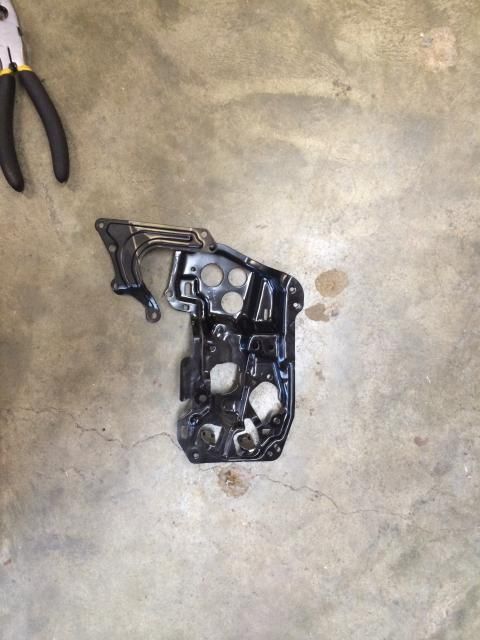
Now... finally... you have access to screws to remove. Three on the front side remove the front part of the mirror bracket. I think there are another three on the backside that hold the other side in. Once those are all removed, the metal bracketry is free and out of the way.
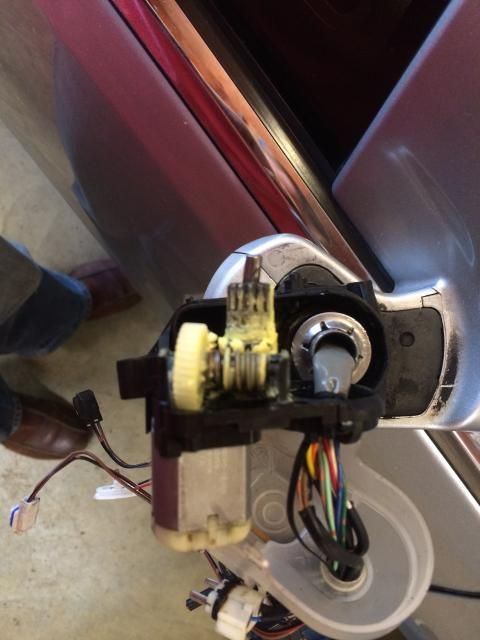
Now... remove the opaque plastic cover of the mirror, you may have to rearrange some of the wires a bit. The top of the motor case removed, and you can see why the mirror is flopping around. That spring retainer isn't even on the shaft anymore, and the mirror isn't being held down against it's gears.
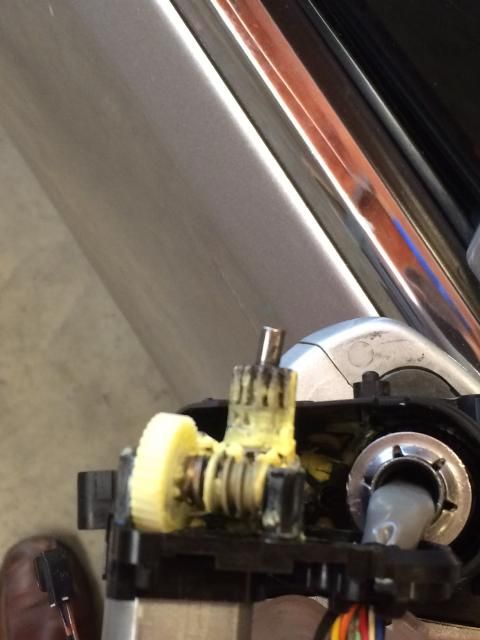
I pulled the motor and gears out, and look... the dang shaft for the motor drive was bent!
Not sure if this was causing my problem, or was a symptom due to the problem, but this clearly wasn't going to do. The gears are held in place by this shaft, which is captured in the bottom and top of the motor casing, in a straight line. Luckily, I had a piece of metal rod in the shop. I got out the micrometer, measured it (1.425", if I recall correctly) cut one to length, polished it up, slathered it with grease, and reassembled.
New shaft installed. Notice it's straight now.
Now... I don't have good pics of this. Sorry. The shaft that the spring sits on... pull the spring, and the whole lower half of the motor casing off (you don't have to cut wires, there is enough room to pull it all off, stack it in together, and have access to the shaft).
The shaft is two diameters. Right where the diameter narrows, about 5/8" or so down the shaft, is where the spring clip to hold the spring is supposed to sit. You may be able to see the original marks on the shaft. That spring has a LOT of tension. I was unable to compress the spring enough to get it back down there, and even if I had been able, the spring clip was so weak it wasn't going to stay.
I got a cotter pin, and the drill out. Using a small long screwdriver, I had a helper press the wires to one side of the inside of the shaft. I then drilled a hole a little bigger than my cotter pin. I did the same on the other side. The hole is offset, it's not through the center, I need to allow room for the wires. It's not a perfect fix, but it's a lot better than just a spring clip.
Once that was done it was time to compress the spring and install the cotter pin. Yea, right. That spring I couldn't compress enough ever to get it in, and I was throwing all my weight into it.
We pulled the spring free, and found two zipties. We compressed the spring fully, and then secured it with the zipties. The spring must be fully compressed, and the zip ties have to sit parallel to the sides of the car. There is barely enough room for the head of the zip tie in this motor housing. Once the spring is down in there (and the metal "washer" is below it, and seated properly), you can put on the spring retainer, and then work the cotter pin into the holes and through. This will require some patience.
Ta da!! Now it won't move. Cut the cotter pin ends down, fold them firmly against the shaft. Take a razor knife, and cut the zip ties, and then fish them out with needle nose pliers. Then reassemble it. Now that the motor is together, you can put the front part of the metal frame on. Once that's there, you can put the rear metal on, being sure to route the wires the same way as they were. Plug in the motor at this point for the folding mirrors.
Now, place the mirror motor plate back in place, and clip it in, and then use pliers to squeeze the plastic pins back into the plastic tabs to lock the tabs in place. Once that's complete, reconnect all of the wires on the motor. At this point, we can reinstall the front mirror cover, and get it clipped in. The plastic will have cooled off now, and it will be more challenging to get in... If you need to reheat the plastic, do so.
Once that's on, reconnect the puddle light and get it in place in the forward mirror. Following that, get the rear cover in place. Pay particular attention to where it joins the front have at the door, it has a special slot there it must fit in, and you must guide the puddle light in at the same time. Once that's done, install the 4 screws that connect that to the metal frame.
Now, re-install the backing plate that the mirror connects to. It's held in by one phillips screw in the center. Once that's connnected, reconnect the black and while mirror wires to the mirror, making sure to put them back into their guide. Heat up the plastic if it's cold. Insert the top of the mirror into the plastic backing plate, and get that engaged fully. The mirror will then swing down, and you can press hard to get it to clip the bottom two clips into the backing plate. You may feel like you are going to break the mirror when doing this. It took a lot of pressure.
Don't worry about the clicking noises as you move the mirror against the motor pins. It's fine. Once the mirror is reconnected, clean the glass, and check the operation of all of it.
This wasn't an easy project - in fact - it was a lot more involved that I had originally thought it would be. But, it's nice to have a non-floppy mirror. And for the cost of a $0.20 cent cotter pin, and a few hours of work, I'd say it was worth it.
Honestly, it's not that bad. There's a lot of steps, but none are difficult except for a couple. Drilling the hole requires some care and patience. Getting the damned spring compressed is really awful. And then getting the cotter pin through the holes is a pain. The rest is just easy disassembly and re-assembly.
And yes, it's a *LOT* better than paying a stupid sum to Lexus, when one cotter pin, and an afternoon, fixed the problem permanently.
The write up was very good but I am afraid that this was a fail for me... not an epic fail but a failure just the same. In my case a "helpful" car wash attendant decided to close my mirror for me.
I tried my best to follow the instructions and they were spot on . The only thing that I can add to this tread is that it really is a two person job. If I would have had a second person to hold the washer down it would have been a bunch easier. I was able to press the washer down but the shaft was way too chewed up for the to be any chance of the washer holding. If I would have had a helper and a better set of tools maybe I would have had better luck.
As it was I was able to drill a hole and use a cotter key but I nicked the wires a bit doing that so I lost one of the motions on the mirror and the folding feature stopped working. I don't know if that was because of nicking the wires or some other issue.
In the end, I am only out a bit of time and the mirror is at least a functional until I find a reasonably priced used one.
hello,
your mirror repair discussion is excellent.
i hit my driver side mirror on garage side. Nothing broke but now the mirror folds wrong and not in sinc with the driver side. And wobbles a bit even when I manually move to the correct position to drive.
i opened everything like you suggest but my folding mechanism housing is solid black and don�t know how to open this to get at the gears.
Excellent guide! My mirror was doing the same, flopping forward at random. It would still fold against the door window, but would rotate completely forward at random. The problem was caused by the heavy “push nut” sliding off the top of the metal tube. I’m pretty sure I broke it myself months ago when I stood up after working under another car parked adjacent in my garage. I hit my head on the bottom of the mirror and apparently forced that push nut off the tube. I wasn’t brave enough to drill into the tube, afraid of drilling into the wire harness. I compressed the spring and held with zip ties. Then “flared” the top of the tube. The first 1/8 inch of the tube crumbled and broke off but I was able to deform the remainder enough to positively retain the push nut. It’s not as low as it should be, but works fine now. With no damage to the wiring.
 01-21-15, 07:36 PM