When you click on links to various merchants on this site and make a purchase, this can result in this site earning a commission. Affiliate programs and affiliations include, but are not limited to, the eBay Partner Network.
Spent a few hours on the "new" old car today. To wit:
Tore the console apart trying to figure out how to get at the plastic shift gate - learned a few things. Finally repaired the clear plastic shift "gate" - the adhesive was failing, so I cleaned that all up. Looks way better.
Removed the crummy looking, weathered, gold "L" logo from the center caps of the wheels, painted them a stainless color, and reinstalled them.
Used the woolite method of cleaning the leather with fabulous results - waiting for the protectant to arrive via Amazon.
Waxed the second third of the car. Will do the last third tomorrow night.
Replaced the cabin air filter - wow - I guarantee that was the first time that's been done in the life of the car - it was absolutely filthy and packed with junk. If you haven't done that, you should do it...5 minute job.
Registered on Lexus Drivers to see the service history.
Put Rain-ex on the windshield.
Cleaned and conditioned the rubber side window tracks and all the rubber seals with Lexol vinyl cleaner and protectant.
Checked all the lights and found only one in need of replacement - one front parking light.
All in all, a good few hours' work.
I should post pictures, shouldn't I? It's too dark at the moment to take good ones...I'll grab some tomorrow.
Spent a few hours on the "new" old car today. To wit:
Tore the console apart trying to figure out how to get at the plastic shift gate - learned a few things. Finally repaired the clear plastic shift "gate" - the adhesive was failing, so I cleaned that all up. Looks way better.
Hello there! Would you please share further details of how you accomplished this? I was under the impression that I would have to replace that entire piece but if I'm able to remedy the issue myself then I would much prefer to do that instead. Thank you very much.
OK, here are a few items. I'm sure much of this is on the site somewhere already. I did not think to take pictures during the process, so sorry about that, but I'll do the best I can.
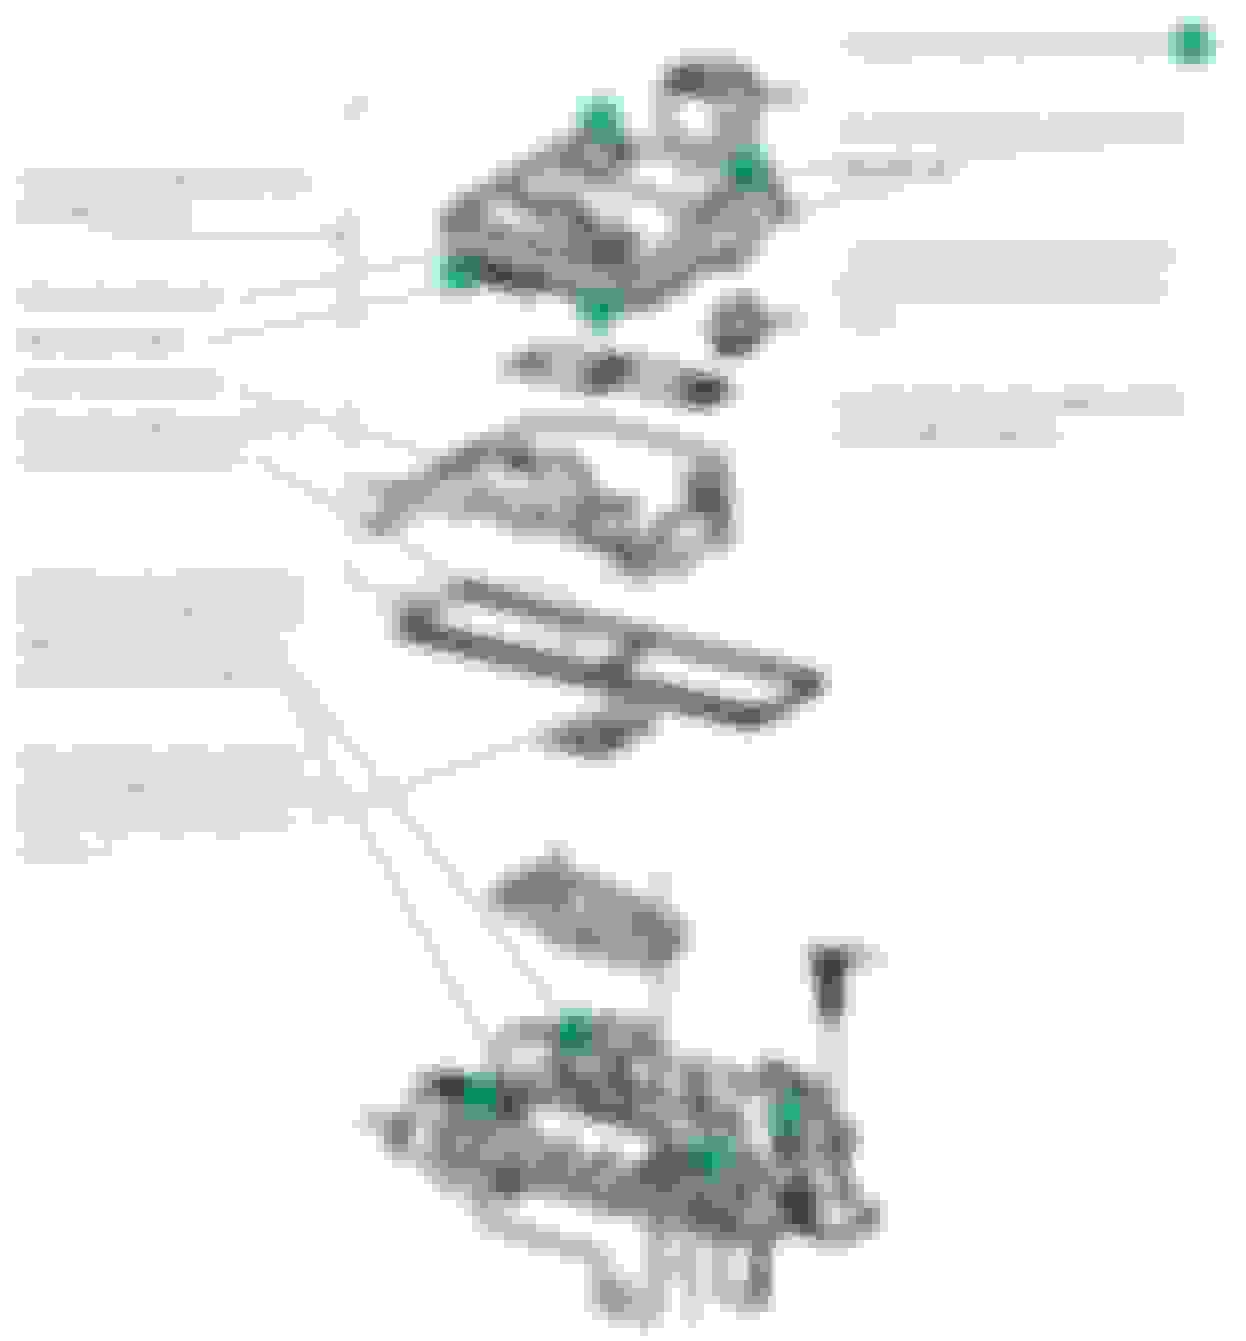
This is the video that helped me remove the console. The guy in the video is removing the radio, so all of the stuff at the beginning - with the A/C vents is not important to the console and shifter, but the rest is: Link Here
There are two clear plastic parts to the shift gate - one sits on top of the black plate and is affixed to the black plate with double sided tape - that's what makes them look awful - the tape breaking down. The other is clipped on the bottom of the black plate and includes the (very easy to break off, but also easy to super glue back - ask me how I know this) rounded part that directs the long rubber shift **** surround down into the console when the shift lever is in Neutral or Drive or Low 3, 2 or 1.
This three part assembly then just clips in place to the top of the shifter. I'm sure this three part assembly is sold only as a unit, but it's possible to take apart.
Here is a drawing of the approximate locations of the clips and some other details:
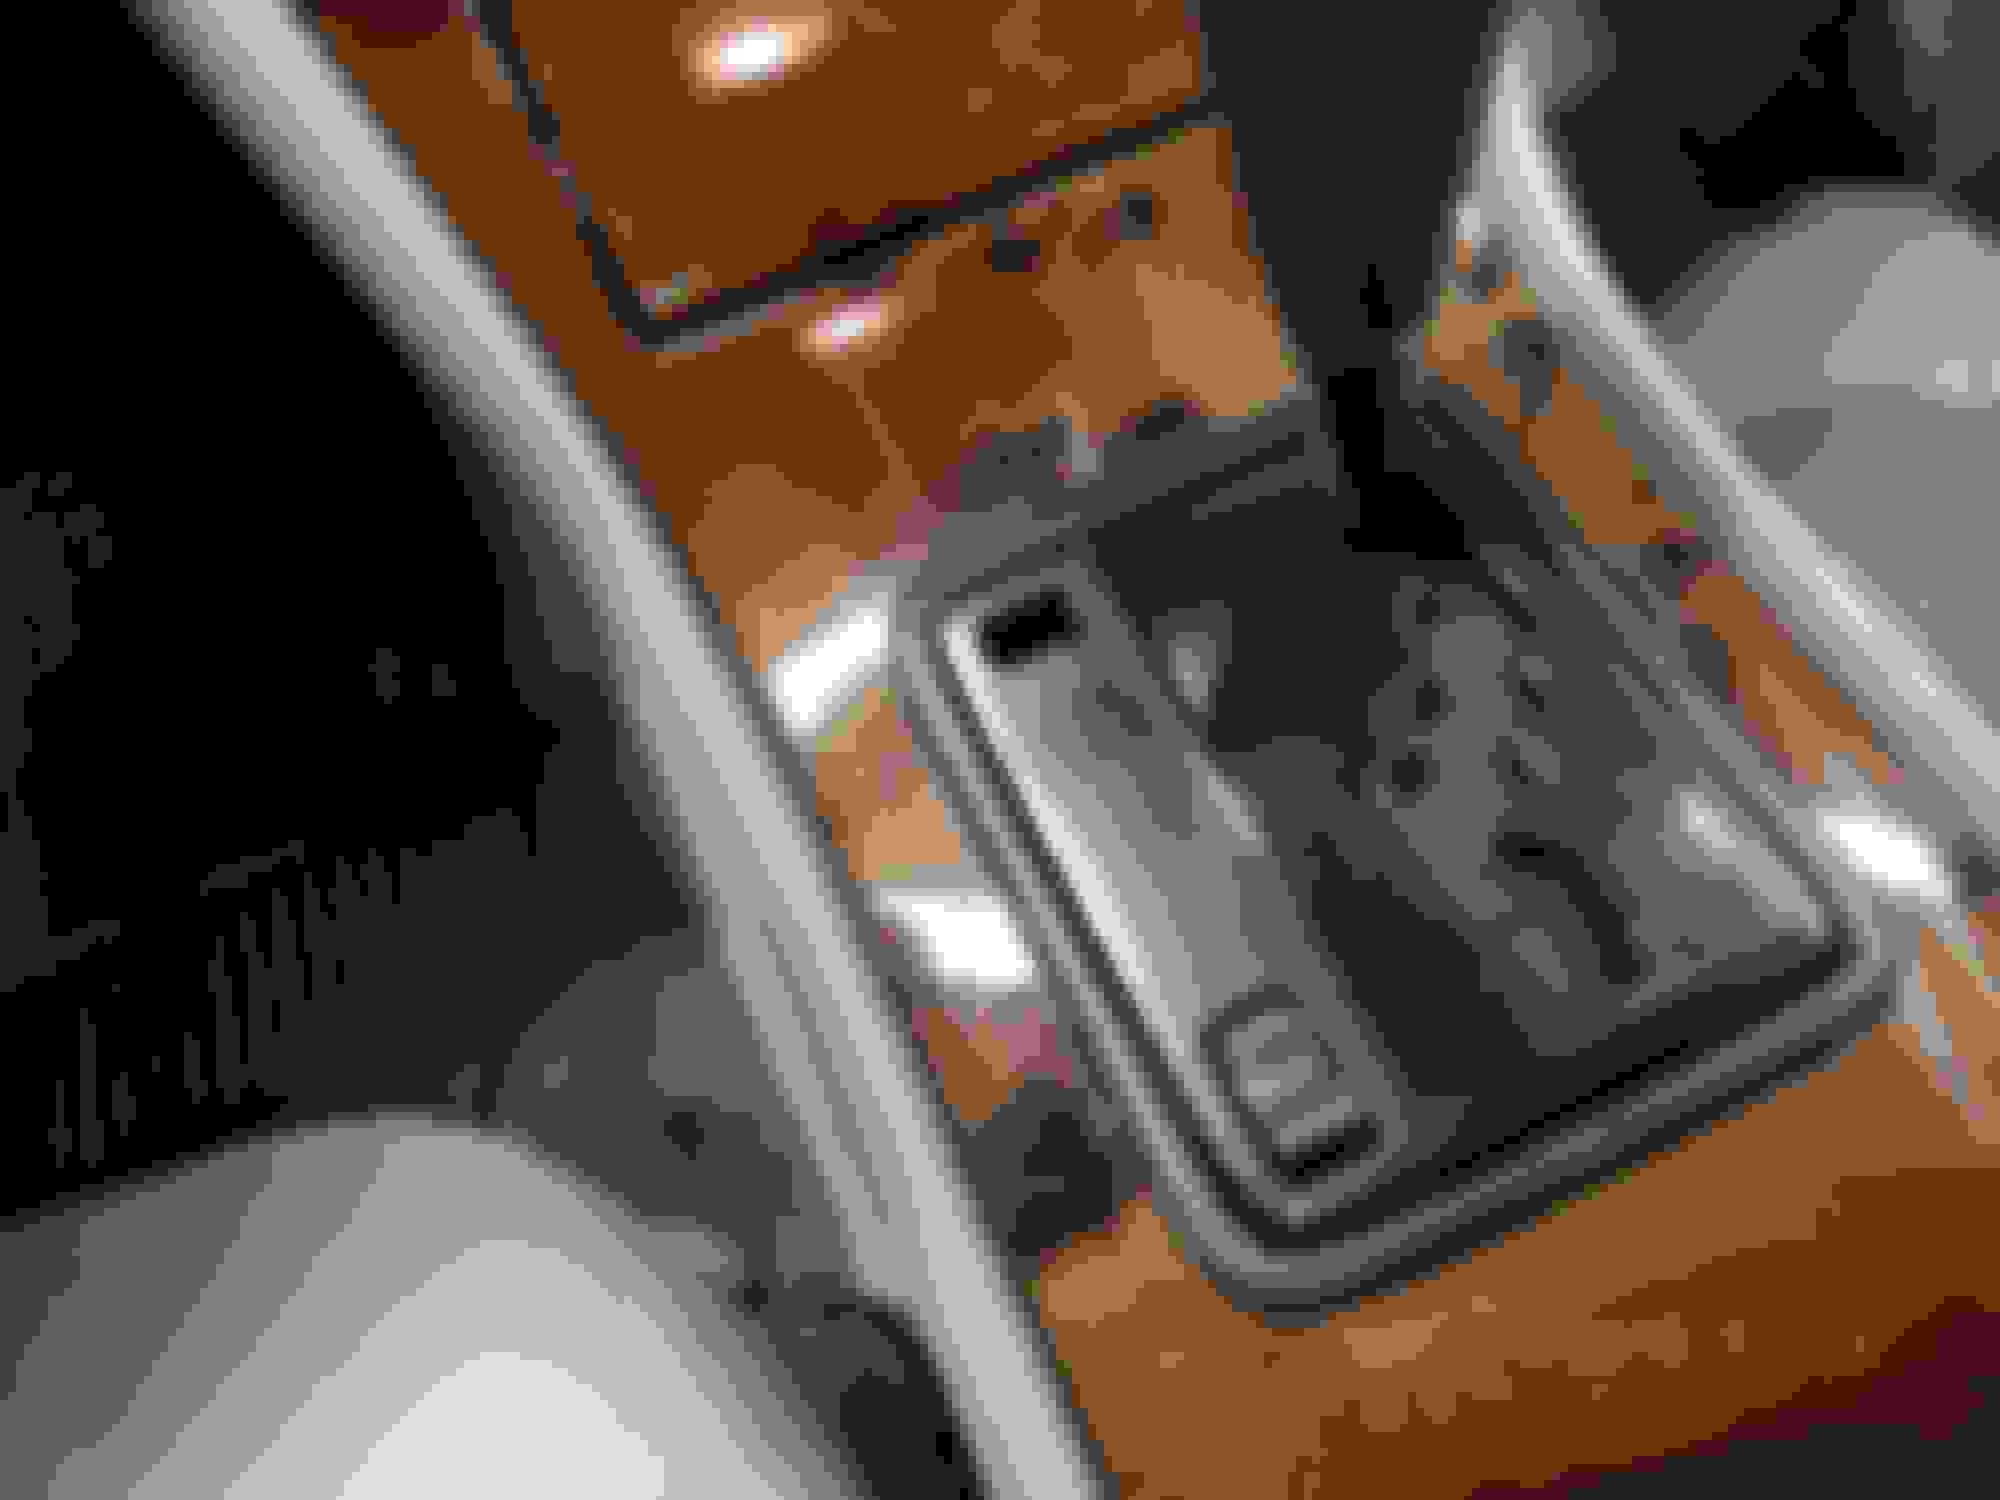
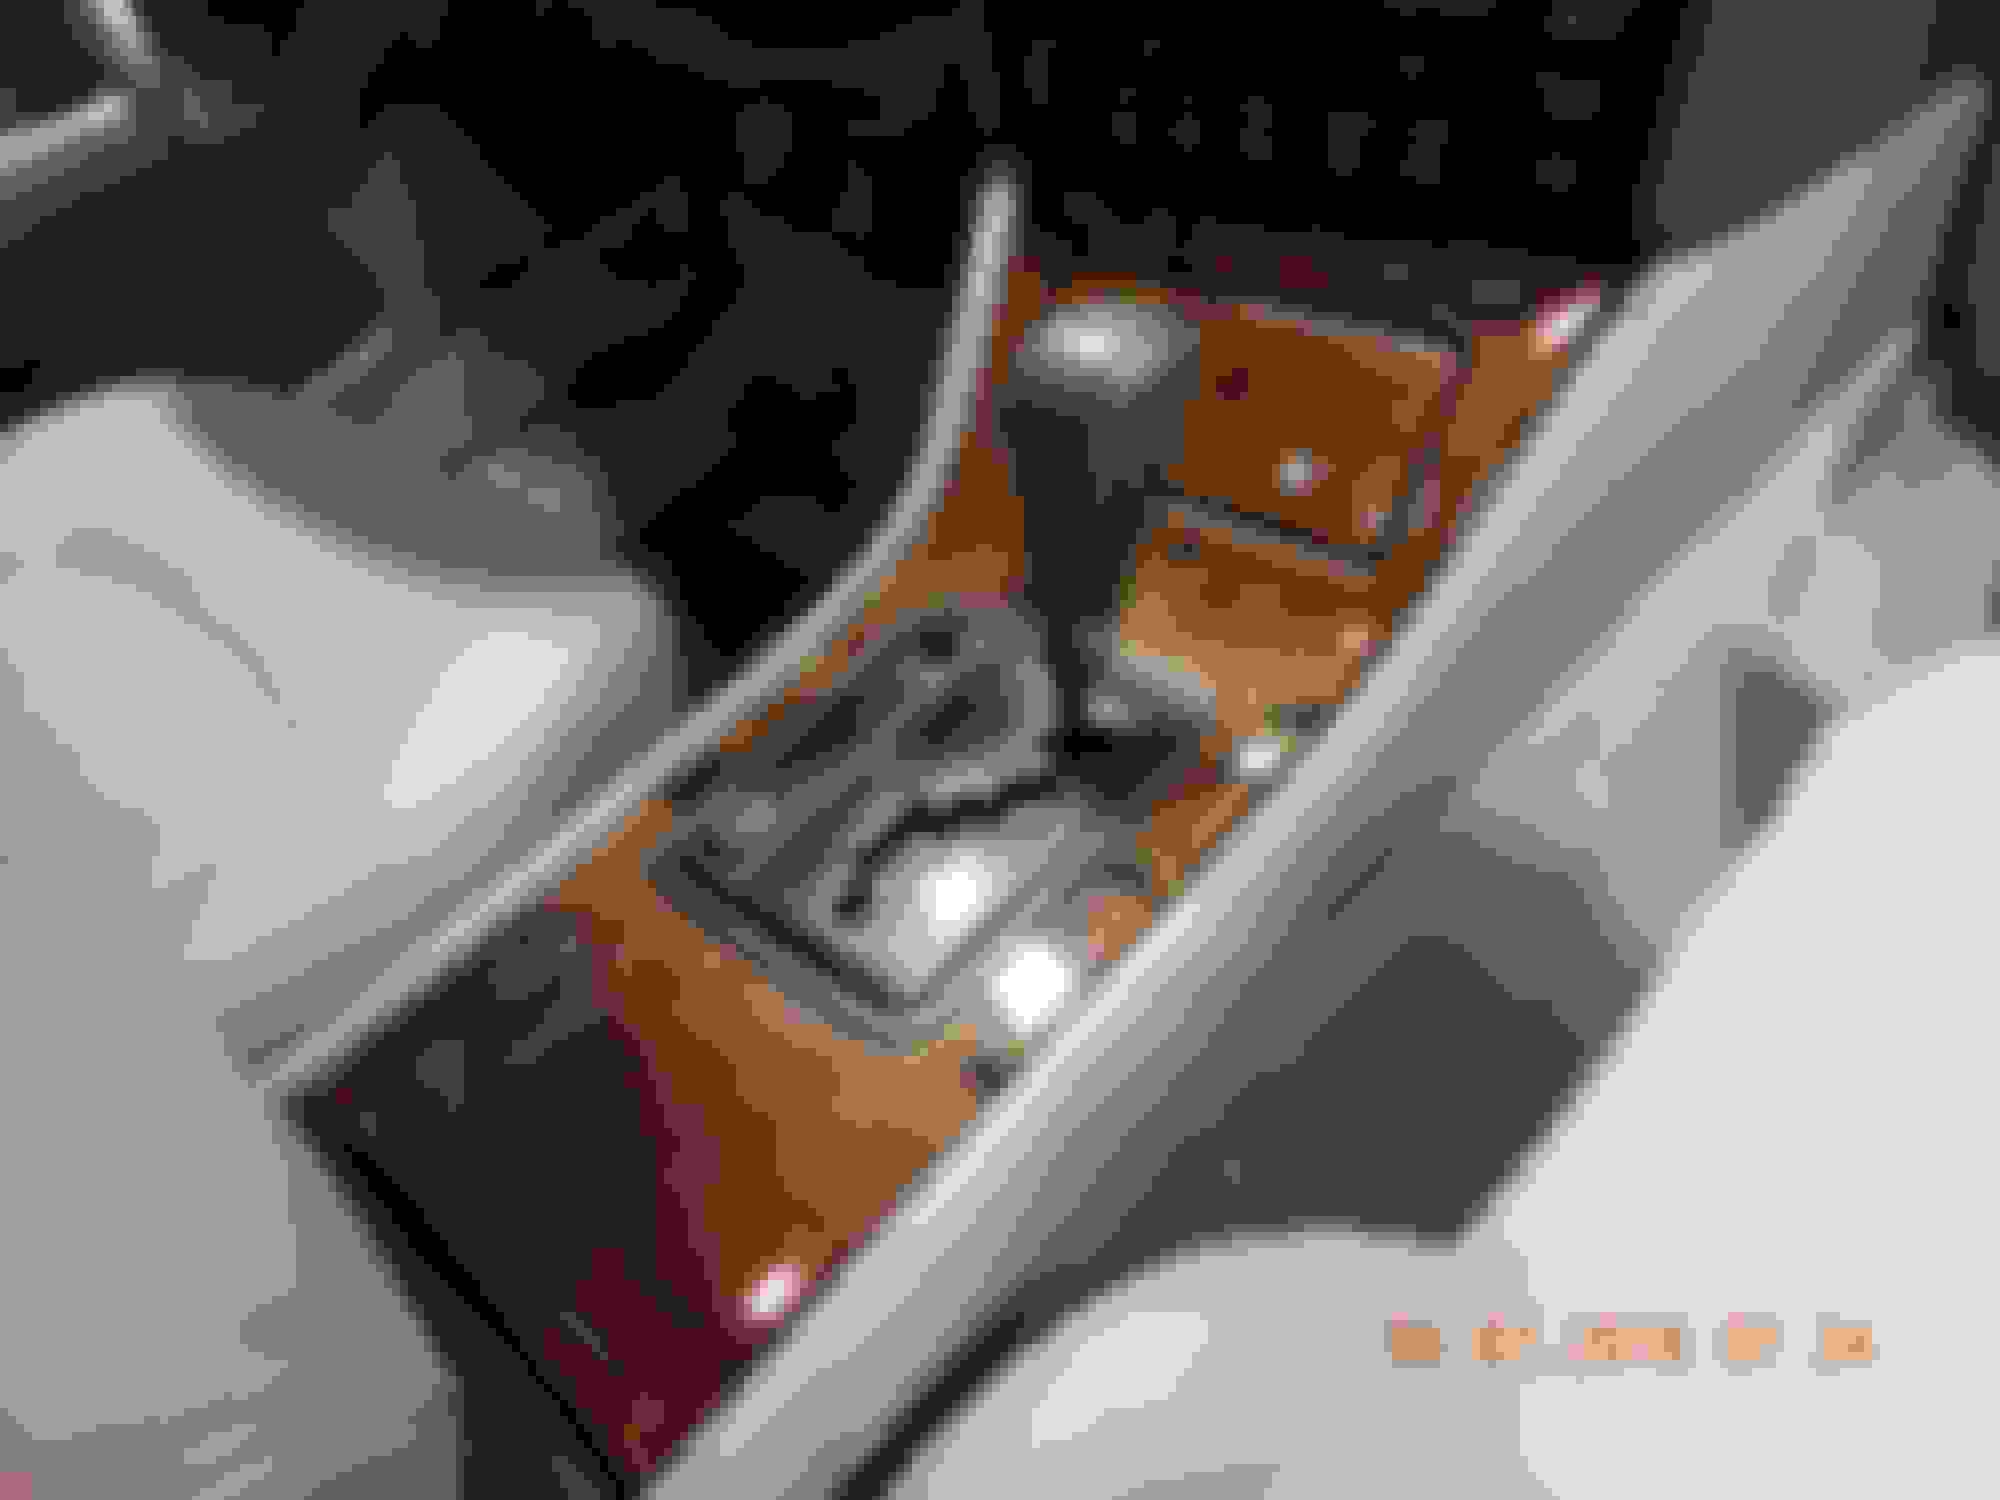
Again, the lower clear part clips to the black gate. The upper clear part - the part with the actual numbers on it, is double-side taped to the black gate and is removable WITH GREAT CARE. I just slid a thin tool behind the two and carefully worked them loose from each other. One can then scrape off the old adhesive on the black piece. The black gate piece winds up looking pretty good.
I found it easier to work the upper clear piece loose from the black gate by separating the black gate from the lower clear piece. Remember to use care - these are old and brittle.
Now, to be clear, separating the upper clear piece from the black gate will likely ruin the numbers unless you're far more careful than I was. :-( So, when I saw this happening, I had to decide - can I more easily live with the crummy looking adhesive, or something else in the gate? I decided to go with something else - and here's what i did. Since the shift indicator is also on the instrument panel, I decided to paint the underside of the upper clear plastic piece, so when you look at my shifter, all you see is black. At least for now - I prefer this look to the mottled looking adhesive. In days to come, I may try to find a new upper plastic piece, but for now it works.
Now, as you can see in the pictures, what I did not do on Monday is polish the face of the upper clear piece...like you would a plastic headlight. I ran out of time, but I'll do that someday soon, which will clean the look up and smooth it out. All of the roughness you see in the pictures is from 71K of use and is on the top of the upper clear piece, and it will buff out. The back is smooth and perfect, as the top will be once buffed.
The good thing is, when re-installing the upper clear piece, the tolerances are so tight, you don't really need adhesive - it just sort of snaps back into the black gate. If you really need some adhesion, I'd cut tiny strips of double sided tape - not the think 3M molding tape, but just Scotch double stick tape, and put a few pieces vertically on the long portions of the black gate. That should more than hold it in place.
When I'm ready to buff the top out, or replace it with likely a junkyard piece, I'll be able to easily remove the upper clear (now painted black on mine) piece.
ddiddle, I just wanted to start off by saying thank you very much for your awesome and informative post! It's not often that you see people experimenting with their vehicle(s) and sharing the results. The video link was also very handy as I am a visual learner and it's always helpful for me to have something to refer to while working on my own car. That being said, I think I'll probably wait until I can source a suitable replacement for the upper plastic piece when the time is right.
Be sure to share some photos with us once you finish waxing your car!
Wow really nice interior. And when dealing with stuck together parts you and always use a hair dryer to warm it up and make the stickum a bit softer and easier to work with.
It's funny - those pictures make it look way worse than it does in person. Even as it is, it looks way better than the adhesive pieces all coming up, etc.
I'm pretty much an as-factory person, so eventually I'll be going to the wrecking yard to see what I can find.
Even if I can't find a factory one in excellent condition, I think with my printer and some high-end clear printable adhesive labels - like sign stock, I could create a close factory replica.
Yes, I think you could make a template like that...that's what I'm thinking might be an answer. Parts of it would have to be printed in black to stop the indicator light from coming through in unwanted places, but it's very possible.
I had the same gross shifter gate but opted to cut a custom piece of rosewood veneer, lacquered it, and glued it on.
I like your black shifter surround more. My veneer grain clashes too hard with the surrounding wood grain of the center console.
 09-05-16, 06:04 PM