My 93 LS400...


 08-27-09, 03:29 PM
#19
Once we determined the ideal location of the tank and compressors, we can start assembly of the air suspension components on the base plate. Secure the (2) compressors on the base plate with the provided nuts and bolts. APPLY TEFLON TAPE, about 3~5 passes, TO ALL THREADED PARTS of each components. Attached the lead hoses to the tank. You may install a water trap in between the compressors and the tank or tank to the valves. This will help prolong the life of the valves by minimizing moisture in the valves, which over time, can corrode and cause valve malfunction.
You should have something similar to this...

Now, we need to plumb the air lines. When you install the fittings, make certain that you wrap the threads with teflon tape at least 3~5 passes. Install the fittings to the billet base of the bags hand tight first then tighten it 1/4 of a turn using a 10mm deep socket.
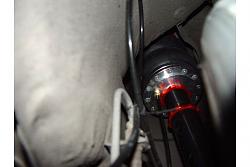
Front air lines...
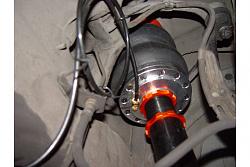
Ran the front air line through the left and right side fuel line covers...
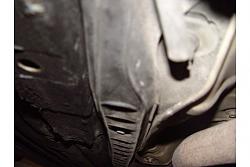
Rear lines...
All the lines will go through the left and right side ABS wire harness rubber grommet to the trunk...

The front left and right air lines will meet to a T-fitting and goes to the appointed front valves. The rear left and right air lines will also meet to a T-fitting and goes to the appointed rear valves.
You should have something similar to this...

Now, we need to plumb the air lines. When you install the fittings, make certain that you wrap the threads with teflon tape at least 3~5 passes. Install the fittings to the billet base of the bags hand tight first then tighten it 1/4 of a turn using a 10mm deep socket.
Front air lines...

Ran the front air line through the left and right side fuel line covers...

Rear lines...

All the lines will go through the left and right side ABS wire harness rubber grommet to the trunk...

The front left and right air lines will meet to a T-fitting and goes to the appointed front valves. The rear left and right air lines will also meet to a T-fitting and goes to the appointed rear valves.

 08-27-09, 04:14 PM
#21
Since I do not do this for a living... One of the time consuming phase for me is planning the wiring process. I wanted to have the following: able to remove and reconnect the wires with ease, and wire organization. If you just wanted to tap and splice everything then the KSport Air Pro kit is very complete to finish and make the system run. I wanted to use quick disconnect harness to make it "like" plug-n-play so I bought the following extras: (4 pairs) 2 pin quick disconnect harness, (2 pairs) 6 pin quick disconnect harness, 12 and 22 gauge spade connectors, and 12 gauge ring terminals. I spent an additional approximately $50.00 or less for these items.
Run the (2) 40amp fused 12 gauge wires from the battery-under the driver side fender liner-inside the driver side kick panel-and under the carpet to the trunk...
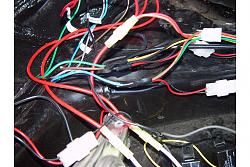
2 Pin and 6 Pin quick disconnect harnesses...
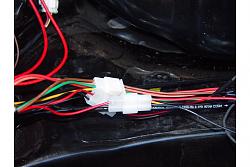
12 and 22 gauges spade connectors and ring terminals...

Run the (2) 40amp fused 12 gauge wires from the battery-under the driver side fender liner-inside the driver side kick panel-and under the carpet to the trunk...


2 Pin and 6 Pin quick disconnect harnesses...

12 and 22 gauges spade connectors and ring terminals...

Last edited by Garage7RP; 08-27-09 at 10:11 PM.
08-27-09, 05:36 PM
#23
Former Sponsor
iTrader: (6)

Join Date: Jun 2009
Location: NY
Posts: 766
Likes: 0
Received 0 Likes
on
0 Posts
I am very impressed with the install, well actually, the whole build in general. Looks like you are putting in a lot of hard work and it is finally paying off.
For a pricing/ordering, please shoot me a PM, I guarantee pricing will be the best you find, low overhead = low pricing.
For a pricing/ordering, please shoot me a PM, I guarantee pricing will be the best you find, low overhead = low pricing.


 08-28-09, 12:17 AM
#30
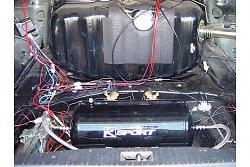
The KSport Air Pro kit comes with all the wires pre-labeled, the relays are pre-wired and labeled too, and the wireless remote control box wire harness is also pre-labeled. There will also be another set of relays inside the compressor box but you do not need to use them.
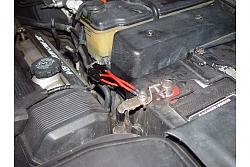
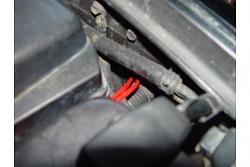
Once we have the (2) 40amp fused 12 gauge power wire directly ready from the (+) battery, all we need is to look for a ignition switched activated (+) 12volts power source. I used the gray/white wire from the radio antenna harness.
When you have all the wires set-up and ready, you can begin connecting each wires as directed by the labels and use the instruction schematics and diagrams as a guide.
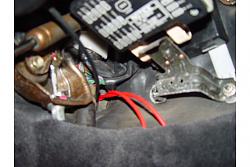
Connect all the power wires and ground the system appropriately.
When everything is connected. You should have a wire mess like this...
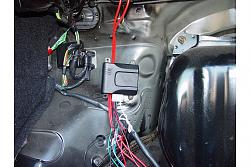
Wireless remote control box...
Panel switch and air pressure gauge location...
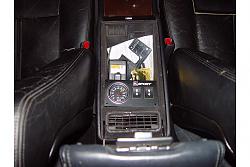
I decided to place them inside the center console. I also connected the gauge light wires to the cigarette lighter harness for a switch 12 volts source. It will only light up when the ignition is on.
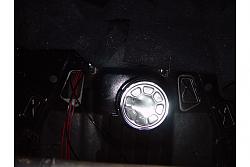
Run the wires from the wireless remote control box and air lines for the air pressure gauge from the trunk through the rear firewall. Remove the soft metal cover with an "X" stamped on the cover...

Once we have the (2) 40amp fused 12 gauge power wire directly ready from the (+) battery, all we need is to look for a ignition switched activated (+) 12volts power source. I used the gray/white wire from the radio antenna harness.
When you have all the wires set-up and ready, you can begin connecting each wires as directed by the labels and use the instruction schematics and diagrams as a guide.
Connect all the power wires and ground the system appropriately.
When everything is connected. You should have a wire mess like this...

Wireless remote control box...

Panel switch and air pressure gauge location...

I decided to place them inside the center console. I also connected the gauge light wires to the cigarette lighter harness for a switch 12 volts source. It will only light up when the ignition is on.
Run the wires from the wireless remote control box and air lines for the air pressure gauge from the trunk through the rear firewall. Remove the soft metal cover with an "X" stamped on the cover...

