
DIY - How to install a S4play Diffuser
 09-20-12, 02:08 PM
#1
Lead Lap
Thread Starter
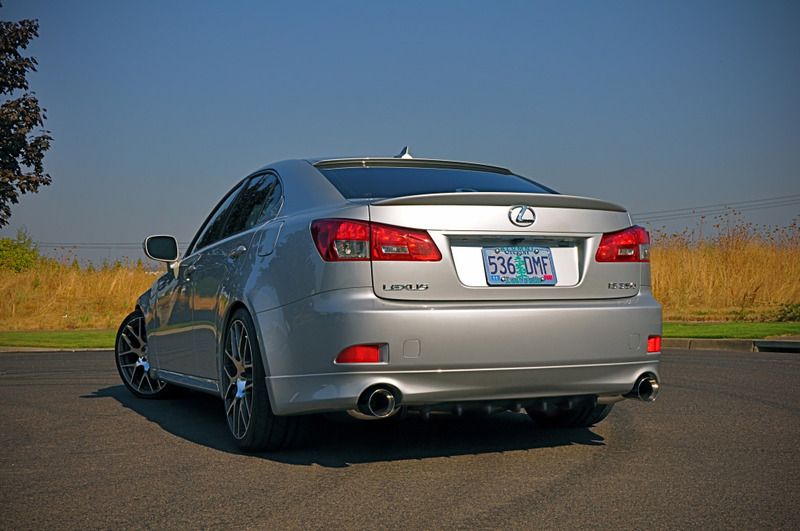
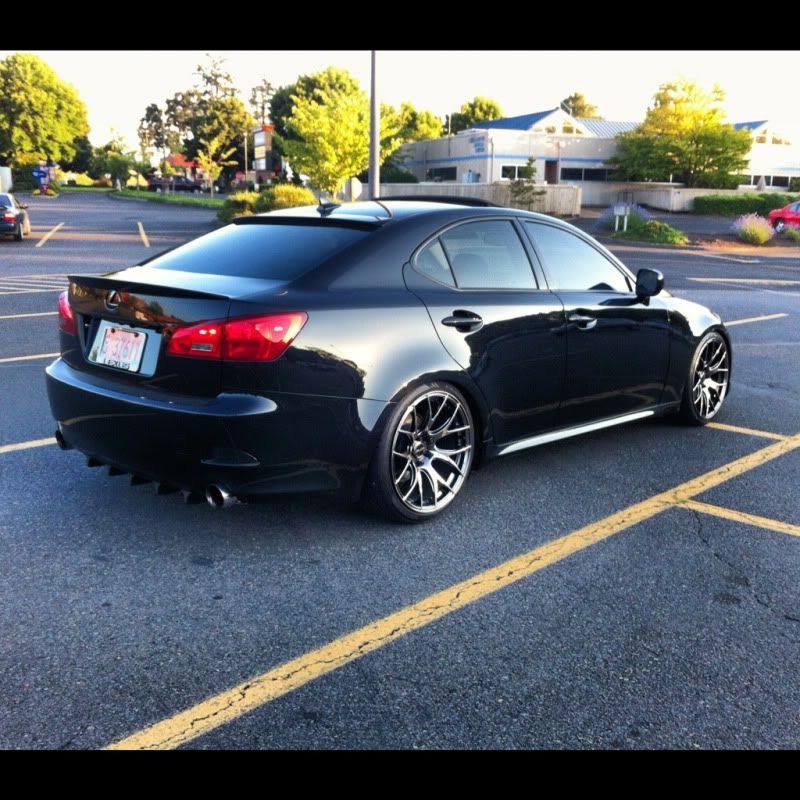
In this DIY I will show you how to install the S4play diffuser onto your IS250/350 with, or without GFX rear lip. Installation of the diffuser is relatively easy and this DIY can be tackled by a novice. My diffuser did not come with instructions, so I gathered info from the web, and made a few changes to my process.
If you are intrested in getting this diffuser for yourself I got it from Exact Motorsports, a vendor here on CL.
NOTICE! AFTER REVIEWING THIS DIY I HAVE REALIZED I DID A GREAT JOB AT MAKING THE INSTALL SEEM WAY MORE COMPLICATED THAN IT NEEDS TO BE. IT REALLY IS SIMPLE, ESPECIALLY WHEN YOU USE THE SUPPLIED HARDWARE AND MOUNT IT IN THE CORRECT POSITION.
Optional installation steps
I have no doubt that the supplied self tapping screws can get the job done, but as an engineer I wanted to ensure this install was as solid as possible. I purchased larger-threaded screws, machine screws with washers & nylon nuts, and clear silicon.
For the larger screws I purchased #12x1" flat-head for the screws you will be able to see & rounded-head for the holes closer to the front of the vehicle.

If you are going this route you will need to enlarge the holes that will use the larger flat-head screws so they flush better. Just be sure not to make the whole too large, or the screw head will just pass through.
#10 3/4" machine screws, etc.
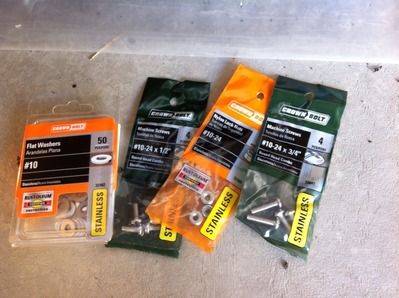
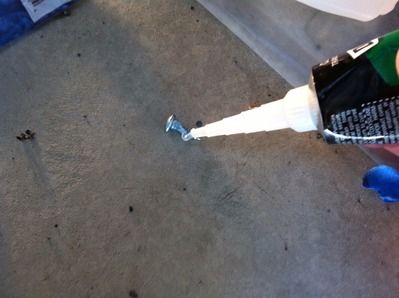
Clear, or black silicone. I placed this on the screw threads to, hopefully, combat anything coming loose from vibrations over time.
I also grabbed a can of black plastidip to re-spray the diffuser after installation.
Installation
I put the rear end of my car up on jack stands to give myself more room to work. Locate the two tabs the red arrows are pointing to. Measure out the center between these tabs and make a mark. Using a piece of painters tape, extend that center mark to the rear bumper.
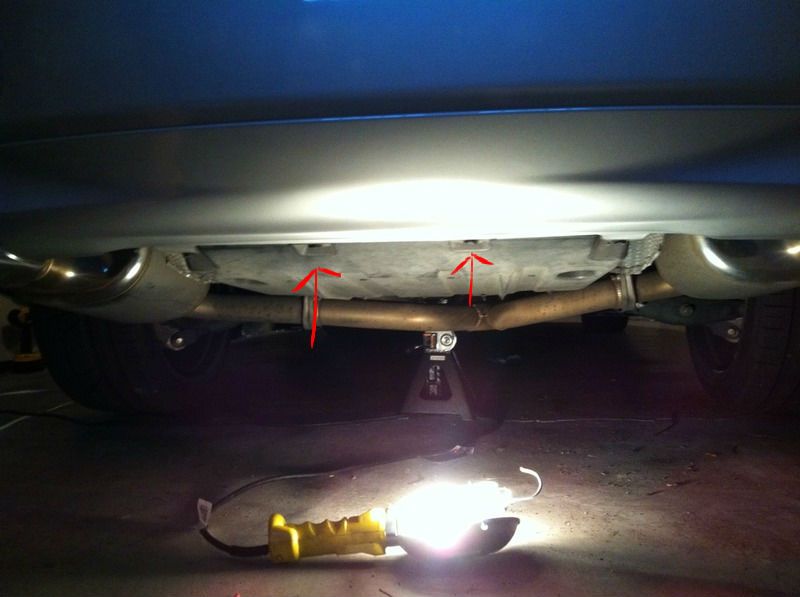
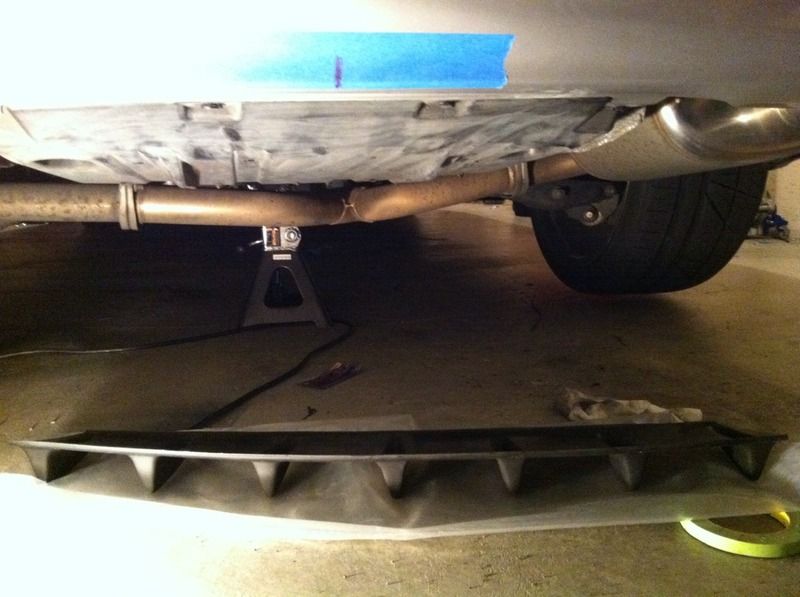
I then used a 2ft level, aligned with the center of my backup cam, to verify that my center line was proper.
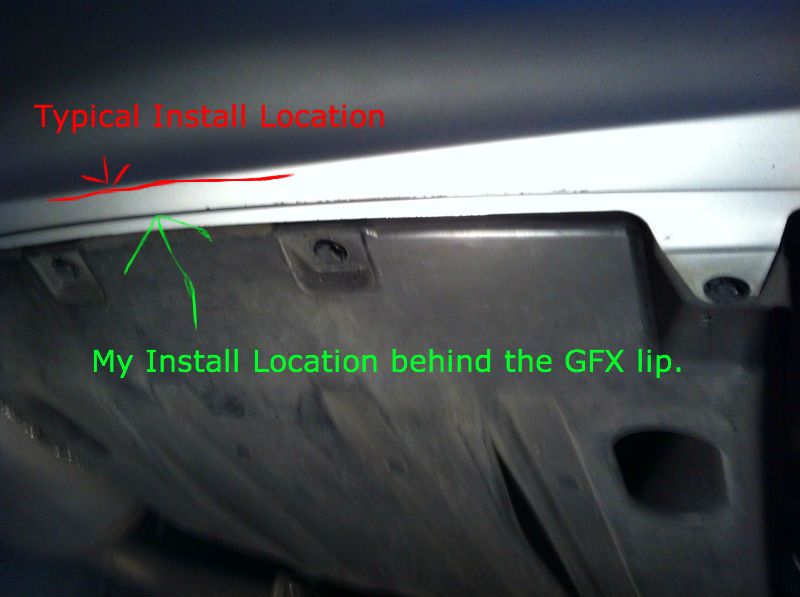
Diffuser position
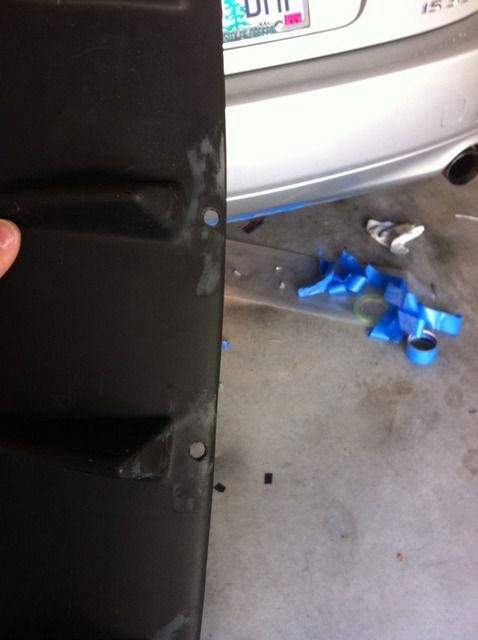
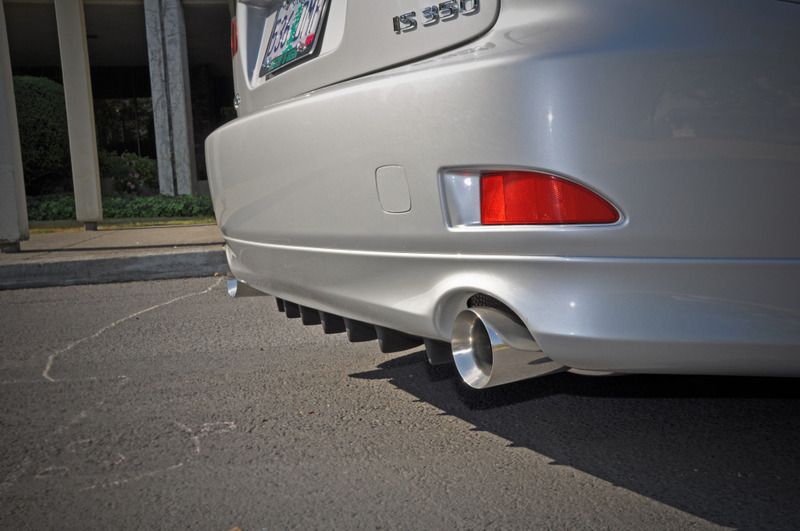
From what I have seen on the web the most common placement is the edge of the diffuser, closest to you when installing, is brought out to the bottom edge of the bumper (red line in photo). I wanted to try and give my diffuser a more integrated look with the GFX kit, so I decided to place just behind the edge of the GFX lip (green arrows). If you choose a further back position as I have you may have to slightly modify the diffuser to make it line up right, as the outer-most screw holes will have nothing to mount to and the outer edges may need to be trimmed up a bit if they interfere with a level installation. I trimmed my edges just slightly using a pair of dikes.
Using 2" blue painters tape, align the diffuser so it is centered, and the edge of the diffuser facing you is in the position you want on the lower bumper.
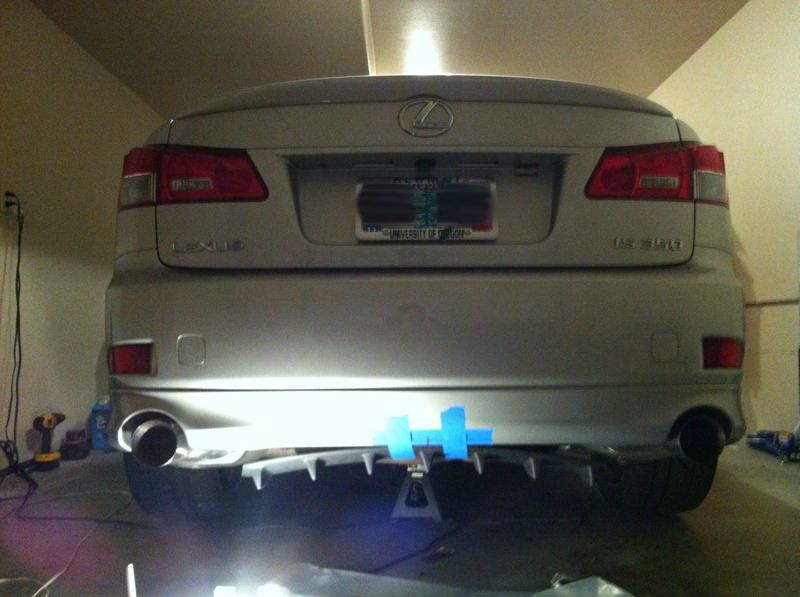
Use more tape to hold the diffuser up as work your way towards the edges of the diffuser ensuring your holes line up from edge to edge. If you placed your diffuser further back your outermost holes will not line up with the bumper.

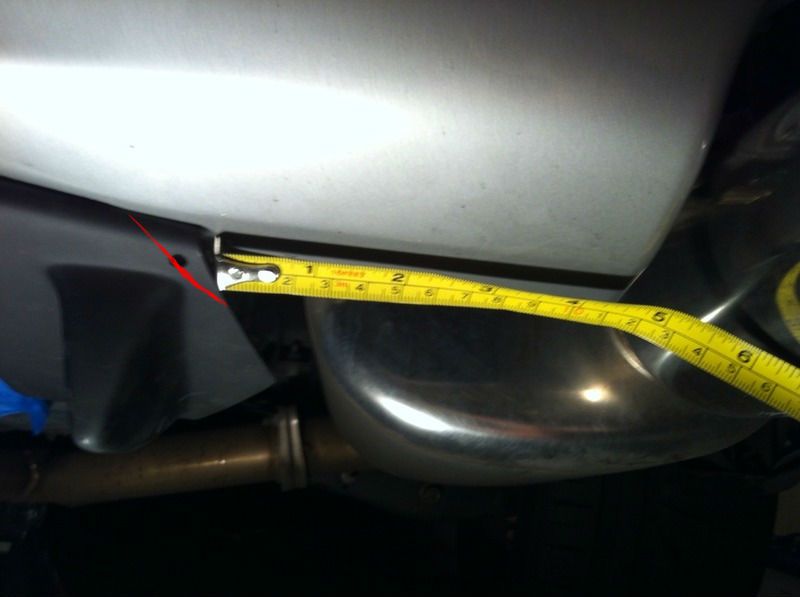
Now measure the distance from the edge of the diffuser to the edge of the exhaust cutout to be sure you are 100% centered. If you mounted the diffuser further back cut at the red line so the edge does not interfere with the bumper tab.
Once you are satisfied with your placement it is time to insert the screws. If you are using the larger non-self taping screw be sure to drill pilot holes. When installing any screws into plastic hand tighten only! Once you strip out that hole your only option will be to move to a larger diameter screw.
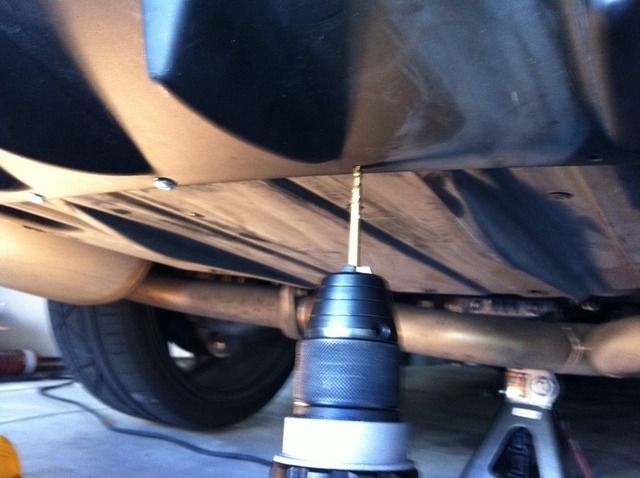
If you installed your diffuser further back as I have, the outer edges are just hanging there for now. Drill your own hole that goes through the diffuser and into the lower bumper. Install a machine screw with washer and a nylon nut. This should all but guarantee that your diffuser is never going to fall off

View from behind bumper...was not easy to get this photo right!

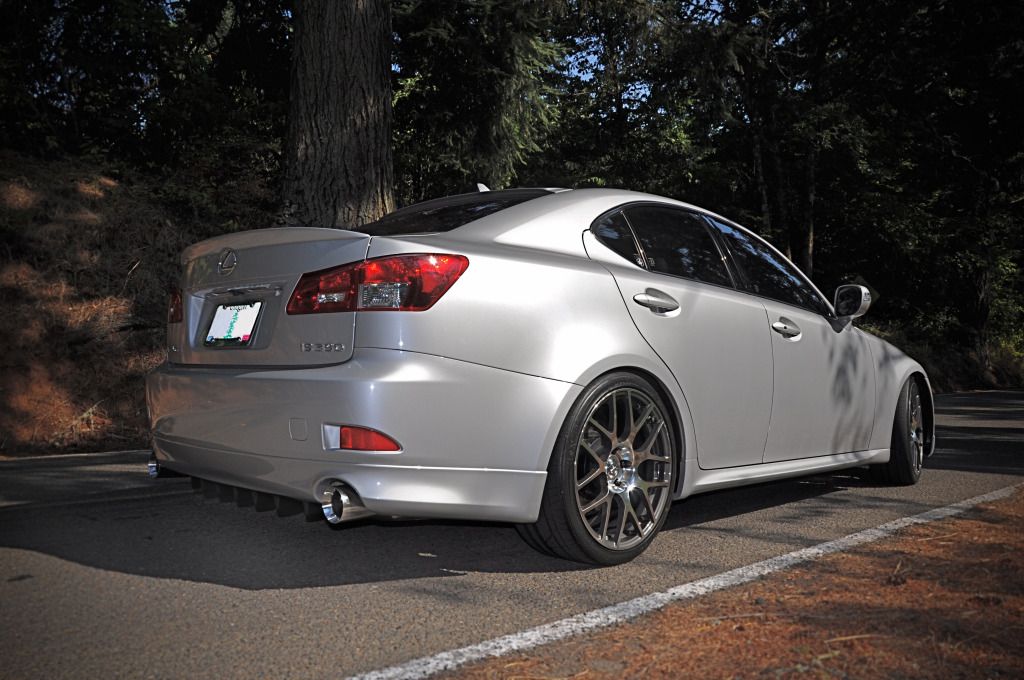
At this point, if you are happy with the install, you are done! I, on the other hand, wanted to cover up the silver screws and touch up the look of the diffuser.
More optional work!
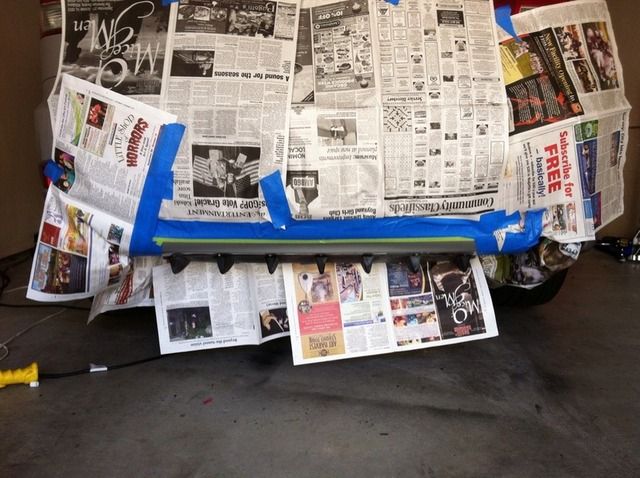
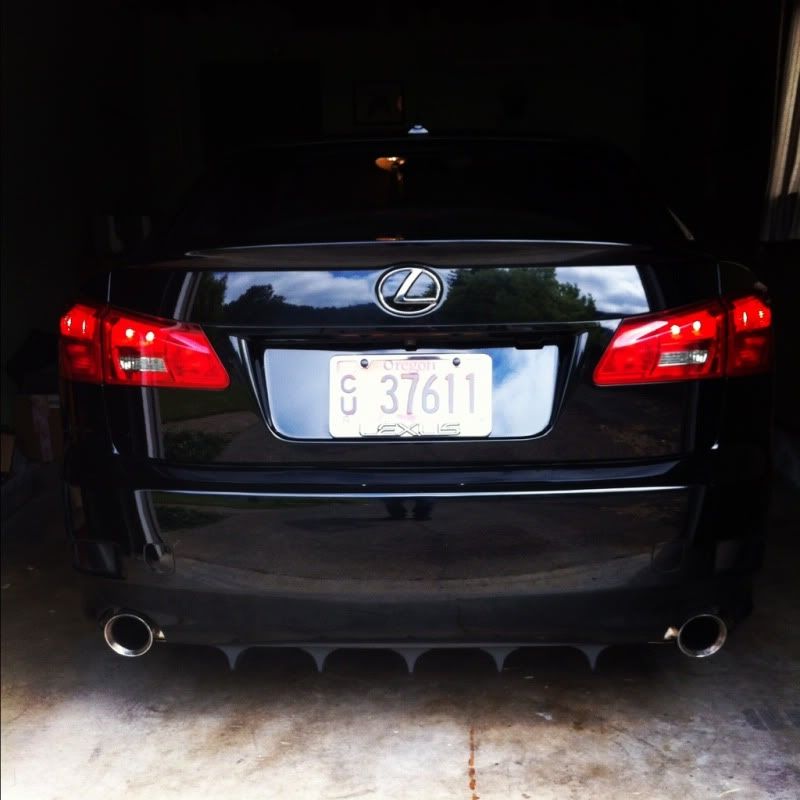
Mask off the diffuser in preparation of a layer of plastidip. I tried to paint a black section into my bumper, but was not happy with the look so I just ended up spraying the diffuser. Be sure to clean any areas you are going to spray. I used Isopropyl alcohol for cleaning.

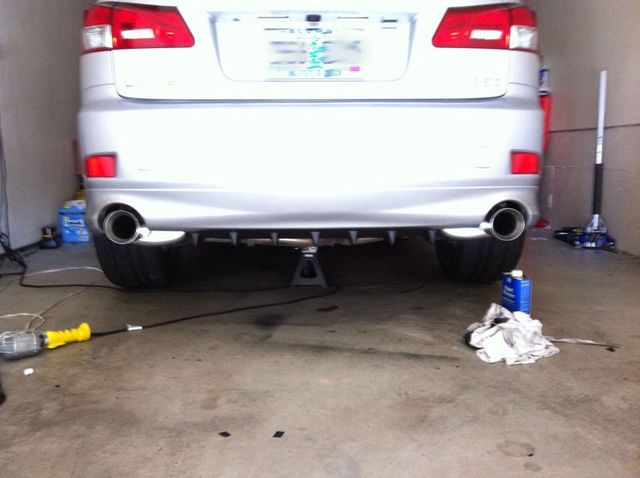
Remove mask and you are done!!!!!!
Feel free to contact me with questions/issues and I will try my best to help.
If you are intrested in getting this diffuser for yourself I got it from Exact Motorsports, a vendor here on CL.
NOTICE! AFTER REVIEWING THIS DIY I HAVE REALIZED I DID A GREAT JOB AT MAKING THE INSTALL SEEM WAY MORE COMPLICATED THAN IT NEEDS TO BE. IT REALLY IS SIMPLE, ESPECIALLY WHEN YOU USE THE SUPPLIED HARDWARE AND MOUNT IT IN THE CORRECT POSITION.
Optional installation steps
I have no doubt that the supplied self tapping screws can get the job done, but as an engineer I wanted to ensure this install was as solid as possible. I purchased larger-threaded screws, machine screws with washers & nylon nuts, and clear silicon.
For the larger screws I purchased #12x1" flat-head for the screws you will be able to see & rounded-head for the holes closer to the front of the vehicle.
If you are going this route you will need to enlarge the holes that will use the larger flat-head screws so they flush better. Just be sure not to make the whole too large, or the screw head will just pass through.
#10 3/4" machine screws, etc.
Clear, or black silicone. I placed this on the screw threads to, hopefully, combat anything coming loose from vibrations over time.
I also grabbed a can of black plastidip to re-spray the diffuser after installation.
Installation
I put the rear end of my car up on jack stands to give myself more room to work. Locate the two tabs the red arrows are pointing to. Measure out the center between these tabs and make a mark. Using a piece of painters tape, extend that center mark to the rear bumper.
I then used a 2ft level, aligned with the center of my backup cam, to verify that my center line was proper.
Diffuser position
From what I have seen on the web the most common placement is the edge of the diffuser, closest to you when installing, is brought out to the bottom edge of the bumper (red line in photo). I wanted to try and give my diffuser a more integrated look with the GFX kit, so I decided to place just behind the edge of the GFX lip (green arrows). If you choose a further back position as I have you may have to slightly modify the diffuser to make it line up right, as the outer-most screw holes will have nothing to mount to and the outer edges may need to be trimmed up a bit if they interfere with a level installation. I trimmed my edges just slightly using a pair of dikes.
Using 2" blue painters tape, align the diffuser so it is centered, and the edge of the diffuser facing you is in the position you want on the lower bumper.
Use more tape to hold the diffuser up as work your way towards the edges of the diffuser ensuring your holes line up from edge to edge. If you placed your diffuser further back your outermost holes will not line up with the bumper.
Now measure the distance from the edge of the diffuser to the edge of the exhaust cutout to be sure you are 100% centered. If you mounted the diffuser further back cut at the red line so the edge does not interfere with the bumper tab.
Once you are satisfied with your placement it is time to insert the screws. If you are using the larger non-self taping screw be sure to drill pilot holes. When installing any screws into plastic hand tighten only! Once you strip out that hole your only option will be to move to a larger diameter screw.
If you installed your diffuser further back as I have, the outer edges are just hanging there for now. Drill your own hole that goes through the diffuser and into the lower bumper. Install a machine screw with washer and a nylon nut. This should all but guarantee that your diffuser is never going to fall off
View from behind bumper...was not easy to get this photo right!
At this point, if you are happy with the install, you are done! I, on the other hand, wanted to cover up the silver screws and touch up the look of the diffuser.
More optional work!
Mask off the diffuser in preparation of a layer of plastidip. I tried to paint a black section into my bumper, but was not happy with the look so I just ended up spraying the diffuser. Be sure to clean any areas you are going to spray. I used Isopropyl alcohol for cleaning.
Remove mask and you are done!!!!!!
Feel free to contact me with questions/issues and I will try my best to help.
Last edited by rcJten; 09-20-12 at 02:59 PM.


 09-20-12, 09:05 PM
#5
Lead Lap
Thread Starter
Have any pics up of how yours came out? I was tempted to try and make my own, but the gf has been on my case about spending too much time with my car...
Trending Topics

 09-22-12, 01:42 AM
#14
Lead Lap
Thread Starter