IS - 2nd Gen (2006-2013) Discussion about the 2006+ model IS models

6SICK6: Molding a wald spoiler

Thread Tools
 
Search this Thread
 
Old 07-15-12, 03:49 AM
  #1  
6sick6
Pole Position
Thread Starter
iTrader: (4)
 
6sick6's Avatar
 
Join Date: May 2010
Location: Az
Posts: 344
Likes: 0
Received 1 Like on 1 Post
Default 6SICK6: Molding a wald spoiler

As some of you know, im a painter at a bodyshop in AZ. A few weeks ago i started working on molding a rep wald spoiler for another member on the forum(silec) on his IS250. I know theres plenty of threads on molding these spoilers but i figured i would document my progress for everyone anyways.

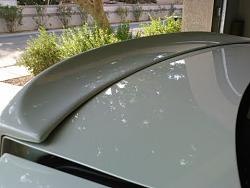
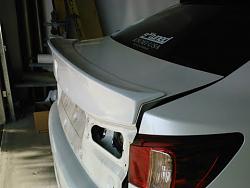
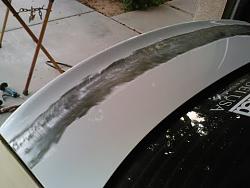
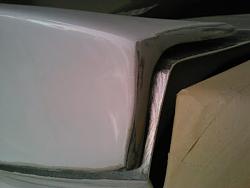
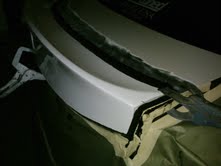
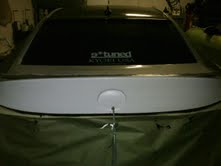
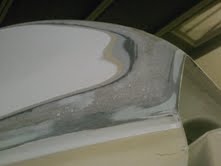
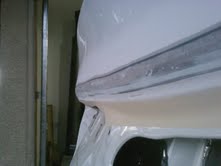
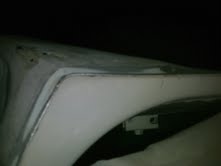
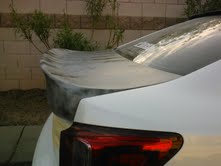
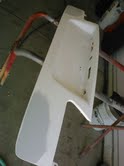
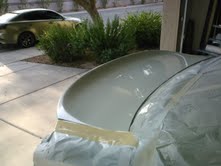
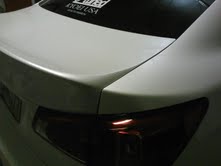
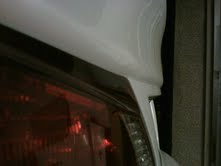
This is how it fit just sitting on the trunk
6SICK6: Molding a wald spoiler-1.jpg
6SICK6: Molding a wald spoiler-mail.google.com.jpg

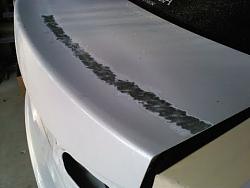
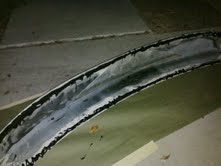
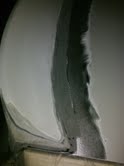
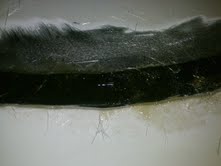
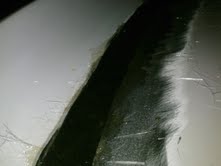
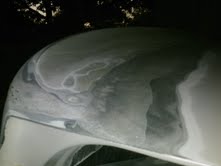
Starting to grind down the paint to metal to achieve the best adhesion possible
6SICK6: Molding a wald spoiler-2.jpg
6SICK6: Molding a wald spoiler-3.jpg
6SICK6: Molding a wald spoiler-5.jpg
Old 07-15-12, 04:09 AM
  #2  
6sick6
Pole Position
Thread Starter
iTrader: (4)
 
6sick6's Avatar
 
Join Date: May 2010
Location: Az
Posts: 344
Likes: 0
Received 1 Like on 1 Post
Default

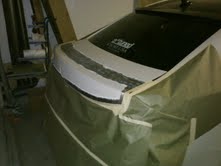
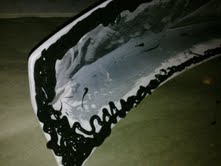
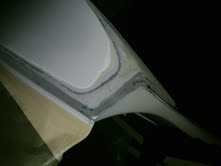
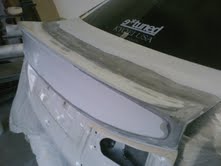
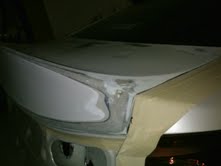
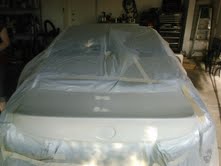
Taping off the area around the trunk to keep it a little cleaner and keep the 2 part adhesive from getting on the car.
Name:  9.jpg
Views: 814
Size:  5.6 KB

The adhesive i used to adhere the spoiler to the trunk. Made to use on FRP, which the spoiler is made out of.
Name:  20.jpg
Views: 723
Size:  5.2 KB

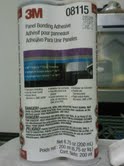
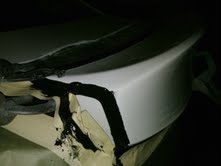
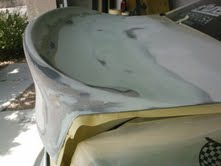
Grind down the back of the spoiler before adding the adhesive to ensure the best adhesion possible.
Name:  10.jpg
Views: 728
Size:  6.1 KB
Name:  11.jpg
Views: 772
Size:  6.7 KB

SORRY ABOUT THE CRAPPY PHONE PICS BTW
Old 07-15-12, 04:22 AM
  #3  
6sick6
Pole Position
Thread Starter
iTrader: (4)
 
6sick6's Avatar
 
Join Date: May 2010
Location: Az
Posts: 344
Likes: 0
Received 1 Like on 1 Post
Default

Placing the spoiler on the trunk and clamping it down for a secure fit
Name:  12.jpg
Views: 780
Size:  5.5 KB
Name:  13.jpg
Views: 695
Size:  3.9 KB
Name:  14.jpg
Views: 690
Size:  4.4 KB
Name:  15.jpg
Views: 701
Size:  5.2 KB
Old 07-15-12, 04:26 AM
  #4  
6sick6
Pole Position
Thread Starter
iTrader: (4)
 
6sick6's Avatar
 
Join Date: May 2010
Location: Az
Posts: 344
Likes: 0
Received 1 Like on 1 Post
Default

starting to sand the spoiler down
Name:  21.jpg
Views: 696
Size:  3.8 KB
Name:  22.jpg
Views: 704
Size:  2.7 KB

adding the fiberglass
Name:  25.jpg
Views: 754
Size:  4.6 KB
Name:  26.jpg
Views: 689
Size:  4.4 KB
Old 07-15-12, 04:30 AM
  #5  
6sick6
Pole Position
Thread Starter
iTrader: (4)
 
6sick6's Avatar
 
Join Date: May 2010
Location: Az
Posts: 344
Likes: 0
Received 1 Like on 1 Post
Default

Sanding and shaping the spoiler
Name:  27.jpg
Views: 693
Size:  4.1 KB
Name:  28.jpg
Views: 688
Size:  4.5 KB
Name:  29.jpg
Views: 690
Size:  2.9 KB
Name:  30.jpg
Views: 683
Size:  5.5 KB
Name:  32.jpg
Views: 688
Size:  4.5 KB
Old 07-15-12, 04:36 AM
  #6  
6sick6
Pole Position
Thread Starter
iTrader: (4)
 
6sick6's Avatar
 
Join Date: May 2010
Location: Az
Posts: 344
Likes: 0
Received 1 Like on 1 Post
Default

Adding the duraglass body filler and of course more sanding
6SICK6: Molding a wald spoiler-34.jpg
6SICK6: Molding a wald spoiler-35.jpg
Name:  38.jpg
Views: 692
Size:  6.1 KB
Name:  42.jpg
Views: 690
Size:  4.0 KB
Old 07-15-12, 04:42 AM
  #7  
6sick6
Pole Position
Thread Starter
iTrader: (4)
 
6sick6's Avatar
 
Join Date: May 2010
Location: Az
Posts: 344
Likes: 0
Received 1 Like on 1 Post
Default

primered
Name:  49.jpg
Views: 689
Size:  3.2 KB
Name:  51.jpg
Views: 696
Size:  5.9 KB

Final sanded and ready for paint
Name:  55.jpg
Views: 768
Size:  7.6 KB

Also shaved the lexus and is250 emblems on the lower trunk filler panel
Name:  60.jpg
Views: 699
Size:  3.8 KB
Old 07-15-12, 04:46 AM
  #8  
6sick6
Pole Position
Thread Starter
iTrader: (4)
 
6sick6's Avatar
 
Join Date: May 2010
Location: Az
Posts: 344
Likes: 0
Received 1 Like on 1 Post
Default

Might as well fix some hazed out headlights while were at it right?
Name:  57.jpg
Views: 711
Size:  6.9 KB
Name:  58.jpg
Views: 687
Size:  6.1 KB

after wet sanding
Name:  61.jpg
Views: 680
Size:  3.9 KB
Name:  62.jpg
Views: 676
Size:  4.0 KB
Old 07-15-12, 04:50 AM
  #9  
6sick6
Pole Position
Thread Starter
iTrader: (4)
 
6sick6's Avatar
 
Join Date: May 2010
Location: Az
Posts: 344
Likes: 0
Received 1 Like on 1 Post
Default

Clear coated headlights
Name:  65.jpg
Views: 682
Size:  5.2 KB
Name:  67.jpg
Views: 684
Size:  4.9 KB
Name:  77.jpg
Views: 700
Size:  5.5 KB
Old 07-15-12, 04:57 AM
  #10  
6sick6
Pole Position
Thread Starter
iTrader: (4)
 
6sick6's Avatar
 
Join Date: May 2010
Location: Az
Posts: 344
Likes: 0
Received 1 Like on 1 Post
Default

....and painted
Name:  66.jpg
Views: 690
Size:  6.9 KB
Name:  68.jpg
Views: 681
Size:  5.7 KB
Name:  78.jpg
Views: 680
Size:  6.0 KB
Name:  79.jpg
Views: 684
Size:  4.4 KB
Name:  80.jpg
Views: 681
Size:  4.3 KB
Old 07-15-12, 05:00 AM
  #11  
6sick6
Pole Position
Thread Starter
iTrader: (4)
 
6sick6's Avatar
 
Join Date: May 2010
Location: Az
Posts: 344
Likes: 0
Received 1 Like on 1 Post
Default

more fitment pics
Name:  81.jpg
Views: 671
Size:  4.1 KB
Name:  86.jpg
Views: 673
Size:  2.7 KB
Name:  87.jpg
Views: 676
Size:  2.8 KB
Name:  89.jpg
Views: 680
Size:  3.8 KB
Old 07-15-12, 05:06 AM
  #12  
6sick6
Pole Position
Thread Starter
iTrader: (4)
 
6sick6's Avatar
 
Join Date: May 2010
Location: Az
Posts: 344
Likes: 0
Received 1 Like on 1 Post
Default

Name:  91.jpg
Views: 673
Size:  5.0 KB
Name:  92.jpg
Views: 679
Size:  4.2 KB

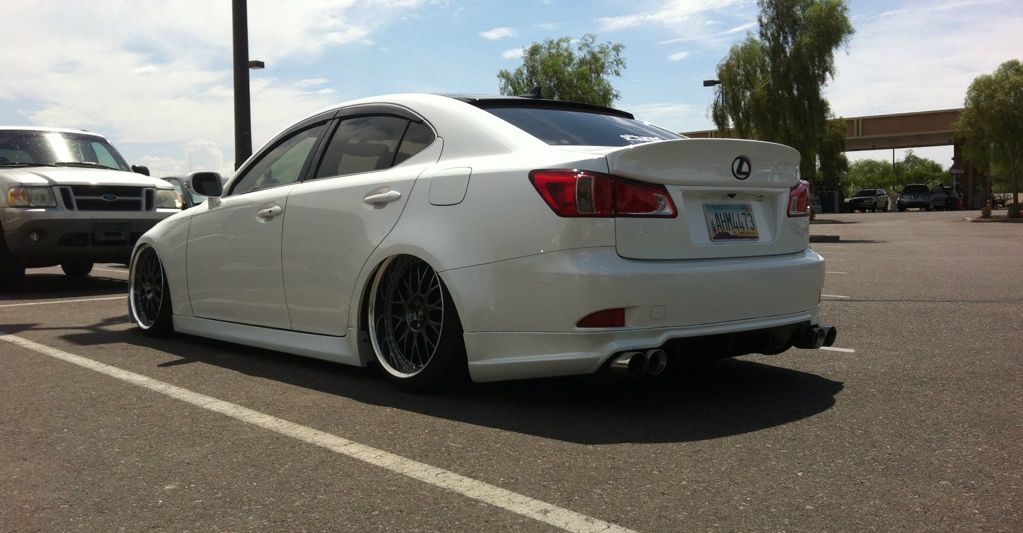
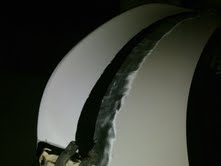
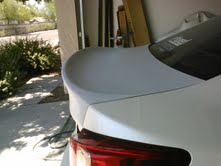
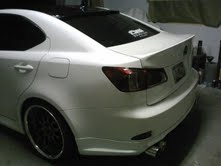
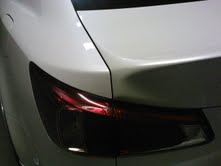
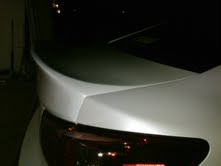
There you have it guys. Feel free to ask any questions. The whole molding process took about 15 hours total. Pretty much sucked the whole time, although it might have been more tolerable if i weren't in the middle of 115 degree summer haha. I would have added some pics of the whole car with it all done but I wanted to leave something for silec to post about his own car haha. So everyone expect silec's pics to be up soon! Thanks for looking

Last edited by 6sick6; 07-15-12 at 05:09 AM.
Old 07-15-12, 05:21 AM
  #13  
aWorkOfArt
Lexus Test Driver
 
aWorkOfArt's Avatar
 
Join Date: Feb 2012
Location: Guam
Posts: 1,332
Likes: 0
Received 4 Likes on 3 Posts
Default

Looks good bro and well documented for others to see your craftsmanship and dedication to your work
Old 07-15-12, 07:17 AM
  #14  
Quik208
Lead Lap
iTrader: (7)
 
Quik208's Avatar
 
Join Date: Apr 2010
Location: Ca
Posts: 710
Likes: 0
Received 0 Likes on 0 Posts
Default

Looks good!
Old 07-15-12, 04:36 PM
  #15  
Silec
Lead Lap
iTrader: (10)
 
Silec's Avatar
 
Join Date: Jul 2009
Location: AZ
Posts: 706
Likes: 0
Received 4 Likes on 4 Posts
Default

drew did an awesome job molding the trunk.


Quick Reply: 6SICK6: Molding a wald spoiler


All times are GMT -7. The time now is 06:15 AM.