DIY - How to Cover Things with Real Carbon Fiber
 02-27-12, 12:04 AM
#1
Lead Lap
Thread Starter
In this DIY I will show you my process for Carbon Fiber skinning where you will lay layers of material over existing parts. I set out to learn this skill after realizing that I really wanted the ISF interior panels, but I could never bring my self to drop a couple grand on them. This DIY deals with the wood grain interiors.
Perform this DIY at your own risk!
Sorry for the iPhone pics, but I didn't want deal with my SLR around all the dust and epoxy.
If you would like to start laying carbon fiber I highly recommend that you start on a test piece first. Experience is essential if you would like to produce quality parts for your Lexus. I started with a piece from my LS400, then did the rear drivers side switch from my IS, then did the other 3 switches, and finished with the center console. In all honesty the center console is the only piece I'm really happy with. For this DIY I decided to redo the rear drivers switch because I improperly mixed the epoxy, causing it to have a yellowish tint.
The first thing you need to do is select what fabric you would like to use. I ordered my Texalium from here http://compositeenvisions.com/?zenid...2vl6u29dmo25m3
There are allot of options these days, but be sure you order 2x2 twill!
This might look nice in an MRM

Or for an F-Sport interior

Here's what else you will need
Thick epoxy resin top coat - http://www.ebay.com/itm/EPOXY-RESIN-...-/310186223912
Pigment for base coat (this is the layer beneath the carbon fabric, occasionally the weave will have gaps you can see through so you want the under layer to be a similar color) - http://compositeenvisions.com/colored-pigments-138/
Clear Coat -
Paint brushes
Clear plastic cups
Small paper cups
Stir sticks
Disposable gloves
Paint thinner
Sand paper (120, 600-800, 1000, 1500, 2000)
Heat gun
Dremel with router bit
Buffer of Drill with buffer pads
Straight and round files
Exacto knife with fresh blades
Sanding block
Respirator or carbon impregnated mask
Kitchen scale for chem. mixing
Clear coat polish and rubbing compound
If you want to add painted trim as I have
Spray paint
Masking tapes of various widths (.5", 1")
Start out by prepping your workspace
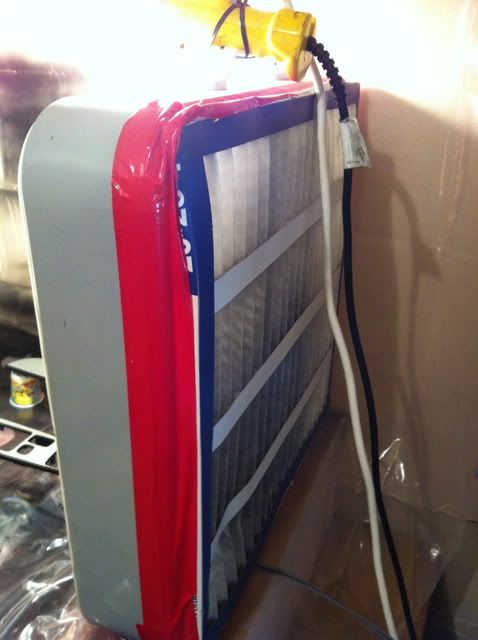
I made a makeshift table and covered it with plastic. The epoxy can be really messy. I also taped a furnace filter to the back of a box fan so I could blow dust free air over the drying pieces.I secured a shop light to the handle of the fan with zip ties to provide a bright source of light.
Remove the interior trim pieces you wish to cover
Here's a DY that should help - https://www.clublexus.com/forums/is-...m-removal.html
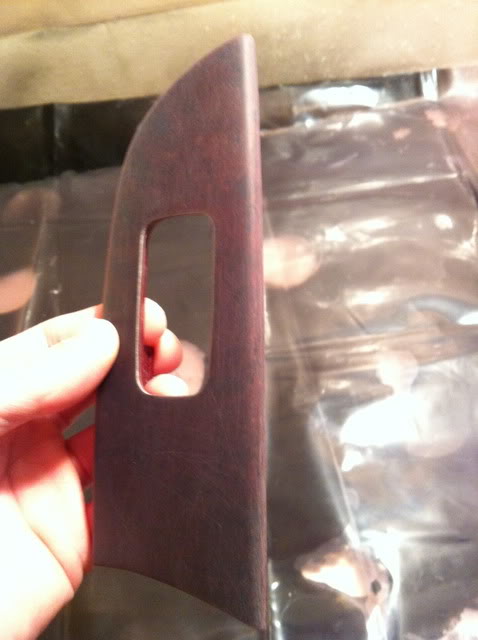
Once you have the pieces striped down you will need to sand down the existing clear coat with 120 grit sandpaper. In theory you only need to make sure the entire surface is scuffed, but as you will be adding layers I sanded mine down quite a bit.
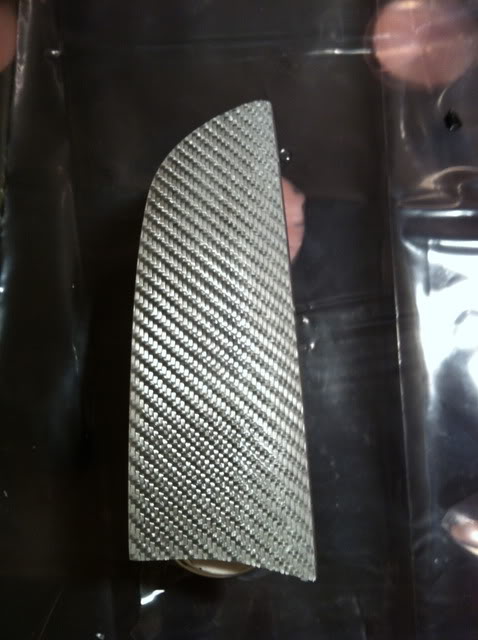
Now it's time to cut the carbon fiber
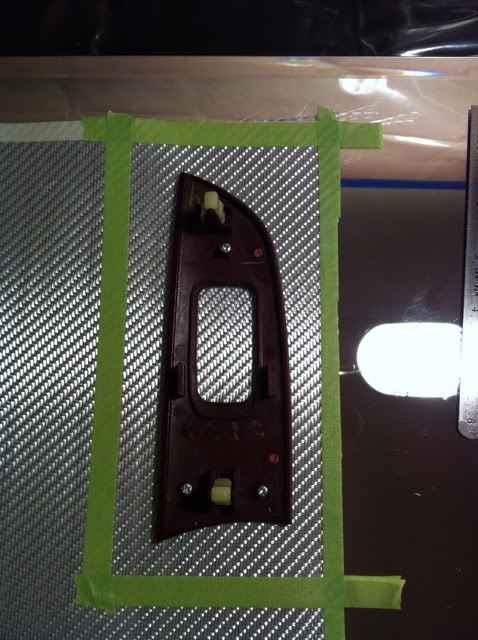
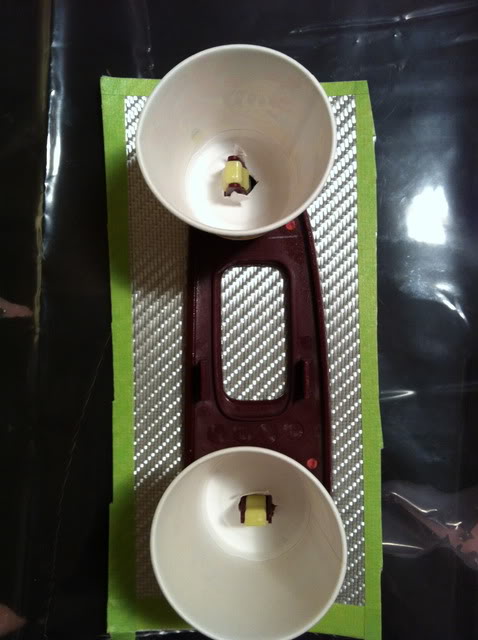
You need to first decide which direction you want to lay the fabric. Most CF is laid in the same direction for all pieces, but don't be afraid to experiment is I did. On the window switches I decided to have the weave always moving forward and away from the interior to create a sense of movement, speed. Once you've got a direction figured out lay the fabric face down on a cutting matt, and lay the interior piece face down onto the fabric.
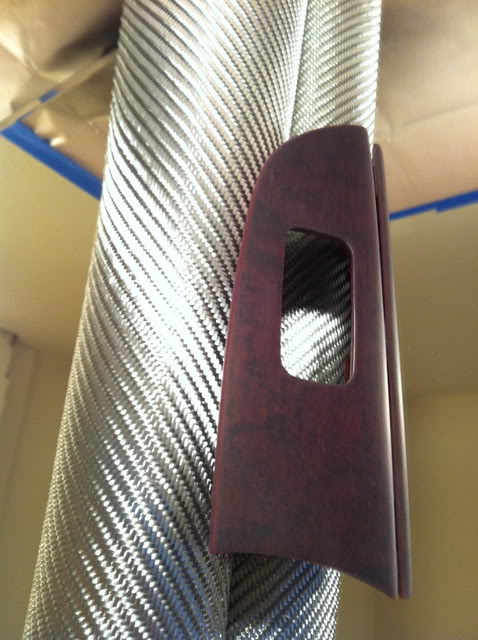
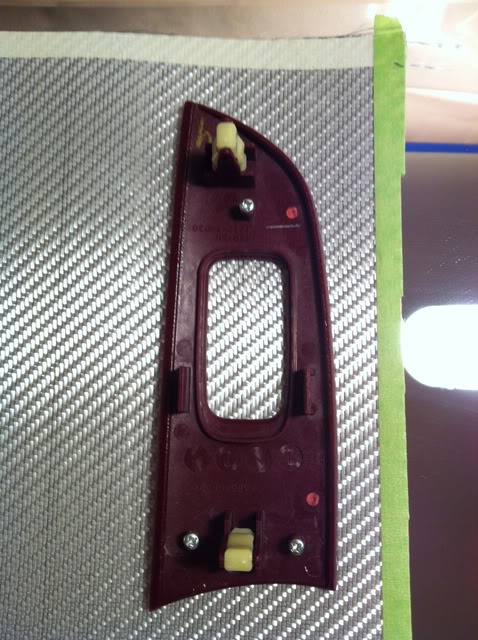
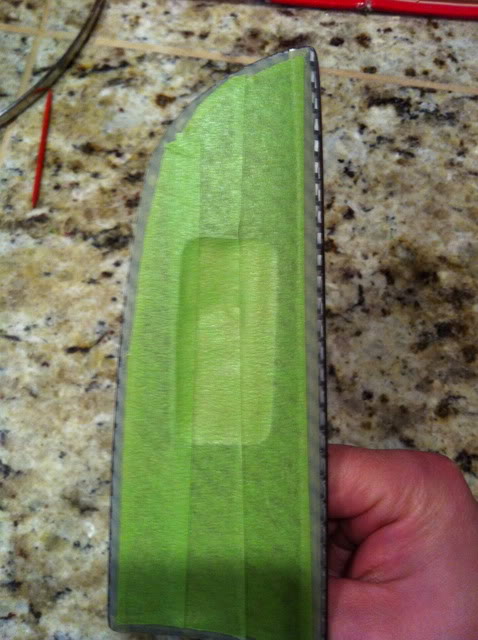
Before you cut any edge of the fabric you will need to lay down masking tape so the weave does not fray. The fabric has some play in it, and can shift so that the pattern is not straight, so start with one edge at a time when placing the masking tape and try and align the weave with the tape edges. I used the switch cut out to align it with the fabric weave. Make sure you have some space around the edges of the piece to be wrapped. Cut down the middle of the masking tape so each side still has a taped edge.
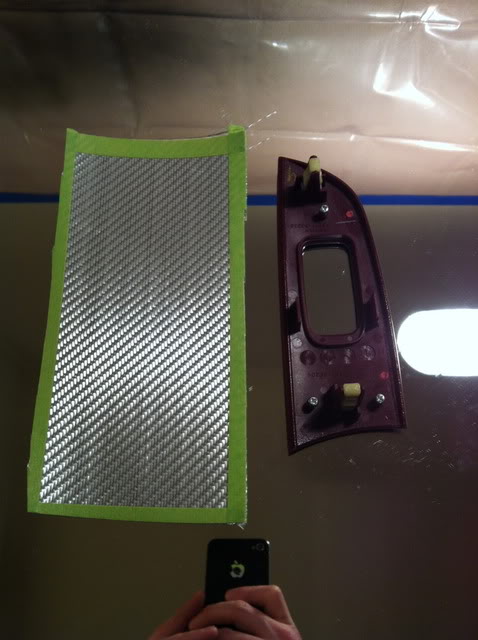
Double check that the weave is in the correct direction before moving forward.
Time to lay down the base coat
Always wear gloves when dealing with the epoxy chemicals. They are toxic and absorb through the skin.
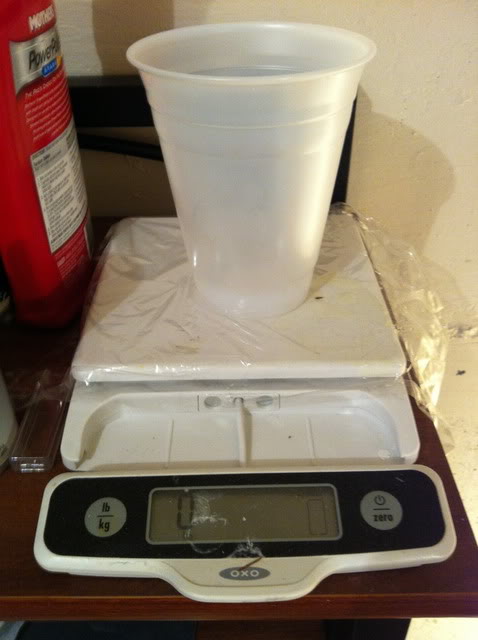
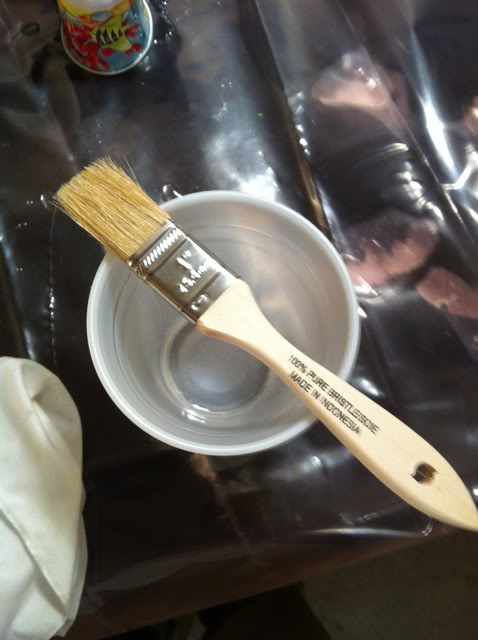
The carbon fiber is bonded to the interior piece by a thin layer of epoxy. Since the weave can stretch and expose tiny gaps, it is recommended that you use a colored base coat. White for Texalium, or black for standard CF, etc. Using your kitchen scale, mix the epoxy and hardener in a clear plastic cup to the manufacturers specifications. My epoxy is 2-1. Mixing too much epoxy for what you need is easy to do. For just this switch I mixed 6g of epoxy and 3g of hardener. Use a stir stick to mix, but stir slowly as you will add air bubbles by fast stirring. I ran out of white epoxy so I am using clear, which can work out, but I would recommend some experience if you want to go this route.
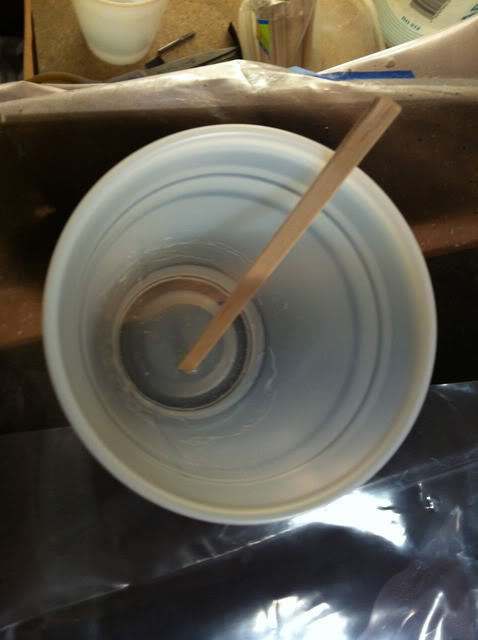
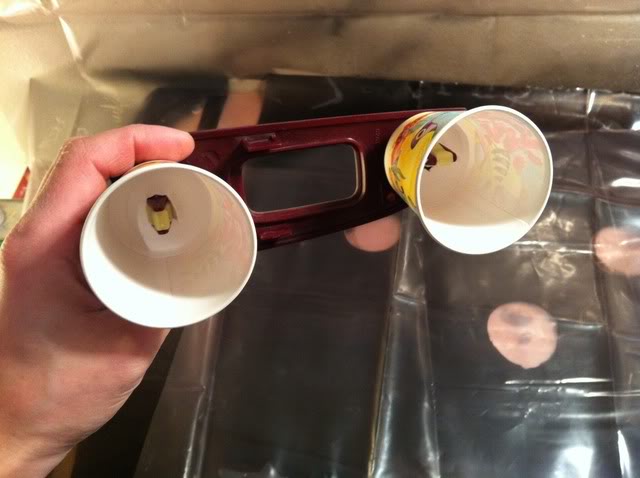
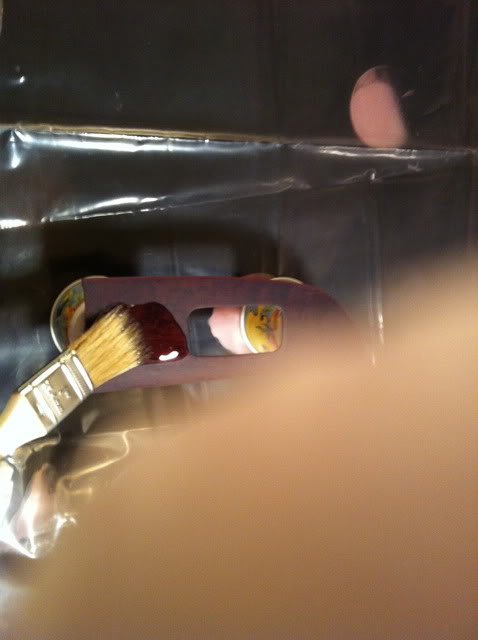
You will need to keep the switch as level as possible so the epoxy doesn't pool to once side. I used small paper cups, and pushed the clips down into the tops. Brush a thin layer of epoxy onto the surface of the piece to be skinned. Sorry for the terrible pic
Let the epoxy set for 4-6 hours until it dries to a tack. At this point the epoxy should stick to your finger, but not come off onto your finger. Make sure to check at the edges because the epoxy tends to pool thicker here due to the curved shape of the piece.
Time to lay the carbon fiber!
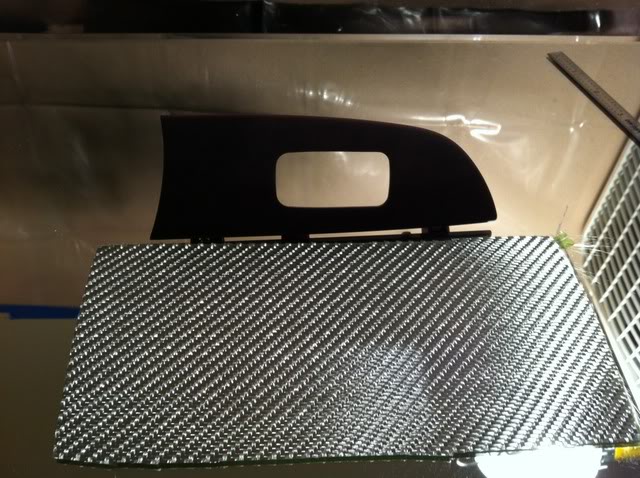
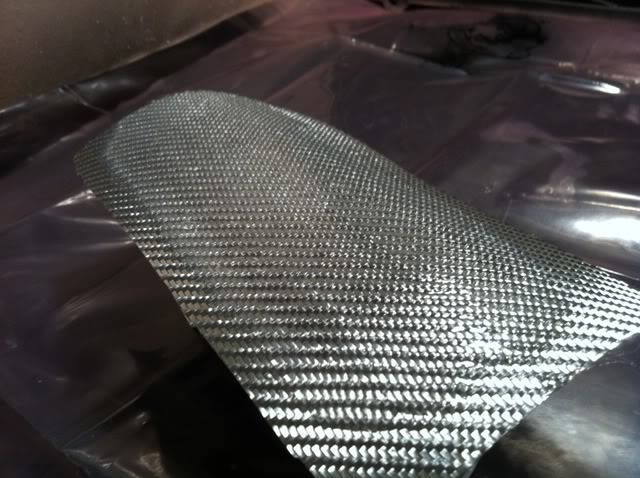
Once your epoxy has reached a tack it's time to take the plunge and lay your fabric. Using a clean surface I lay my cut out face down again. Holding onto the paper cup legs of the piece, I place the piece upside down onto the fabric, using the straight lines of the switch cut out for alignment. Press the piece down to bond the fabric, then flip over and firmly press the fabric onto the piece.
If you are adding painted trim like me, you only need to worry about bonding the fabric to the top surfaces. If you want pure CF without the trim you will need to first trim off the extra material around the edges, leaving about a 1/2" to 1" of extra material all the way around. Then wrap the CF around the edges and tape it to the backside, that way it holds tight around the edges.
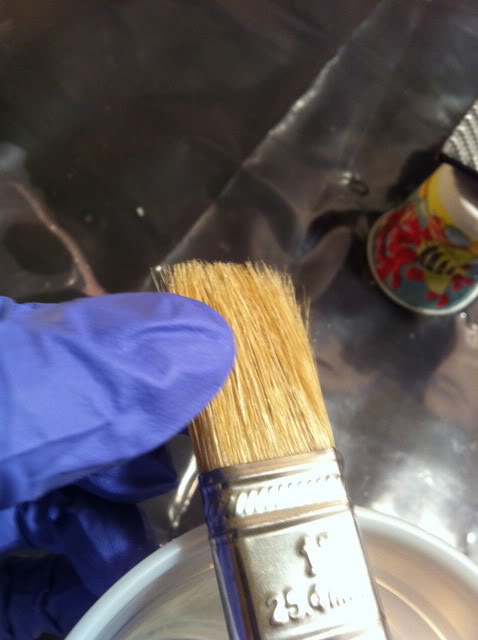
With the fabric bonded down it's time to lay your first layer of clear epoxy. Mix the epoxy, being sure to stir slowly to reduce bubbles. Before using the brush I tug on the bristles to remove any that may be loose. There nothing worse than realizing there is a bristle trapped under your epoxy.
Apply the epoxy evenly across the piece, be sure to coat the entire surface.
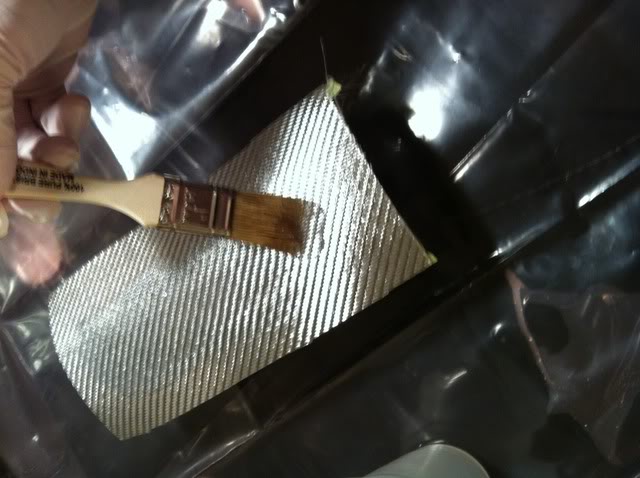
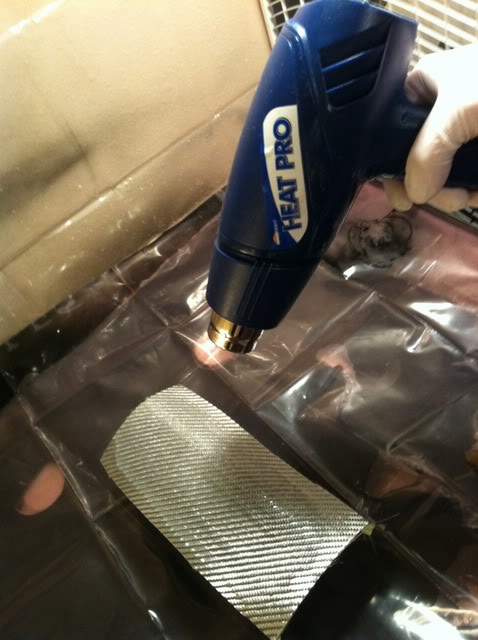
With mixing, and brushing the epoxy on, it's inevitable that you are going to have bubbles in your freshly applied layer. Often they are tiny, but you need to get them out. Use a heat gun to get these bubbles out. I set the heat gun to medium and hold it about 6" to 1ft above the piece and move it around, this way there's less risk of over-heating the epoxy. You should start to see tiny bubbles popping on the surface, continue until the bubbles stop.
Allow epoxy to cure for 24hrs.
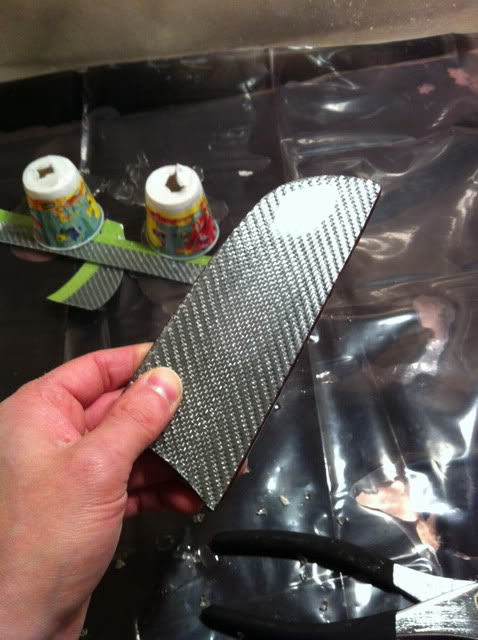
Trim the piece
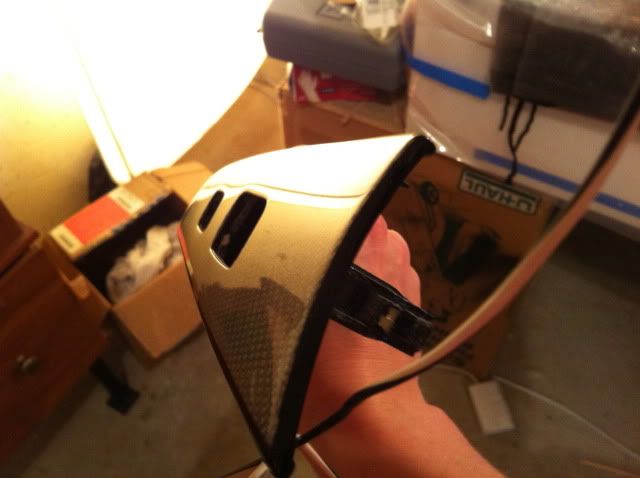
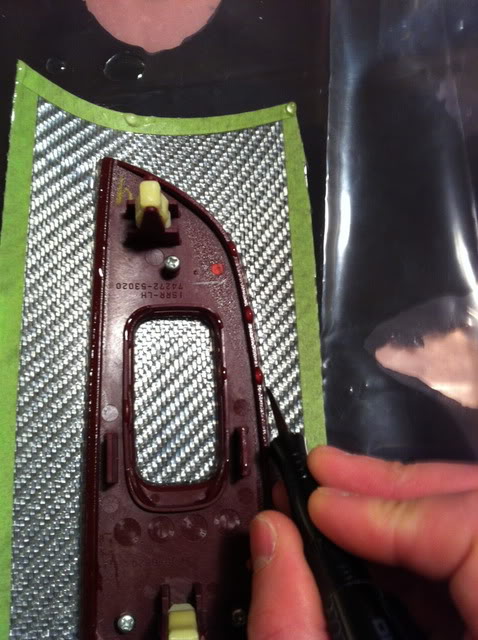
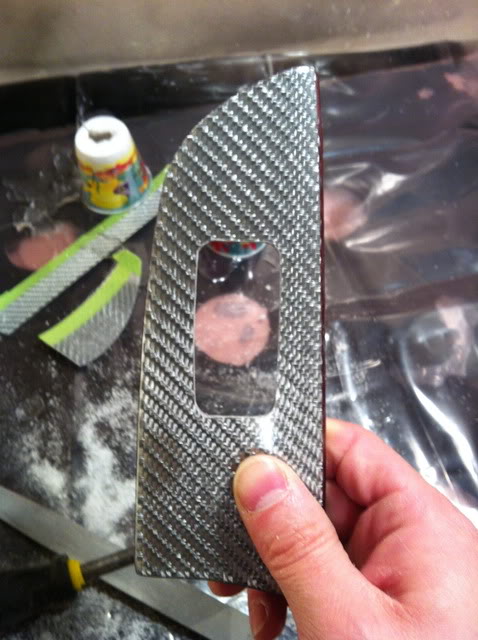
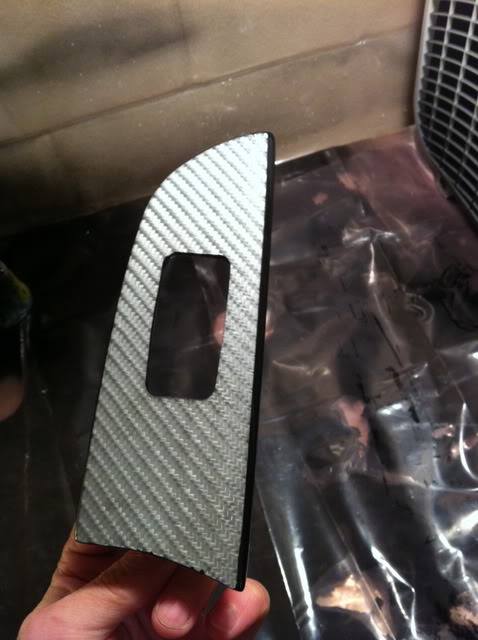
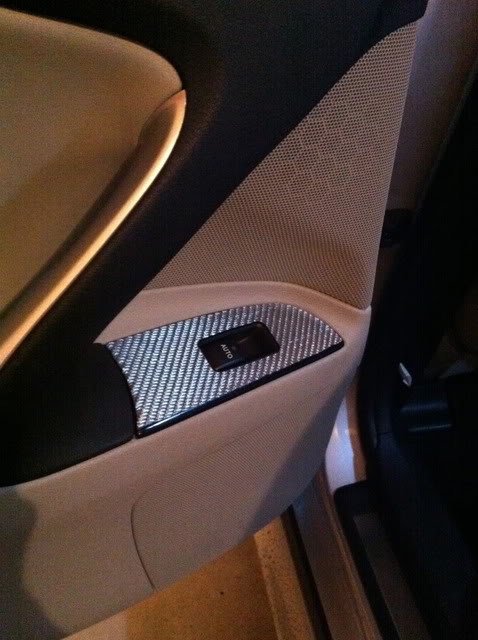
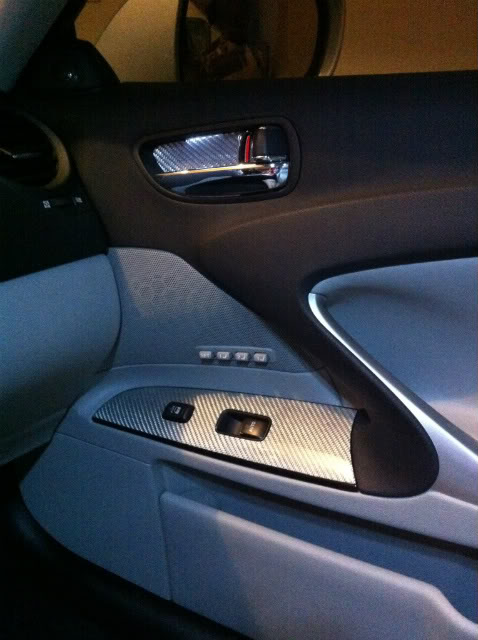
Now that the first layer of epoxy has permeated the carbon fiber we can begin to trim off some of the excess material while it's thin. Trimming at this stage is done easily with a sharp Exacto knife, but there is a catch. Any edge you trim now will develop a rounded edge as the next layers of epoxy are applied due to surface tension. If you cut out the window switch opening now the results will look similar to this around the switch (you can see the rounding around the window on/off switch) -

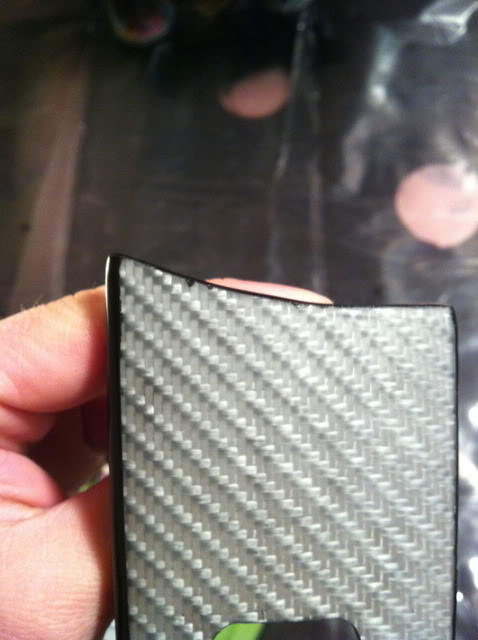
If you wait till later to cut out the switches you can get a flatter, cleaner look like this -
-
Perform this DIY at your own risk!
Sorry for the iPhone pics, but I didn't want deal with my SLR around all the dust and epoxy.
If you would like to start laying carbon fiber I highly recommend that you start on a test piece first. Experience is essential if you would like to produce quality parts for your Lexus. I started with a piece from my LS400, then did the rear drivers side switch from my IS, then did the other 3 switches, and finished with the center console. In all honesty the center console is the only piece I'm really happy with. For this DIY I decided to redo the rear drivers switch because I improperly mixed the epoxy, causing it to have a yellowish tint.
The first thing you need to do is select what fabric you would like to use. I ordered my Texalium from here http://compositeenvisions.com/?zenid...2vl6u29dmo25m3
There are allot of options these days, but be sure you order 2x2 twill!
This might look nice in an MRM
Or for an F-Sport interior
Here's what else you will need
Thick epoxy resin top coat - http://www.ebay.com/itm/EPOXY-RESIN-...-/310186223912
Pigment for base coat (this is the layer beneath the carbon fabric, occasionally the weave will have gaps you can see through so you want the under layer to be a similar color) - http://compositeenvisions.com/colored-pigments-138/
Clear Coat -
Paint brushes
Clear plastic cups
Small paper cups
Stir sticks
Disposable gloves
Paint thinner
Sand paper (120, 600-800, 1000, 1500, 2000)
Heat gun
Dremel with router bit
Buffer of Drill with buffer pads
Straight and round files
Exacto knife with fresh blades
Sanding block
Respirator or carbon impregnated mask
Kitchen scale for chem. mixing
Clear coat polish and rubbing compound
If you want to add painted trim as I have
Spray paint
Masking tapes of various widths (.5", 1")
Start out by prepping your workspace
I made a makeshift table and covered it with plastic. The epoxy can be really messy. I also taped a furnace filter to the back of a box fan so I could blow dust free air over the drying pieces.I secured a shop light to the handle of the fan with zip ties to provide a bright source of light.
Remove the interior trim pieces you wish to cover
Here's a DY that should help - https://www.clublexus.com/forums/is-...m-removal.html
Once you have the pieces striped down you will need to sand down the existing clear coat with 120 grit sandpaper. In theory you only need to make sure the entire surface is scuffed, but as you will be adding layers I sanded mine down quite a bit.
Now it's time to cut the carbon fiber
You need to first decide which direction you want to lay the fabric. Most CF is laid in the same direction for all pieces, but don't be afraid to experiment is I did. On the window switches I decided to have the weave always moving forward and away from the interior to create a sense of movement, speed. Once you've got a direction figured out lay the fabric face down on a cutting matt, and lay the interior piece face down onto the fabric.
Before you cut any edge of the fabric you will need to lay down masking tape so the weave does not fray. The fabric has some play in it, and can shift so that the pattern is not straight, so start with one edge at a time when placing the masking tape and try and align the weave with the tape edges. I used the switch cut out to align it with the fabric weave. Make sure you have some space around the edges of the piece to be wrapped. Cut down the middle of the masking tape so each side still has a taped edge.
Double check that the weave is in the correct direction before moving forward.
Time to lay down the base coat
Always wear gloves when dealing with the epoxy chemicals. They are toxic and absorb through the skin.
The carbon fiber is bonded to the interior piece by a thin layer of epoxy. Since the weave can stretch and expose tiny gaps, it is recommended that you use a colored base coat. White for Texalium, or black for standard CF, etc. Using your kitchen scale, mix the epoxy and hardener in a clear plastic cup to the manufacturers specifications. My epoxy is 2-1. Mixing too much epoxy for what you need is easy to do. For just this switch I mixed 6g of epoxy and 3g of hardener. Use a stir stick to mix, but stir slowly as you will add air bubbles by fast stirring. I ran out of white epoxy so I am using clear, which can work out, but I would recommend some experience if you want to go this route.
You will need to keep the switch as level as possible so the epoxy doesn't pool to once side. I used small paper cups, and pushed the clips down into the tops. Brush a thin layer of epoxy onto the surface of the piece to be skinned. Sorry for the terrible pic
Let the epoxy set for 4-6 hours until it dries to a tack. At this point the epoxy should stick to your finger, but not come off onto your finger. Make sure to check at the edges because the epoxy tends to pool thicker here due to the curved shape of the piece.
Time to lay the carbon fiber!
Once your epoxy has reached a tack it's time to take the plunge and lay your fabric. Using a clean surface I lay my cut out face down again. Holding onto the paper cup legs of the piece, I place the piece upside down onto the fabric, using the straight lines of the switch cut out for alignment. Press the piece down to bond the fabric, then flip over and firmly press the fabric onto the piece.
If you are adding painted trim like me, you only need to worry about bonding the fabric to the top surfaces. If you want pure CF without the trim you will need to first trim off the extra material around the edges, leaving about a 1/2" to 1" of extra material all the way around. Then wrap the CF around the edges and tape it to the backside, that way it holds tight around the edges.
With the fabric bonded down it's time to lay your first layer of clear epoxy. Mix the epoxy, being sure to stir slowly to reduce bubbles. Before using the brush I tug on the bristles to remove any that may be loose. There nothing worse than realizing there is a bristle trapped under your epoxy.
Apply the epoxy evenly across the piece, be sure to coat the entire surface.
With mixing, and brushing the epoxy on, it's inevitable that you are going to have bubbles in your freshly applied layer. Often they are tiny, but you need to get them out. Use a heat gun to get these bubbles out. I set the heat gun to medium and hold it about 6" to 1ft above the piece and move it around, this way there's less risk of over-heating the epoxy. You should start to see tiny bubbles popping on the surface, continue until the bubbles stop.
Allow epoxy to cure for 24hrs.
Trim the piece
Now that the first layer of epoxy has permeated the carbon fiber we can begin to trim off some of the excess material while it's thin. Trimming at this stage is done easily with a sharp Exacto knife, but there is a catch. Any edge you trim now will develop a rounded edge as the next layers of epoxy are applied due to surface tension. If you cut out the window switch opening now the results will look similar to this around the switch (you can see the rounding around the window on/off switch) -
If you wait till later to cut out the switches you can get a flatter, cleaner look like this
-
Last edited by rcJten; 03-01-12 at 04:29 PM.

The following users liked this post:
AyeNick (02-05-21)
02-27-12, 12:04 AM
#2
Lead Lap
Thread Starter
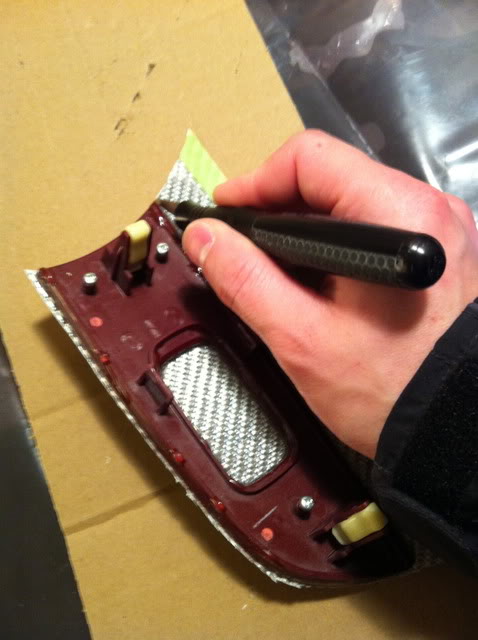
The rounding is not as noticeable on the edges so I cut them off now with the Exacto.

Using a sanding block, with 400 grit sandpaper, sand down the cut of edges until they are smooth and flush with the edges of the piece. Clean the dust off with isopropyl alcohol on a lint free cloth.
Time to build up layers
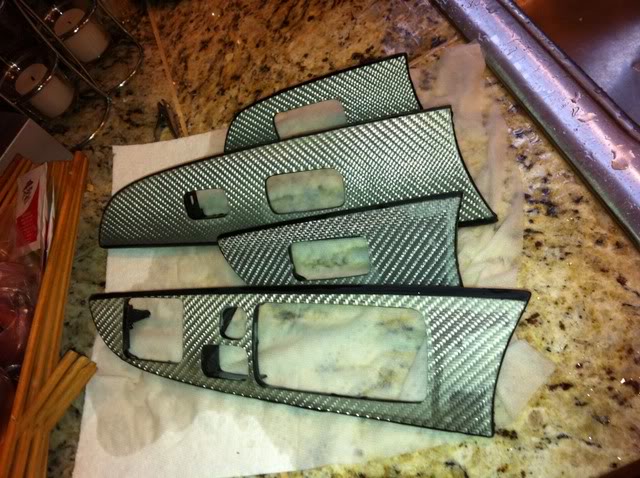
Set your piece up for more layers of epoxy. Brush on 3-4 more heavy layers of epoxy, waiting about 5-6 hours in between each layer. Remember to stir slowly. Be sure to use the heat gun to remove bubbles each time your apply a coat. Following the final coat allow the epoxy to cure for a full 24 hours, after which you should start to have a nice looking piece -
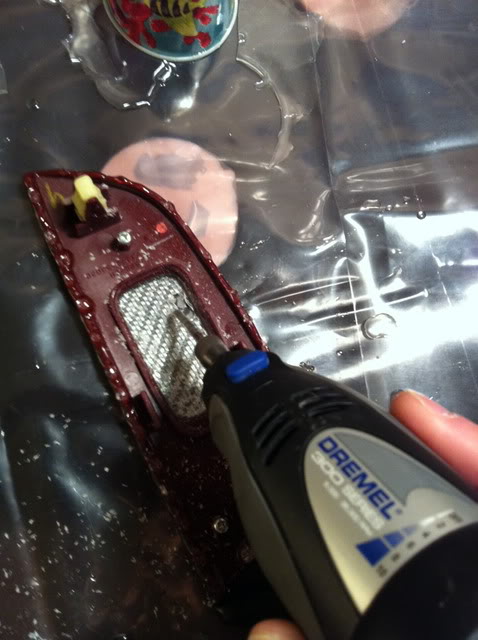
Trim out the window switch
Now that your finished laying the epoxy it's time to cut out the window switch. Start with the Dremel and routing bit, make sure you don't go too close to the actual edge you want though because it's easy to screw up and over cut. Try and keep about 1/2" of extra material.
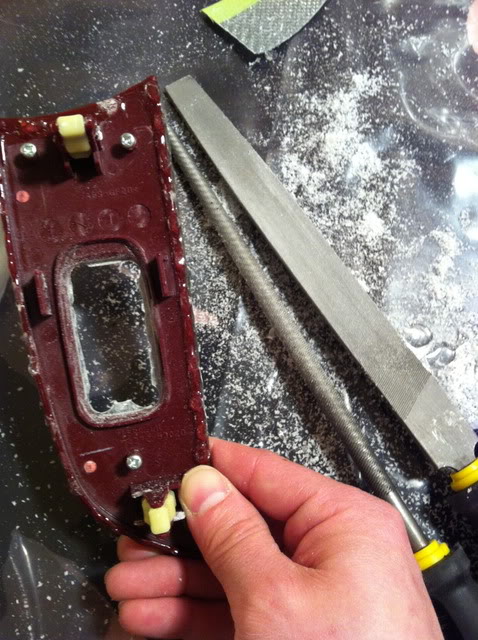
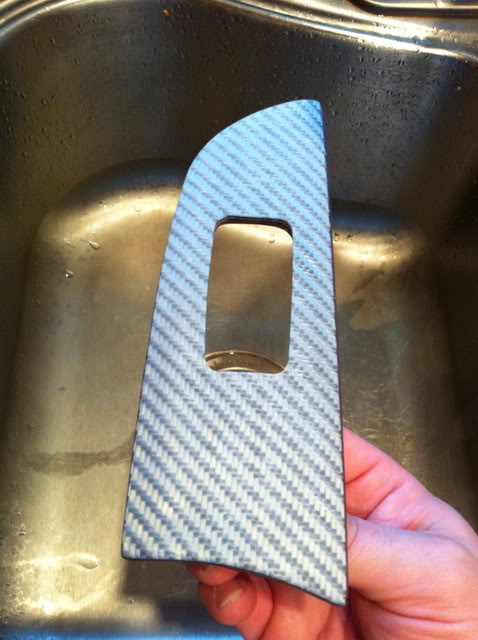
Use the flat and round files to shave away the rest of the extra material. The flat file works great for the straight edges, just be sure to keep it perpendicular to the front surface of the piece to achieve the flat hard edges. Use the round file for the rounded corners. File just until you reach the original edges, then finish with a very quick hand sand with 400 grit to smooth away any roughness.
Now you can flatten out the surface
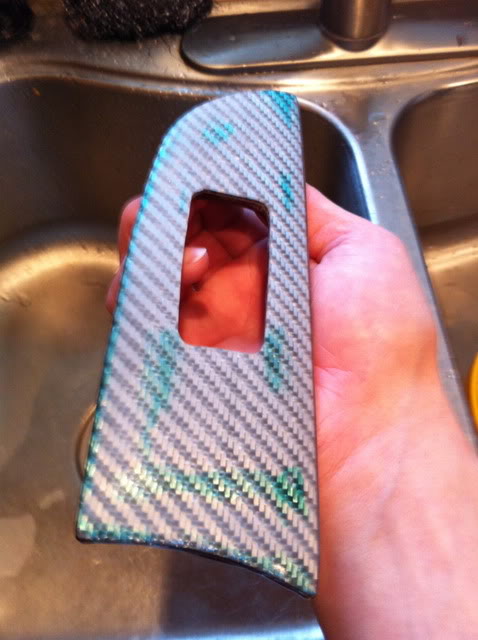
This next step may take some time, but extra effort will greatly improve you piece. You will want to even out the surface as best you can. Begin by soaking your 600-800 grit sandpaper in a bowl of water, with a drop of dish soap in it, for about 10 minutes. Wet sanding will minimize the mess, and give you smoother results.

Make sure to keep the sanding surface wet, and rinse it off often. Give the whole surface a good sand with the sanding block, then rinse it off, and dry with a paper towel. Once dry you'll get a good idea of how close to smooth your surface is by what parts are still glossy (low spots), and what is now flat. If you are doing a lighter color CF you can use a sharpie to mark the glossy spots so you know where you still need to sand when the water makes it hard to tell what's still glossy.

Once you've reached the point that there's no longer any shiny low spots, the surface should be flat enough to move on to cleaning up the underside of the piece. You will probably have a number of epoxy stalactites. I used my dremel to take of the majority in these, then use the sanding block with the 120 grit to finish them off. These parts wont be seen so it's not as critical to make it perfect. When finished wash the piece in soap and water and move on to the next step.
If your painting the trim, it's time to start masking
This portion is a bit more subjective. You can mask the piece anyway you like, your trim doesn't necessarily have to be just like mine. That said, I tried to copy the trim style used on the factory ISF pieces. I used pictures found on the web as examples. You can try to make each switch identical, but the nice thing is is that they will never be next to one another so any slight variation in the trim will not be noticeable. Start with a thin masking tape and mask of the edges.

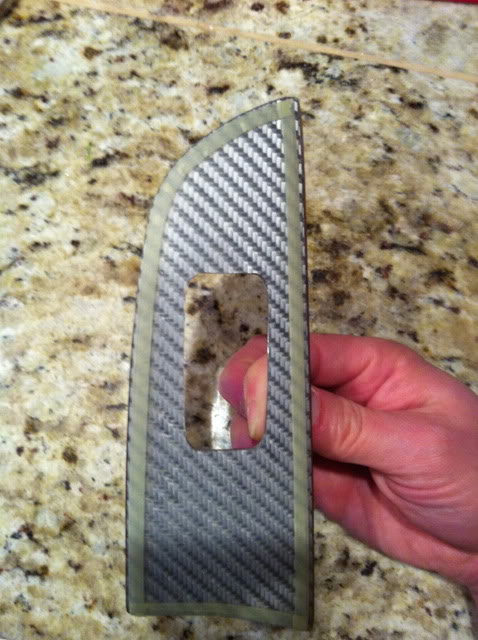
Now fill in the surface with standard masking tape. Make sure to push down hard on the tape around the edges of the switch cut out. This way, when you paint the underside of the piece, the edges of the cut out will be painted as well.
Wear a glove so you can hold the piece and paint both sides. Follow the paint manufacturers instructions. I typically did one light first coat, then two heavier coats. Allow the paint to cure for at least 24 hours before proceeding.
Remove the masking tape and inspect for over spray. Use a small piece of 600 or 800 grit sand paper to remove any overspray. I also lightly sand the ridge cause by the tape at the edge of the painted areas.
Clean the surface with isopropyl alcohol when finished.
Clear coat
Adding a clear coat will not only make your piece look better, it protects the epoxy from UV rays which can cause yellowing over time. Set up your piece on your work table with the paper cups again. This is when having the fan and filter come in handy as it will reduce the amount of particles that fall onto your drying clear coat.

Follow the clear coat manufacturer instructions, and be sure to wear your respirator! The clear coat I recommended will give you professional results, but it is not something you want to breathe in.
I first spray a light coat, then follow with two additional heavier coats. Allow the clear to cure for a minimum of 24 hours, but even longer will benefit you as the clear will continue to harden.
I waited 5 days before moving to the next step.
Time for more wet sanding...maybe
At this point you no doubt have a very glossy looking piece, and if your happy with it you can slap it in to your car, but going another round of wet sanding will take your piece to the next level.
Just as before soak your paper in water with a drop of soap, but this time start with 1000 grit in the sanding block. Continue sanding with 1000 grit until you again get a flat surface, no glossy low spots. Once you have smoothed out the entire surface move onto briefly wet sanding with the 1500 grit, then the 2000 grit. Once finished clean the part with soap and water and allow to dry.
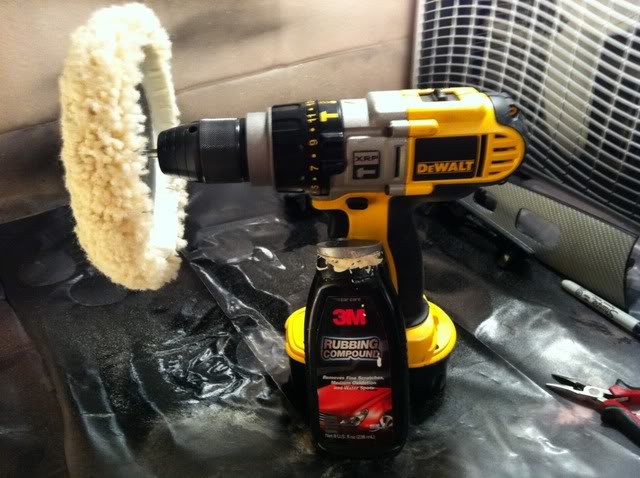
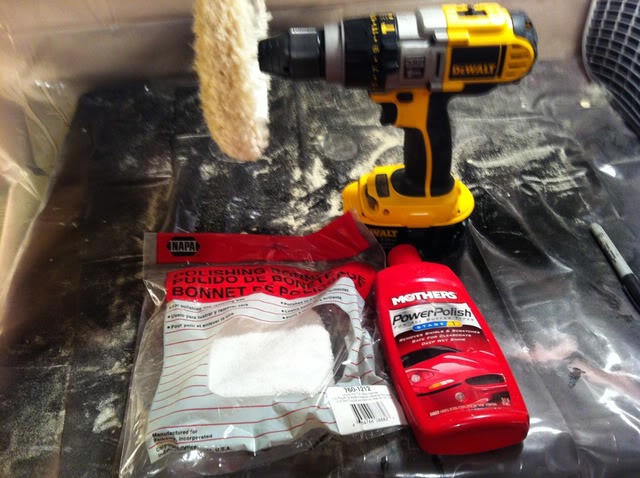
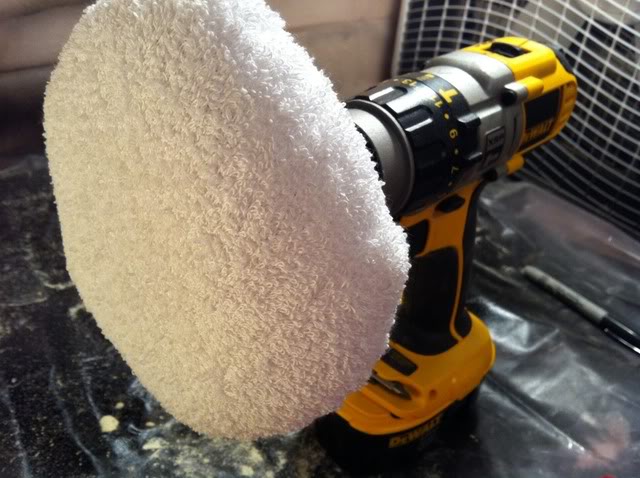
Buffing and Polishing
Time to bring that shine back to your pieces. I bought this buffing pad from NAPA, it works great with my cordless drill. I set the drill to medium speed and apply the rubbing compound directly to the part. Make sure to hold on tight to your piece as you buff it because the pad has a way of grabbing things and throwing them across the room. Buff the surface until it has a decent glossy surface. Clean off any residual rubbing compound.
Now switch to the polishing pad, and apply the polish directly to the pad. Continue to buff until the desired gloss is achieved. Use the lights in the room to inspect for hairline scratches. Don't let the polish dry out, apply more as needed. Clean the surface with a soft cloth when finished. As you can see I was able to reach a near glass-like finish

Using a sanding block, with 400 grit sandpaper, sand down the cut of edges until they are smooth and flush with the edges of the piece. Clean the dust off with isopropyl alcohol on a lint free cloth.
Time to build up layers
Set your piece up for more layers of epoxy. Brush on 3-4 more heavy layers of epoxy, waiting about 5-6 hours in between each layer. Remember to stir slowly. Be sure to use the heat gun to remove bubbles each time your apply a coat. Following the final coat allow the epoxy to cure for a full 24 hours, after which you should start to have a nice looking piece -
Trim out the window switch
Now that your finished laying the epoxy it's time to cut out the window switch. Start with the Dremel and routing bit, make sure you don't go too close to the actual edge you want though because it's easy to screw up and over cut. Try and keep about 1/2" of extra material.
Use the flat and round files to shave away the rest of the extra material. The flat file works great for the straight edges, just be sure to keep it perpendicular to the front surface of the piece to achieve the flat hard edges. Use the round file for the rounded corners. File just until you reach the original edges, then finish with a very quick hand sand with 400 grit to smooth away any roughness.
Now you can flatten out the surface
This next step may take some time, but extra effort will greatly improve you piece. You will want to even out the surface as best you can. Begin by soaking your 600-800 grit sandpaper in a bowl of water, with a drop of dish soap in it, for about 10 minutes. Wet sanding will minimize the mess, and give you smoother results.
Make sure to keep the sanding surface wet, and rinse it off often. Give the whole surface a good sand with the sanding block, then rinse it off, and dry with a paper towel. Once dry you'll get a good idea of how close to smooth your surface is by what parts are still glossy (low spots), and what is now flat. If you are doing a lighter color CF you can use a sharpie to mark the glossy spots so you know where you still need to sand when the water makes it hard to tell what's still glossy.
Once you've reached the point that there's no longer any shiny low spots, the surface should be flat enough to move on to cleaning up the underside of the piece. You will probably have a number of epoxy stalactites. I used my dremel to take of the majority in these, then use the sanding block with the 120 grit to finish them off. These parts wont be seen so it's not as critical to make it perfect. When finished wash the piece in soap and water and move on to the next step.
If your painting the trim, it's time to start masking
This portion is a bit more subjective. You can mask the piece anyway you like, your trim doesn't necessarily have to be just like mine. That said, I tried to copy the trim style used on the factory ISF pieces. I used pictures found on the web as examples. You can try to make each switch identical, but the nice thing is is that they will never be next to one another so any slight variation in the trim will not be noticeable. Start with a thin masking tape and mask of the edges.
Now fill in the surface with standard masking tape. Make sure to push down hard on the tape around the edges of the switch cut out. This way, when you paint the underside of the piece, the edges of the cut out will be painted as well.
Wear a glove so you can hold the piece and paint both sides. Follow the paint manufacturers instructions. I typically did one light first coat, then two heavier coats. Allow the paint to cure for at least 24 hours before proceeding.
Remove the masking tape and inspect for over spray. Use a small piece of 600 or 800 grit sand paper to remove any overspray. I also lightly sand the ridge cause by the tape at the edge of the painted areas.
Clean the surface with isopropyl alcohol when finished.
Clear coat
Adding a clear coat will not only make your piece look better, it protects the epoxy from UV rays which can cause yellowing over time. Set up your piece on your work table with the paper cups again. This is when having the fan and filter come in handy as it will reduce the amount of particles that fall onto your drying clear coat.
Follow the clear coat manufacturer instructions, and be sure to wear your respirator! The clear coat I recommended will give you professional results, but it is not something you want to breathe in.
I first spray a light coat, then follow with two additional heavier coats. Allow the clear to cure for a minimum of 24 hours, but even longer will benefit you as the clear will continue to harden.
I waited 5 days before moving to the next step.
Time for more wet sanding...maybe
At this point you no doubt have a very glossy looking piece, and if your happy with it you can slap it in to your car, but going another round of wet sanding will take your piece to the next level.
Just as before soak your paper in water with a drop of soap, but this time start with 1000 grit in the sanding block. Continue sanding with 1000 grit until you again get a flat surface, no glossy low spots. Once you have smoothed out the entire surface move onto briefly wet sanding with the 1500 grit, then the 2000 grit. Once finished clean the part with soap and water and allow to dry.
Buffing and Polishing
Time to bring that shine back to your pieces. I bought this buffing pad from NAPA, it works great with my cordless drill. I set the drill to medium speed and apply the rubbing compound directly to the part. Make sure to hold on tight to your piece as you buff it because the pad has a way of grabbing things and throwing them across the room. Buff the surface until it has a decent glossy surface. Clean off any residual rubbing compound.
Now switch to the polishing pad, and apply the polish directly to the pad. Continue to buff until the desired gloss is achieved. Use the lights in the room to inspect for hairline scratches. Don't let the polish dry out, apply more as needed. Clean the surface with a soft cloth when finished. As you can see I was able to reach a near glass-like finish
Last edited by rcJten; 03-01-12 at 04:21 PM.
02-27-12, 12:05 AM
#3
Lead Lap
Thread Starter
Refrain from applying wax!
The clear coat will continue to out-gas for up to a couple of months, so waxing now can cause problems down the road. I plan on pulling the pieces back out of the car in a few months, re-polishing them, and then applying wax for protection.
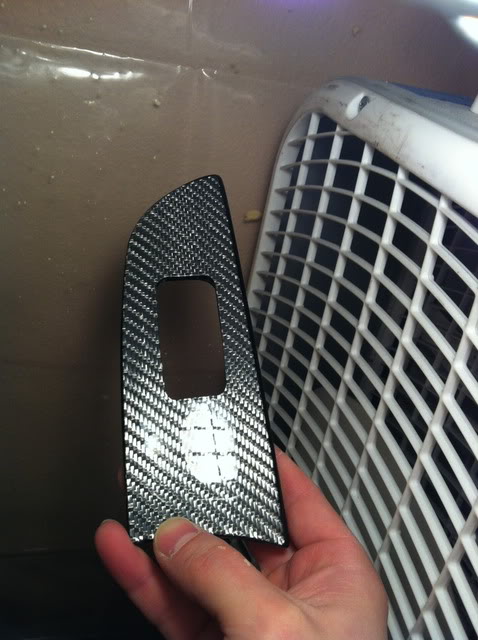
You are now ready to install, and enjoy your new carbon fiber pieces!!!!!
Here are my results -


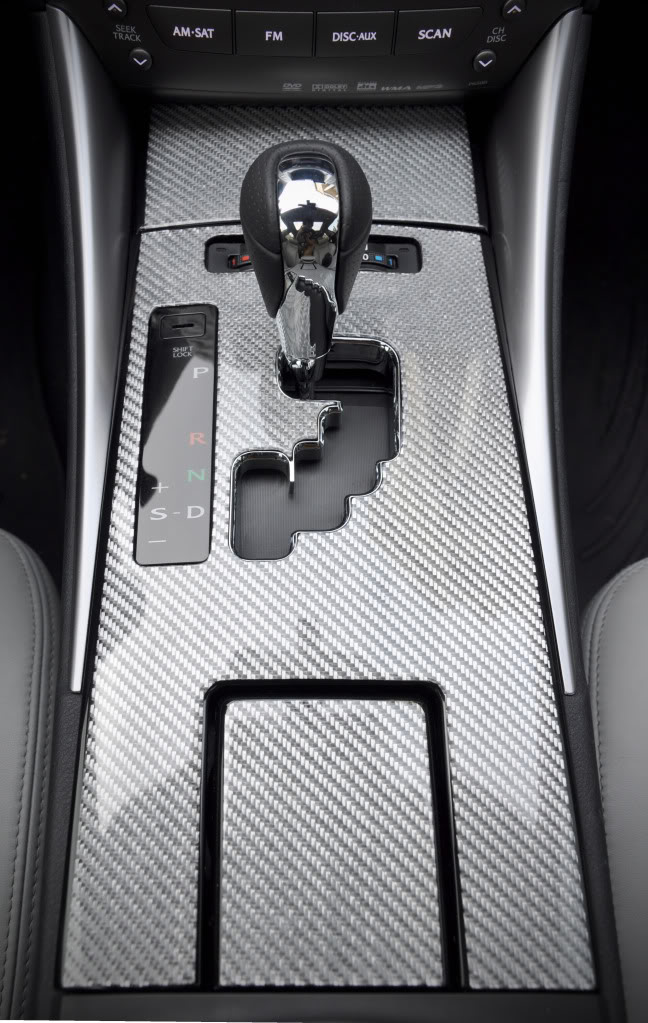
I know this seems like a long and arduous process, but the finished pieces will be so worth it. Feel free to ask any questions; I'll try and help out as best I can.
Good Luck!!
The clear coat will continue to out-gas for up to a couple of months, so waxing now can cause problems down the road. I plan on pulling the pieces back out of the car in a few months, re-polishing them, and then applying wax for protection.
You are now ready to install, and enjoy your new carbon fiber pieces!!!!!
Here are my results -
I know this seems like a long and arduous process, but the finished pieces will be so worth it. Feel free to ask any questions; I'll try and help out as best I can.
Good Luck!!
Last edited by rcJten; 02-27-12 at 12:18 AM.

 !
!


