DIY - How to Cover Things with Real Carbon Fiber


 02-03-15, 07:01 PM
#53
Driver School Candidate

Join Date: Feb 2015
Location: Ny
Posts: 1
Likes: 0
Received 0 Likes
on
0 Posts
Hey I was wondering how much would you charge to do about 7-10 car pieces? For a Subaru . You can text me /call me or email me .
(917)250-0179 and elore36225@aol.com
(917)250-0179 and elore36225@aol.com
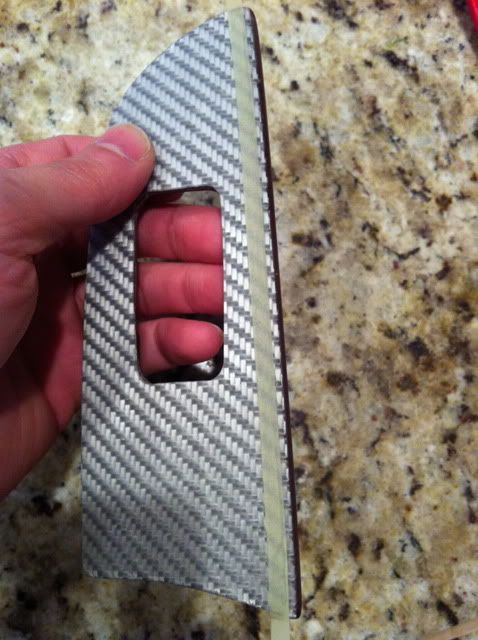
The rounding is not as noticeable on the edges so I cut them off now with the Exacto.
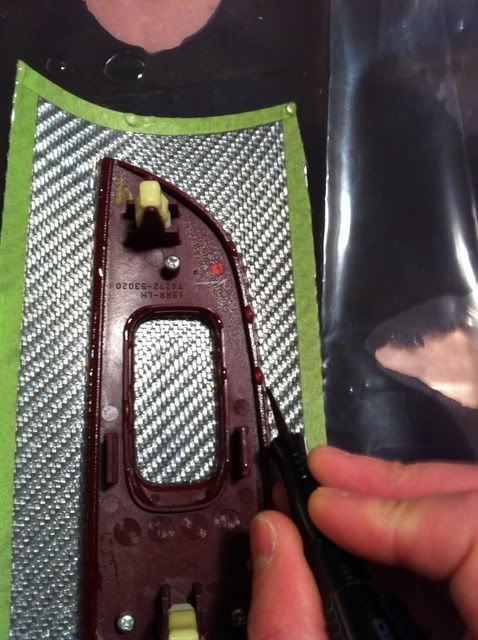
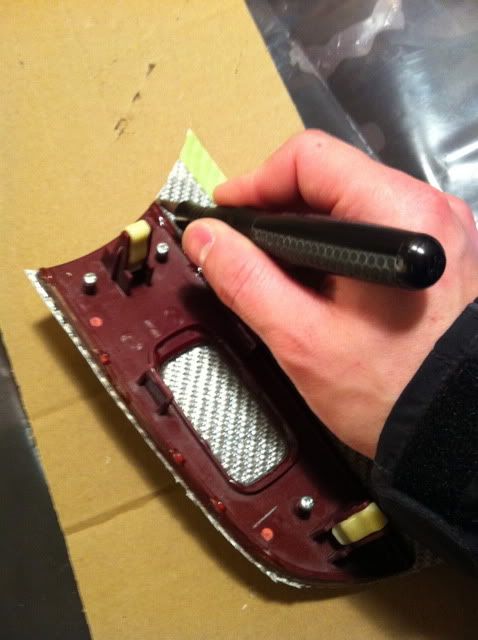
Using a sanding block, with 400 grit sandpaper, sand down the cut of edges until they are smooth and flush with the edges of the piece. Clean the dust off with isopropyl alcohol on a lint free cloth.
Time to build up layers
Set your piece up for more layers of epoxy. Brush on 3-4 more heavy layers of epoxy, waiting about 5-6 hours in between each layer. Remember to stir slowly. Be sure to use the heat gun to remove bubbles each time your apply a coat. Following the final coat allow the epoxy to cure for a full 24 hours, after which you should start to have a nice looking piece -
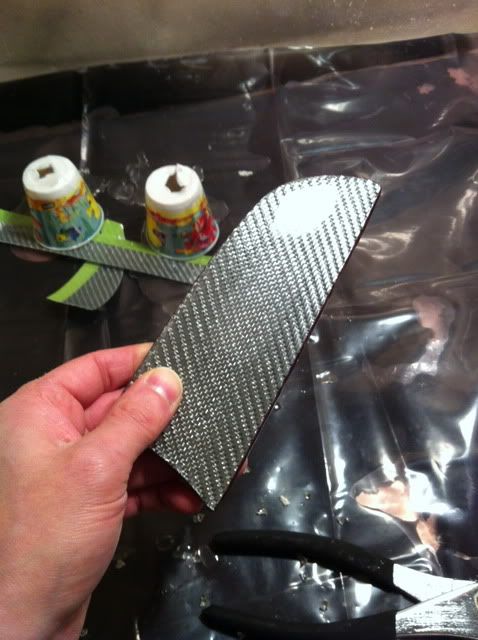
Trim out the window switch
Now that your finished laying the epoxy it's time to cut out the window switch. Start with the Dremel and routing bit, make sure you don't go too close to the actual edge you want though because it's easy to screw up and over cut. Try and keep about 1/2" of extra material.

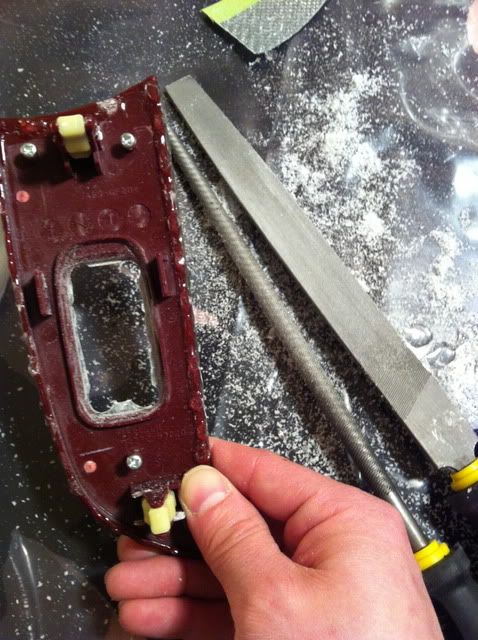
Use the flat and round files to shave away the rest of the extra material. The flat file works great for the straight edges, just be sure to keep it perpendicular to the front surface of the piece to achieve the flat hard edges. Use the round file for the rounded corners. File just until you reach the original edges, then finish with a very quick hand sand with 400 grit to smooth away any roughness.
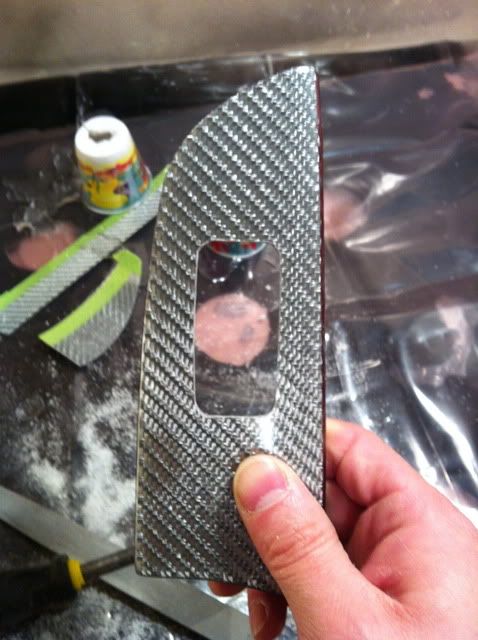
Now you can flatten out the surface
This next step may take some time, but extra effort will greatly improve you piece. You will want to even out the surface as best you can. Begin by soaking your 600-800 grit sandpaper in a bowl of water, with a drop of dish soap in it, for about 10 minutes. Wet sanding will minimize the mess, and give you smoother results.

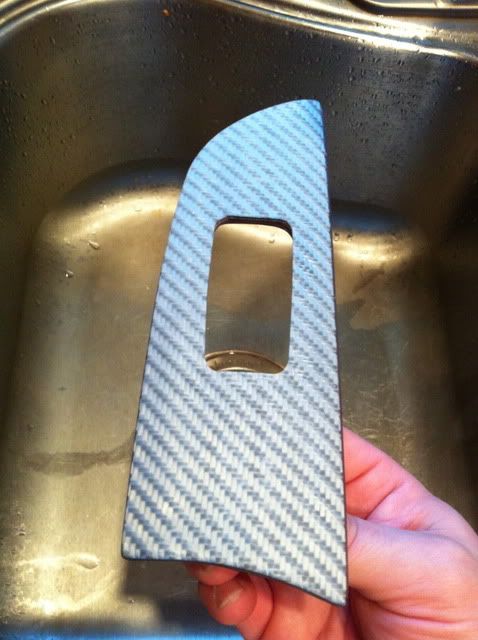
Make sure to keep the sanding surface wet, and rinse it off often. Give the whole surface a good sand with the sanding block, then rinse it off, and dry with a paper towel. Once dry you'll get a good idea of how close to smooth your surface is by what parts are still glossy (low spots), and what is now flat. If you are doing a lighter color CF you can use a sharpie to mark the glossy spots so you know where you still need to sand when the water makes it hard to tell what's still glossy.


Once you've reached the point that there's no longer any shiny low spots, the surface should be flat enough to move on to cleaning up the underside of the piece. You will probably have a number of epoxy stalactites. I used my dremel to take of the majority in these, then use the sanding block with the 120 grit to finish them off. These parts wont be seen so it's not as critical to make it perfect. When finished wash the piece in soap and water and move on to the next step.
If your painting the trim, it's time to start masking
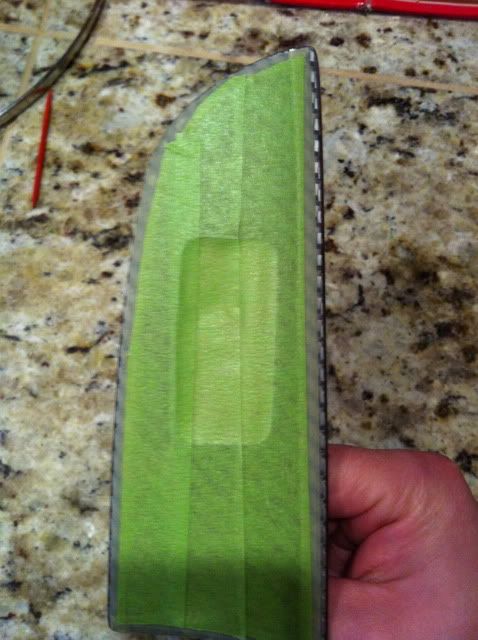
This portion is a bit more subjective. You can mask the piece anyway you like, your trim doesn't necessarily have to be just like mine. That said, I tried to copy the trim style used on the factory ISF pieces. I used pictures found on the web as examples. You can try to make each switch identical, but the nice thing is is that they will never be next to one another so any slight variation in the trim will not be noticeable. Start with a thin masking tape and mask of the edges.

Now fill in the surface with standard masking tape. Make sure to push down hard on the tape around the edges of the switch cut out. This way, when you paint the underside of the piece, the edges of the cut out will be painted as well.
Wear a glove so you can hold the piece and paint both sides. Follow the paint manufacturers instructions. I typically did one light first coat, then two heavier coats. Allow the paint to cure for at least 24 hours before proceeding.
Remove the masking tape and inspect for over spray. Use a small piece of 600 or 800 grit sand paper to remove any overspray. I also lightly sand the ridge cause by the tape at the edge of the painted areas.
Clean the surface with isopropyl alcohol when finished.
Clear coat
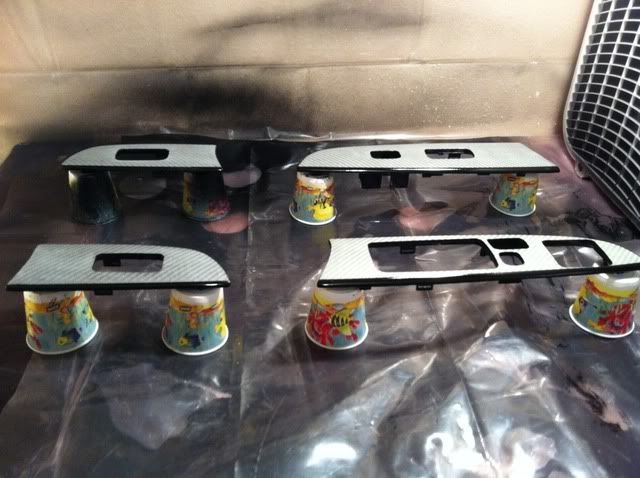
Adding a clear coat will not only make your piece look better, it protects the epoxy from UV rays which can cause yellowing over time. Set up your piece on your work table with the paper cups again. This is when having the fan and filter come in handy as it will reduce the amount of particles that fall onto your drying clear coat.
Follow the clear coat manufacturer instructions, and be sure to wear your respirator! The clear coat I recommended will give you professional results, but it is not something you want to breathe in.
I first spray a light coat, then follow with two additional heavier coats. Allow the clear to cure for a minimum of 24 hours, but even longer will benefit you as the clear will continue to harden.
I waited 5 days before moving to the next step.
Time for more wet sanding...maybe
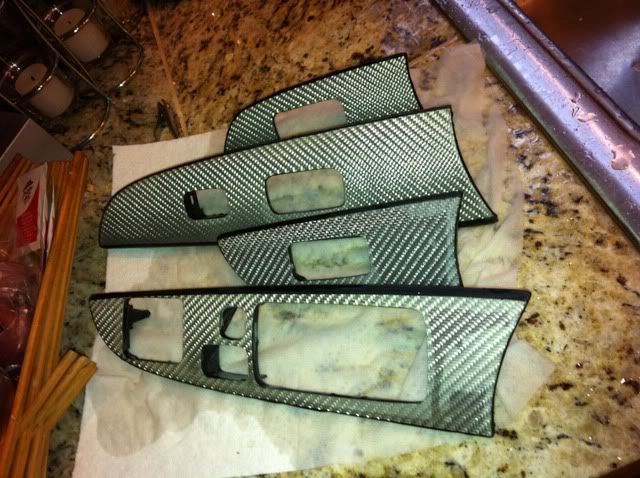
At this point you no doubt have a very glossy looking piece, and if your happy with it you can slap it in to your car, but going another round of wet sanding will take your piece to the next level.
Just as before soak your paper in water with a drop of soap, but this time start with 1000 grit in the sanding block. Continue sanding with 1000 grit until you again get a flat surface, no glossy low spots. Once you have smoothed out the entire surface move onto briefly wet sanding with the 1500 grit, then the 2000 grit. Once finished clean the part with soap and water and allow to dry.
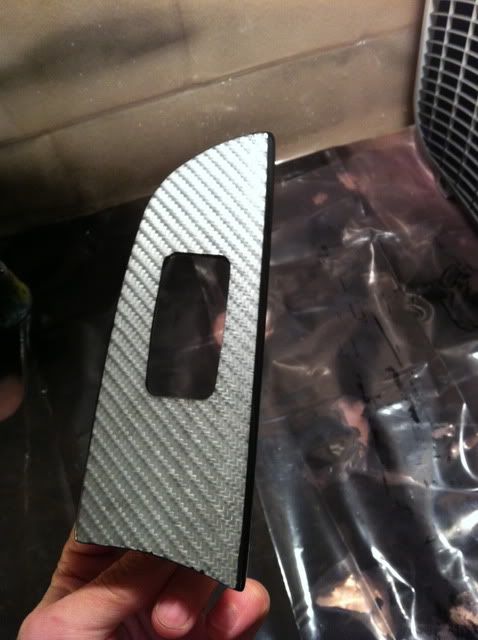
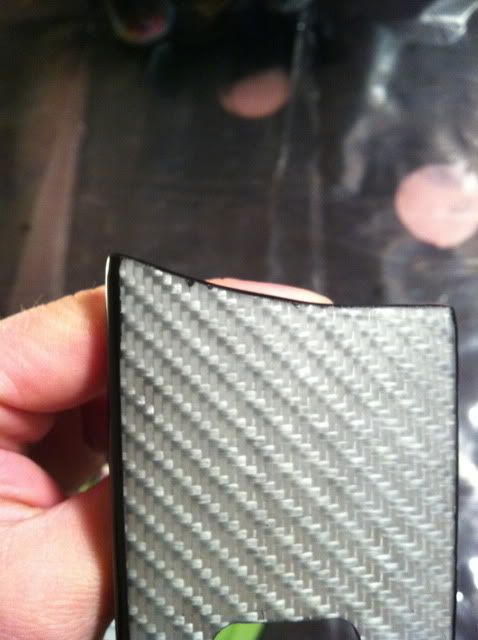
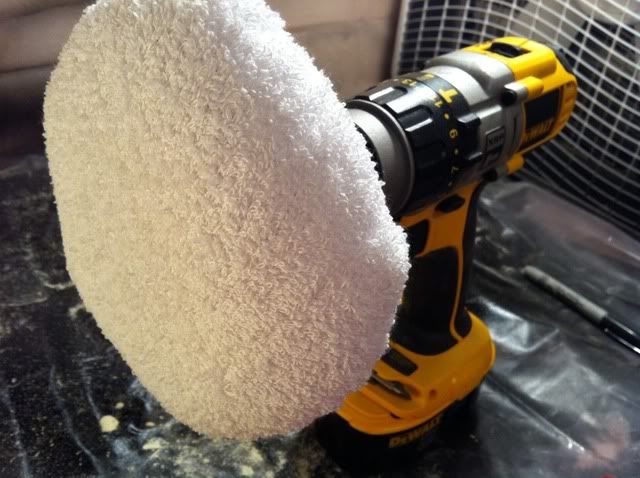
Buffing and Polishing
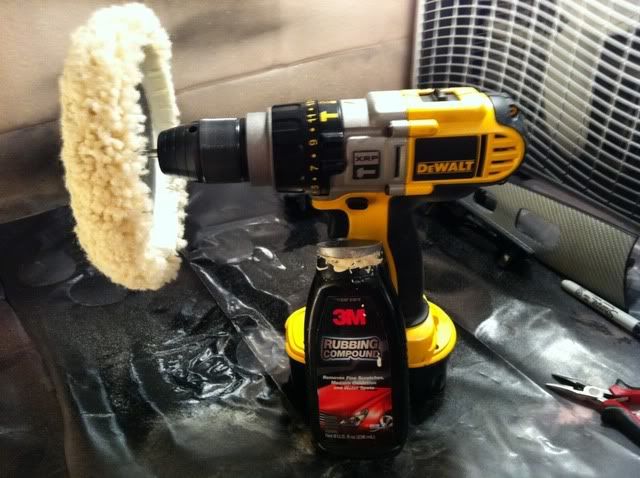
Time to bring that shine back to your pieces. I bought this buffing pad from NAPA, it works great with my cordless drill. I set the drill to medium speed and apply the rubbing compound directly to the part. Make sure to hold on tight to your piece as you buff it because the pad has a way of grabbing things and throwing them across the room. Buff the surface until it has a decent glossy surface. Clean off any residual rubbing compound.
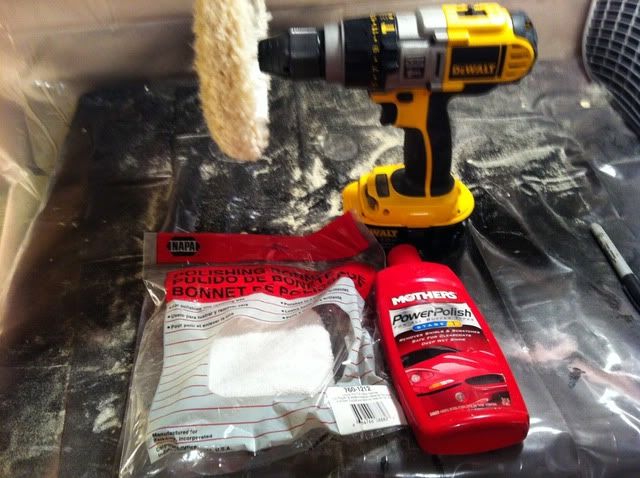
Now switch to the polishing pad, and apply the polish directly to the pad. Continue to buff until the desired gloss is achieved. Use the lights in the room to inspect for hairline scratches. Don't let the polish dry out, apply more as needed. Clean the surface with a soft cloth when finished. As you can see I was able to reach a near glass-like finish
Using a sanding block, with 400 grit sandpaper, sand down the cut of edges until they are smooth and flush with the edges of the piece. Clean the dust off with isopropyl alcohol on a lint free cloth.
Time to build up layers
Set your piece up for more layers of epoxy. Brush on 3-4 more heavy layers of epoxy, waiting about 5-6 hours in between each layer. Remember to stir slowly. Be sure to use the heat gun to remove bubbles each time your apply a coat. Following the final coat allow the epoxy to cure for a full 24 hours, after which you should start to have a nice looking piece -
Trim out the window switch
Now that your finished laying the epoxy it's time to cut out the window switch. Start with the Dremel and routing bit, make sure you don't go too close to the actual edge you want though because it's easy to screw up and over cut. Try and keep about 1/2" of extra material.
Use the flat and round files to shave away the rest of the extra material. The flat file works great for the straight edges, just be sure to keep it perpendicular to the front surface of the piece to achieve the flat hard edges. Use the round file for the rounded corners. File just until you reach the original edges, then finish with a very quick hand sand with 400 grit to smooth away any roughness.
Now you can flatten out the surface
This next step may take some time, but extra effort will greatly improve you piece. You will want to even out the surface as best you can. Begin by soaking your 600-800 grit sandpaper in a bowl of water, with a drop of dish soap in it, for about 10 minutes. Wet sanding will minimize the mess, and give you smoother results.
Make sure to keep the sanding surface wet, and rinse it off often. Give the whole surface a good sand with the sanding block, then rinse it off, and dry with a paper towel. Once dry you'll get a good idea of how close to smooth your surface is by what parts are still glossy (low spots), and what is now flat. If you are doing a lighter color CF you can use a sharpie to mark the glossy spots so you know where you still need to sand when the water makes it hard to tell what's still glossy.
Once you've reached the point that there's no longer any shiny low spots, the surface should be flat enough to move on to cleaning up the underside of the piece. You will probably have a number of epoxy stalactites. I used my dremel to take of the majority in these, then use the sanding block with the 120 grit to finish them off. These parts wont be seen so it's not as critical to make it perfect. When finished wash the piece in soap and water and move on to the next step.
If your painting the trim, it's time to start masking
This portion is a bit more subjective. You can mask the piece anyway you like, your trim doesn't necessarily have to be just like mine. That said, I tried to copy the trim style used on the factory ISF pieces. I used pictures found on the web as examples. You can try to make each switch identical, but the nice thing is is that they will never be next to one another so any slight variation in the trim will not be noticeable. Start with a thin masking tape and mask of the edges.
Now fill in the surface with standard masking tape. Make sure to push down hard on the tape around the edges of the switch cut out. This way, when you paint the underside of the piece, the edges of the cut out will be painted as well.
Wear a glove so you can hold the piece and paint both sides. Follow the paint manufacturers instructions. I typically did one light first coat, then two heavier coats. Allow the paint to cure for at least 24 hours before proceeding.
Remove the masking tape and inspect for over spray. Use a small piece of 600 or 800 grit sand paper to remove any overspray. I also lightly sand the ridge cause by the tape at the edge of the painted areas.
Clean the surface with isopropyl alcohol when finished.
Clear coat
Adding a clear coat will not only make your piece look better, it protects the epoxy from UV rays which can cause yellowing over time. Set up your piece on your work table with the paper cups again. This is when having the fan and filter come in handy as it will reduce the amount of particles that fall onto your drying clear coat.
Follow the clear coat manufacturer instructions, and be sure to wear your respirator! The clear coat I recommended will give you professional results, but it is not something you want to breathe in.
I first spray a light coat, then follow with two additional heavier coats. Allow the clear to cure for a minimum of 24 hours, but even longer will benefit you as the clear will continue to harden.
I waited 5 days before moving to the next step.
Time for more wet sanding...maybe
At this point you no doubt have a very glossy looking piece, and if your happy with it you can slap it in to your car, but going another round of wet sanding will take your piece to the next level.
Just as before soak your paper in water with a drop of soap, but this time start with 1000 grit in the sanding block. Continue sanding with 1000 grit until you again get a flat surface, no glossy low spots. Once you have smoothed out the entire surface move onto briefly wet sanding with the 1500 grit, then the 2000 grit. Once finished clean the part with soap and water and allow to dry.
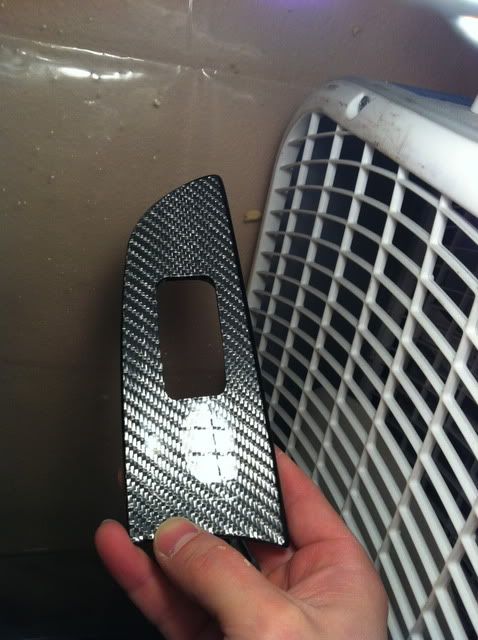
Buffing and Polishing
Time to bring that shine back to your pieces. I bought this buffing pad from NAPA, it works great with my cordless drill. I set the drill to medium speed and apply the rubbing compound directly to the part. Make sure to hold on tight to your piece as you buff it because the pad has a way of grabbing things and throwing them across the room. Buff the surface until it has a decent glossy surface. Clean off any residual rubbing compound.
Now switch to the polishing pad, and apply the polish directly to the pad. Continue to buff until the desired gloss is achieved. Use the lights in the room to inspect for hairline scratches. Don't let the polish dry out, apply more as needed. Clean the surface with a soft cloth when finished. As you can see I was able to reach a near glass-like finish
10-10-16, 07:02 AM
#55
This looks awesome. You did a great job! I want to do it this way, but $200 is a little bit much for me especially since I am just trying to do my center console.
10-11-16, 08:25 AM
#56

Great job! Thanks for sharing these details.
This is something I want to tackle myself also and you've answered allot of questions I've had in my head about such a project.
...hopefully you'll continue doing more and sharing those experiences and posting more pics as well.
This is something I want to tackle myself also and you've answered allot of questions I've had in my head about such a project.
...hopefully you'll continue doing more and sharing those experiences and posting more pics as well.
10-11-16, 11:24 AM
#57
Lexus Test Driver
Great thread! like the carbon fiber shiny look.
10-12-16, 08:19 AM
#58
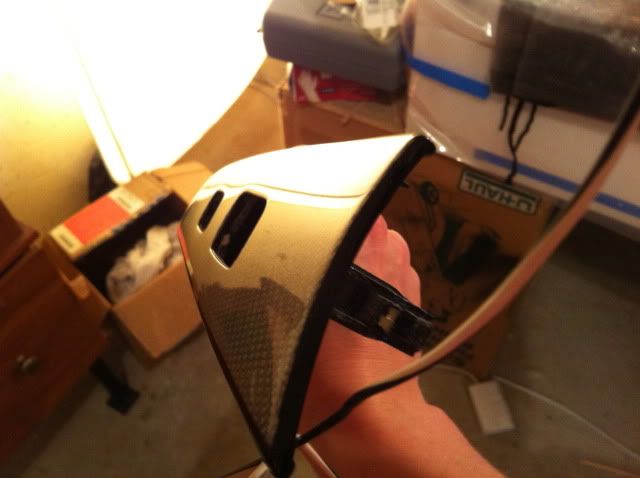
Good write up. I did the same on my car except instead of painting the edges of things, I actually wrapped the parts around the edge, which honestly is the source of 90% of my frustration with getting it perfect every time. CF is not all that forgiving!!
So far I've done the center console and switch plates. Up next is the more challenging dash vents. I don't have much time to work on it so I'll post it when I'm done.
one tip I can offer up - instead of putting down epoxy and waiting for that small time period where it's tacky enough to stick down the CF, I have switched up to a 5 minute epoxy. The method you have is fine, but when you start wrapping around the edges as I've done on mine, there has to be a fair amount of tack otherwise you'll end up with lifted surfaces which cannot be reworked.
Also, for those who attempt this, don't cheap out on the epoxy. Get good, marine grade quality epoxy, such as that offered by West systems. It will have less tendency to yellow over time. Cheap epoxy will turn yellowish very quickly. Also, it is of great help to get the west systems pumps so you don't have to fuss with a scale. The pumps dose out the right ratio of resin to hardener. If anyone is trying this and gets frustrated, feel free to hit me up and I'll see how I can assist.
I can't emphasize enough to try this on some stuff you don't care about first, because if you screw up, and you most likely will the first time, it's a PITA to do any amount of rework.


Thread
Thread Starter
Forum
Replies
Last Post
Lexman4375
SC- 1st Gen (1992-2000)
16
02-12-14 03:04 PM