DIY Rear 350 Brakes with Pics (Pads, Painted and Stickers)
 04-28-08, 06:20 AM
#1
Lexus Fanatic
Thread Starter
To all CL Memebers,
Passnu2 and I wanted to place a DIY for the rear brakes on the 350 since there is a DIY for the fronts on CL. The pad swap out was very easy for both front and back. You do not have to remove the caliper as well. Mike and I replaced both his front and rear OEM pads with a ceramic pad in order to reduce the brake dust build-up on his chrome wheels. Lexus engineers have designed a nice caliper which allows the pads to be removed from the top on all 4 axles of the 350. If any memebers have any questions on this DIY, please feel free to PM me.
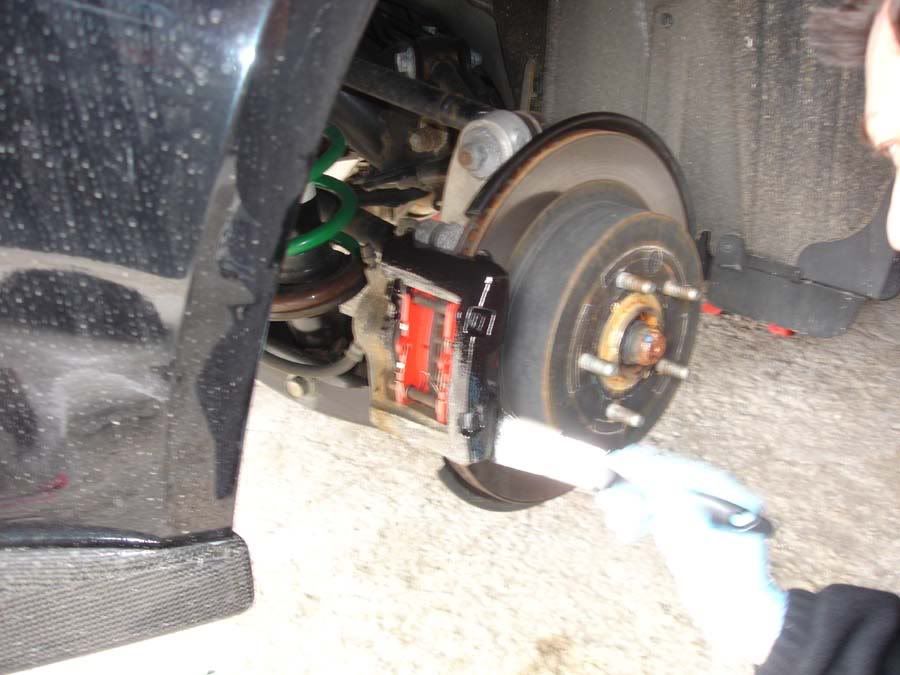
After removing the wheel, locate the caliper pin retaining clip (looks like a long spring. This simply pops out from the holes on the caliper pin.
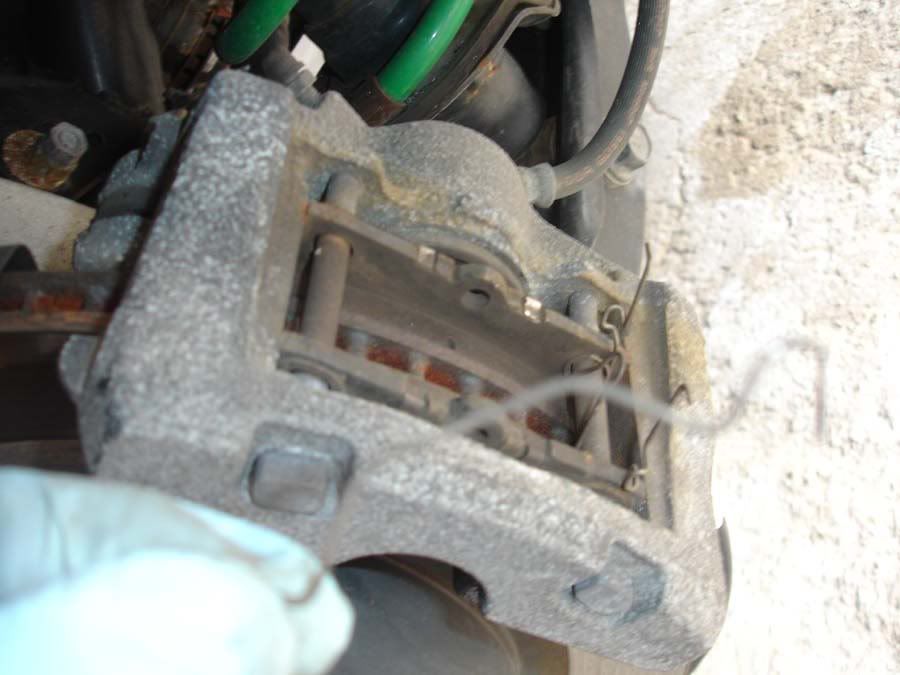
Once that stabilizer pin is removed, you are ready to simply pull out the pad retainer pins and the spacer spring will come out as well once you sqeeze it and free it froom the inner notches of the pads. You may need to tap on the back of the inner caliper to free the pins as corrosion may retaining it. Then it is time to compress the piston with a large c-clamp. One very important trick is to remove the cap from the master cylinder under the hood to allow the pressure to release a little while you are compressing the piston.
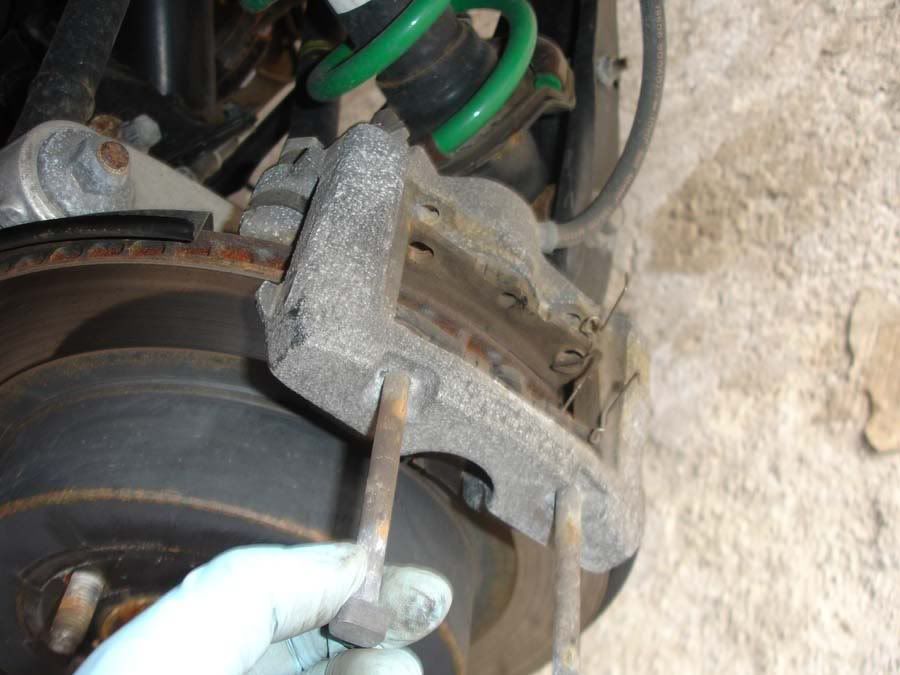
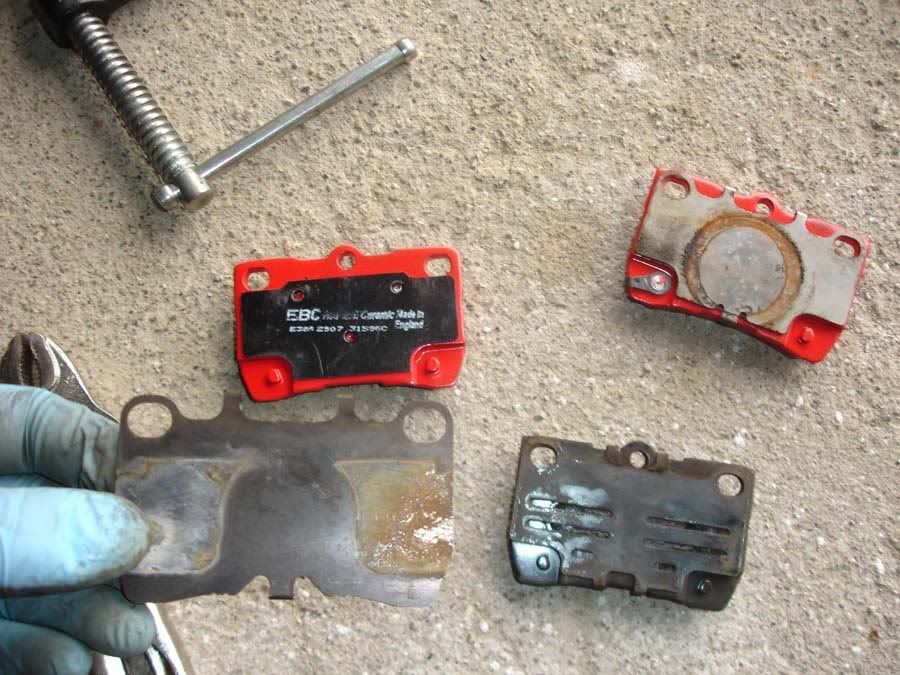
Once you remove the old pads, simply remove one shim from the two on the OEM pad. Most ceramic pads already have a rubber coated backing to reduce shifting and thus, only need one shim.
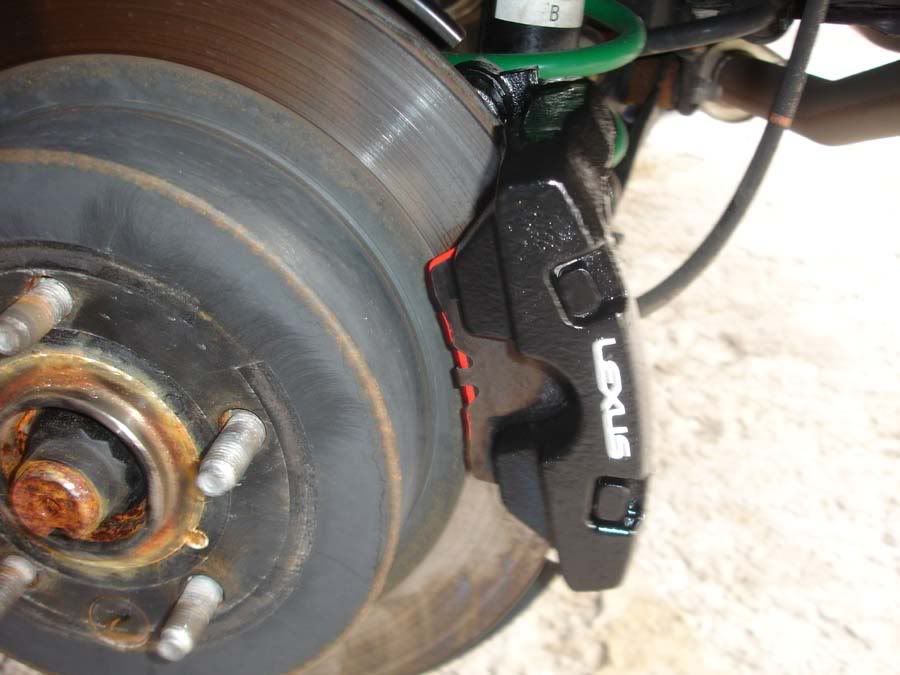
Then put the new pads in (may have to jiggle one in due to tight clearance of new pad). Make sure to slide the pad retaining pins through the pad stabilizer spring and reattach to new inner pads. Then re-attach the pin spring that runs paralell to the pad. We decided to paint the caliper with Duplicolor and place the sticker set on. We also cleaned the caliper really weel with the brakeclean inlcuded within the Duplicolor set.
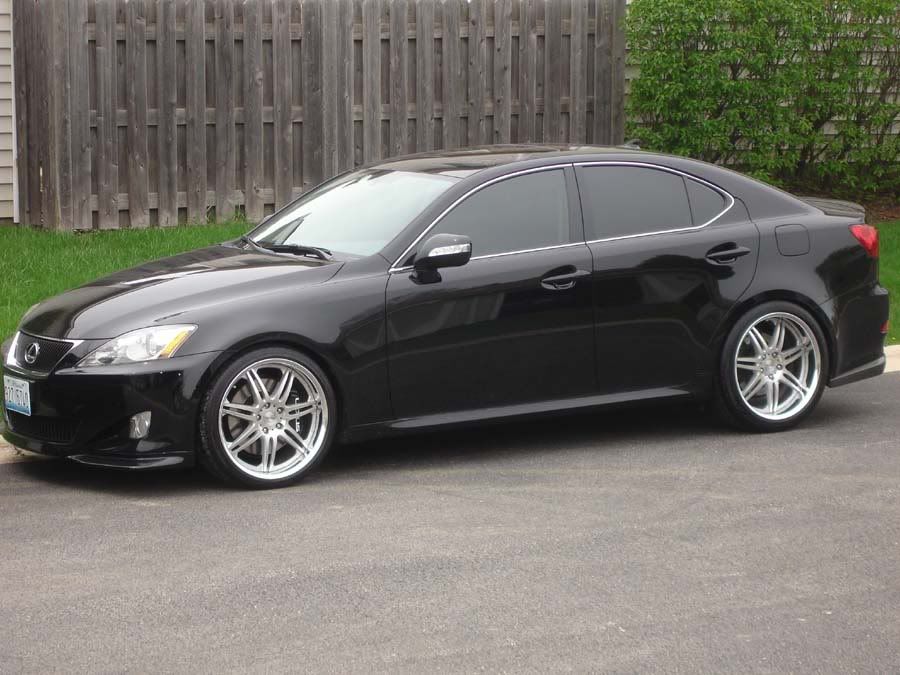
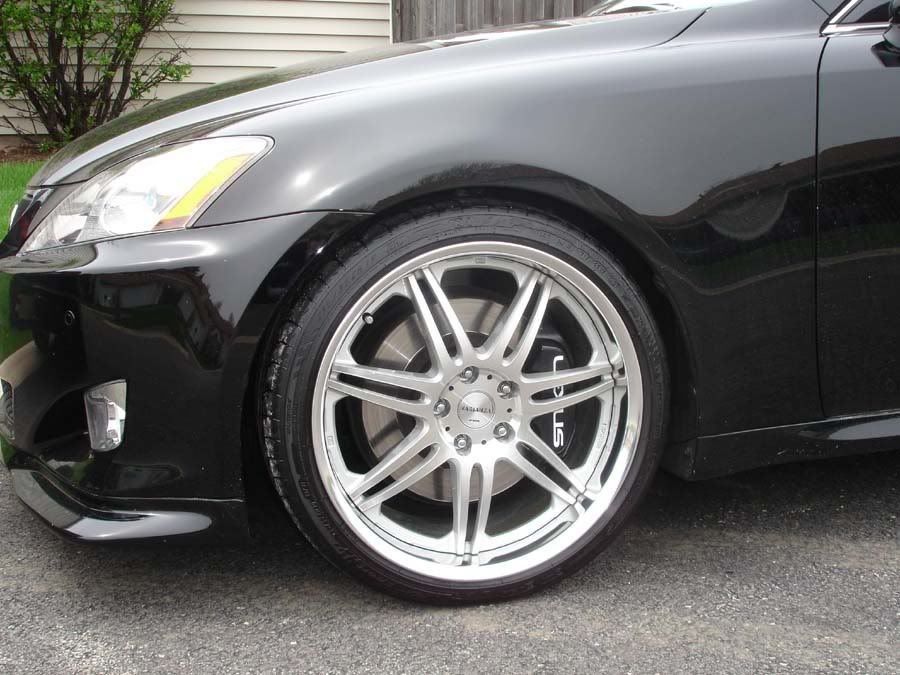
Passnu2 (Mike's) car is sharper than a Bobby Ginsu knife collection:
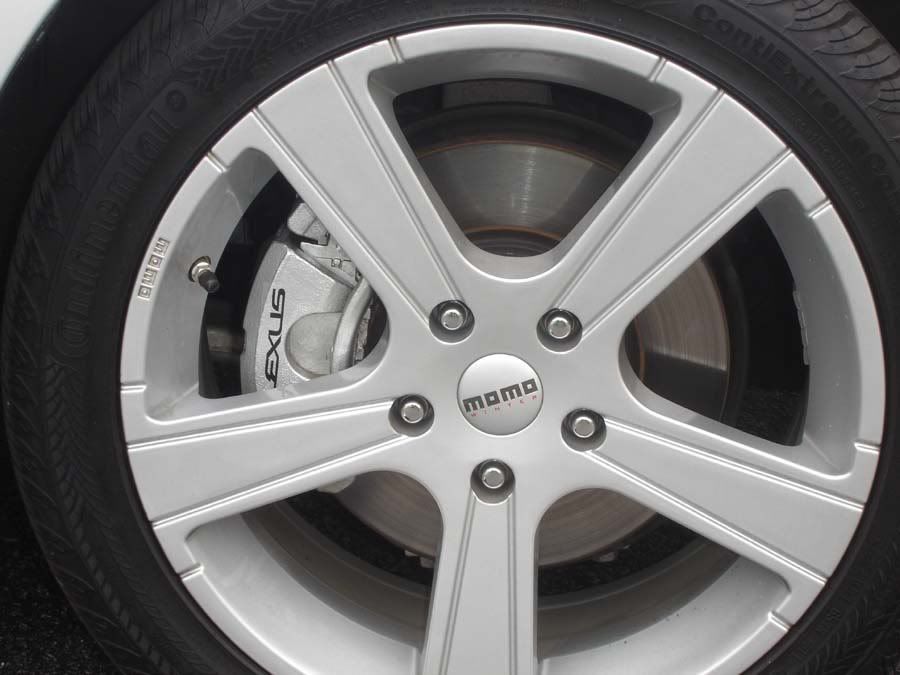
Here is a pic of my front caliper painted with Duplicolor silver and stickers applied. We were having a difficult time having the vinyl sticker adhere to the 250 caliper.
Elmo the dog was standing by for any assistance with this DUY, he tends to be an expert at braking systems. He has even become amazing with Powerpoint and Access.
Passnu2 and I wanted to place a DIY for the rear brakes on the 350 since there is a DIY for the fronts on CL. The pad swap out was very easy for both front and back. You do not have to remove the caliper as well. Mike and I replaced both his front and rear OEM pads with a ceramic pad in order to reduce the brake dust build-up on his chrome wheels. Lexus engineers have designed a nice caliper which allows the pads to be removed from the top on all 4 axles of the 350. If any memebers have any questions on this DIY, please feel free to PM me.
After removing the wheel, locate the caliper pin retaining clip (looks like a long spring. This simply pops out from the holes on the caliper pin.
Once that stabilizer pin is removed, you are ready to simply pull out the pad retainer pins and the spacer spring will come out as well once you sqeeze it and free it froom the inner notches of the pads. You may need to tap on the back of the inner caliper to free the pins as corrosion may retaining it. Then it is time to compress the piston with a large c-clamp. One very important trick is to remove the cap from the master cylinder under the hood to allow the pressure to release a little while you are compressing the piston.
Once you remove the old pads, simply remove one shim from the two on the OEM pad. Most ceramic pads already have a rubber coated backing to reduce shifting and thus, only need one shim.
Then put the new pads in (may have to jiggle one in due to tight clearance of new pad). Make sure to slide the pad retaining pins through the pad stabilizer spring and reattach to new inner pads. Then re-attach the pin spring that runs paralell to the pad. We decided to paint the caliper with Duplicolor and place the sticker set on. We also cleaned the caliper really weel with the brakeclean inlcuded within the Duplicolor set.
Passnu2 (Mike's) car is sharper than a Bobby Ginsu knife collection:
Here is a pic of my front caliper painted with Duplicolor silver and stickers applied. We were having a difficult time having the vinyl sticker adhere to the 250 caliper.
Elmo the dog was standing by for any assistance with this DUY, he tends to be an expert at braking systems. He has even become amazing with Powerpoint and Access.

 04-28-08, 06:51 AM
#3
Thanks Brian! Everything looks great! Hope the post helps other members when its time to replace the rear pads. Mine did not require this but I had purchased front and rear matching pads. I am very happy with the EBC pads so far!
Painting the caliper is very easy! I suggest to get a 1" brush from your local hardware store to make it easier and quicker. The tiny brush they give in that kit is pretty much worthless. I found that worked much better!
Many thanks to Brian for his time and help to make this happen!
Painting the caliper is very easy! I suggest to get a 1" brush from your local hardware store to make it easier and quicker. The tiny brush they give in that kit is pretty much worthless. I found that worked much better!
Many thanks to Brian for his time and help to make this happen!
04-28-08, 08:17 AM
#5
Lexus Fanatic
Thread Starter
Thanks Bichon. Mike and I wanted to post this in order to help other members who are irritated by the brake dust and wanted to DIY rather than the established TSIB. It was extremely easy and worth getting the painting done at the same time. I should have posted that the braking efficiency had no loss at all and seems to better with less dust according to Mike who drives a ton during the week at mostly highway speeds.
 Brake dust....ugh!
04-28-08, 08:46 AM
Brake dust....ugh!
04-28-08, 08:46 AM
#7
Super Moderator
Your DIY write up should be a helpful guide not only to those who want a lower dust alternative to the stock rear pads (my stockers don't seem terribly dusty), but also for owners of higher mileage cars who need to replace them due to wear. I was pleased to see that the job is so easy; on most cars you need a special tool to rotate the piston as you push it back in.
Trending Topics
04-28-08, 08:47 AM
#8
Lexus Fanatic
Thread Starter
It is typically $18 at autozone, Murrays etc.
http://www.americanmuscle.com/duplic...hannelid=FROOG
04-28-08, 08:51 AM
#10
With our very cold and rainy weather today, might have to hop on a plane with my toolbox (LOL)!!!! I just witnessed snow flurries and sleet just a half hour ago. I would have the TSIB done for the fronts if your wheels are becoming bombarded with the dust Erin. Then you could simply paint the calipers black yourself with the below kit. You will love how it looks.
It is typically $18 at autozone, Murrays etc.
http://www.americanmuscle.com/duplic...hannelid=FROOG
It is typically $18 at autozone, Murrays etc.
http://www.americanmuscle.com/duplic...hannelid=FROOG
")
 04-28-08, 09:18 AM
#13
Lexus Champion
iTrader: (2)
Join Date: Feb 2008
Location: *661* CA
Posts: 2,502
Likes: 0
Received 0 Likes
on
0 Posts
Mike and Brian,
It's going to be 94 degrees here today in wonderful Bakersfield, CA...HOT,HOT, HOT! I am gonna see if the stealership will do the TSIB brake dust at my 5k service (last time I checked, they were kinda yes/no on doing the brake dust TSIB for 2008 models).
You guys did a good job!
It's going to be 94 degrees here today in wonderful Bakersfield, CA...HOT,HOT, HOT!
I am gonna see if the stealership will do the TSIB brake dust at my 5k service (last time I checked, they were kinda yes/no on doing the brake dust TSIB for 2008 models). You guys did a good job!
04-28-08, 09:18 AM
#14
Lexus Fanatic
Thread Starter
In that case Mike, we leave tommorow!!!!! After Little E's brake job, it is off to the beach with margaritas in hand.

