IS F (2008-2014) Discussion topics related to the IS F model

Installed my Wald "Style" spoiler today...

Old 05-19-13, 12:03 AM
  #46  
digger08
Lexus Test Driver
Thread Starter
iTrader: (1)
 
digger08's Avatar
 
Join Date: Jan 2004
Location: Canada
Posts: 1,028
Received 10 Likes on 8 Posts
Default

Originally Posted by bnizzle87
Good to know! Is there any adhesive or trim to install where the diffuser meets the paint? I've noticed a few F owners with the Tom's diffuser using that trim to avoid debris getting in those tiny spaces, but I haven't seen any of that trim with those who have the WALD diffuser
I first mounted with nothing....no good - fits well along the top but the sides have gaps. A "T" gasket will not work on the Wald as the mating surfaces are all an inch wide.


I pulled it back off and fiddled with it, but could not get the gaps to settle on both sides (near each end).

So I went and just ran 3M tape along the entire front surface. which helped with the side gaps, and created a uniform fitment.


Digger08
Old 05-19-13, 12:11 AM
  #47  
FD3SISF
Lead Lap
iTrader: (2)
 
FD3SISF's Avatar
 
Join Date: May 2012
Location: SoCal
Posts: 664
Likes: 0
Received 0 Likes on 0 Posts
Default

Looking good.
Old 05-19-13, 12:52 PM
  #48  
bnizzle87
Lexus Fanatic
 
bnizzle87's Avatar
 
Join Date: Jul 2009
Location: CA
Posts: 5,595
Received 60 Likes on 51 Posts
Default

Good to know. Thanks! Hopefully not much of a longer wait for mine
Old 05-19-13, 01:01 PM
  #49  
Murph145
Lexus Test Driver
 
Murph145's Avatar
 
Join Date: Apr 2012
Location: Ca
Posts: 1,003
Likes: 0
Received 5 Likes on 4 Posts
Default

Nice pick up...I don't think you should coat your diffuser any of the top brand name ones come witha good clear coat already on that is UV resistant and the exhaust will not damage it either. Leave it be as is and enjoy your dope diffuser
Old 05-19-13, 01:31 PM
  #50  
PrezJay
Driver
 
PrezJay's Avatar
 
Join Date: Apr 2012
Location: CA
Posts: 120
Likes: 0
Received 0 Likes on 0 Posts
Default

Looks good! My full Tom's kit is coming in this week so I'm excited to join the diffuser club
Old 05-27-13, 12:56 PM
  #51  
ISSForged
Driver
 
ISSForged's Avatar
 
Join Date: Jan 2013
Location: TX
Posts: 192
Likes: 0
Received 0 Likes on 0 Posts
Default

Loving the build! A+
Old 09-09-13, 09:16 AM
  #52  
digger08
Lexus Test Driver
Thread Starter
iTrader: (1)
 
digger08's Avatar
 
Join Date: Jan 2004
Location: Canada
Posts: 1,028
Received 10 Likes on 8 Posts
Default

Sorry...just to add a picture, as I used silicone that closely matched Mercury Metallic to help fill in the gaps.


Digger08
Old 09-09-13, 02:00 PM
  #53  
Defratos
Racer
 
Defratos's Avatar
 
Join Date: Oct 2011
Location: On a sand dune
Posts: 1,496
Received 69 Likes on 43 Posts
Default

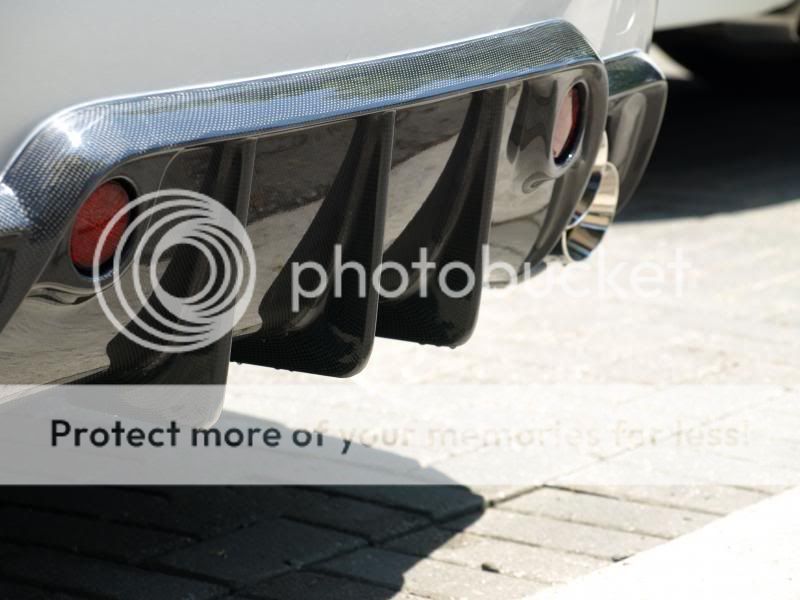
Car looks great, love the Wald diffsuer
Old 09-09-13, 03:58 PM
  #54  
aWorkOfArt
Lexus Test Driver
 
aWorkOfArt's Avatar
 
Join Date: Feb 2012
Location: Guam
Posts: 1,332
Likes: 0
Received 3 Likes on 2 Posts
Default

Love your build bro! What silcone did you use BTW I need to do what you did for my Wald wing too. Thanks in advance!
Old 03-24-14, 04:10 PM
  #55  
teamcalvin
Pole Position
 
teamcalvin's Avatar
 
Join Date: Aug 2013
Location: Texas (DFW)
Posts: 387
Likes: 0
Received 0 Likes on 0 Posts
Default

Just purchased a wald diffuser today.. i was wondering if you had to screw on anything or did you use 3m tape all the day? also which silicone did you use?
Old 03-24-14, 04:56 PM
  #56  
digger08
Lexus Test Driver
Thread Starter
iTrader: (1)
 
digger08's Avatar
 
Join Date: Jan 2004
Location: Canada
Posts: 1,028
Received 10 Likes on 8 Posts
Default

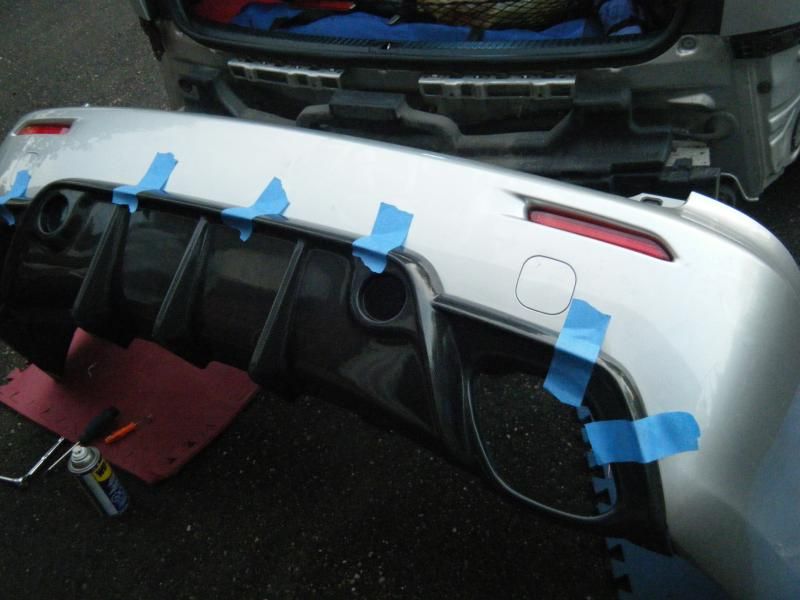
The diffuser is also held on by those two rear deflectors (from the Highlander - should you lose one)...so you will need to drill, they're length is very short and they just barely fit through the bumper - so you will need to drill 2 small holes through your bumper - they are bolts with nuts. There is also two small screws for the bottom of the diffuser as well. This is the main reason why you will need to remove the bumper completely to install this properly.

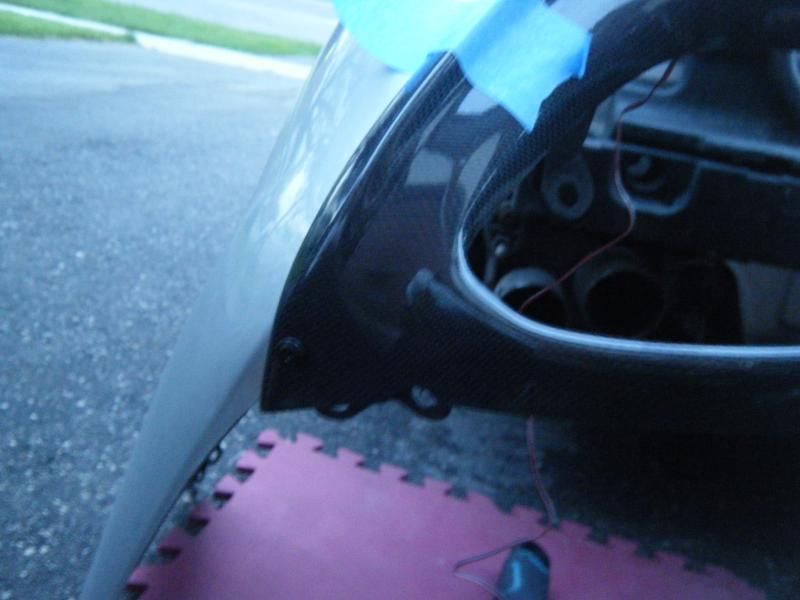
You can see the hole here, with the reflectors removed.


There is also two small screws for the bottom of the diffuser on each end that go through the bumper as well.


I used Permatex Ultra Gray High Rigid/ Torque just along the top - where the gaps were.


The rest of the diffuser, I use 3M foam tape.


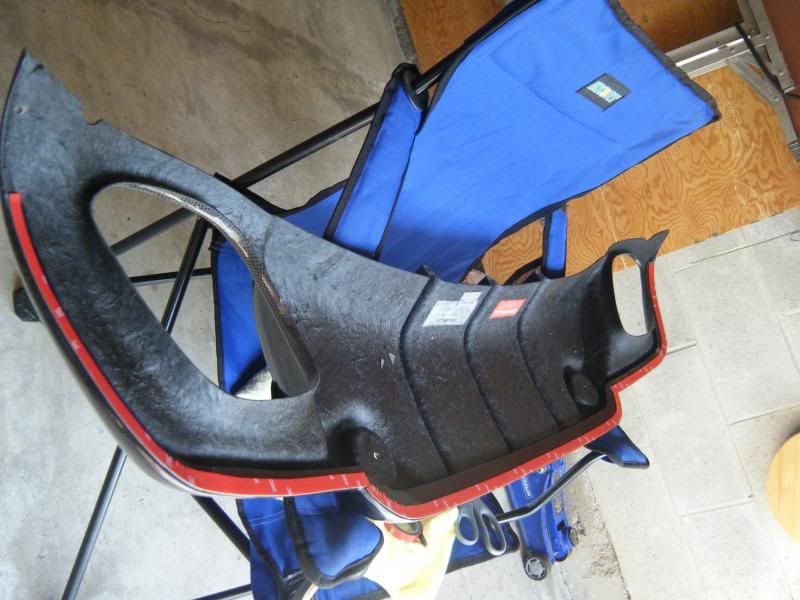
The RTV sealant has not shrunk, peeled or separated at all for the last year/ including two track days.


Digger08
Old 03-24-14, 11:41 PM
  #57  
teamcalvin
Pole Position
 
teamcalvin's Avatar
 
Join Date: Aug 2013
Location: Texas (DFW)
Posts: 387
Likes: 0
Received 0 Likes on 0 Posts
Default

damn nice man, thanks for everything!
Old 04-20-14, 08:09 PM
  #58  
Rickna
Racer
iTrader: (3)
 
Rickna's Avatar
 
Join Date: Mar 2014
Location: ConnectiTAX
Posts: 1,951
Received 231 Likes on 160 Posts
Default

OP great tutorial on the install. I too, have a "Wald Style" spoiler and will be installing it within a week or so.
Old 02-08-15, 05:09 PM
  #59  
Lexusboy4
Driver School Candidate
iTrader: (1)
 
Lexusboy4's Avatar
 
Join Date: Dec 2014
Location: North carolina
Posts: 39
Likes: 0
Received 0 Likes on 0 Posts
Default

How did you remove the emblem from the trunk
Old 02-08-15, 05:17 PM
  #60  
Rickna
Racer
iTrader: (3)
 
Rickna's Avatar
 
Join Date: Mar 2014
Location: ConnectiTAX
Posts: 1,951
Received 231 Likes on 160 Posts
Default

Originally Posted by Lexusboy4
How did you remove the emblem from the trunk
I used fishing line.

Thread Tools
Search this Thread
Quick Reply: Installed my Wald "Style" spoiler today...


All times are GMT -7. The time now is 03:59 AM.