DIY: IS-F front brake pads
#197
Just got my pads and rotors for the front and pads only for the rear. Gonna try to do everything hopefully Thursday and will see how everything goes. My buddy has done brakes before but I never have attempted but have always wanted to do it.
#198
#199
Tech Info Resource

iTrader: (2)
#201
Definitely a great DIY. I replaced front rotors and pads. Took about two hours total. Second side was easier after I was confident doing the job and only took about 30 minutes of the two hours. The rear pads were really easy and only took about an hour with half of that time cleaning my wheels.
#202
Lexus Test Driver
iTrader: (1)
caymandive, thanks for the pictures and directions. It made this DIY very easy. I didn't use the shims, but now I know they help with heat so I might put them back on or upgrade to the titanium shims via RR Racing. We also installed new bushings in the front end (figs) and I could immediately tell a difference. And a big thanks to mikersoft for his help and patience. 


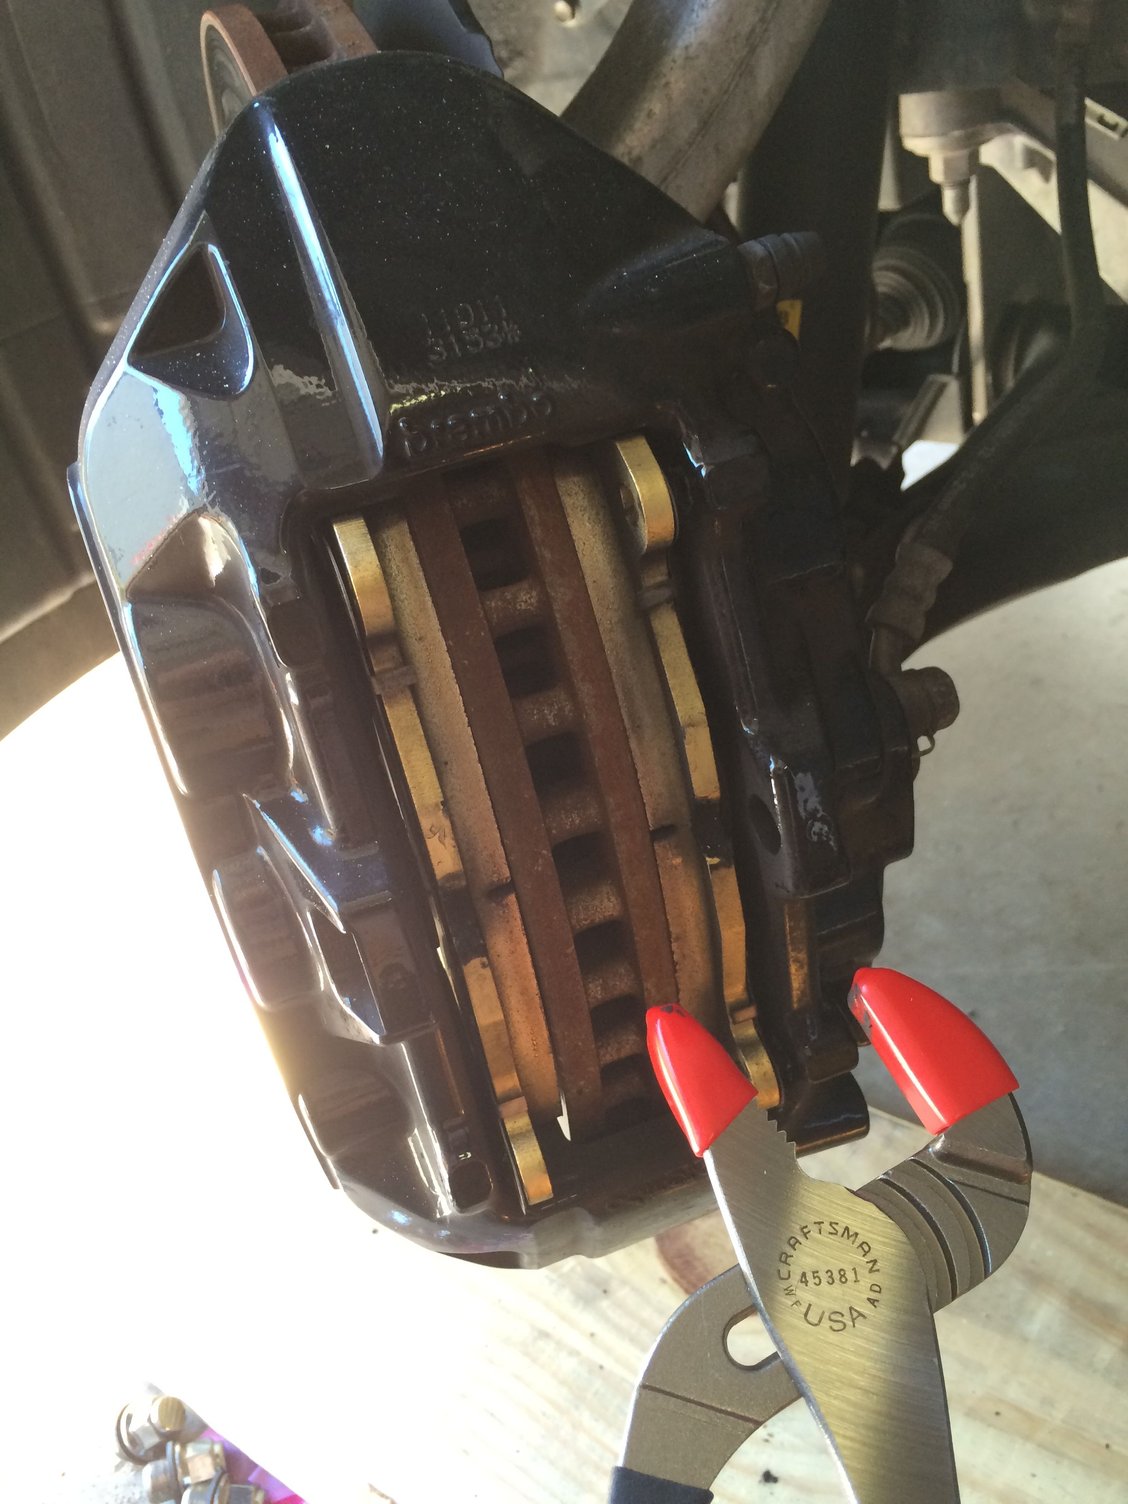
BTW, I stumbled on a nice alternative to the c-clamp for depressing the caliper pistons before removing pads. I found these rubber covers for channel lock pliers at Sears.
-Mike

#203
Yep, this DIY was just what I needed to start doing my own brake work (and help Mark learn to do his). It's especially important to do it myself to save some $$ now that I've started doing track days & will run different pad compounds for track & street. Thanks. 
BTW, I stumbled on a nice alternative to the c-clamp for depressing the caliper pistons before removing pads. I found these rubber covers for channel lock pliers at Sears.
-Mike

BTW, I stumbled on a nice alternative to the c-clamp for depressing the caliper pistons before removing pads. I found these rubber covers for channel lock pliers at Sears.
-Mike
#205
Intermediate
iTrader: (2)
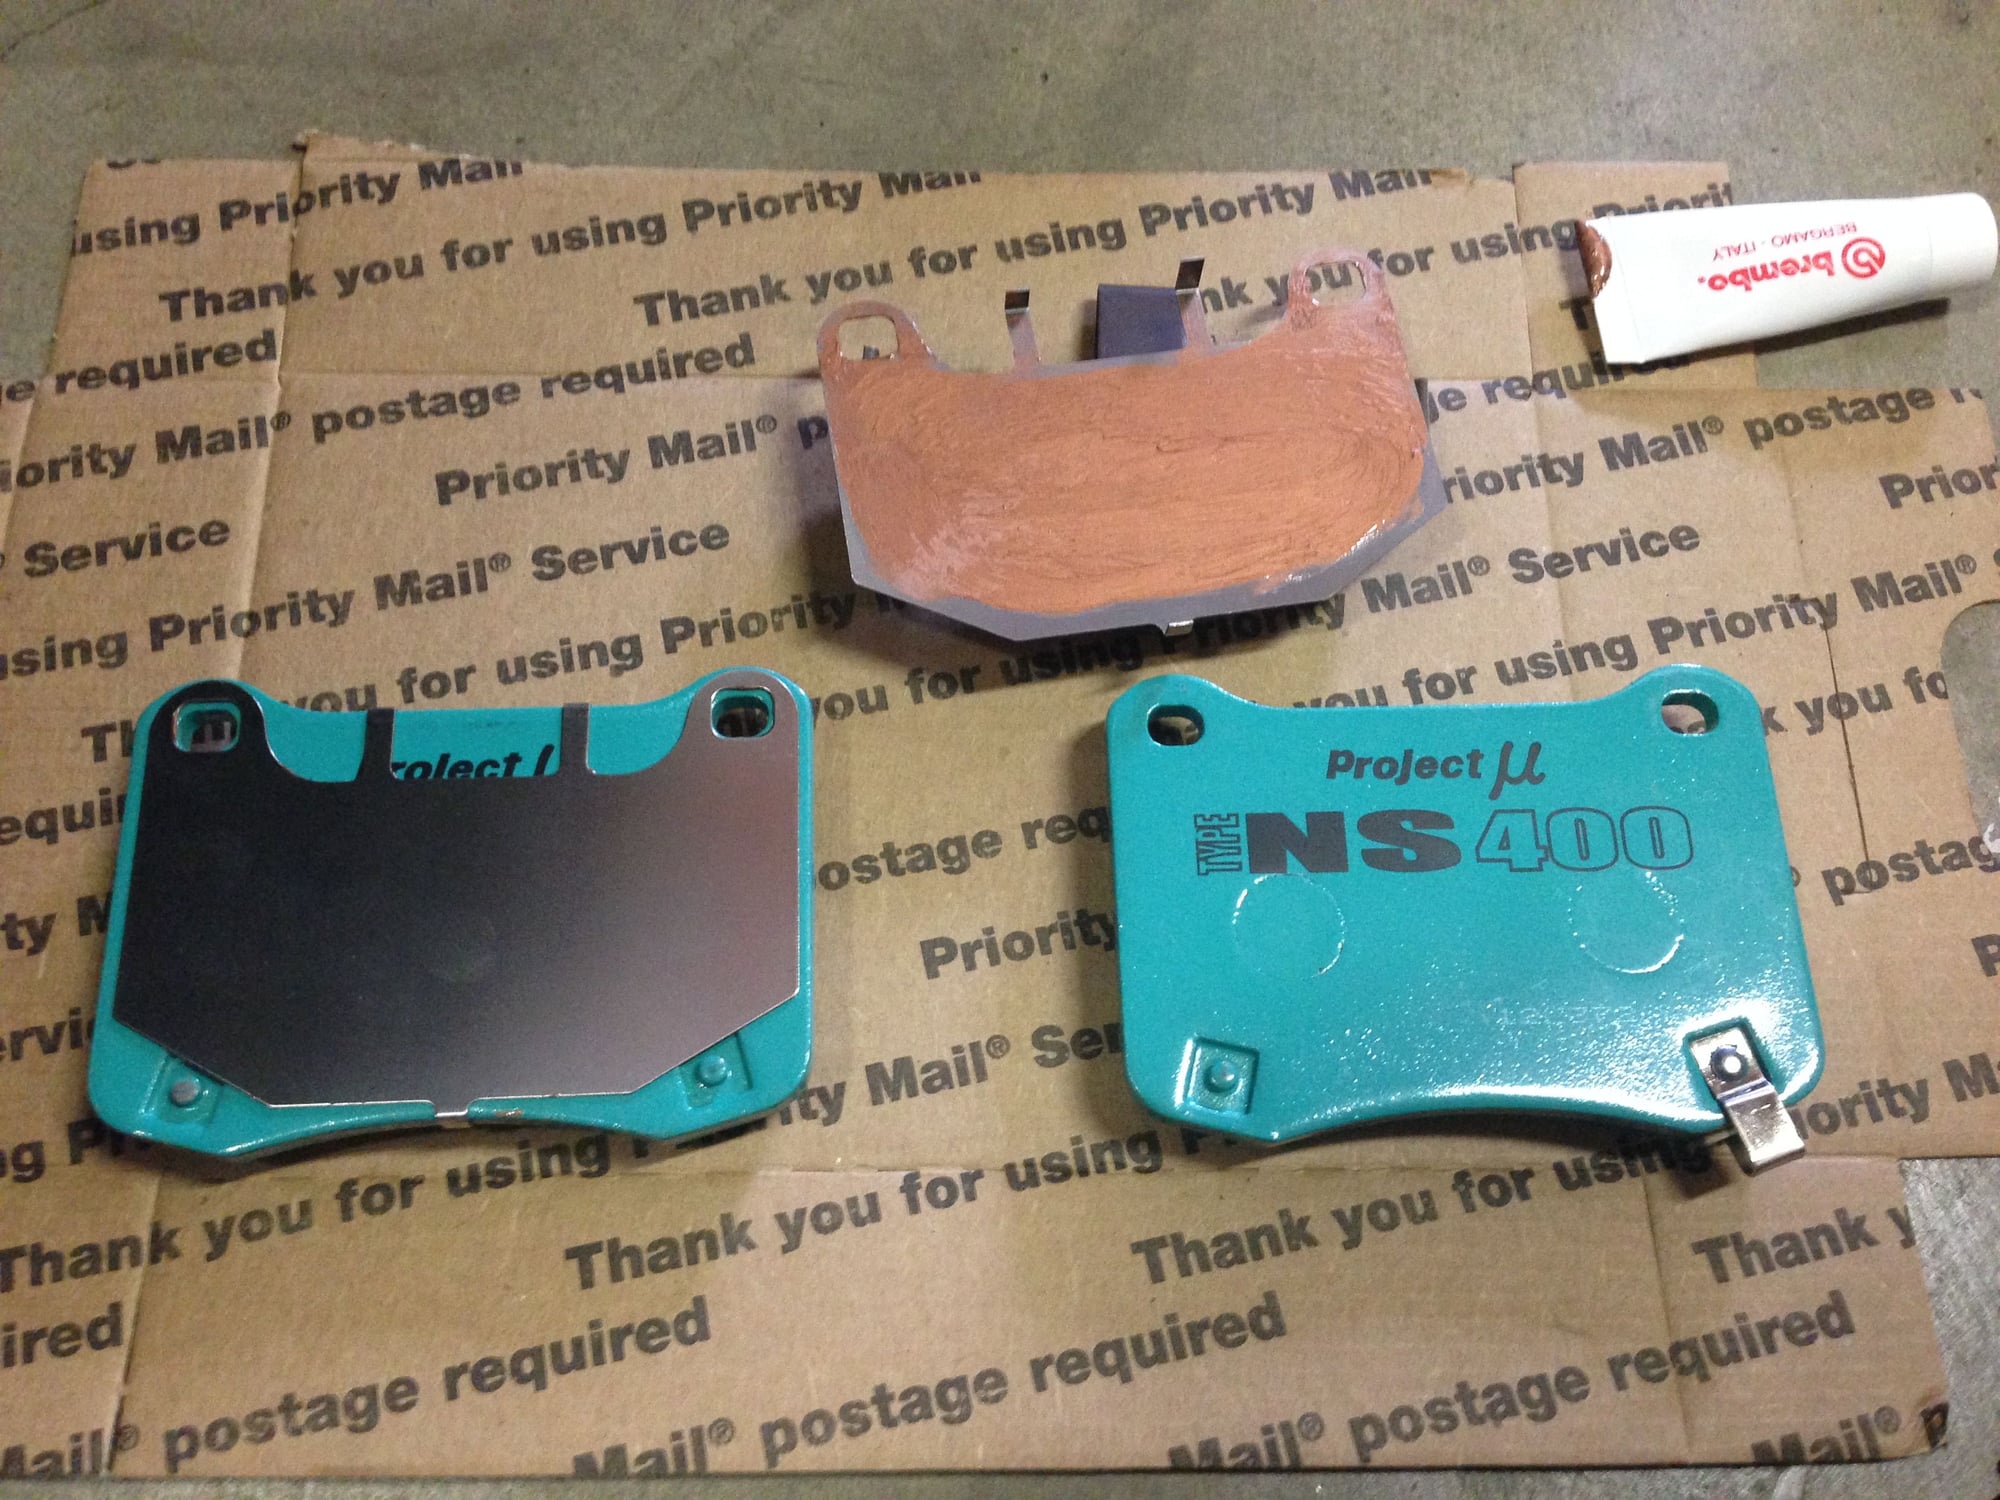
I'm confused as to where to put the copper lube. This DIY says the back of the shim, which touches the back of the pad and is what I did with my last pad change. Others have now also said that it's wrong, and that the lube should go on the front of the shim, which touches the pistons. Which one is it?
#206
Lexus Fanatic
iTrader: (10)
Join Date: Nov 2004
Location: Under an IS F since 2008
Posts: 13,446
Received 1,058 Likes
on
586 Posts
I'm confused as to where to put the copper lube. This DIY says the back of the shim, which touches the back of the pad and is what I did with my last pad change. Others have now also said that it's wrong, and that the lube should go on the front of the shim, which touches the pistons. Which one is it?
Never on the outside of shim touching the Pistons.
Below is a textbook install photo.

Joe Z

#207
Lexus Fanatic
great write up bud. I have been inspiring some to hit the track and others are inspiring me to try some work on my car myself. I love Club Lexus
#208
you go to the track that often and you don't wrench on your own car for at least the minor stuff?
doing a full rotor swap in our cars is pretty much 4 bolts and 3 pins that need to be removed.
doing a full rotor swap in our cars is pretty much 4 bolts and 3 pins that need to be removed.
#209
Racer
 , I've always put the anti-squel on both sides, the side where it sandwhiches with the brake pad and the side where it makes contact with the pistons.
 I thought thats how everyone does it? I can swear the dealership has done the same thing when I last looked at my pad change which they did.
Is there anything bad that can happen to the pistons if it makes contact with the anti-squel?

Last edited by Defratos; 05-31-16 at 12:41 AM.
#210
Really?  , I've always put the anti-squel on both sides, the side where it sandwhiches with the brake pad and the side where it makes contact with the pistons.
I thought thats how everyone does it? I can swear the dealership has done the same thing when I last looked at my pad change which they did.
Is there anything bad that can happen to the pistons if it makes contact with the anti-squel?
 , I've always put the anti-squel on both sides, the side where it sandwhiches with the brake pad and the side where it makes contact with the pistons.
 I thought thats how everyone does it? I can swear the dealership has done the same thing when I last looked at my pad change which they did.
Is there anything bad that can happen to the pistons if it makes contact with the anti-squel?

What JoeZ has said is correct. With that being said I did take my calipers off to do a color change since the previous owner wrapped them. He did however just have the brakes done at a Lexus dealer which did in fact put the AS on the inner side of the plate and where the pistons touch.
hmmm.


