DIY: How To Replace the Water Pump on the IS250
 01-15-14, 01:21 PM
#1
Driver
Thread Starter
This is the first big repair I ever done on a car and my first write-up. Feel free to make any corrections or suggestions as I am not a mechanic. Just a dude with some tools to fix minor problems lol. The job took me about 3 hours. 
***USE AT YOUR OWN RISK***

Leaking water pump
What You Would Need:
10mm, 12mm, and 14mm socket wrenches
Torque Wrench
Breaker Bar
Large pliers to remove hose clamps
Loctite Blue 242 Thread Locker
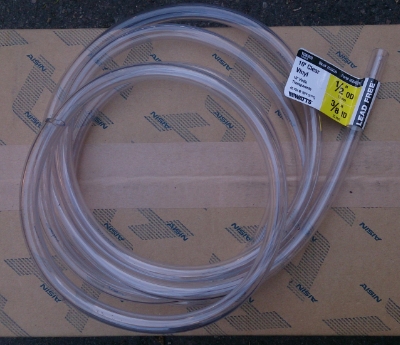
3/8” inside diameter vinyl tubing
Toyota Super Life Long Coolant (2 Gallons)
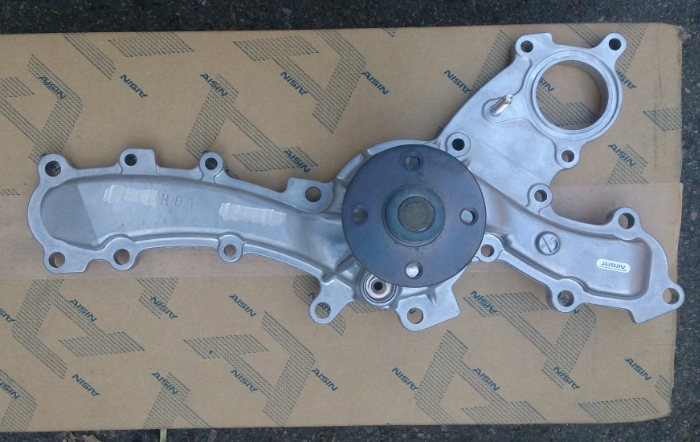
Aisin WPT-137 water pump. Aisin is the OEM provider for the water pump. You can find it on Amazon for $84.

As you can see, Toyota is etched off. It should come with a gasket and 2 O-rings.

Remove engine covers and cool air duct that attaches to the air box. Remove the 10mm bolt and slide it to the right to remove.
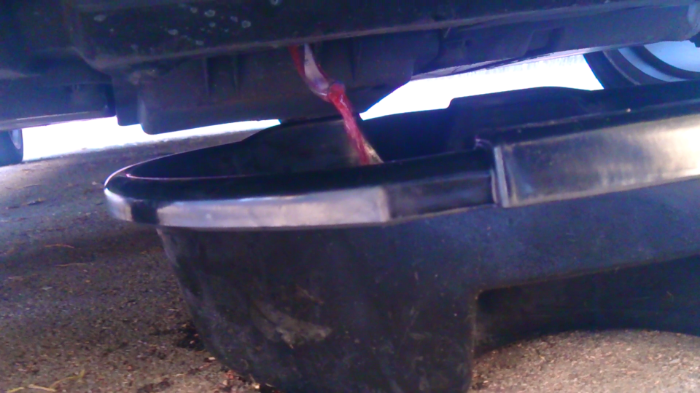
Now you need to drain the coolant. Attach the 3/8” vinyl tubing to the drain plug at the bottom of the radiator. Remove the radiator cap, and then turn the drain plug slowly until you see coolant draining out. Do not fully remove the drain plug.
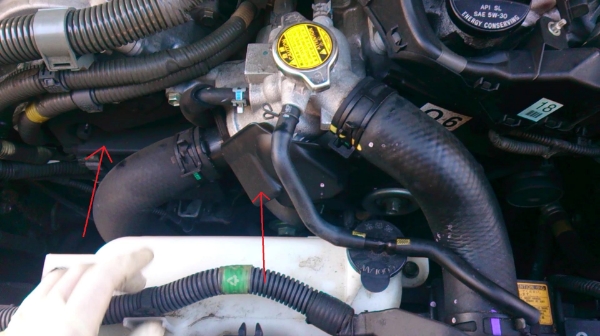
Remove Plastic covers. One is covering the water inlet and the other one covers the top portion of the Injector Driver.
Remove water reservoir by removing the 2 10mm bolts.

Slightly loosen the 4 bolts on the water pump pulley before removal of the serpentine belt. The belt helps hold the pulley in place.
Using a breaking bar of your choice, release the tension of the tensioner pulley by turning to the left. I bought a cheap 24” breaker bar at Harbor Freight for $9. Attach it to a 14mm socket.
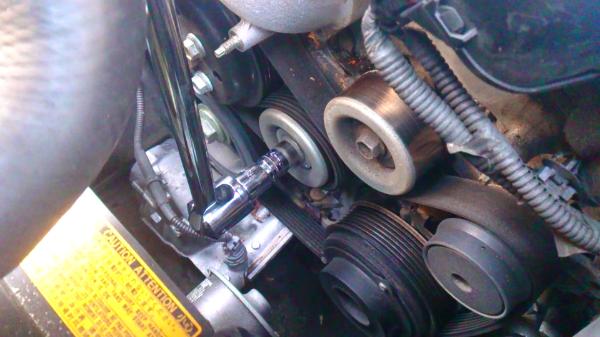
After removal of the belt, you can now take off the water pump pulley.
Disconnect the 6 hoses with pliers.
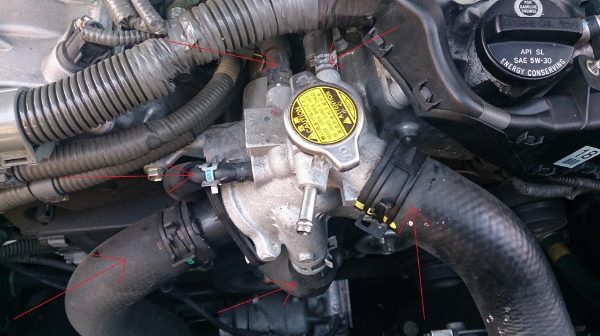
Remove the 4 bolts and nut holding the water inlet in place. I forgot to take a picture of the bolt locations, but here is a diagram.
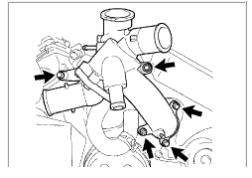
Once the hoses and all bolts are removed, carefully pull out the water inlet towards you. It was a little tough at first, but just keep tugging.
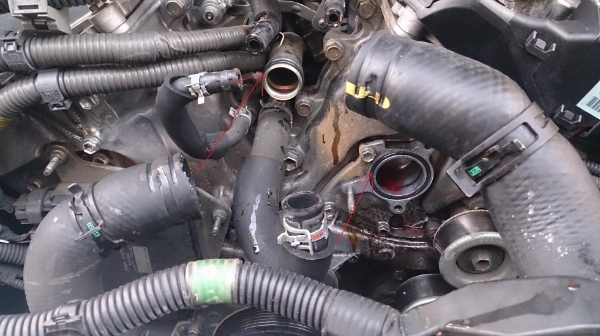
Remove these O-Rings. You will be replacing them with the new ones supplied with your water pump. You can replace the smaller O-Ring now, but you cant replace the bigger one yet until you put in your new water pump.
Remove the 3 10mm bolts holding the Injector Driver and move the driver to the side. I did not have to unplug any of the plugs to the driver.

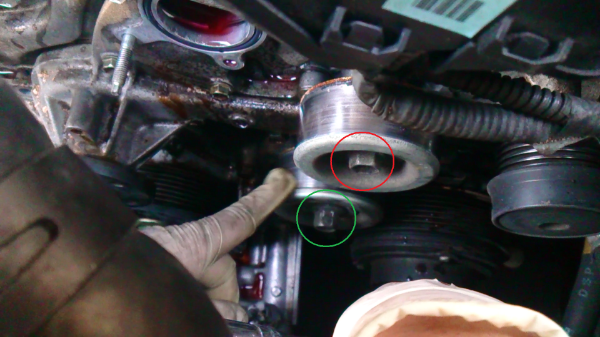
Remove the 2 pulleys. The tensioner pulley (Green) is left hand threaded, so turn right to loosen. Pulley #2 (Red) is normal thread, so turn left to loosen.
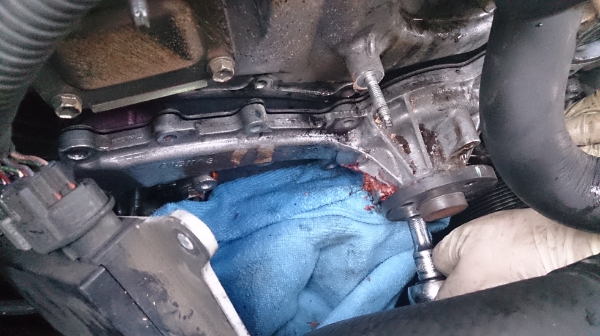
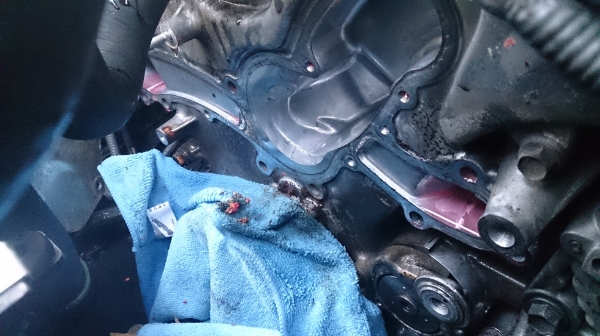
Remove the 16 bolts (12mm) on the water pump. There would be 3 different size bolts. Large (Bolts A), medium (Bolts B), short (Bolts C). Be prepared for a waterfall of coolant to flush out after removing the water pump. Get a bunch of rags ready, cover the floors, cover the pulleys, etc.

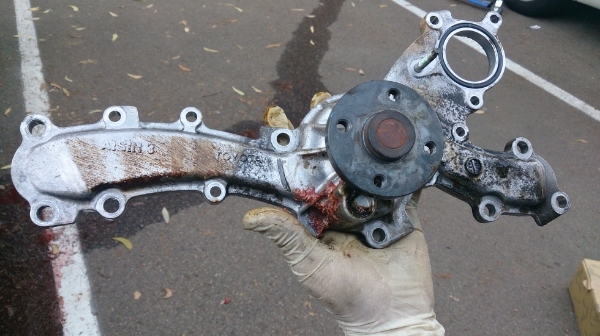
Here is the old water pump
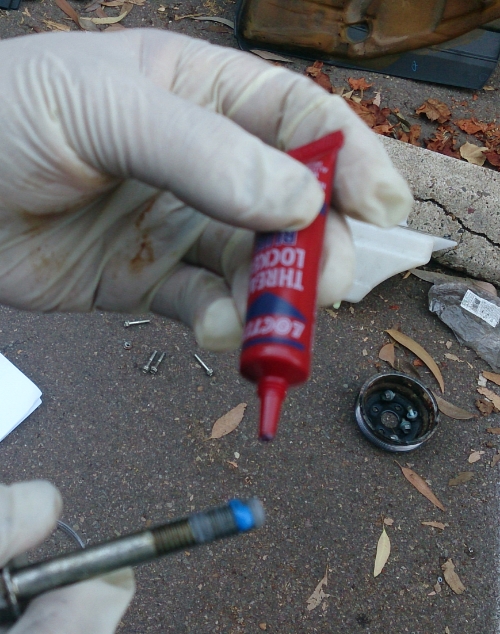
Now its time to put on that shiny new water pump and the gasket. Don’t forget to add a drop or 2 of the Loctite Blue thread locker to the bolts.


For the large bolts (Bolts A) Torque to 21 Nm (214 kgf-cm, 15 ft. lbs.)
For medium and short bolts (Bolts B and C) Torque to 9.1 Nm (93 kgf-cm, 6.5 ft. lbs.)

That’s it! The hard part is done. Now its time to put everything back.
Reinstall the 2 pulleys. Torque to 43 Nm (438 kgf-cm, 32 ft. lbs.)
Reinstall the water inlet. Torque the 4 bolts and nut to 10 Nm (102 kgf-cm, 7 ft. lbs.) Make sure you replaced the O-Rings!
Reinstall the water pump pulley. Torque to 21 Nm (214 kgf-cm, 15 ft. lbs.) It would be tough to tighten as the pulley spins. So wait till you put the serpentine belt back on to torque it to specs.
Good time to replace your serpentine belt if you want. Reinsert all hoses, plastic covers, and water reservoir.
Add Toyota Super Life Long coolant. Don’t forget to bleed out the air. Check for leaks.
You are now done and saved yourself $600+ if you are out of warranty like I was.
***USE AT YOUR OWN RISK***
HOW TO REPLACE THE WATER PUMP ON A LEXUS IS 250
Leaking water pump
What You Would Need:
10mm, 12mm, and 14mm socket wrenches
Torque Wrench
Breaker Bar
Large pliers to remove hose clamps
Loctite Blue 242 Thread Locker
3/8” inside diameter vinyl tubing
Toyota Super Life Long Coolant (2 Gallons)
Aisin WPT-137 water pump. Aisin is the OEM provider for the water pump. You can find it on Amazon for $84.
As you can see, Toyota is etched off. It should come with a gasket and 2 O-rings.
Remove engine covers and cool air duct that attaches to the air box. Remove the 10mm bolt and slide it to the right to remove.
Now you need to drain the coolant. Attach the 3/8” vinyl tubing to the drain plug at the bottom of the radiator. Remove the radiator cap, and then turn the drain plug slowly until you see coolant draining out. Do not fully remove the drain plug.
Remove Plastic covers. One is covering the water inlet and the other one covers the top portion of the Injector Driver.
Remove water reservoir by removing the 2 10mm bolts.
Slightly loosen the 4 bolts on the water pump pulley before removal of the serpentine belt. The belt helps hold the pulley in place.
Using a breaking bar of your choice, release the tension of the tensioner pulley by turning to the left. I bought a cheap 24” breaker bar at Harbor Freight for $9. Attach it to a 14mm socket.
After removal of the belt, you can now take off the water pump pulley.
Disconnect the 6 hoses with pliers.
Remove the 4 bolts and nut holding the water inlet in place. I forgot to take a picture of the bolt locations, but here is a diagram.
Once the hoses and all bolts are removed, carefully pull out the water inlet towards you. It was a little tough at first, but just keep tugging.
Remove these O-Rings. You will be replacing them with the new ones supplied with your water pump. You can replace the smaller O-Ring now, but you cant replace the bigger one yet until you put in your new water pump.
Remove the 3 10mm bolts holding the Injector Driver and move the driver to the side. I did not have to unplug any of the plugs to the driver.
Remove the 2 pulleys. The tensioner pulley (Green) is left hand threaded, so turn right to loosen. Pulley #2 (Red) is normal thread, so turn left to loosen.
Remove the 16 bolts (12mm) on the water pump. There would be 3 different size bolts. Large (Bolts A), medium (Bolts B), short (Bolts C). Be prepared for a waterfall of coolant to flush out after removing the water pump. Get a bunch of rags ready, cover the floors, cover the pulleys, etc.
Here is the old water pump
Now its time to put on that shiny new water pump and the gasket. Don’t forget to add a drop or 2 of the Loctite Blue thread locker to the bolts.
For the large bolts (Bolts A) Torque to 21 Nm (214 kgf-cm, 15 ft. lbs.)
For medium and short bolts (Bolts B and C) Torque to 9.1 Nm (93 kgf-cm, 6.5 ft. lbs.)
That’s it! The hard part is done. Now its time to put everything back.
Reinstall the 2 pulleys. Torque to 43 Nm (438 kgf-cm, 32 ft. lbs.)
Reinstall the water inlet. Torque the 4 bolts and nut to 10 Nm (102 kgf-cm, 7 ft. lbs.) Make sure you replaced the O-Rings!
Reinstall the water pump pulley. Torque to 21 Nm (214 kgf-cm, 15 ft. lbs.) It would be tough to tighten as the pulley spins. So wait till you put the serpentine belt back on to torque it to specs.
Good time to replace your serpentine belt if you want. Reinsert all hoses, plastic covers, and water reservoir.
Add Toyota Super Life Long coolant. Don’t forget to bleed out the air. Check for leaks.
You are now done and saved yourself $600+ if you are out of warranty like I was.
Last edited by Serifiyah; 06-21-15 at 03:01 AM.


 01-15-14, 02:16 PM
#7
Lexus Test Driver

You got to it before I did. I was gonna do a write up of my water pump change but its too cold for me to do a water pump change now. It seems pretty straight forward compared to other cars that Ive driven.


