
Xenon Depot Volt HID kit: fog light installation...
 03-06-09, 07:24 PM
#61
Lexus Test Driver
iTrader: (1)
Join Date: Jun 2008
Location: NYC
Posts: 1,124
Likes: 0
Received 0 Likes
on
0 Posts
Not exactly  . I have a 6000k kit in my H11 non-hid equipped car right now, and I HATE IT. That's probably why I don't recommend it to anyone
I'll have a different set up in the next week or so, but for now, I am a hypocrite.
. I have a 6000k kit in my H11 non-hid equipped car right now, and I HATE IT. That's probably why I don't recommend it to anyoneI'll have a different set up in the next week or so, but for now, I am a hypocrite.


 04-10-12, 12:47 PM
#68
Hi,
A relay harness is only necessary to ensure that the ballasts receive a constant 12V. XenonDepot HID kits only use ballasts with EMI filters. You will not have any issues with power steering interference like you do with lower grade HID kits.
Steve
A relay harness is only necessary to ensure that the ballasts receive a constant 12V. XenonDepot HID kits only use ballasts with EMI filters. You will not have any issues with power steering interference like you do with lower grade HID kits.
Steve
04-10-12, 02:30 PM
#69
Driver School Candidate

Join Date: Mar 2012
Location: CA
Posts: 9
Likes: 0
Received 0 Likes
on
0 Posts
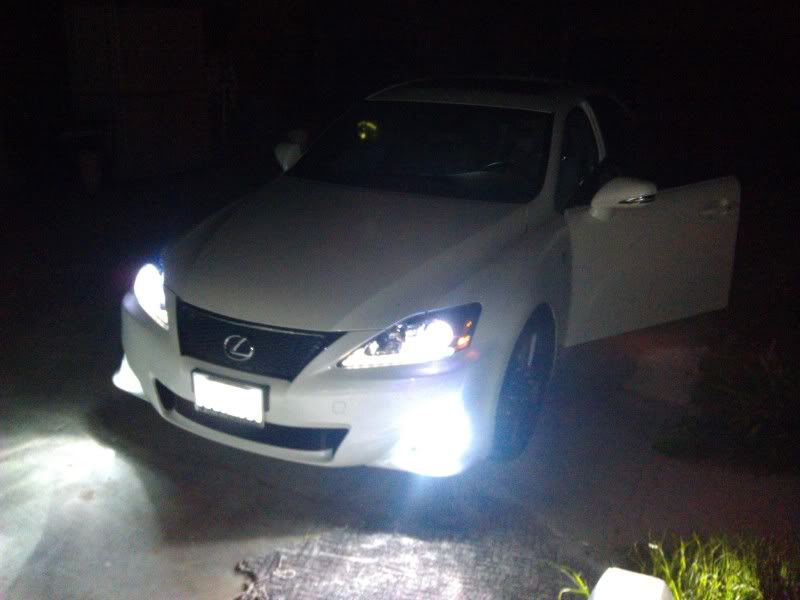
Just installed my 6000k Xtreme HID D4s lows and my Volt HID 6000k Fog Lights this weekend and it matches up perfectly! The driver's side fog light seem a little more blue but that's just due to my crappy camera phone =P. This gives you an idea of the color match for the replacement bulbs with the Volt HID kit from XenonDepot.
Last edited by Maikoh; 04-02-15 at 11:07 PM.
04-11-12, 08:47 AM
#70
Sweet! Thanks for taking the time to post up a picture and feedback. I am glad to hear (and see) that you are enjoying your Xtreme D4S 6000k bulb and Volt 6000k HID kit.
Steve
Steve
04-15-13, 08:54 PM
#71
It took a while, but I finally upgraded from fog light overlays to actual HID bulbs. 
First and foremost, a big thanks to Steve of Xenon Depot for providing a superb product that was easy to install and exceeded my expectations.
Second, another big thanks to Tommy of Music Box in South El Monte, CA. He helped install the HID kit, and model the installation process below.
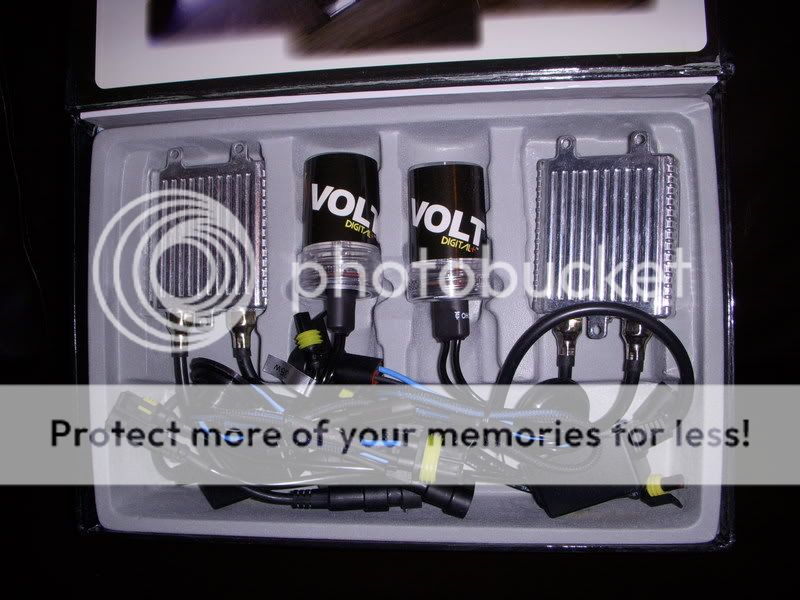
Xenon Depot has a new product, Volt HID Digital+ Kits. It's a high quality product that can be found on their website: Xenon Depot description of Volt HID Digital+ Kits. Volt HID Digital+ ballasts are the smallest and lightest ballasts manufactured today. This new ultra-slim design will enable the product to be used in a wider variety of applications.
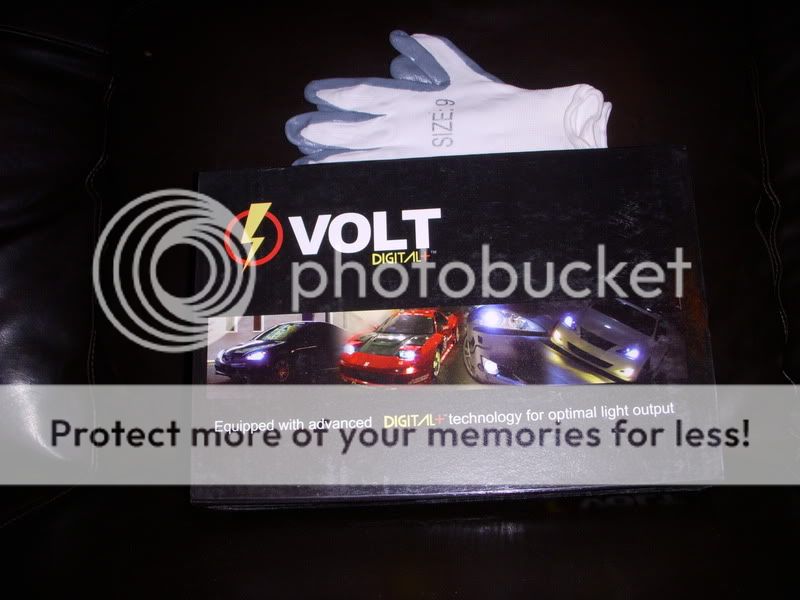
The box was mailed via UPS, well packaged and complete with installation gloves:
 ]
]
INSTALLATION IS EASY!!!
Photos were taken while the car was lifted, for better views.
First, the passenger side:
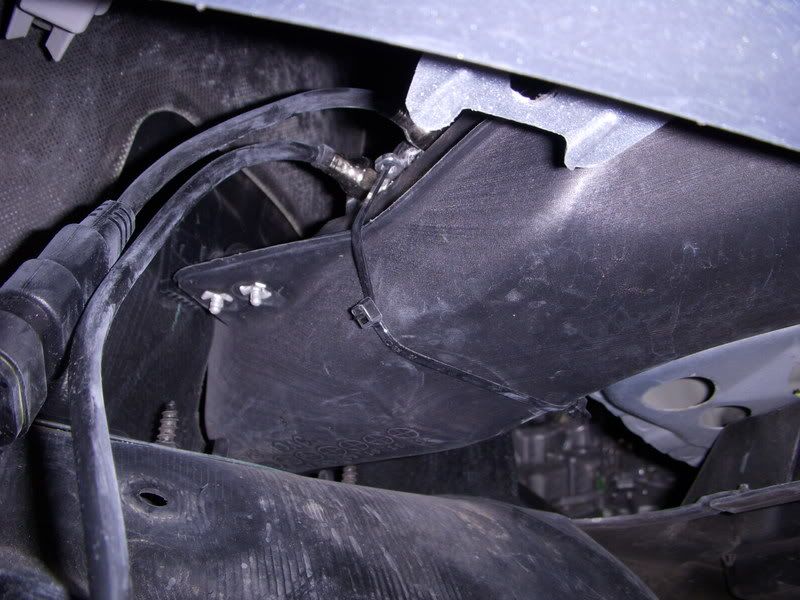
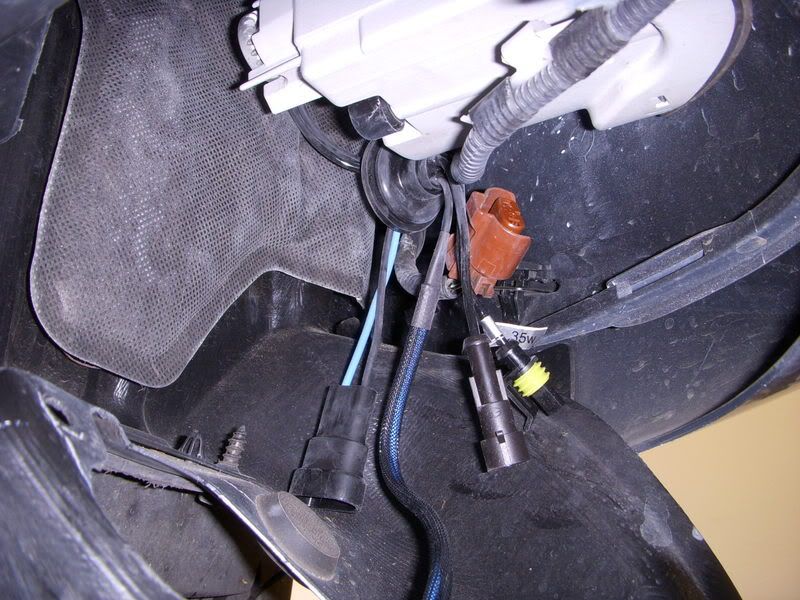
Remove the bottom covers behind the bumper below the fog lights. One panel with three screws on the passenger side; two panels with four screws total on the driver side. Remove the original bulbs from the fog light housing. The original bulb housing is orange.
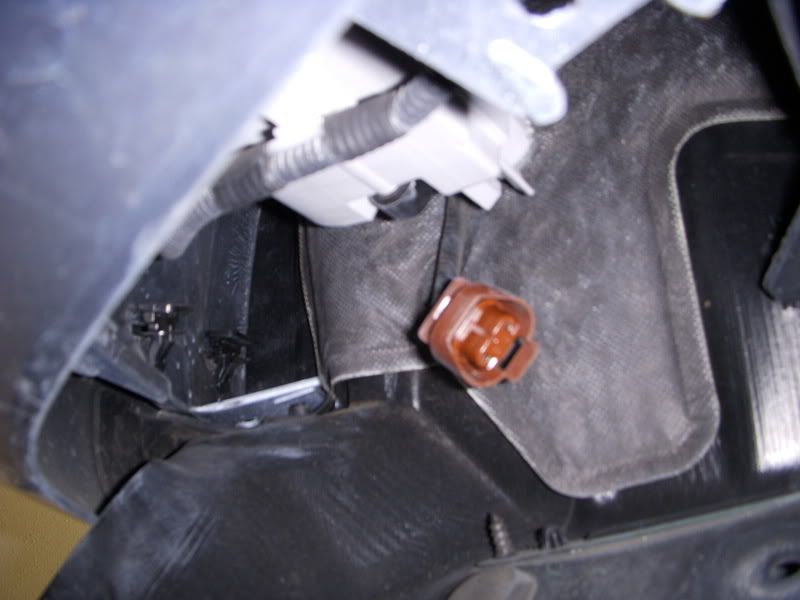
Note that with this kit, the positive and negative inputs need to be switched. That can easily be done by removing the prongs from the connector and switching it. The kit is a simple plug-and-play that you install between the bulb and bulb housing. No wiring harness required.
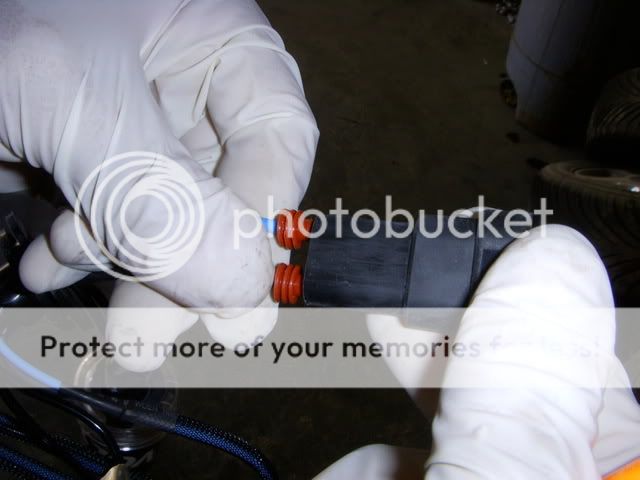
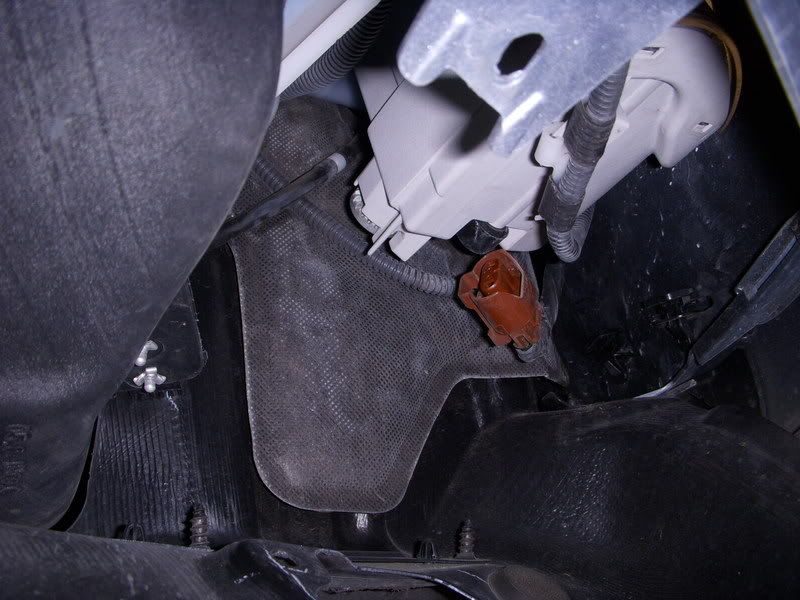
Next, attach the one end of the HID ballast to the bulb housing. Connect the HID bulb wire to the ballast and you have a pretty long wire loop. The HID bulb goes into the fog light housing.
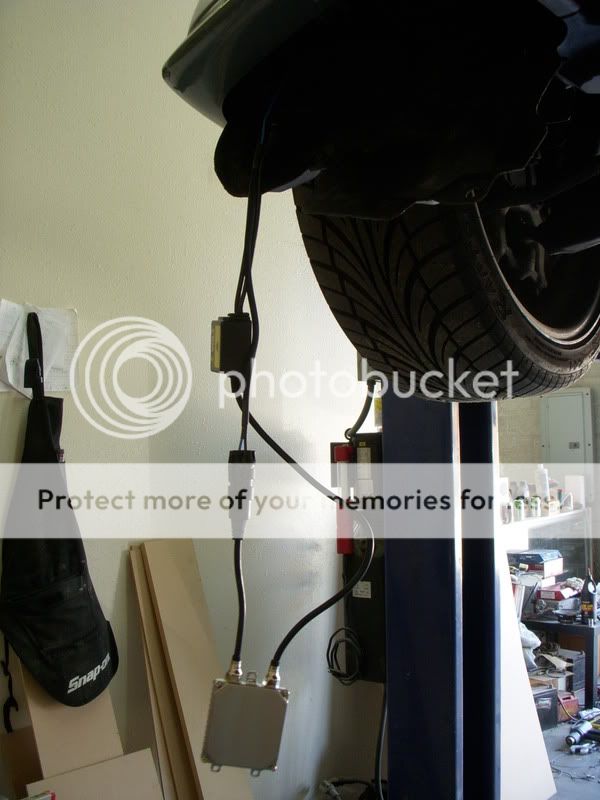
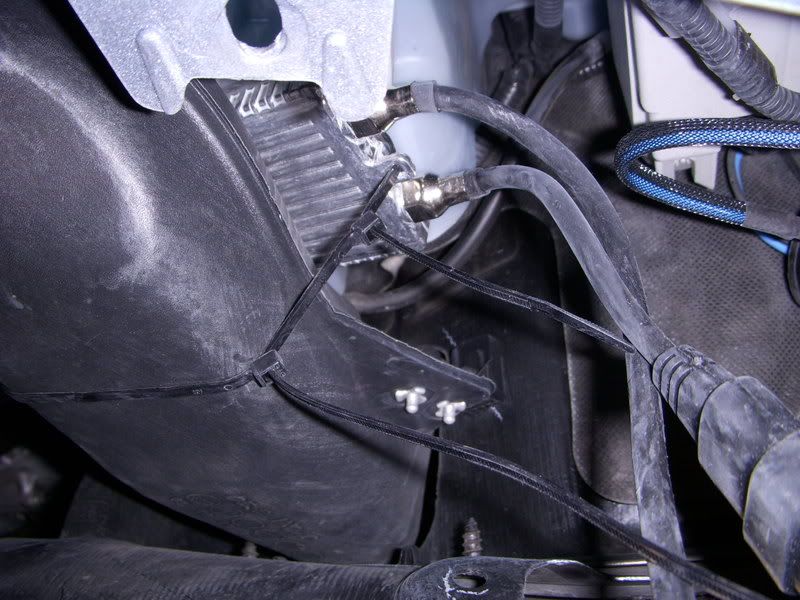
For security and the least amount of possible water contact, the ballast was zip-tied to the top of the front brake air dam (a tunnel from the front air dam to the wheel well).
The same process goes for the driver side.
First and foremost, a big thanks to Steve of Xenon Depot for providing a superb product that was easy to install and exceeded my expectations.
Second, another big thanks to Tommy of Music Box in South El Monte, CA. He helped install the HID kit, and model the installation process below.
Xenon Depot has a new product, Volt HID Digital+ Kits. It's a high quality product that can be found on their website: Xenon Depot description of Volt HID Digital+ Kits. Volt HID Digital+ ballasts are the smallest and lightest ballasts manufactured today. This new ultra-slim design will enable the product to be used in a wider variety of applications.
The box was mailed via UPS, well packaged and complete with installation gloves:
]INSTALLATION IS EASY!!!
Photos were taken while the car was lifted, for better views.
First, the passenger side:
Remove the bottom covers behind the bumper below the fog lights. One panel with three screws on the passenger side; two panels with four screws total on the driver side. Remove the original bulbs from the fog light housing. The original bulb housing is orange.
Note that with this kit, the positive and negative inputs need to be switched. That can easily be done by removing the prongs from the connector and switching it. The kit is a simple plug-and-play that you install between the bulb and bulb housing. No wiring harness required.
Next, attach the one end of the HID ballast to the bulb housing. Connect the HID bulb wire to the ballast and you have a pretty long wire loop. The HID bulb goes into the fog light housing.
For security and the least amount of possible water contact, the ballast was zip-tied to the top of the front brake air dam (a tunnel from the front air dam to the wheel well).
The same process goes for the driver side.
Thanks for the quick and easy write up. I knocked it out first attempt after reading your post. First mod. Done in 30 mins.
I just picked up a 2009 BSP Lexus IS350 a few weeks ago... Stock HID's, crappy yellow overlays and a newly installed Volt 3000K fog HID's I love them! They look great on dimmer roads in the city.
I do some photography on the side. I've had the Sc400 for so long, i didn't think to shoot my newer ride. If you are wondering about The Volt or more expensive HID kit. Go for it!

 12-10-14, 01:00 PM
#74
Rookie
Join Date: Dec 2013
Location: CA
Posts: 58
Likes: 0
Received 0 Likes
on
0 Posts
Hi,
I understand it won't be a perfect match, but which kit do you recommend in order to have the fog lights match the stock low beam HIDs? I entered my car information on your site and the following 3 kits came up:
a) Philips 9006 HID Kit | Xtreme HID
b) Philips 9006 Motorcycle HID Kit | Xtreme Motorcycle HID
c) Volt 9006 HID Kit | Volt HID
Thanks in advance.
