When you click on links to various merchants on this site and make a purchase, this can result in this site earning a commission. Affiliate programs and affiliations include, but are not limited to, the eBay Partner Network.
I picked up the xm kit from replacement radios, installed it a couple days ago. Very easy took me less than 30
Mins. Works great and I can't believe I didn't do this when I got the car 5 years ago.
So I just got done doing this install but when I powered the radio up and tried to toggle the AM/SAT button it doesn't change to SAT. I have double checked all of my connections and they are all good. Anyone run into this? I have a NON-NAV head unit for what it's worth. Thanks guys.
Following up on my last post. Even though I had tried re-seating the power to the SAT receiver a few times without the ACC in the ON position without any luck, I tried it again with the radio already on. This time I was able to get to SAT1 and heard the preview music. However, after turning the car off and back on I was back to the same issue again with no SAT unless I went to the trunk and re-seated the connection again. Now I am worried about putting everything back in the trunk for fear I am going to have to keep doing this. Very frustrating so far...
EDIT: Just confirming that the only way for me to get SAT working is to have the radio already on, and then walk back to the trunk and re-seat the power cable at the top on the receiver. Anytime I turn the car off and re-start it I am back in the same boat. Not really sure what else I can do at this point.
2nd EDIT: I also want to point out that even though my tuner is the exact same model as the OP mine has an extra blue SAT input on it above the one that I used.
Thanks for posting those replacement parts - I have been searching for that for my 2007 IS 250 - It has NAV. Any idea if the harness will work on ? I would assume so since the connections are in the back. One other question, did you replace the receiver because it was the wrong one or because it was defective.
With regard to Step 12 in the procedure, wanted to confirm the existing Shark Fin antennae cable that is to be connected to the SAT tuner, (already present in 2007 & UP models), is located on the outside of the black wire loom fastened in place under the white cable tie as seen in Phots 1 & 2, or is the antennae wire located inside the black wire loom and is to be removed from there ?
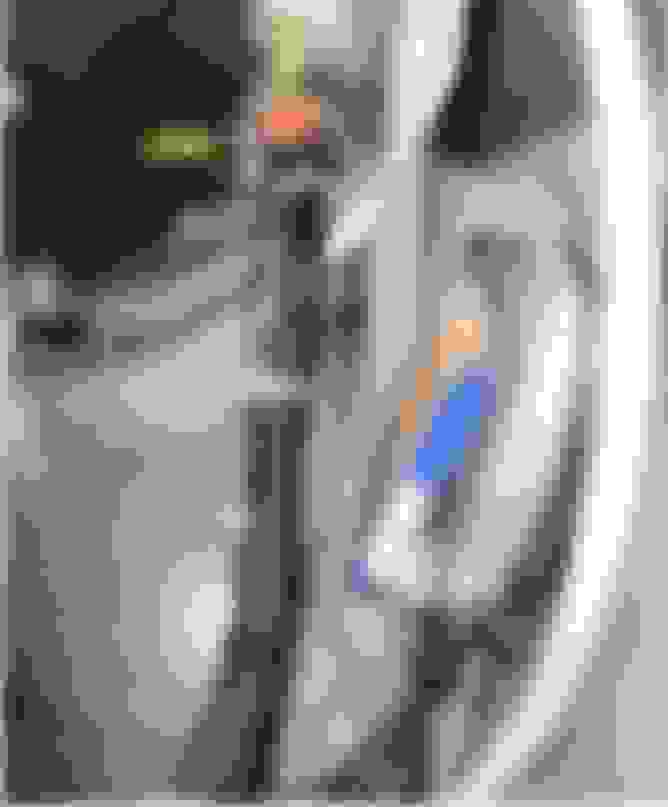
Also, can either SAT tuner part 86180-0W030 or 86180-0W031, be installed regardless if existing amp is a ML (Mark Levison) or non ML? Photo 3 shows harness removed from 2007 IS 250 with SAT installed from dealer however, believe it may be useless due to two of the six connectors unfortunately being cut.
I've since had the opportunity to try installing the XM Satellite receiver. Installing the smart key module / satellite receiver assembly was accomplished without issue. When it came to connecting the tuner cable harness with the amplifier connections, I was somewhat confused, with which of the six connectors from the tuner harness (referenced by a Yellow arrow in the First photo below), is connected to the four amplifier connectors (referenced by a Green arrow in First photo below). and which amplifier connectors remain connected to the amplifier. I did locate the one connector that was taped to the vehicle body (referenced as Connector (6P) in Second photo, and circled in the First photo),. Third and Fourth photos show additional connectors located further down from the ground screw location towards the rear seat, unsure if used with the XM tuner install.. Fifth and Sixth photos show the finished connections, but still does not show which connectors connect to the ports on the amplifier. Are any of the four amplifier ports left "open" without a connector when the installation is completed correctly? Seventh photo shows the Turner harness by itself.
Also reviewed Lexus IS: How to Install XM Satellite Radio https://www.clublexus.com/how-tos/a/...e-radio-363502
Any additional assistance would be greatly appreciated!
Follow up:
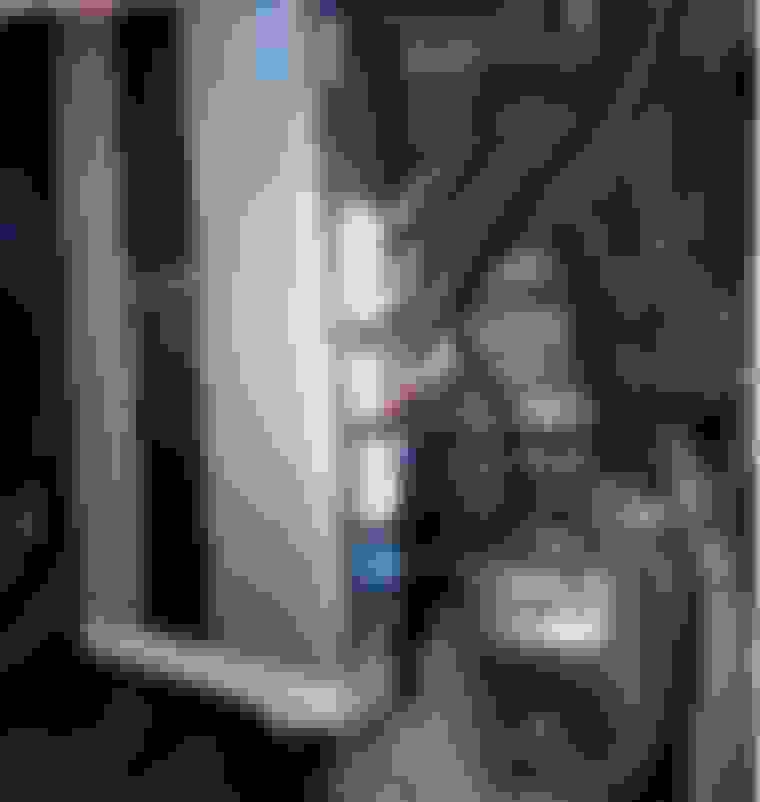
Was able to determine that once you sort and connect all of the tuner harness female connectors to the amplifier, all male connectors that were removed from the amplifier ports are then connected to the female connectors on the tuner harness. The left over tuner connectors are then installed in the SAT tuner and the connector that was taped to the vehicle body (referenced as Connector (6P ) in step 4 of the instructions and circled in White in photo below. The Antennae wire is located right above the circled connecter, connected to the SAT receiver. I believe the connectors originally connected to ports two and three, remain there. Turned on the stereo, pressed AM/SAT button and SAT 1, SAT2, SAT 3 were now shown. SAT 1 preview channel was broadcasting without issue. The tuner harness connectors are referenced in Yellow and vehicle amplifier connectors are referenced in Black in photo below.
A thank you to all who contributed information to assist with the self installation of the SAT tuner. Very much appreciate your time and doing so!
Photo of OEM connections going to the ML amplifier prior to the SAT tuner install;


 01-07-15, 01:01 PM