Xenon Depot HID 4300k Install (56k beware!!)
 04-18-06, 10:32 PM
#1
Rookie
Thread Starter

Join Date: Oct 2005
Location: CA
Posts: 50
Likes: 0
Received 0 Likes
on
0 Posts
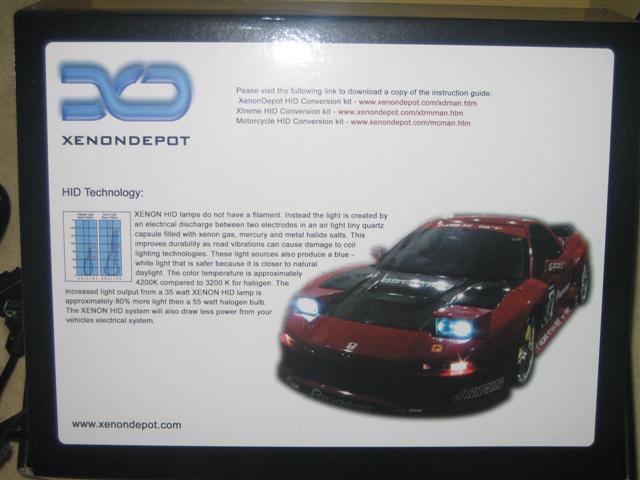
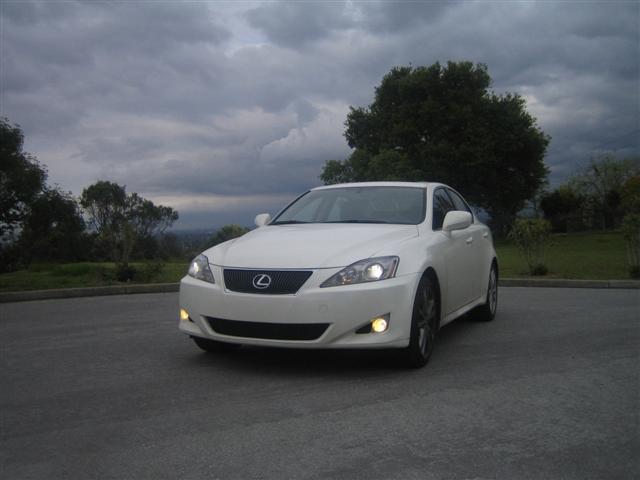
Hey everyone,
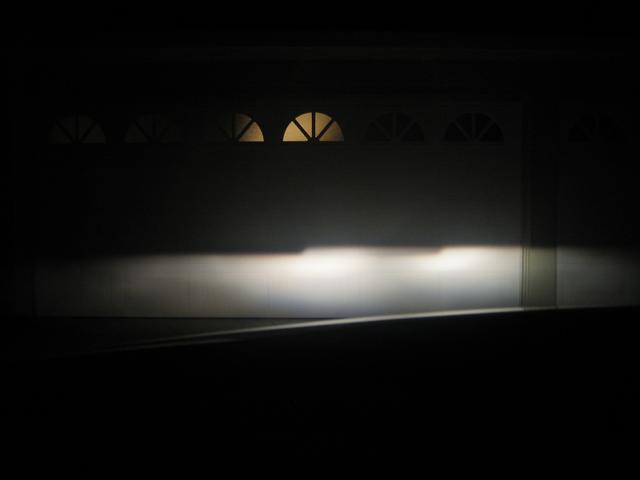
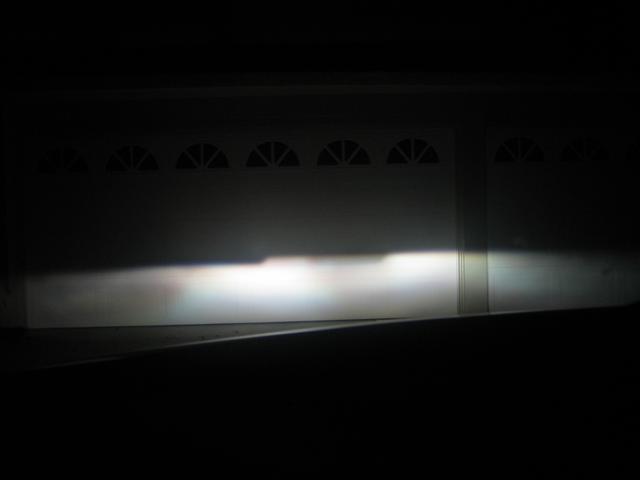
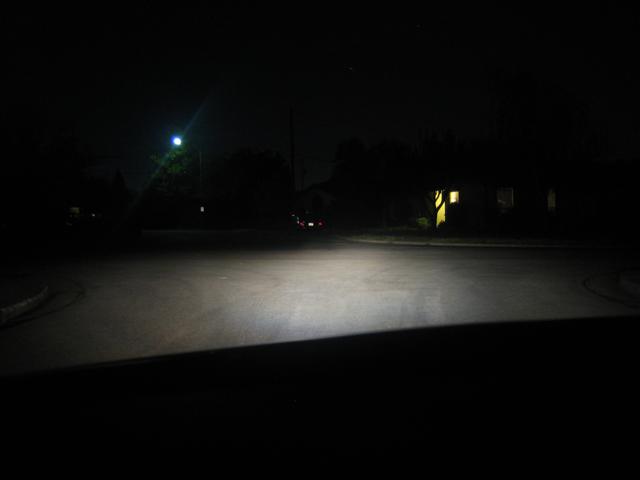
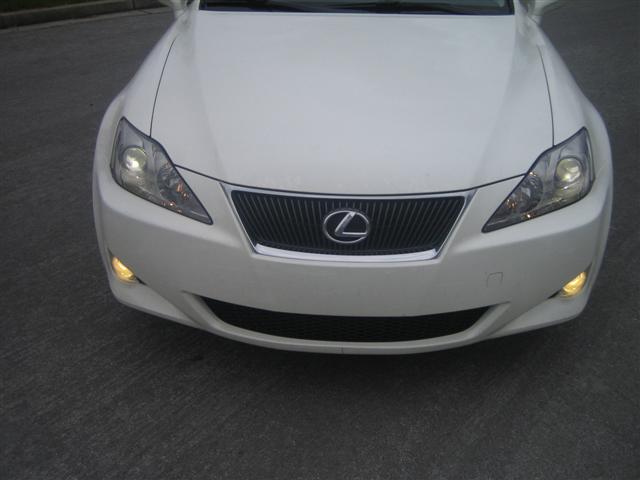
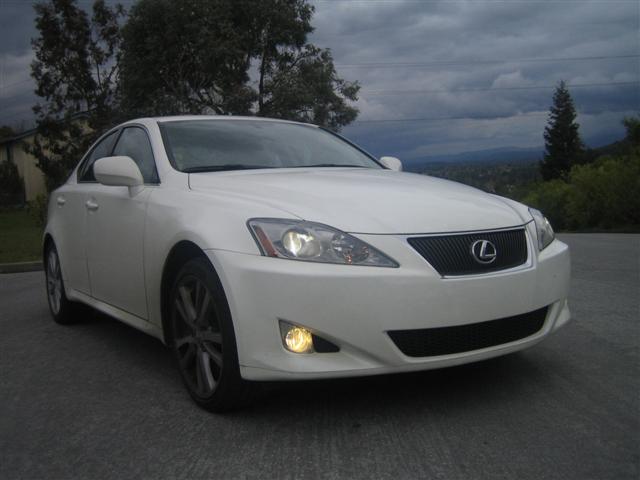
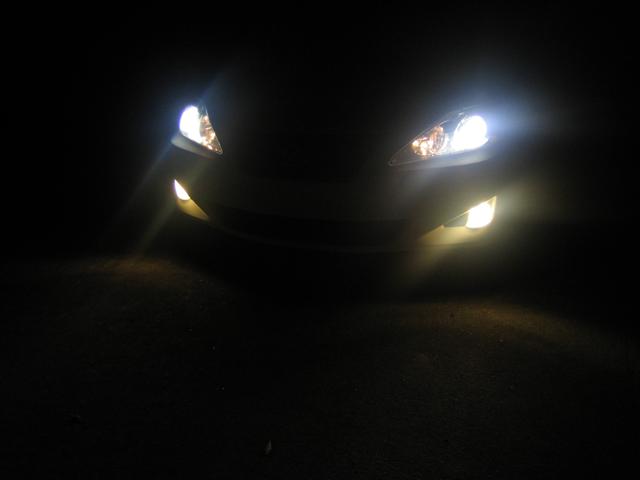
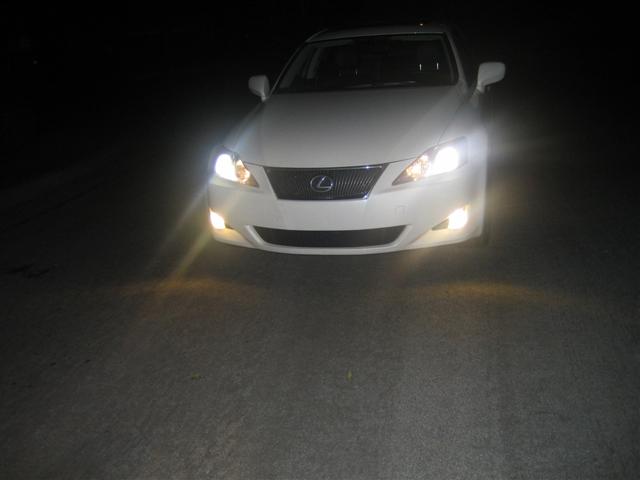
This is my Xenon Depot install Phillips ballast and bulbs all the way! Customer service at xenon depot is also top notch. Since when I was looking to buy HIDS for my 2nd Gen IS I couldn't find any pictures of what they looked like installed I decided to post some up. I have also taken the liberty to do a "how to" or in my case how I installed mine. The install wasn't hard just took some patience since the engine bay in the 2IS is SMALL! SO here goes.. first some before and after shots. Its not as apparent in the photo graphs but the HIDs are significatly brighter!! Then I will get into the how to and some more shots. You 56k people prepare to wait!
Oh and so far no moisture in my housing and it rained and stormed for a few days after I did the install. So far so good.
BEFORE
AFTER
BEFORE
AFTER

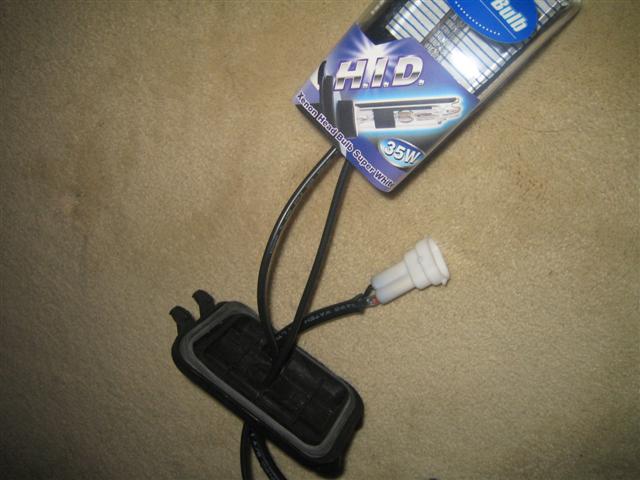
Here is the kit when I got it.. we see two bulbs, two ballasts, two ignitors, and the wiring harness. The wireing harness has two relays and they are basically two independent harnesses.
We also have some clips that hold one of the plugs in place and some zipties/double sided tape pads.
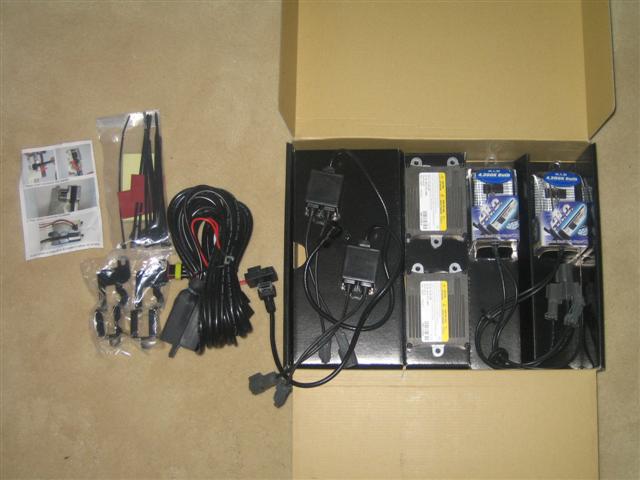
Here is the inside insert of the kit.. gives you a url to the wiring diagram.
So I did passenger side first.. since it is the less cramped of the two sides.
First take off all those panels covering your engine. Just push down on the center of the little black clips to pop them off. Center panel first then the two sides. The two sides also have a pastic nut screwed in on the side so besure to get those as well.
Then you should (I did) take apart the intake assembly. This is useful later on since you will run the driver side power wires under the air intake over the radiator area (pictures below)
To take apart the air intake there is a screw and a clip holding the center duct. Unscrew the first and use a screw driver to pop up the center of the left clip.
Then you can just wiggle the front duct piece out.
Next unplug the sensor wire on the main air hose. Use a wrench to unbolt two nuts holding the air filter housing in place. Also unscrew the clamp holding the hose to the filter box.
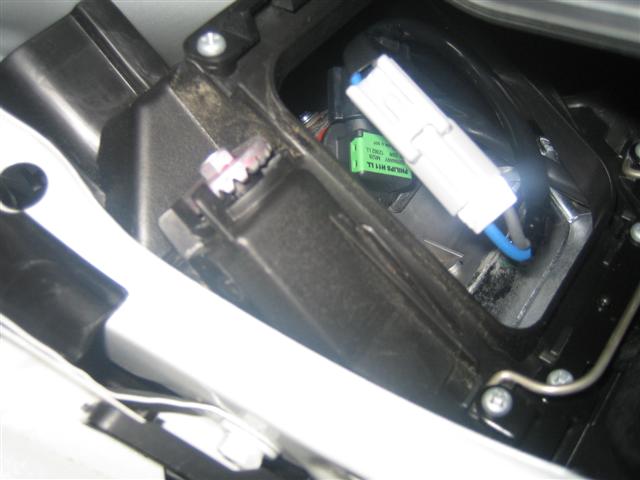
Pull up on the box when you have removed the top portion of the airfilter housing and air filter. Just move it aside so you can have easy access to the low beam dust cap.
To remove the dust cap just push the metal clip away from the dust cap.
Now you have access just like in this photo. You can see the bulb harness attached to the bulb (in green)
Last edited by rdrunner; 05-28-07 at 10:06 PM.
 04-18-06, 10:33 PM
#2
Rookie
Thread Starter
Join Date: Oct 2005
Location: CA
Posts: 50
Likes: 0
Received 0 Likes
on
0 Posts
Once you have the dust caps I drilled two holes. One for the bulb wires and one fore the relay plug that goes into your OEM light plug.
The big hole is 1 inch and the little hole is the width of the wire(any drill bit kit should have the right size). ( I later use silicone 3 bucks at home depot to seal the holes)
To get the white plug through I used an Xacto knife to pry the plastic clips that are holding the metal plugs in. They are inside in the center of the plug. Two white tabs holding each metal plug in place. Just push the tab to the center while gently tugging on the wire. I did one at a time. REMEBER TO use a sharpy and mark what side is positive ie white wire Just mark it on the plastic plug housing.
Once you feed it through just push the wires back up. Make sure postive is going to the right place. and once you get it high enough those plastic tabs will snap back in.
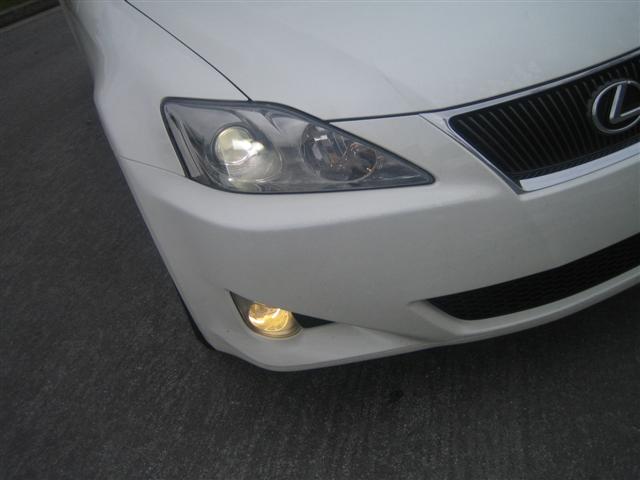
This is a close up shot of the dust caps.Perfect

Now take the old bulb out and set it aside. Plug the white relay plug into the OEM light plug and it should just snap in. Easy. Then CAREFULLY insert the bulb into the housing. Don't touch the bulb it will shorten the bulb's life. And don't bang it around. Make sure to first look and line up the three tabs on the bulbs to the light housing. There is one bigger tab so it has to go in a certain way. Rotate to lock it in. Make sure to lock it in to not get any moisture later on.
put the dust cap back on and lock it up!
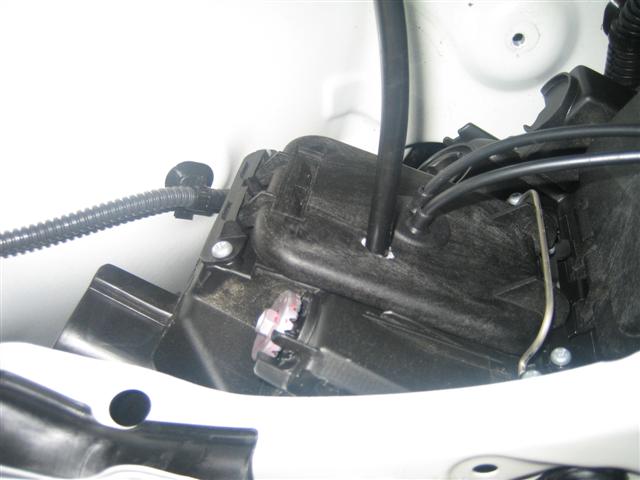
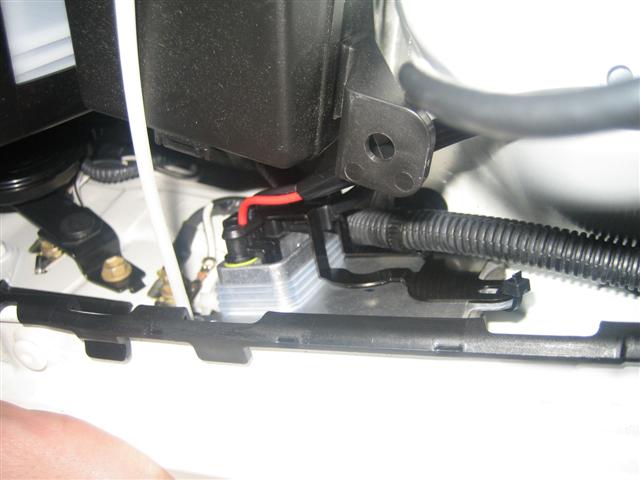
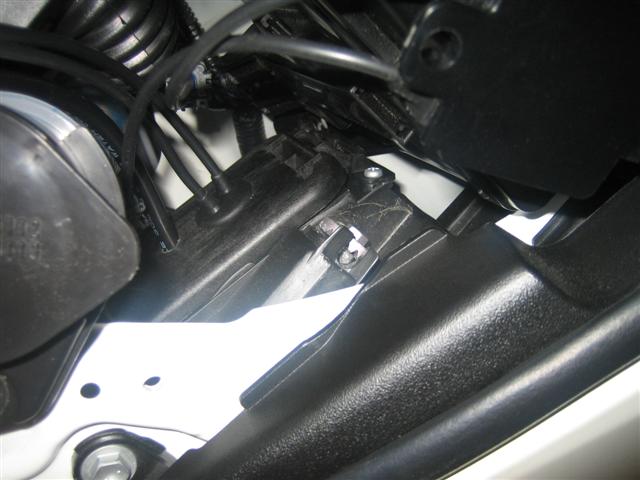
Now where to put those ballasts... I place the passenger side close to the battery next to the fuse box. In this picture you can see ground points right next to the left of the ballast.
I zip tied up the ballast to the stock wiring. And used the sticky pad to stick it to the side. I also added another ziptie from the top of the ballast through its mount hole and wrapped it around the hood hindge. Just to give the ballast some stability.
Here is a shot of the air filter assembly taken apart. you can also see the ignitor plugs zip tied to the stock wiring.
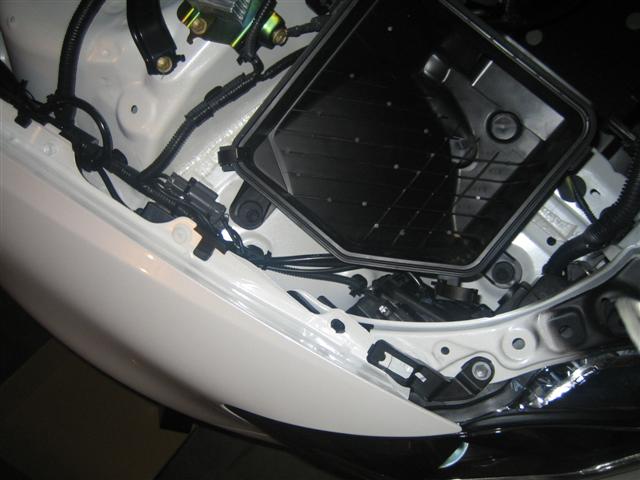
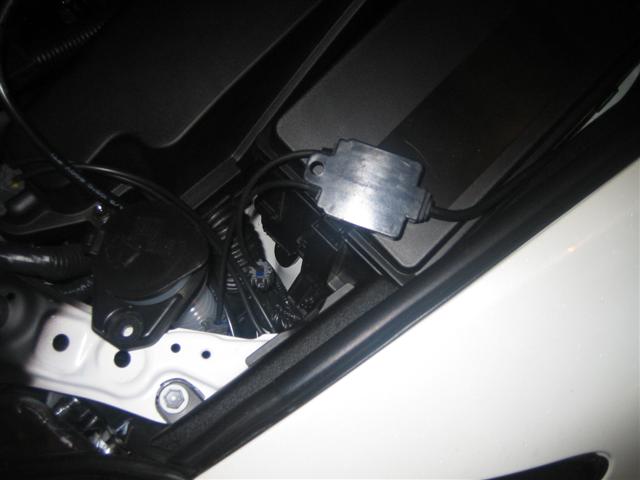
Here is where I put the components. I ran all the wires along the edge too so I could zip tie them to the stock wiring.
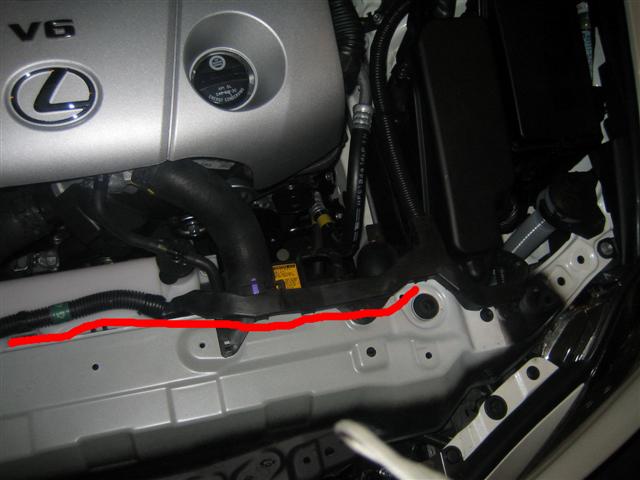
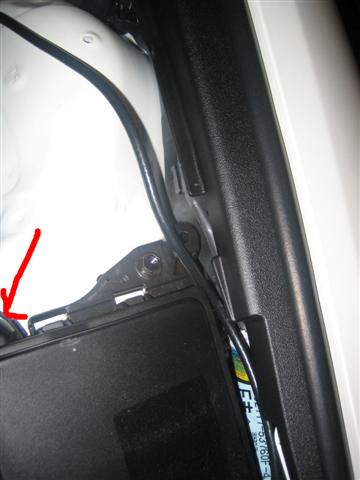
Here is where I ran the driver side power harnest. There is OEM stock wiring that you can tie the power wire to.

The big hole is 1 inch and the little hole is the width of the wire(any drill bit kit should have the right size). ( I later use silicone 3 bucks at home depot to seal the holes)
To get the white plug through I used an Xacto knife to pry the plastic clips that are holding the metal plugs in. They are inside in the center of the plug. Two white tabs holding each metal plug in place. Just push the tab to the center while gently tugging on the wire. I did one at a time. REMEBER TO use a sharpy and mark what side is positive ie white wire Just mark it on the plastic plug housing.
Once you feed it through just push the wires back up. Make sure postive is going to the right place. and once you get it high enough those plastic tabs will snap back in.
This is a close up shot of the dust caps.Perfect
Now take the old bulb out and set it aside. Plug the white relay plug into the OEM light plug and it should just snap in. Easy. Then CAREFULLY insert the bulb into the housing. Don't touch the bulb it will shorten the bulb's life. And don't bang it around. Make sure to first look and line up the three tabs on the bulbs to the light housing. There is one bigger tab so it has to go in a certain way. Rotate to lock it in. Make sure to lock it in to not get any moisture later on.
put the dust cap back on and lock it up!
Now where to put those ballasts... I place the passenger side close to the battery next to the fuse box. In this picture you can see ground points right next to the left of the ballast.
I zip tied up the ballast to the stock wiring. And used the sticky pad to stick it to the side. I also added another ziptie from the top of the ballast through its mount hole and wrapped it around the hood hindge. Just to give the ballast some stability.
Here is a shot of the air filter assembly taken apart. you can also see the ignitor plugs zip tied to the stock wiring.
Here is where I put the components. I ran all the wires along the edge too so I could zip tie them to the stock wiring.
Here is where I ran the driver side power harnest. There is OEM stock wiring that you can tie the power wire to.
Last edited by rdrunner; 05-28-07 at 10:19 PM.
04-18-06, 10:35 PM
#3
Rookie
Thread Starter
Join Date: Oct 2005
Location: CA
Posts: 50
Likes: 0
Received 0 Likes
on
0 Posts
Another shot on the driver side now.. keep it running there and tie it down with zips!
Driver side is the same as the passanger for dust cap etc. To get at the light area you have to unbolt the windshield wiper fluid tube.
Here is a better shot of the bolt you have to undo from the windshield wiper refill tube.
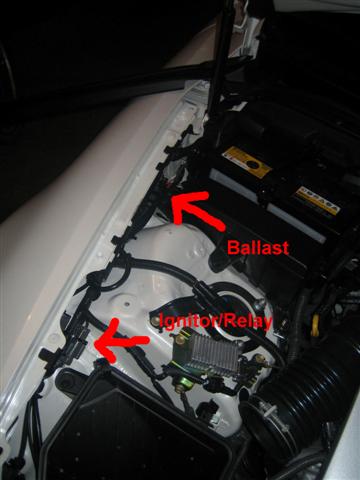
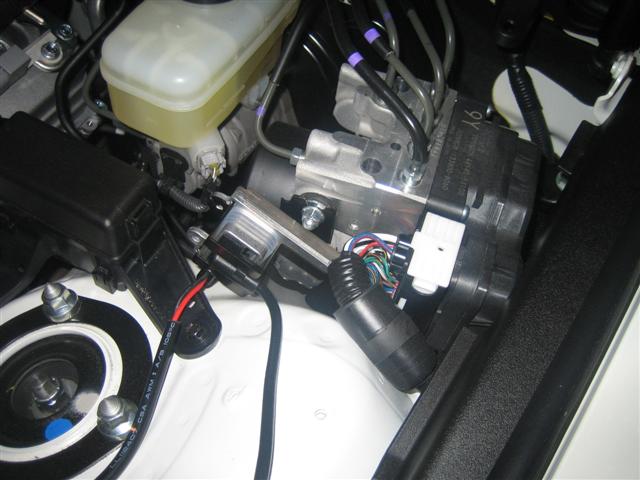
This is where I put the driver side ballast. Right above the strut is a metal plate holding that thing with all the tubes coming out. The ballast fits nice and sung there.
Clean the place with some alcohol and used the double sided pad to stick it on. But first feed a long zip tie through(or make a double tie, two zip ties or just go buy a longer one) since you won't have access once the ballast goes on. Insert the plugs for the ballast first too. Put the ballast on and tie up the ballast with the pre strung zip tie.
The power wires for the ballast can run to the right and below that oem stock wiring with the big black pad.
Run the wires down the side. Also tie the ignitor to the fuse box at the top.. there isn't much room for the ignitor so I placed it here. The fuse box has a slit on the left just like the right one you see here. Leave the tie a little loose since the panel will hold it down once you put the right side engine panel back on.
Just tie up the wires to the stock wiring and place some silicone sealant on the dustcaps.
Turn on the lights and see them BURN! Then just put the air filter housing and everything back.
Driver side is the same as the passanger for dust cap etc. To get at the light area you have to unbolt the windshield wiper fluid tube.
Here is a better shot of the bolt you have to undo from the windshield wiper refill tube.
This is where I put the driver side ballast. Right above the strut is a metal plate holding that thing with all the tubes coming out. The ballast fits nice and sung there.
Clean the place with some alcohol and used the double sided pad to stick it on. But first feed a long zip tie through(or make a double tie, two zip ties or just go buy a longer one) since you won't have access once the ballast goes on. Insert the plugs for the ballast first too. Put the ballast on and tie up the ballast with the pre strung zip tie.
The power wires for the ballast can run to the right and below that oem stock wiring with the big black pad.
Run the wires down the side. Also tie the ignitor to the fuse box at the top.. there isn't much room for the ignitor so I placed it here. The fuse box has a slit on the left just like the right one you see here. Leave the tie a little loose since the panel will hold it down once you put the right side engine panel back on.
Just tie up the wires to the stock wiring and place some silicone sealant on the dustcaps.
Turn on the lights and see them BURN! Then just put the air filter housing and everything back.
Last edited by rdrunner; 05-28-07 at 10:14 PM.


Trending Topics


 I'm installing mine this weekend
04-19-06, 10:59 AM
I'm installing mine this weekend
04-19-06, 10:59 AM
#11
Driver School Candidate

Join Date: Feb 2006
Location: Tx
Posts: 7
Likes: 0
Received 0 Likes
on
0 Posts
Did you have to adjust your headlight's vertical aim after installation? After i did my installation, it seems my driver side beam is not lighting as far as my passenger side beam. From ur pictures, it seems both headlight is lighting pretty evenly. I read somewhere in the forum that the driver side is suppose to be lower to avoid blinding oncoming drivers. Well, my question is where do you adjust the vertical aim? I know where the bolt is to adjust the horizontal aim, but i can't find the bolt to adjust the vertical aim. I did look in the manual.
Edit: Well nvm. I just called Lexus about this and they said you have to remove the fender assembly to get to the vertical aim bolt. Anybody ever done this before?
Edit: Well nvm. I just called Lexus about this and they said you have to remove the fender assembly to get to the vertical aim bolt. Anybody ever done this before?
Last edited by Unrl18; 04-19-06 at 11:57 AM.
04-19-06, 12:17 PM
#12
Rookie
Thread Starter
Join Date: Oct 2005
Location: CA
Posts: 50
Likes: 0
Received 0 Likes
on
0 Posts
I didn't have to adjust the headlight's vertical aim. My driver side beam is slightly lower but its suppose to be like that. Thats how it came when I bought it and all other cars with OEM hids are the same.
If your beam pattern is simular to mine when you shine it on a garage wall then you are fine.
If your beam pattern is simular to mine when you shine it on a garage wall then you are fine.
04-19-06, 01:06 PM
#13
Lexus Champion
what's the use of them supplying one grommet when another wire goes thru the dust cover with no grommet.......?!?!?!?
asking for moisture probs IMO...not to mention looks rigged.
not the installers fault...it xenondepot's fault.
I like PROXENON's setup MUCH better...
asking for moisture probs IMO...not to mention looks rigged.
not the installers fault...it xenondepot's fault.
I like PROXENON's setup MUCH better...
04-19-06, 02:05 PM
#14
Rookie
Thread Starter
Join Date: Oct 2005
Location: CA
Posts: 50
Likes: 0
Received 0 Likes
on
0 Posts
Originally Posted by bagwell
what's the use of them supplying one grommet when another wire goes thru the dust cover with no grommet.......?!?!?!?
asking for moisture probs IMO...not to mention looks rigged.
not the installers fault...it xenondepot's fault.
I like PROXENON's setup MUCH better...
asking for moisture probs IMO...not to mention looks rigged.
not the installers fault...it xenondepot's fault.
I like PROXENON's setup MUCH better...
The reason I DIDN'T go with proxenon is:
A) Terrible customer service - there are several posts on this forum on how their service is bad. (The member that got it from ebay seemed to have a good experience. But through their website I hear bad stories. Plus they arn't on ebay anymore)
B) Unsure of what brand their ballasts and bulbs are. Some web sites say Bohmen is no good. Everyone says Philips is quality.
C) For their plug into the stock harness it is just two metal tabs! XENON DEPOT's plug actually LOCKs into place once plugged into the stock harness. Therefore I don't have to worry about my plugs falling out in the future.
But the buyer really has to just decide on what they like and what they don't..
