DIY Remote Oil Filter Relocation Kit
 04-29-16, 01:22 AM
#1
Driver School Candidate
Thread Starter
Join Date: Jul 2015
Location: CA
Posts: 20
Likes: 0
Received 0 Likes
on
0 Posts
This DIY is for the average/moderate person with patience and knowledge of working on cars, changing the oil themselves, & common sense. This is also written without the stock airbox in use. An aftermarket air intake system is ideal to create open space for Oil Filter Relocation.
More pictures to come...

 DIY Project time: Under 2 Hours
 Please watch these helpful videos before beginning this DIY Project:
 More information:
~What is NPT?
~What is an AN Fitting?
 Tools needed:
Open-ended Wrenches (large sizes)
Allen Wrench/Standard (10/11/12/? cant remember size)
10mm Socket/Wrench
Cordless Drill W/ Drill bits (for mounting remote filter)
Flashlight
 Supplies needed:
7 Quarts of Oil (your preference)
Oil pan/catch
PH4 or comparable oil filter (this will be your new size)
High Temp ATV (your choice of color ect.)
 Parts list:
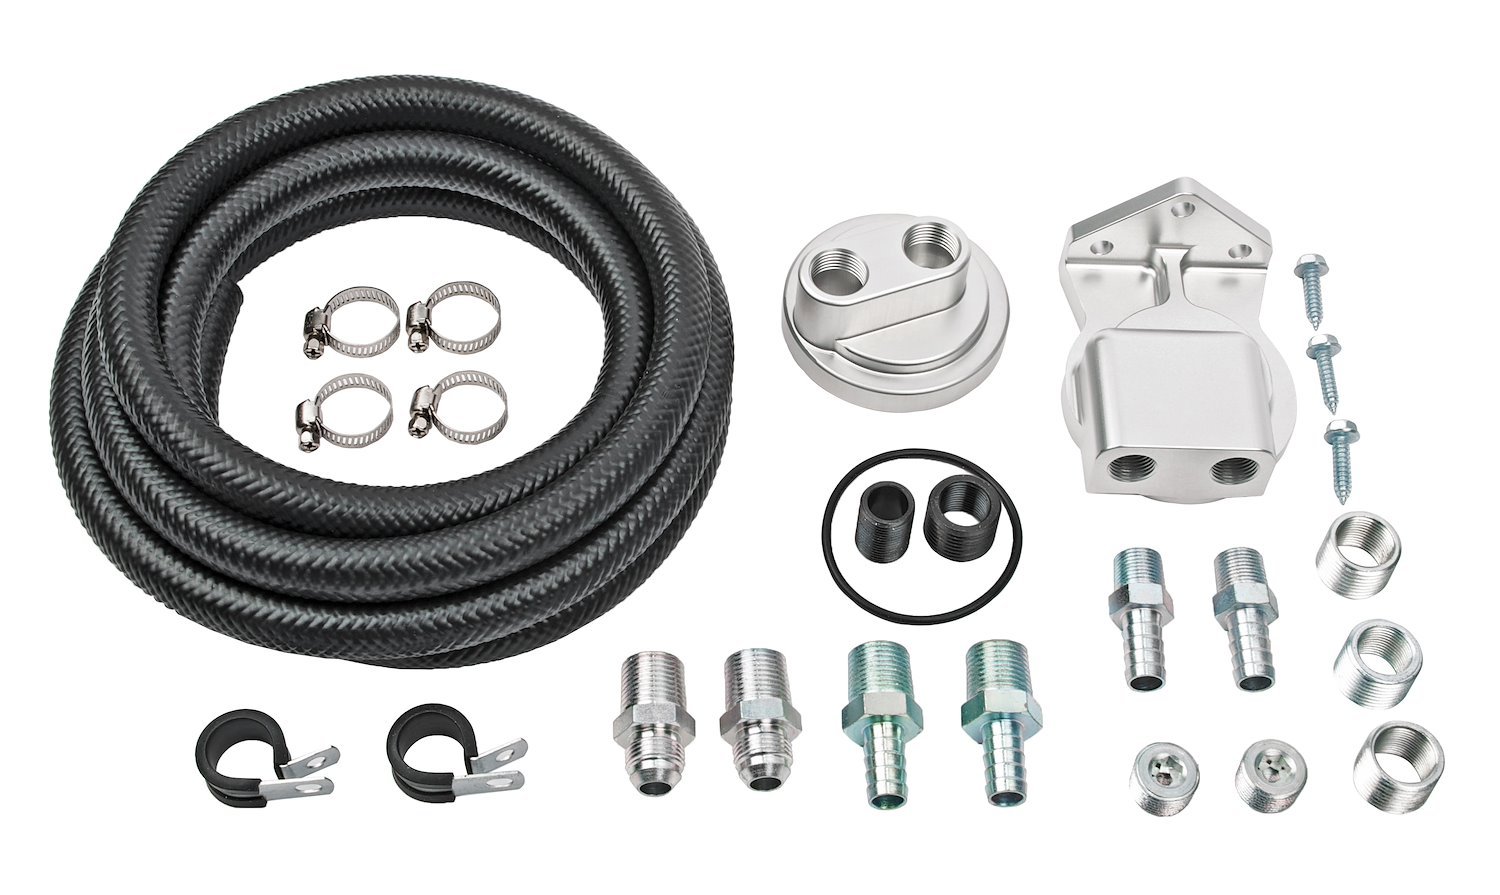
$43.99 Jegs remote oil filter relocation kit
$50.00 Black Stainless Steel Nylon Braided Oil Line Hose -8AN(you'll need about 13-16 feet total, Sending & Return Line)
$16.14 PRE-12801BLK -8 AN To 1/2" NPT Straight Swivel Hose End (choose whichever color you'd like)
$24.64 PRE-10890BLK -8 AN 90 Degree Swivel Hose End Fitting For Braided Hose Black
Total Cost Estimated: $134.77 + Oil, Oil Filter, & Pipe Dope/Gasket Sealer.
Step one:
Double check your parts, pre-assemble making sure you have everything necessary to complete the DIY project. Notice both adaptors are marked IN & OUT (this is paramount when getting to step eleven).
Step two:
Block the rear tires, pull the E-Brake and place the car on jack stands. Remove the oil cap, then drain the oil into oil pan/catch. Dispose of oil properly at your local oil recycle center.
Step three:
Remove oil filter by loosening it until able to twist off easily, double bag it with plastic bags to the catch oil, bring it up from underneath the brake booster or your own method if you're already comfortable doing your own oil changes.
Step four:
Place the adaptor inside the oil filter adaptor by half of the threads deep, then lub the O-ring to make a good seal.
Thread adaptor for JCE10 block

Adaptor to screw center piece into for JCE10 block

Step five:
Without attaching the lines, thread adaptor onto block with lub on O-ring (very important to prevent leaks)
Step six:
Cut braided line in half and connect braided hose to AN fittings

Step seven:
Add pipe dope/gasket sealer to the AN fittings and thread into adaptor already mounted to JCE10 block
Step eight:
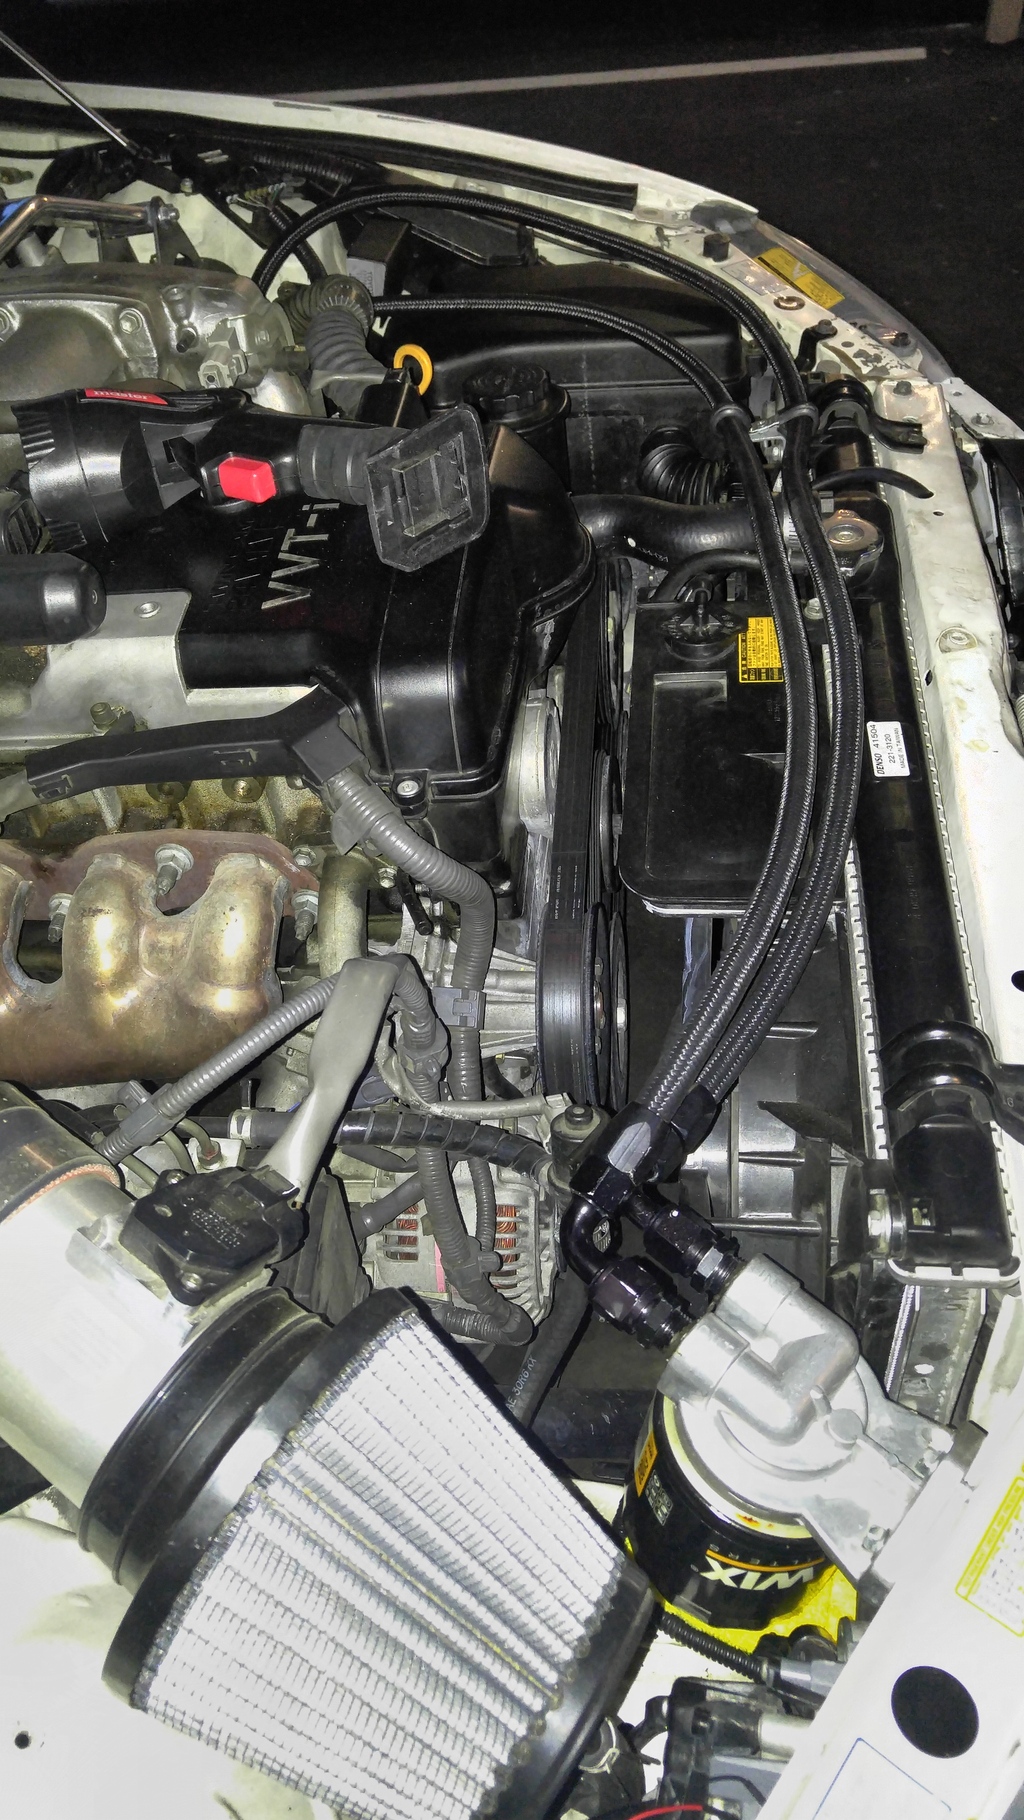
Route the braided lines to the passenger side of engine bay above the radiator, not to cross near firewall or DBW Throttle Cable.
Step nine:
Lub the oil filter and attach it to the oil filter adaptor. Place the oil filter adaptor with oil filter attached to view mock clearance behind passenger headlight to the radiator support between air intake filter and radiator.
Step ten:
Mark, Double check & drill three holes to mount the oil filter adaptor. Use pipe dope/gasket sealer on NPT side to attach AN fittings.

Step eleven:
When attaching the AN fittings to the corresponding IN & OUT connections. Make sure that the block adaptor out is going to the oil filter adapter in and the oil filter out is going to the block adaptor in.
Again...
Engine Adaptor OUT to Remote Oil Filter IN
Remote Oil Filter OUT to Engine Adaptor IN
This is crucial when starting your engine.
WARNING: IF YOU DO NOT CONNECT THESE HOSES IN THE CORRECT SEQUENCE NO OIL WILL FLOW BACK TO THE ENGINE AND YOU WILL BE SORRY.
Step twelve:
Retighten all connections and be sure not to overtighten the connections. Return the oil drain plug snug not to strip the threads and fill with six (6) quarts of oil.
Step thirteen:
Reattach oil cap and start the car, check for any oil leaks from the engine block oil filter adaptor and remote mount oil filter adaptor. If leaking check connections and follow step twelve. If the engine starts to knock immediately shut off the engine and switch IN & OUT connections on the remote oil filter adaptor. Be prepared to catch oil with plastic bags when disconnecting lines.
Step fourteen:
Check oil level and add oil if needed, let run until at normal temperature. Check again for leaks.
Step fifteen:
Next day after Pipe dope/gasket sealer has cured and while at normal running temperature attempt high-level revs to create high oil pressure. Again, check for leaks...

DISCLAIMER: I take no responsibility for any part of you and your vehicle and or any damage that may occur while reading, following this DIY project. All claims and or advice are for novelty purposes only.
If you enjoyed reading this DIY as much as I enjoyed making it please hop over to my.is and click the star and let me know.
 Pictures Missing? PDF File Here
More pictures to come...
DIY Project time: Under 2 HoursPlease watch these helpful videos before beginning this DIY Project:More information:~What is NPT?
~What is an AN Fitting?
Open-ended Wrenches (large sizes)
Allen Wrench/Standard (10/11/12/? cant remember size)
10mm Socket/Wrench
Cordless Drill W/ Drill bits (for mounting remote filter)
Flashlight
Supplies needed:7 Quarts of Oil (your preference)
Oil pan/catch
PH4 or comparable oil filter (this will be your new size)
High Temp ATV (your choice of color ect.)
$43.99 Jegs remote oil filter relocation kit
$50.00 Black Stainless Steel Nylon Braided Oil Line Hose -8AN(you'll need about 13-16 feet total, Sending & Return Line)
$16.14 PRE-12801BLK -8 AN To 1/2" NPT Straight Swivel Hose End (choose whichever color you'd like)
$24.64 PRE-10890BLK -8 AN 90 Degree Swivel Hose End Fitting For Braided Hose Black
Total Cost Estimated: $134.77 + Oil, Oil Filter, & Pipe Dope/Gasket Sealer.
Step one:
Double check your parts, pre-assemble making sure you have everything necessary to complete the DIY project. Notice both adaptors are marked IN & OUT (this is paramount when getting to step eleven).
Step two:
Block the rear tires, pull the E-Brake and place the car on jack stands. Remove the oil cap, then drain the oil into oil pan/catch. Dispose of oil properly at your local oil recycle center.
Step three:
Remove oil filter by loosening it until able to twist off easily, double bag it with plastic bags to the catch oil, bring it up from underneath the brake booster or your own method if you're already comfortable doing your own oil changes.
Step four:
Place the adaptor inside the oil filter adaptor by half of the threads deep, then lub the O-ring to make a good seal.
Thread adaptor for JCE10 block
Adaptor to screw center piece into for JCE10 block
Step five:
Without attaching the lines, thread adaptor onto block with lub on O-ring (very important to prevent leaks)
Step six:
Cut braided line in half and connect braided hose to AN fittings
Step seven:
Add pipe dope/gasket sealer to the AN fittings and thread into adaptor already mounted to JCE10 block
Step eight:
Route the braided lines to the passenger side of engine bay above the radiator, not to cross near firewall or DBW Throttle Cable.
Step nine:
Lub the oil filter and attach it to the oil filter adaptor. Place the oil filter adaptor with oil filter attached to view mock clearance behind passenger headlight to the radiator support between air intake filter and radiator.
Step ten:
Mark, Double check & drill three holes to mount the oil filter adaptor. Use pipe dope/gasket sealer on NPT side to attach AN fittings.
Step eleven:
When attaching the AN fittings to the corresponding IN & OUT connections. Make sure that the block adaptor out is going to the oil filter adapter in and the oil filter out is going to the block adaptor in.
Again...
Engine Adaptor OUT to Remote Oil Filter IN
Remote Oil Filter OUT to Engine Adaptor IN
This is crucial when starting your engine.
WARNING: IF YOU DO NOT CONNECT THESE HOSES IN THE CORRECT SEQUENCE NO OIL WILL FLOW BACK TO THE ENGINE AND YOU WILL BE SORRY.
Step twelve:
Retighten all connections and be sure not to overtighten the connections. Return the oil drain plug snug not to strip the threads and fill with six (6) quarts of oil.
Step thirteen:
Reattach oil cap and start the car, check for any oil leaks from the engine block oil filter adaptor and remote mount oil filter adaptor. If leaking check connections and follow step twelve. If the engine starts to knock immediately shut off the engine and switch IN & OUT connections on the remote oil filter adaptor. Be prepared to catch oil with plastic bags when disconnecting lines.
Step fourteen:
Check oil level and add oil if needed, let run until at normal temperature. Check again for leaks.
Step fifteen:
Next day after Pipe dope/gasket sealer has cured and while at normal running temperature attempt high-level revs to create high oil pressure. Again, check for leaks...
DISCLAIMER: I take no responsibility for any part of you and your vehicle and or any damage that may occur while reading, following this DIY project. All claims and or advice are for novelty purposes only.
If you enjoyed reading this DIY as much as I enjoyed making it please hop over to my.is and click the star and let me know.
Pictures Missing? PDF File Here


Thread
Thread Starter
Forum
Replies
Last Post
roadfrog
LS - 4th Gen (2007-2017)
14
03-03-22 11:30 AM
scout356
RX - 2nd Gen (2004-2009)
2
05-07-10 09:06 AM