My IS200 Supercharged Toy

 07-06-10, 12:01 PM
#17
Pole Position

Join Date: Oct 2008
Location: Pa
Posts: 297
Likes: 0
Received 0 Likes
on
0 Posts
 07-07-10, 01:05 AM
#20
Driver School Candidate
Thread Starter

Join Date: Apr 2009
Location: UK
Posts: 23
Likes: 0
Received 0 Likes
on
0 Posts
cheers for all the comments, im not done with her yet plenty more still to do
need to get a few more sensors around the car, get some of the paint wok corrected skirts fixed and wheels refurbed.
plus a big change happening very very soon ......
need to get a few more sensors around the car, get some of the paint wok corrected skirts fixed and wheels refurbed.
plus a big change happening very very soon ......
08-07-10, 06:28 AM
#23
Driver School Candidate
Thread Starter
Join Date: Apr 2009
Location: UK
Posts: 23
Likes: 0
Received 0 Likes
on
0 Posts
Sorry for the delay in getting back on here been very busy and so has the car...
well i got bored of the car and wanted something new so was going to sell up
BUT then i found a car being sold with a turbo on so i bought the car and had everything swapped over.
So i now have a Turbo IS200 pushing 282bhp woop
well i got bored of the car and wanted something new so was going to sell up
BUT then i found a car being sold with a turbo on so i bought the car and had everything swapped over.
So i now have a Turbo IS200 pushing 282bhp woop

 01-02-11, 01:41 PM
#29
Driver School Candidate
Thread Starter
Join Date: Apr 2009
Location: UK
Posts: 23
Likes: 0
Received 0 Likes
on
0 Posts
I been keeping a secret.....
Well as some of you from the uk will have seen i sold my supercharger and a few other bits from beloved car this was to fund a new project.
I decided to go for a turbo..... not just any turbo but one that will give me upto 400bhp.....
But alas im only pushing 282bhp so far ......
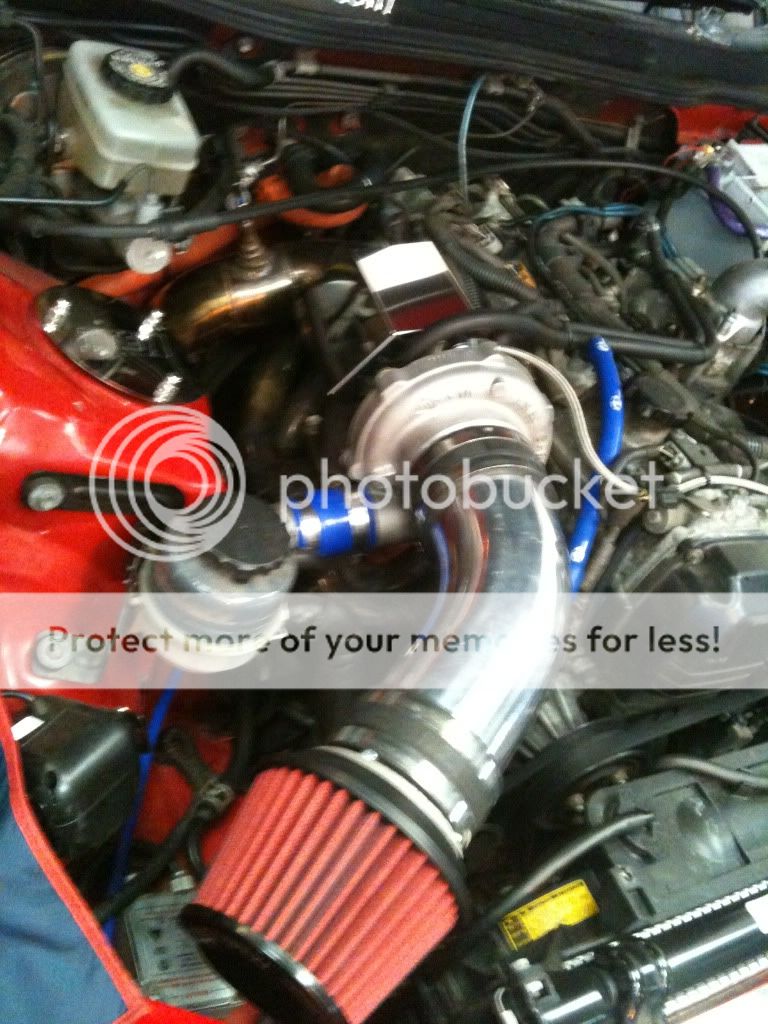
So parts on the car are
Big intercooler
IKE engineering Turbo Manifold
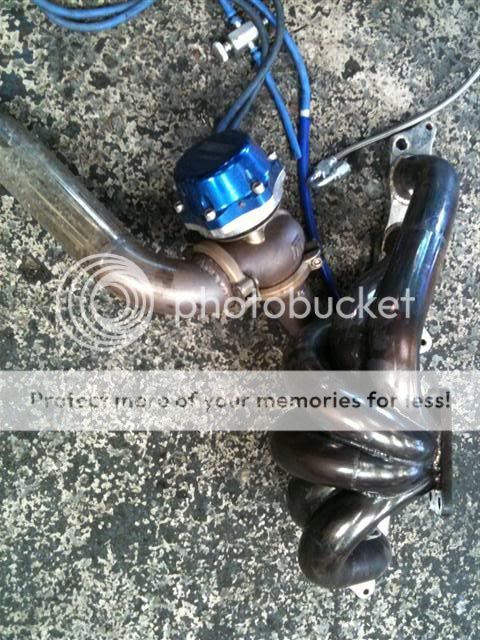
Ike Enginering Down Pipe 3”

IKE Engineering Centre Pipe
AEM FIC (fuel and Ignition Controller)

550cc Injectors
Supra Fuel Pump

Stainless stel fuel Lines with Aeroquip fittings
GT30 Roller bearing Turbo


Tial Waste gate 50mm
100mm Custom Induction with Apexi Filter
Custom Intercooler Piping 60mm
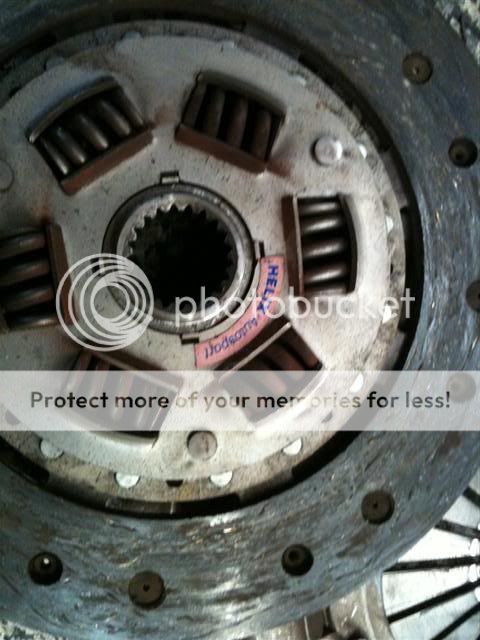
UPrated Helix Clutch
Apexi Back Box
Iridium 7 Spark Plugs
Standard Fuel Regulator


Well as some of you from the uk will have seen i sold my supercharger and a few other bits from beloved car this was to fund a new project.
I decided to go for a turbo..... not just any turbo but one that will give me upto 400bhp.....
But alas im only pushing 282bhp so far ......
So parts on the car are
Big intercooler
IKE engineering Turbo Manifold
Ike Enginering Down Pipe 3”
IKE Engineering Centre Pipe
AEM FIC (fuel and Ignition Controller)
550cc Injectors
Supra Fuel Pump
Stainless stel fuel Lines with Aeroquip fittings
GT30 Roller bearing Turbo
Tial Waste gate 50mm
100mm Custom Induction with Apexi Filter
Custom Intercooler Piping 60mm
UPrated Helix Clutch
Apexi Back Box
Iridium 7 Spark Plugs
Standard Fuel Regulator
01-02-11, 01:49 PM
#30
Driver School Candidate
Thread Starter
Join Date: Apr 2009
Location: UK
Posts: 23
Likes: 0
Received 0 Likes
on
0 Posts
ok so we now have another section of my project completed see details below, there are not alot of pictures of the production stage but mainly the finished article.
so anyway 1st things 1st i had to but another screen, after having a liliput screen in my nav housing which seemed to perform wonderfully i hunted for the smae model again.
liliput 619gl
i then attacked this to make it fit inside the standard IS200 Fascia adaptor alot of you are familiar with The walk through HERE
the same principal applies except i cut the existing screen housing apart to make it fit inside the hole
i then used primer & plastic filler to smooth it all followed by primer and paint
So yeah umm here is the finished article in the car

shortly after this i took the pc back out the car to do some work mainly software based but as its been slow due to weather lately
Main thing was to: -
install a Relay board Driver
Windows Updates
Adjust PSU boot times etc (carnetix PSU2410) adjusted by pc software
Customize background of software
attempt to fix satnav problem...
well out of all the above the Sat nav is still outstanding, don't think that's to bad considering lol
Lets start with the background this is done via a Hack in centrafuse once installed you can place pictures into the images directory and either have them rotate through each time it boost or lock it to a image.
i chose a pic of my car which has been customized
So here is before

pic after

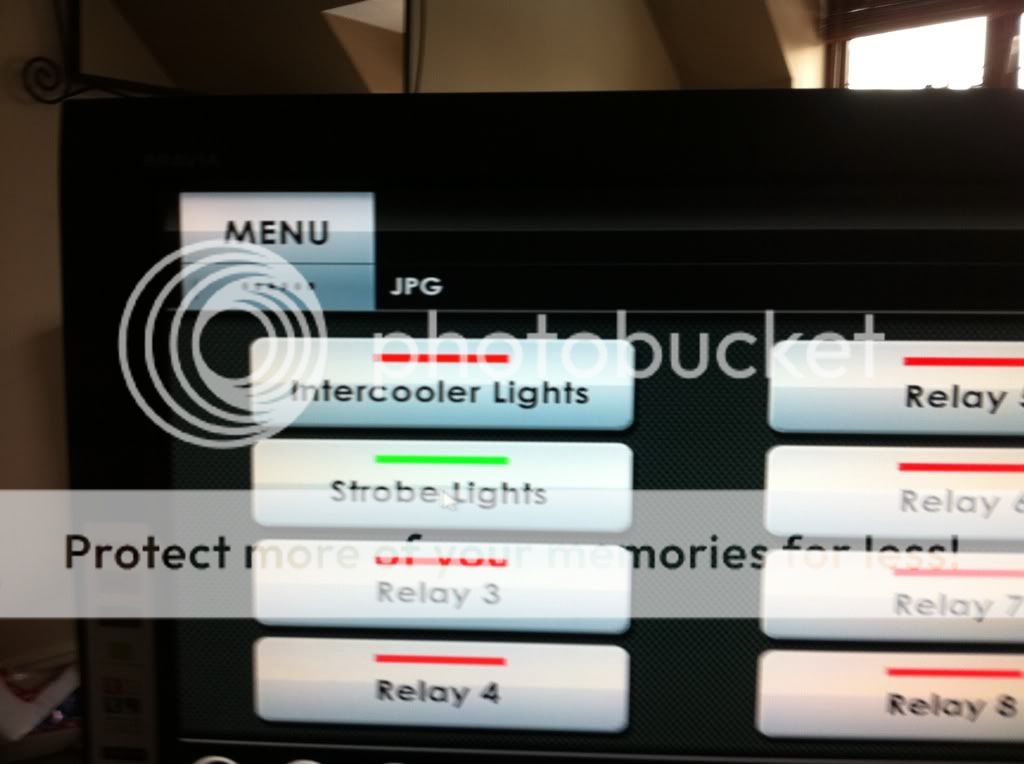
so with this installed i then moved onto the Realy board, the whole reason for this is im running out of places to install switches lol , this particular board runs on USB with a 12v input and can switch 12v via relays so i have assigned 4 circuits to start with
Circuit 1 - Inter cooler
Circuit 2 - Strobe Lights
Circuit 3 - Front Camera
Circuit 4 - Audio Amps.
the software has been developed to work as a hack so once installed will automaticly install the relevant task area and buttons on the Centrafuse front End
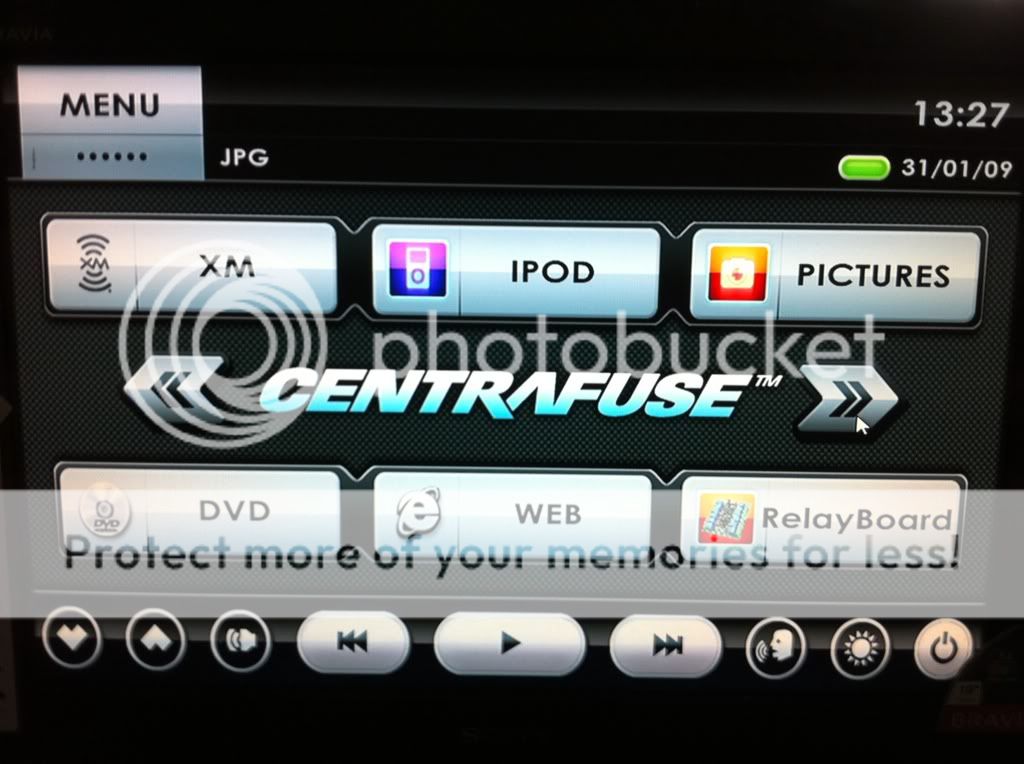
Labelled up circuits ok only 2 labelled but you get the idea

here is the board in test status on my Living room floor

as you can see LED2 is illuminated this means that the Relay is now in the Normally open position closing the circuit thus giving me a 12v output on that switch
when you press a button on the touch screen the button illuminates green to indicate its operation
the board can be set with 2 system
syetem one to allow toggle press (so it flashes the output upon being pressed non latching)
or
System two Latched output (a single press on the circuit will latch the output and stays latched until pressed again)

Hope you like what you see
Rabs
so anyway 1st things 1st i had to but another screen, after having a liliput screen in my nav housing which seemed to perform wonderfully i hunted for the smae model again.
liliput 619gl
i then attacked this to make it fit inside the standard IS200 Fascia adaptor alot of you are familiar with The walk through HERE
the same principal applies except i cut the existing screen housing apart to make it fit inside the hole
i then used primer & plastic filler to smooth it all followed by primer and paint
So yeah umm here is the finished article in the car
shortly after this i took the pc back out the car to do some work mainly software based but as its been slow due to weather lately
Main thing was to: -
install a Relay board Driver
Windows Updates
Adjust PSU boot times etc (carnetix PSU2410) adjusted by pc software
Customize background of software
attempt to fix satnav problem...
well out of all the above the Sat nav is still outstanding, don't think that's to bad considering lol
Lets start with the background this is done via a Hack in centrafuse once installed you can place pictures into the images directory and either have them rotate through each time it boost or lock it to a image.
i chose a pic of my car which has been customized
So here is before
pic after
so with this installed i then moved onto the Realy board, the whole reason for this is im running out of places to install switches lol , this particular board runs on USB with a 12v input and can switch 12v via relays so i have assigned 4 circuits to start with
Circuit 1 - Inter cooler
Circuit 2 - Strobe Lights
Circuit 3 - Front Camera
Circuit 4 - Audio Amps.
the software has been developed to work as a hack so once installed will automaticly install the relevant task area and buttons on the Centrafuse front End
Labelled up circuits ok only 2 labelled but you get the idea
here is the board in test status on my Living room floor
as you can see LED2 is illuminated this means that the Relay is now in the Normally open position closing the circuit thus giving me a 12v output on that switch
when you press a button on the touch screen the button illuminates green to indicate its operation
the board can be set with 2 system
syetem one to allow toggle press (so it flashes the output upon being pressed non latching)
or
System two Latched output (a single press on the circuit will latch the output and stays latched until pressed again)
Hope you like what you see
Rabs