H3 HID Fog Light Installation
 12-29-09, 03:14 PM
#1
H3 HID Fog Light Installation v2.0
I got some time to put the finishing touches on my H3 HID fog light install. I took a number of pictures along the way, and tried to describe what I was doing at each step. Hopefully this will be of some use to some DIYers. Do this at your own risk, and don't blame me if you mess up blah, blah, blah...
Items Needed:
- Socket wrench and 10mm socket
- Philips head screwdriver or an extension for the socket wrench (bumper removal)
- Flat head screwdriver (to pry the centers of "pop-off" pins)
- Panel popper - makes it easier to remove "pop-off" pins once the center is released
- Jeweler's flat head screwdriver to remove male OEM fog light plug
- Drill & bit to make a pilot hole
- Rotary tool + Conical sanding stone
- Clear silicone
- 3M automotive tape
- Zip ties
- Remove bumper: http://my.is/forums/f90/tutorial-how...lights-226292/ (obviously don't do anything involving the removal of headlights).
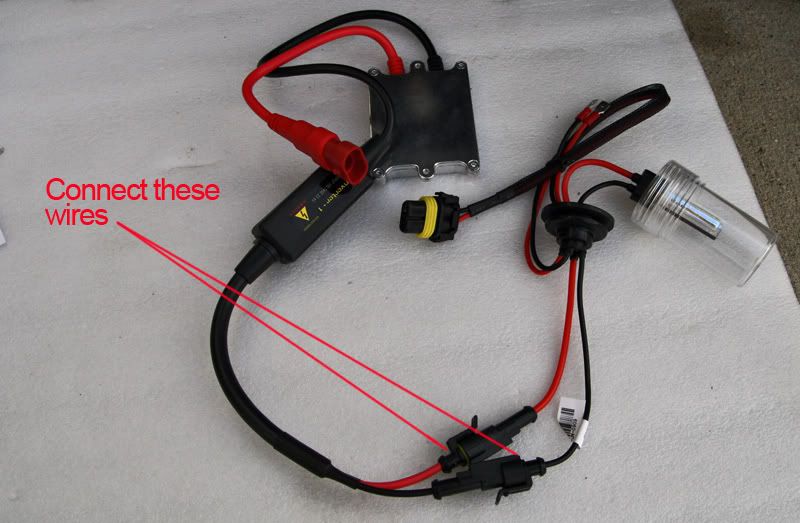
- Wiring for most kits is pretty self-explanatory, and the included directions should help you out. Here�s a pic of my kit by HIDeXtra.com.
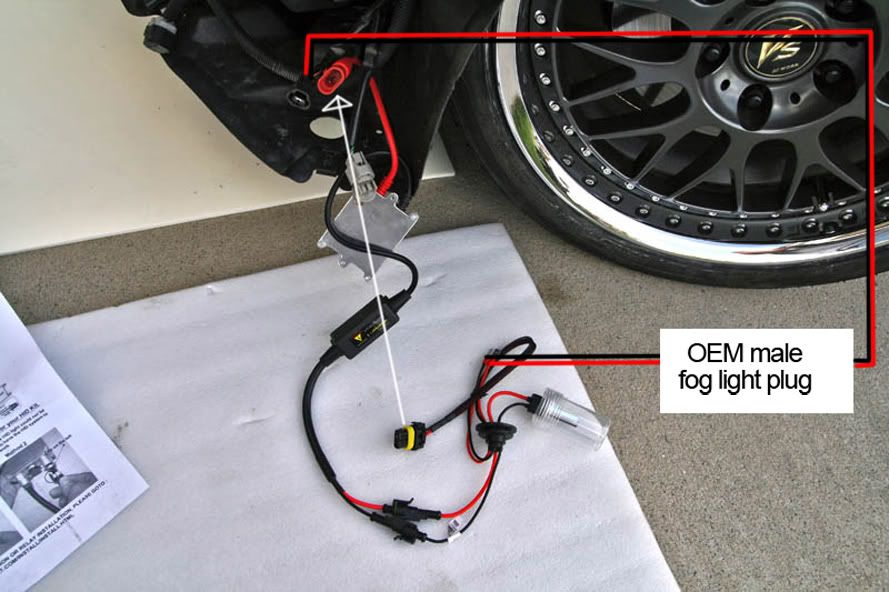
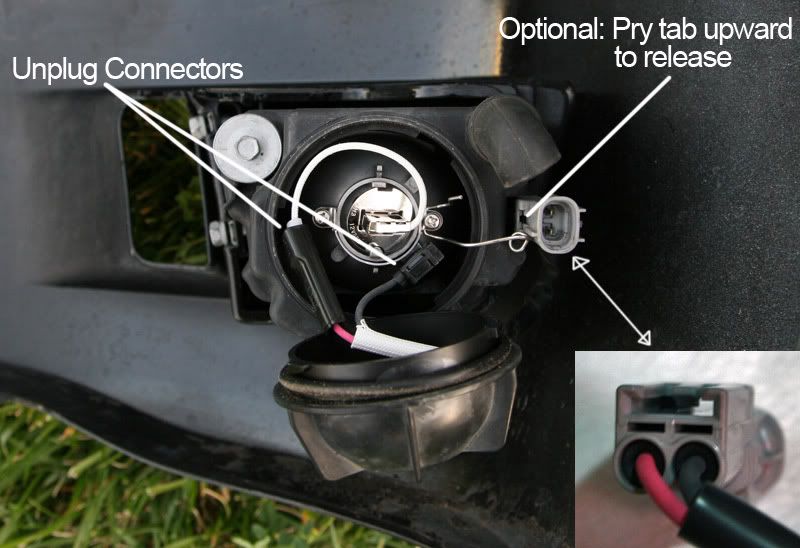
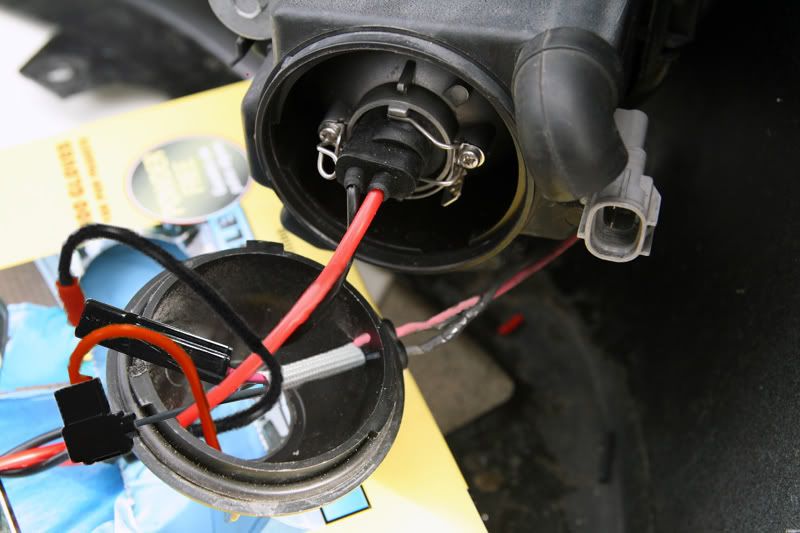
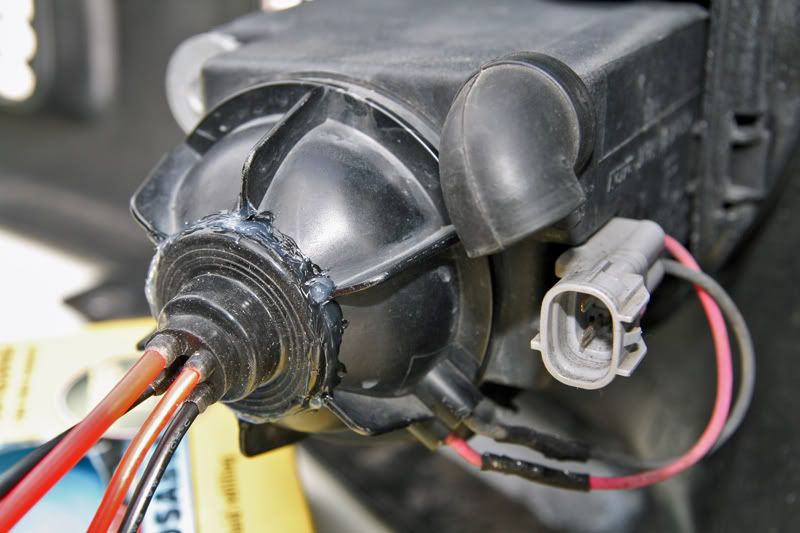
- It would probably be easier to remove the gray male fog light plug attached to the housing. Use a small flat head screwdriver to pry up the tab, and pull the plug away from the housing (See image below). You will need to unplug the two plugs inside the dust cap. One will be attached to the H3 bulb, and the other is a ground wire. The spade connectors from the HID kit will attach to these plugs later.
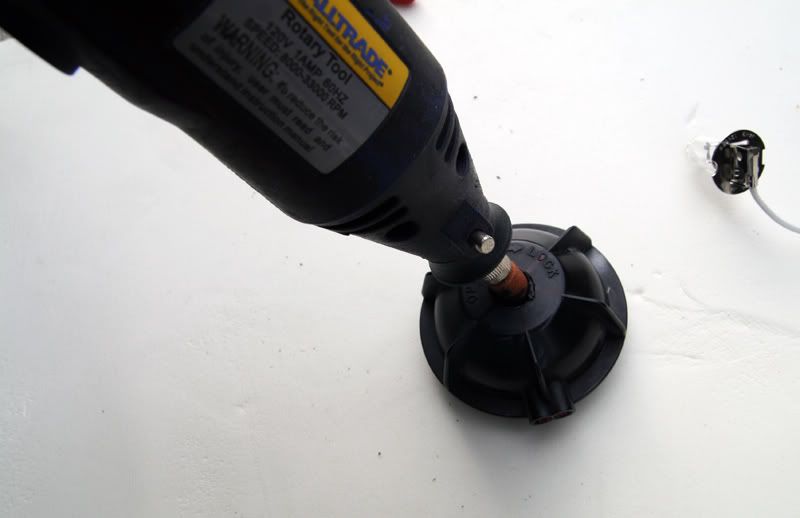
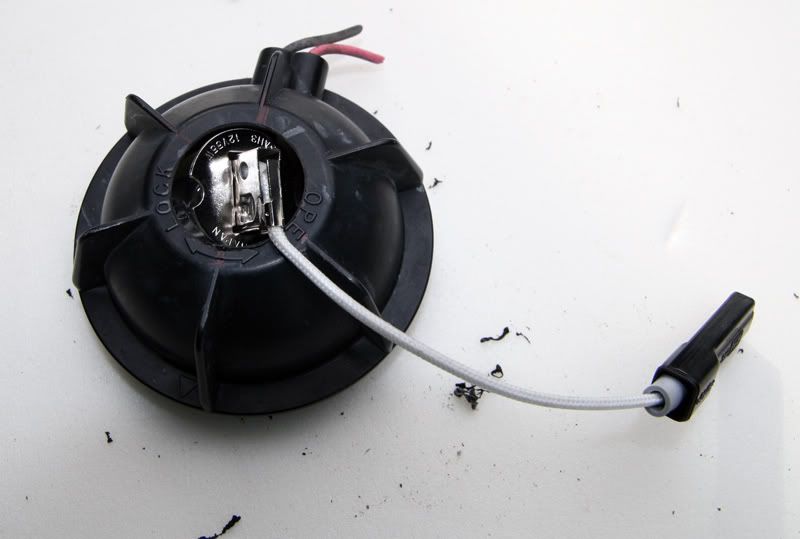
- Since you have H3 housings, you will need to modify the black dust cap. I started by drilling a pilot hole in the center of the cap.

Notice that there are no wires coming out of the cap. The wires were cut in the initial install. DO NOT CUT THE WIRES!!
If you want to be able to go back to OEM lighting, you can buy replacement caps fairly cheap (notice that the invoice is for 2 caps).

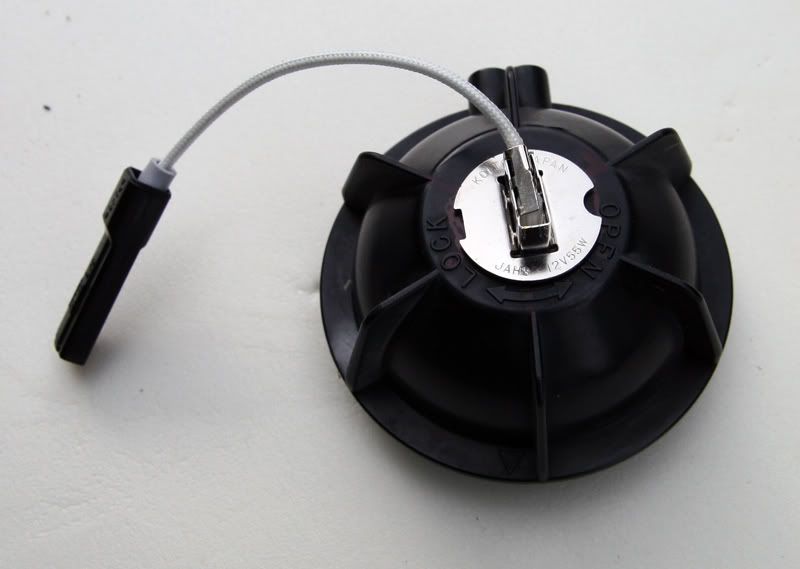
- I widened the hole with a conical sanding stone until I could fit the H3 bulb inside. I traced the base of the bulb to use as a guideline, and made the hole large enough to fit the bulb and wiring through it. Clean up any melted plastic around the hole. Pushing on them with my thumb was enough for me to break them loose.
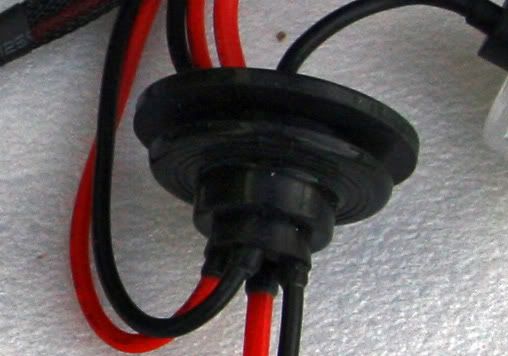
- With the hole already made in your dust caps, run the bulb and wiring through the hole, and immediately put the bulb in place. Depending on your kit, you may need to tweak the wire clamp & the hook before everything will lock into place. The two wires with spade connectors supply power to your kit. Plug them into female connectors inside the dust cap (*hint: this is what your OEM bulb was connected to). With my kit, it was necessary to reverse polarity to make them work. It was even noted in the kit�s instructions. If you turn them on, and they don�t work, there�s a good chance you need to reverse the polarity of your wires.
Notice the polarity switch
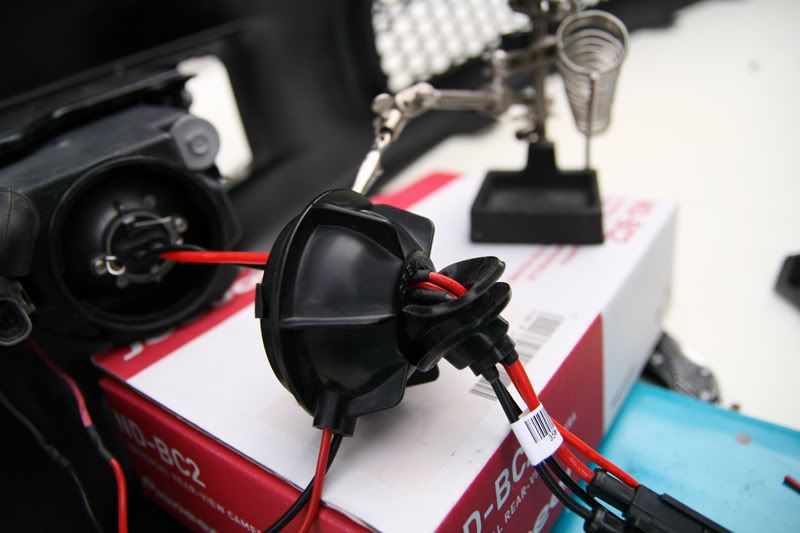
- My kit came with a nice rubber seal. The seal will slide along the wires as needed. You will find this useful when you find that you have too much wire inside the dust cap. Fold the seal, and push the first part through the dust cap. At this point, you can ensure that no water gets in by applying clear silicone around the perimeter of the seal.
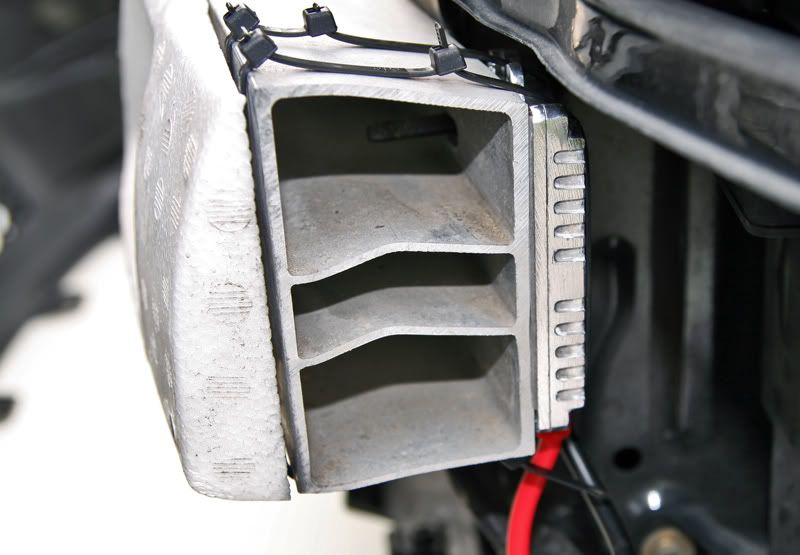
- I mounted my ballasts using 3M automotive double-sided tape and used zip ties as a backup. Many people mount theirs above the fog light housing, but I chose to mount mine behind the crash bar. Make sure you clean the surface with rubbing alcohol before you mount your ballasts.
- If you haven't already connected the red and black wires that connect to the black main wire (with the Inverter) from the ballast, do so now.
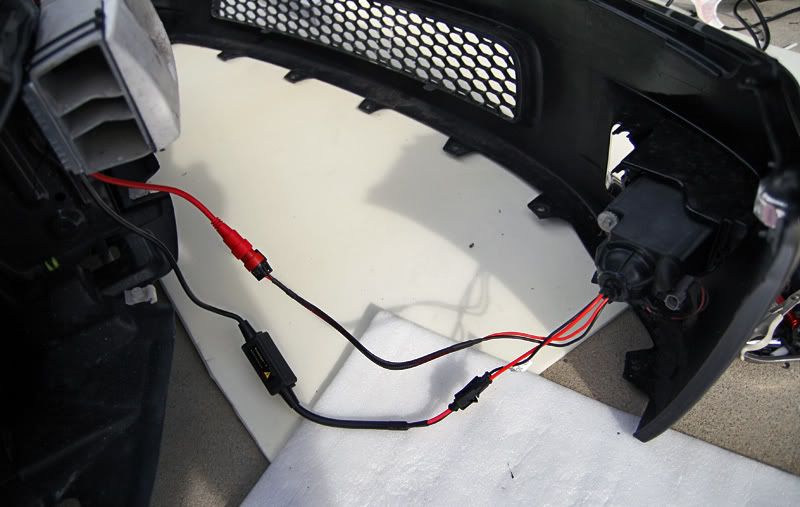
Your project should look something like this:
- Do the same for the other side, and remount your bumper. As a precaution, I zip tied my HID wiring to existing wires to keep them off the lower splash guard where puddles of water may accumulate. The kits are water proof, but I figured that I might as well do it since I was already there. When you mount the bumper, remember to plug in your OEM fog light plug and side markers.

Complete
If you notice any errors, please let me know, and I will correct them.
Last edited by rvalero; 01-04-10 at 06:35 PM.


Thread
Thread Starter
Forum
Replies
Last Post