
DIY - Front license plate side mount
 12-29-14, 02:43 PM
#1
for those of you that followed my other purchase thread... i went to PA to purchase my truck a few weeks ago... knowing that i would register the car in NJ, the salesman gave me these two hideous screws and told me that when i got my plates, just screw the plate in with these and they would go straight into the bumper... i saw the dimples where Lexus marks the holes to drill, but i'd be damned if i was drilling into the face of my perfectly clean bumper which has been kept pristine the last 5 years...
i looked online to see if any of the tow hook or universal side mount brackets would work on our model, but there was nothing i liked... and all of which seemed to require some type of hole to mount the steel bracket... so i played around with a few ideas and options, and this is what i came up with...
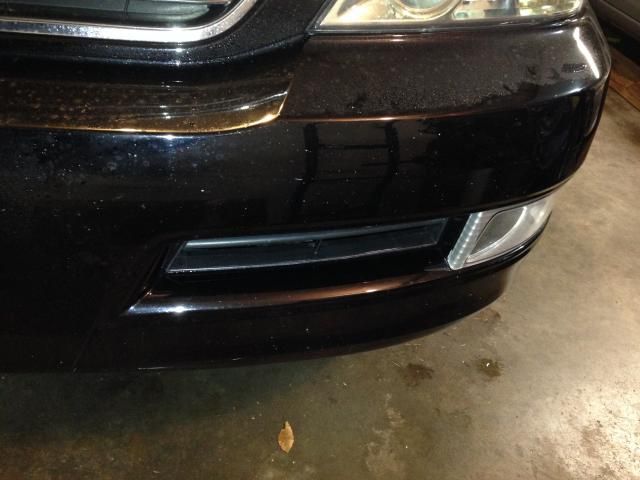
i decided to go with the driver side vent area... my plan was to use l-brackets on the shelf/ledge where the bumper scooped in...
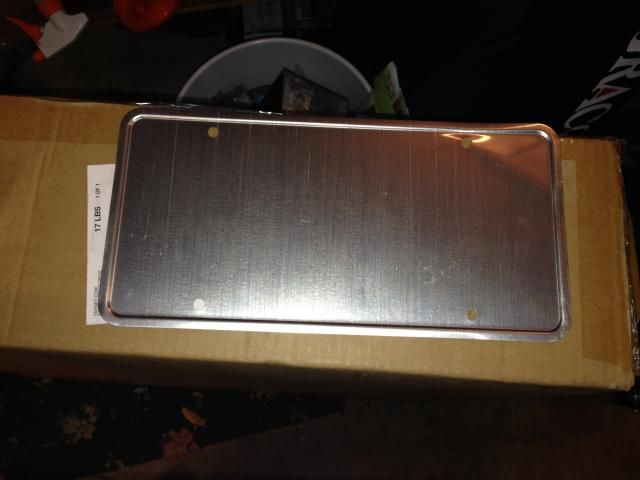
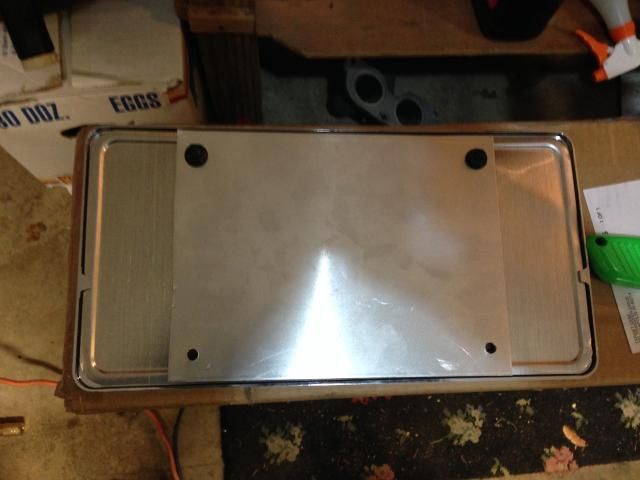
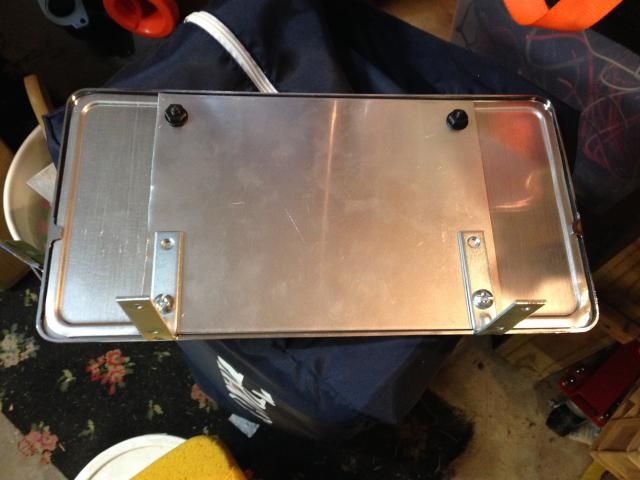
here is the back of the license/number plate as reference
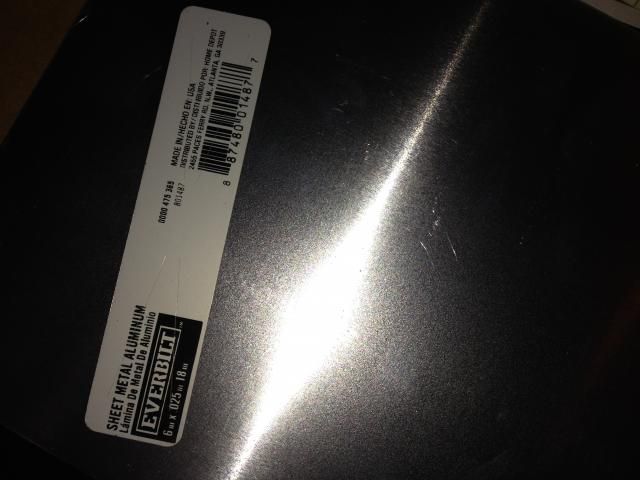
i went to home depot and got a piece of aluminium sheet metal to reinforce the back of the plate to tie in the plate from top to bottom... it was under $10... this step isn't necessarily needed since you can just mount the bottom of the plate and be done, but i wanted something to tie into the top to keep it secure...
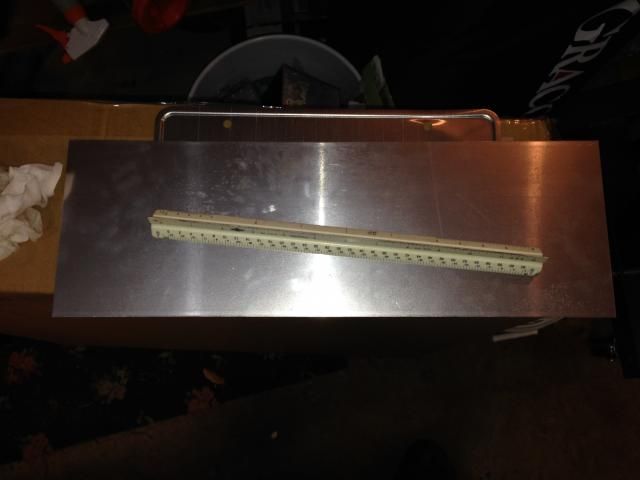
measure it out against the back of the plate, you could do the whole plate, but i opted for just the center 4 holes to tie in... use some tin snips to cut and make sure you sand/file the edge you cut so you don't accidentally cut yourself later...
and i came up with something like this... i used the dealer frame for more reinforcement... i usually only put the dealer frame on the front as added protection from the crap parallel parkers in NY/NJ... otherwise, i'm not an advocate of free advertising...
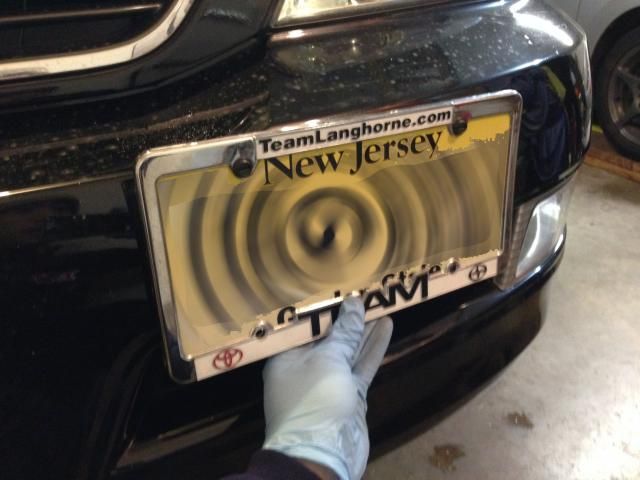
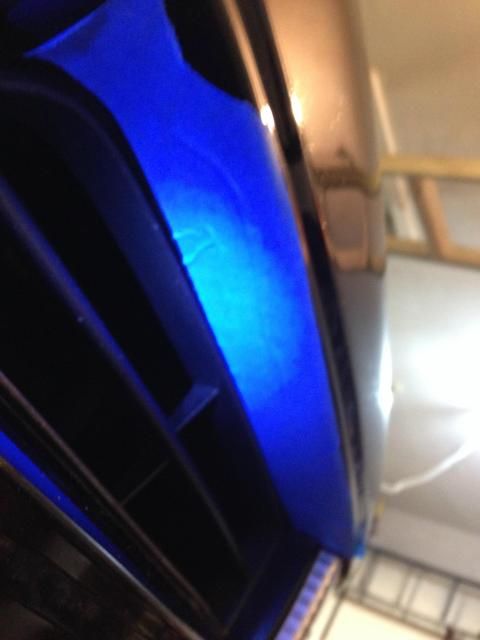
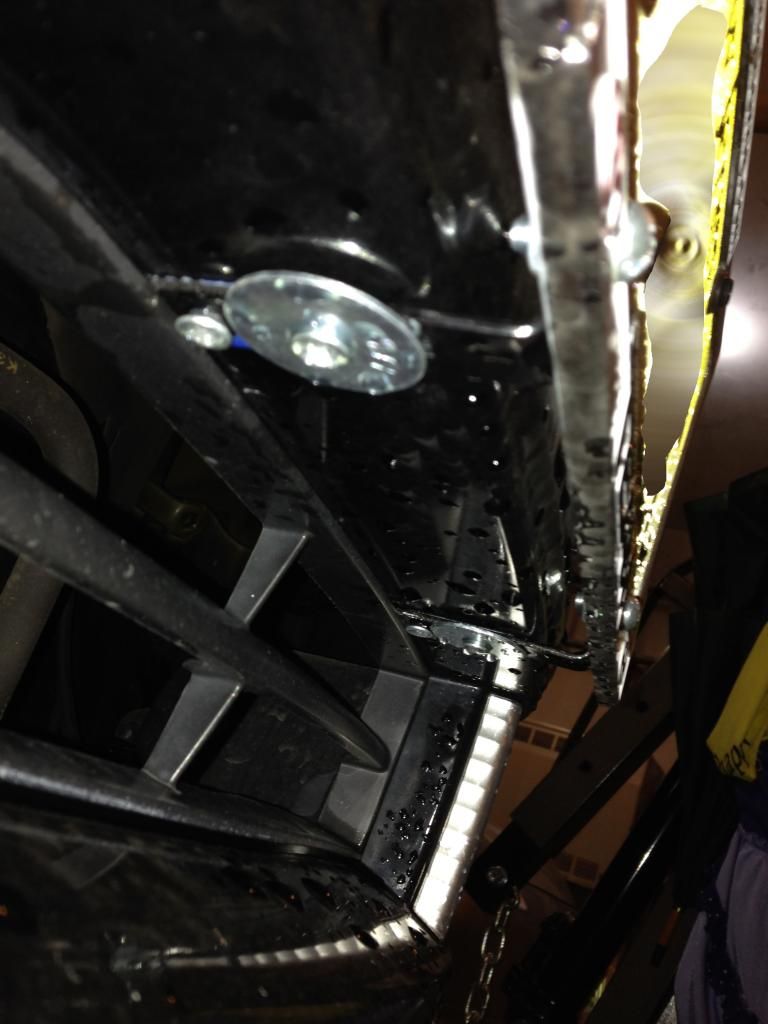
test fit the location where you would like it... i chose the driver side just above the vent... initially i wanted it lower but didn't want to impede the airflow into the trans cooler and radiator...
i began to measure the space i had underneath that i had to work with... as you can see there is ~2" lip in which you can mount your bracket against.. and if you stick your hand up under the bumper you will feel that there is nothing behind this area of the bumper...
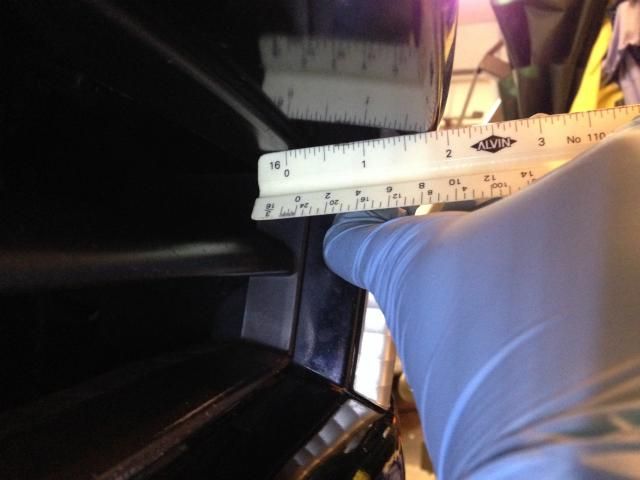
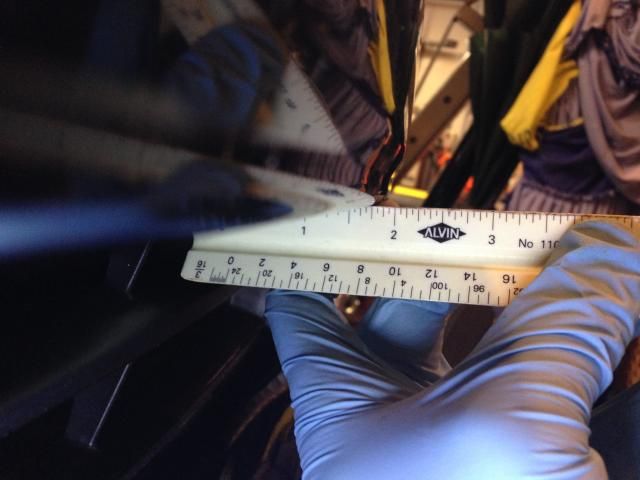
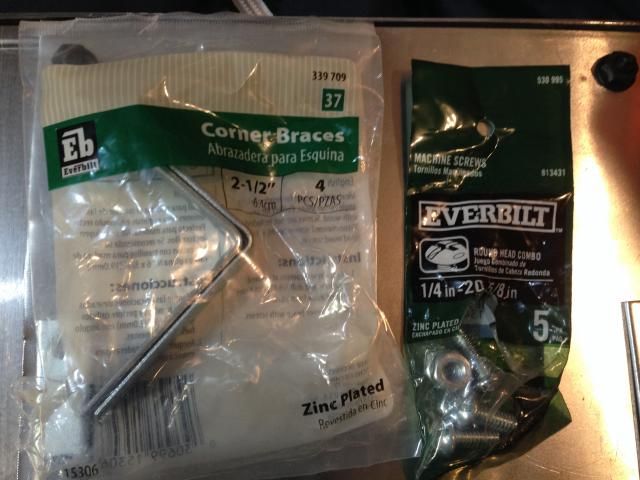
since we had 2" to work with, i went to home depot and got 2.5" l-brackets and some stainless steel nuts and bolts...and some wide fender washers... now, the l-bracket has two holes on each side... when you test fit the bracket, you will notice that the hole closer to the front of the car is very close to the bumper edge where it comes up to the face... since i wanted the widest flat surface i drilled a hole in the middle of the two holes... you can see in the pics...
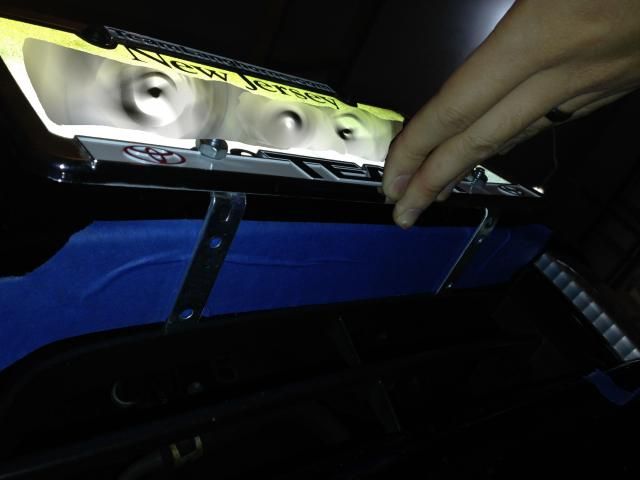
once done, bolt the plate up and here is a mock up of what the back side of the plate would look like with everything test fitted...
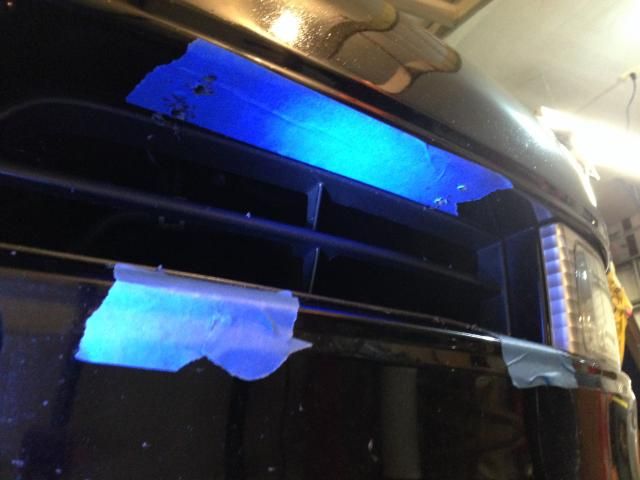
now this is important... any time you are working with sharp metal (like l-brackets) around paint, mask the whole area with painters tape... it will protect the paint from any nicks and scratches and also allow you to see your markings better to drill your holes... the truck is black onyx, so no way i can see a black sharpie markings to drill my holes...
hold the bracket up and mark your holes with a sharpie... remember the inner hole was there on the bracket... i drilled in the middle (second hole)... the front hole won't be used...
once you have your markings, drill your holes... you will notice in this picture, i put tape on the lower part of the vent opening on the bumper... unless you have a 90-degree close quarter drill, a standard drill bit on your drill will put the drill chuck very close to the bottom section... i taped this area off to protect the paint from any marring of the rotating chuck... i also put my left hand on that side as a guide to protect the bumper in case i got too close... take this part very slow and carefully... the bumper is abs plastic so you don't need your drill maxed out to drill these holes... steady even pressure and sharp drill bits help alot...
i had a can of leftover black onyx touch of paint, so i painted the brackets and sheet metal... if you plan to paint, take the required prep steps (sand, clean with IP alcohol, and tack cloth) even though stainless steel and aluminium won't rust, it was just my OCD...
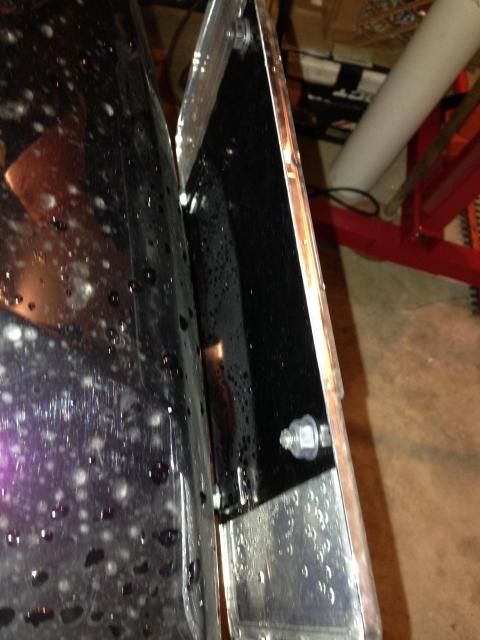
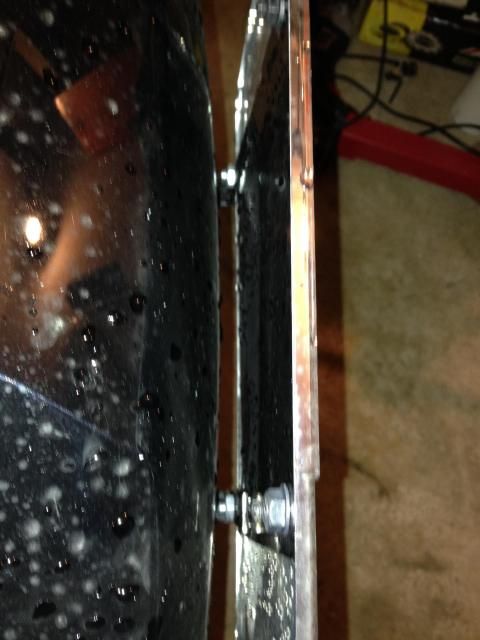
and here is how i mounted the bracket... i used the center hole with the fender washers on both sides to spread the clamping force... so its screw bolt->fender washer->bracket->car->fender washer (on inside of the bumper)->nut... the inner screw bolt is just bolt and nut...
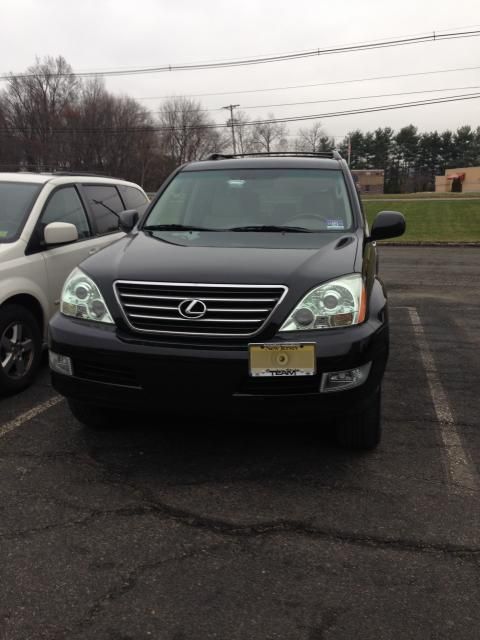
and here is the finished product... i know that this isn't everyone's cup of tea, but i love the look... it also helps me pick out the truck in a parking lot since i'm the only one with a plate off to the side...
feedback and comments are welcome... any questions, i am more than happy to answer and provide more pics if there is interest...
i looked online to see if any of the tow hook or universal side mount brackets would work on our model, but there was nothing i liked... and all of which seemed to require some type of hole to mount the steel bracket... so i played around with a few ideas and options, and this is what i came up with...
i decided to go with the driver side vent area... my plan was to use l-brackets on the shelf/ledge where the bumper scooped in...
here is the back of the license/number plate as reference
i went to home depot and got a piece of aluminium sheet metal to reinforce the back of the plate to tie in the plate from top to bottom... it was under $10... this step isn't necessarily needed since you can just mount the bottom of the plate and be done, but i wanted something to tie into the top to keep it secure...
measure it out against the back of the plate, you could do the whole plate, but i opted for just the center 4 holes to tie in... use some tin snips to cut and make sure you sand/file the edge you cut so you don't accidentally cut yourself later...
and i came up with something like this... i used the dealer frame for more reinforcement... i usually only put the dealer frame on the front as added protection from the crap parallel parkers in NY/NJ... otherwise, i'm not an advocate of free advertising...
test fit the location where you would like it... i chose the driver side just above the vent... initially i wanted it lower but didn't want to impede the airflow into the trans cooler and radiator...
i began to measure the space i had underneath that i had to work with... as you can see there is ~2" lip in which you can mount your bracket against.. and if you stick your hand up under the bumper you will feel that there is nothing behind this area of the bumper...
since we had 2" to work with, i went to home depot and got 2.5" l-brackets and some stainless steel nuts and bolts...and some wide fender washers... now, the l-bracket has two holes on each side... when you test fit the bracket, you will notice that the hole closer to the front of the car is very close to the bumper edge where it comes up to the face... since i wanted the widest flat surface i drilled a hole in the middle of the two holes... you can see in the pics...
once done, bolt the plate up and here is a mock up of what the back side of the plate would look like with everything test fitted...
now this is important... any time you are working with sharp metal (like l-brackets) around paint, mask the whole area with painters tape... it will protect the paint from any nicks and scratches and also allow you to see your markings better to drill your holes... the truck is black onyx, so no way i can see a black sharpie markings to drill my holes...
hold the bracket up and mark your holes with a sharpie... remember the inner hole was there on the bracket... i drilled in the middle (second hole)... the front hole won't be used...
once you have your markings, drill your holes... you will notice in this picture, i put tape on the lower part of the vent opening on the bumper... unless you have a 90-degree close quarter drill, a standard drill bit on your drill will put the drill chuck very close to the bottom section... i taped this area off to protect the paint from any marring of the rotating chuck... i also put my left hand on that side as a guide to protect the bumper in case i got too close... take this part very slow and carefully... the bumper is abs plastic so you don't need your drill maxed out to drill these holes... steady even pressure and sharp drill bits help alot...
i had a can of leftover black onyx touch of paint, so i painted the brackets and sheet metal... if you plan to paint, take the required prep steps (sand, clean with IP alcohol, and tack cloth) even though stainless steel and aluminium won't rust, it was just my OCD...
and here is how i mounted the bracket... i used the center hole with the fender washers on both sides to spread the clamping force... so its screw bolt->fender washer->bracket->car->fender washer (on inside of the bumper)->nut... the inner screw bolt is just bolt and nut...
and here is the finished product... i know that this isn't everyone's cup of tea, but i love the look... it also helps me pick out the truck in a parking lot since i'm the only one with a plate off to the side...
feedback and comments are welcome... any questions, i am more than happy to answer and provide more pics if there is interest...


Thread
Thread Starter
Forum
Replies
Last Post
NXOwner
NX - 1st Gen (2015-2021)
7
06-27-16 12:27 PM
rominl
GS - 2nd Gen (1998-2005)
14
01-13-12 09:52 AM
xknowonex
SC- 1st Gen (1992-2000)
38
05-04-10 01:08 PM
mctuners
IS - 2nd Gen (2006-2013)
13
12-10-06 09:24 PM