When you click on links to various merchants on this site and make a purchase, this can result in this site earning a commission. Affiliate programs and affiliations include, but are not limited to, the eBay Partner Network.
My 2008 GX 470 (88,xxx Miles) had started to do the infamous brake shake/vibration during braking at mid to high speeds...This is usually due to warped front rotors.
Here's a DIY for swapping out the warped rotors which will likely fix this problem.
All my parts were purchased from Toyotapartszone (unfortunately Sewell couldn't beat these prices)
PAD KIT, DISC BRAKE PART # 04465-35290
SHIM KIT, FR DISC BR PART# 04945-35120 (shims can be re-used if you wanna save a few bucks)
DISC, FR PART # 43512-60151
Turn wheels to access caliper bolt easier.
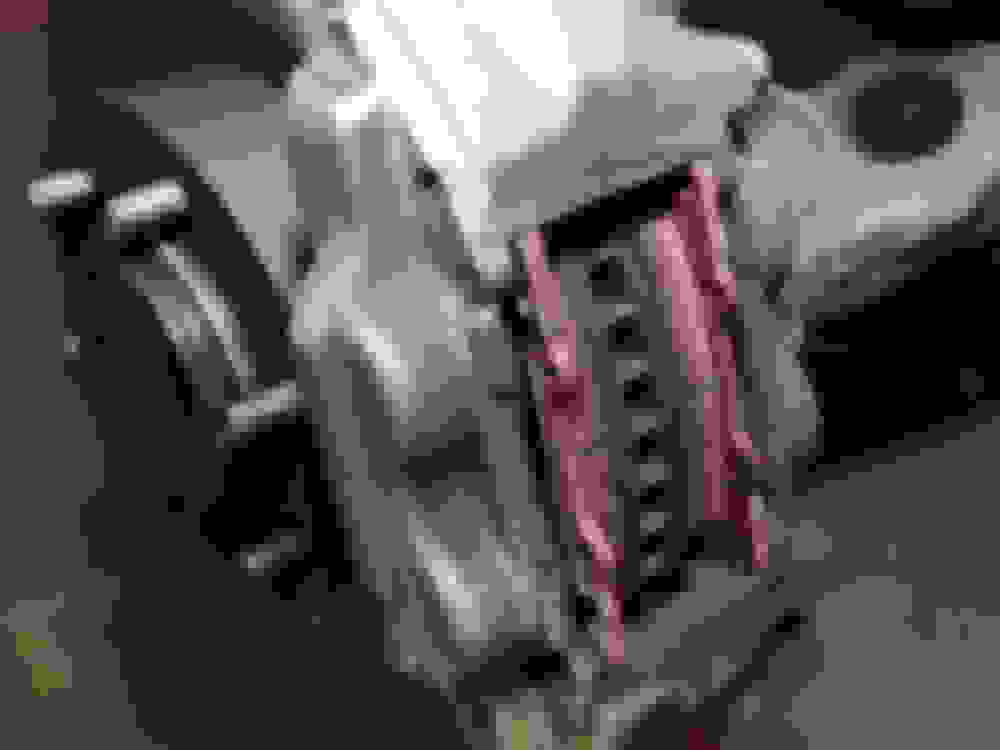
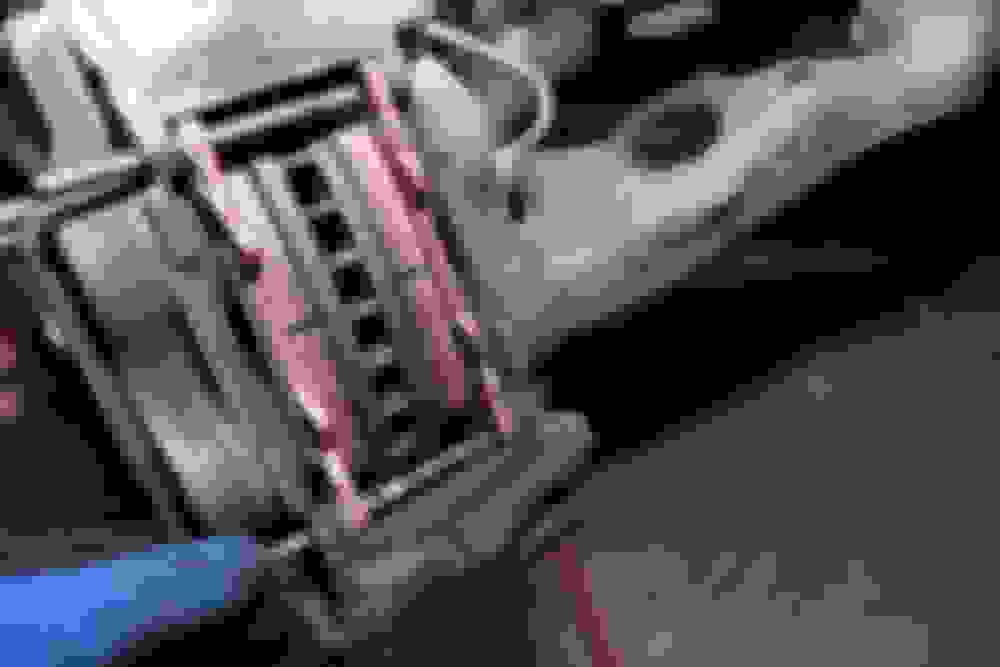
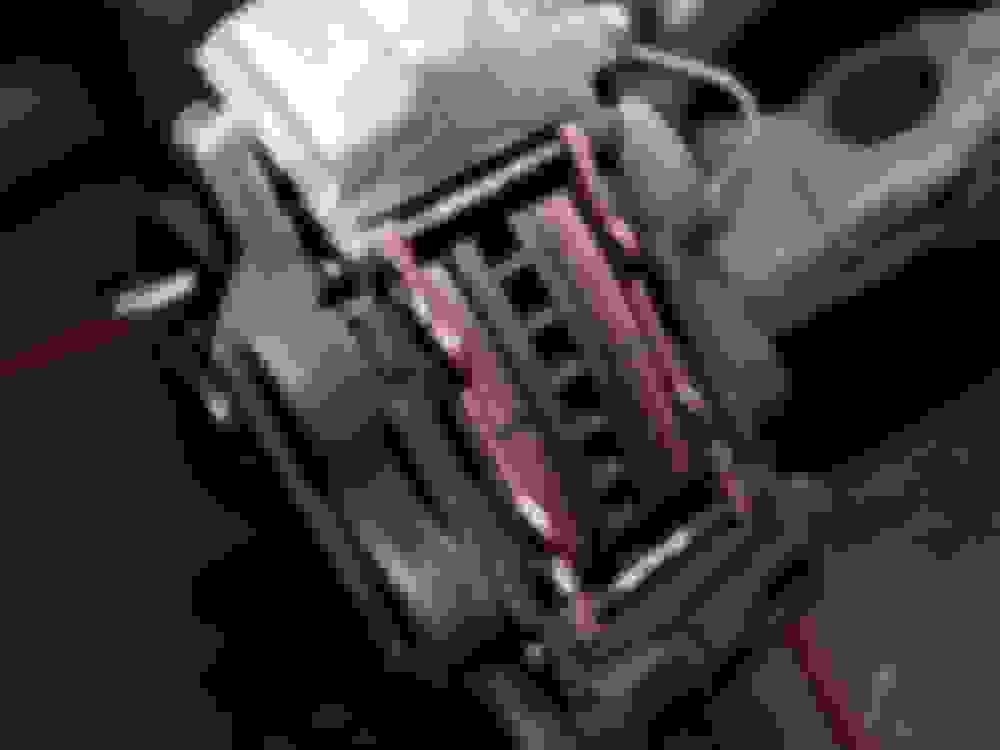
Pull cotter pins off anti-rattle pins .
Pull out top and bottom anti-rattle pins then remove the anti-rattle spring.
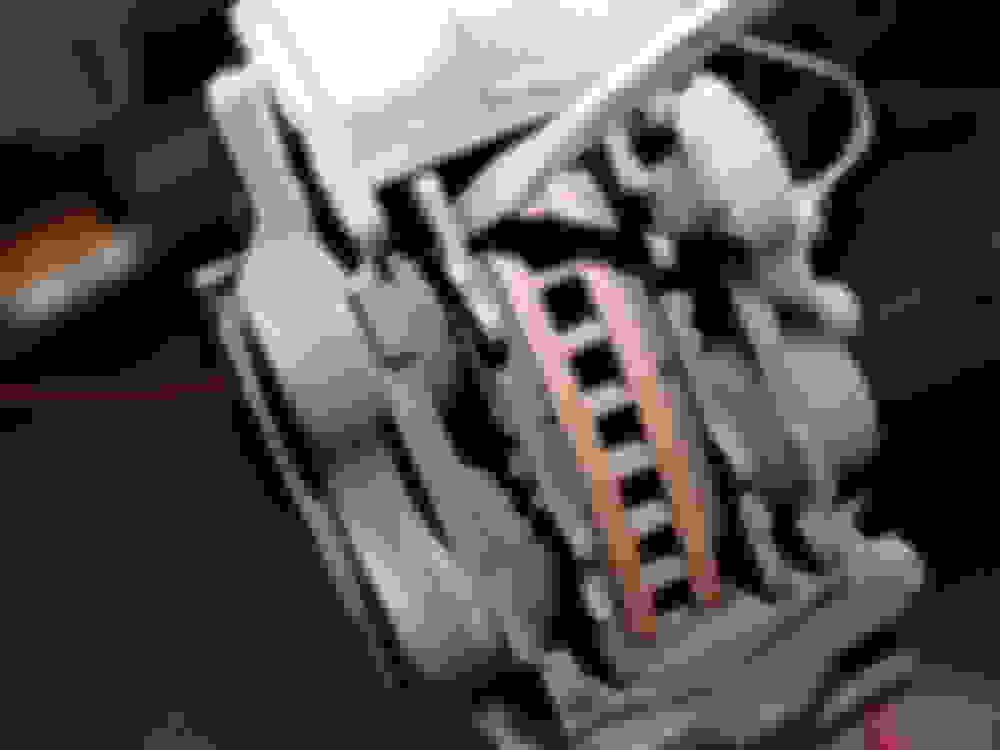
Leaving the old pads in... use a small flat head screw driver to depress the brake pistons back. Use the rotor as leverage while prying forward at the top and bottom of the pad. Do this for both sides.
Pry from the center of the pad when you have enough room. The pads both need to be pressed back until the pad plate touches the caliper shown with red arrows. Do this on both sides.
Now remove the old pads.
Remove the 12mm bolt holding the brake lines.
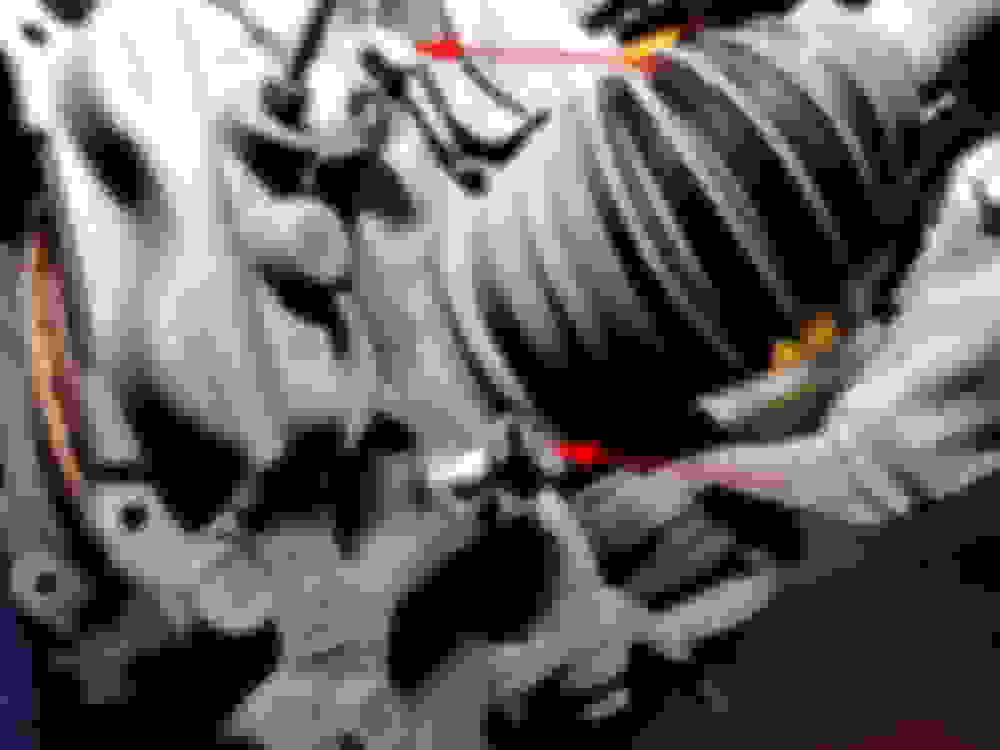
Remove the 17mm brake caliper bolts shown with the red arrows.
Slowly remove the caliper and be careful not to kink the brake lines. You can use a bungee tie like I did to hold the caliper up.
Now you can simply remove the rotor by pulling it out. (no pounding necessary)
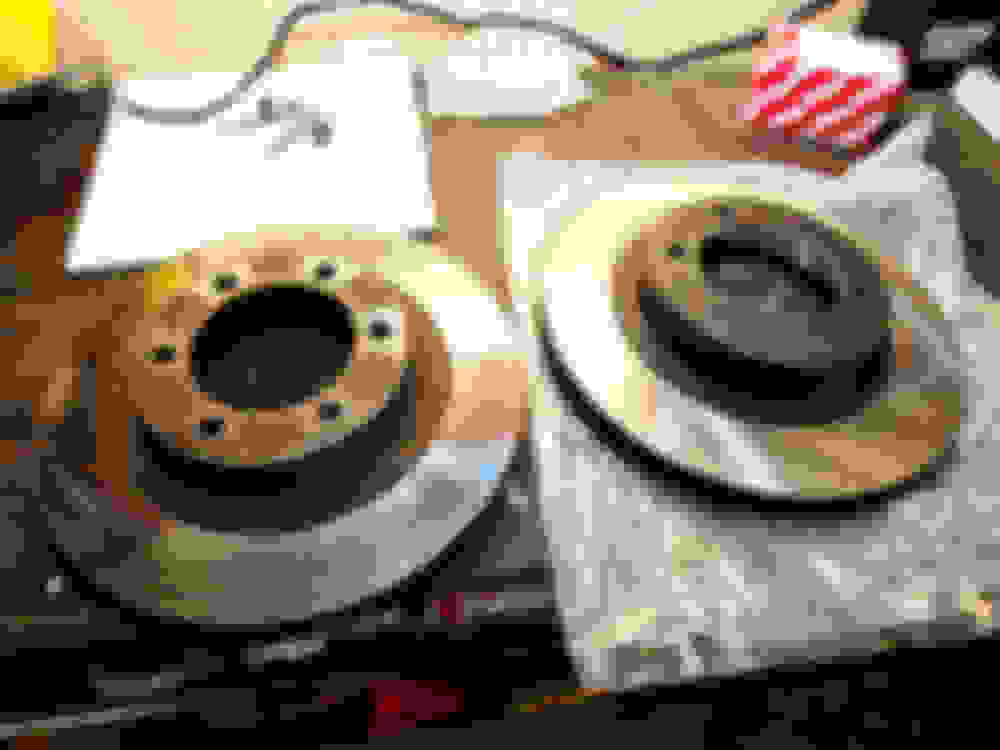
Old Rotor and New Rotor
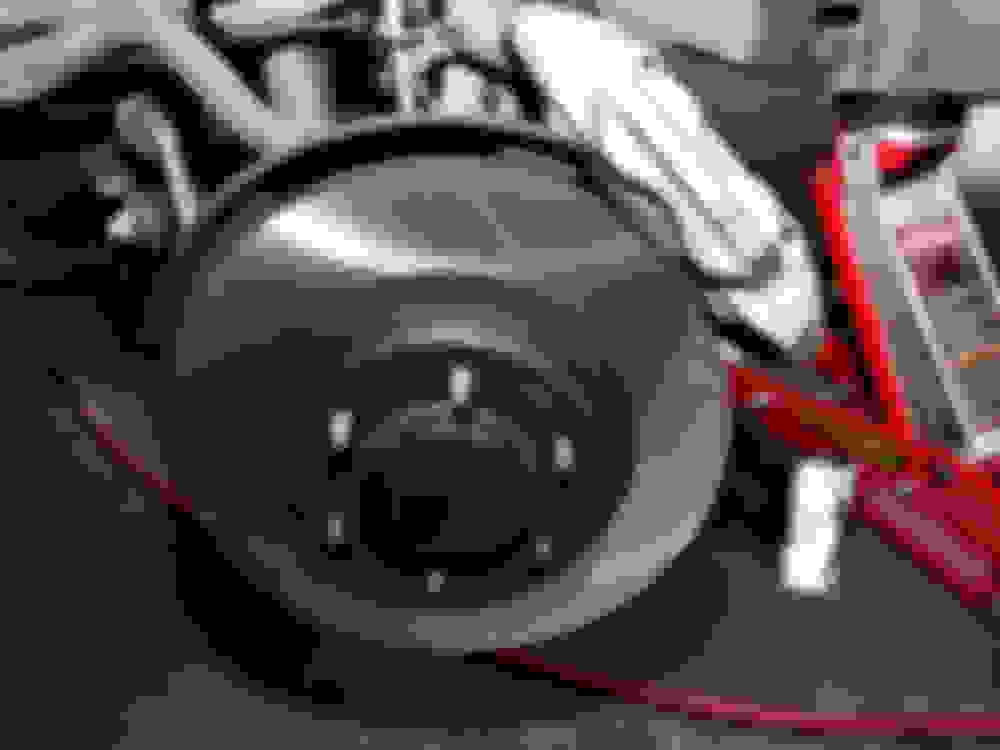
Now install the new rotor. (there is no right or wrong way to put it on.. just put it on like you would the wheel)
Now put the caliper back on and tighten the two 17mm bolts at 85lb. Also don't forget the 12mm bolt for the brake line bracket.
You'll notice that the new rotor is loose and wobbly at this point.. this is normal. It will be more stable once the new pads are installed.
Old Pad and New Pad.
Install the new pads. (attached shims on the pads per instructions included with the pads)
Re-install brake anti-rattle pin, anti-rattle spring, and cotter pins. ( I cleaned all of these items with wd-40 prior to re-installing)
All Done!!
Now start your engine and pump your brakes to set the pads. Go for a test drive!
Shake/Vibrations all gone!!
Whole job took just under an hour.
Feel free to message me if you have any questions.
Hope this helps!
Last edited by tightlinez; 11-28-17 at 02:27 AM.
Reason: re up photos
Very nice write up!! Perfect timing too as my 08 with 37K has front rotor warp bad lol! My question is do you have to change out all 4 rotors at same time? Would it be better to do this or not and if NO to the rears should I put new pads on the rear at the least?
Curious? What is the purpose of a caliper tool? Aren't the pistons threaded and need to rotate as they compress, therefore can you just squeeze them in with a screw driver?
Curious? What is the purpose of a caliper tool? Aren't the pistons threaded and need to rotate as they compress, therefore can you just squeeze them in with a screw driver?
Pistons are not threaded in most cases. There are certain cars whose rear brakes (Ford Focus is one popular one) we refer to as ratcheting, as they do turn - it has to do with the integrated parking brake into the caliper on those cars...
To depress the pistons back, you can do what is shown here, or buy a special spreader... Even though I have access to the special tools, this method is usually easier and faster...
Best write up with pictures to date on front brakes. Excellent. This is what makes this forum so special. Someone does a great write up with pictures, that inspires others to do the same. I have an 08 same color, with 70,000 miles. Fronts are OK, back pads wearing thin. Maybe I can wait for you to do a write up on the rear pads. Just kidding, good job!!!!!
To replace Front Pad / Front Brake Disc , you could do the following inspection for replacement.
1. The pad lining thickness Standard Thickness is 11.5mm( around 0.453 inches)
and the minimum thickness should be 1.0mm ( 0.039 inch) anything lower go the replacement.
2. To replace disk replacement
Using the micrometer gauge the standard thickness is 28.00mm ( 1.102 inches)
the minimum thickness should be 26.00mm ( 1.024 inch) Anything between 28.00-26.00mm mm you could for skimming or full replacement below 26.00mm( if braking is found not fully effective)
To replace Rear Disc / Rear Pad
1. The standard Thickness is 18.0 mm( 0.709 inches)
The minimum thickness is 16.0mm( 0.630 inches) Anything between17.00mm / 16.00mm you could for skimming or full replacement below 16.00mm
2.1. The pad lining thickness Standard Thickness is 10.0 mm( around 0.394 inches)
and the minimum thickness should be 1.0mm ( 0.039 inch) anything lower go the replacement.
The above measurement are from the Lexus Repair Manual
 11-10-12, 04:25 PM