Installed the Coastal "Ultimate Lockpick" today w/ many pics, but need help posting.
 08-19-06, 05:36 PM
#1
Pole Position
Thread Starter

Join Date: Nov 2005
Location: New York
Posts: 299
Likes: 0
Received 0 Likes
on
0 Posts
Installation of “Ultimate Lockpick” in 2006 Lexus GX470
**THIS IS A PARTIAL LIST** Can't get all the pics to post- says I am limited to 10, but I've got a good 25 or so. I am open to suggestions....
***UPDATE****
I NOW STRONGLY SUGGEST USING PLASTIC TRIM TOOLS TO REMOVE TRIM INSTEAD OF METAL TOOLS. FAR SAFER. Wasn't aware of them the first time around. See here:
http://www.etoolcart.com/doorpanelre...5pcst9007.aspx
The brand is "Sir John", but this looks like a clone:
http://www.tooltopia.com/astro-pneumatic-4505.aspx
Before starting, let’s go over a few basics so as to not mar the installation—or your vehicle. First and foremost, READ THE DIRECTIONS. Read them again. And then read them yet again. If you are not comfortable with basic interior work and trim disassembly think twice or get help. The job is fairly easy and straightforward, but requires patience and, at times, a gentle touch. Wrecking an expensive piece of trim to save 5 minutes is generally not a good idea! But, with a few simple tools and a bit of patience, most people should be able to do the job in an hour or two. If you have any desire to see a trim breakdown and instructions from Lexus as to disassembly, check out this site: http://www.techinfo.toyota.com/ For about $10 per day you can access a wealth of technical information, including drawings of how things fit together and tips for disassembly, etc.
You’ll also need a yellow tipped video extension cable and female-female adapter, as the supplied cable isn’t quite long enough:
To begin the job, start by washing your hands. We don’t want to get greasy fingerprints on the trim, Navigation unit or other parts. Next, clear out any items in or around the center console.
Now we start the actual disassembly. Start by inserting a tape or cloth covered prying tool on the right (passenger side) trim and GENTLY pry the console trim up as shown. Start closest to the center of the car and lift it up and then out. Be very careful and proceed slowly and gently, unless you want scratches. They are only held in with spring clips. Place the trim piece in a safe, out of the way location. Here is the beginning:
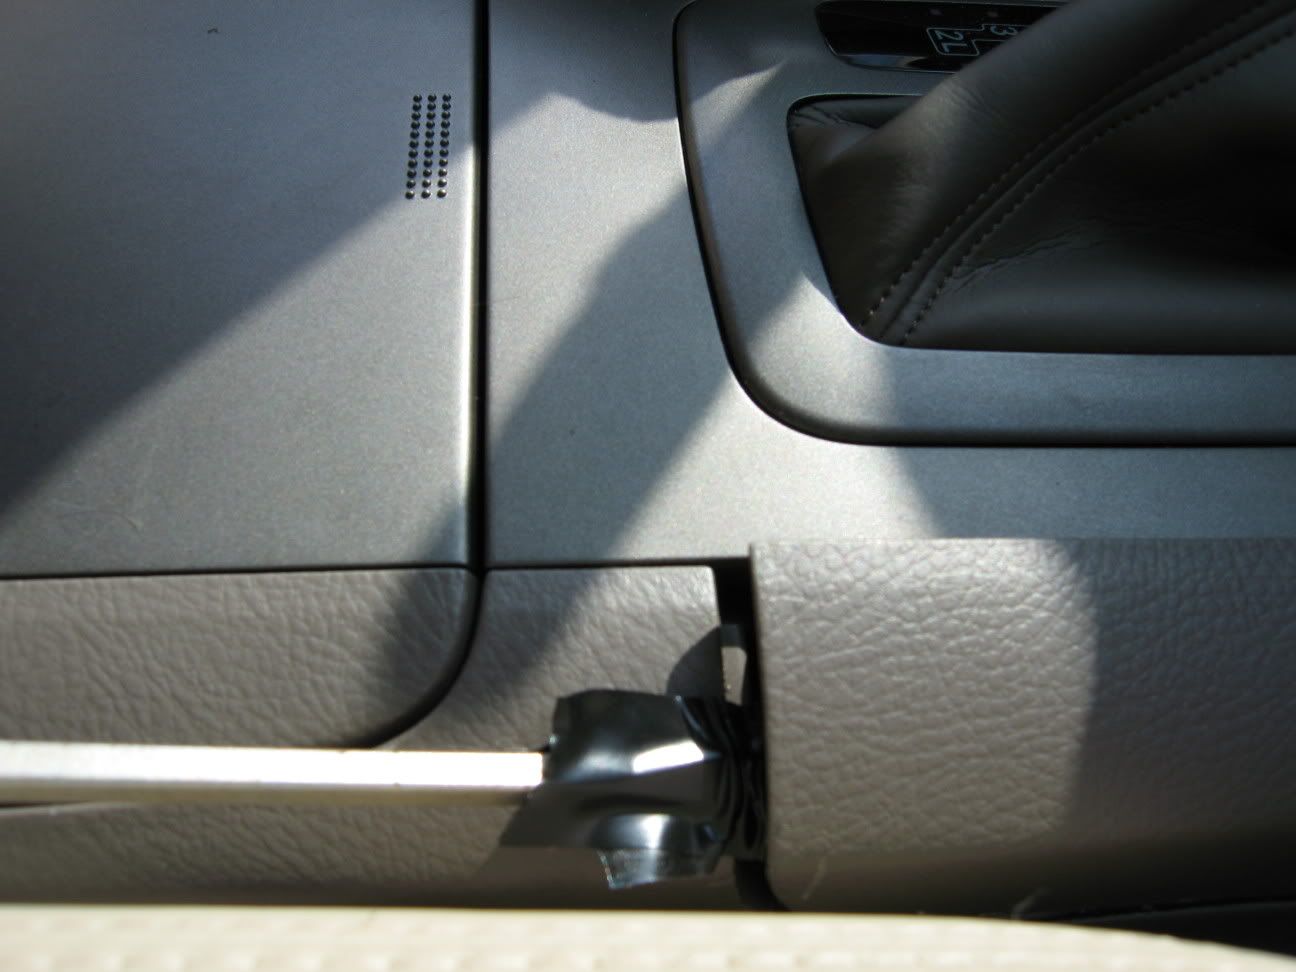
The piece is lifted up and swung towards the front of the truck and then pulled out.
Repeat on the left side.
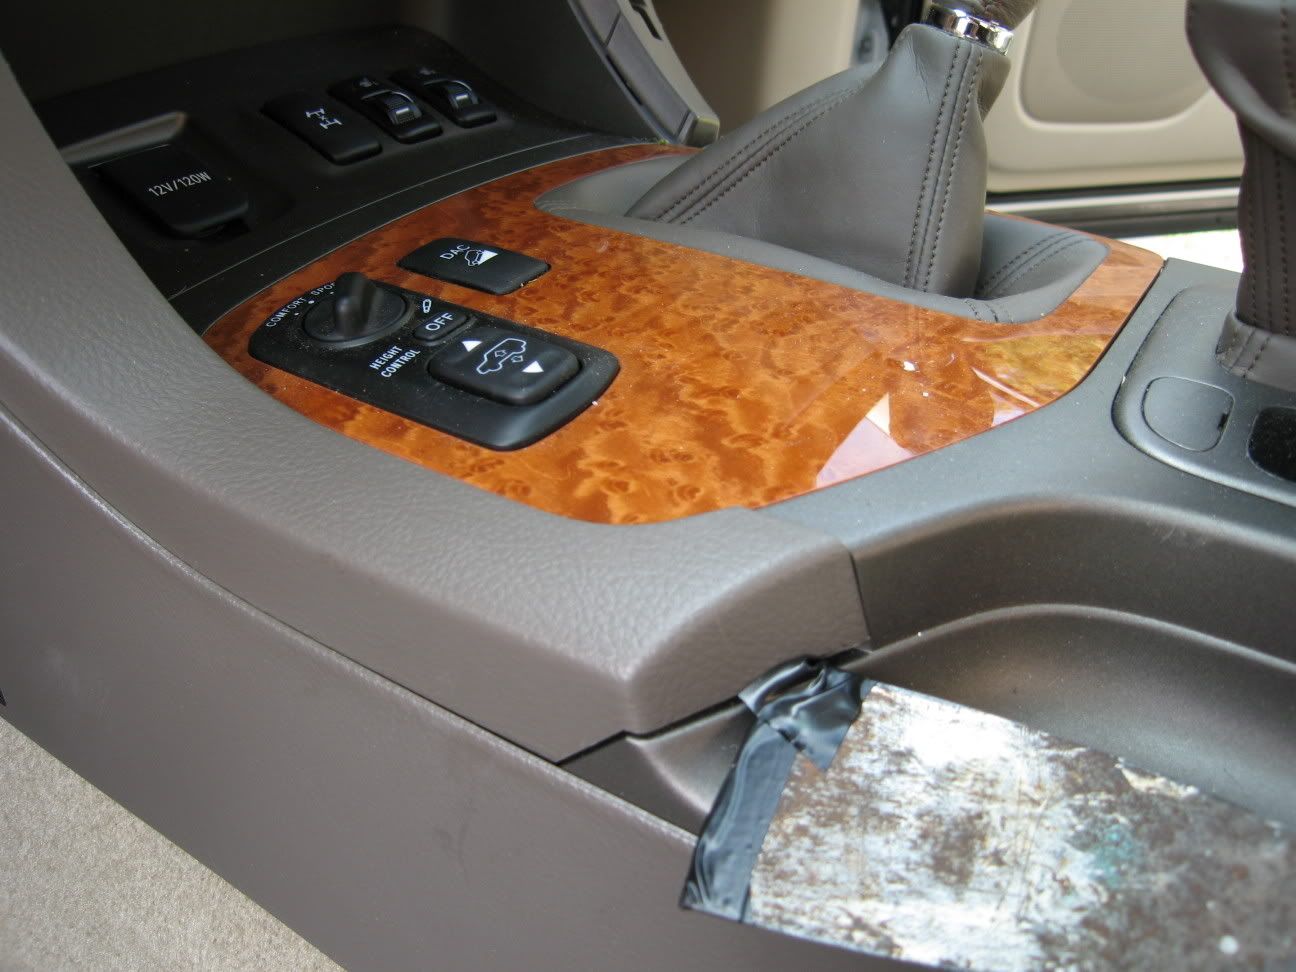
OK, now for the (slightly) more difficult part: Removing the wood trim pieces flanking the NAV unit. Like the other pieces they too are held in with spring clips and can be broken if forced the wrong way. They are said to be expensive, so don’t go crazy!
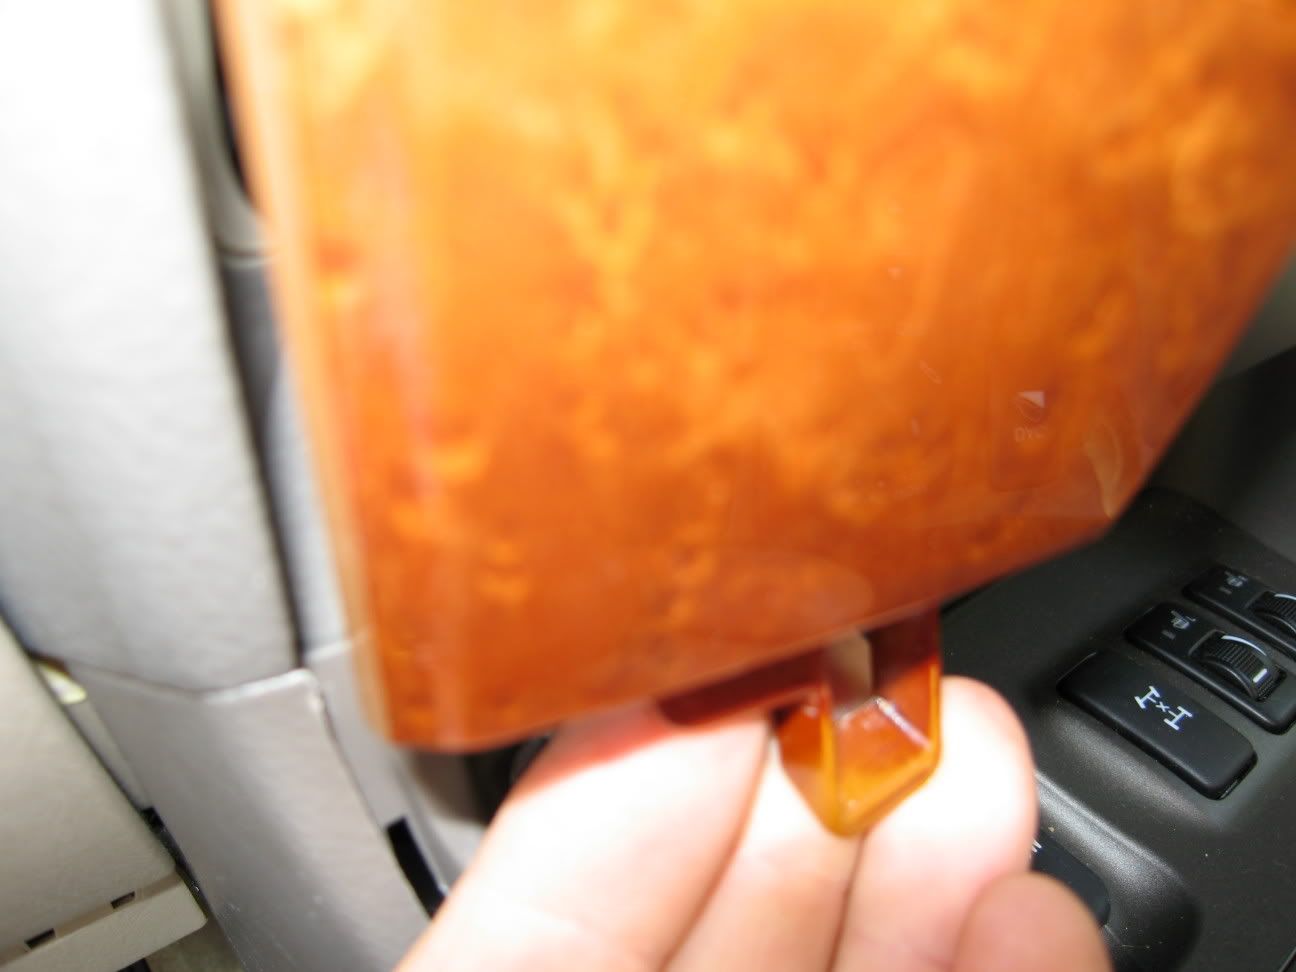
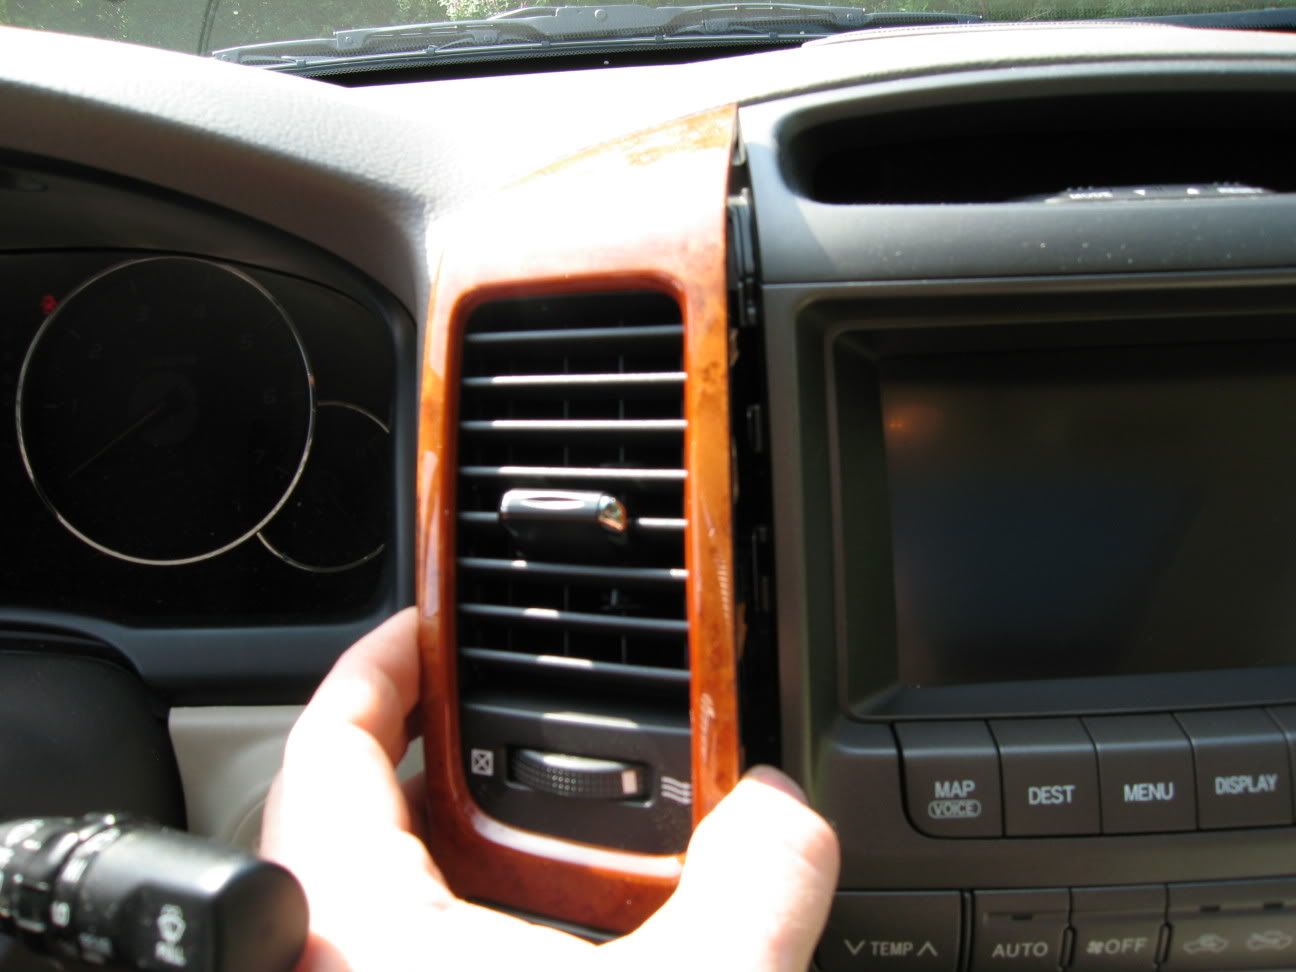
The best way I have found is to use your fingers and GENTLY, but firmly start at the bottom as shown. Moving from the bottom to the top as you go, pry out the trim with your fingers evenly, gently and SLOWLY. They fit rather snugly and are attached only with spring clips. They also use felt on the sides to avoid squeaks and rattles. Don’t remove or damage it. When loose, remove the wires on the back by gently pressing in on the release button. Place the trim someplace safe where it won’t get stepped on or broken. Repeat the same on the other side. Here is the sequence:
By now you will see the 4 10mm bolts that need to be removed:
Next, pull out the ash try area. A gently tug as shown is all it takes.
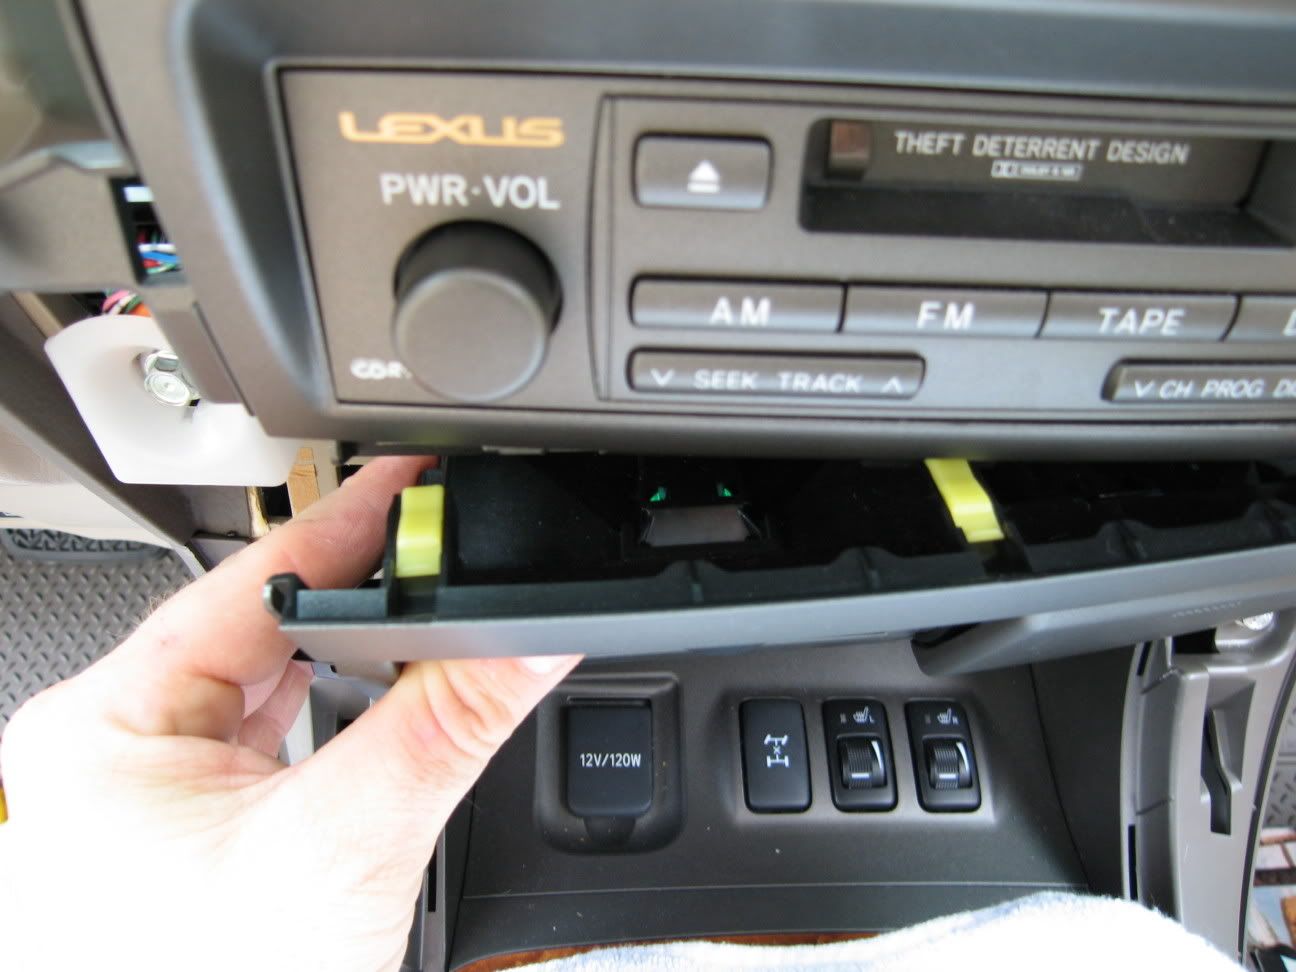
There is no need to remove the wires on the back. Just pull it down and out of the way.
Before going ahead, place your towel on the console! You will need a place to rest the Nav unit when removed. Now, using a 10mm socket wrench, remove the 4 bolts.
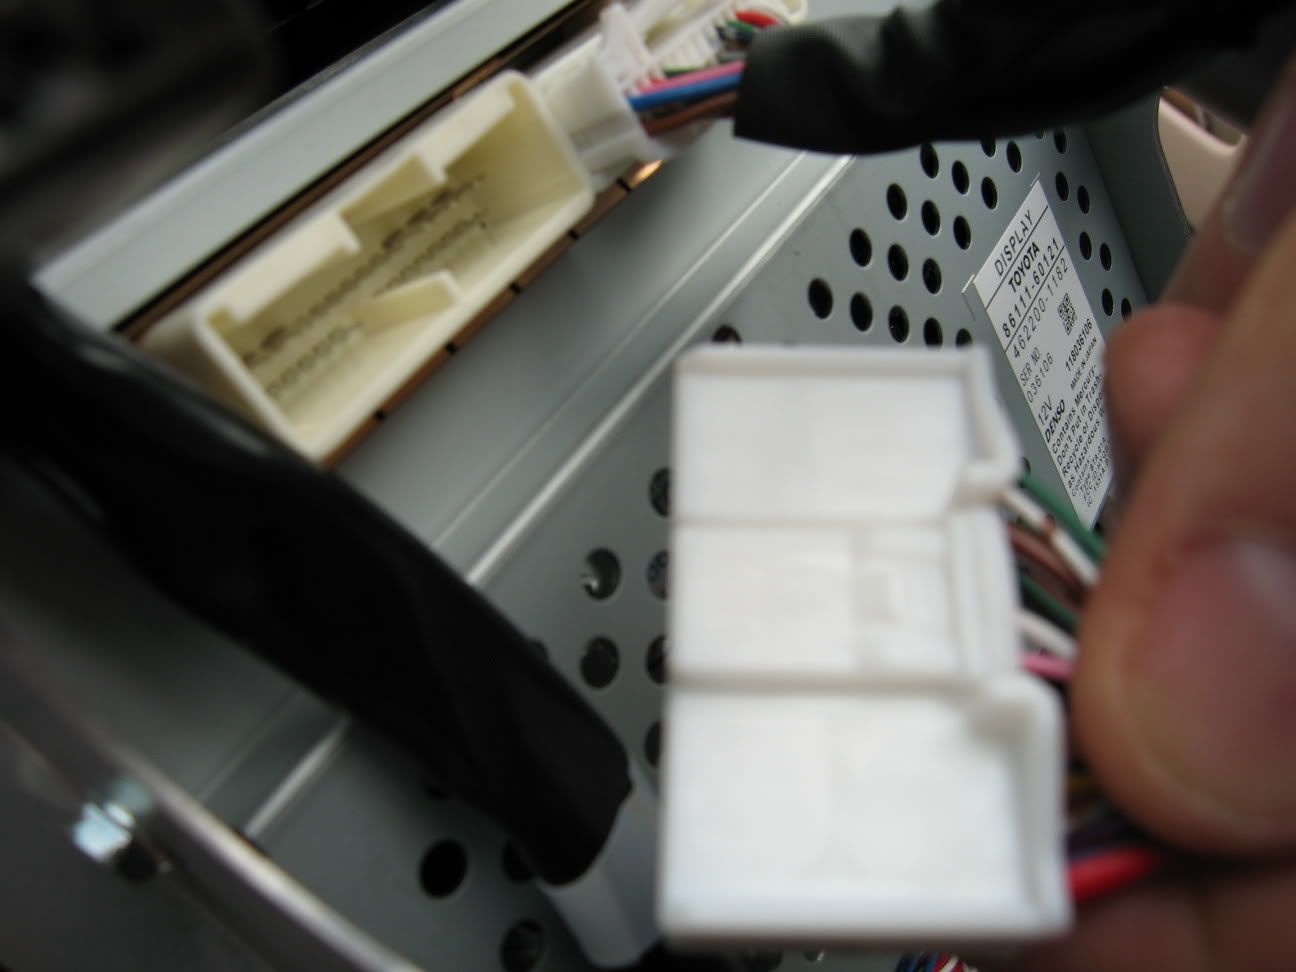
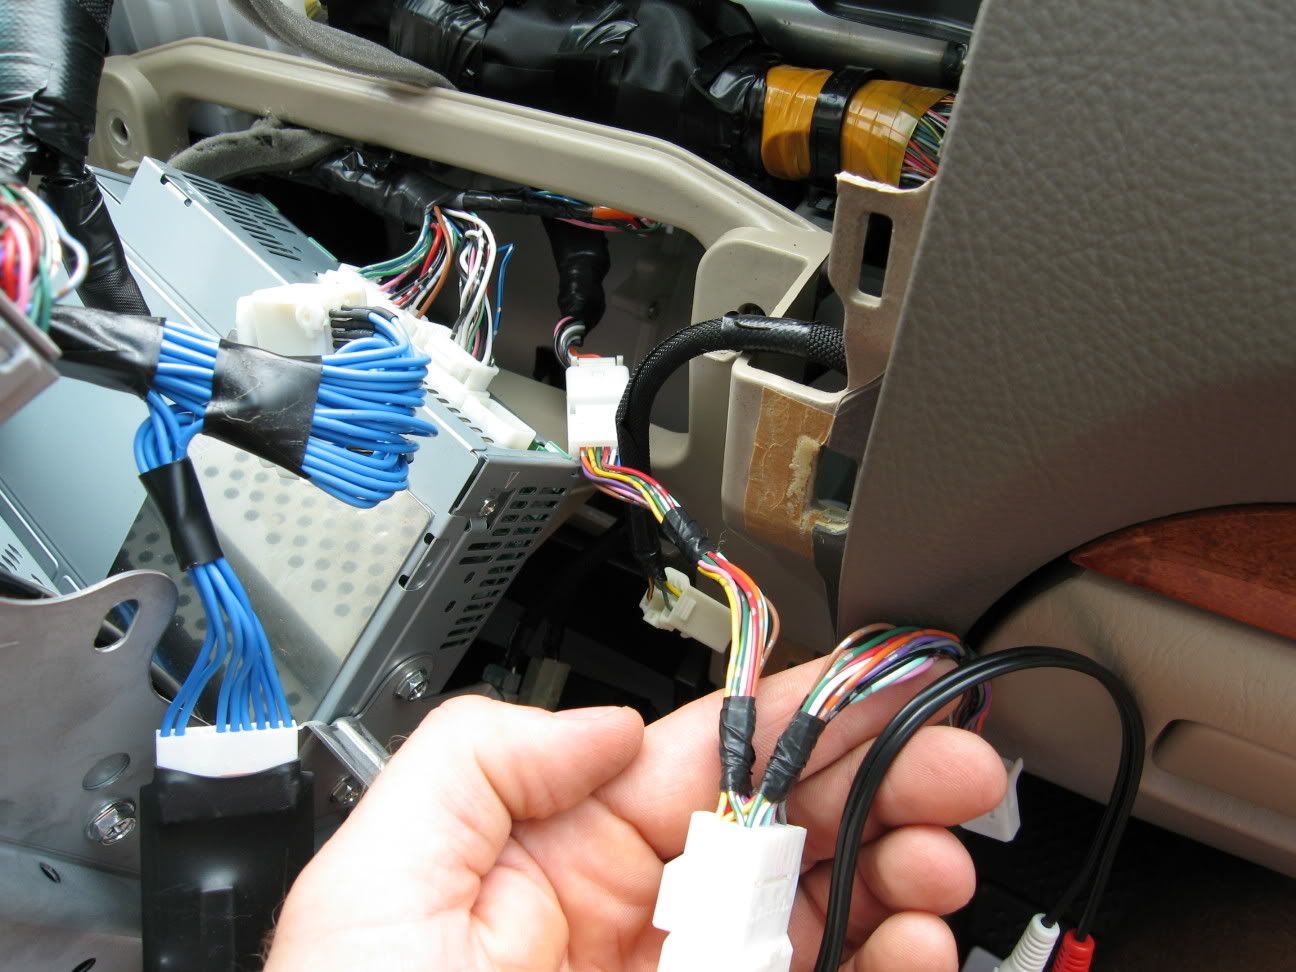
It is time to gently, but firmly, remove the Nav unit. Lean it on the towel and examine the wires and wire harnesses protruding from the back of the Nav unit. Here is what you’ll see with the wire harness we need to start with removed. To remove just push gently on the tab and pull the male connector out as shown:
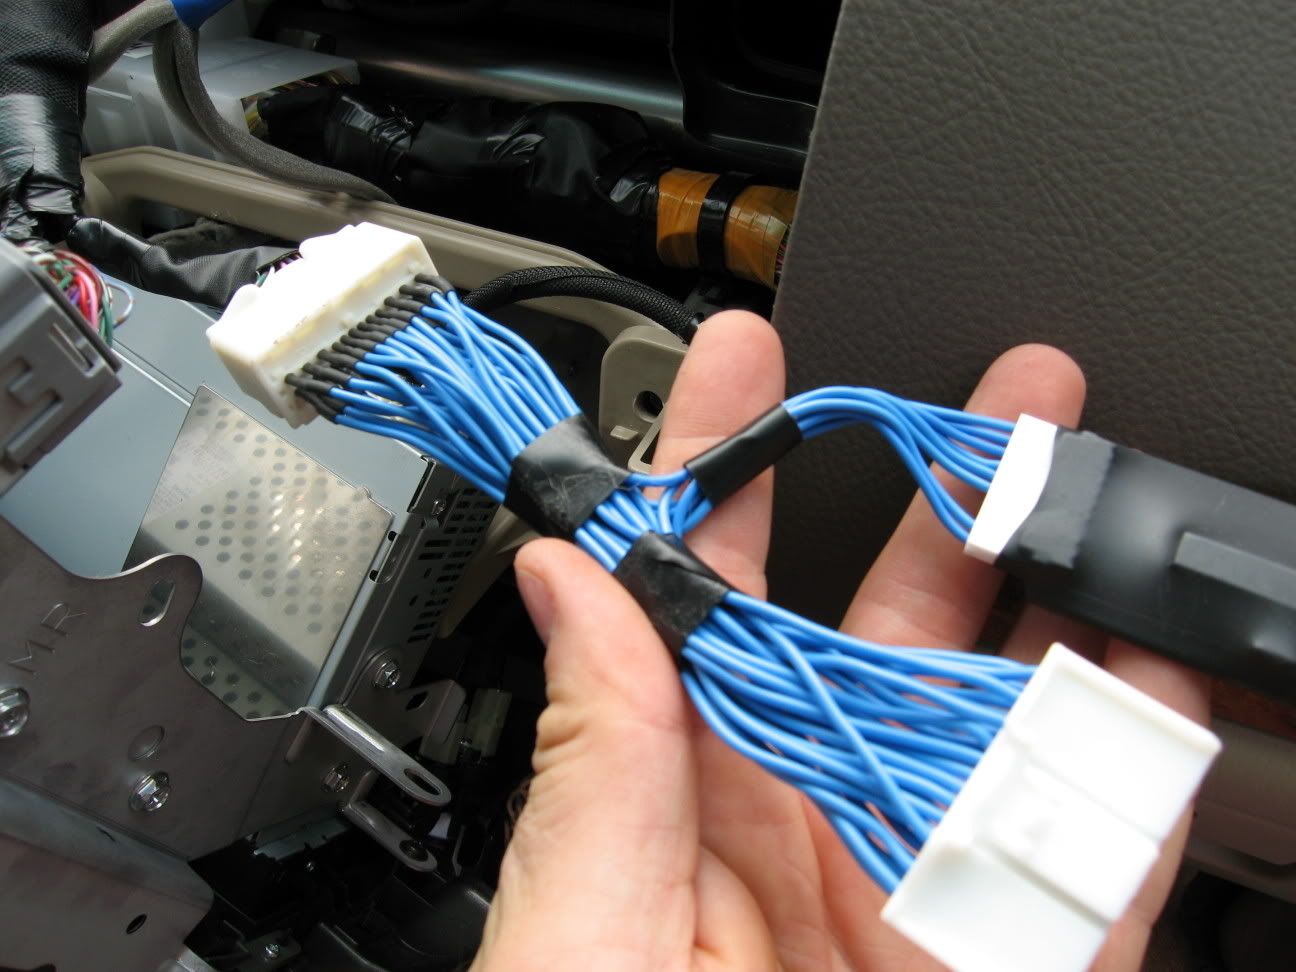
Now it’s time to start the installation of the Ultimate Lockpick. Take the male connector and harness you just removed and plug it into the matching female plug of the Ultimate Lockpick. Next, insert the male plug from the Ultimate Lockpick back into the female connector on the Nav unit you unplugged the first wire from. Take a breather: the worst is over! Here is the Lockpick half way installed. The male connector on the bottom of the picture will be reinserted in the Nav unit momentarily:
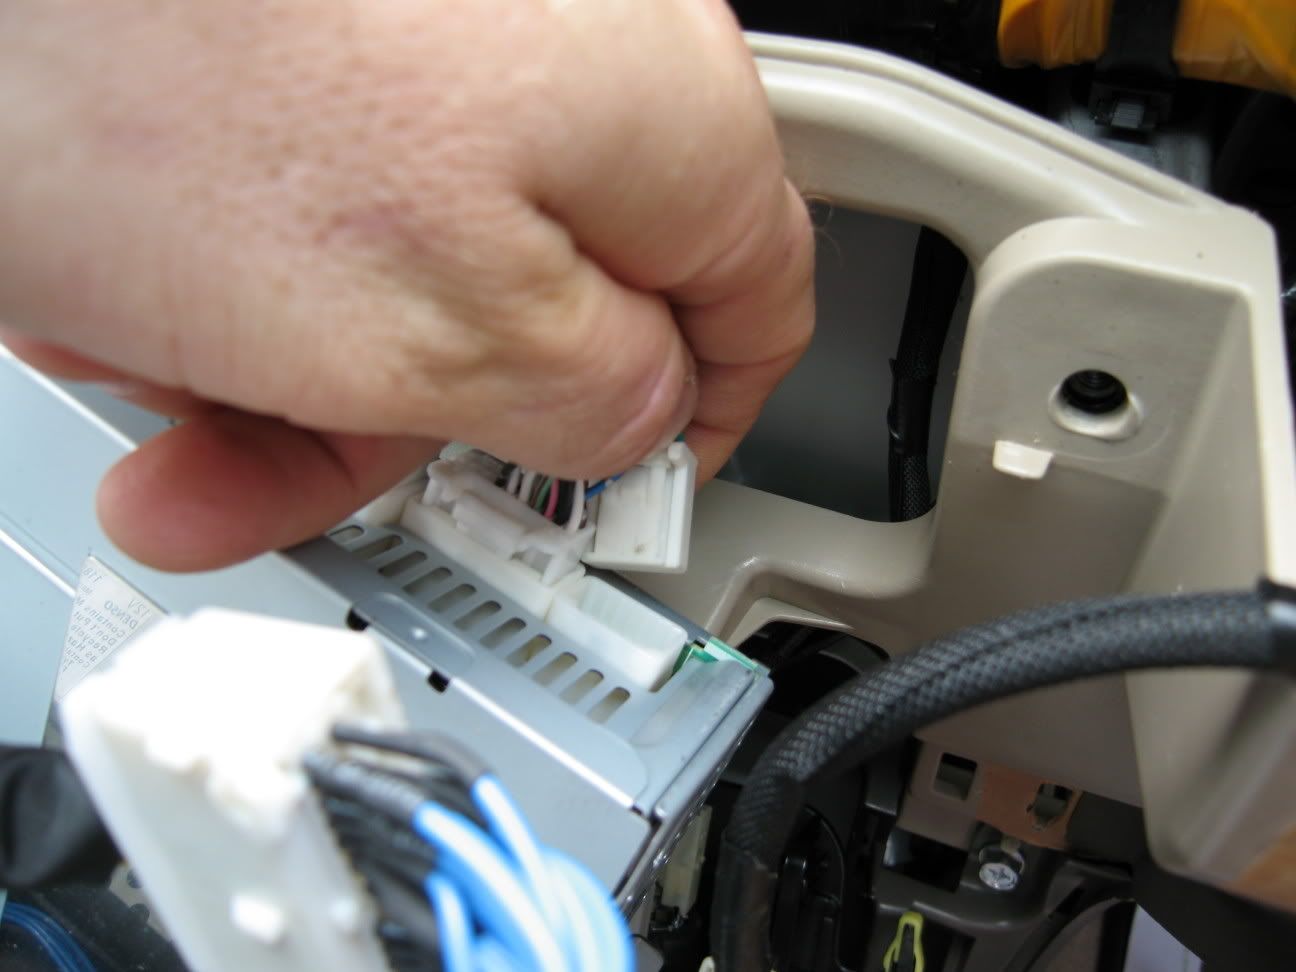
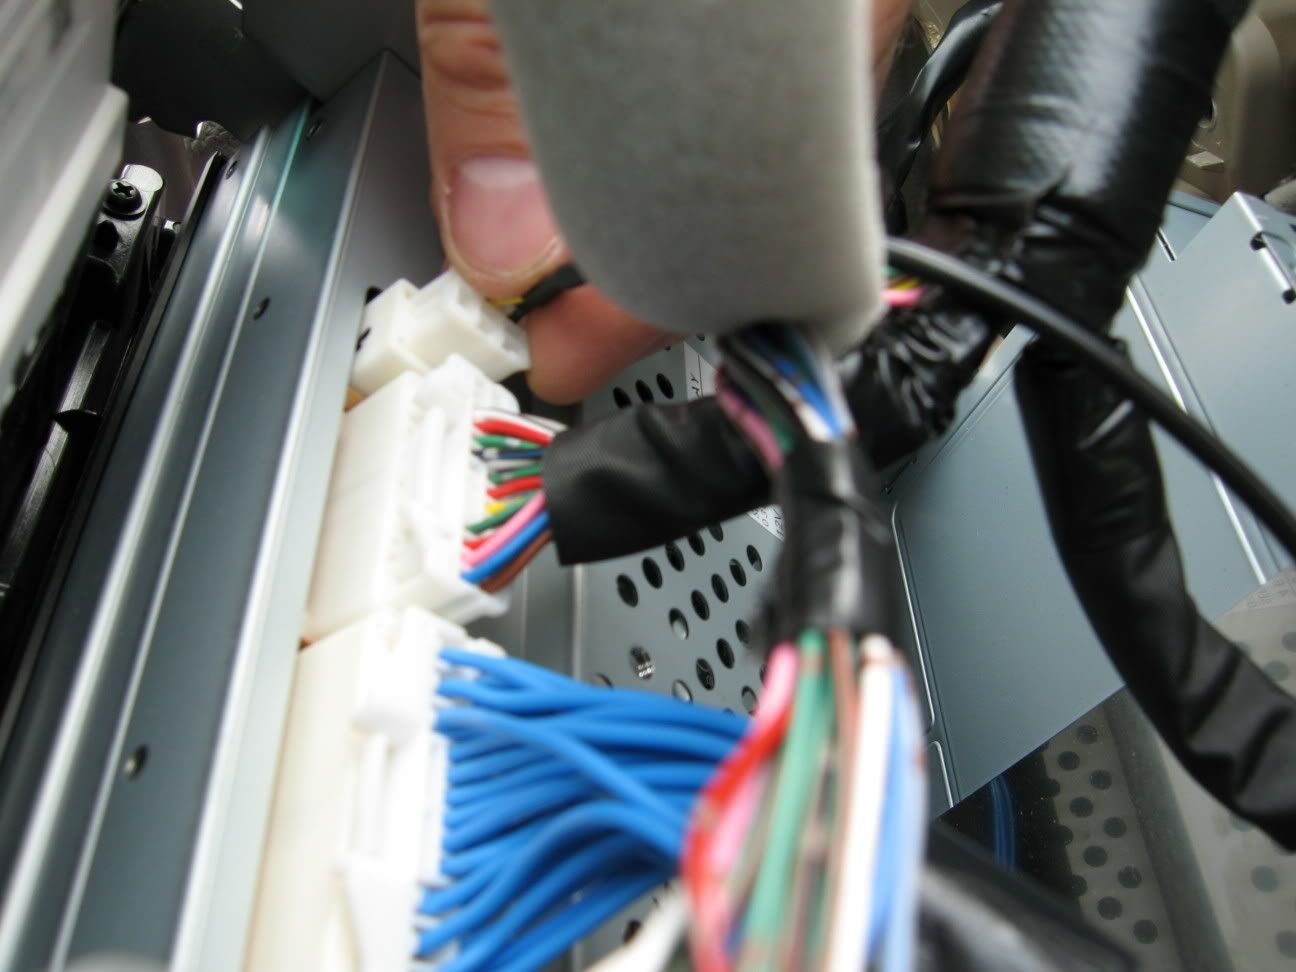
Ok, now we move onto the part of the installation that will enable one to play audio and unlock DVDs, etc. These wires are not connected to the Nav unit, but to the radio below. Begin by unplugging the wire shown below:
Just like before, take the male plug you just removed and insert it into the female connector of the audio adapter of the kit. The male connector from the kit will go back into the radio—just like before. See here:
Next, install the noise canceling device by plugging in the RCA connectors. Red to red and black to white:
There is one more wire to run, that being the video lead, terminating with a yellow RCA connector This one is back up on the back of the Nav unit, not the radio (adjacent to the first set of wires worked on):
This one is easiest of all. Just plug it in here and you’re almost ready to start running the audio (now red & black RCA connectors) wires and video wire (yellow RCA connector) to the glove compartment or where ever else you want access to them. The yellow video wire supplied is not long enough to reach the glove compartment. You’ll need to use the extension wire shown above. Bundle the three together and route them towards the glove compartment. There are several ways to do this, depending on where you want the wires to terminate. Due to the cramped space, the camera didn’t fit for pictures. Route them carefully and avoid any sharp edges, pinch points and moving parts. In this installation, they end in the glove compartment. A short piece of wire loom was used to neaten things up a bit:
Before starting to reassemble everything, take the time to organize the installation and dress the wiring. Try to keep everything as factory looking as possible. Don’t stuff the Ultimate lockpick behind the Nav unit. Tuck it in off to the side and make sure it has enough room. Avoid crimping wires or just stuffing them in any old way. Tie the harnesses to existing ones and keep it neat. Here are the final steps before reassembly:
We are coming down the home stretch here. Start by GENTLY reinserting the Nav unit into the dash and reinstall the 10mm bolts. Tighten them snugly, but do not force them. Next, reinstall the ash tray area by engaging the clips into the appropriate holes. Everything fits easily, so if you encounter resistance, don’t force anything. Check to make sure everything is lined up correctly and then push into place. It is now time to test the unit. Better to find out now if something is amiss, before all the reinstallation work is done.
Gather the wood trim pieces and reinstall the wires on both sides, but don’t yet reinstall the trim all the way back into place. Place them loosely in their respective openings. The wires to the trim must be connected or you will get error messages on the Nav screen. Next, test the Ultimate Lockpick as per the directions. When satisfied all is working gently finish reinserting each of the wood trim pieces and push them into place. It is generally easier to start by pushing the entire unit in about � of the way, and then pressing it in starting from the top and moving down. Once these are in reinsert the console trim. Step back, admire your work and say GOODBYE to the annoying “I agree” screen and Nav/Bluetooth blackouts. It’s that easy!
**THIS IS A PARTIAL LIST** Can't get all the pics to post- says I am limited to 10, but I've got a good 25 or so. I am open to suggestions....
***UPDATE****
I NOW STRONGLY SUGGEST USING PLASTIC TRIM TOOLS TO REMOVE TRIM INSTEAD OF METAL TOOLS. FAR SAFER. Wasn't aware of them the first time around. See here:
http://www.etoolcart.com/doorpanelre...5pcst9007.aspx
The brand is "Sir John", but this looks like a clone:
http://www.tooltopia.com/astro-pneumatic-4505.aspx
Before starting, let’s go over a few basics so as to not mar the installation—or your vehicle. First and foremost, READ THE DIRECTIONS. Read them again. And then read them yet again. If you are not comfortable with basic interior work and trim disassembly think twice or get help. The job is fairly easy and straightforward, but requires patience and, at times, a gentle touch. Wrecking an expensive piece of trim to save 5 minutes is generally not a good idea! But, with a few simple tools and a bit of patience, most people should be able to do the job in an hour or two. If you have any desire to see a trim breakdown and instructions from Lexus as to disassembly, check out this site: http://www.techinfo.toyota.com/ For about $10 per day you can access a wealth of technical information, including drawings of how things fit together and tips for disassembly, etc.
You’ll also need a yellow tipped video extension cable and female-female adapter, as the supplied cable isn’t quite long enough:
To begin the job, start by washing your hands. We don’t want to get greasy fingerprints on the trim, Navigation unit or other parts. Next, clear out any items in or around the center console.
Now we start the actual disassembly. Start by inserting a tape or cloth covered prying tool on the right (passenger side) trim and GENTLY pry the console trim up as shown. Start closest to the center of the car and lift it up and then out. Be very careful and proceed slowly and gently, unless you want scratches. They are only held in with spring clips. Place the trim piece in a safe, out of the way location. Here is the beginning:
The piece is lifted up and swung towards the front of the truck and then pulled out.
Repeat on the left side.
OK, now for the (slightly) more difficult part: Removing the wood trim pieces flanking the NAV unit. Like the other pieces they too are held in with spring clips and can be broken if forced the wrong way. They are said to be expensive, so don’t go crazy!
The best way I have found is to use your fingers and GENTLY, but firmly start at the bottom as shown. Moving from the bottom to the top as you go, pry out the trim with your fingers evenly, gently and SLOWLY. They fit rather snugly and are attached only with spring clips. They also use felt on the sides to avoid squeaks and rattles. Don’t remove or damage it. When loose, remove the wires on the back by gently pressing in on the release button. Place the trim someplace safe where it won’t get stepped on or broken. Repeat the same on the other side. Here is the sequence:
By now you will see the 4 10mm bolts that need to be removed:
Next, pull out the ash try area. A gently tug as shown is all it takes.
There is no need to remove the wires on the back. Just pull it down and out of the way.
Before going ahead, place your towel on the console! You will need a place to rest the Nav unit when removed. Now, using a 10mm socket wrench, remove the 4 bolts.
It is time to gently, but firmly, remove the Nav unit. Lean it on the towel and examine the wires and wire harnesses protruding from the back of the Nav unit. Here is what you’ll see with the wire harness we need to start with removed. To remove just push gently on the tab and pull the male connector out as shown:
Now it’s time to start the installation of the Ultimate Lockpick. Take the male connector and harness you just removed and plug it into the matching female plug of the Ultimate Lockpick. Next, insert the male plug from the Ultimate Lockpick back into the female connector on the Nav unit you unplugged the first wire from. Take a breather: the worst is over! Here is the Lockpick half way installed. The male connector on the bottom of the picture will be reinserted in the Nav unit momentarily:
Ok, now we move onto the part of the installation that will enable one to play audio and unlock DVDs, etc. These wires are not connected to the Nav unit, but to the radio below. Begin by unplugging the wire shown below:
Just like before, take the male plug you just removed and insert it into the female connector of the audio adapter of the kit. The male connector from the kit will go back into the radio—just like before. See here:
Next, install the noise canceling device by plugging in the RCA connectors. Red to red and black to white:
There is one more wire to run, that being the video lead, terminating with a yellow RCA connector This one is back up on the back of the Nav unit, not the radio (adjacent to the first set of wires worked on):
This one is easiest of all. Just plug it in here and you’re almost ready to start running the audio (now red & black RCA connectors) wires and video wire (yellow RCA connector) to the glove compartment or where ever else you want access to them. The yellow video wire supplied is not long enough to reach the glove compartment. You’ll need to use the extension wire shown above. Bundle the three together and route them towards the glove compartment. There are several ways to do this, depending on where you want the wires to terminate. Due to the cramped space, the camera didn’t fit for pictures. Route them carefully and avoid any sharp edges, pinch points and moving parts. In this installation, they end in the glove compartment. A short piece of wire loom was used to neaten things up a bit:
Before starting to reassemble everything, take the time to organize the installation and dress the wiring. Try to keep everything as factory looking as possible. Don’t stuff the Ultimate lockpick behind the Nav unit. Tuck it in off to the side and make sure it has enough room. Avoid crimping wires or just stuffing them in any old way. Tie the harnesses to existing ones and keep it neat. Here are the final steps before reassembly:
We are coming down the home stretch here. Start by GENTLY reinserting the Nav unit into the dash and reinstall the 10mm bolts. Tighten them snugly, but do not force them. Next, reinstall the ash tray area by engaging the clips into the appropriate holes. Everything fits easily, so if you encounter resistance, don’t force anything. Check to make sure everything is lined up correctly and then push into place. It is now time to test the unit. Better to find out now if something is amiss, before all the reinstallation work is done.
Gather the wood trim pieces and reinstall the wires on both sides, but don’t yet reinstall the trim all the way back into place. Place them loosely in their respective openings. The wires to the trim must be connected or you will get error messages on the Nav screen. Next, test the Ultimate Lockpick as per the directions. When satisfied all is working gently finish reinserting each of the wood trim pieces and push them into place. It is generally easier to start by pushing the entire unit in about � of the way, and then pressing it in starting from the top and moving down. Once these are in reinsert the console trim. Step back, admire your work and say GOODBYE to the annoying “I agree” screen and Nav/Bluetooth blackouts. It’s that easy!
Last edited by JWS3; 09-24-10 at 06:21 AM. Reason: Updates
 08-21-06, 04:03 PM
#2
Pole Position

Join Date: Jul 2002
Location: Texas
Posts: 313
Likes: 0
Received 0 Likes
on
0 Posts
JWS3, thx for a great informational post.
There are limits to the number of attachments and number of links in a post.
I think if you just do a second post in this thread with the rest of the pic links it should work (or at least another 10 at a time).
There are limits to the number of attachments and number of links in a post.
I think if you just do a second post in this thread with the rest of the pic links it should work (or at least another 10 at a time).
08-21-06, 05:15 PM
#3
Pole Position
Thread Starter
Join Date: Nov 2005
Location: New York
Posts: 299
Likes: 0
Received 0 Likes
on
0 Posts
in much, much more detail. Gotta work on it again!
 10-02-06, 08:35 PM
#7

I just got the ultimate lockpick for my 06 GX with RSES. I have not installed it yet as I am waiting to have my xm installed first. However, my kit did not come with the additional piece that installs on the radio. Is this because I have the factory RSES? and I do not need the extra piece?
Trending Topics
10-03-06, 07:41 AM
#8
Driver School Candidate

Join Date: Sep 2006
Location: California
Posts: 22
Likes: 0
Received 0 Likes
on
0 Posts
i was wondering did you gx470 came with the cd changer, because mine did and i cannot find any place that will allow me to plug the audio jack. it doesn't fit any where
10-03-06, 08:28 AM
#9
Yes I do have the glove box CD changer. But my kit did not come with anyother piece besides the main piece.
Also, I ordered the Ultimate lockpick 1 unit as that was the one it stated I needed on the website as my GX has the factory RSES.
Also, I ordered the Ultimate lockpick 1 unit as that was the one it stated I needed on the website as my GX has the factory RSES.
10-03-06, 10:46 PM
#10
Driver School Candidate
Join Date: Sep 2006
Location: California
Posts: 22
Likes: 0
Received 0 Likes
on
0 Posts
mine came with 3 piece the main ultimate piece the video and the audio, however i contact coastaletech and a very nice lady answr my call this morning and she said i might be missing a piece. so she 2 day deliver the piece i need hopefully its the right one.
 10-07-06, 06:10 PM
#14
Installed the ultimate unit in today and all is working as it should. Thankx for the great pics and instructions!
Initially the GX didn't recognize the unit and it gave a 'check system' message and the screen went blank. So I double checked the connections and fired up the GX again and everything worked as it should. Thanks again for the great write-up.
Initially the GX didn't recognize the unit and it gave a 'check system' message and the screen went blank. So I double checked the connections and fired up the GX again and everything worked as it should. Thanks again for the great write-up.
10-07-06, 07:14 PM
#15
Driver School Candidate
Join Date: Sep 2006
Location: California
Posts: 22
Likes: 0
Received 0 Likes
on
0 Posts
Well got sound got video, yep with the ultimate lock pick 1 you can use the external dvd player for viewing and you don't need a fm. modulator. if any of you folks out there get this kits for gx with no rse it should come with 4 pieces: the lock pick, the video, the audio and the jumper for the radio. I am 1 happy camper right now