Wet sanding headlights?
#1
Instructor
Thread Starter
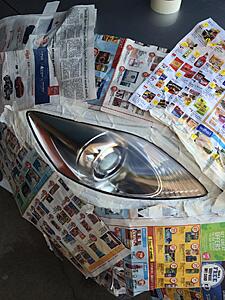
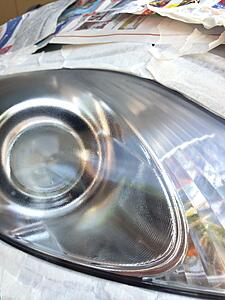
After watching a few youtube videos, I managed to try and wet sand my headlights, but it turned blurry after the final spray.
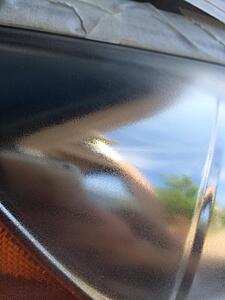
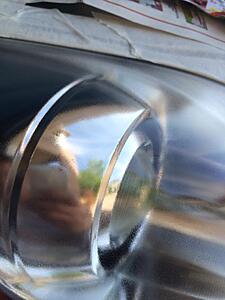
I started with 400 and then 600,1500 then 3000 to finish. I waited for it to dry and applied 2 coats of acrylic emamal. Then after the spray it looks clean and clear from far but within a feet you will notice tiny bubbles or some sort of haziness like a frost, normally I can see my reflection from the chrome inside the headlight but I can barely see my face. I applied first coat and t was still bad so I tried a second and it was the same...
Anyone tried wet sanding headlights before and could help me out? it would be great.
-Then after that I tried to do a different method by doing 400-600-1500 then the spray but it turned out the same!
Last edited by energie8; 08-11-14 at 12:14 PM.
#3
After watching a few youtube videos, I managed to try and wet sand my headlights, but it turned blurry after the final spray.
I started with 400 and then 600,1500 then 3000 to finish. I waited for it to dry and applied 2 coats of acrylic emamal. Then after the spray it looks clean and clear from far but within a feet you will notice tiny bubbles or some sort of haziness like a frost, normally I can see my reflection from the chrome inside the headlight but I can barely see my face. I applied first coat and t was still bad so I tried a second and it was the same...
Anyone tried wet sanding headlights before and could help me out? it would be great.
-Then after that I tried to do a different method by doing 400-600-1500 then the spray but it turned out the same!
I started with 400 and then 600,1500 then 3000 to finish. I waited for it to dry and applied 2 coats of acrylic emamal. Then after the spray it looks clean and clear from far but within a feet you will notice tiny bubbles or some sort of haziness like a frost, normally I can see my reflection from the chrome inside the headlight but I can barely see my face. I applied first coat and t was still bad so I tried a second and it was the same...
Anyone tried wet sanding headlights before and could help me out? it would be great.
-Then after that I tried to do a different method by doing 400-600-1500 then the spray but it turned out the same!
I'v always wetsanded with the same then used 3M perfect it III rubbing compound cut with water until a clear finish. Never used spray after that, and I just repeat the process once a year.
#4
Lead Lap
Hmmm, I've never had any issues doing the wet sanding on my previous cars. I'd try sanding that coating off, then look into buying one of the many kits out there to replace the UV protective coating. I believe 3M makes a great one that you just roll on. The coating you're using just might not be up to snuff. Best of luck!
#5
Instructor
iTrader: (1)
I thinking you needed to use a polishing agent before the enamel. In my opinion this is the BEST method on what you are trying to achieve:
http://www.autopiaforums.com/forums/...storation.html
http://www.autopiaforums.com/forums/...storation.html
#6
Lexus Test Driver
iTrader: (1)
The problem I see is that when you sprayed the clear you didnt flow the clear on. Its called dry spraying, what you did. The technique you should have done was to spray a light tack coat, let that flash then lay down a good layer without allowing it to run on you.
How to fix it, you can try wet sanding and then buffing but im not sure if your able to polish enamel. You can sand it with 600grit and respray it the way I mentioned. But what I would recommend, sand off all the enamel clear. Go to a auto paint supply store you can purchase 2k clearcoat in a can. Spray it and if the clear doesnt come out looking better you can always wet sand with 2500-3000 and buff and polish
How to fix it, you can try wet sanding and then buffing but im not sure if your able to polish enamel. You can sand it with 600grit and respray it the way I mentioned. But what I would recommend, sand off all the enamel clear. Go to a auto paint supply store you can purchase 2k clearcoat in a can. Spray it and if the clear doesnt come out looking better you can always wet sand with 2500-3000 and buff and polish
Trending Topics
#9
does not look that good.
After sanding, even at 3000, you need to move up to the cutting/polishing compounds. then you'll get an optically clear surface. Did it look perfect before the spray and the spray ruined it?
I would also suggest if you can afford it to go with PPF as the final protection layer.
You are guaranteed a smooth toplayer, and if properly applied, the adhesive will fill in the micro imperfections.
#12
So you might as well start with the most aggressive sandpaper and just cut far enough to remove the cloudiness, and work your way up the pyramid just once.
But hey, if you have all the time in the world and plenty of sandpaper and cutting paste have at it.
I will give the warning again, that you must reseal your headlights with something after you do headlight repair. (i recommend you go all the way and get it PPFed as well) Otherwise all that effort you did will be wasted within 1 summer's time.
#14
Lexus Test Driver
iTrader: (1)
A lot of wasted effort there, If you go to a deeper cutting ; there's no way you can tell if you're getting enough improvement until you go all the way back up the pyramid.
So you might as well start with the most aggressive sandpaper and just cut far enough to remove the cloudiness, and work your way up the pyramid just once.
But hey, if you have all the time in the world and plenty of sandpaper and cutting paste have at it.
I will give the warning again, that you must reseal your headlights with something after you do headlight repair. (i recommend you go all the way and get it PPFed as well) Otherwise all that effort you did will be wasted within 1 summer's time.
#15
Personal experience, make sure you have a nice few coats on it, then take some more 3000 grit w/ water and sand it down until it feels smooth again, then use the cutting compound, along with a good sealant OR wax (not both, as sealants and waxes are two different purposes).
GL! Done this on a Prelude that had probably the WORST haze I've ever witnessed.
FWIW, from the photos it's just orange peel to me.... Normal for rattle can spray.
GL! Done this on a Prelude that had probably the WORST haze I've ever witnessed.
FWIW, from the photos it's just orange peel to me.... Normal for rattle can spray.


