Pictures: GS400 timing belt parts and part #'s. How-to soon.
 06-21-07, 12:58 AM
#1
I will be changing the timing belt, along with other items (pictured) this Saturday. I will take pictures during the process. Does anyone have a link to the PDF file for the GS400 timing belt replacement within the Lexus service manual? I can do without it, but it will help if I had it. Any advice provided will be very much appreciated.
Here are the parts I ordered from Carson Toyota. All the parts were in stock. The total for all the parts was: $280.xx shipped.
I don't remember the prices exactly (invoice was not included), but they were around this much:
Timing belt: $64
Accessory belt: $46
Water pump: $105
Gasket: $6
Crank seal: $10
Timing belt tensioner: $45
That's with the 20% discount they provided. I think that is really reasonable. Shipping was fast also. I placed the order on Friday afternoon and received the parts today (Wednesday; California to Oklahoma). Anyways, on with the pictures.
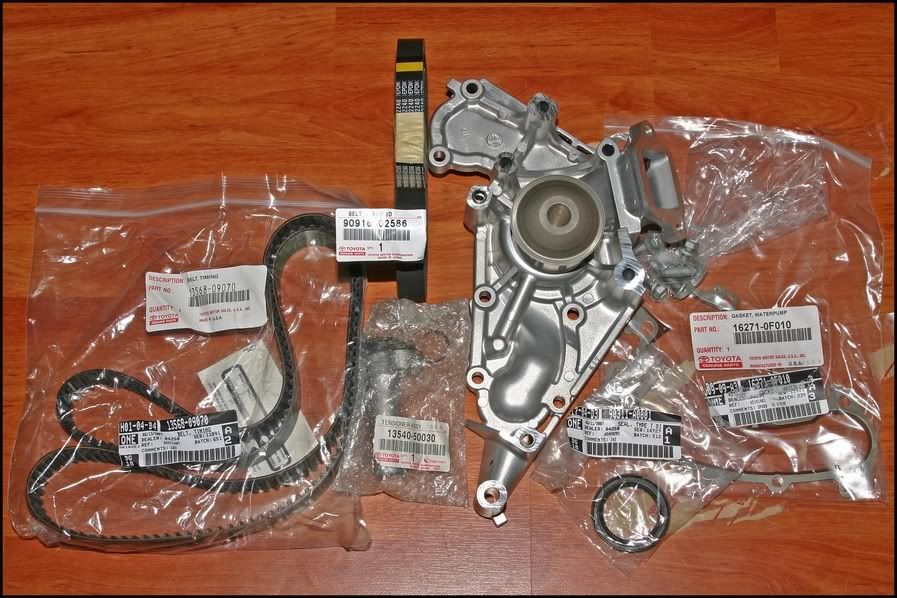
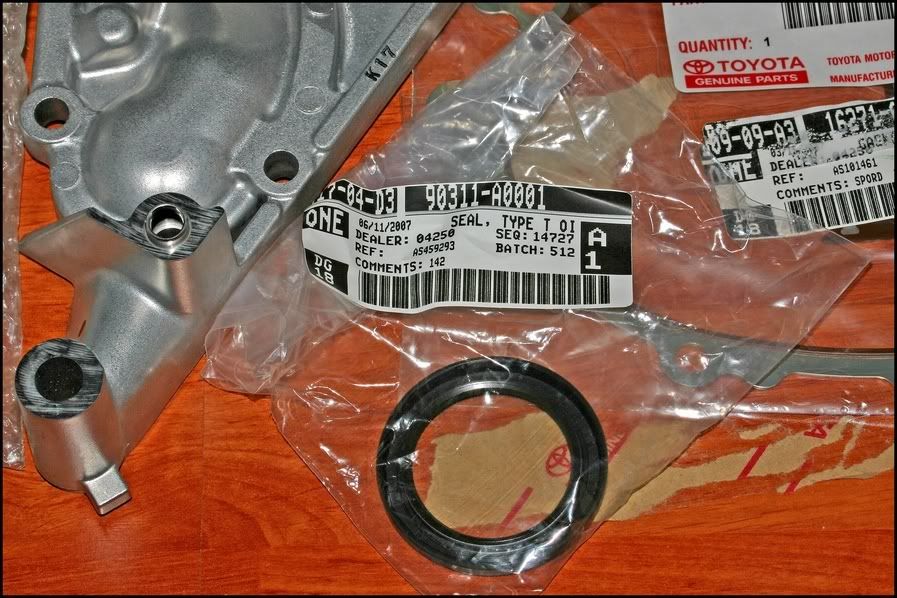
All the OEM parts. Water pump in the middle (removed from packaging):
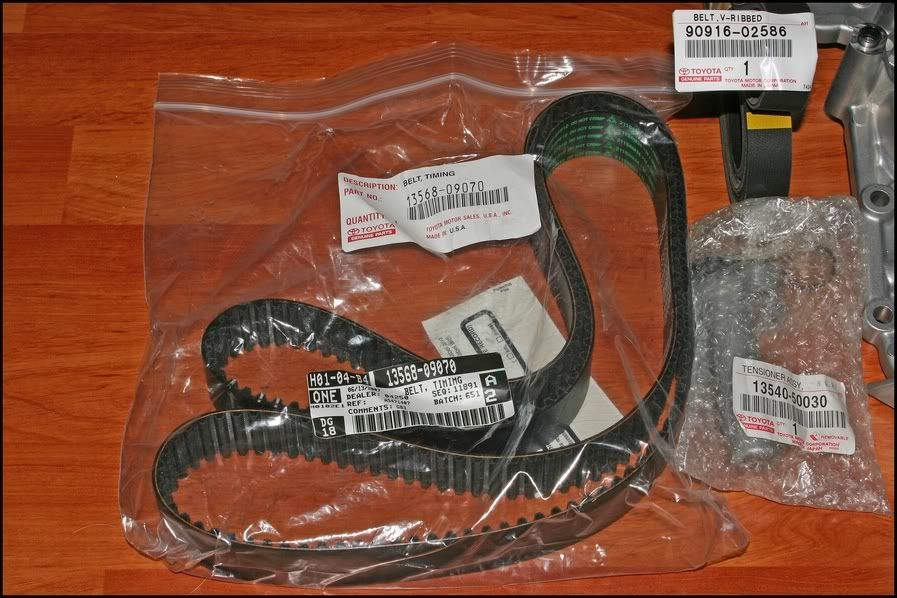
Timing belt:
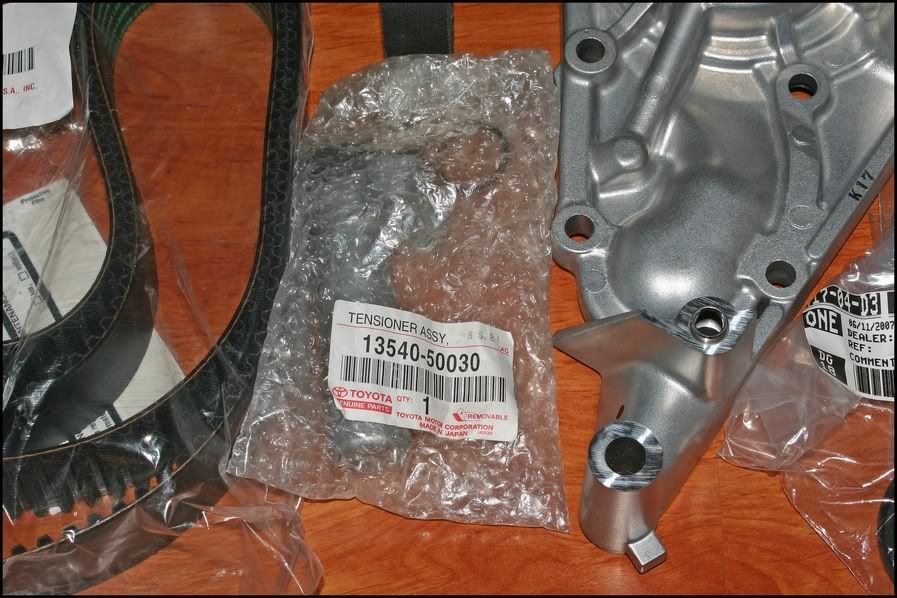
Timing belt tensioner:
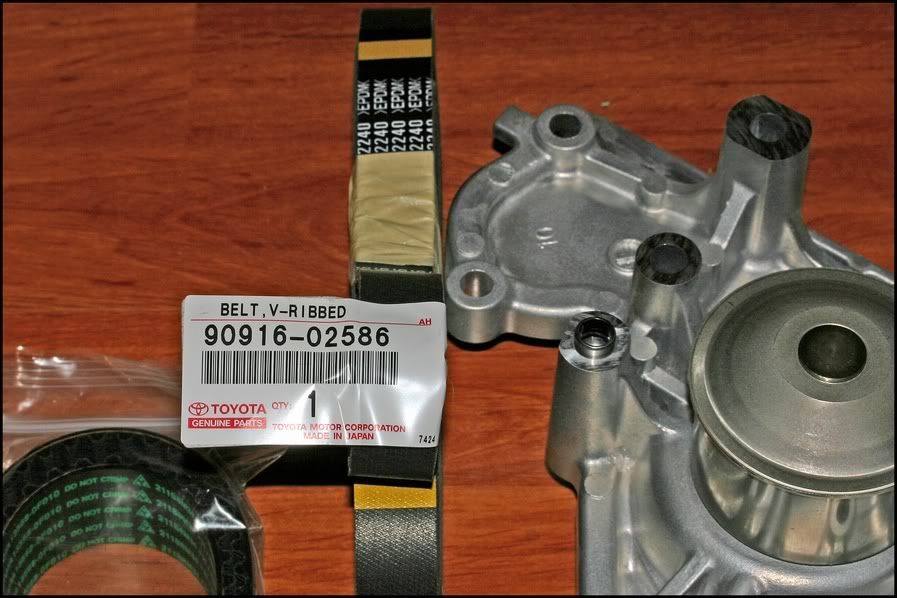
Accessories drive belt:
Crankshaft seal:
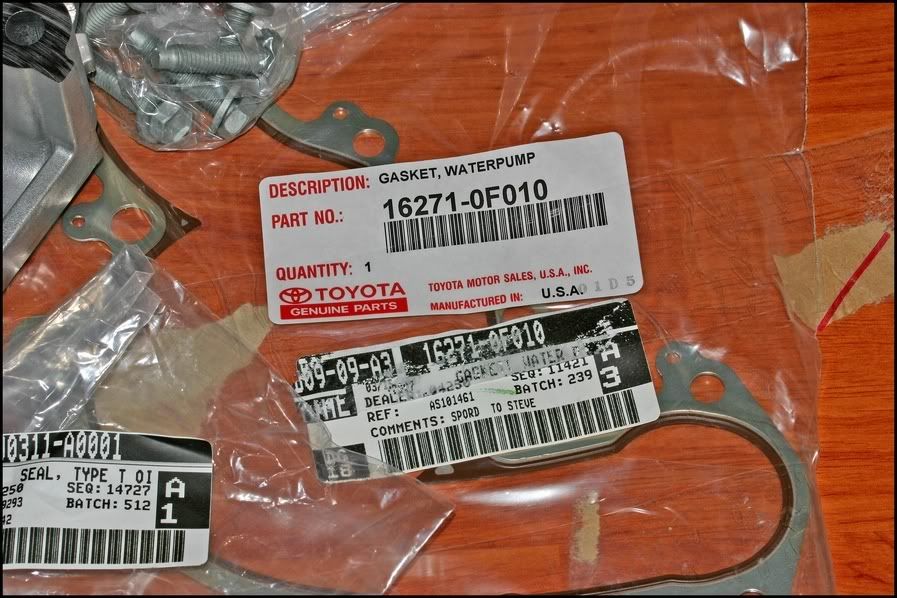
Water pump gasket:
These are the parts I think I need. I hope I am not missing anything else. I hope this post will help some of you guys that are due for a timing belt replacement.
Here are the parts I ordered from Carson Toyota. All the parts were in stock. The total for all the parts was: $280.xx shipped.
I don't remember the prices exactly (invoice was not included), but they were around this much:
Timing belt: $64
Accessory belt: $46
Water pump: $105
Gasket: $6
Crank seal: $10
Timing belt tensioner: $45
That's with the 20% discount they provided. I think that is really reasonable. Shipping was fast also. I placed the order on Friday afternoon and received the parts today (Wednesday; California to Oklahoma). Anyways, on with the pictures.
All the OEM parts. Water pump in the middle (removed from packaging):
Timing belt:
Timing belt tensioner:
Accessories drive belt:
Crankshaft seal:
Water pump gasket:
These are the parts I think I need. I hope I am not missing anything else. I hope this post will help some of you guys that are due for a timing belt replacement.
 06-21-07, 04:11 AM
#2

1. Remove all necessary components for access to the right-hand side No. 3 and No. 2, and left-hand side No. 2 timing belt covers, then remove the covers.
2. Turn the crankshaft pulley and align it's groove with the timing mark 0 of the No. 1 timing cover. Check that the timing marks of the camshaft timing pulleys and timing belt rear plates are aligned. If not, turn the crankshaft 1 full revolution (360 degrees).
3. Remove the timing belt tensioner. Using the proper tool, loosen the tension between the left side and right side timing pulleys by slightly turning the left side camshaft clockwise.
4. Disconnect the timing belt from the camshaft timing pulleys. Using the proper tool, remove the bolt and the timing pulleys.
5. Remove the bolt and the crankshaft pulley with the proper tool. Remove the fan bracket. On the SC400, remove the hydraulic pump.
6. Remove the mounting bolts and the No. 1 timing belt cover.
7. Remove the 2 upper and lower timing belt covers.
8. Remove the timing belt guide (No. 1 crank position sensor plate).
9. Remove the timing belt.
NOTE: If the timing belt is to be reused, draw a directional arrow on the timing belt in the direction of engine rotation (clockwise) and place matchmarks on the timing belt and crankshaft gear to match the drilled mark on the pulley.
To install:
10. Align the installation mark on the timing belt with the drilled mark of the crankshaft timing pulley. Install the timing belt on the crankshaft timing pulley, No. 1 idler pulley and the No. 2 idler pulley.
NOTE: If the old timing belt is being reinstalled, be sure the directional arrow is facing in the original direction and that the belt and crankshaft gear matchmarks are properly aligned.
11. Install the timing belt guide (No. 1 crank angle sensor plate) with the cup side facing forward. Replace the timing belt cover spacer.
12. Install the No. 1 timing belt cover and tighten the mounting bolts. On the SC400, install the hydraulic pump. Install the fan bracket.
13. Align the pulley set key on the crankshaft with the key groove of the pulley. Install the pulley, using the proper tool to tap in the pulley. Tighten the pulley bolt to 181 ft. lbs. (245 Nm).
14. Align the knock pin on the right side camshaft with the knock pin of the timing pulley. Slide on the timing pulley with the right side mark facing forward. Tighten the bolt to 80 ft. lbs. (108 Nm).
15. Align the knock pin on the left side camshaft with the knock pin of the timing pulley. Slide on the timing pulley with the left side mark facing forward. Tighten the bolt to 80 ft. lbs. (108 Nm).
16. Turn the crankshaft pulley and align its groove with the 0 timing mark on the No. 1 timing belt cover. Using the proper tool, turn the crankshaft timing pulley and align the timing marks of the camshaft timing pulley and the timing belt rear plate.
17. Install the timing belt to the left side camshaft timing pulley by:
A. Using the proper tool, slightly turn the left side timing pulley clockwise. Align the installation mark of the timing belt with the timing mark of the camshaft timing pulley and hang the timing belt on the left side camshaft pulley.
B. Using the proper tool, align the timing marks of the left side camshaft pulley and the timing belt rear plate.
C. Check that the timing belt has tension between crankshaft timing pulley and the left side camshaft pulley.
18. Install the timing belt to the right side camshaft timing pulley by:
A. Using the proper tool, slightly turn the right side timing pulley clockwise. Align the installation mark of the timing belt with the timing mark of the camshaft timing pulley and hang the timing belt on the right side camshaft pulley.
B. Using the proper tool, align the timing marks of the right side camshaft pulley and the timing belt rear plate.
C. Check that the timing belt has tension between the crankshaft timing pulley and the right side camshaft pulley.
19. The timing belt tensioner must be set prior to installation. The tensioner can be set as follows:
A. Place a plate washer between the tensioner and a block. Using a suitable press, press in the pushrod using 220�2205 lbs. (100�1000kg) of pressure.
B. Align the holes of the pushrod and housing, pass the proper tool (0.05 in. Allen wrench) through the holes to keep the setting position of the pushrod.
C. Release the press and install the dust boot on the tensioner.
20. Install the tensioner and tighten the bolts to 20 ft. lbs. (26 Nm). Remove the tool from the tensioner.
21. Turn the crankshaft pulley two complete revolutions from TDC-to-TDC. Always turn the crankshaft clockwise. Check that each pulley aligns with the timing marks.
22. Install all remaining components in the reverse order of removal.
Hope that helped!
06-21-07, 05:08 AM
#3
Pole Position

Join Date: Nov 2006
Location: Florida
Posts: 334
Likes: 0
Received 0 Likes
on
0 Posts
What are the five bolts for that come with the timing belt/waterpump from Sewell? I see that you have the bag of them in your pic and was wondering what they go to. Thanks
06-21-07, 05:11 AM
#4

I found this when I went was looking for helpful threads that I thought would help me in the future. I am not sure if it will help because I think that it is for a GS 300 but you might find some insight from it. Can someone verify this pdf as to what application it is for.
Hope it helps in some way.
Hope it helps in some way.
06-21-07, 10:22 AM
#5
The bag supplied are new bolts for the waterpump.
The PDF file is for a GS300, but it still helps with the tensioner portion of the install.


Trending Topics
 06-21-07, 06:26 PM
#10
The only pulley that needs to be removed is the crankshaft pulley. That's why I am replacing the seal for that. The camshaft gears do not need to be removed, so nothing will be needed to be replaced there. The only thing that requires seals are the 2 pulleys (idler and something else). But usually, Lexus does not replace those. They just inspect them, however if they are damaged, they will replace them. Those are over $55 apiece. I opted not to buy them. I think the entire process can be done in less than 4 hours.
06-21-07, 08:21 PM
#11
Moderator

Couple of things that need planning and thought.
1. Procedure to break the pully nut/bolt. [the pully spins].
2. Use the markings on the gears of the valve train, but they can be deceiving. Mark with sharpie or paint for yourself before removing the tensioner.
3. Once the belt is off, DO NOT SPIN any gear. If they accidentally move bring them back. The number of roations at the valve do not match number of rotation of the crank.
4. Do not close any side till the tensioner is in place. Check twice to make sure all marks lineup.
If in doubt have the car flat bed to the dealer/shop. Incorrect assembly can be very costly.
Salim
Salim
 06-22-07, 10:18 AM
#14
Driver
iTrader: (1)

Join Date: May 2005
Location: CA
Posts: 101
Likes: 0
Received 0 Likes
on
0 Posts
so is this basicially all u need to change the water pump, timing belt, and etc?
my 90k service is already up. i needs to change it soon
oh btw is the gs400 the same as well. sorry if this is stupid question
timmy
my 90k service is already up. i needs to change it soon
oh btw is the gs400 the same as well. sorry if this is stupid question
timmy
06-22-07, 10:27 AM
#15
Inspection of other parts are also needed as well (idler pulley, camshaft gears, etc.). If they are worn, then they will need to be replaced. The main aspect of a timing belt change is to replace the timing belt, water pump, tensioner, and accessory drive belt. The gasket and seal are required for the reinstallation of those parts. Inspection of the other engine components (hoses, clamps, lines, etc.) during the replacement is almost natural and definitely beneficial.

