
 01-09-15, 10:02 AM
Last edit by: IB Advertising
See related guides and technical advice from our community experts:
Browse all: Lexus IS Lighting Guides
- Lexus: How to install HID Headlights (on your non-HID equipped 2IS)
Step by step instructions for do-it-yourself repairs
Browse all: Lexus IS Lighting Guides

DIY: GS 350 F Sport Fog Lights Installation Guide, non-oem switch
09-16-13, 07:16 PM
#16
 01-18-15, 04:32 PM
#17
Driver School Candidate

Join Date: Oct 2014
Location: california
Posts: 25
Likes: 0
Received 0 Likes
on
0 Posts
INSTRUCTIONS:
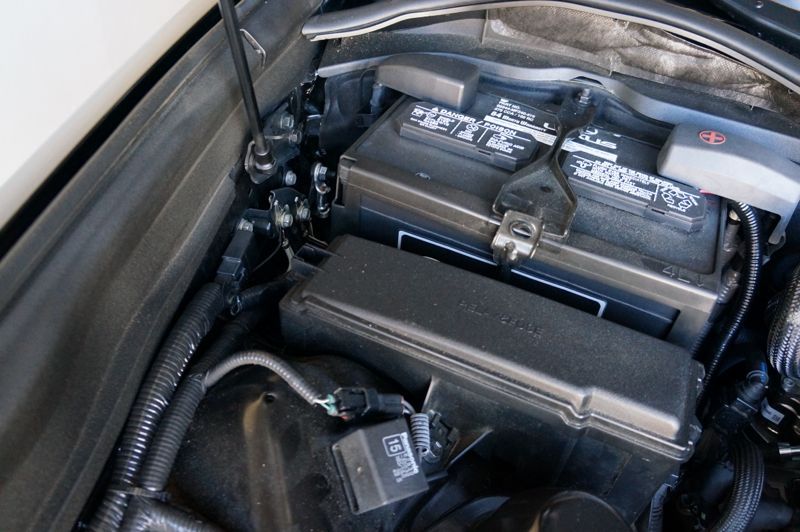
1. Disconnect the negative battery terminal.
2. Locate and remove these plastic plugs (11) in order to expose the area on top of the headlights and radiator. Lift and remove the passenger headlight smaller plastic section. Then remove the larger plastic cover on top radiator.


Here the red lines indicate roughly where you will run your harness and a single trigger (parking light) wire into the cabin. Here's a quick summary don't worry I'll go more into details later:
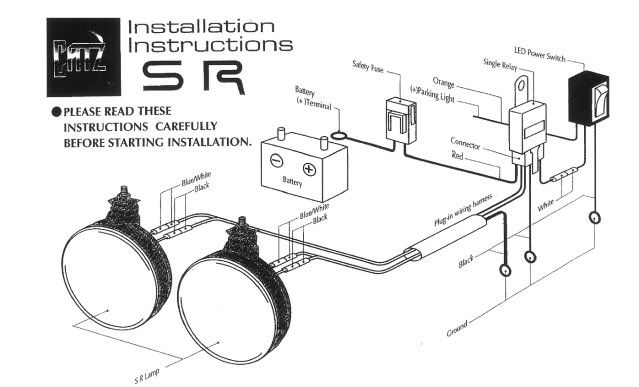
Near the battery you will attach your harness Relay, Ground, and Positive power source. Route shorter end of harness toward front passenger fog area. Then continue the longer end of the harness across the bottom in front of the radiator toward the driver side fog. Then run the single long Trigger wire back toward the engine firewall and into the cabin to your switch. Then attach your switch ground. Finally tap the parking light power source in the cabin to your switch and you're set!

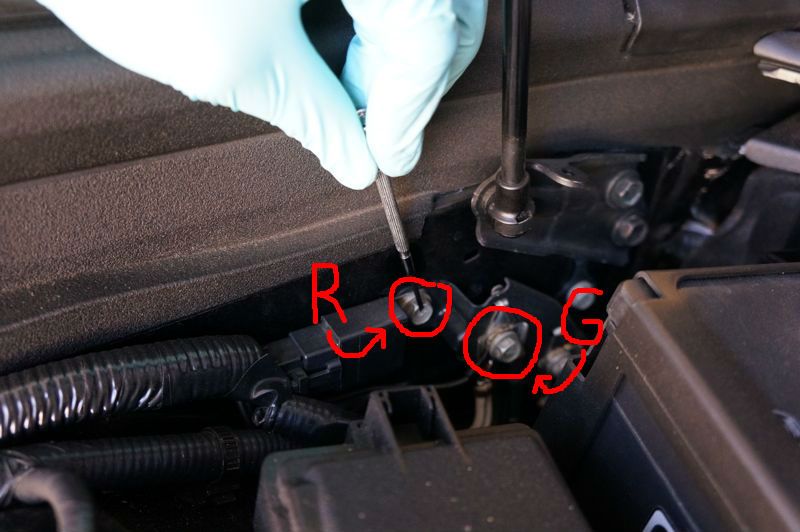
3. So here near the battery corner, unbolt a nut at R and mount your harness Relay. Below and to the right locate another bolt (G) with multiple ground wires attached. Use this to connect your harness Ground wire. At this point you can attach your harness Power wire (has an inline fuse) to the Positive battery terminal. I actually didn't do this until the last step of the fog install. Just don't forget to come back if you choose to do this.
4. Run harness down passenger side of fender. I actually wrapped the harness with black electric tape to keep an OEM look. Run shorter end of harness into passenger fog light area. I'll show you how to get access to the fog light later.
5. Now run longer part of harness in front of the radiator. You can secure the harness using double sided tape and zip tie. Continue running the longer part of the harness across the radiator to the driver fog light area. We'll come back to finish this part later.


6. At this point there should be a final single longer wire that needs to be routed into the cabin and connected to your switch. Run this Trigger wire (red arrow) up the driver side of fender toward the firewall of the engine.

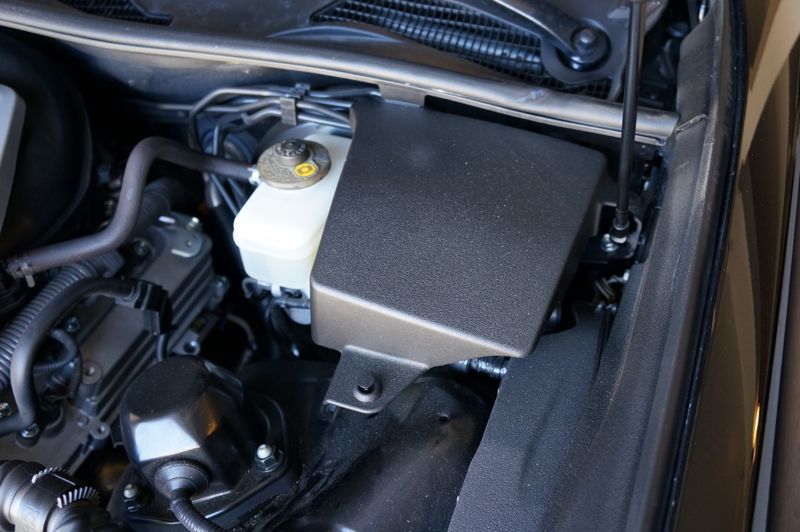
7. When you're at the engine firewall on the driver side. Remove this plastic cover. There are two different plastic clips. Remove the first one like the previous 11 clips in the beginning. The second clip in a plug in so just lift up. Finally release tab closest to firewall and lift cover out.
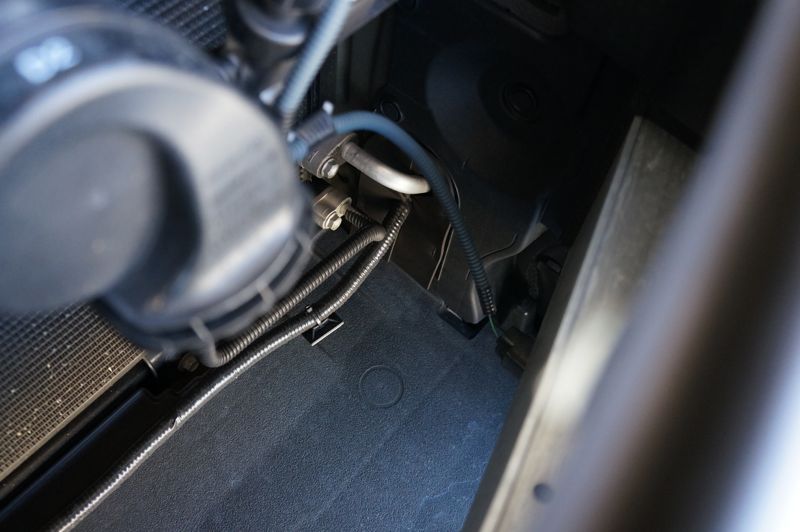
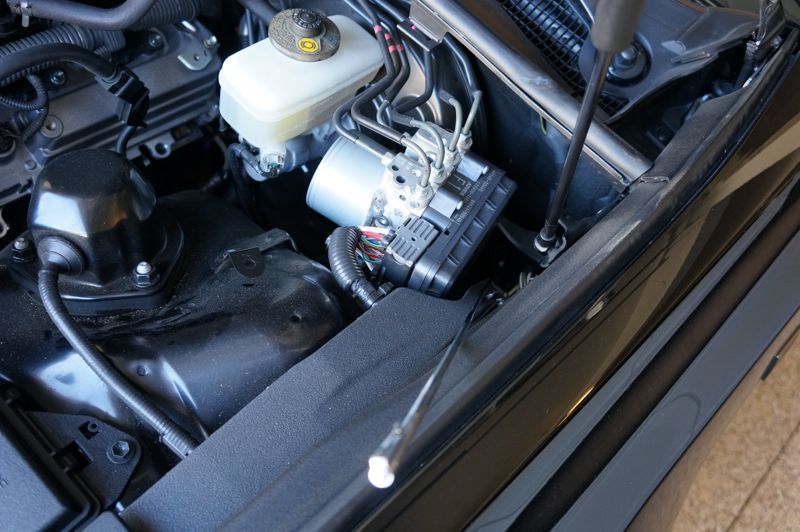
8. Now notice where this metal stick is pointing. That is where you will be looking for a rubber grommet. You want to run your Trigger wire through this and into the interior cabin. Since this is much easier if done from inside the car. The next step will show you how.

9. From inside your car on the driver side. Get down and look right above the dead pedal. You will see this black round grommet. Get something like a coat hanger and poke a hole through this area (red circle). Now go back to the engine side and try to secure your trigger wire to that hanger (probably the second most difficult part of the install). Then pull the coat hanger and Trigger wire through the rubber grommet into the cabin.
Now get your switch. It will have three connections. First is ground, second is parking light power, and we'll call the third "Trigger". Connect the Trigger wire you just pulled in from the engine to this wire.
10. Under the big round grommet above you will find a good Ground point (red square). Attach your switch Ground wire here. Now you will have the last remaining parking light power source. We'll do that next.

11. To tap the parking light power source you first need to remove this plastic panel under the knee airbag sign (3 screws and 2 clips) on the driver side.

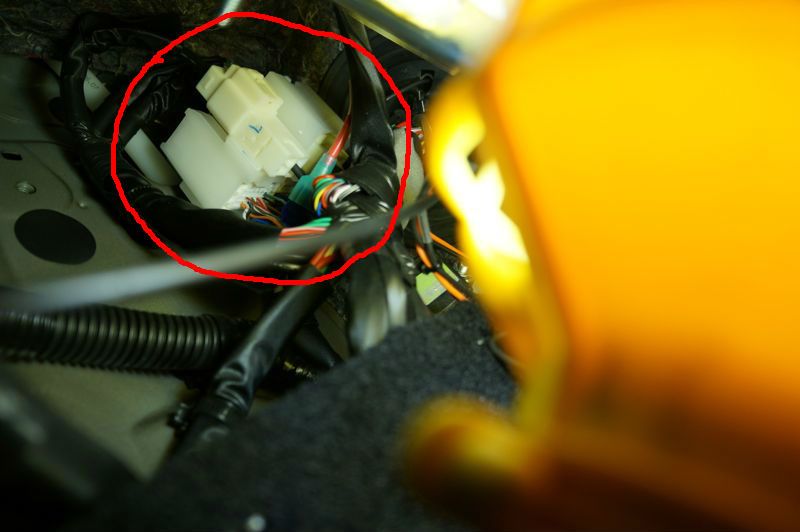
12. Locate this white harness on the driver side above dead pedal.
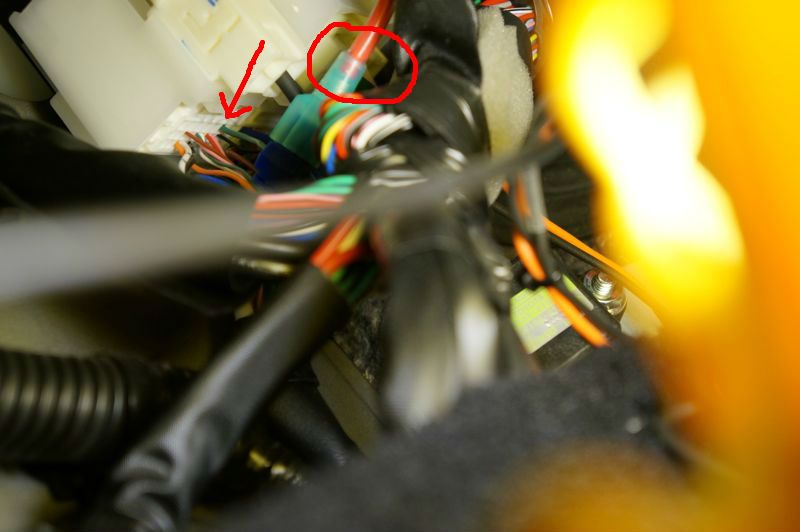
13. On the harness you need to locate this green wire (red arrow). This is the parking light power source that needs to be connected to your switch. The fog light only turns on when the parking lights are on. Here you can see the parking light wire already being tapped by red wire. This was the most difficult part of the install!
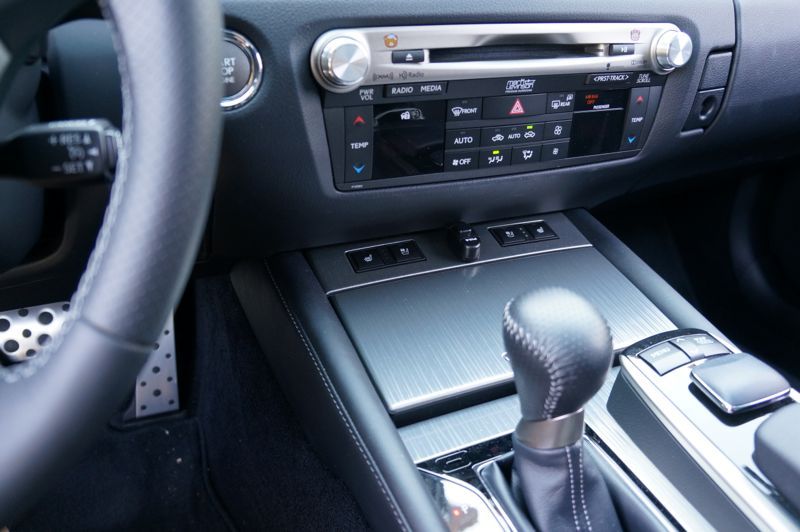
14. Now you can mount the switch where ever you like. I mounted my switch between the seat cooler buttons with double sided tapes. Some people mount them under the dash or on the dash somewhere.
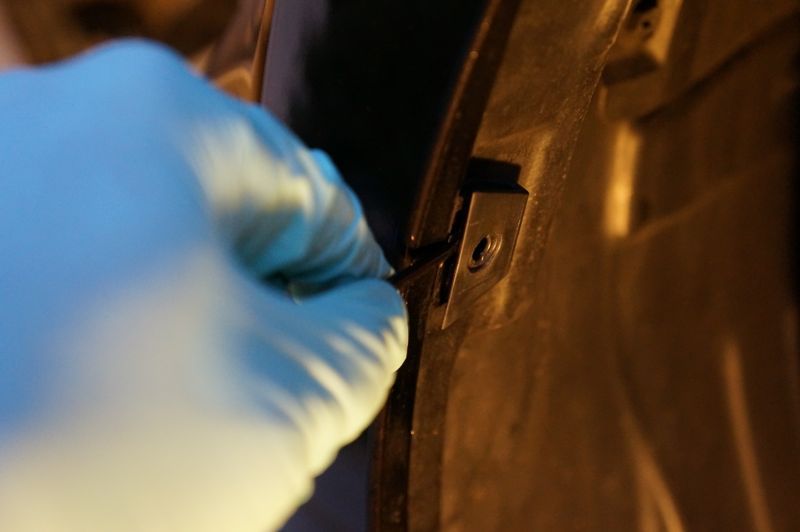
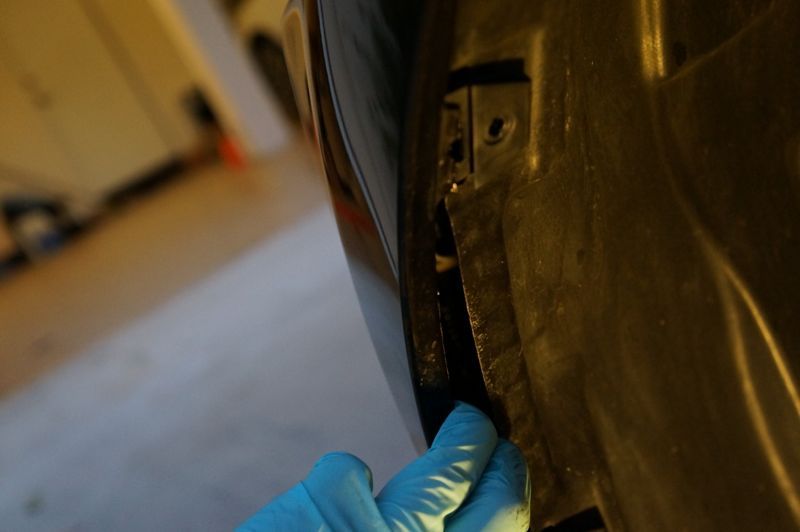
15. Now we turn your attention back to the fog light areas in the bumper. Turn the steering wheel toward one side for easier access to the wheel wells. Remove two plastic clips and one or two screws from under the bumper. Lift fender lining out of the way to route the harness/ plug and install the fog bezels and lights.

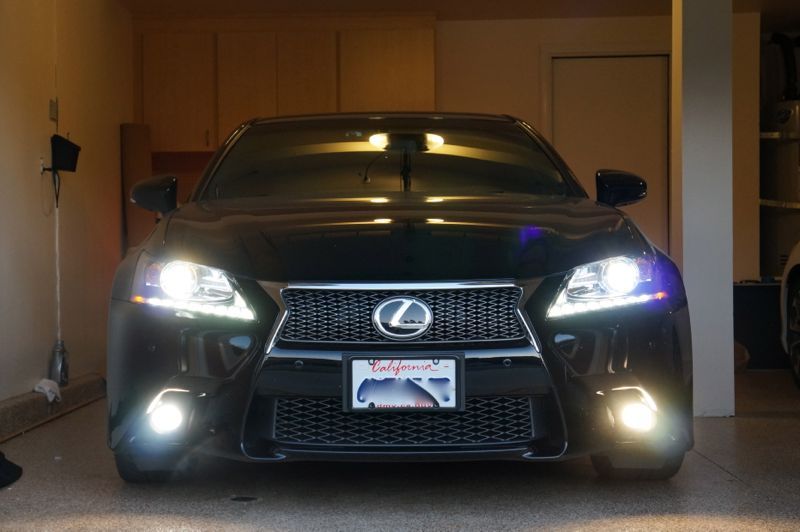
16. Here's what it should look like after removing the OEM F Sport bezel (4 clips) and install your JDM fog lights and bezels. Again you only need to screw the two bottom screws. Leave the top two taps unsecured, don't worry it's pretty tight.

If you haven't done so attached your fused positive wire to the battery and test our your new fog lights!! They should look something like this. Don't worry I'm testing out two bulbs that's why the colors are different
1. Disconnect the negative battery terminal.
2. Locate and remove these plastic plugs (11) in order to expose the area on top of the headlights and radiator. Lift and remove the passenger headlight smaller plastic section. Then remove the larger plastic cover on top radiator.
Here the red lines indicate roughly where you will run your harness and a single trigger (parking light) wire into the cabin. Here's a quick summary don't worry I'll go more into details later:
Near the battery you will attach your harness Relay, Ground, and Positive power source. Route shorter end of harness toward front passenger fog area. Then continue the longer end of the harness across the bottom in front of the radiator toward the driver side fog. Then run the single long Trigger wire back toward the engine firewall and into the cabin to your switch. Then attach your switch ground. Finally tap the parking light power source in the cabin to your switch and you're set!
3. So here near the battery corner, unbolt a nut at R and mount your harness Relay. Below and to the right locate another bolt (G) with multiple ground wires attached. Use this to connect your harness Ground wire. At this point you can attach your harness Power wire (has an inline fuse) to the Positive battery terminal. I actually didn't do this until the last step of the fog install. Just don't forget to come back if you choose to do this.
4. Run harness down passenger side of fender. I actually wrapped the harness with black electric tape to keep an OEM look. Run shorter end of harness into passenger fog light area. I'll show you how to get access to the fog light later.
5. Now run longer part of harness in front of the radiator. You can secure the harness using double sided tape and zip tie. Continue running the longer part of the harness across the radiator to the driver fog light area. We'll come back to finish this part later.
6. At this point there should be a final single longer wire that needs to be routed into the cabin and connected to your switch. Run this Trigger wire (red arrow) up the driver side of fender toward the firewall of the engine.
7. When you're at the engine firewall on the driver side. Remove this plastic cover. There are two different plastic clips. Remove the first one like the previous 11 clips in the beginning. The second clip in a plug in so just lift up. Finally release tab closest to firewall and lift cover out.
8. Now notice where this metal stick is pointing. That is where you will be looking for a rubber grommet. You want to run your Trigger wire through this and into the interior cabin. Since this is much easier if done from inside the car. The next step will show you how.
9. From inside your car on the driver side. Get down and look right above the dead pedal. You will see this black round grommet. Get something like a coat hanger and poke a hole through this area (red circle). Now go back to the engine side and try to secure your trigger wire to that hanger (probably the second most difficult part of the install). Then pull the coat hanger and Trigger wire through the rubber grommet into the cabin.
Now get your switch. It will have three connections. First is ground, second is parking light power, and we'll call the third "Trigger". Connect the Trigger wire you just pulled in from the engine to this wire.
10. Under the big round grommet above you will find a good Ground point (red square). Attach your switch Ground wire here. Now you will have the last remaining parking light power source. We'll do that next.
11. To tap the parking light power source you first need to remove this plastic panel under the knee airbag sign (3 screws and 2 clips) on the driver side.
12. Locate this white harness on the driver side above dead pedal.
13. On the harness you need to locate this green wire (red arrow). This is the parking light power source that needs to be connected to your switch. The fog light only turns on when the parking lights are on. Here you can see the parking light wire already being tapped by red wire. This was the most difficult part of the install!
14. Now you can mount the switch where ever you like. I mounted my switch between the seat cooler buttons with double sided tapes. Some people mount them under the dash or on the dash somewhere.
15. Now we turn your attention back to the fog light areas in the bumper. Turn the steering wheel toward one side for easier access to the wheel wells. Remove two plastic clips and one or two screws from under the bumper. Lift fender lining out of the way to route the harness/ plug and install the fog bezels and lights.
16. Here's what it should look like after removing the OEM F Sport bezel (4 clips) and install your JDM fog lights and bezels. Again you only need to screw the two bottom screws. Leave the top two taps unsecured, don't worry it's pretty tight.
If you haven't done so attached your fused positive wire to the battery and test our your new fog lights!! They should look something like this. Don't worry I'm testing out two bulbs that's why the colors are different


 04-22-15, 08:55 AM
#23

I did the install past weekend. I'll soon post it with detail. Busy at work this week to write something in detail. As always.. credits to club members for sharing wealth of information.
