
 01-09-15, 03:29 PM
Last edit by: IB Advertising
See related guides and technical advice from our community experts:
Browse all: Lexus IS Engine and Powertrain Guides
- Lexus IS GS: How to Change Your Oil
Step by step instructions for do-it-yourself repairs
Browse all: Lexus IS Engine and Powertrain Guides

GS350 Oil Change Procedure with Pictures
01-30-09, 07:49 PM
#1
Intermediate
Thread Starter

I saw that the old thread lost all it's pictures and some people were asking for them... I took pictures when I did my first oil change on my 2007 GS350 (I bought it pre-owned) but I never made a post. Anyway, here it is. I hope this is helpful.
1. First step is to get your car on ramps and be sure to set the parking brake. I bought my ramps from O'Reilly Auto Parts for $32.99+tax (link).
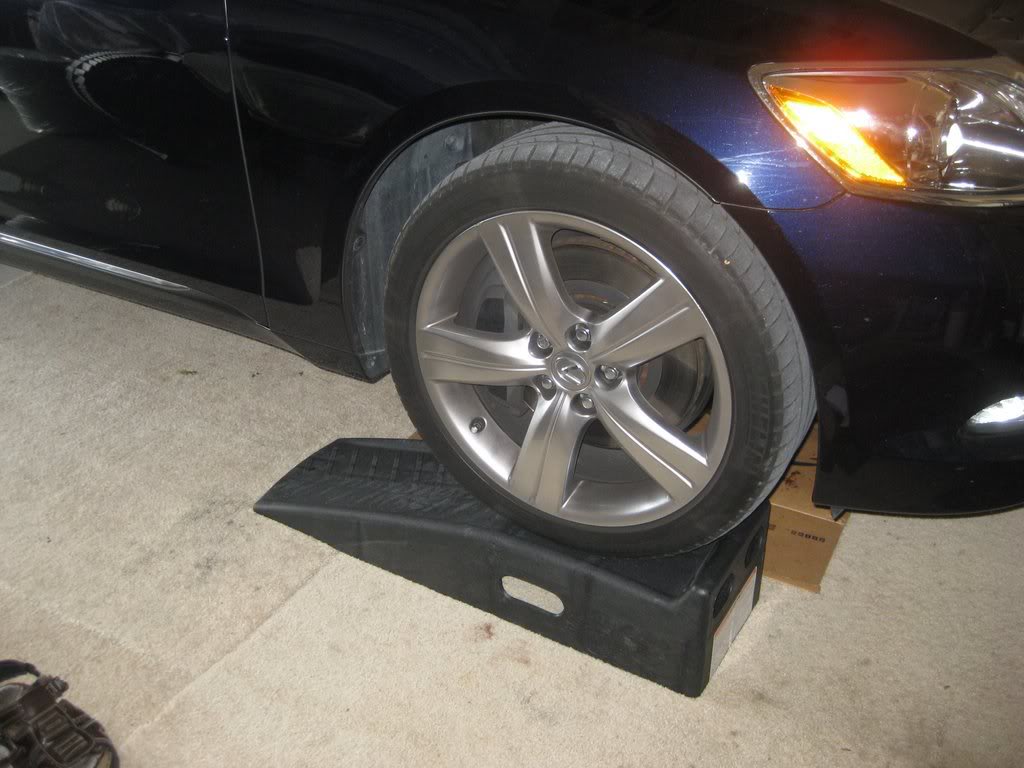
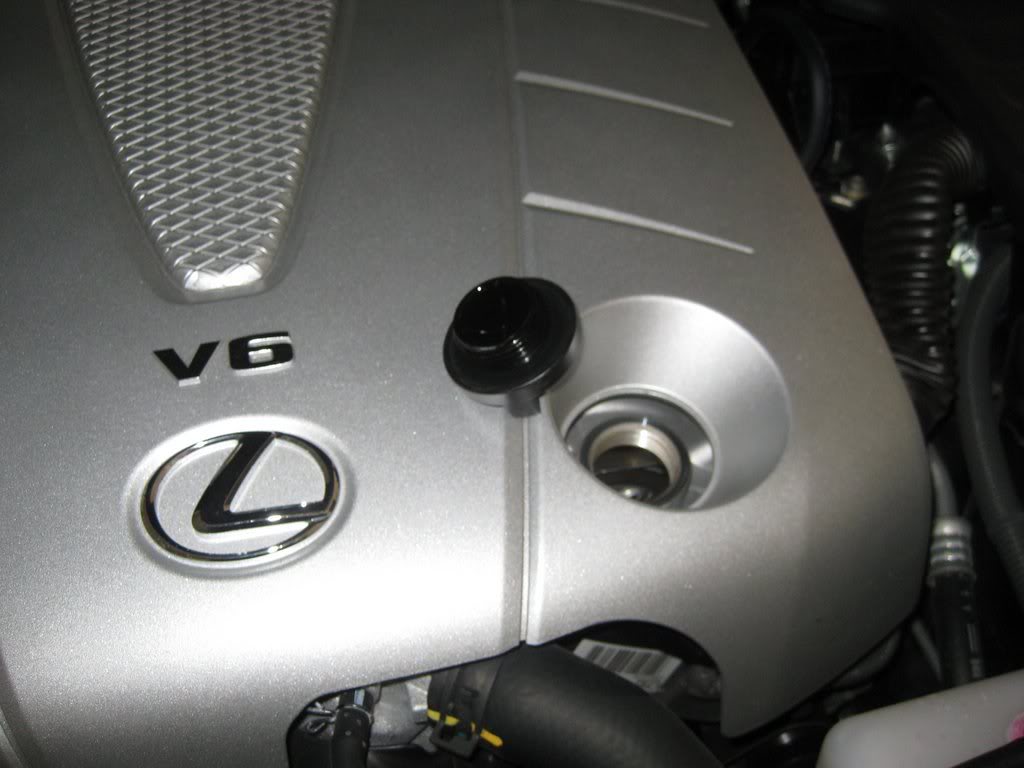
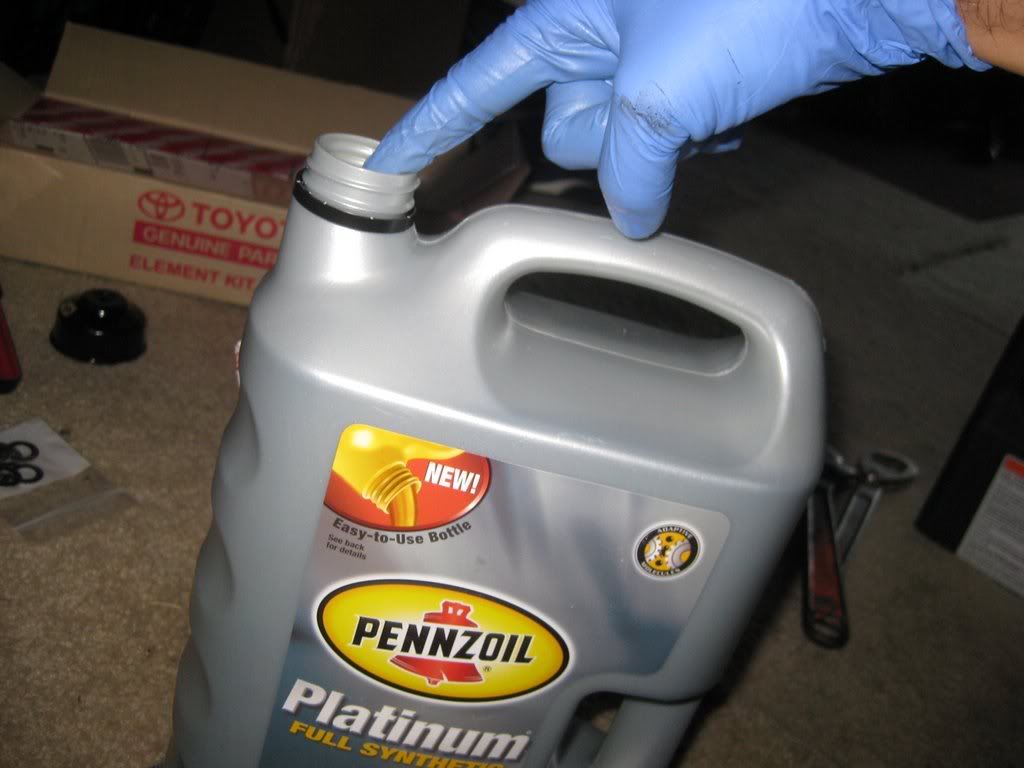
2. Open up the oil fill cap to allow air in and for easier oil drainage.
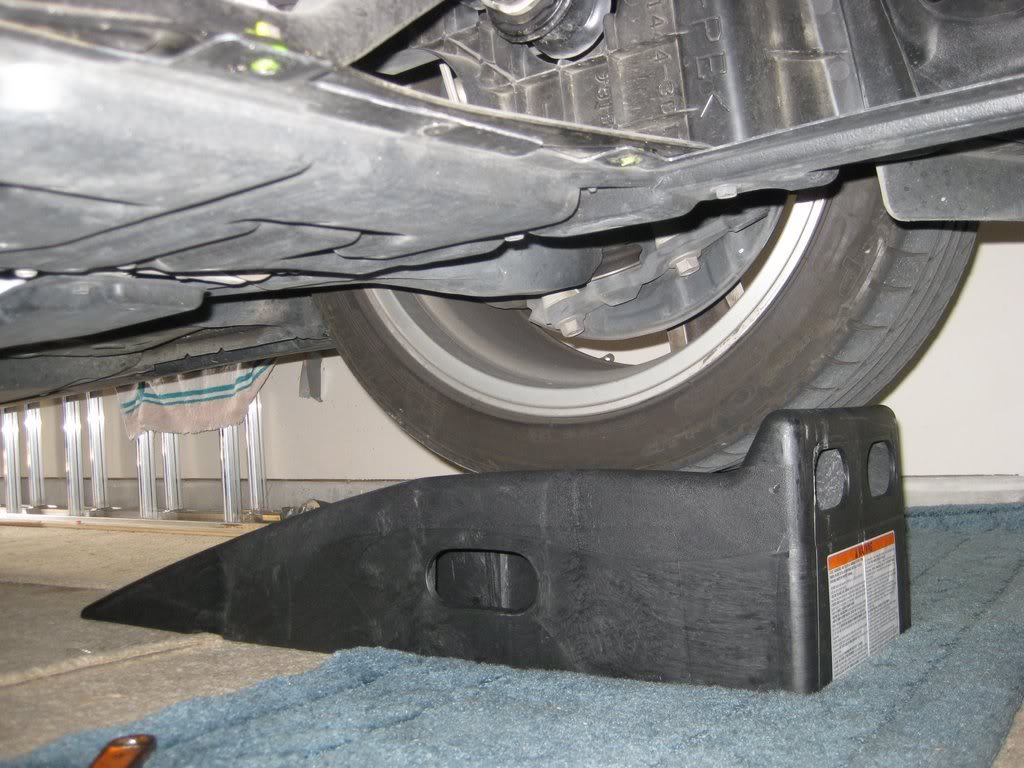
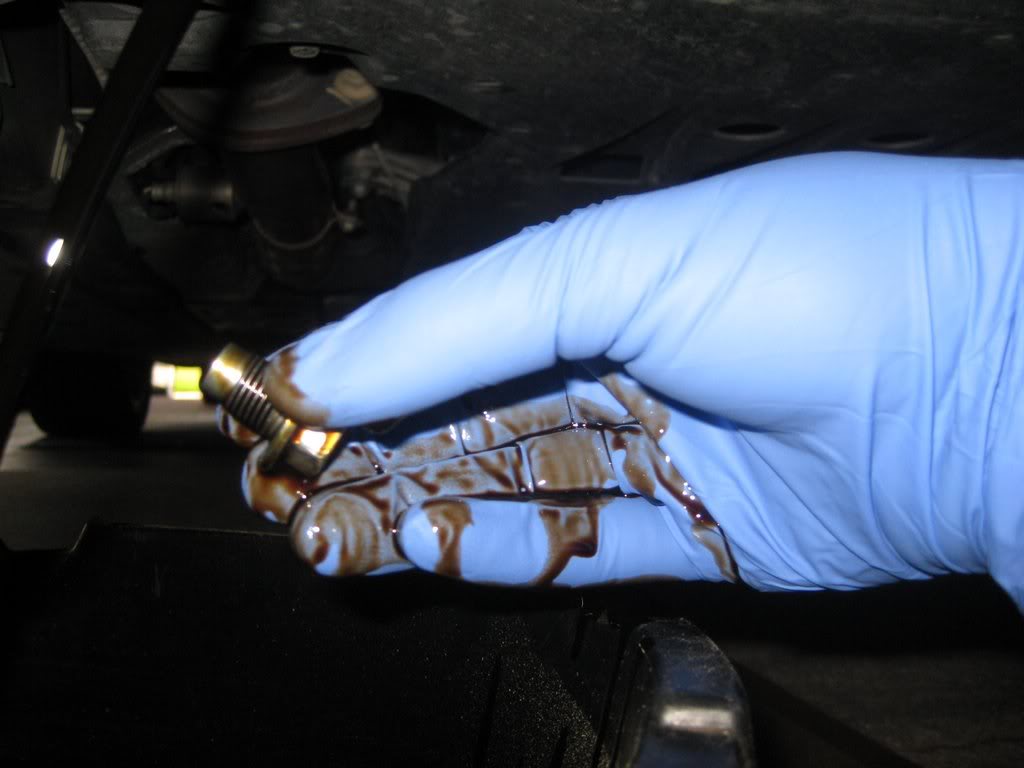
3. Next step is to locate the oil drain plug.
4. Use a 14 mm socket to open it up. I used the back of another wrench to get some more torque to loosen it up. Be sure your drain pan is in position.
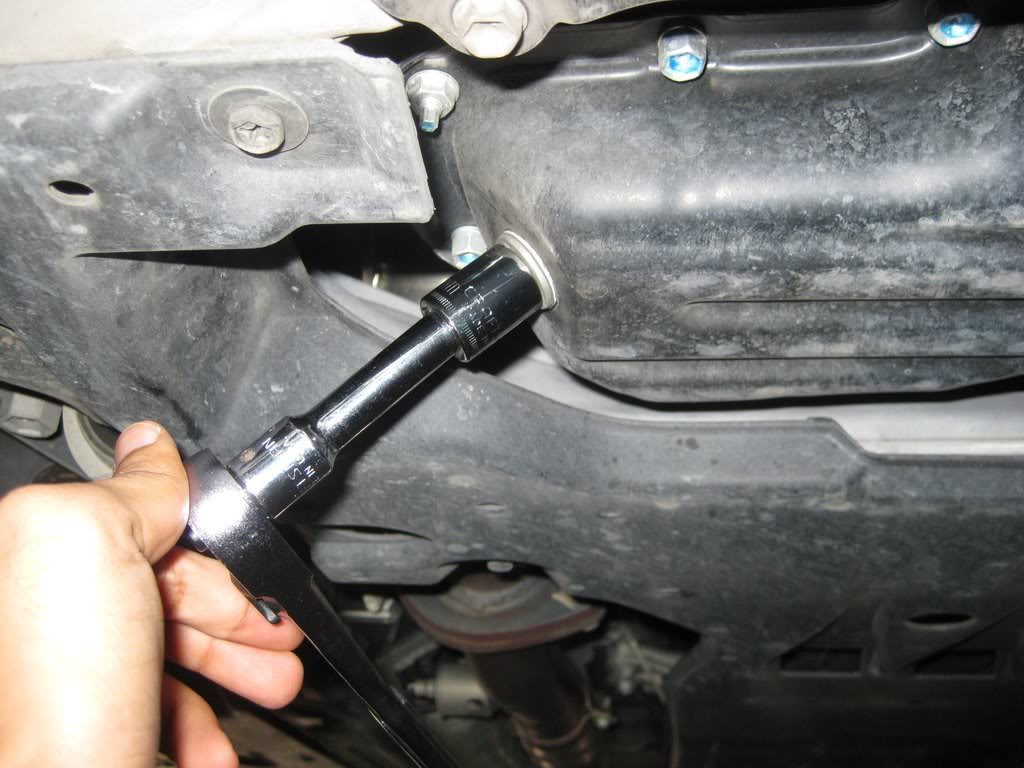
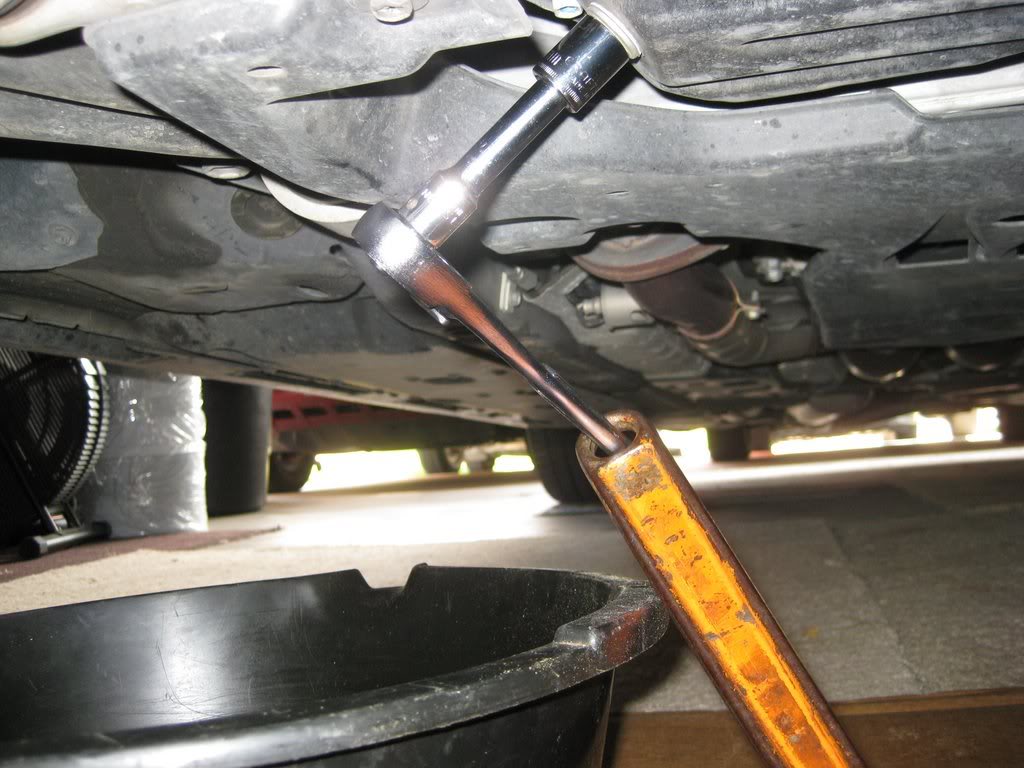
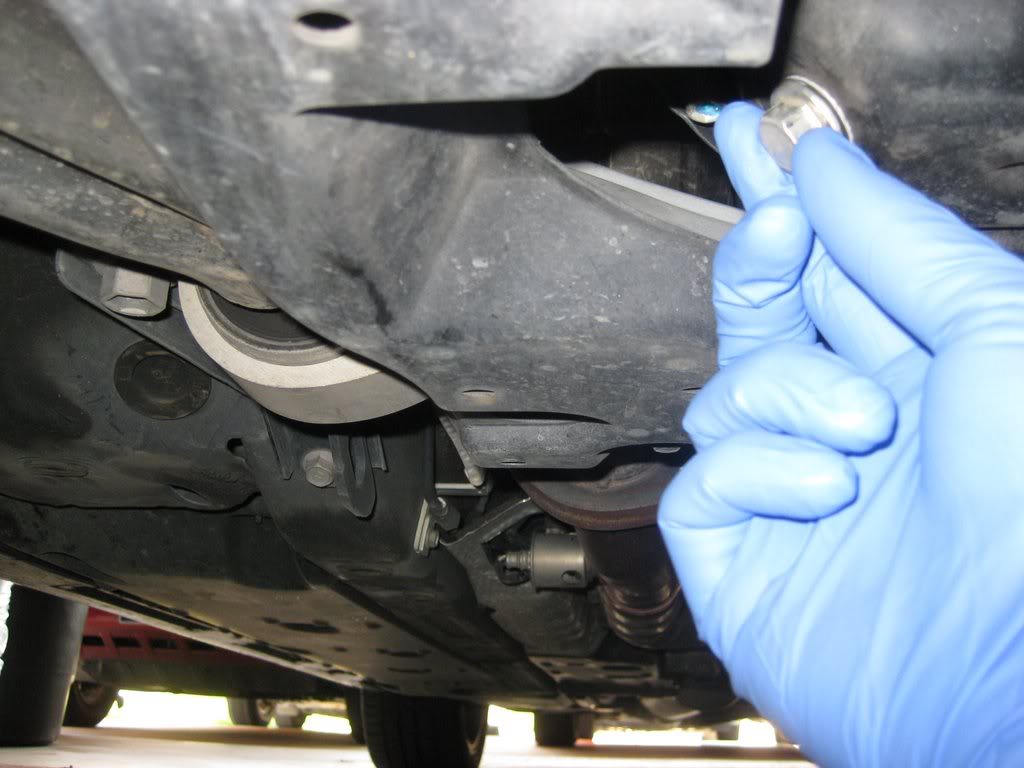
4. Loosen it the rest of the way using your hand. I would wear gloves...
1. First step is to get your car on ramps and be sure to set the parking brake. I bought my ramps from O'Reilly Auto Parts for $32.99+tax (link).
2. Open up the oil fill cap to allow air in and for easier oil drainage.
3. Next step is to locate the oil drain plug.
4. Use a 14 mm socket to open it up. I used the back of another wrench to get some more torque to loosen it up. Be sure your drain pan is in position.
4. Loosen it the rest of the way using your hand. I would wear gloves...
Last edited by Arantant; 01-30-09 at 08:41 PM.
 01-30-09, 07:50 PM
#2
Intermediate
Thread Starter
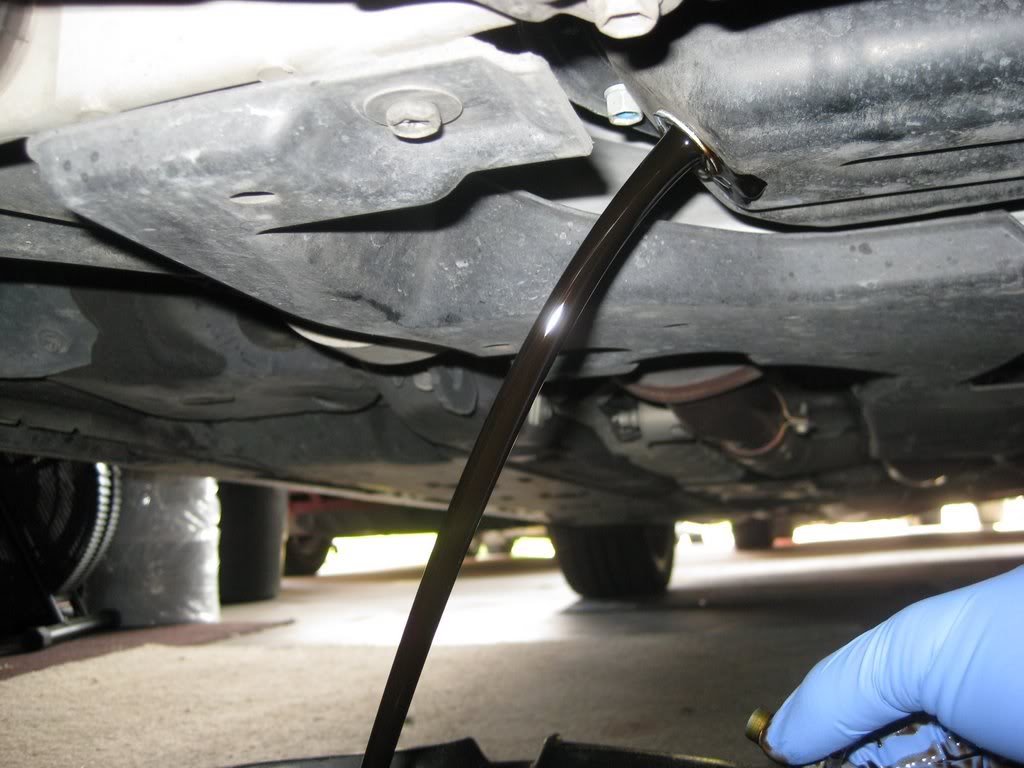
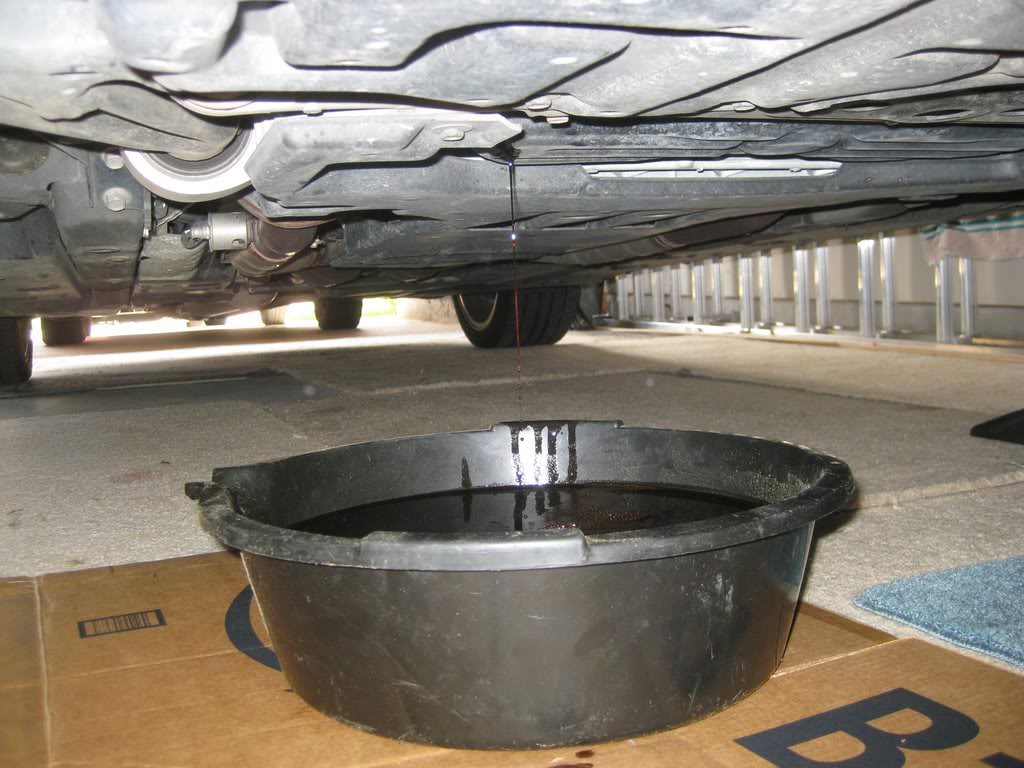
5. Let the oil drain out for a while while you work on the filter.
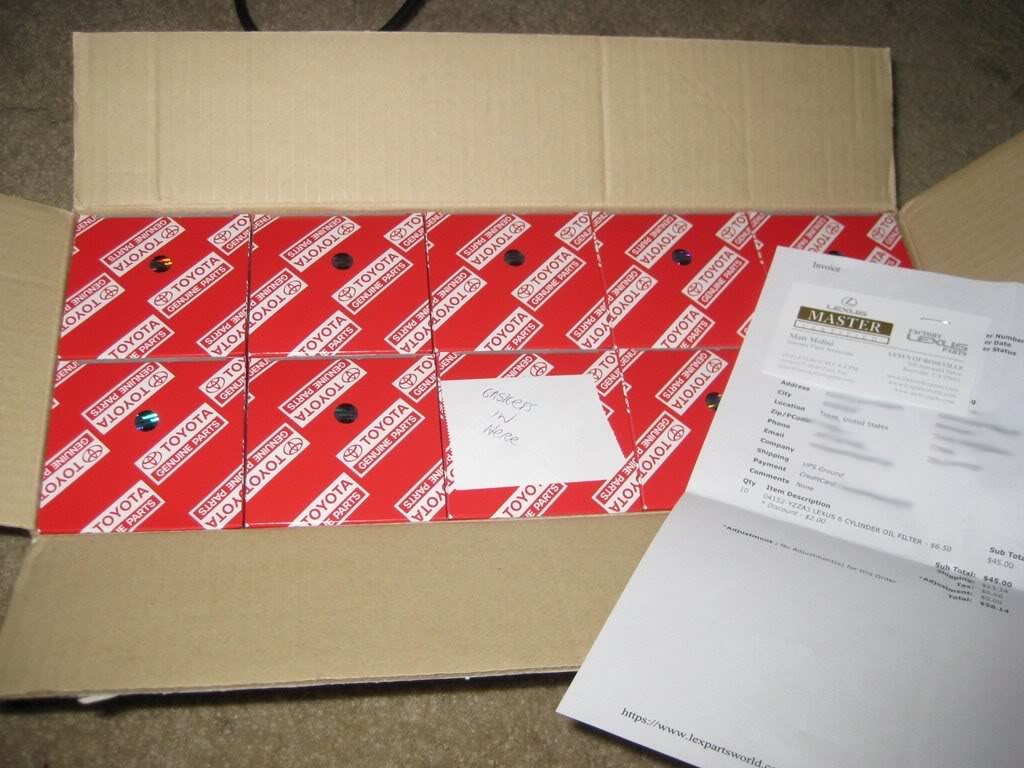
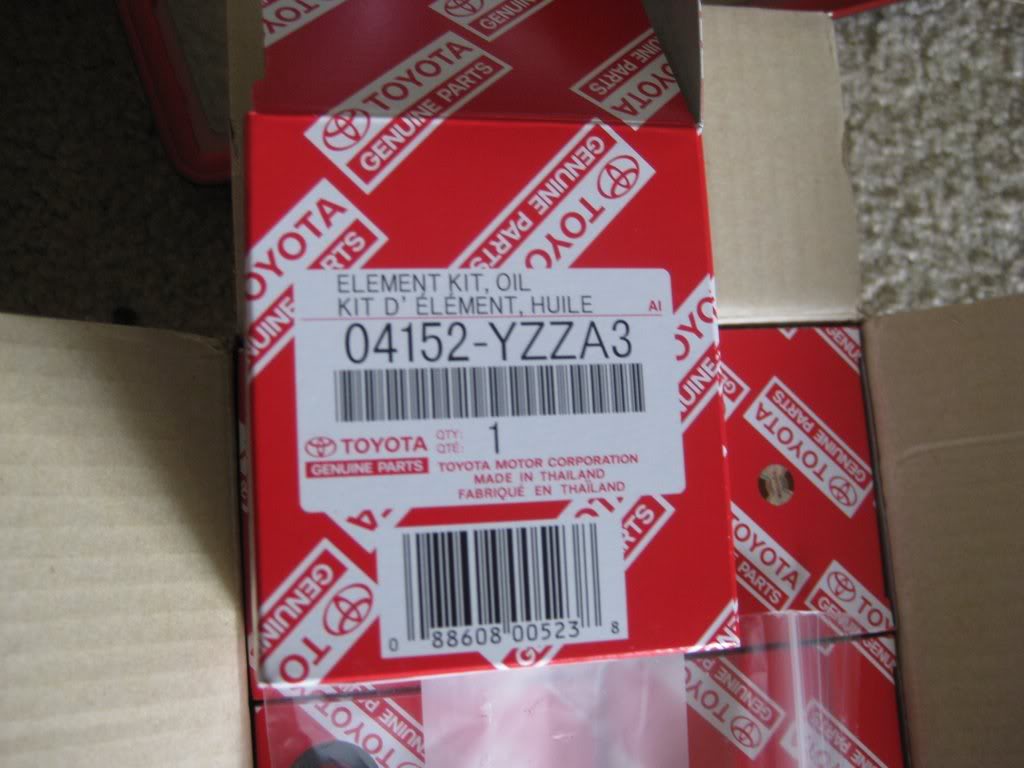
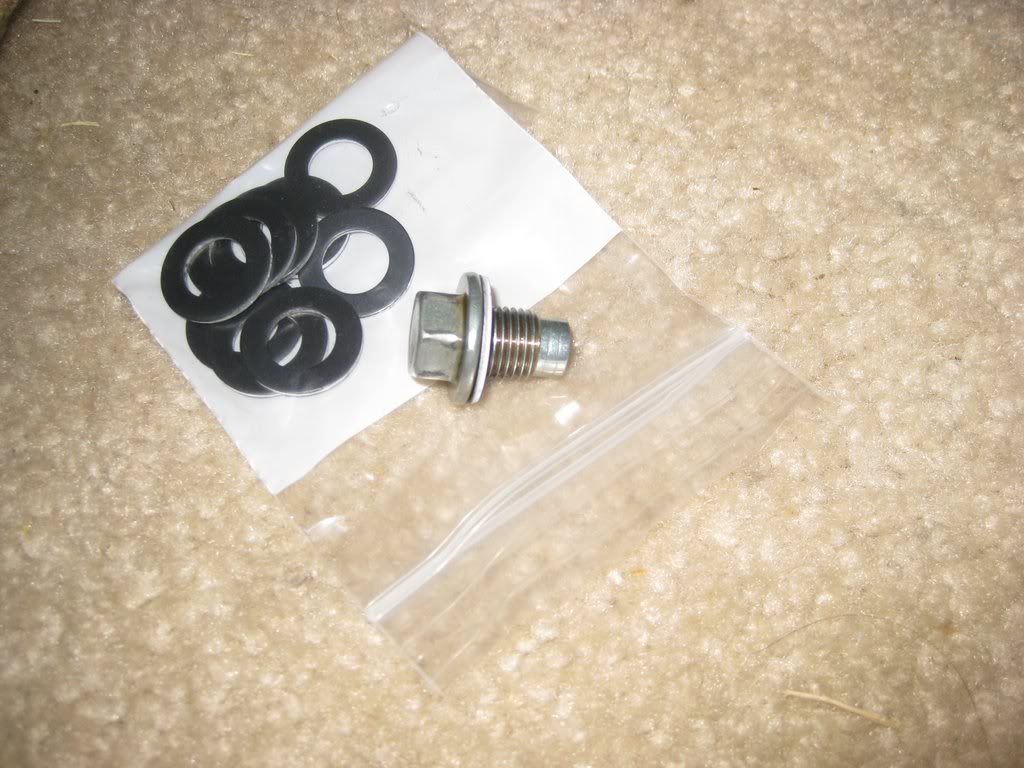
6. Now it's time to work on the filter. I bought my filters from www.lexpartsworld.com; I got 10 for about $58 shipped with the washers (aka gaskets). Make sure you get the right filter. This is for my car which is a GS350 RWD. AWD is slightly different.
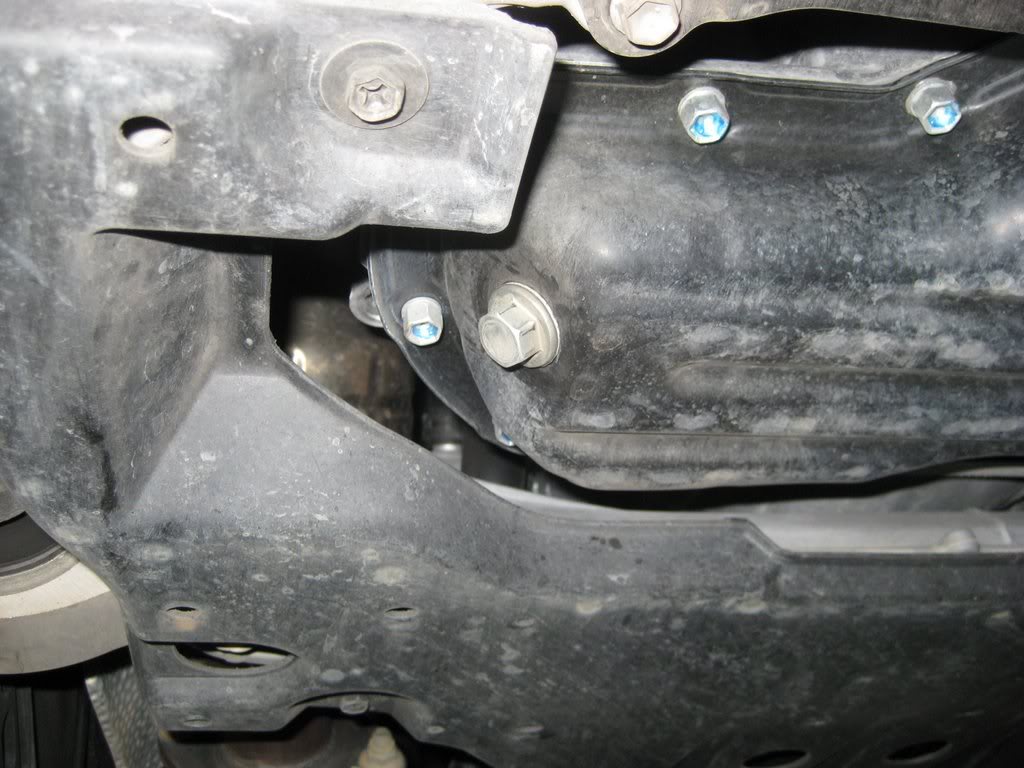
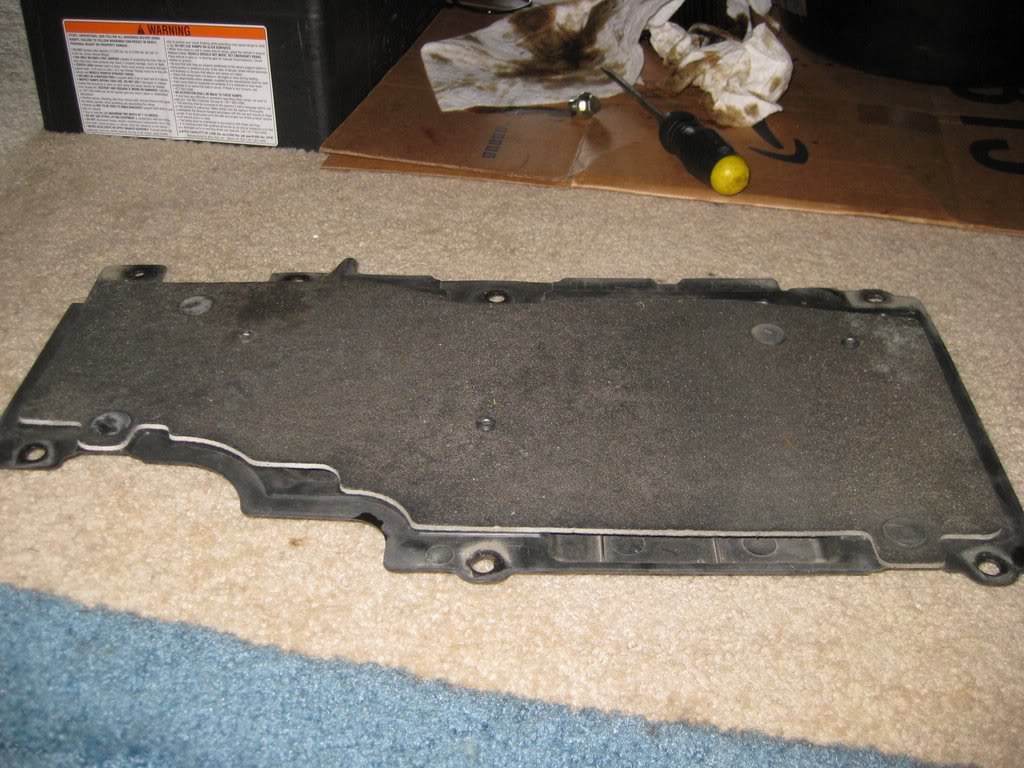
7. Open up the panel towards the front of the car. It has about 7 10mm bolts holding it in place. And then locate the filter behind it.
6. Now it's time to work on the filter. I bought my filters from www.lexpartsworld.com; I got 10 for about $58 shipped with the washers (aka gaskets). Make sure you get the right filter. This is for my car which is a GS350 RWD. AWD is slightly different.
7. Open up the panel towards the front of the car. It has about 7 10mm bolts holding it in place. And then locate the filter behind it.
Last edited by Arantant; 01-30-09 at 08:04 PM.
01-30-09, 07:50 PM
#3
Intermediate
Thread Starter
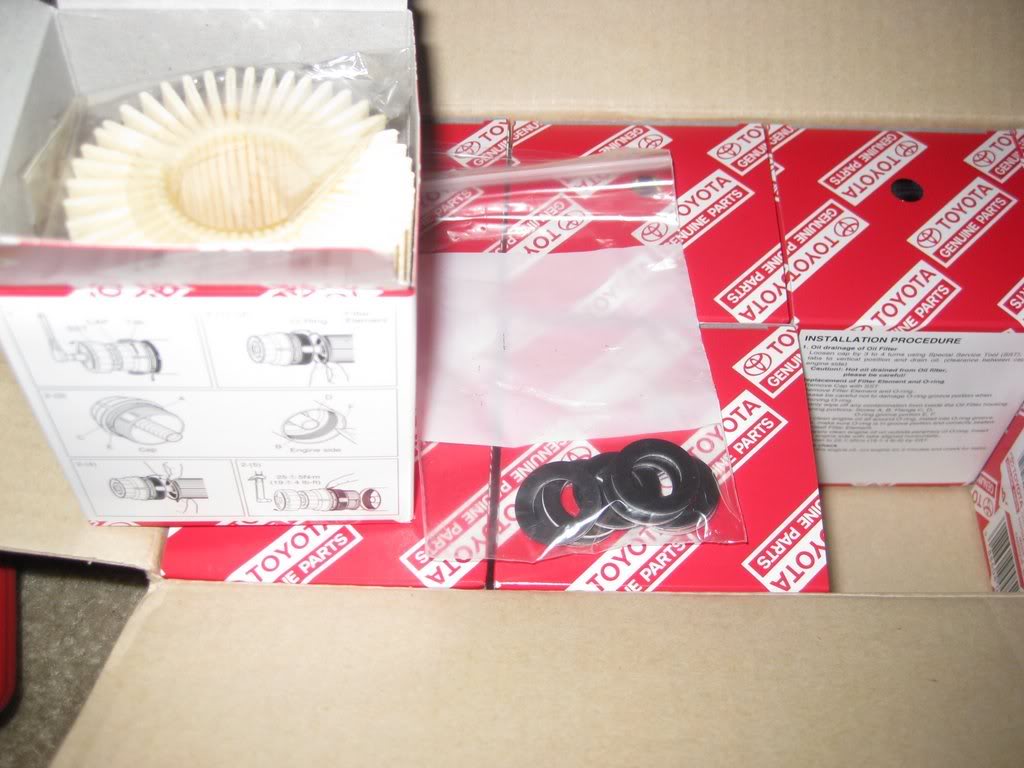
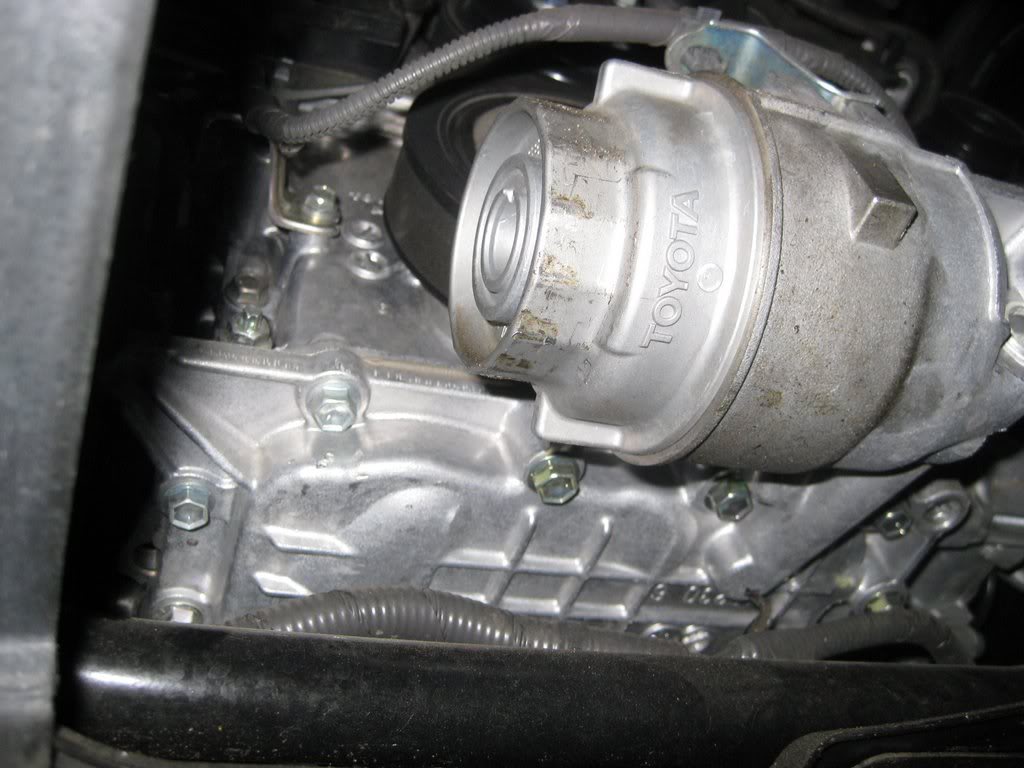
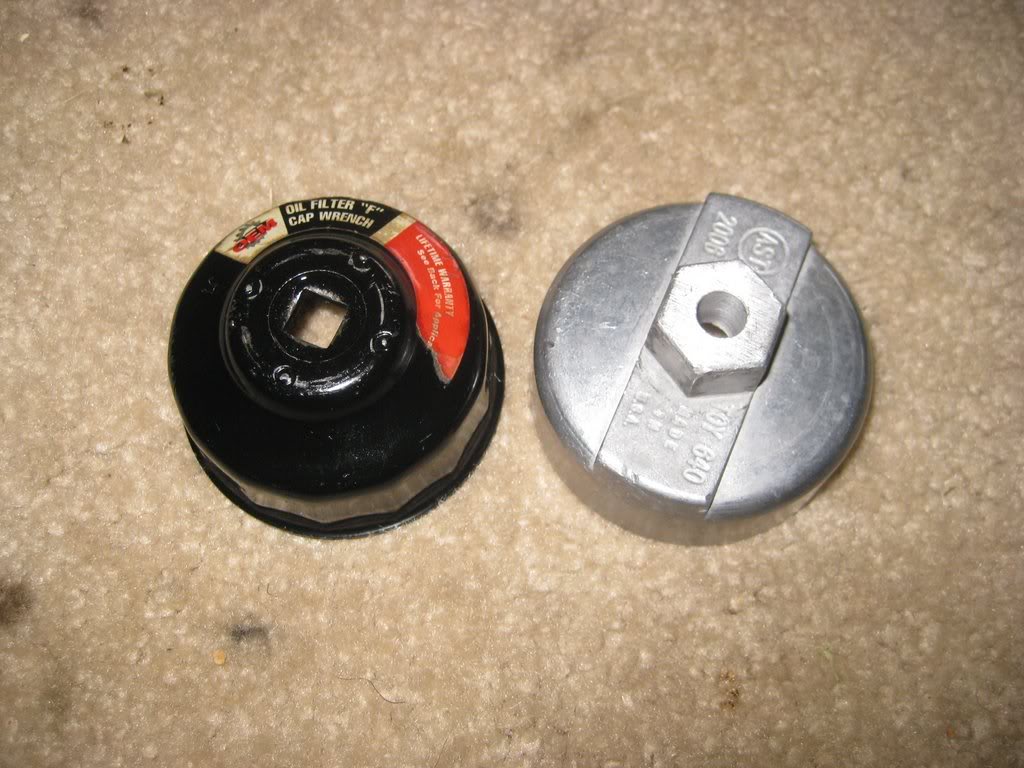
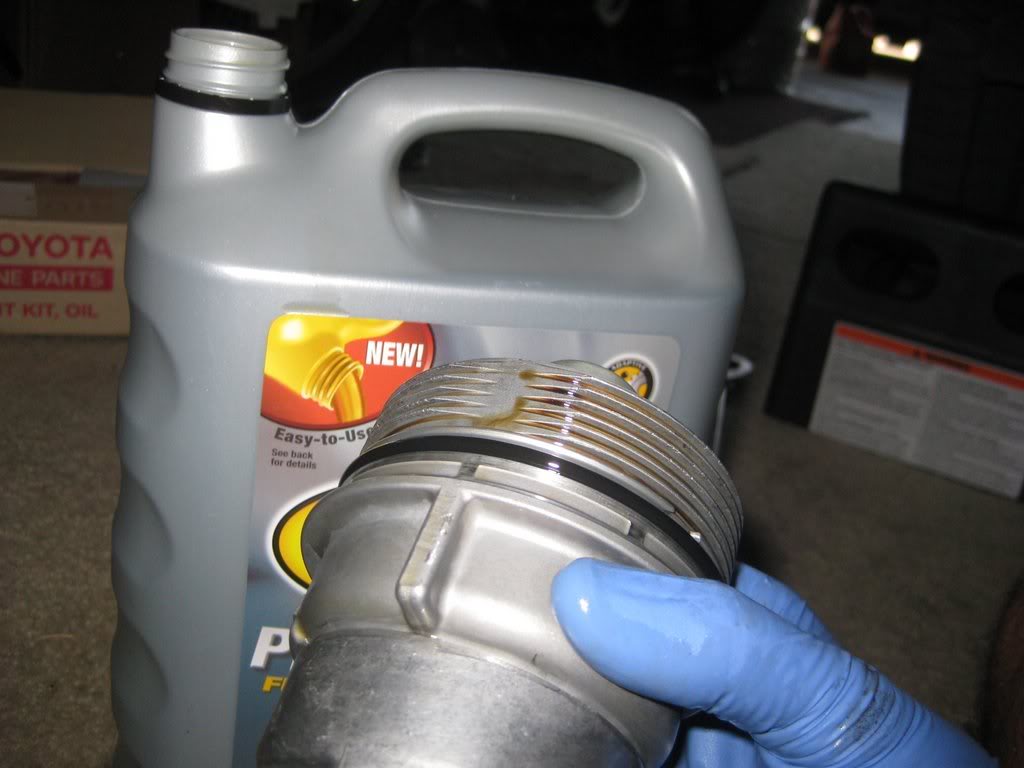
8. Follow the instructions on the filter box to remove the old filter. I had two oil filter wrenches that would have worked. Neither was the offical Toyota SST which costs an arm and a leg.
9. Removing the old filter and pouring the oil out...

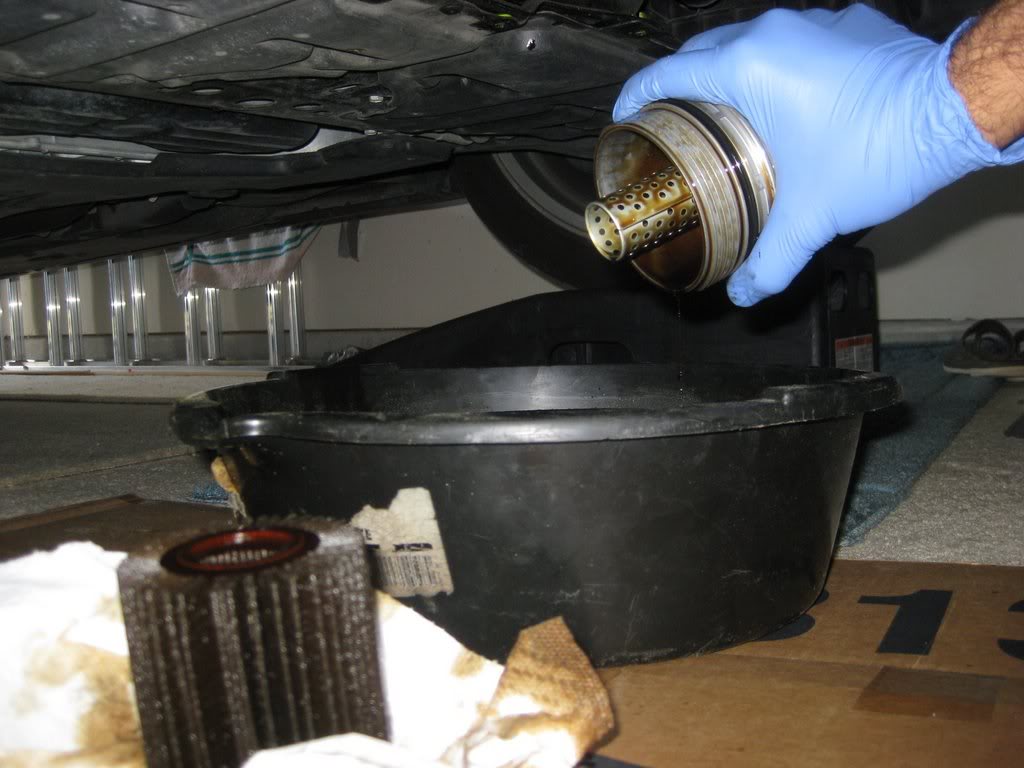
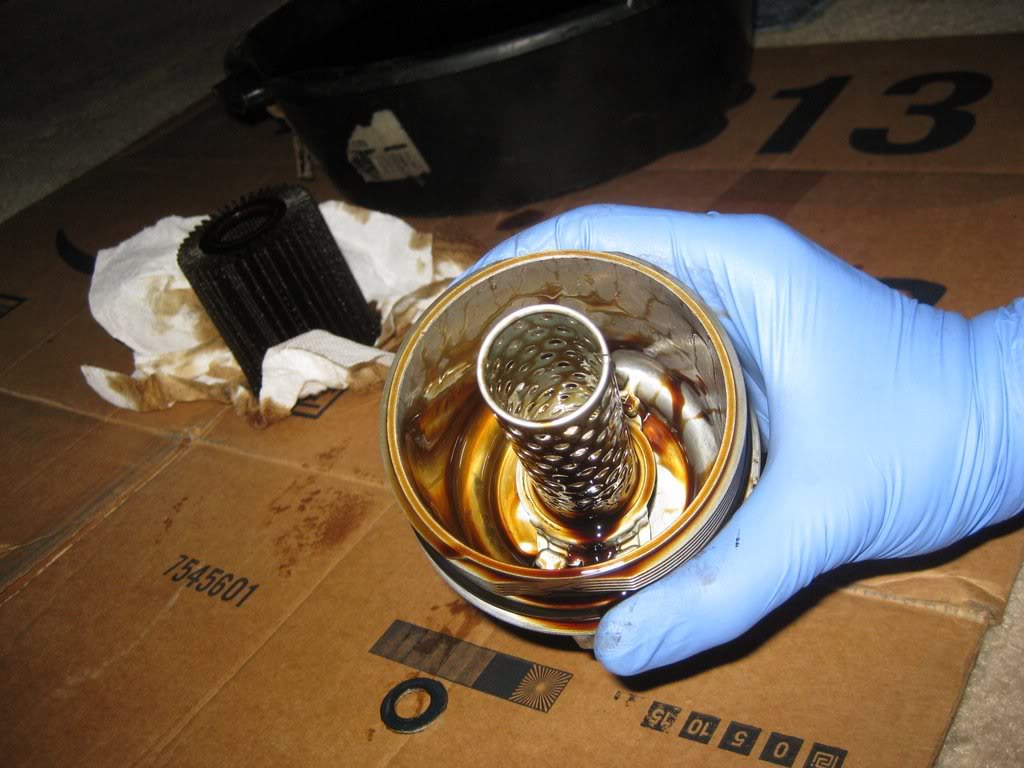
9. Removing the old filter and pouring the oil out...
Last edited by Arantant; 01-30-09 at 08:43 PM.
01-30-09, 07:51 PM
#4
Intermediate
Thread Starter
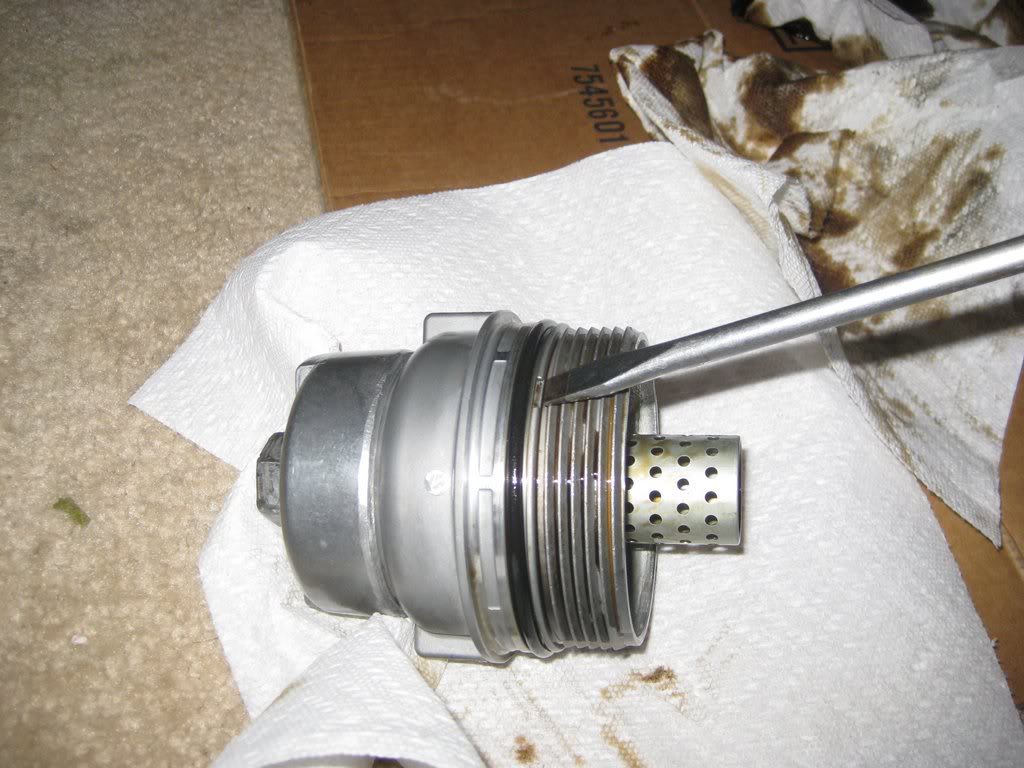
10. Removing the old gasket, cleaning the housing, oiling it up with clean oil and placing the filter element in place.

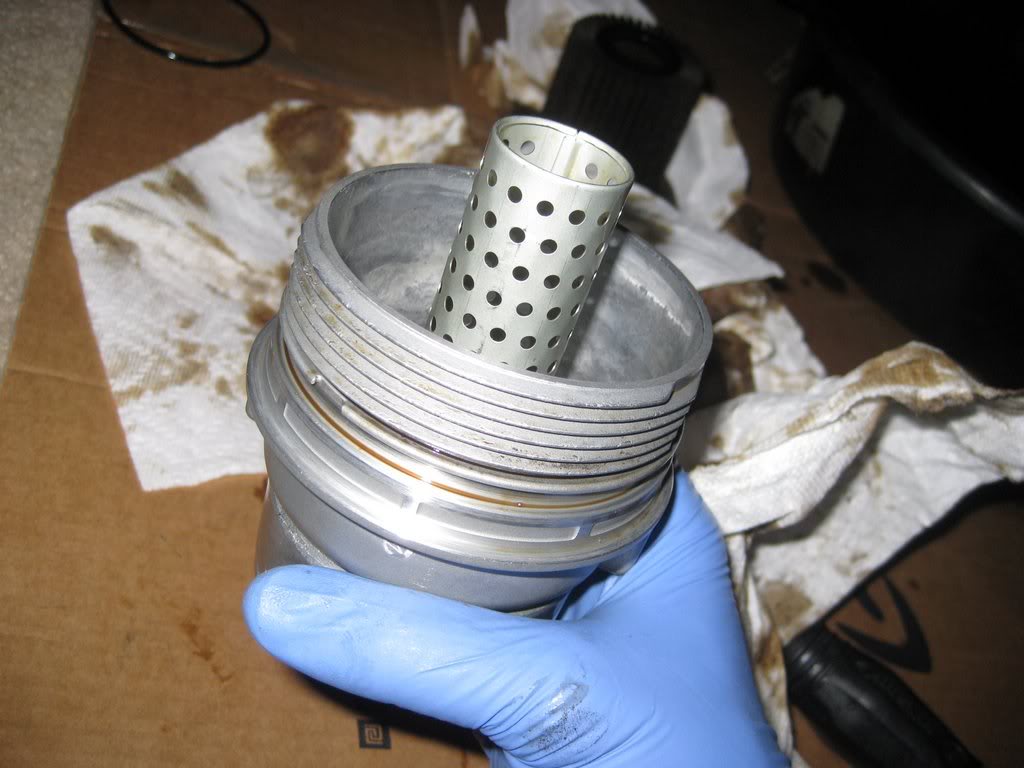
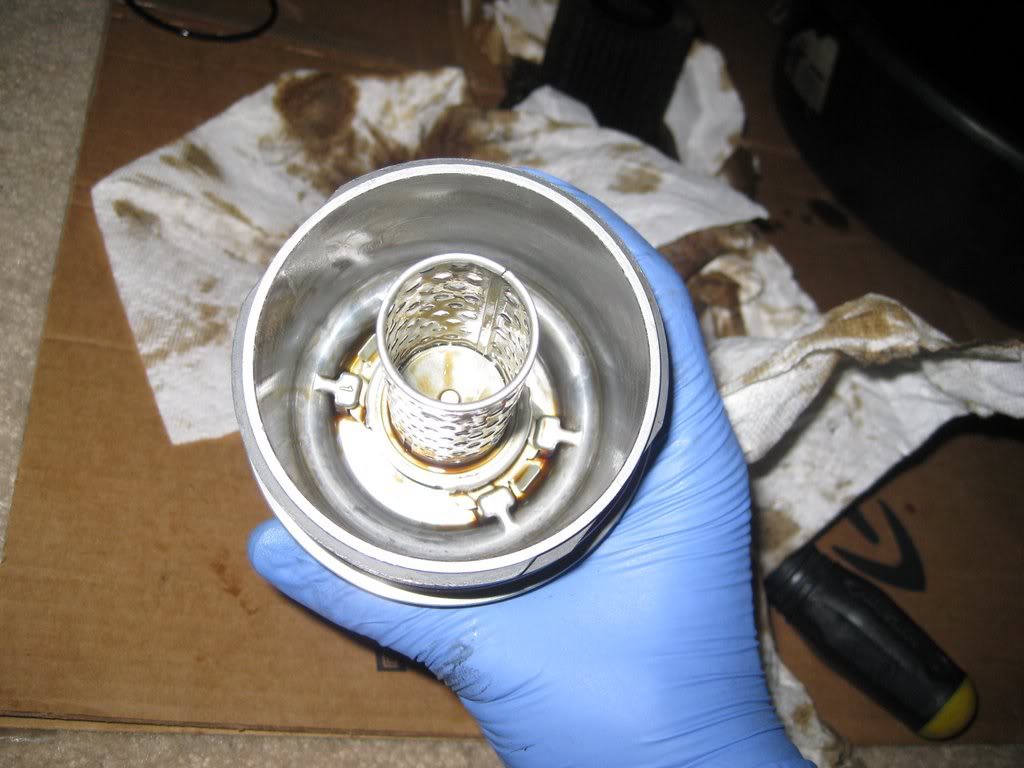
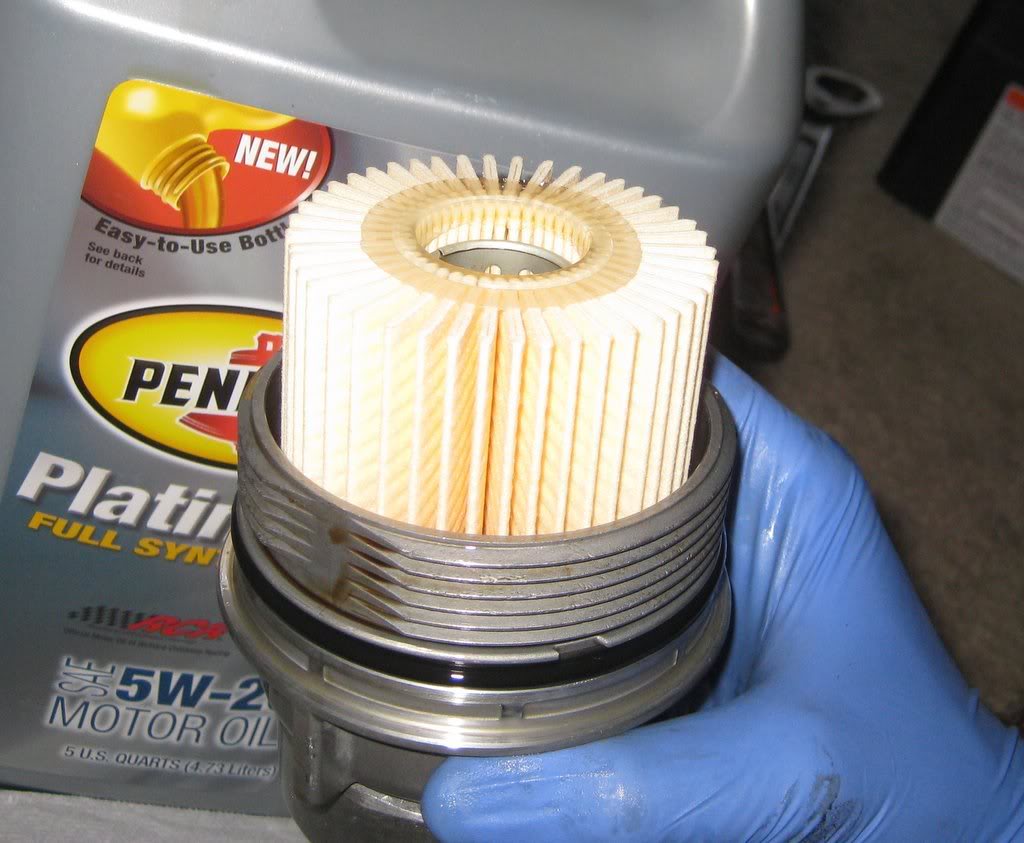
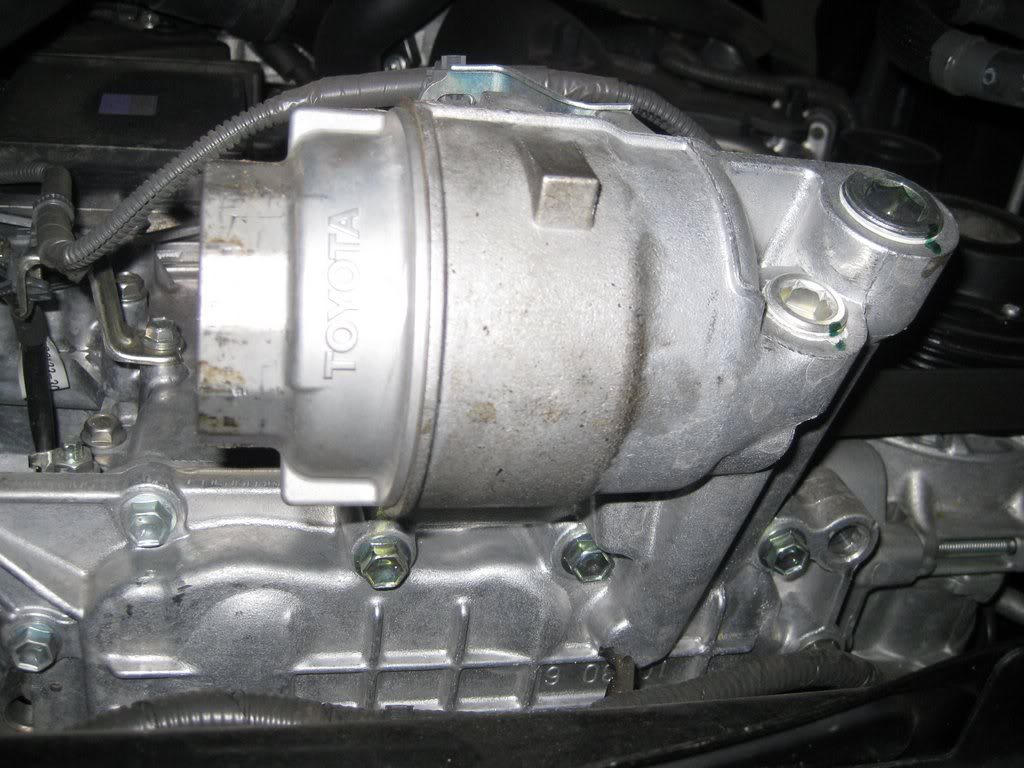
11. Install the filter housing back to where it was.
11. Install the filter housing back to where it was.
Last edited by Arantant; 01-30-09 at 07:54 PM.
The following users liked this post:
AlexDev (08-03-19)
01-30-09, 07:51 PM
#5
Intermediate
Thread Starter
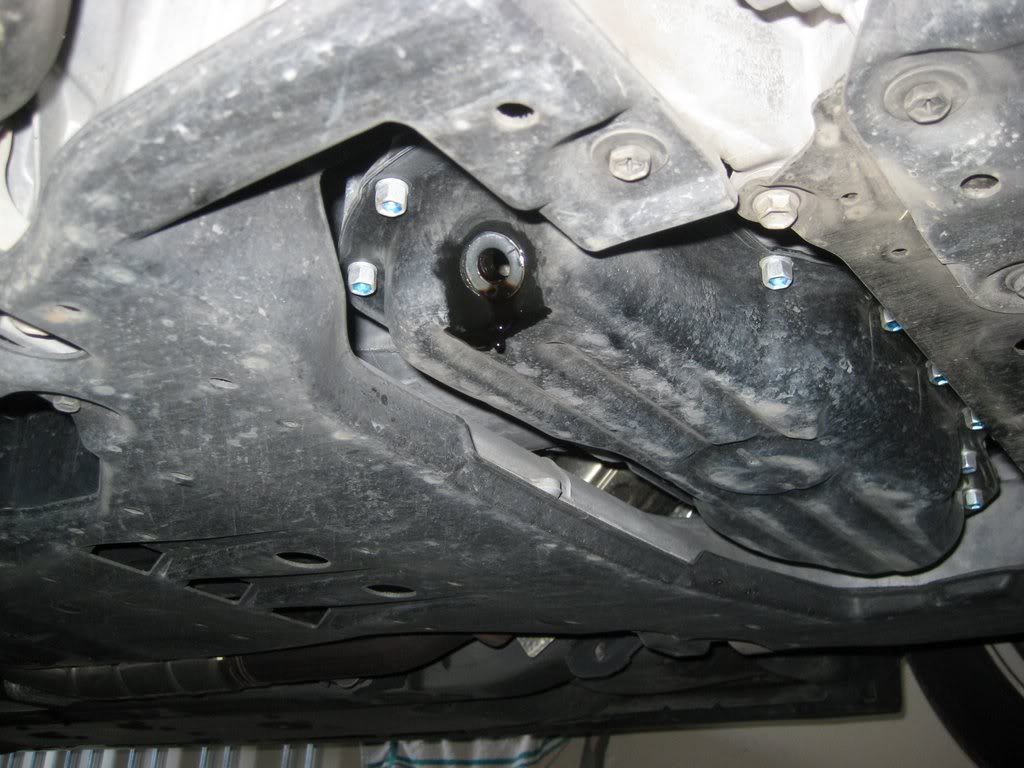
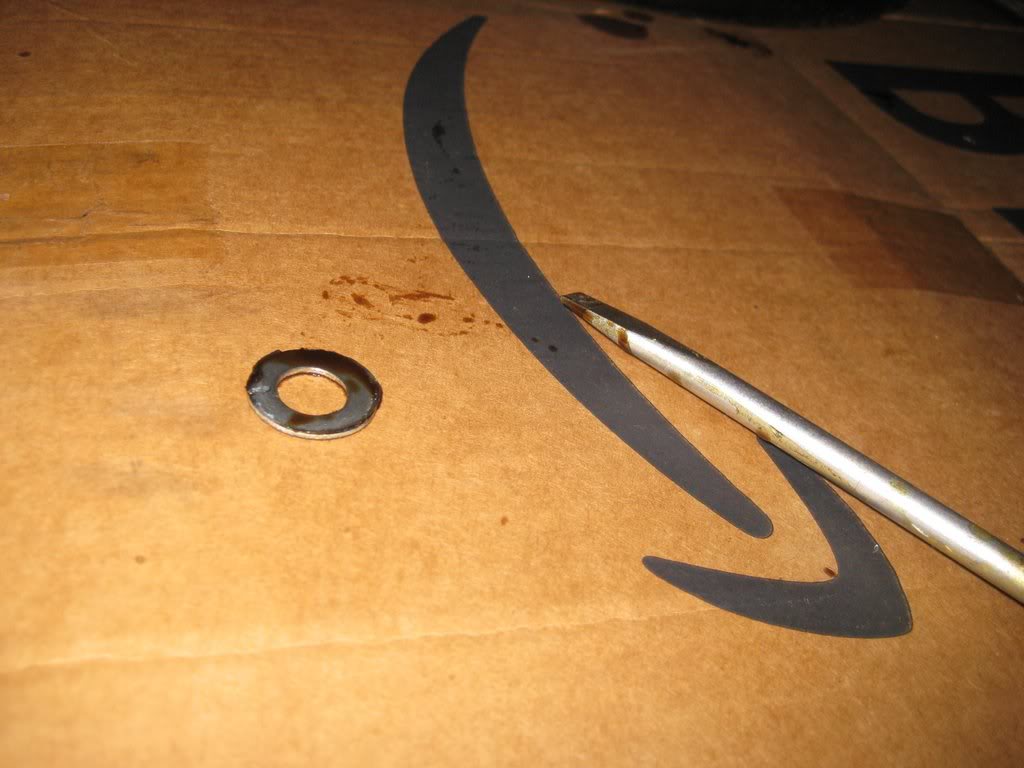
12. Back to the drained oil. Remove the old washer from either the bolt or the surface of the oil pan (wherever it stuck to), replace it with a new one and screw the bolt back in.
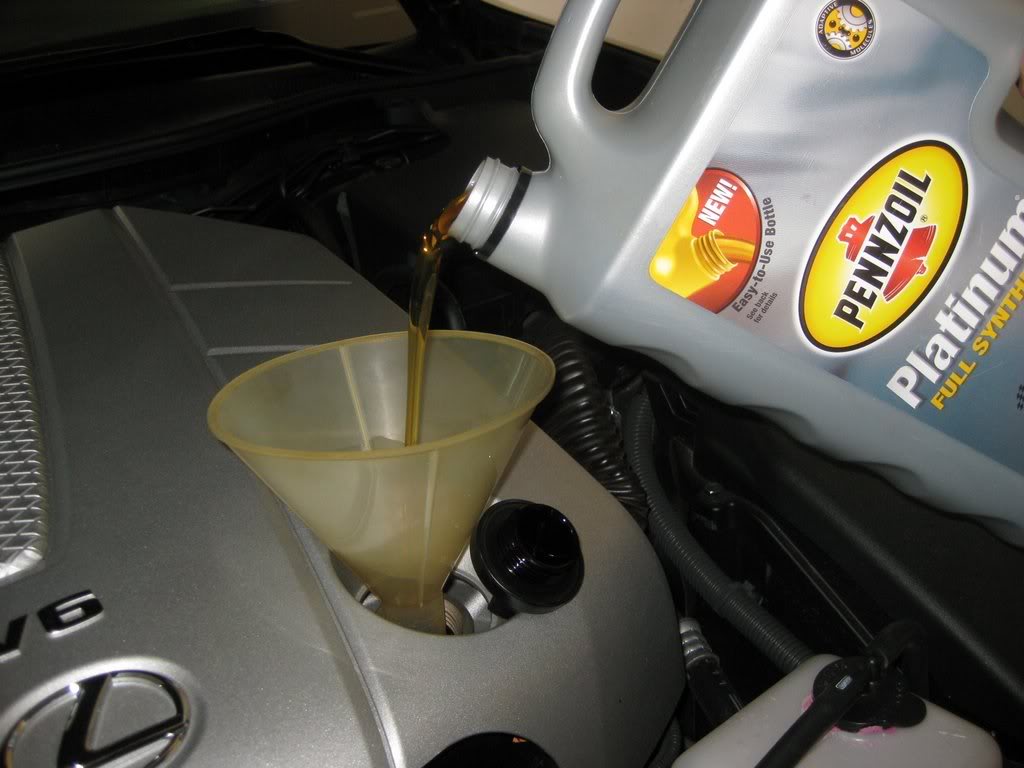
13. Pour in the correct amount of oil (check your manual). I used Pennzoil Platinum Full Synthetic. I went with 5w-20 which is per the TSIB for the 2GR engine.
14. Pull out the drained oil pan from under the car. Drive the car for a bit, bring it back, check for leaks.
15. You can pour the used oil into old oil containers and recycle it (most auto parts stores accept used oil for free, or check your local city recycling center).
16. Reset the oil change on the maintenace system in the NAV and/or on the dash (they are separate systems). I usually use the one in the NAV display.
Last edited by Arantant; 01-30-09 at 08:47 PM.
The following 7 users liked this post by Arantant:
93SCMax (03-11-17),
AlexDev (07-17-19),
Antwon2014 (01-05-20),
chavie (01-30-17),
Farqui (01-19-18),
and 2 others liked this post.
Trending Topics
01-30-09, 08:52 PM
#10
Lexus Fanatic

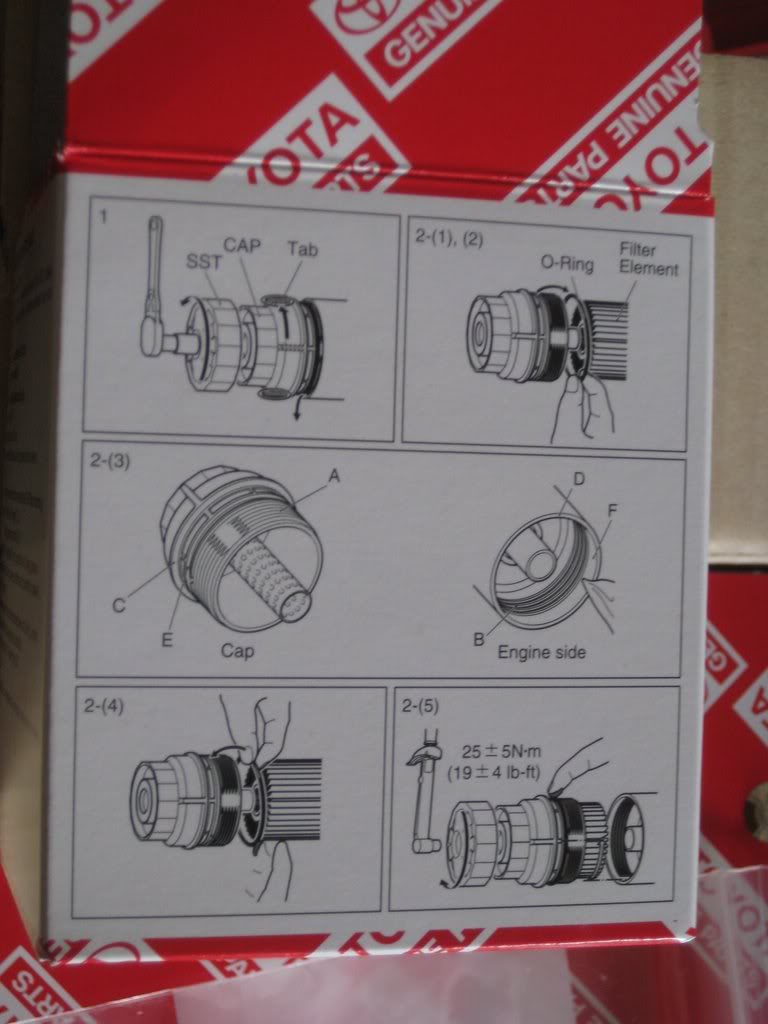
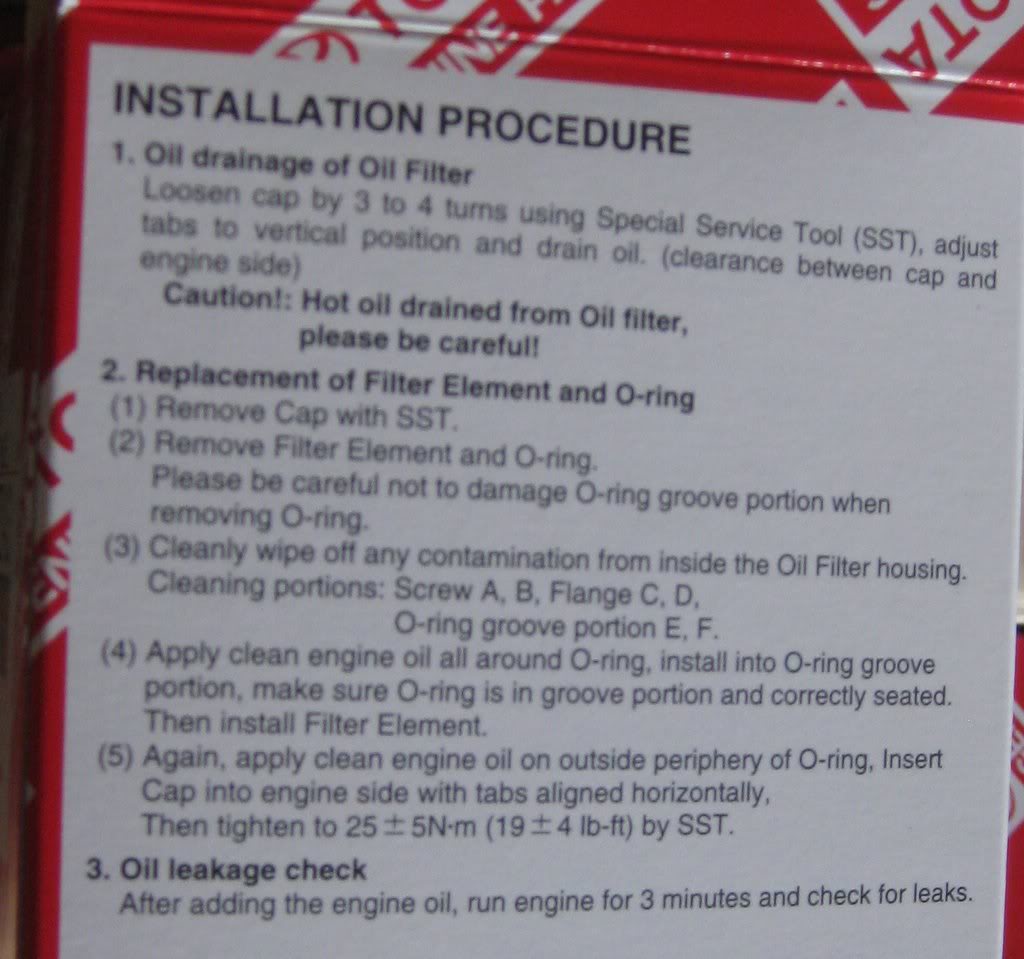
pdf file of instructions above. posted for posterity.
you'll also need the Assenmacher TOY640 wrench cap. for about $22 shipped.
you'll also need the Assenmacher TOY640 wrench cap. for about $22 shipped.
Last edited by dunnojack; 11-17-10 at 04:34 PM.

The following users liked this post:
skur (05-21-22)
