LS430 Quad HID Projector Retrofit - w/ Progress Pics
 12-05-10, 08:13 PM
#1
Ok, first off there are a few retrofit how to's on the site. And this isn't meant to be a full DIY. But I might as well add some more information to the sites database for future searches. I will try to note some useful details along the way.
Jeffsai's projectgs.com had excellent information I've read in the past, but the site has been down for a while.
I won't go into getting the headlights apart. I followed BP_VVt-i's post on opening and painting.
https://www.clublexus.com/forums/gs-...rn-signal.html
I've had the Luxurymods brackets and LS430 projectors for almost a year in a box. Just so many other projects and responsibilities take up so much time. Mr Jokester's recent LS430 Retro posting got me motivated to go ahead and get it over with.
https://www.clublexus.com/forums/gs-...s-bracket.html
So before we start, thank you's go out to:
BP_VVt-i for the DIY
Mr Jokester for the DIY
JeffTsai for the previous DIY's
LilCelisor for getting me the LS430 Projectors
Tony @ LuxuryMod's for the LS430 Brackets
Matt @ TheRetrofitSource for all the other HID parts I'm using
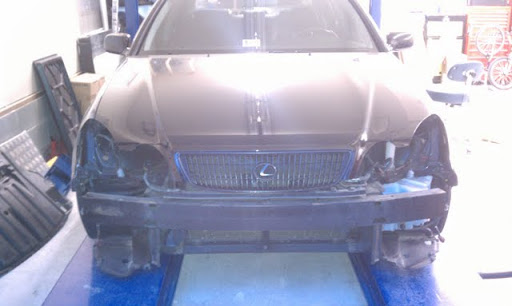
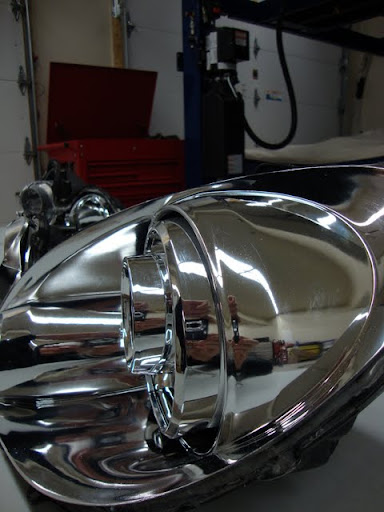
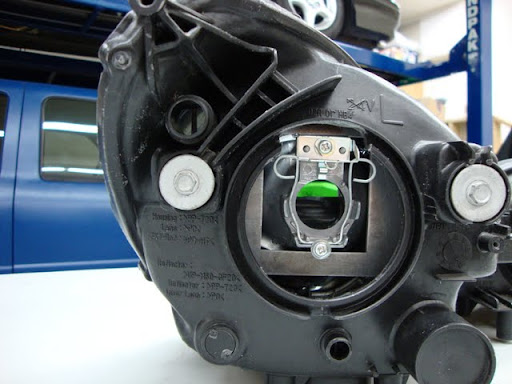
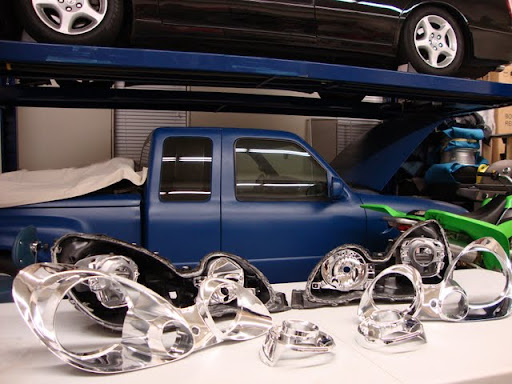
Bumper off / Lights out:
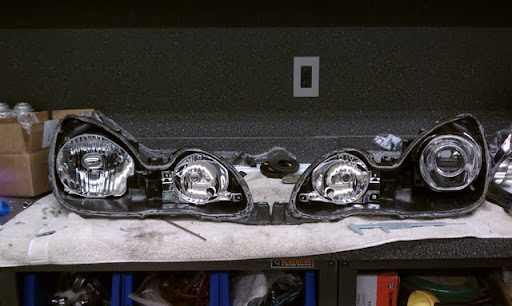
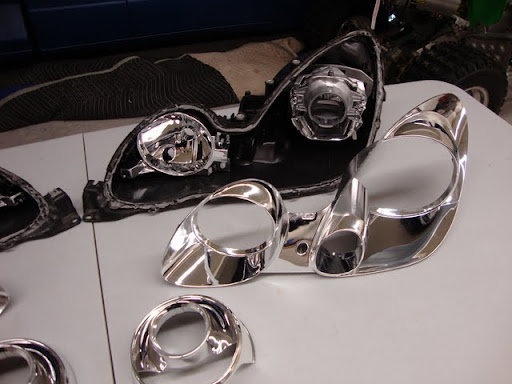
Headlights Opened:
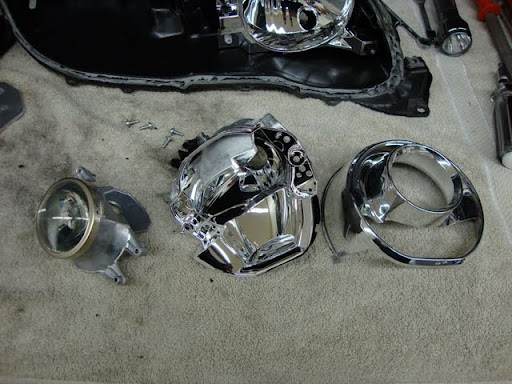
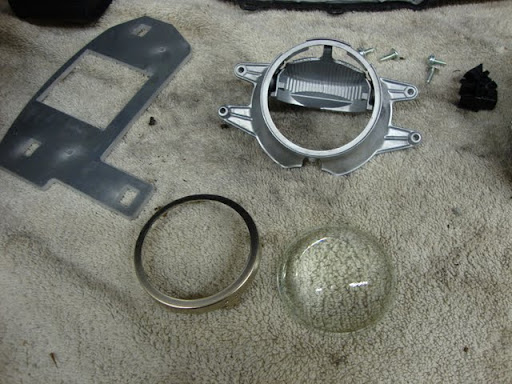
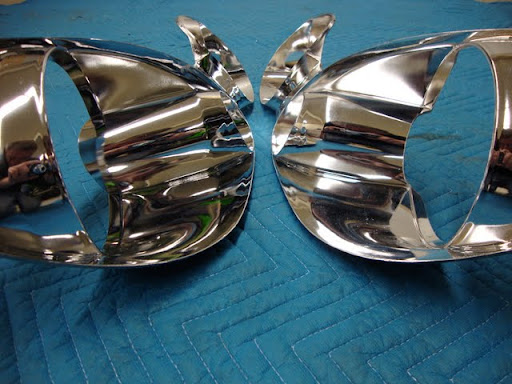
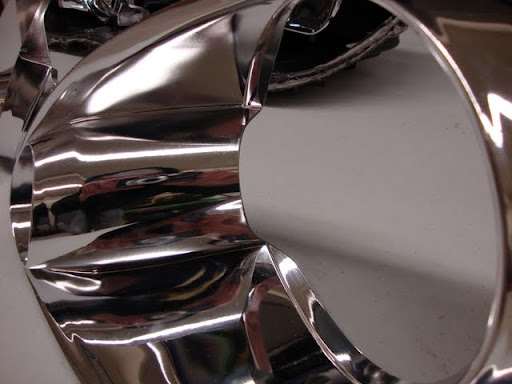
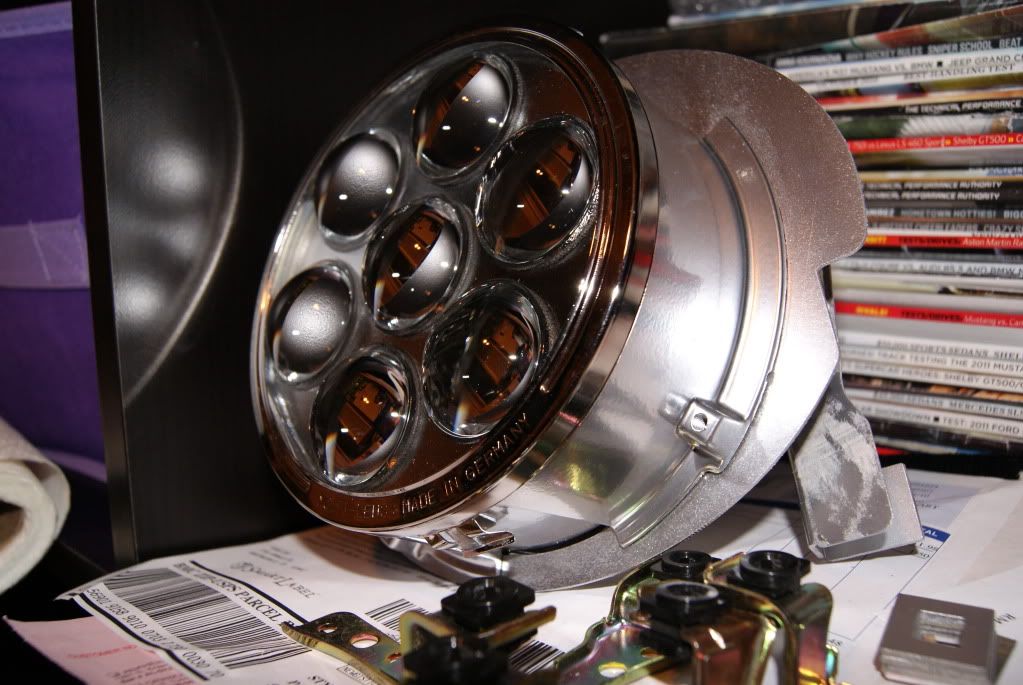
Here is a LS430 taken apart into its 3 main pieces:
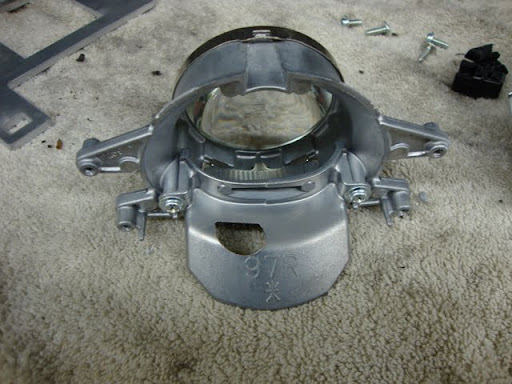
Here is the Cutoff shield inside the housing:
Here is the front with the Lens and Retainer Ring removed:
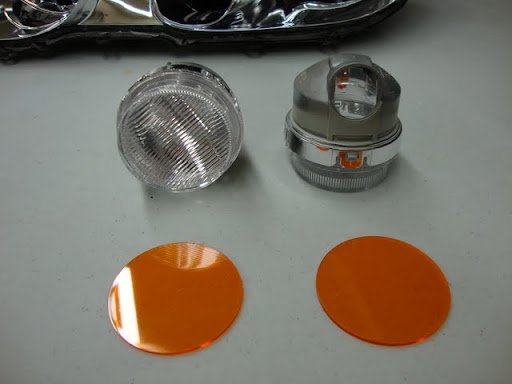
Here are the Turn Signal Housings, the cover snaps off the housing and the orange lenses were removed (old news I know, but here's a pic anyway):
Now some notes on the Luxurymod's Bracket mounting.. Mr Jokester showed using 6/32x3" screws to mount these. I used the same screws as that's what I could find locally at Lowe's. Most chain hardware stores have crappy selection of metric screws. The 6/32 actually slides thru the mounting holes without threading, if you want to source/order the actual size on the web before you begin the retro the actual size of the screws would be 4mm diameter, .7mm thread pitch. Would be mark as a M4x.7, and 3" long would be 76mm, and 80mm long screw would be fine.
But after assembling them there is no slop or play, and the 6/32 work just fine. I would mount them again with these no worries. It's a very sturdy setup indeed.
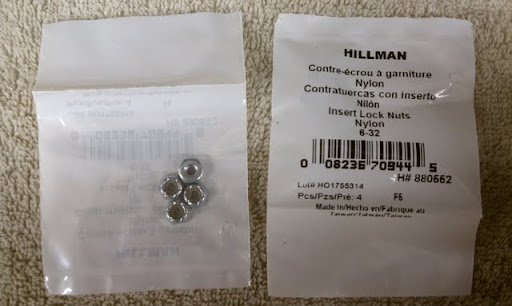
One small thing I did do is use Nylon Lock nuts to eliminate the possibility of any of the nuts ever backing off any due to vibrations.
These are available at Lowe's, part #990552 and are stored in the big blue pull-out small hardware drawers in the store not hanging on the racks where the screws are.
As Mr Jokester mention in his DIY the aluminum LuxuryMod's brackets will bend if you crank down on them to much, you can stop once they snug up nicely and just make sure the are level/square with the housing as this is important for aiming.
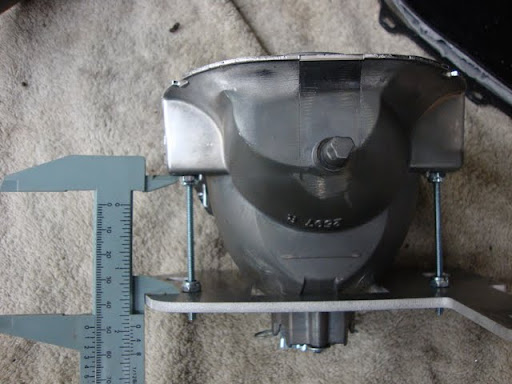
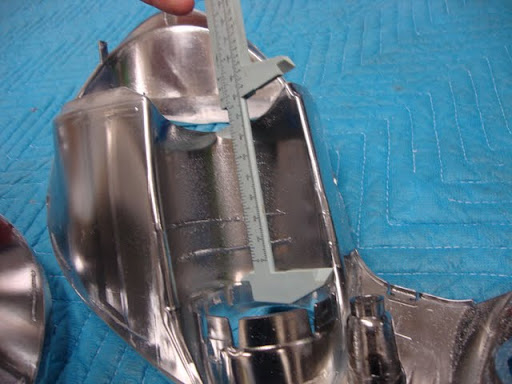
I used a micrometer to measure left and right to make sure they stayed equal as I locked the bolts together to sandwich the bracket to the projector. The equal measurement I got was about 49mm.
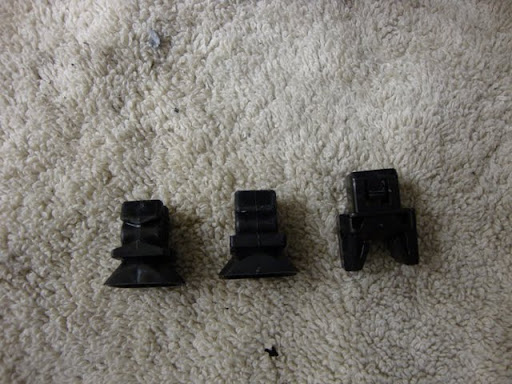
Next up are the snap in leveling tabs you removed from the factory bowls. If you forget to pay attention when you remove them, they are straight cut on one side and V cut on the other. The V face up when you snap them into the bracket. These are made like this to allow movement without binding when adjusting the leveling screws.
Now here is one more good point. Mr Jokester also mentioned the the square snap plug the goes on the bottom 'leg' of the bracket did not fit the hole in the LuxuryMod bracket and he had to file the hole bigger. I had to do the same thing, and the reason is be cause the bracket was designed for the OEM Auto-Leveling feature on some GS's, and in that setup you would have a another identical straight/V plug like the other two, as the Stepper motor threads into them just like a other manual aiming screws. So if you have NON-OEM-HID you too will need to file this hole bigger as there is just a static pivot bolt that the larger square plug snaps to.
Pic from left to right - V(face top) Straight(face bottom) and NON-HID Square Plug:
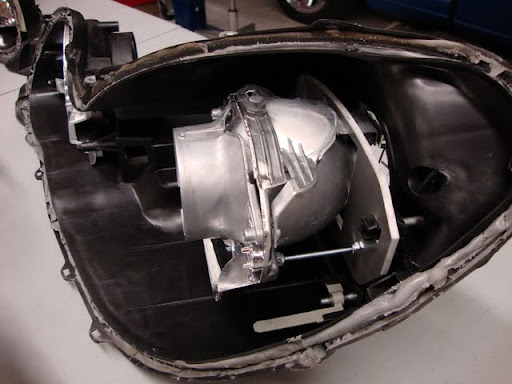
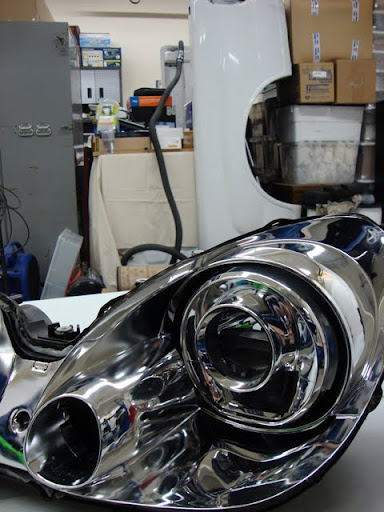
Next is the Assembley mounted in the housing showing up close how the bracket holds it in:

OK, now for some serious cutting. This is what scares off most people, and there is ALOT of cutting/trimming/sanding to do.
If you are going to keep your bezels chrome then you should be even more nervous as one slip and your f'd. If your going to paint the bezels the you have a little more give since you can sand out any nicks or scratches on the surface is you have a mishap.
I am painting the bezels black before it's done so I wanted to keep maximum chrome on the LS430 shroud showing since it will be the only chrome in the housings. I've seen other 430 installs where most all of the deep sides are cut down to leave just the front face of the shroud. This is typically needed to be cut because when aiming the 430 shroud will run into both the top and fender sides of the oem bezels. (as well as the blinker tube of course, thats next)
I elected to trim the oem bezel down in the interference areas instead of trimming the 430 shroud.
Trimming was done with an air die grinder, switching between three attachments, a 3" cut-off wheel, and tapered grinding stone, and a 1.5" sanding wheel. Some people use dremels for these jobs but I hate a dremel, they are way too jumpy and it's harder to cut long straight lines with a tiny little wheels. And air die grinder has more torque, is easier to feather the speed as needed, and doesn't jump around like a little high rpm electric tool will do.
I finish it all off with hand sanding, to smooth out all the curves nicely.
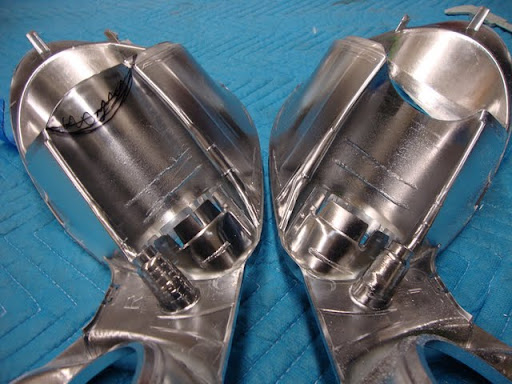
Here is where I trimmed under the top of the bezel instead of cutting of the 430 shroud.

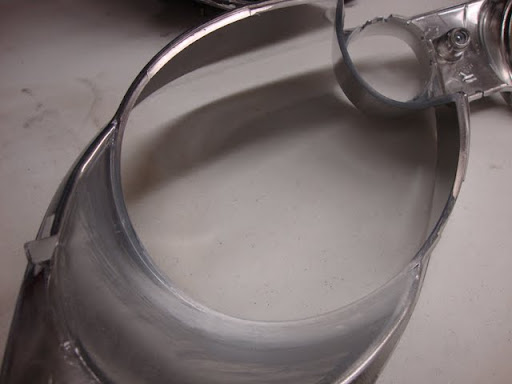
Stock 430 shroud on left, trimmed one on the right (before final sanding):
This shows all the meat that is still left on the top and side by trimming the bezel instead of the shroud and retain full clearance:
Ok, so moving on to the BLINKER TUBES!
After getting the first blinker tube to clear the shroud properly, it was easy to duplicate on the other side. Here's a few tips that I used.
Tip 1) I put tape behind the already cut tube and marked the curve with a sharpie. Then I cut the tape on that line with a razor.
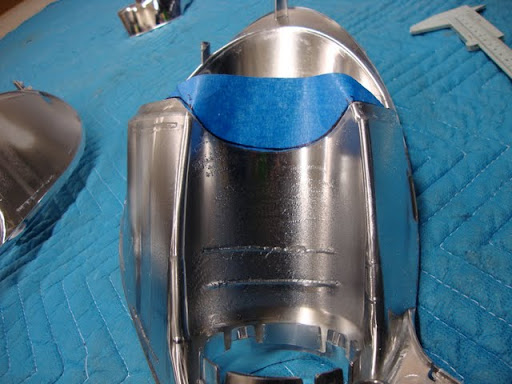
Tip 2) Then I stuck the cut tape onto the to-be-cut tube and traced it on, this will give a close range to start with, I cut a little shy of the line then trimmed it to match, taking measurements along the way:
You are cutting a lot off this tube, close to an 1.5".. For the shroud to clear thru the full leveling range + a little extra clearance it left me with approx 84mm to the lowest point of the curve:
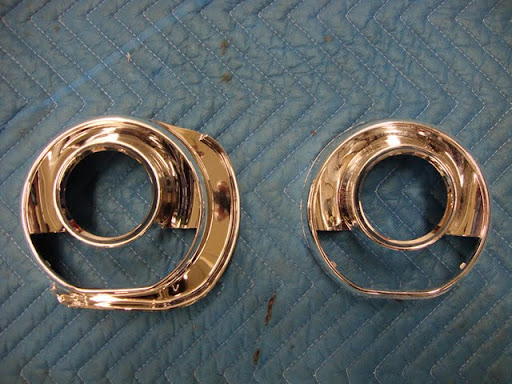
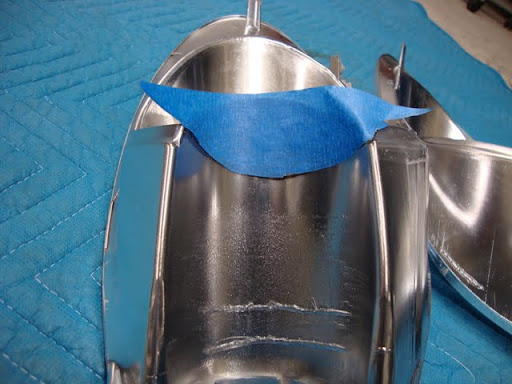
Here is an uncut vs cut bezel to relate how much has to go:
With a little bit of smoothing done, it isn't looking to bad so far:
The rear of the housing needed some clearance for the bulb holder, it was real close to not needing it but as you adjusted the aiming screws it would rub it, should still easily get a cap over it though:
Jeffsai's projectgs.com had excellent information I've read in the past, but the site has been down for a while.
I won't go into getting the headlights apart. I followed BP_VVt-i's post on opening and painting.
https://www.clublexus.com/forums/gs-...rn-signal.html
I've had the Luxurymods brackets and LS430 projectors for almost a year in a box. Just so many other projects and responsibilities take up so much time. Mr Jokester's recent LS430 Retro posting got me motivated to go ahead and get it over with.
https://www.clublexus.com/forums/gs-...s-bracket.html
So before we start, thank you's go out to:
BP_VVt-i for the DIY
Mr Jokester for the DIY
JeffTsai for the previous DIY's
LilCelisor for getting me the LS430 Projectors
Tony @ LuxuryMod's for the LS430 Brackets
Matt @ TheRetrofitSource for all the other HID parts I'm using
Bumper off / Lights out:
Headlights Opened:
Here is a LS430 taken apart into its 3 main pieces:
Here is the Cutoff shield inside the housing:
Here is the front with the Lens and Retainer Ring removed:
Here are the Turn Signal Housings, the cover snaps off the housing and the orange lenses were removed (old news I know, but here's a pic anyway):
Now some notes on the Luxurymod's Bracket mounting.. Mr Jokester showed using 6/32x3" screws to mount these. I used the same screws as that's what I could find locally at Lowe's. Most chain hardware stores have crappy selection of metric screws. The 6/32 actually slides thru the mounting holes without threading, if you want to source/order the actual size on the web before you begin the retro the actual size of the screws would be 4mm diameter, .7mm thread pitch. Would be mark as a M4x.7, and 3" long would be 76mm, and 80mm long screw would be fine.
But after assembling them there is no slop or play, and the 6/32 work just fine. I would mount them again with these no worries. It's a very sturdy setup indeed.
One small thing I did do is use Nylon Lock nuts to eliminate the possibility of any of the nuts ever backing off any due to vibrations.
These are available at Lowe's, part #990552 and are stored in the big blue pull-out small hardware drawers in the store not hanging on the racks where the screws are.
As Mr Jokester mention in his DIY the aluminum LuxuryMod's brackets will bend if you crank down on them to much, you can stop once they snug up nicely and just make sure the are level/square with the housing as this is important for aiming.
I used a micrometer to measure left and right to make sure they stayed equal as I locked the bolts together to sandwich the bracket to the projector. The equal measurement I got was about 49mm.
Next up are the snap in leveling tabs you removed from the factory bowls. If you forget to pay attention when you remove them, they are straight cut on one side and V cut on the other. The V face up when you snap them into the bracket. These are made like this to allow movement without binding when adjusting the leveling screws.
Now here is one more good point. Mr Jokester also mentioned the the square snap plug the goes on the bottom 'leg' of the bracket did not fit the hole in the LuxuryMod bracket and he had to file the hole bigger. I had to do the same thing, and the reason is be cause the bracket was designed for the OEM Auto-Leveling feature on some GS's, and in that setup you would have a another identical straight/V plug like the other two, as the Stepper motor threads into them just like a other manual aiming screws. So if you have NON-OEM-HID you too will need to file this hole bigger as there is just a static pivot bolt that the larger square plug snaps to.
Pic from left to right - V(face top) Straight(face bottom) and NON-HID Square Plug:
Next is the Assembley mounted in the housing showing up close how the bracket holds it in:
OK, now for some serious cutting. This is what scares off most people, and there is ALOT of cutting/trimming/sanding to do.
If you are going to keep your bezels chrome then you should be even more nervous as one slip and your f'd. If your going to paint the bezels the you have a little more give since you can sand out any nicks or scratches on the surface is you have a mishap.
I am painting the bezels black before it's done so I wanted to keep maximum chrome on the LS430 shroud showing since it will be the only chrome in the housings. I've seen other 430 installs where most all of the deep sides are cut down to leave just the front face of the shroud. This is typically needed to be cut because when aiming the 430 shroud will run into both the top and fender sides of the oem bezels. (as well as the blinker tube of course, thats next)
I elected to trim the oem bezel down in the interference areas instead of trimming the 430 shroud.
Trimming was done with an air die grinder, switching between three attachments, a 3" cut-off wheel, and tapered grinding stone, and a 1.5" sanding wheel. Some people use dremels for these jobs but I hate a dremel, they are way too jumpy and it's harder to cut long straight lines with a tiny little wheels. And air die grinder has more torque, is easier to feather the speed as needed, and doesn't jump around like a little high rpm electric tool will do.
I finish it all off with hand sanding, to smooth out all the curves nicely.
Here is where I trimmed under the top of the bezel instead of cutting of the 430 shroud.
Stock 430 shroud on left, trimmed one on the right (before final sanding):
This shows all the meat that is still left on the top and side by trimming the bezel instead of the shroud and retain full clearance:
Ok, so moving on to the BLINKER TUBES!
After getting the first blinker tube to clear the shroud properly, it was easy to duplicate on the other side. Here's a few tips that I used.
Tip 1) I put tape behind the already cut tube and marked the curve with a sharpie. Then I cut the tape on that line with a razor.
Tip 2) Then I stuck the cut tape onto the to-be-cut tube and traced it on, this will give a close range to start with, I cut a little shy of the line then trimmed it to match, taking measurements along the way:
You are cutting a lot off this tube, close to an 1.5".. For the shroud to clear thru the full leveling range + a little extra clearance it left me with approx 84mm to the lowest point of the curve:
Here is an uncut vs cut bezel to relate how much has to go:
With a little bit of smoothing done, it isn't looking to bad so far:
The rear of the housing needed some clearance for the bulb holder, it was real close to not needing it but as you adjusted the aiming screws it would rub it, should still easily get a cap over it though:
Last edited by 99 GS3; 12-05-10 at 08:35 PM.
 12-05-10, 08:14 PM
#2
Everything cut, trimmed, and sanded to fit:
Well, that's it for today. It's coming along nicely, but this is defiantly a pretty involved undertaking so I hope this helps others who on are the fence about doing this DIY understand the scope of what all is involved.
The Bi-Xenon's for the high beam location will be up next as soon as I get some free time this week.
 12-05-10, 09:07 PM
#4
Which did you try that were to big? The Infinity FX? That was my initial choice in the beginning.
Size was a huge concern, the smallest I could find were the Morimoto Mini H1, but I chose to go with the next step up the Morimoto Mini D2S. It is a touch bigger than the H1 but I wanted to keep the use of standard D2S bulbs for ultimate flexibility in bulb choices, and achieve the highest bulb performance.
On the aiming, the top underside of the oem bezel is where the shroud would begin to rub on mine, so I shaved the bezel flat. And you will never see it as your always looking down at the lens, not looking up under it on a lowered car.
 12-05-10, 09:17 PM
#7
If using the LuxuryMod's bracket for the Q45, the tab mounting will be very similar. And clearance on the blinker tube will be similar as well.
I initially wanted the Q45's but the prices were outrageous at the time.
POST UP! I'd love to see some more retro work thru's posted.
I initially wanted the Q45's but the prices were outrageous at the time.
POST UP! I'd love to see some more retro work thru's posted.
Trending Topics


 12-06-10, 01:38 AM
#14
Which did you try that were to big? The Infinity FX? That was my initial choice in the beginning.
Size was a huge concern, the smallest I could find were the Morimoto Mini H1, but I chose to go with the next step up the Morimoto Mini D2S. It is a touch bigger than the H1 but I wanted to keep the use of standard D2S bulbs for ultimate flexibility in bulb choices, and achieve the highest bulb performance.
On the aiming, the top underside of the oem bezel is where the shroud would begin to rub on mine, so I shaved the bezel flat. And you will never see it as your always looking down at the lens, not looking up under it on a lowered car.
Size was a huge concern, the smallest I could find were the Morimoto Mini H1, but I chose to go with the next step up the Morimoto Mini D2S. It is a touch bigger than the H1 but I wanted to keep the use of standard D2S bulbs for ultimate flexibility in bulb choices, and achieve the highest bulb performance.
On the aiming, the top underside of the oem bezel is where the shroud would begin to rub on mine, so I shaved the bezel flat. And you will never see it as your always looking down at the lens, not looking up under it on a lowered car.
http://www.theretrofitsource.com/pro...products_id=92
As for the rubbing on the bezel, I have plenty of clearance above mine. I have another idea though, but I'm gonna check the back side first.