01 gs430 motor mount replacement attempt
 10-11-10, 05:03 PM
#46


 10-11-10, 09:25 PM
#47
Pole Position
Thread Starter

Join Date: May 2009
Location: CA Bay Area
Posts: 218
Likes: 0
Received 0 Likes
on
0 Posts
10-11-10, 09:52 PM
#48
Pole Position
Thread Starter
Join Date: May 2009
Location: CA Bay Area
Posts: 218
Likes: 0
Received 0 Likes
on
0 Posts
YES.! I finally did it. I used your method and it worked like a charm! Thanks again!
I was doing Daizen front suspension bushings primarily and had everything taken apart there (lower control arms, knuckle and etc.) so it made it even easier. I dropped the crossmember like you did and was able to access nuts with cut wrenches and pipe for jackstand over it. Worked perfect! I had steering rack disconnected from crossmember too to avoid putting too much pressure on lines and etc and I just hang it on wires to the engine.
For others if you plan on dropping cross member do not forget to disconnect ps wire loop attached to it on the passenger side so that crossmember can go down even lower and not to damage lines. You can easily access this screw from the engine bay with few extensions.
I changed tranny mount also, changed oil and tomorrow just have to take it for alignment.
Thanks again everyone!!!
P.S. I couldnt find torque for the crossmember to body (for nuts) anywhere so I just kept playing with my torque ranch to see how tight it is before loosening it and it was anywhere form 130 to 140 foot/pound, which is what I used as a reference.
Last edited by krispl; 10-11-10 at 09:56 PM.

 01-15-11, 08:23 PM
#51

Both left and right mounts are the same.
As for people having problems with the middle nut, you could have avoided it. When I did mine years ago, I unbolted the 4 nuts that holds the bracket to the engine. Its torqued to 27ftlbs so it doesn't it's not going to be tight as say a crank pulley bolt. Yes access to the bolt can be a problem, but if you got the right tools, then it should be a breeze. Impact swivel and extension helps tremendously. I got mine did in little over an hour.
As for people having problems with the middle nut, you could have avoided it. When I did mine years ago, I unbolted the 4 nuts that holds the bracket to the engine. Its torqued to 27ftlbs so it doesn't it's not going to be tight as say a crank pulley bolt. Yes access to the bolt can be a problem, but if you got the right tools, then it should be a breeze. Impact swivel and extension helps tremendously. I got mine did in little over an hour.
01-15-11, 09:03 PM
#52
Both left and right mounts are the same.
As for people having problems with the middle nut, you could have avoided it. When I did mine years ago, I unbolted the 4 nuts that holds the bracket to the engine. Its torqued to 27ftlbs so it doesn't it's not going to be tight as say a crank pulley bolt. Yes access to the bolt can be a problem, but if you got the right tools, then it should be a breeze. Impact swivel and extension helps tremendously. I got mine did in little over an hour.
As for people having problems with the middle nut, you could have avoided it. When I did mine years ago, I unbolted the 4 nuts that holds the bracket to the engine. Its torqued to 27ftlbs so it doesn't it's not going to be tight as say a crank pulley bolt. Yes access to the bolt can be a problem, but if you got the right tools, then it should be a breeze. Impact swivel and extension helps tremendously. I got mine did in little over an hour.

 BTW are the headers just rotting a hole in your eyes by sitting there uninstalled? Mine are.
01-17-11, 01:12 PM
BTW are the headers just rotting a hole in your eyes by sitting there uninstalled? Mine are.
01-17-11, 01:12 PM
#55
nope, put them in a box with all my other current projects. out of site out of mind as they say. damn i forgot bout the header gaskets (they not valve cover gaskets are you said) got the part # for them by any chance and how much were they?
01-17-11, 01:43 PM
#56
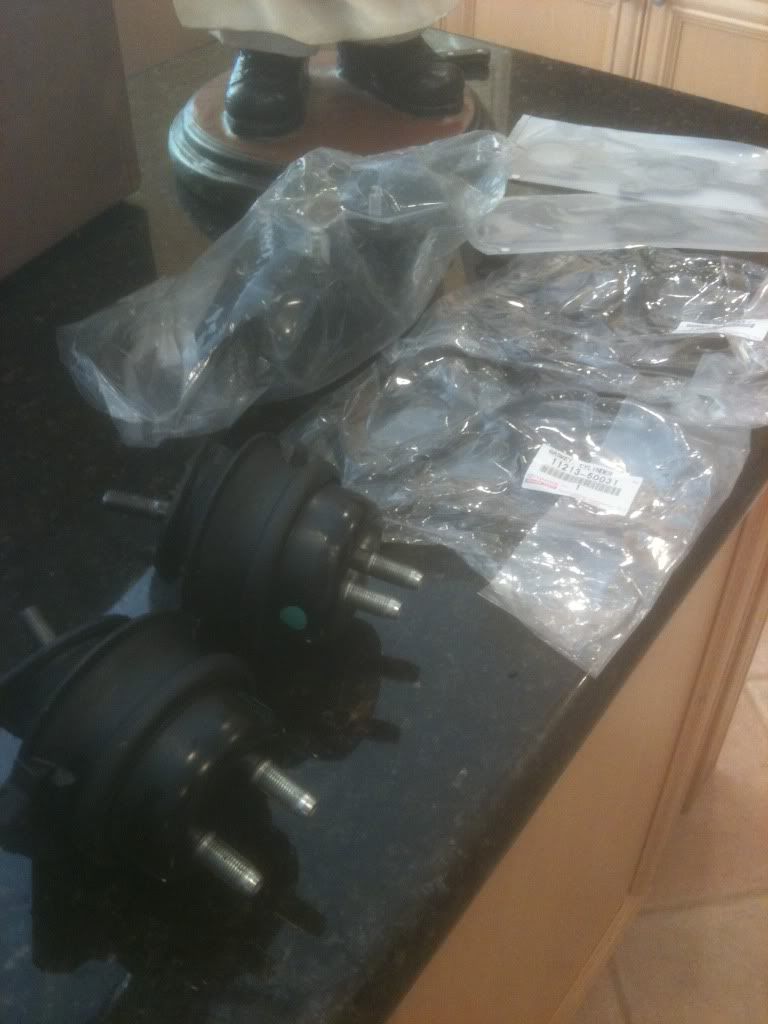
hahaha didnt even notice it. it blends in with the granite fairly well...
nope, put them in a box with all my other current projects. out of site out of mind as they say. damn i forgot bout the header gaskets (they not valve cover gaskets are you said) got the part # for them by any chance and how much were they?
nope, put them in a box with all my other current projects. out of site out of mind as they say. damn i forgot bout the header gaskets (they not valve cover gaskets are you said) got the part # for them by any chance and how much were they?
Part number for Exhaust manifold gaskets:
17173-50021
17173-50021
$15.93 each.
When are you planing on installing the headers and motor mounts?
01-17-11, 01:53 PM
#57
If you look closely at the first bag next to the engine mounts it says "cylinder, gasket". ie. Valve cover gasket, i did the drivers side yesterday so it wouldn't leak onto my shiny new headers.
Part number for Exhaust manifold gaskets:
17173-50021
17173-50021
$15.93 each.
When are you planing on installing the headers and motor mounts?
Part number for Exhaust manifold gaskets:
17173-50021
17173-50021
$15.93 each.
When are you planing on installing the headers and motor mounts?
i dunno when i will do them, probably never along with all my other million projects
04-02-11, 05:59 PM
#58
Racer
Welp, I was not successful removing my motor mounts. The transmission mount was ridiculously easy.
I dropped the crossmember while replacing my front springs, but I could not budge the drivers side top nut. I couldn't even get a wrench on the passenger side.
I do not want to let the dealer do this. Every time they have seen my car (all of twice since 2004), something comes back missing or broken.
04-18-11, 05:39 PM
#59
Pole Position
Thread Starter
Join Date: May 2009
Location: CA Bay Area
Posts: 218
Likes: 0
Received 0 Likes
on
0 Posts
[QUOTE=jonathancl;6277438]Welp, I was not successful removing my motor mounts. The transmission mount was ridiculously easy.
I dropped the crossmember while replacing my front springs, but I could not budge the drivers side top nut. I couldn't even get a wrench on the passenger side.
I do not want to let the dealer do this. Every time they have seen my car (all of twice since 2004), something comes back missing or broken.[/QUO
I did them when I was doing my Daizen busihings and when I had my crossmember loosened. I basically dropped it with engine obviously secured by a jack and piece of wood block. Once I lowered crossmember I had room to put 'custom' 17 wrench in there and then pipe over it for more leverage. That's it. It was a ***** though.......
04-18-11, 09:35 PM
#60
As for people having problems with the middle nut, you could have avoided it. When I did mine years ago, I unbolted the 4 nuts that holds the bracket to the engine. Its torqued to 27ftlbs so it doesn't it's not going to be tight as say a crank pulley bolt. Yes access to the bolt can be a problem, but if you got the right tools, then it should be a breeze. Impact swivel and extension helps tremendously. I got mine did in little over an hour.