Evaporator DIY w/ Pics
 08-08-10, 07:37 AM
#1
Pole Position
Thread Starter
Let me first start by saying that I am not a mechanic by trade. I enjoy working on my car and learning how it works, so to do this, I just start taking my car apart to fix it. If I say something incorrect in here, please feel free to correct me, although I am pretty sure I am spot on with this write up. I will just share some information that I have come across when dealing with this issue with my car to hopefully save you guys some trouble and time.
Evaporator DIY
Tools:
Phillips head screwdriver (short and long shaft)
Ratchet set (10mm, 12mm, etc...)
Flat head screwdriver
Pliers
AC seals
Freon
AC Gauges w r134a couplers
Electrical tape
HVAC insulation
Camper tape
I would recommend buying a new insulator for your evaporator housing
Vacuum pump
I would also recommend changing your heater core just to do it while its out
Procedure:
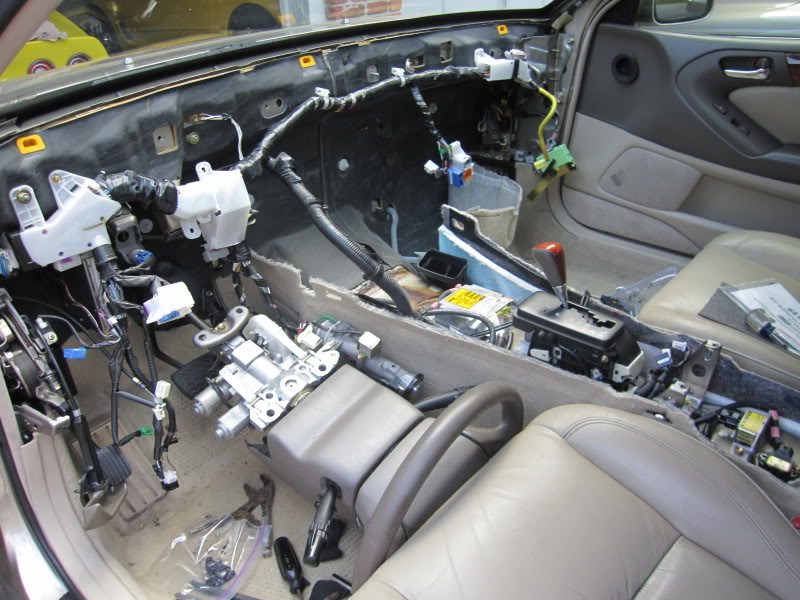
You need to start by taking out your dash obviously. I started by taking off the armrest, centerconsole, kickboards in driver and passenger side floorboard, glove box, amp, cd changer, pieces around the steering wheel containing the hood release/gas release, ignition switch housing, gauge cluster, dropping steering wheel, removing radio/ac gauges, ac vents in center, pulling dash, dash mounting support, blower fan, heater core, evaporator box. Here is how to do all of that. I didnt do it in order because I didnt have the directions, so I will do it as best as I can to put it in the best order

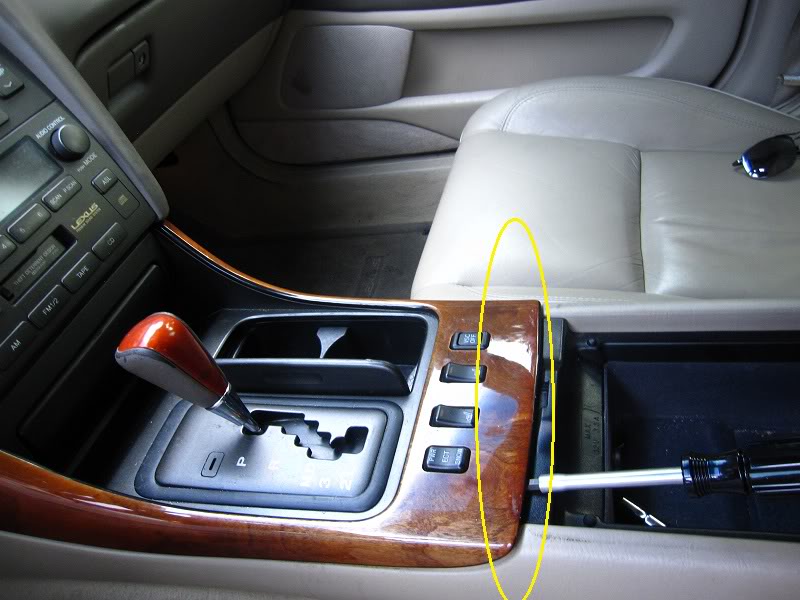
** Tip** when removing the trim, place car in neutral. If you are still having issues, you can pull the ashtray away from the trim.
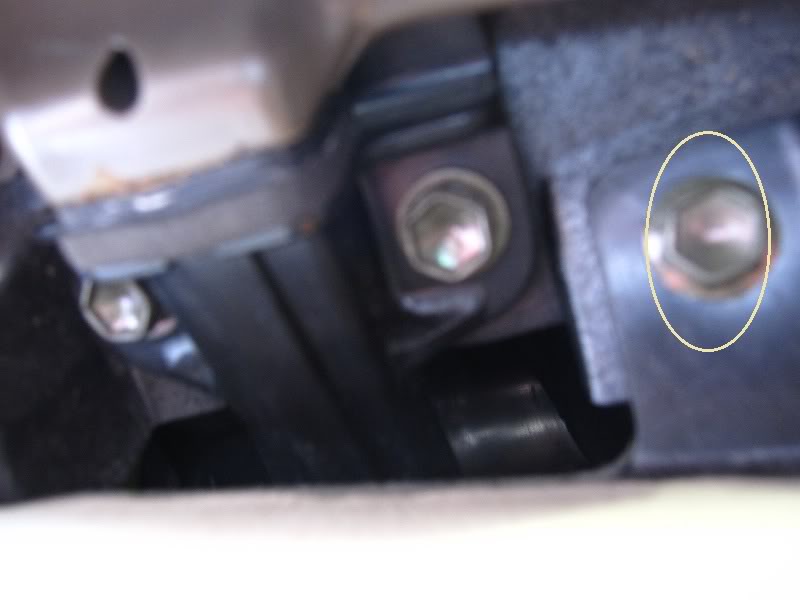
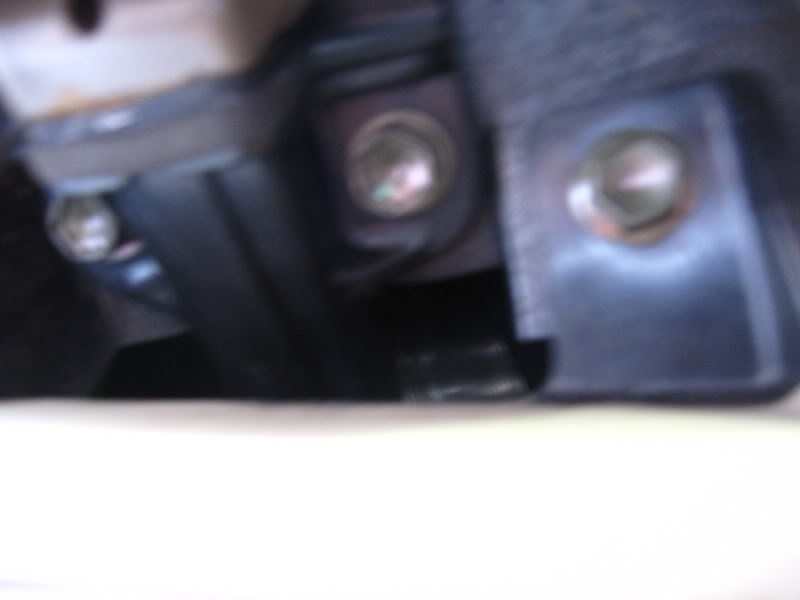
I forgot to circle the two black 10mm bolts and the tab in there, also remove those. They are connected to that silver bracket and right above the screws taht are removed in the photo
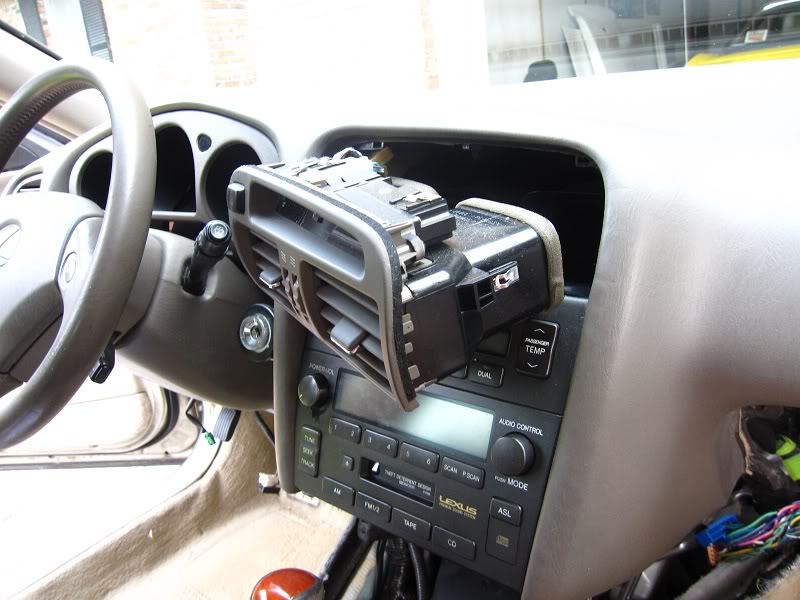
Now your radio should be ready to come out, so remove all the plugs from the rear of the radio and AC cluster and remove.
Passenger side:
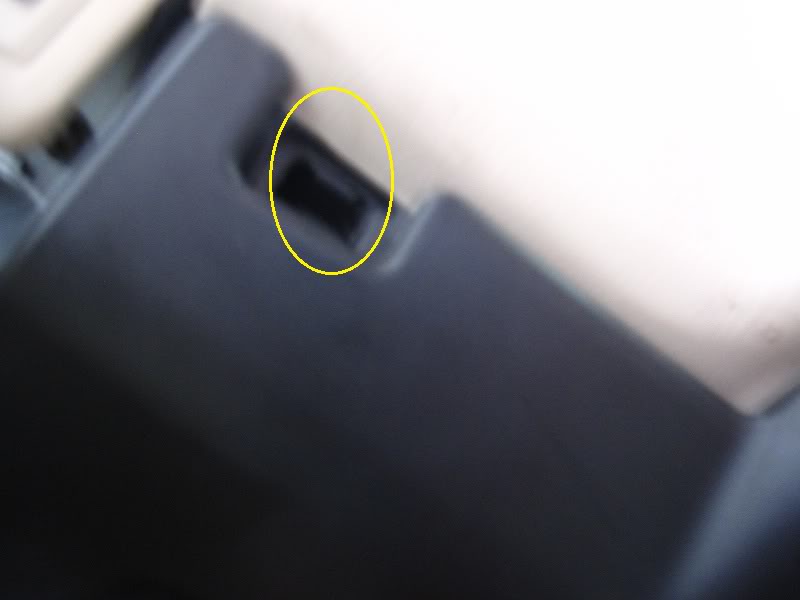
Remove the kickplate by gently and prying it free from brackets
*********************************************************
*********************************************************
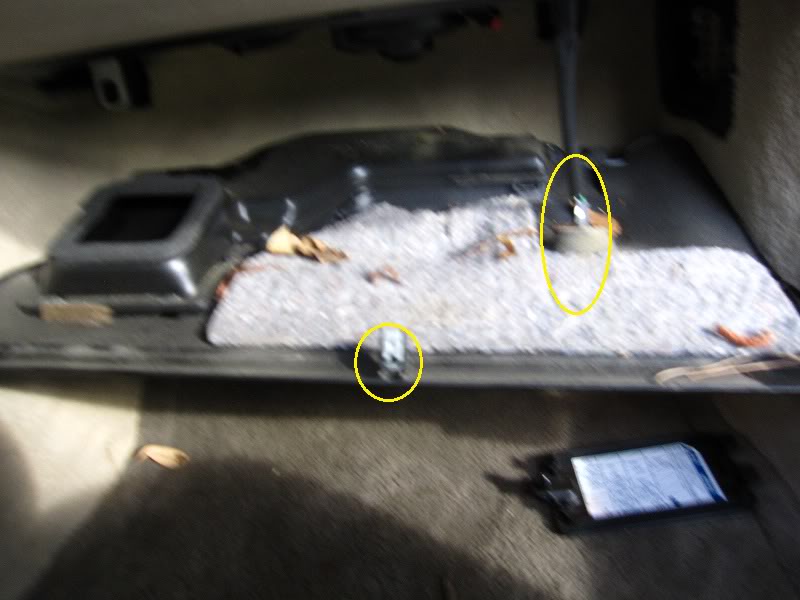
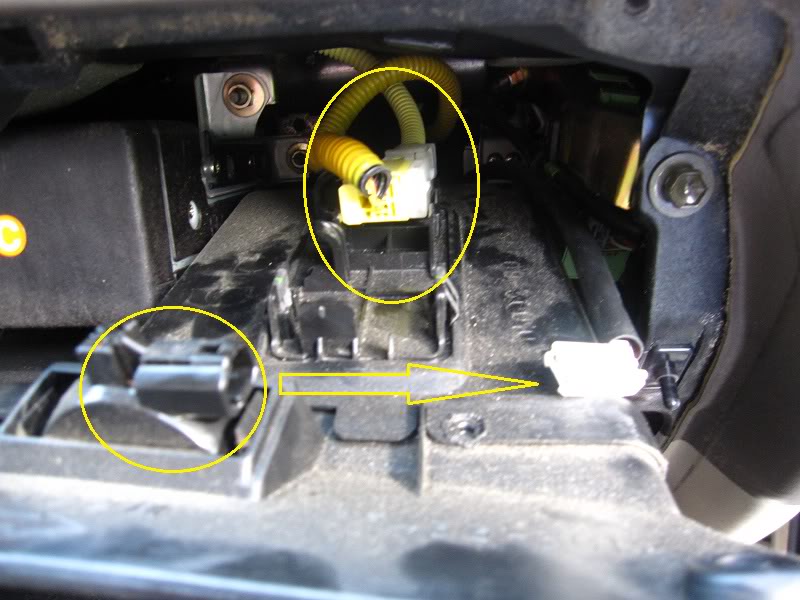
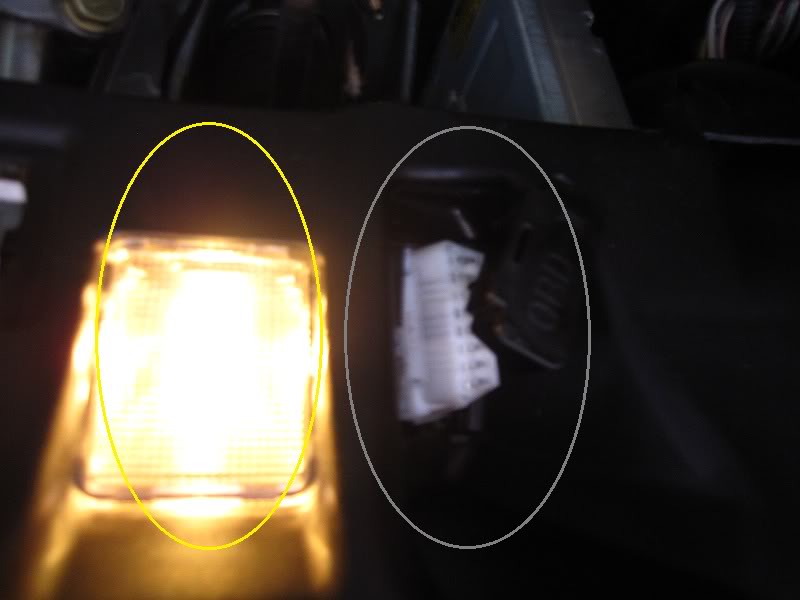
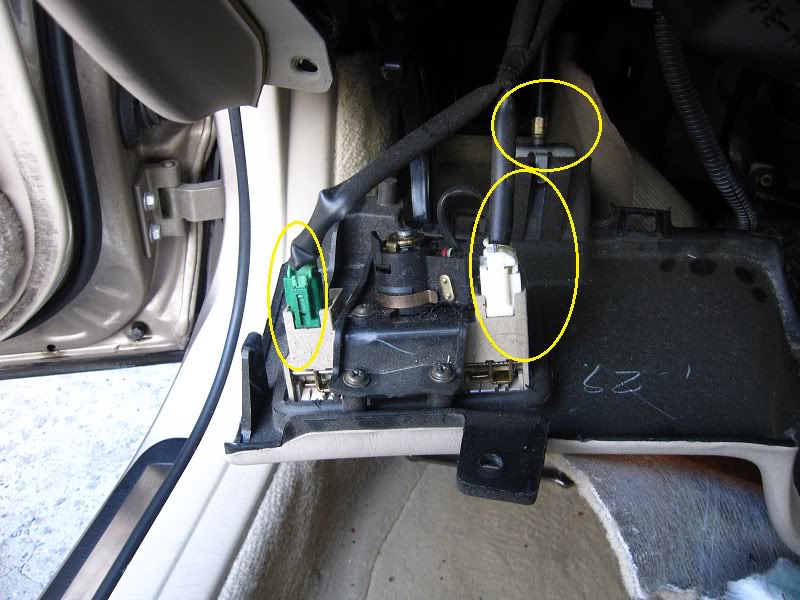
THE YELLOW PLUG IN THE PHOTO IS THE AIRBAG. BEFORE DISCONNECTING THIS HARNESS. DISCONNECT THE BATTERY. I read somewhere to let the car sit for 15 minutes prior to disconnecting... so I did... anything to prevent getting owned in the face with an airbag...
*********************************************************
*********************************************************
Evaporator DIY
Tools:
Phillips head screwdriver (short and long shaft)
Ratchet set (10mm, 12mm, etc...)
Flat head screwdriver
Pliers
AC seals
Freon
AC Gauges w r134a couplers
Electrical tape
HVAC insulation
Camper tape
I would recommend buying a new insulator for your evaporator housing
Vacuum pump
I would also recommend changing your heater core just to do it while its out
Procedure:
You need to start by taking out your dash obviously. I started by taking off the armrest, centerconsole, kickboards in driver and passenger side floorboard, glove box, amp, cd changer, pieces around the steering wheel containing the hood release/gas release, ignition switch housing, gauge cluster, dropping steering wheel, removing radio/ac gauges, ac vents in center, pulling dash, dash mounting support, blower fan, heater core, evaporator box. Here is how to do all of that. I didnt do it in order because I didnt have the directions, so I will do it as best as I can to put it in the best order
** Tip** when removing the trim, place car in neutral. If you are still having issues, you can pull the ashtray away from the trim.
I forgot to circle the two black 10mm bolts and the tab in there, also remove those. They are connected to that silver bracket and right above the screws taht are removed in the photo
Now your radio should be ready to come out, so remove all the plugs from the rear of the radio and AC cluster and remove.
Passenger side:
Remove the kickplate by gently and prying it free from brackets
*********************************************************
*********************************************************
THE YELLOW PLUG IN THE PHOTO IS THE AIRBAG. BEFORE DISCONNECTING THIS HARNESS. DISCONNECT THE BATTERY. I read somewhere to let the car sit for 15 minutes prior to disconnecting... so I did... anything to prevent getting owned in the face with an airbag...
*********************************************************
*********************************************************
 08-08-10, 07:37 AM
#2
Pole Position
Thread Starter
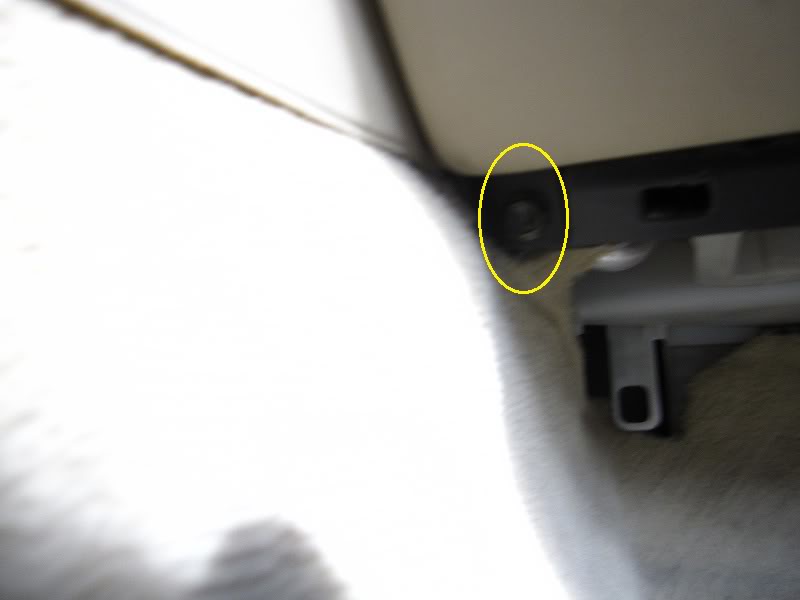
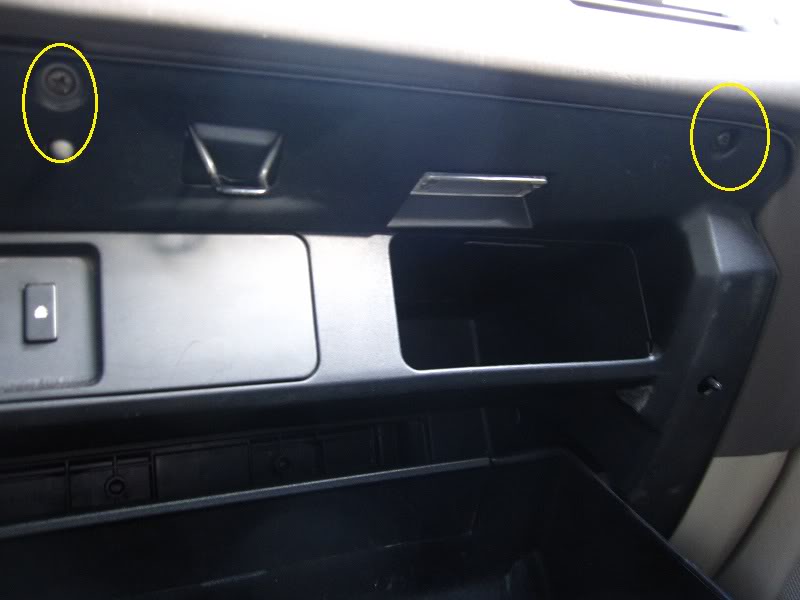
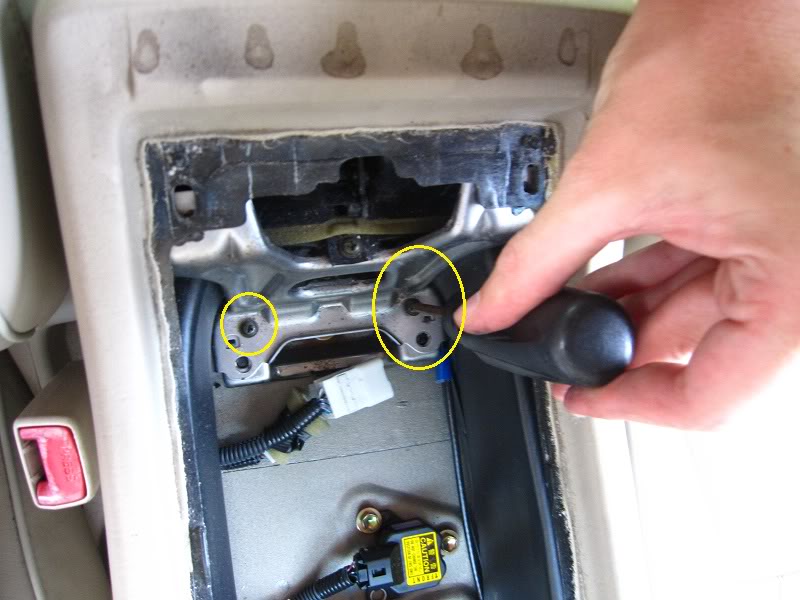
I dont know where the other picture is, but the one shown above is the bottom left of the glove box. There is also another bolt at the bottom right. Remove it, too. Then the glove box should lower and look like this:
Driver Side:


In the picture below, push up and pull the trim towards you. There are no screws in it and should slide right off


Also disconnect the hood latch... etc...
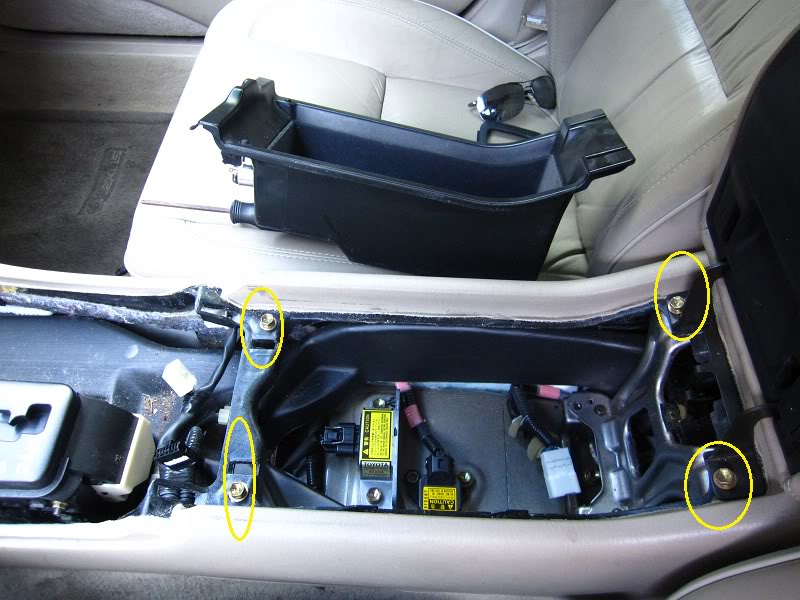
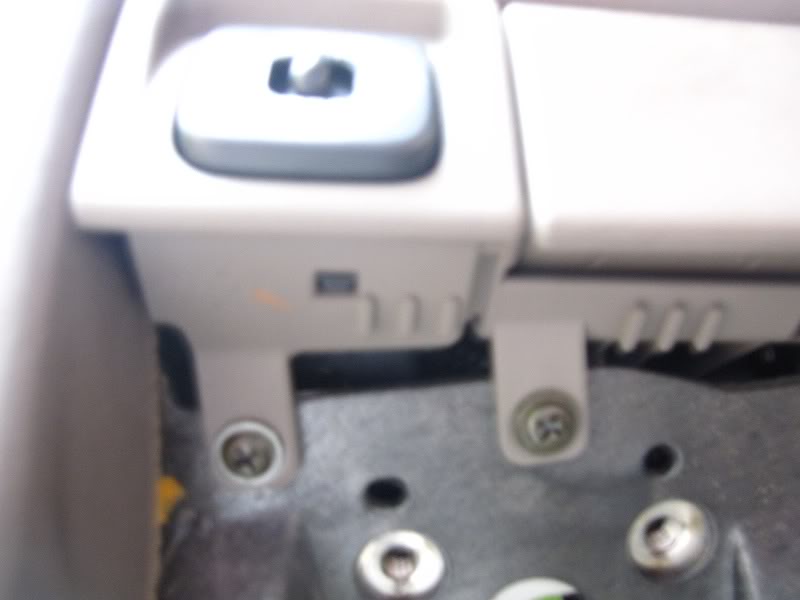
In the picture above, the bolt on the far right has already been removed. Remove the other two bolts on the left to release the parking break handle
Last edited by dcz; 08-08-10 at 07:47 AM.
08-08-10, 07:38 AM
#3
Pole Position
Thread Starter
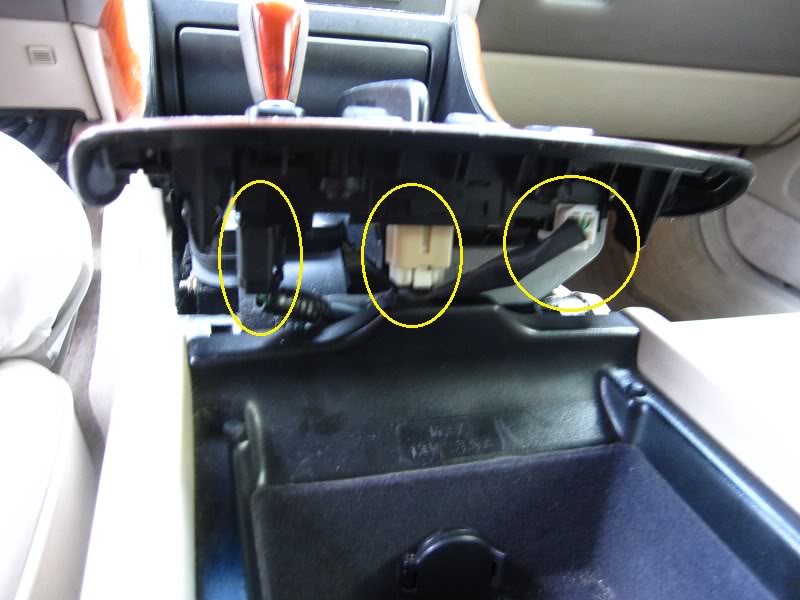
Besides the two screws in this photo there is one more holding the part in that, if looking at the photo, would be below these two and centered.
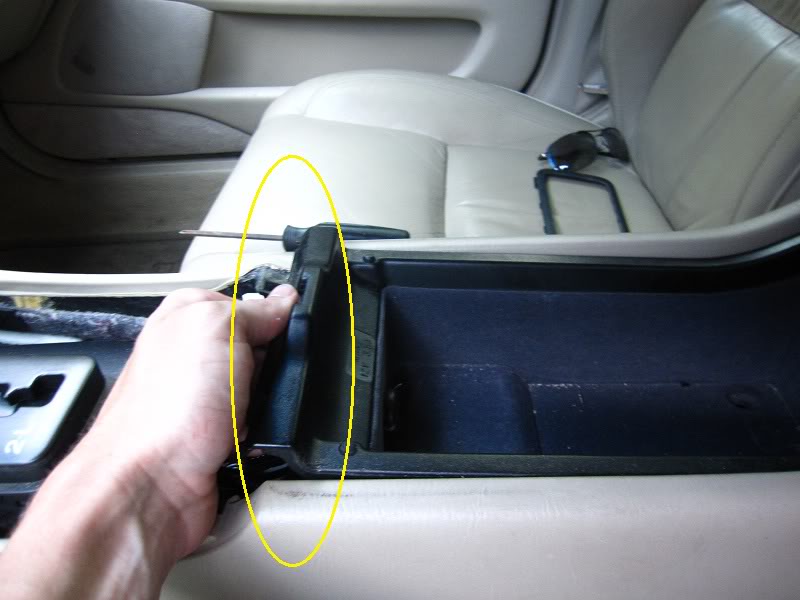
Remove this screw and remove center console.
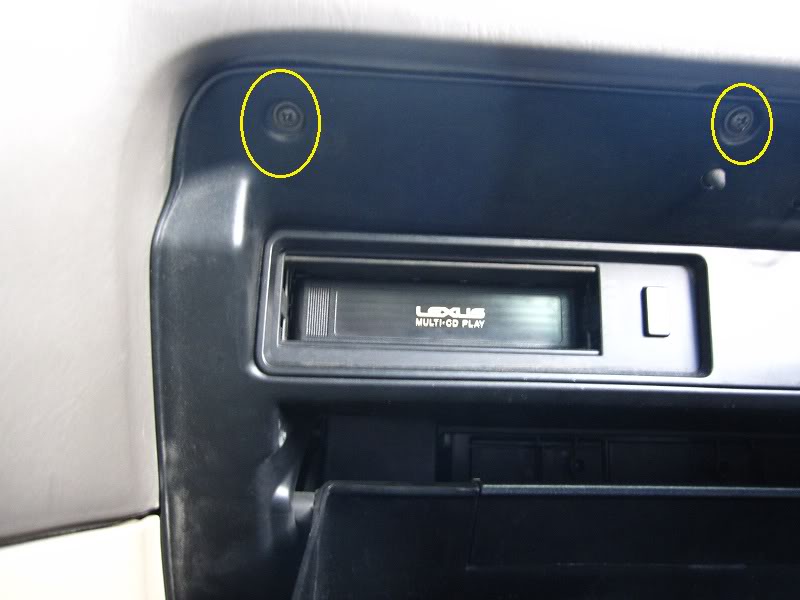
I dont have a picture, but remove the three bolts on the CD changer and remove.

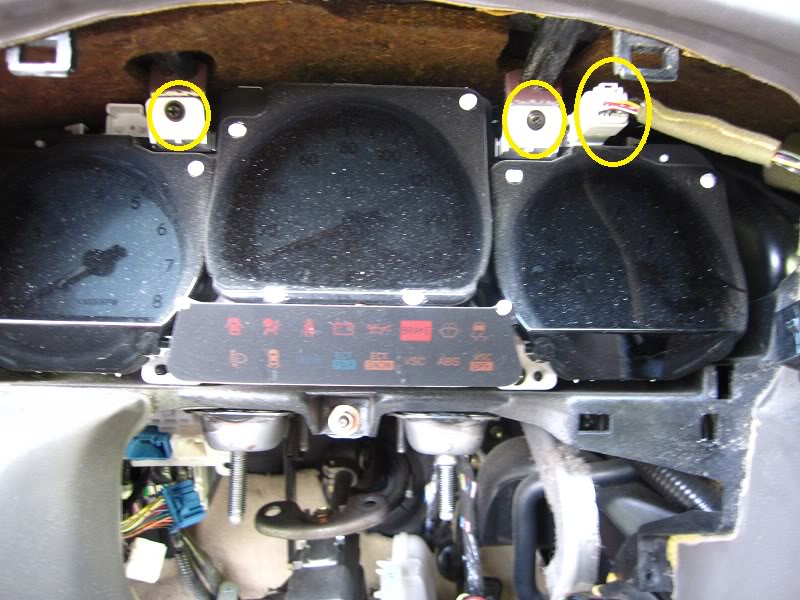
Now you need to drop the steering wheel to get the dash/gauge cluster out. Do so by unbolting these four bolts from under the floorboard. You can do this without taking off the steering wheel casing.
Now that the steering wheel is dropped. You had to disconnect a ton of plugs and maybe take off a few small brackets. One being for the powersteering. After you get this done, remove the gauge cluster and disconnect everything. Then the dash is ready to be pulled.

Remove these trim pieces from the A pillers my carefully prying them away. these must come off before the dash comes out.
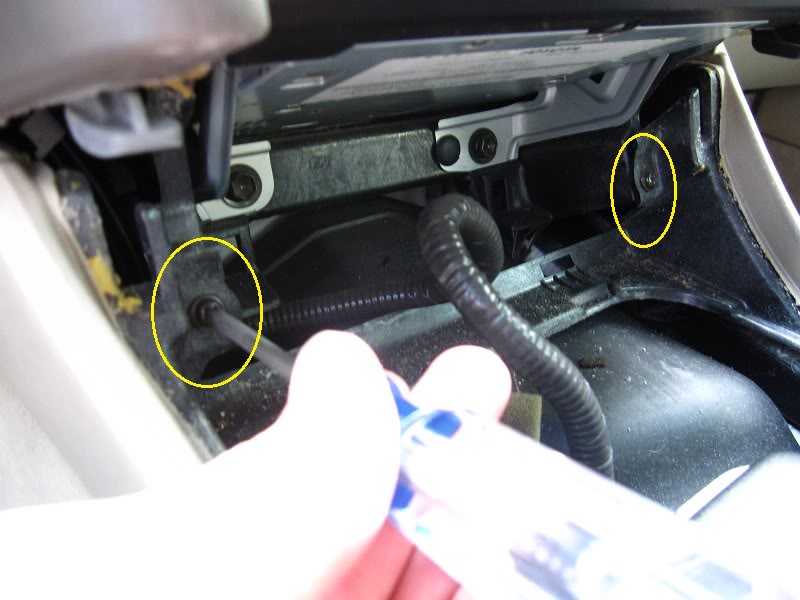
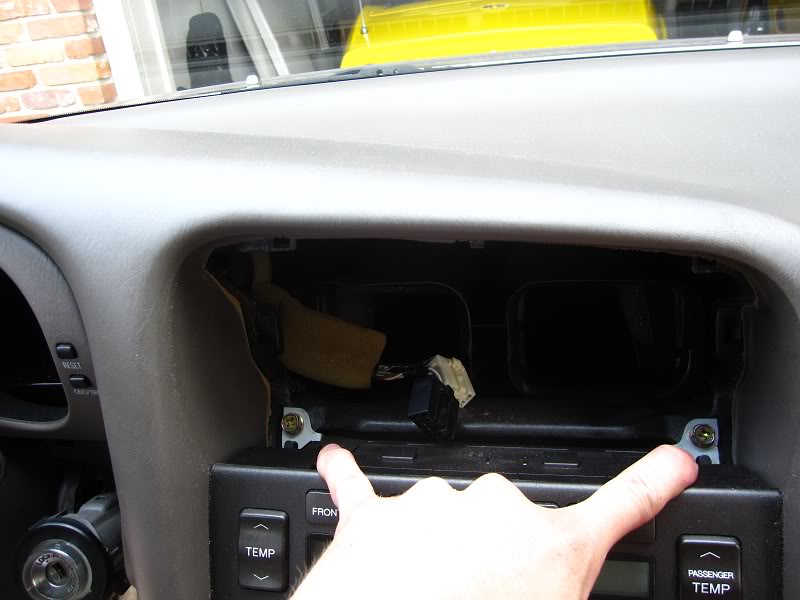
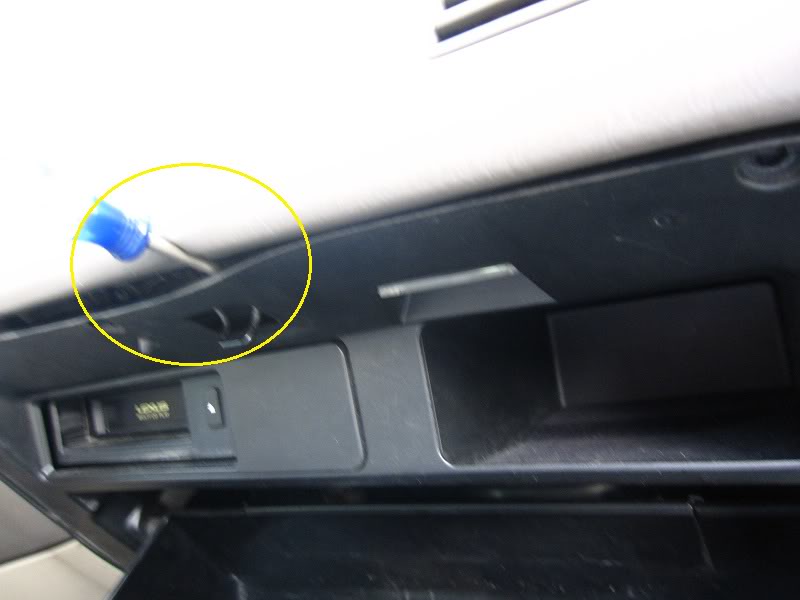
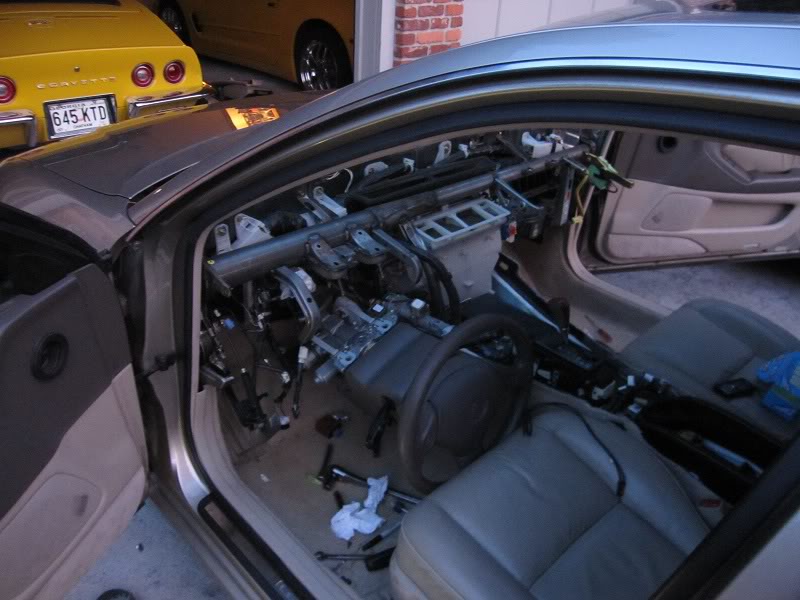
Once removed, I am pretty sure all of the bolts are removed in order to take out the dash. Look over it and if carefully pull the dash and 'wiggle' it around to make sure it is not still connected to anything or still bolted in and then remove. I may have missed one bolt securing the dash to the support. It is located in the glove box at the top.
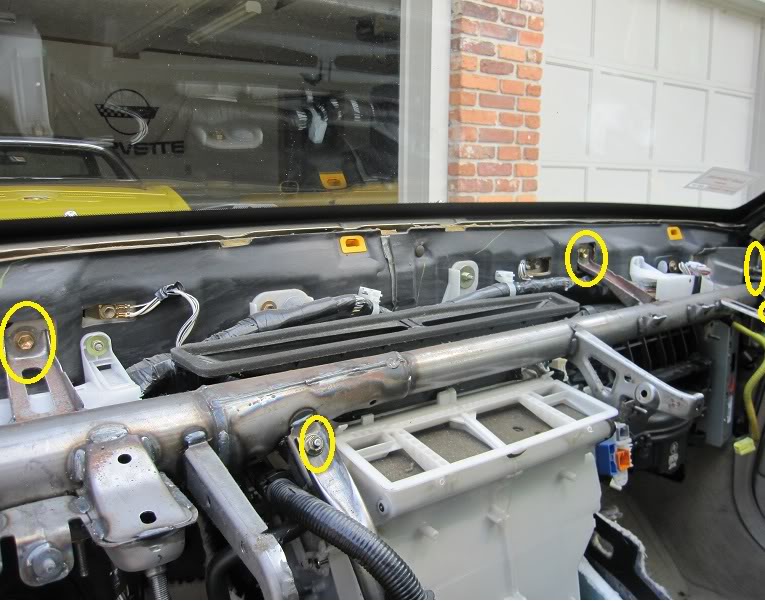
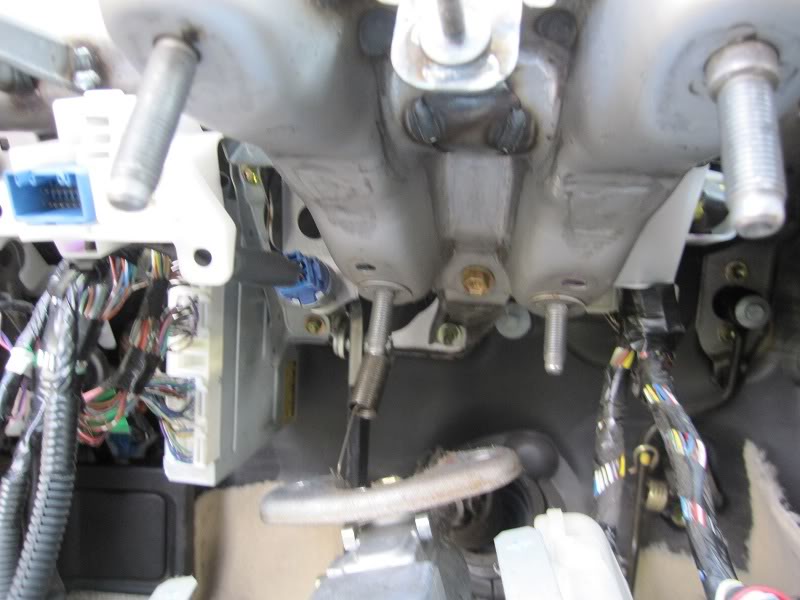
The supports (verticle ones in the center of the picture... where the radio would be) that brace the main support have two bolts at the bottom you must pull the carpet back for to release. Remove these two bolts and remove the secondary dash braces.

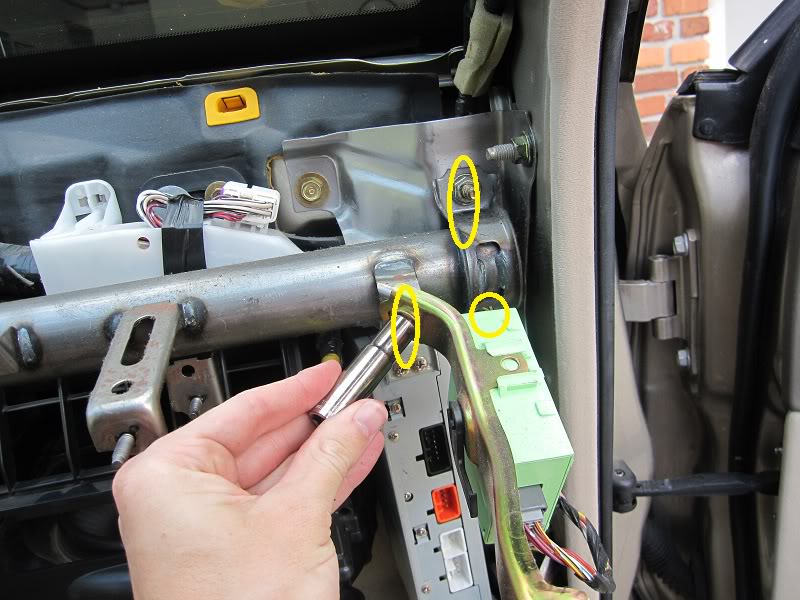
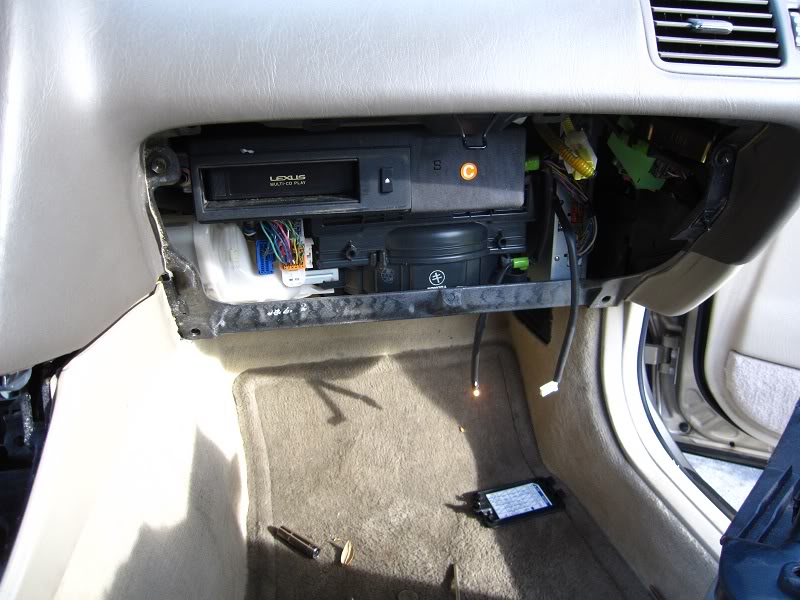
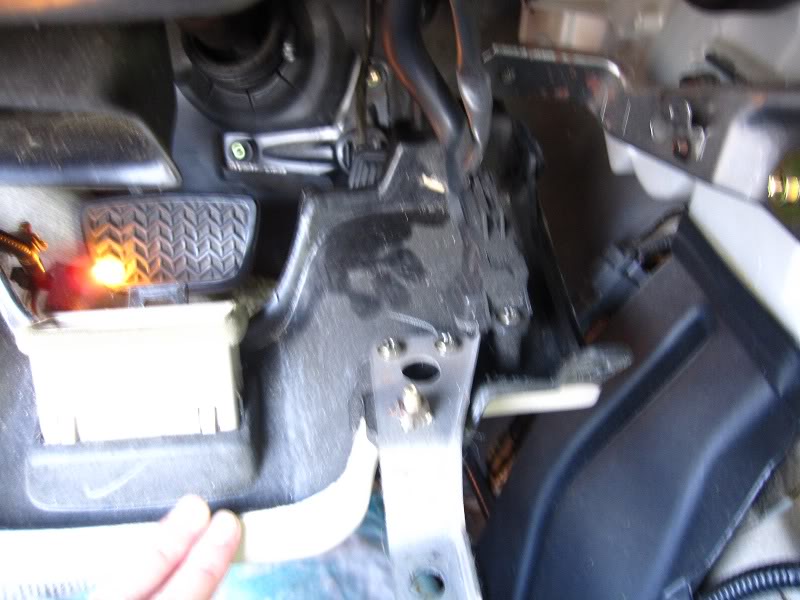
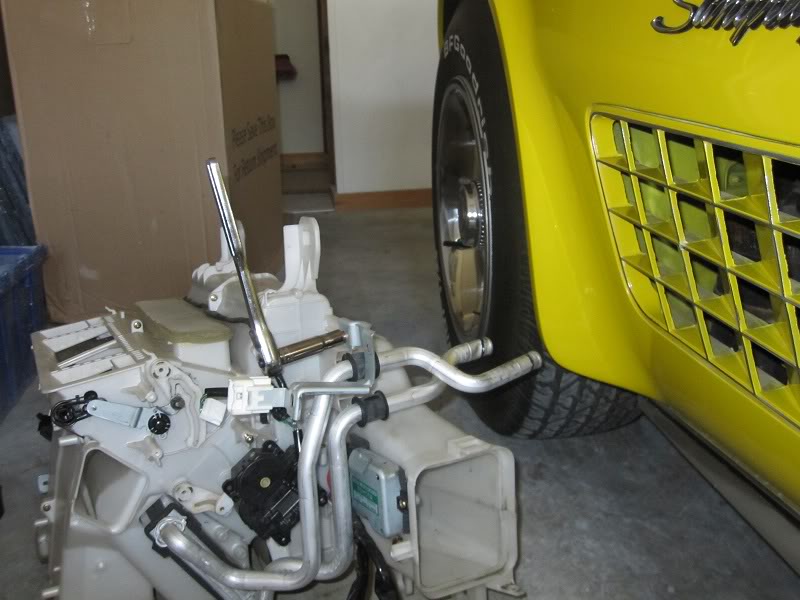
Behind the green box, the factory stereo amp sits. Remove that from its brace on the side of the car so you can remove the blower box.
To be honest, there are so many little screws I would be here all day taking you step by step, but just remove everything around your evaporator housing box in order to remove it. You should remove the screw going into the firewall that hold the clear discharge tube, and anything else that is small that may get in the way. Remove the blower box (Big black box on passenger side) by the large bolts/studs on the top of the box and one on the bottom. Do the same for the Large white box (the housing for the evaporator)
MAKE SURE THE AC SYSTEM IS DISCHARGED BEFORE YOU GO ANY FURTHER.
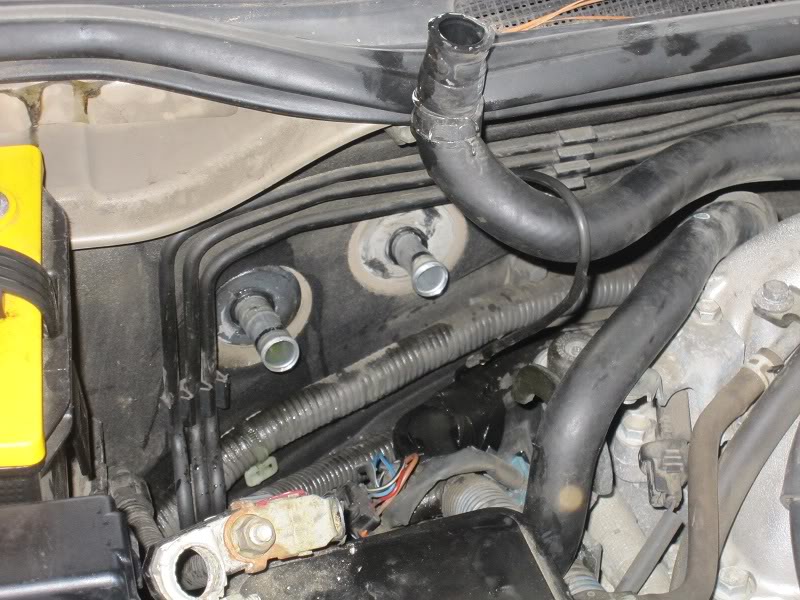
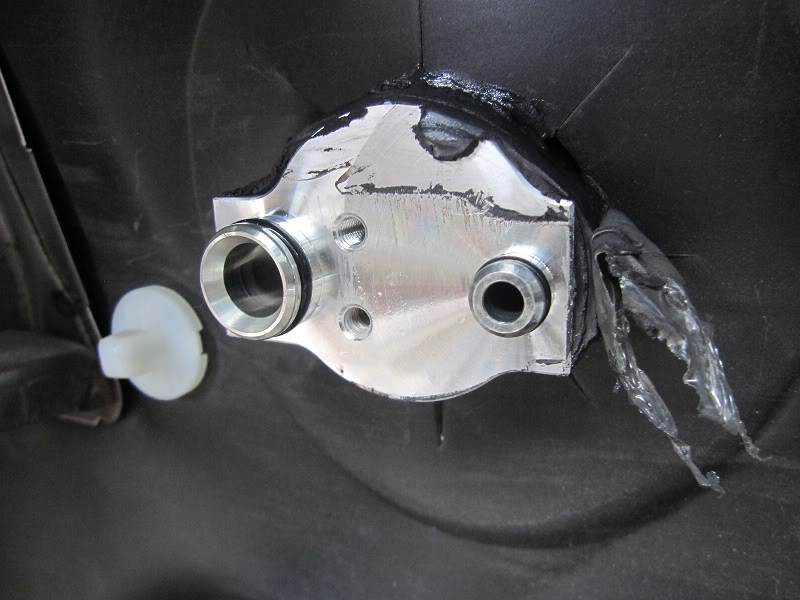
Under the hood, remove the two coolant lines going into the cabin
Last edited by dcz; 08-08-10 at 08:42 AM.
08-08-10, 07:48 AM
#4
Pole Position
Thread Starter
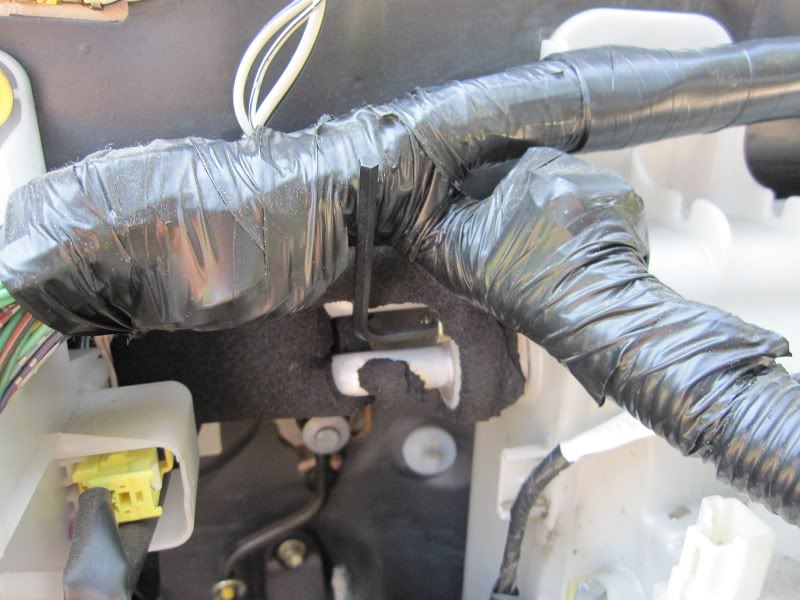
After removing the coolant lines going into your heater core... be careful pulling it through your cabin becuse coolant is still in your core and will spill out into your car.
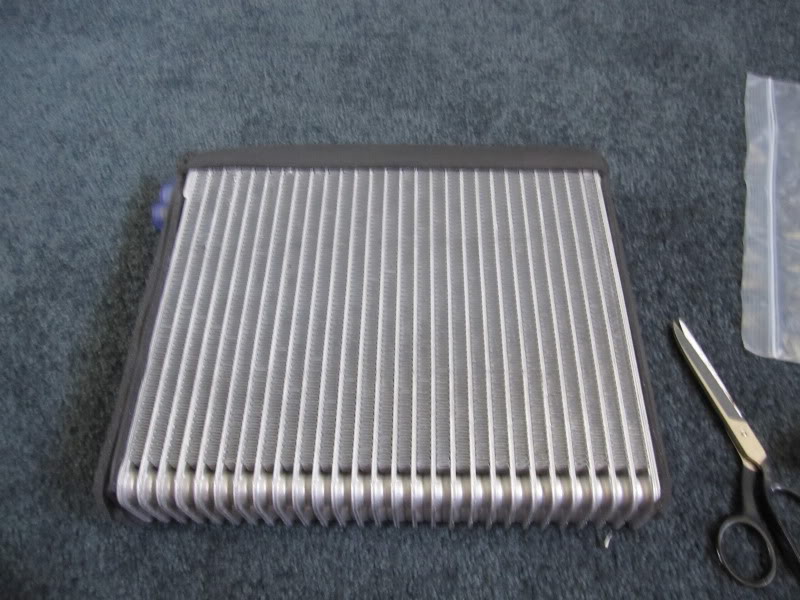
Make sure to replace all the seals that you removed and coat them with PAG oil. Also, The evaporator I ordered from autozone did not have the insulation on it, so I bought some at the store and coated it so it wouldnt rattle in the case. You should also add 40mL of oil into the system. I just went up to lexus and bought some, but just make sure it will work with our model car. Just pour that oil into the evaporator prior to putting it back in the car.
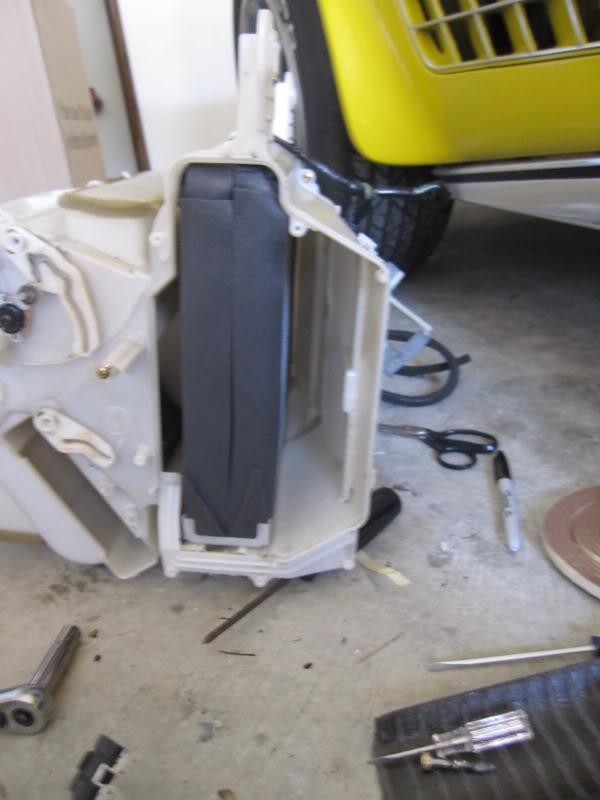
Make sure to put everything back correctly and pay attention to what your servomotors looked like when you took them off. That is what took me the longest time figuring out and putting back together.
It may help to have a few ziplock bags and label where each screw/bolt came from.
I hope this helps out. If nothing else use it as a guide to get the job done! I would recommend getting a set of AC gauges and pulling a vacuum like I did before you put it back together. You dont want to have a leak and have to take the dash out again! After it holds a vacuum for a few hours, start putting it back together and make sure to take your time and pay attention. You dont want any dash rattles! I took my time... wrapped everything that was initially wrapped and taped everything back, too. I didnt have any rattles upon putting it back together..
Hope it helps and if you have any questions Ill do what I can!
Make sure to replace all the seals that you removed and coat them with PAG oil. Also, The evaporator I ordered from autozone did not have the insulation on it, so I bought some at the store and coated it so it wouldnt rattle in the case. You should also add 40mL of oil into the system. I just went up to lexus and bought some, but just make sure it will work with our model car. Just pour that oil into the evaporator prior to putting it back in the car.
Make sure to put everything back correctly and pay attention to what your servomotors looked like when you took them off. That is what took me the longest time figuring out and putting back together.
It may help to have a few ziplock bags and label where each screw/bolt came from.
I hope this helps out. If nothing else use it as a guide to get the job done! I would recommend getting a set of AC gauges and pulling a vacuum like I did before you put it back together. You dont want to have a leak and have to take the dash out again! After it holds a vacuum for a few hours, start putting it back together and make sure to take your time and pay attention. You dont want any dash rattles! I took my time... wrapped everything that was initially wrapped and taped everything back, too. I didnt have any rattles upon putting it back together..
Hope it helps and if you have any questions Ill do what I can!
Last edited by dcz; 08-08-10 at 05:33 PM.


Trending Topics
 08-08-10, 12:43 PM
#9
Pole Position
Thread Starter
thanks... yeh I didnt put much in as far as the expansion valve goes, but I replaced mine too... Definitely a good thing to do while it is all out in the open. Good luck with it. It isnt worth all the money you pay someone to do it, I assure you that. It took me a while because I didnt know what I was doing, but I bet I could do the whole job now in under 4-5 hours... minus recharging... etc... Good luck!

 08-08-10, 06:04 PM
#13
Pole Position
Thread Starter
In a nut shell, your AC system is a closed system of pipes/hoses filled with a gas. The differing pressures throughout the system change the temperature of the gas. The evaporator is the part of the system where the gas is cold. So basically, A fan blows over the evaporator which cools the air and that cool air goes into the ducts of your car and out your vents... thats how the air gets cold...
