GS300 2004 spark plug DIY changes with lots of pictures
 05-16-10, 12:15 PM
#1
Driver School Candidate
Thread Starter

Join Date: Apr 2010
Location: ga
Posts: 7
Likes: 0
Received 0 Likes
on
0 Posts
Finally, I changed spark plugs on my 2004 GS300. Many thanks to cpone, joshoowa, and redjeeper for their great DIY write-ups. I have decided to take some more pictures while I was changing them .
I have to emphasize ,the following pictures all are meant to be an addition to all pictures in these links below. So I highly recommend to read these 3 links first which has very nice DIY write-up. There might be some boring unnecessary picture, but hey, I thought it will make it easier for any level of expertise in this forum.
cpone
https://www.clublexus.com/forums/gs-...-cleaning.html
joshoowa
https://www.clublexus.com/forums/per...-on-gs300.html
redjeeper
https://www.clublexus.com/forums/per...for-gs300.html
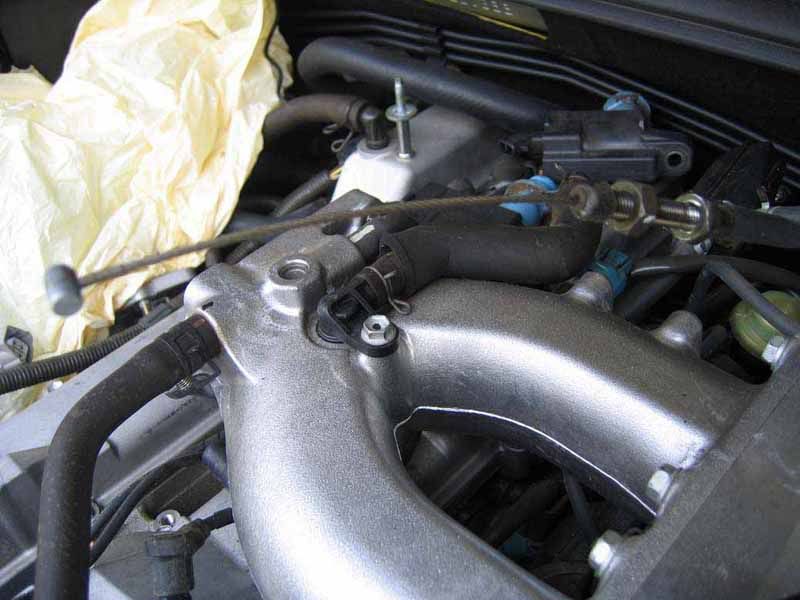
ON throttle-body I have decided to disconnect everything except the hose closer to firewall.
And twist the TB on the side like this picture, I recommend to cover it with some plastic bag, because later on I used air hose to clean plugs housing area:
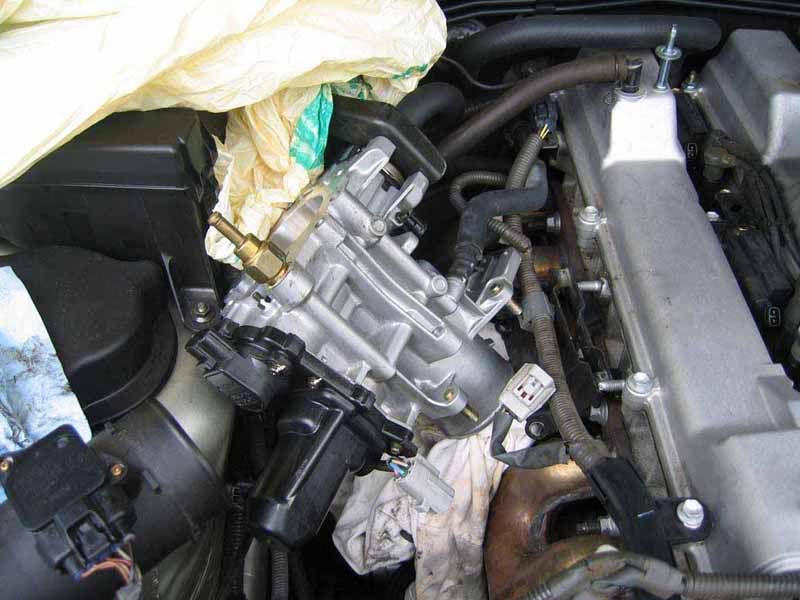
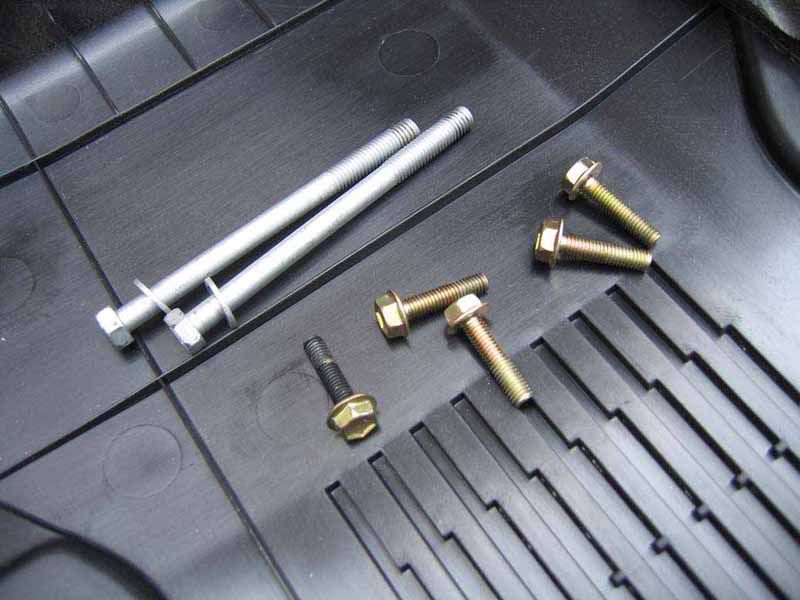
2 upper Screws for holding TB, gold screw for holding coilpack module
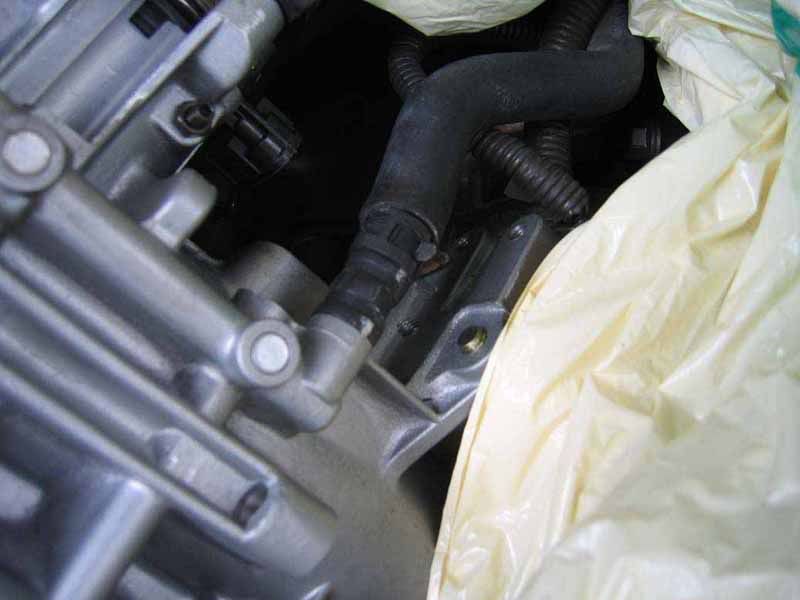
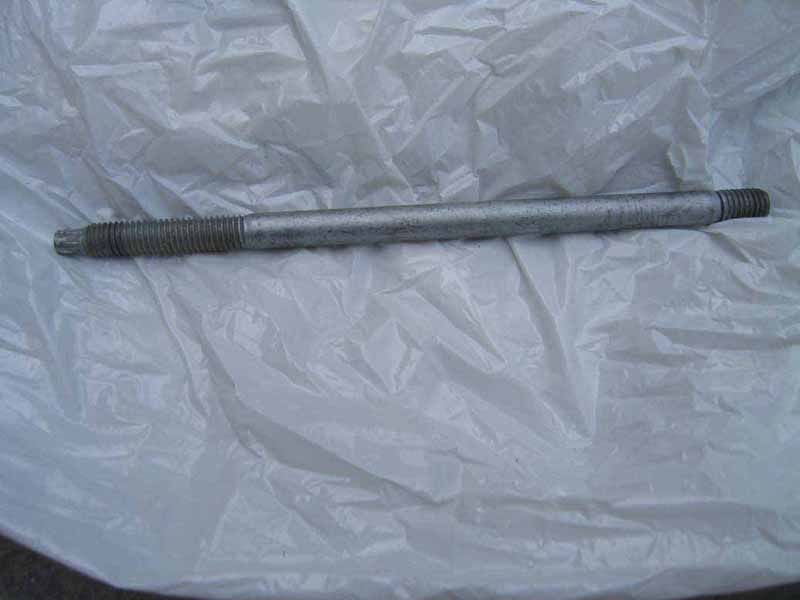
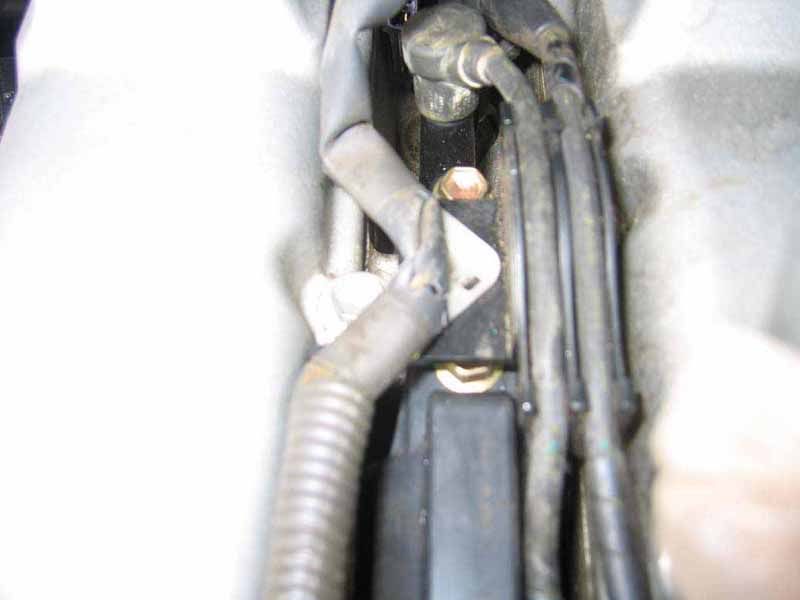
Here is the picture of long screw under TB, which was mentioned to make sure to remove this.
Here is throttle cable unattached
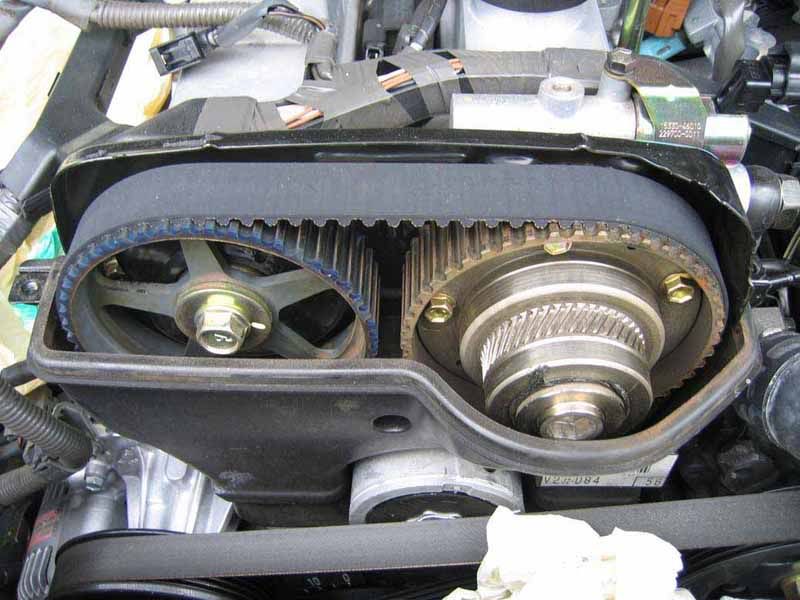
I also suggest covering timing belt area with plastic bag too;
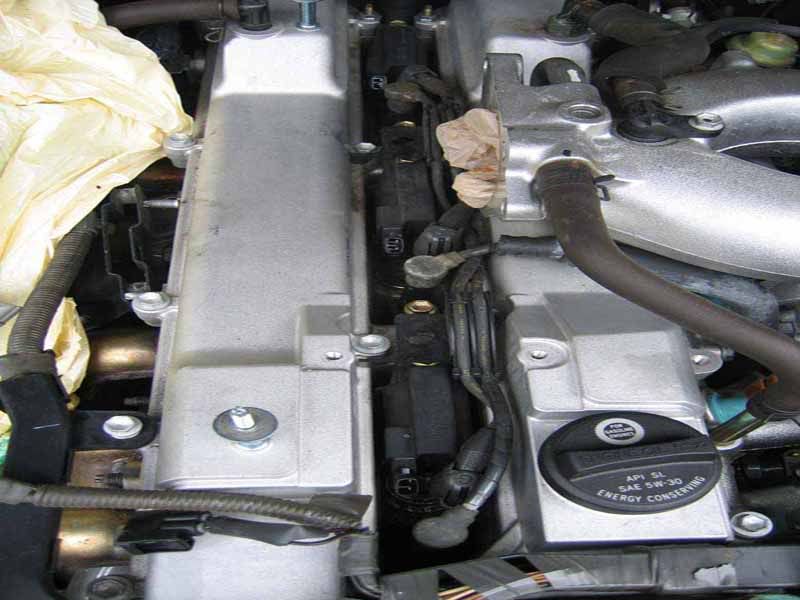
Here is everything removed and I also pushed a plastic bag into IM, DO NOT FORGET to remove this after cleaning with air hose.
I also took out this big rubber washer which was between TB and IM. It’s easier to get into middle plugs by removing this.
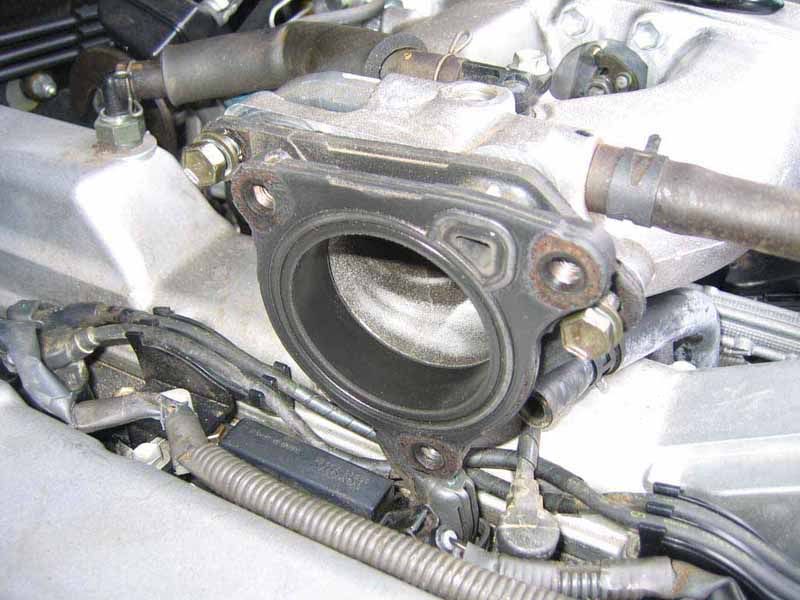
This is coolant line Thanks to VALET dude for correction

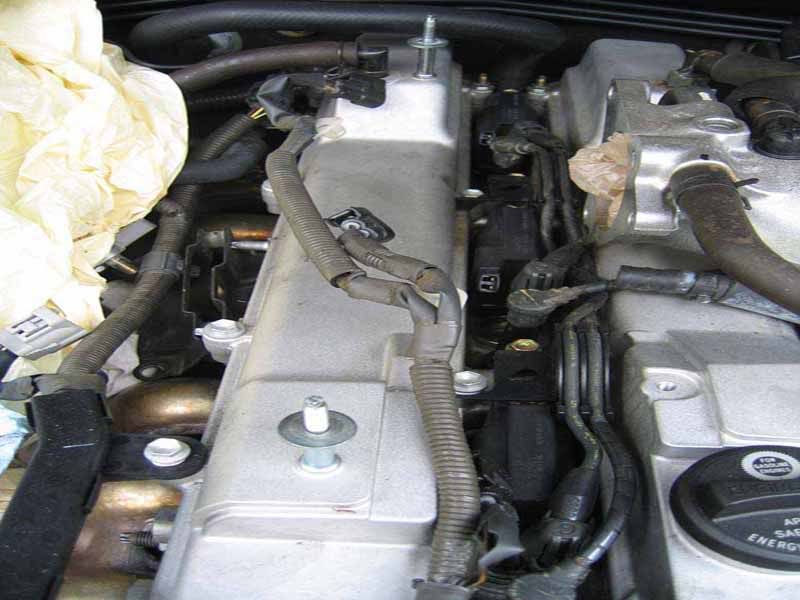
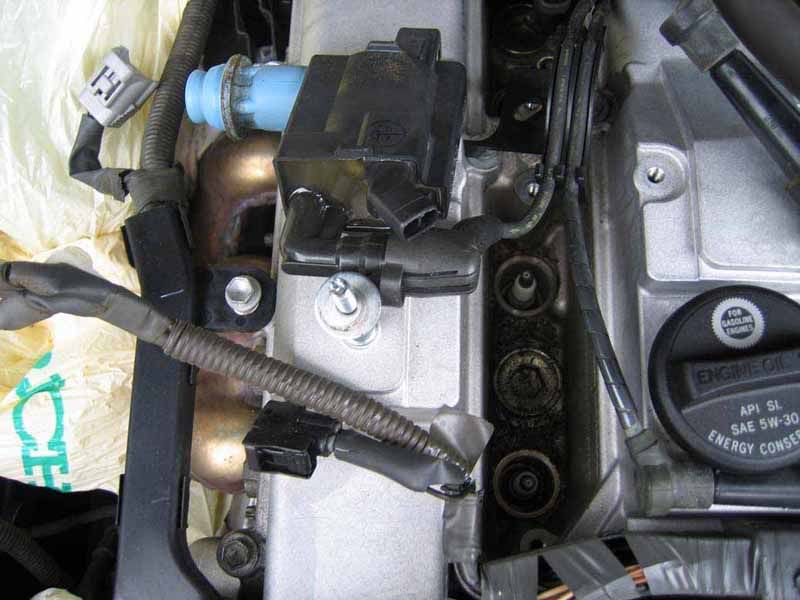
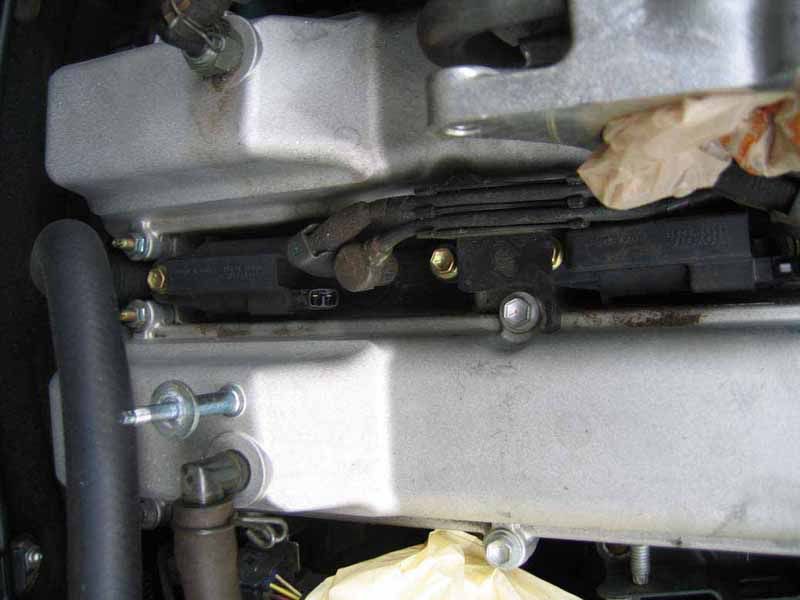
There are total of 6 plugs, in 3 compartments, 2 plugs in each compartment. It’s easier to call each compartment by a letter, E closest to firewall, then C in middle and G close to timing belt gear.
Now remove the low voltage wiring to these 3 compartments, First remove 2 white clips holding these wires in place, then unplug 3 black connector, and put them out of way. Try not to break these clips.
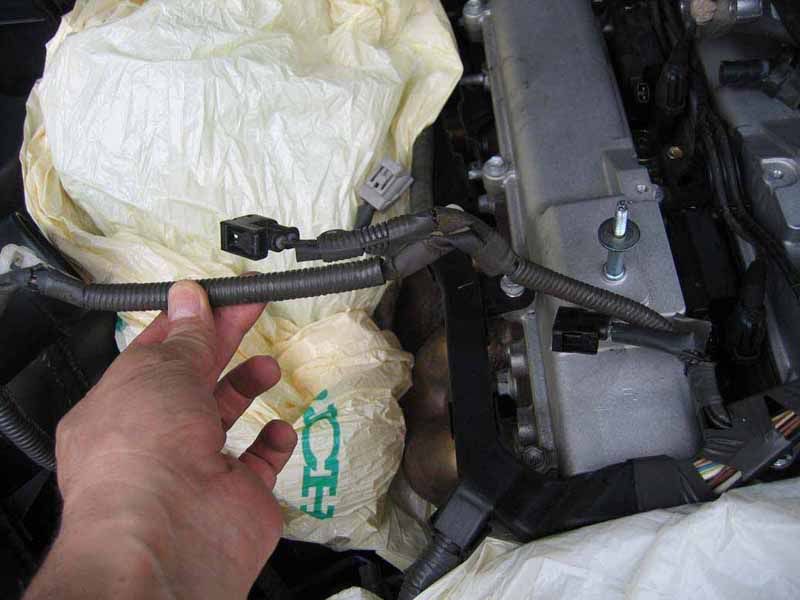
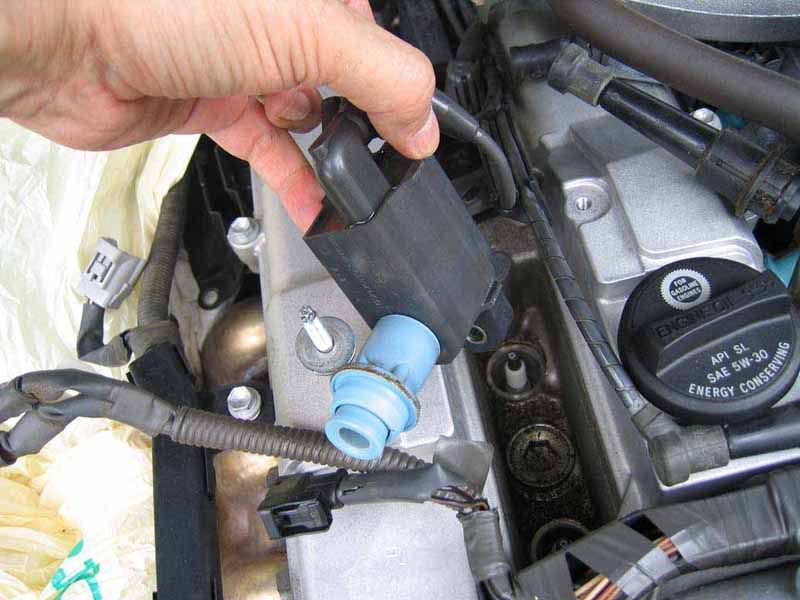
At this stage if you look at each compartment you will see one rectangle black piece of plastic (coil pack) which is screwed to the body with gold screw, attached to this module is a wire cap look like a plugs connection and that’s where you see a letter G, C, and E on the cap. This is G section.
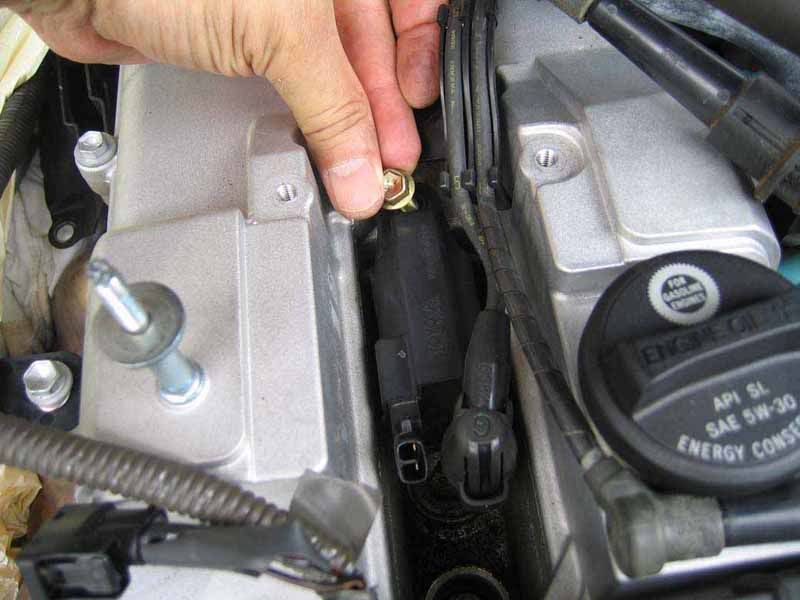
So remember. You DO NOT need to unplug this cap, you could easily break the plastic clip on these. Just pull the whole black module; under this you will see the first plug in that compartment. On mine the rubber booth was a nice blue color.
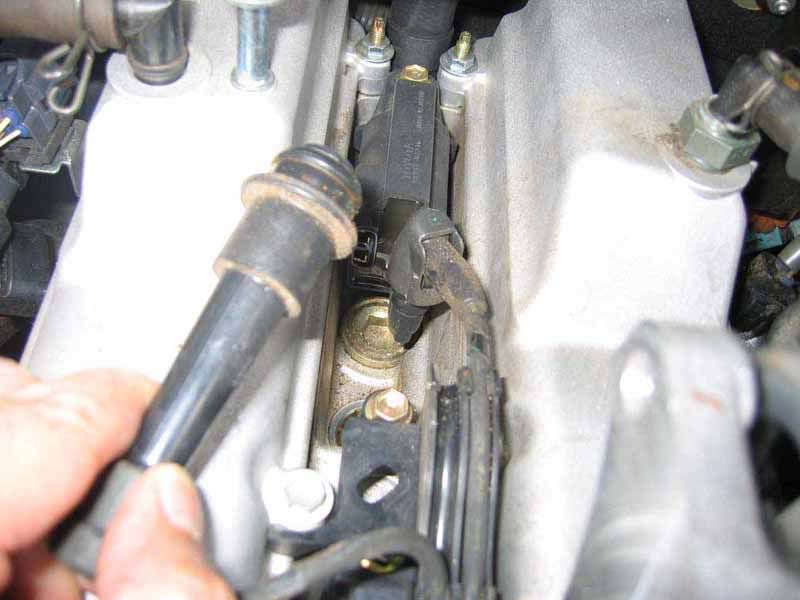
As I mentioned in each compartment there is a coil pack and below that you will see another cap with no lettering and that’s the second plug in compartment with long plastic shaft
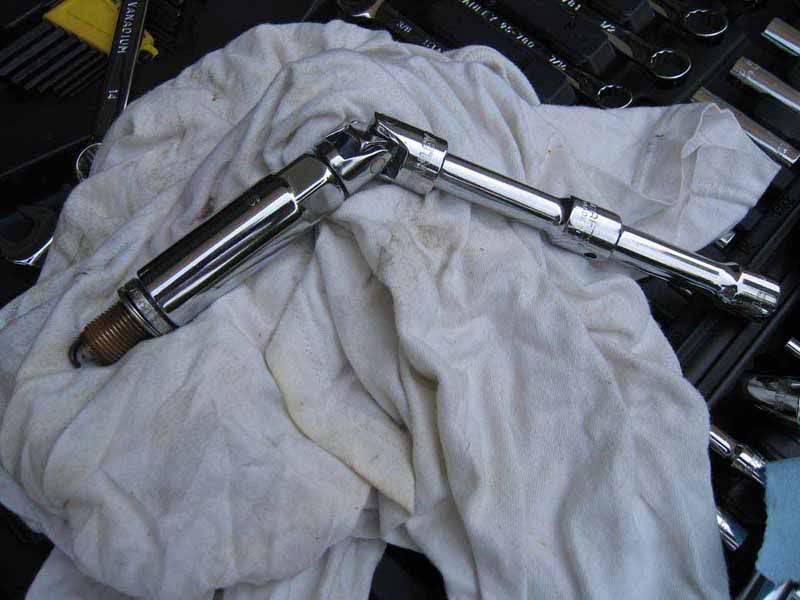
Very last plugs which is in compartment E, does not have enough clearance on the top, so it’s much easier to use a swivel ratchet like this:
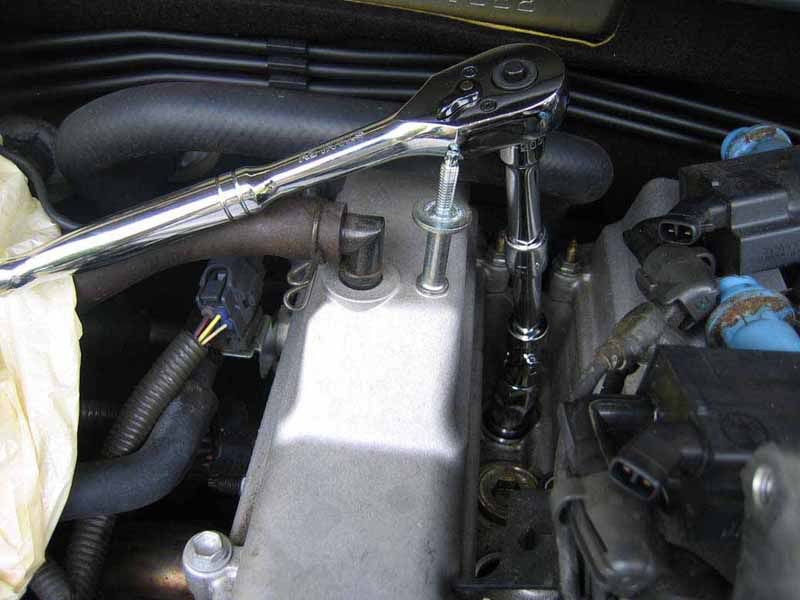
Another view of last compartment E
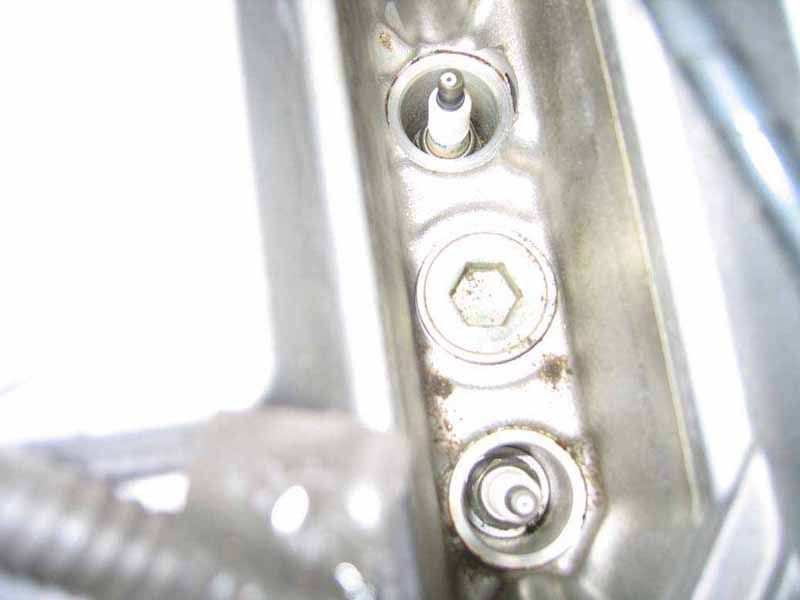
this shows a compartmnet with no coilpack or plug shaft
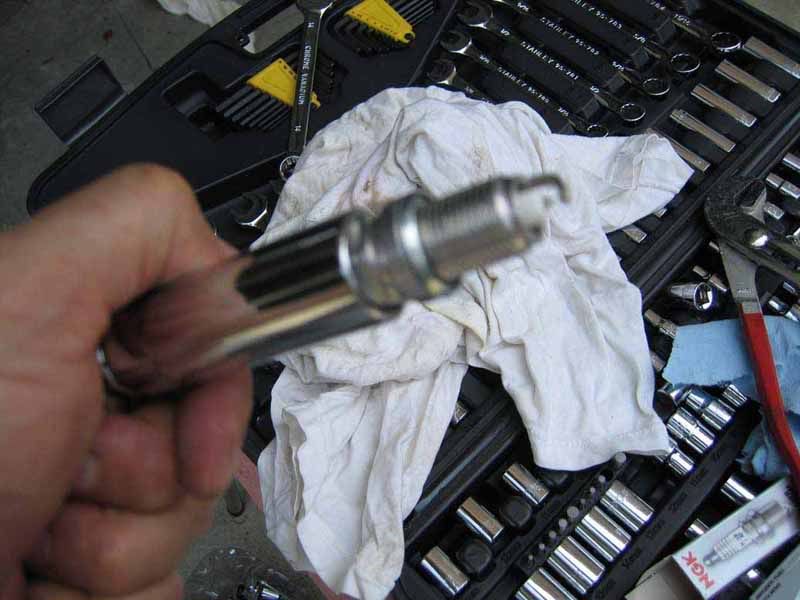
I used an air hose to clean all debris while plugs are inside,
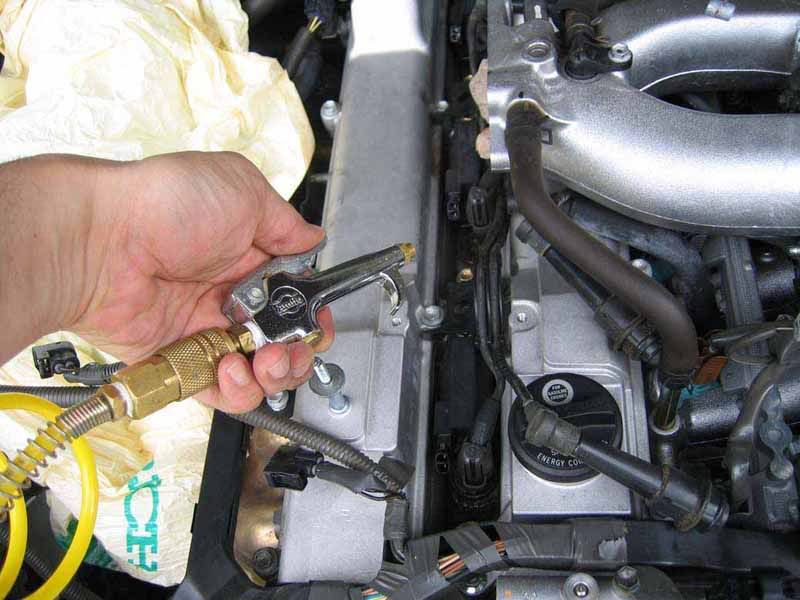
I used plug socket with built-in rubber, it will hold spark plug while you are lowering plugs into holes.
Thant’s it and remember if any steps is missing here you will find it in the other 3 links above
Good luck and have fun
I have to emphasize ,the following pictures all are meant to be an addition to all pictures in these links below. So I highly recommend to read these 3 links first which has very nice DIY write-up. There might be some boring unnecessary picture, but hey, I thought it will make it easier for any level of expertise in this forum.
cpone
https://www.clublexus.com/forums/gs-...-cleaning.html
joshoowa
https://www.clublexus.com/forums/per...-on-gs300.html
redjeeper
https://www.clublexus.com/forums/per...for-gs300.html
ON throttle-body I have decided to disconnect everything except the hose closer to firewall.
And twist the TB on the side like this picture, I recommend to cover it with some plastic bag, because later on I used air hose to clean plugs housing area:
2 upper Screws for holding TB, gold screw for holding coilpack module
Here is the picture of long screw under TB, which was mentioned to make sure to remove this.
Here is throttle cable unattached
I also suggest covering timing belt area with plastic bag too;
Here is everything removed and I also pushed a plastic bag into IM, DO NOT FORGET to remove this after cleaning with air hose.
I also took out this big rubber washer which was between TB and IM. It’s easier to get into middle plugs by removing this.
This is coolant line Thanks to VALET dude for correction
There are total of 6 plugs, in 3 compartments, 2 plugs in each compartment. It’s easier to call each compartment by a letter, E closest to firewall, then C in middle and G close to timing belt gear.
Now remove the low voltage wiring to these 3 compartments, First remove 2 white clips holding these wires in place, then unplug 3 black connector, and put them out of way. Try not to break these clips.
At this stage if you look at each compartment you will see one rectangle black piece of plastic (coil pack) which is screwed to the body with gold screw, attached to this module is a wire cap look like a plugs connection and that’s where you see a letter G, C, and E on the cap. This is G section.
So remember. You DO NOT need to unplug this cap, you could easily break the plastic clip on these. Just pull the whole black module; under this you will see the first plug in that compartment. On mine the rubber booth was a nice blue color.
As I mentioned in each compartment there is a coil pack and below that you will see another cap with no lettering and that’s the second plug in compartment with long plastic shaft
Very last plugs which is in compartment E, does not have enough clearance on the top, so it’s much easier to use a swivel ratchet like this:
Another view of last compartment E
this shows a compartmnet with no coilpack or plug shaft
I used an air hose to clean all debris while plugs are inside,
I used plug socket with built-in rubber, it will hold spark plug while you are lowering plugs into holes.
Thant’s it and remember if any steps is missing here you will find it in the other 3 links above
Good luck and have fun
Last edited by akobari; 05-16-10 at 07:21 PM.

 09-24-10, 05:55 PM
#4
Rookie
Join Date: Sep 2010
Location: VA
Posts: 88
Likes: 0
Received 0 Likes
on
0 Posts
Nice writeup, thanks! Yours clears up some vaguely explained/visualized areas by others and now I have more confidence in doing this project myself. I've replaced spark plugs on many of my older vehicles and it's usually a 20-30 min job at the most. I never imagined a straight-6 would make things so much more complicated.
Thanks for the help..
Thanks for the help..
10-13-10, 08:20 PM
#6
Rookie
Join Date: Sep 2010
Location: VA
Posts: 88
Likes: 0
Received 0 Likes
on
0 Posts
I attempted and completed this DIY myself this past weekend. Let me clear up some confusion. I am not a mechanic nor a tech but I do know my way around basic tools and machines and I've done work on cars before. Plus I have the official Lex repair manuals at hand.
This job, if you don't know exactly what to do, will take you 3-5 hours at least and you will probably break a few minor things along the way.
I will break it down from very recent memory on the keymost parts to keep in mind.. albeit I gave the OP a lot of credit, he missed some crucial parts.
1. Remove middle rubber intake section (wide black assembly) connected to throttle body. Use philips screwdriver to loosen tightener clamps.
2. Take out two silver top bolts (10mm) from thottle body section (LONG ones in pictures), two golden bolts below that, and two more golden ones below that. The four lower ones will release the folding bracket that holds some main wiring to the throttle body section.
3. In between the two middle gold bolts (directly below thottle opening) is a nut that you remove. Altogether if you count, there are 7. Thus far OP is correct, this is all pretty self explanatory.
4. Once you remove these the throttle body will be loosened up but nowhere near ready for removal.
5. You do NOT unscrew that long bolt that the middle inner nut was on holding throttle body on. There is no point and it's very hard to do. It only complicates the process.
6. Probably the hardest part and the other DIY threads on this agree, is removing the two water bypass hoses that now remain holding the throttle body in.
The thicker one is to the bottom rightermost side of the throttle body. You have to use whatever pliers/grips you can and release tension on the metal clamp holding the hose on. You have to squeeze tight and twist back and forth until the hose comes off. The hose is connected extremely tight and there is almost NO room to work on it. I drove myself crazy but eventually got the hose off. Be careful, once off a fair amount of coolant leaks out of this and this piece is DIRECTLY above the coilpacks and plug wires. Now do the same with the other bypass hose to the top left of the throttle body. This one is much easier, smaller, and more room to work with.
7. Do all this and the throttle body slides out along that long bolt (again) you do NOT need to take out. Pull it off and place it to the side. Don't let it hang on the upper bypass hose, it's too easy to take off to risk damage to the TB.
8. Now comes the most time consuming part of the whole process. Once the throttle body is off you will have access to all the plug wiring and coil packs. You will need to remove these individually but very carefully. As in another DIY thread on this (read the others linked above, they will help) there are three sections holding two plugs each. One plug in each section is VERY easy, you just *plop* out the wire revealing the plug underneath. This is not the plug under the coilpacks. That would be the rectangular box with a wire coming out from underneath linked to it with a clip. They are the plugs above the easy to remove plugs.
9. As posted in one of the other DIY threads on this... DO NOT TOUCH THOSE LITTLE PLASTIC CLIPS HOLDING THE WIRE TO THE COIL PACK, no matter how tempting it looks... I don't know what idiot designed them but they break if you breathe on them! Undo the bolt above the coilpack holding it and undo another identical bolt next to it holding the plastic wire organizer and pull out the entire coil pack. This is what I found after breaking all three of those d@^^! clips, even though the repair manual tells you to unclip them!
10. Do that in all three sections and to make it much easier, remove upper and lower plug wires along with the plastic bracket underneath them in pairs in each section at once.
11. Reassembly is obviously the reverse process but be careful. Putting the two bypass hoses back on is honestly not much easier than taking them off. Plan to spend some time and frustration on this part.
Good luck and I hope this addendum helps the above reference.
Last edited by raceforgt; 10-13-10 at 08:23 PM.

Trending Topics
10-14-10, 07:52 AM
#8
Instructor

This write up is very helpful, great first post.
-raceforgt statement about breaking the connectors on the coil packs is so true, the plastic is extremely brittle.
If you do end up breaking or just want to have them on hand, this link 1JZ/2JZ Coil Pack Connector Set from Driftmotion has them with pigtails for $65.
Just one more observation...
Just like when you, for example, replace the timing belt you also do the water pump, why not when you replace the spark plugs you replace the valve cover gaskets.
Most likely by the time the spark plugs need replacing you notice oil in the spark plug valley coming from the leaky valve cover gaskets, sometimes it is a little or quite a bit, enough to cause misfire.
Sooner or later they will need to be replaced, so this would be a very good opportunity to get that done.
Instead of unbolting the throttle body from the plenum, the throttle body /plenum gets removed as one unit from the upper intake.
Here's a link with a few pictures I did on the job, just for referance. Granted I replaced more than just the gaskets.
New valve cover gasket, cam seals and VVT-i pulley


Thread
Thread Starter
Forum
Replies
Last Post