
DIY AC Compressor and Condenser/Drier replacement
 10-25-10, 12:23 PM
#16
Advanced
I was told by my mechanic to also change the expansion valve when replacing the compressor/receiver/drier. I noticed it wasn't in the DIY. Does this need to be replace, yes?
 10-25-10, 12:37 PM
#17
Pole Position
Thread Starter
Yeh, it is recommended, but its not as easy as it is on other cars. Our expansion valves are located inside the cabin behind the steering wheel mounted to the fire wall (Other cars have them under the hood). I dont know how much of the dash you have to remove to get the expansion valve out, but I removed my entire dash and replaced my expansion valve when i replaced my evaporator. I did another DIY on here with evaporator DIY, so check that out and you can decide if you want to do it...
I remember where its at and everything, but in order to take it out... bare with me and try to visualize this.....
The expansion valve connects to some lined that run through the firewall... Once the lines pass into the cabin through the firewall, they go into the expansion valve. On the other side of the expansion valve there are aluminum lines that run out and into the evaporator. The evaporator is so far up in the dash , I dont know if you can get the bolts out to remove the lines you need to take out to remove it. Also I dont know if you even have to remove the lines or if they will flex to allow you to replace to expansion valve... hopefiully i didnt confuse you too much with this... just check out my other DIY to get a feel for where its at and get up underneath your drivers side floorboard and check it out. It will be covered up my clay and tape, though...
10-25-10, 12:41 PM
#18
Pole Position
Thread Starter
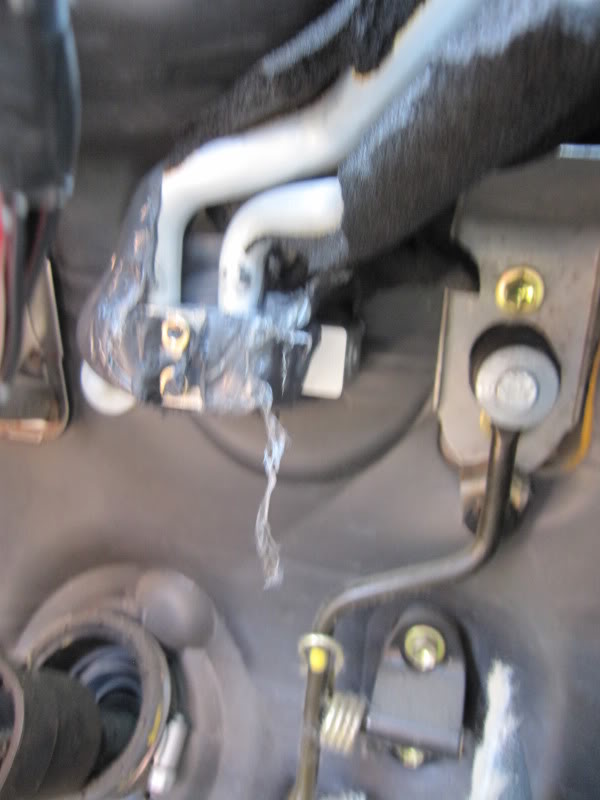 Here is a picture of the location of the expansion valve. Notice the steering column in the bottom left hand corner going into the firewall.... hopefully that will give you some sort of idea of where I am talking abotu
10-25-10, 02:24 PM
Here is a picture of the location of the expansion valve. Notice the steering column in the bottom left hand corner going into the firewall.... hopefully that will give you some sort of idea of where I am talking abotu
10-25-10, 02:24 PM
#19
Do you HAVE replacing the expansion valve when replacing the compressor. Or will it not work right if you don't do it? My thoughts are that it can get clogged from metal shavings and crap from when the compressor goes out. So would a simple flush get rid of this?
10-25-10, 02:37 PM
#20
Pole Position
Thread Starter
Your system will work right with the old expansion valve. Maybe someone else can answer that knows more than I do, but its one of those things where when one goes bad, you might as well just replace the other while youre at it....I didnt replace mine at first and my AC worked fine for a while, then my evaporator blew and I just changed it while i had it out..
10-25-10, 03:02 PM
#21
Advanced
This might be a dumb question, but I will ask it anyway. Can you get to the expansion valve by simply removing the center display console (Radio, front vent, a/c controls, etc.)?
10-25-10, 03:59 PM
#22
Pole Position
Thread Starter
haha, no its not a dumb question... but the answer is no you cant... its more towards the floorboard of the driver side.... if you take out the radio you will be staring at a white box that houses the evaporator and the heater core... nothing is ever that easy, but i sure wish it was!
10-26-10, 03:46 AM
#24
Pole Position
Thread Starter
I ended up putting a new OEM with clutch on it from this website: http://www.carpartswarehouse.com/add.../60-01710.html
It was about $600 but has worked perfect.... Id put another one on my car from them definitely
It was about $600 but has worked perfect.... Id put another one on my car from them definitely
10-26-10, 10:15 AM
#25

here's my theory if you wanna use it, if you JUST putting on a compressor then this list below should be fine, but hey what do i know? i only manage a HVAC supply house

recover the freon if its in there still
flush it while its off (this isnt needed if the compressor just went out as there is no electrical items on a cars compressor to burn the oil or freon, just needed if it blew up and have shards running around in the system)
replace the compressor
vacuum it down
add freon (i recommend R414-b)
NOW if your replacing the evaporator, do the drier and expansion valve while you have the dash out,no sense in doing all this work and NOT changing it..... i know you would be sick if you did this or especially if you paid a shop to do this then after getting it all back together it acts up as the expansion valve is clogged up and you have to pull it all or pay for it again to change the expansion valve.
Your system will work right with the old expansion valve. Maybe someone else can answer that knows more than I do, but its one of those things where when one goes bad, you might as well just replace the other while youre at it....I didnt replace mine at first and my AC worked fine for a while, then my evaporator blew and I just changed it while i had it out..
im with you though, do it while your in there
 09-21-13, 11:20 AM
#26
Moderator

partsgeek have too good a price on Deso compressor, which seems too good to be true. Any one bought the OE compressor from them?
My pressure readings are telling me the compressor is bad and I can spin the pressure plate by finger tips. Clutch engages fine.
Also do I reduce the oil that is filled in condenser by the amount of oil in the compressor (if prefilled)?
For the curious ,,, how come the oil is not sucked out when the system is evacuated?
Salim
10-07-13, 11:03 PM
#27
Moderator
Update ..
Got a good price from Amazon and with prime got the compressor in 2 days. It was Denso made in Japan (stated on the box). I was bit concerned as the numbers did not exactly match with the compressor I removed. But they were identical in appearance and fit. The pump does come with Orings.
Down side was there was no oil in the compressor and ND8 was not to be found.
I searched and searched for oil capacity and there is none stamped on the decal.
I used PAG46 and added about 4.2 oz in the compressor.
I also purchased the Denso dryer insert.
The filter in the dryer was clean, but I still purged and flushed the condenser. I mounted the compressor and its piping and worked on the condenser. By doing this, the dryer was exposed to atmosphere for less than 5 minutes. Incidentally the old dryer was in a felt like fabric and the new one seems to be in a synthetic material. The instructions were old and asked for double seam at the top, and the new one has no seam. I kept the embossed pattern at the top and the indented pattern at the bottom.
Thank you all .. specially to the OP for posting the procedure here.
Salim
03-03-14, 08:52 PM
#28

http://www.davesdiscountautoparts.co...denso/999-0101
Denso part #999-0101 is a six pack of 250cc ND-oil8.
Shows an O-ring but I believe this is a single of 250cc ND-oil8 for a Denso w
134a.
Denso part #999-0101 is a six pack of 250cc ND-oil8.
Shows an O-ring but I believe this is a single of 250cc ND-oil8 for a Denso w
134a.
Last edited by damon; 03-05-14 at 06:15 PM.
03-04-14, 02:07 PM
#30
Advanced
Update ..
Got a good price from Amazon and with prime got the compressor in 2 days. It was Denso made in Japan (stated on the box). I was bit concerned as the numbers did not exactly match with the compressor I removed. But they were identical in appearance and fit. The pump does come with Orings.
Down side was there was no oil in the compressor and ND8 was not to be found.
I searched and searched for oil capacity and there is none stamped on the decal.
I used PAG46 and added about 4.2 oz in the compressor.
I also purchased the Denso dryer insert.
The filter in the dryer was clean, but I still purged and flushed the condenser. I mounted the compressor and its piping and worked on the condenser. By doing this, the dryer was exposed to atmosphere for less than 5 minutes. Incidentally the old dryer was in a felt like fabric and the new one seems to be in a synthetic material. The instructions were old and asked for double seam at the top, and the new one has no seam. I kept the embossed pattern at the top and the indented pattern at the bottom.
Thank you all .. specially to the OP for posting the procedure here.
Salim
Got a good price from Amazon and with prime got the compressor in 2 days. It was Denso made in Japan (stated on the box). I was bit concerned as the numbers did not exactly match with the compressor I removed. But they were identical in appearance and fit. The pump does come with Orings.
Down side was there was no oil in the compressor and ND8 was not to be found.
I searched and searched for oil capacity and there is none stamped on the decal.
I used PAG46 and added about 4.2 oz in the compressor.
I also purchased the Denso dryer insert.
The filter in the dryer was clean, but I still purged and flushed the condenser. I mounted the compressor and its piping and worked on the condenser. By doing this, the dryer was exposed to atmosphere for less than 5 minutes. Incidentally the old dryer was in a felt like fabric and the new one seems to be in a synthetic material. The instructions were old and asked for double seam at the top, and the new one has no seam. I kept the embossed pattern at the top and the indented pattern at the bottom.
Thank you all .. specially to the OP for posting the procedure here.
Salim