When you click on links to various merchants on this site and make a purchase, this can result in this site earning a commission. Affiliate programs and affiliations include, but are not limited to, the eBay Partner Network.
I've been meaning to get around to fixing this cable, and there's lots of good info in this thread to get the job done.
But here's another "quick fix" you can do to get by until you can replace the cable:
Beginning at the center of the right-side latch mounting bolt, measure down 3/4" and then left 3/4" . Drill a hole there large enough to insert a screwdriver.
Now, anytime it sticks open you can pop a screwdriver in there and get it to close.
There is a plastic collar on the cable just behind and to the left of this hole. Use the screwdriver to get behind it and push to the left, thereby pulling the cable *out* and putting the latch back into position to close the hood.
That'll at least get you by until you can replace the cable.
Many thanks to Post #18 for the write-up and pictures. It was extremely helpful. I found an added trick to make this much easier. Attach a small diameter piece of wire (picturing hanging wire) to the old cable on the driver's side. Wrap it with electrical tape. Grease the cable. As you pull the old cable out from the engine side, the wire will travel along with the old cable. Detach the wire after the old cable is out and attach the wire to the new cable. Grease the cable area that will go through the firewall. Have someone help pull the wire as you feed the cable along its original path.
Can I add my 2 cents in here with what I found to solve this issue for me? Hahaha well check it out, My hood wouldnt open for the longest time and I like many thought "Dam I guess its my time to replace that cable everyone always speaks of" until I took a closer look!
Dont mind if I borrow this pic from you real quick, Alright so simple, theres a "male" end to this mechanism obviously thats attached to your hood, the part that whats shown in the picture here grabs a hold of... well its probably bent.... I've fixed 2 others Gs's now lol that thought they also needed a new cable, but chances are you've let your hood slam down a few times which bottomed out the male end into the bottom of the latch and it literally bends inwards, grab some pliers or stick something through it (attached to hood) and straighten it back out.
Originally Posted by gs400dave
let me know if it solves anyone elses issue. Sure a nice new tight cable will probably solve it to... but why would a cable thats rarely pulled need replacing? I dunno just saying....
I just spent 4 hours doing this myself over the weekend...part of the reason why it took so long was because the cable broke and I couldn't open the hood. I spent about 1.5 hours breaking into the hood latch.
It was a real PITA to get the new cable through the engine bay wall. Even with the help of someone pushing while I was pulling didn't work so I finally went to my tried and true friend...the coat hanger and rigged up this simple gizmo. With this I was able to get the cable through by myself pretty easily.
Take 2 new coat hangers and straight them out, cut the U shape part of both coat hangers. Line them up side by side evenly and tape them together about 8" apart.
Assuming you disconnected the existing cable from the hood latch and the inside release latch and the wheel well cover is removed you want to use the existing cable to help pull the coat hanger gizmo through.
From the engine bay, wrap the existing cable to about 6" up 1 end of the coat hanger with tape this is to make sure the coat hanger doesn't pull away from the cable when you pull it through the engine bay wall. From inside the car pull the existing cable until the coat hanger comes through this should be pretty easy. Unwrap the tape that connects the existing cable to the coat hanger. Pull the old existing cable through the wall to remove it...this is optional but I did this and it provided more room. Make sure the coat hanger doesn't come out!
From the engine bay, place the new cable (make sure its the appropriate end) about 6" from the end between the 2 coat hanger. I started wrapping it from 9" up from the end and went down 6", you don't want to make it bulky but you want to tape it enough so it covers the cable and the coat hanger together. It should form a narrow cable and gradually get wider.
Hopefully the attached picture gives you a better idea. I removed the tape in the middle.
happened to me. I just reached under where the cable runs to the latch and slid it back and forth a few times and shut the hood. Simple fix in 15 seconds.
I found that if you gently pull on the lever until it barely releases the latch, it usually stays taught. It has been 5-6 times, so far, and it retracted correctly each time.
No need to yank on it like it is your reserve chute's ripcord at 10,000 feet.
Alright so the total time for this swap was about 2 hours, this includes an oil change I decided to do since I try to never open my hood in the winter because of the stupid latch problem. This was done by my girlfriends brother and I, neither of which are "experienced" mechanics but we know our way around cars.
I will just copy and paste lexsc3's post and try to add the pictures to go along with it.
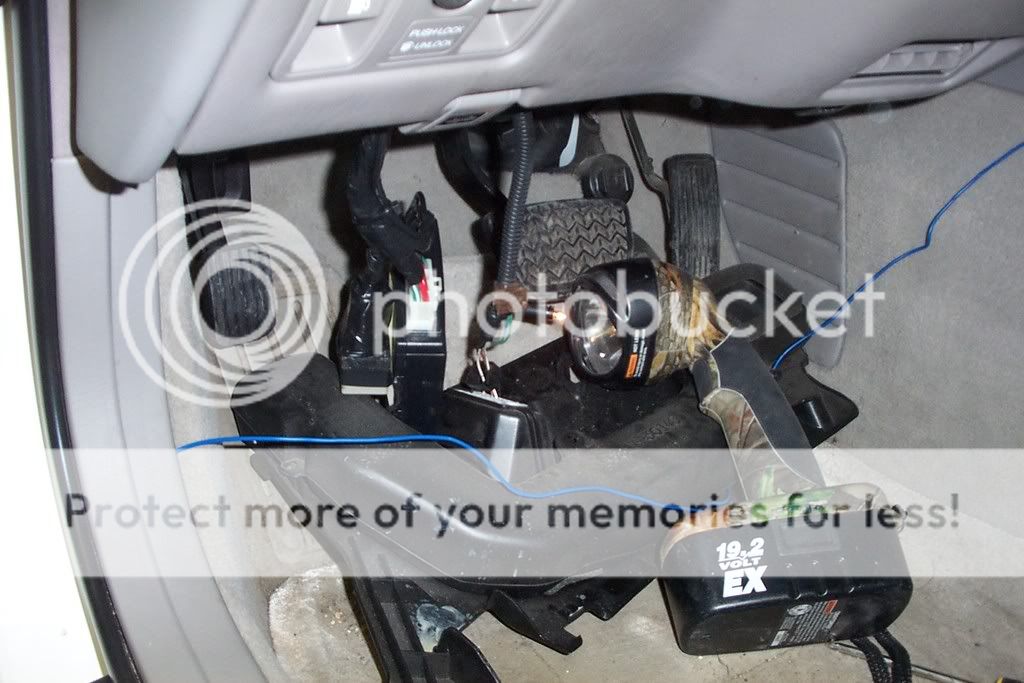
1. Go inside the car, flip the hood release out and look in the inside. Push the metal ball end of the cable out from the release switch, you push it out towards the passenger side. A couple mins of messing with it will get it out pretty easily. Picture is of the inside with the black plastic cover removed...you'll need that gone to get easier access. I broke the frickin plastic clip that helps keep the black part flush with the tan part so now I only have the 2 screws holding it up :/
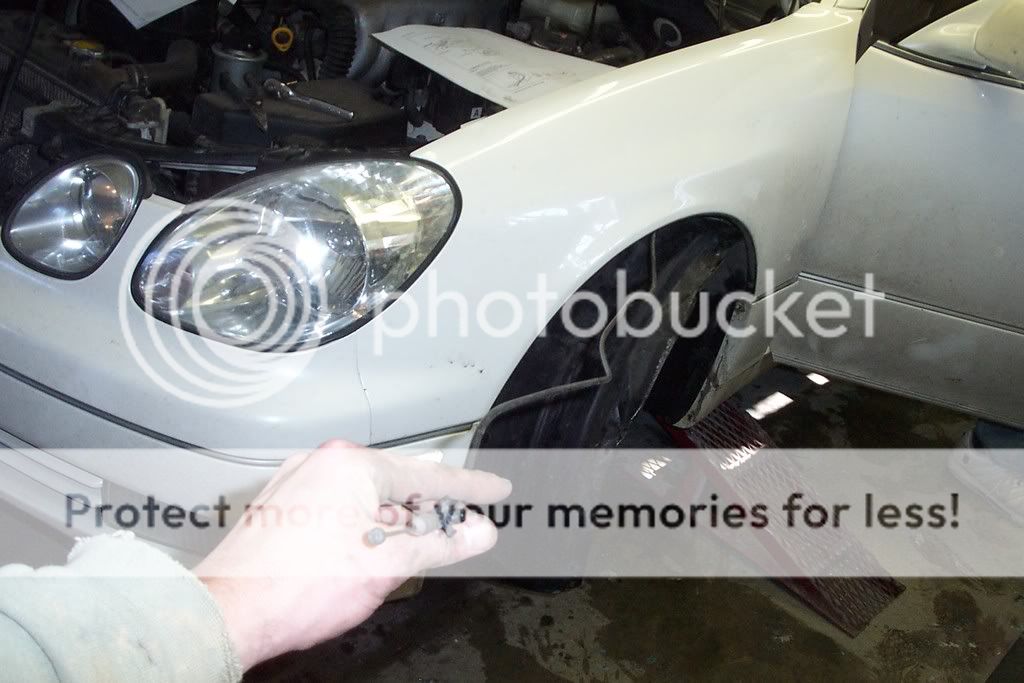
2. Open the hood (most likely open because it wont close). The main hood latch is in the dead center of the core support, there are 2 bolt and one nut in a triangle that you want to remove. The nut is on the bottom and has a cover on it, use a screw drive to pry the cover off so you can get to the nut. Now there is a cover to the right of the latch that protects the cable and a wire harness, there is one bolt with a philips screw head on it right above it. Remove the bolt and the cover, you might need to remove a electronic part that is attach the core support in front of it too. Now you should be able to remove the latch. Undo the harness and the cable. If your cable is bad the latch should click back after you remove the cable ball end. if not your latch is bad.
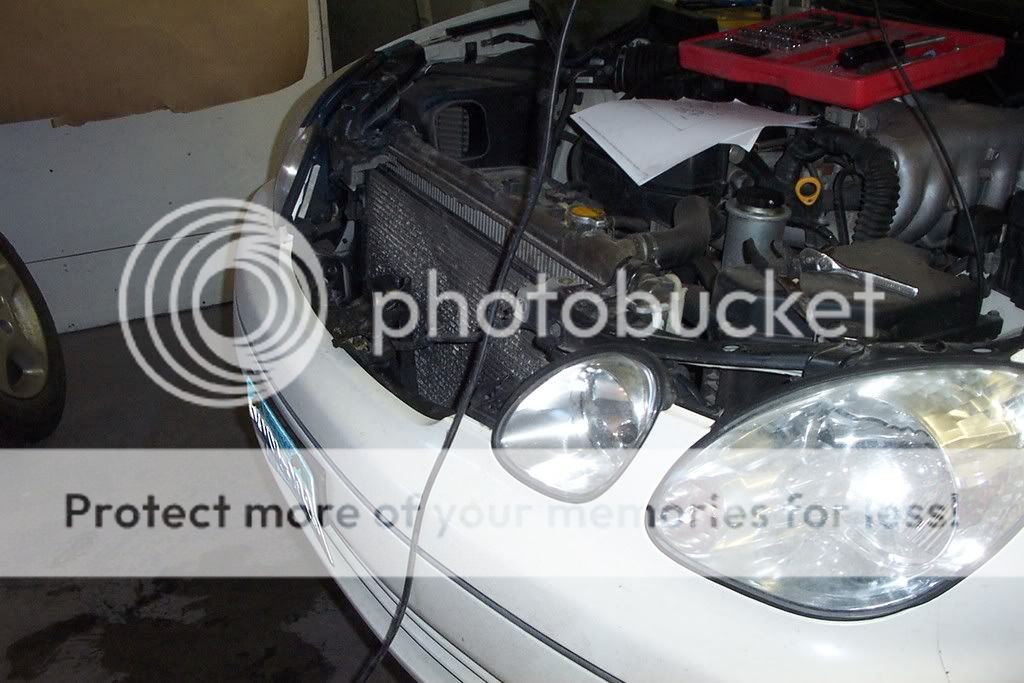
The latch/radiator support removed.
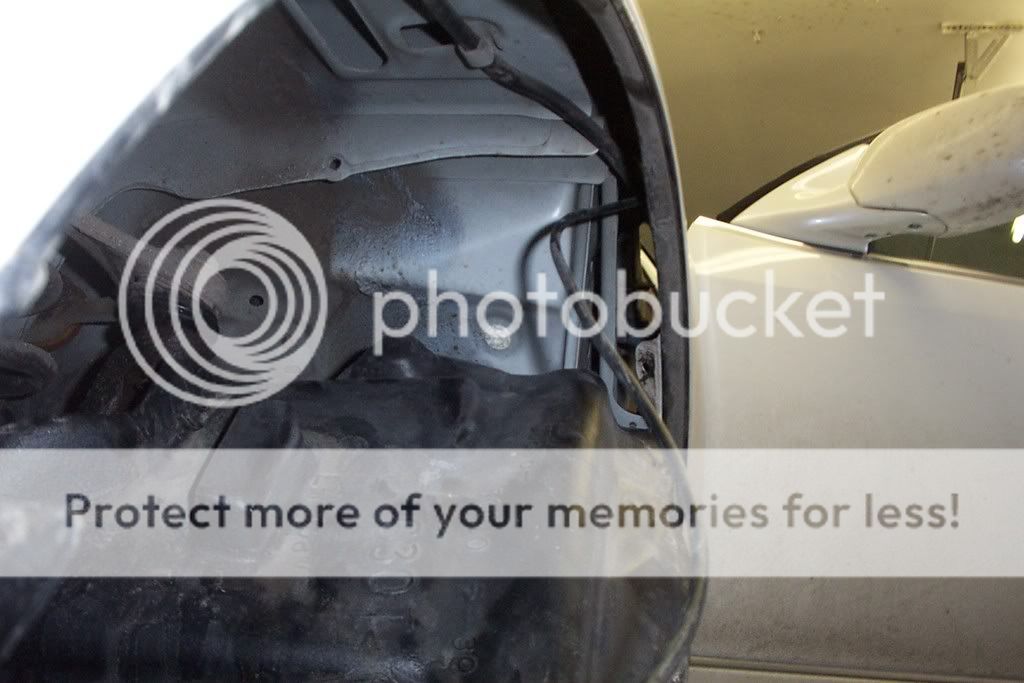
3. Follow the cable to the driver side head light, there is a little clip for the cable connected the core support above the headlight. Click that out by hand or with a pair of pliers.
The rail that the cable follows along the headlight...
4. Jack up the car, put it on a jack stand, and remove the wheel. Now take off the fender liner. There are 4 bolts below the bumper and a bunch of bolts and push in holders (not sure what they are really called) inside the wheel well, and there are two allen bolts on the side of the fender near the door. Remove them all, and remove the liner or remove it from wheel well and swing it around. Now you can see the cable attach to a holder in the top middle of the well, detach it from the clip. You should now be able to feed the cable out from the hood and into the wheel well.
Plastic rivets/bolts like he said you just have to look around to find. I removed WAY too many...in fact we didn't even remove them all IIRC we just removed enough to pry the cover down and see where the cable fed into the car. It would probably be beneficial to have new/replacement small plastic rivets and plastic holders because these things have a tendency to break very easily. The ones that are in there should just pop out with a standard screwdriver.
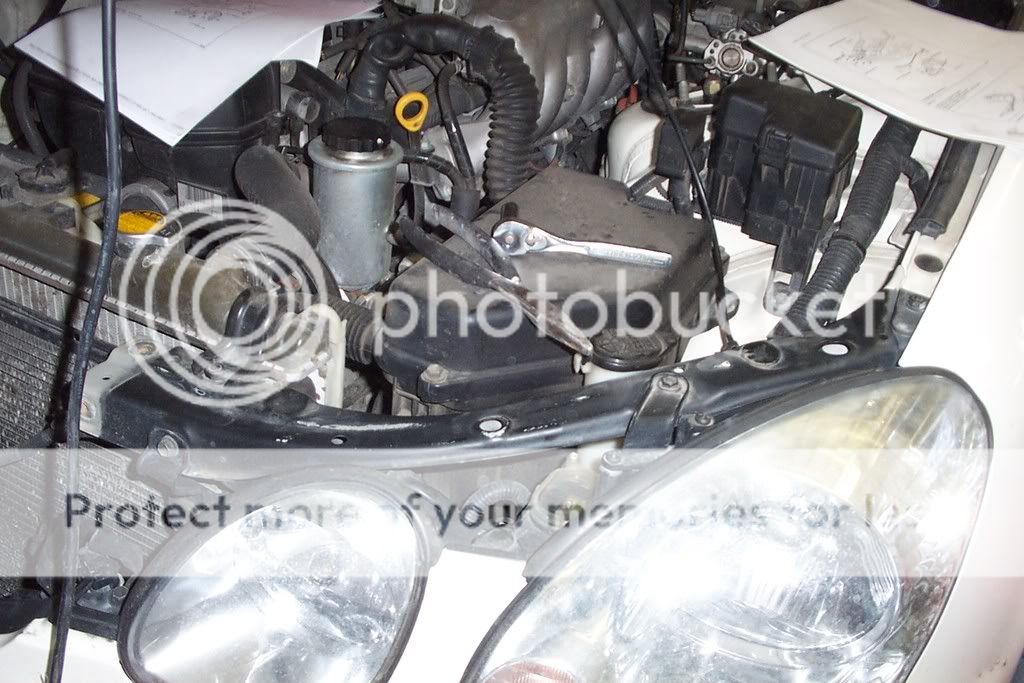
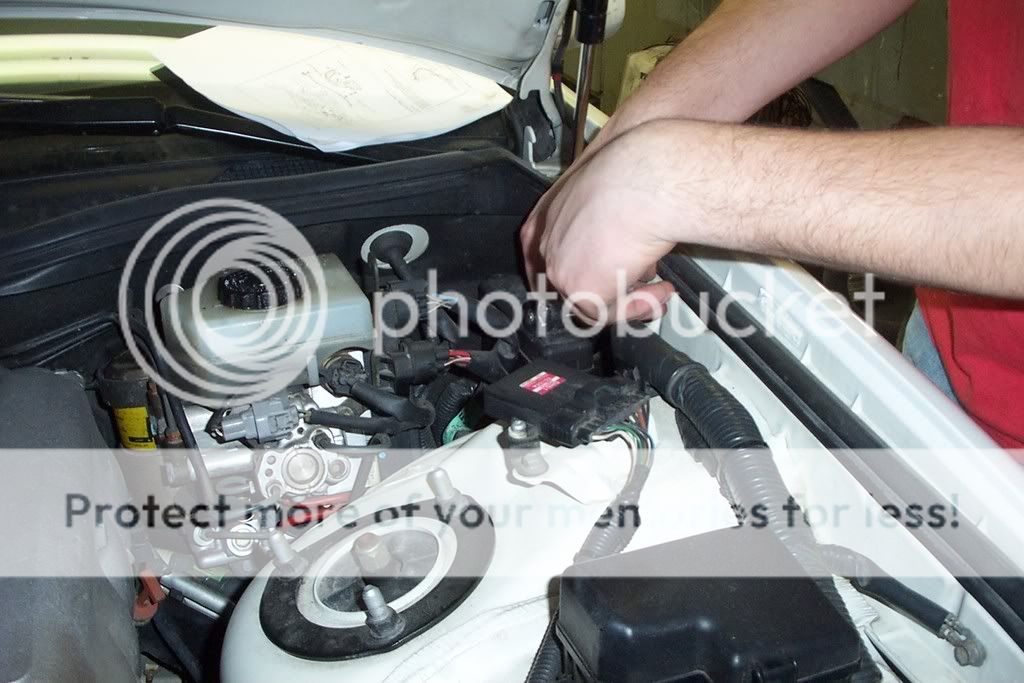
5. Go under the hood and remove the two bolts holding in the black box on the very top corner of the hood marked fuses and relays. Move the relay box as much as you can out of the way, this will give you enough room to put you hand in to find the cable where it attachs to the firewall. Pull on the cable and try to get it out, it maybe easier to feed the line up into the hood, just remember how its routed. You may also need to go into the car and help feed the cable out, be careful feeding it out so you dont mess up any other wiring as you take it out. Try to feel where it comes out of the firewall on the hood side so you know where to feed the new one in.
Small hands are a plus here. It is very helpful to have 2 people do this job, one feeding and one assisting the feed.
6. Once you have the old cable out, first feed the new cable through the firewall, this is going to be the biggest pain. I was being extra careful not to bend the cable in anyway. I found it was easiest to feed the cable in from the hood guiding with my left hand and pushing with my right. Once I got it through the firewall you can pull it through the interior end till the metal stop on the other side hits the firewall. I kept the ball end pushed in the whole time so I wouldnt damage the cable. I would only pull from the black cover of the cable. Reconnect the cable to the dash and the switch.
7. Connect the cable back in clip in the wheel well and feed it back through above the head light. Take the little clip off the old cable and put it on the new cable and hook it back in the core support. This will be annoying too, i balanced it on the tip of my finger and moved it up till i could get it in the hole. Took like 10 tries but I finally did get it. Feed it to the latch spot and reconnect the latch and harness. Bolt back in the latch and then the cover next to it, and the electronic piece if you took it off. Put back in the fender liner and bolt it back up. And then bolt up the relay box. Put back on the wheel and lower the car, (dont forget to torque the lugs down to spec).
8. Now come the moment of truth, to be safe I would remove the grill before testing to see if you did it all right, this way you will be able to get to the latch if somethings messed up. I didnt do this and as I closed the hood I regretted till the moment I hit the interior switch to open it back up and it worked. It only a couple bolts and will save you alot of headaches if it didnt work.
Overall I'd say it was a fairly easy swap. The hardest part was the feeding of the cable through the small holes and spaces, people with large hands I do not envy you if you attempt this. It's VERY nice to have a hood that latches every time now...the job is well worth it and very well worth the savings as lexsc3 said.
Did this over the weekend and I wanted to say thank you for taking the time and writing this up with pics. If it werent for this I would have never been able to replace mine.
TIP - Use a Metal coat hanger for sure to help getting the wire through the grommet.
I'm adding my post to help future weekend mechanics who want to replace their GS300 hood latch cable. A special thanks to "lexcs3 and 98GS300-2" posts for all their insights. After reading everyone's post, I finally took this daunting task on my 2002 GS 300 Sport Design. I'm going to provide insight for those who have a similar situation as mine. My hood latch cable became inoperable due to it being stretch overtime. See Pic below
I followed all the steps "lexsc3 and 98GS300-2" provided but found that in my case I could've just strung the hood cable with a string and pulled it all the way through without disassembling any part. But I will provide my experience and insight with additional pictures for those who need to see what they need to look for if their situation is not similar to mine.
Part number for this project is in the picture below.
There are two screws (one of the screw can be seen on the left side of the hood release in the picture below) and a clip (right side of the hood release on the picture below) that needs to be released to remove the front cover, once unscrewed and unclipped, gently pry it down slowly from one end to the other end until it comes down, this will avoid any breaking of the cover and clips.
Picture below shows the cover removed which will allow you to see where the hood cable is going to. Below you can also see where the screws and clip are placed.
Picture below shows where hood cable is going. Again, for those who just need to replace the hood cable due to being stretch, you don't need to remove this cover or anything else.
Pictures below show the fuse box and once the fuse box removed it will show where the hood cable is coming from.
I moved the fuse box aside instead of removing it completely, see picture below .
The hood cable is the one with the metal top hat attached to it. It's underneath the big boot, so just feel around for it.
Tie your hood cable to a long string before pulling it out. If you do this, you can pull the hood cable in whatever direction, making it a one man project. See pictures below.
Now I tied the new cable to the string and pulled it back into place. Again I could've just string the old hood cable to the new hood cable and pulled it all the way through. Instead, I was concerned that the metal top hat on the hood cable was going to be stuck somewhere so I hesitated in pulling it. In the end, I pulled the rest of the old hood cable along with the new cable to avoid removing the driver's side tire and covers. The metal top hat was not a problem for me, I just pull the whole hood cable through.
Once you pull the new hood cable through the hood latch. Remove the hood latch and replace the old hood cable and install the new hood cable accordingly. This step is easy, if you need further instructions see "98GS300-2" post on this.
By now you should have the new cable in place and you should start putting everything back in place. Hooking the new hood cable to the hood latch and the inside latch release is pretty simple, just try to be comfortable while doing it and do not rush the job. To test the new hood cable, I used a philip screw to press the hood latch down to activate the lock. If you do this, you will avoid having to deal with some of the problems from other who attempt this project. I did this a couple of times before actually closing the hood. For me this project was a success!
 04-29-15, 04:24 PM