
Gauge Cluster DIY as requested...
 03-03-08, 11:49 PM
#1
Instructor
Thread Starter

Sorry if anything is unclear or misleading, it is 1:22am and i am very tired, i have finals in less than 6 hours. Do not do this unless you willing to break something, it should take no more than an hour to anyone who is doing it a 3rd or 4th time, but expect 2 hours to have it apart and together.
I Do Not take responsibility for anyone who breaks something, i tried to document my to the best of my abilities and have tried to be very clear.
Here we go...
-1 Phillips screwdriver
-2 Flathead screwdrivers
Take your time...
Step 1
Don't scratch your interior, you will regret it later on..
Step 2
Put your key in, and keep the steering wheel down, don't pull the keep out until your done..
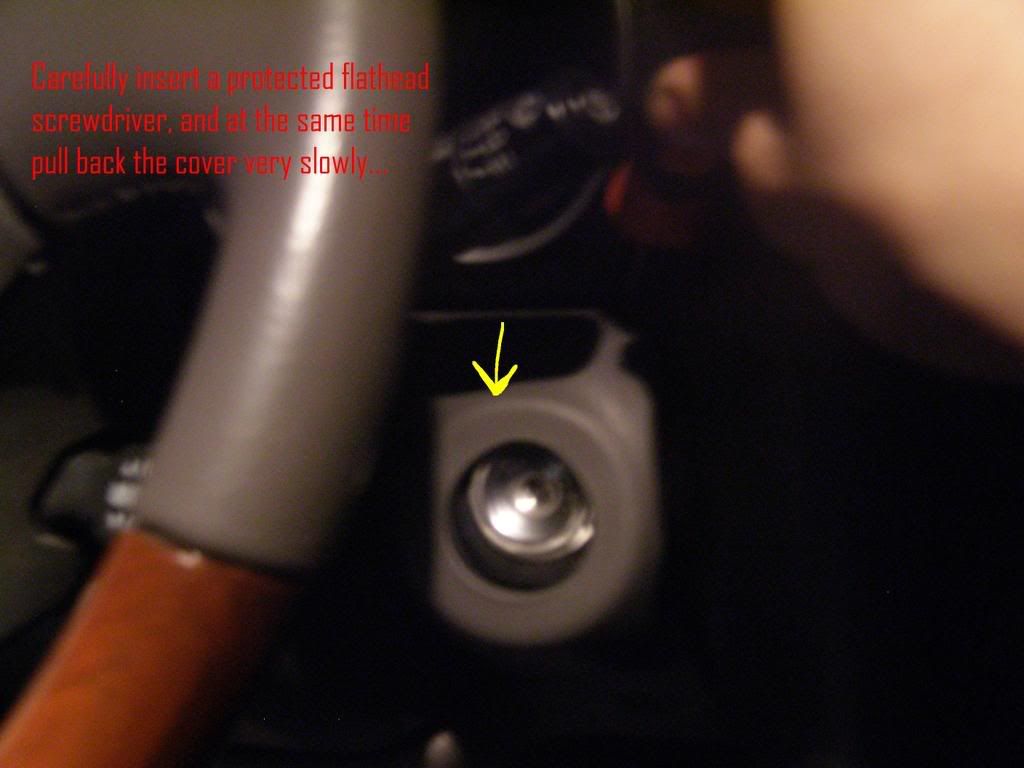
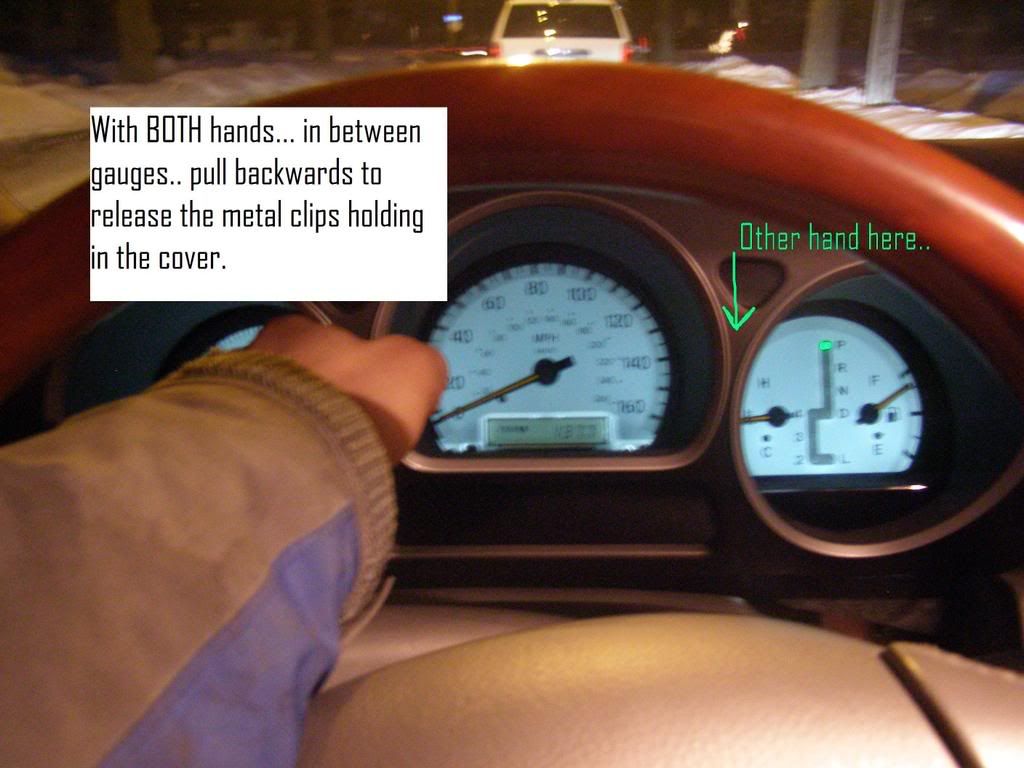
Use 2 hands, of course i had to hold the camera, it helped to loosen the cluster with a flathead, wiggle it around the cluster before the pull...
Step 3
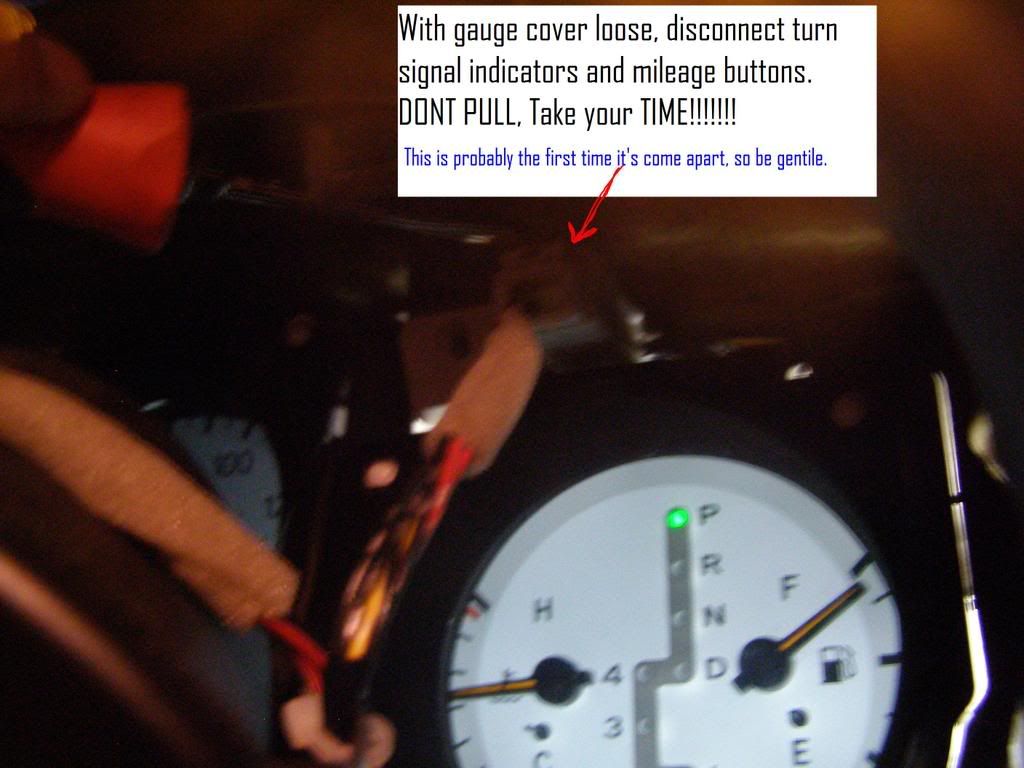
Don't pull on the wires...
Step 4
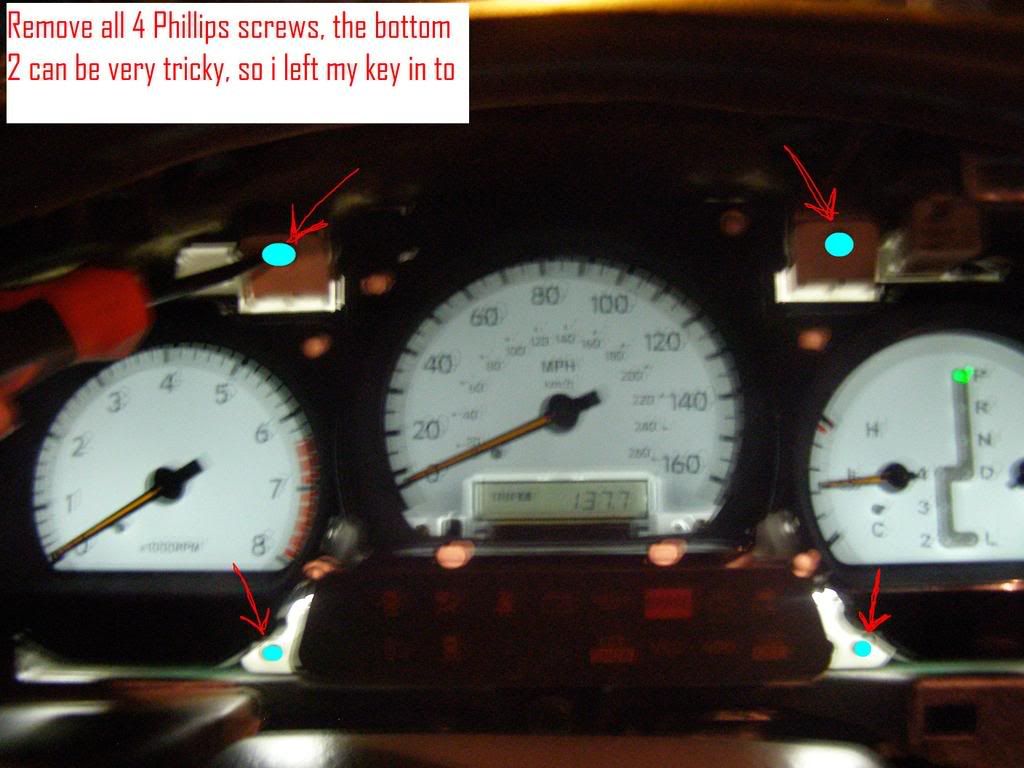
Don't lose the screws in the plastic trim, the lower 2 can be tricky!
Step 5
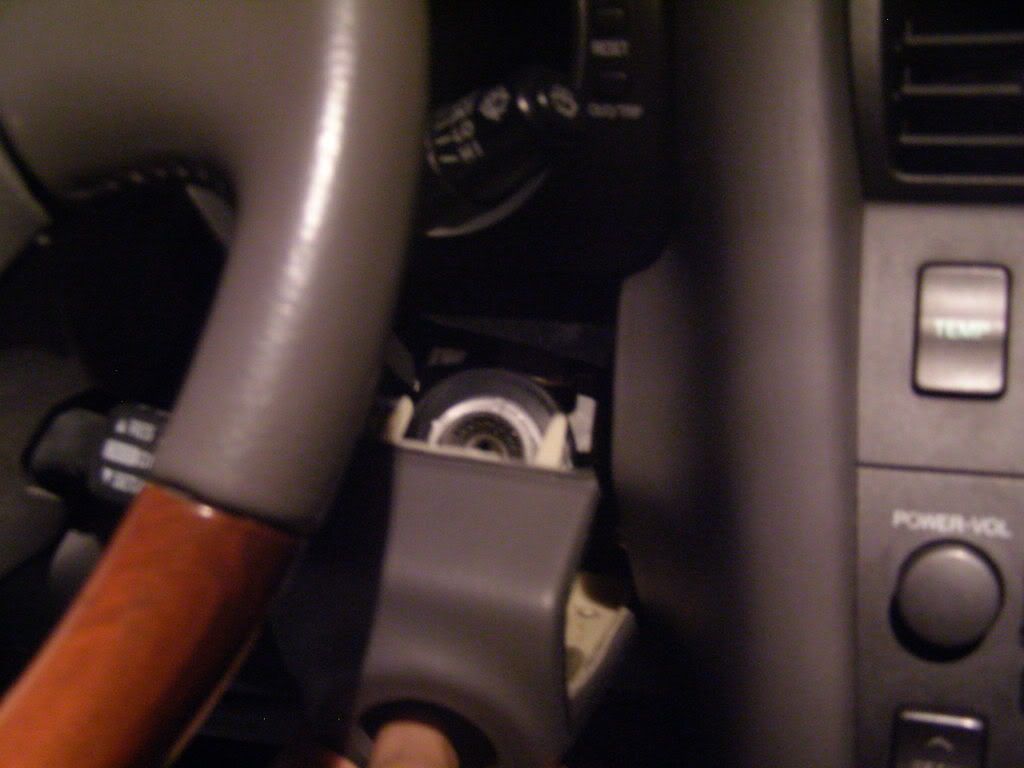
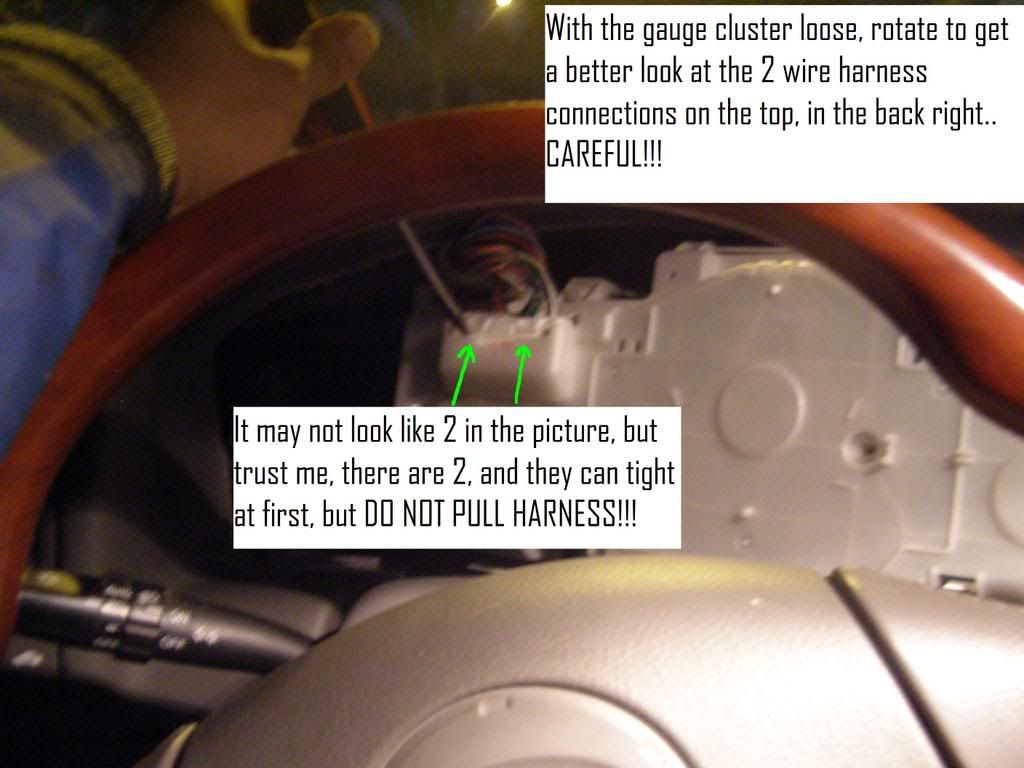
Now your going to twist the gauge cluster, so make sure the harness is free to move and don't pull on the harness, it's quite easy.
Step 6
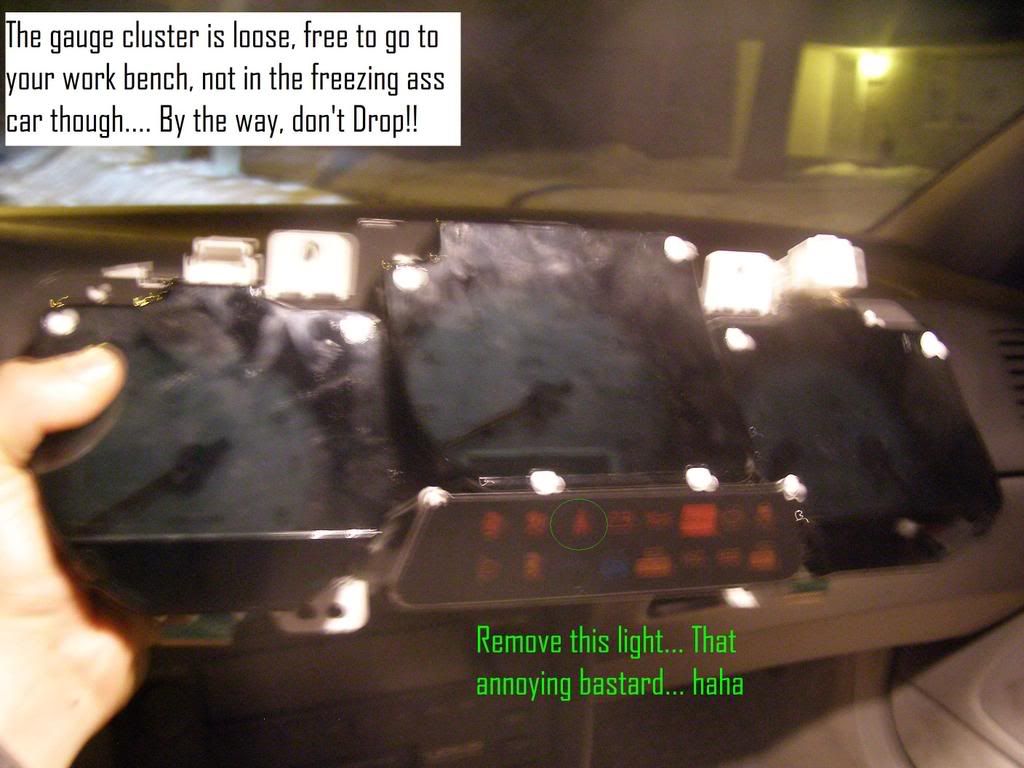
That bastard is free, and don't drop it cause you will be crying........
....Not really a step
Sorry fellas, it is too late to continue. I will finish the gauge disassembly tomorrow, but for now, i will let you guys chew me up on this post. Let me know if there are any questions, complications, etc.
I'm passing out, in the mean time i will be dreaming of my GS... haha, i'm sure you know the feeling... Well here goes nothing..
I Do Not take responsibility for anyone who breaks something, i tried to document my to the best of my abilities and have tried to be very clear.
Here we go...
-1 Phillips screwdriver
-2 Flathead screwdrivers
Take your time...
Step 1
Don't scratch your interior, you will regret it later on..
Step 2
Put your key in, and keep the steering wheel down, don't pull the keep out until your done..
Use 2 hands, of course i had to hold the camera, it helped to loosen the cluster with a flathead, wiggle it around the cluster before the pull...
Step 3
Don't pull on the wires...
Step 4
Don't lose the screws in the plastic trim, the lower 2 can be tricky!
Step 5
Now your going to twist the gauge cluster, so make sure the harness is free to move and don't pull on the harness, it's quite easy.
Step 6
That bastard is free, and don't drop it cause you will be crying........
....Not really a step
Sorry fellas, it is too late to continue. I will finish the gauge disassembly tomorrow, but for now, i will let you guys chew me up on this post. Let me know if there are any questions, complications, etc.
I'm passing out, in the mean time i will be dreaming of my GS... haha, i'm sure you know the feeling... Well here goes nothing..
 03-04-08, 05:57 AM
#3

He is posting this, because if you read on in the forms, he posted something pertaining to "would anybody like a DIY gauge mod?" and I, like many others jumped rite on it... I really appreciate what he is doing.... I have been looking for something like this forever, but have been too afraid to break my car  So anyway thank you very much for the detailed instructions, but FOCUS ON SCHOOL!!!! Write up the DIY when you are all through and you have some free time
  Again Thank you so much for doing this write up. It is much appreciated. -Joe
So anyway thank you very much for the detailed instructions, but FOCUS ON SCHOOL!!!! Write up the DIY when you are all through and you have some free time Again Thank you so much for doing this write up. It is much appreciated. -Joe
03-04-08, 06:07 AM
#4
Instructor
Thread Starter
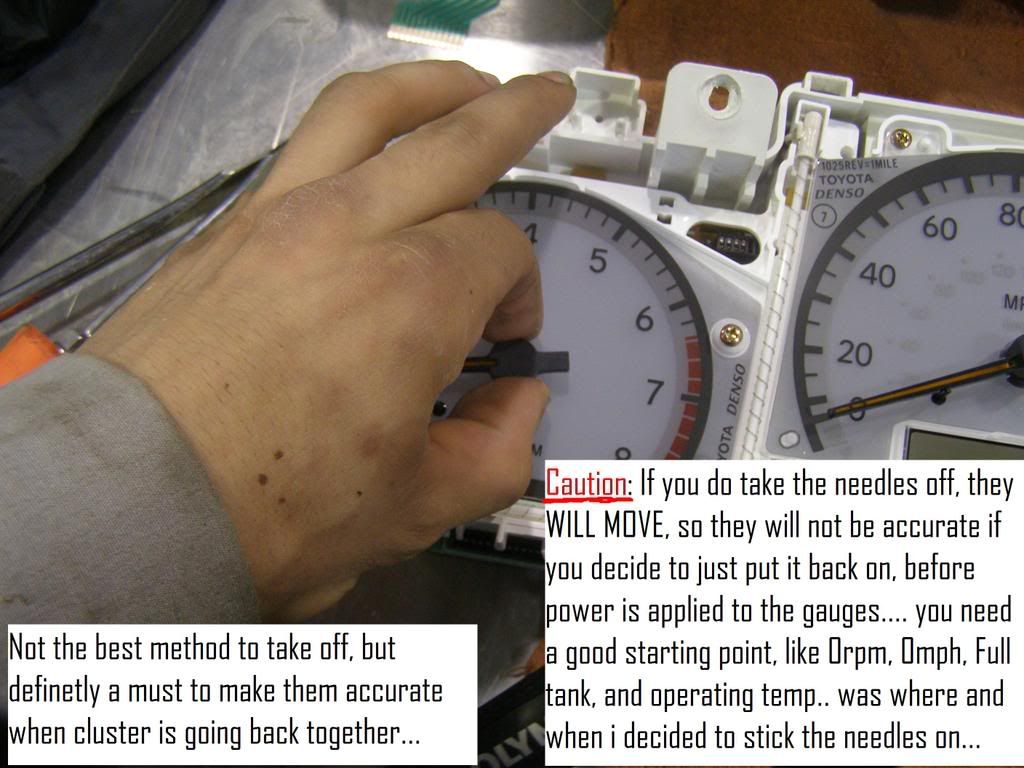
Note: if needles are removed, gauges will rotate, causing gauges to be unaccurate, before applying needles, put gauge cluster in the vehicle, while connecting both connectors, this is cause your gauges to goto a starting point.. (i.e. Key on, engine off.. gauges will be at 0 rpm, 0 mph. It helps to have a full tank to know where to stick the needle, coolant temp can be tricky)
--- I had to drive around with the gauge cluster exposed to get the needles where i liked them before i put the gauge together..----
Step 7
Make sure not to scratch gauge assembly, keep track of screws, and where they go.
Step 8
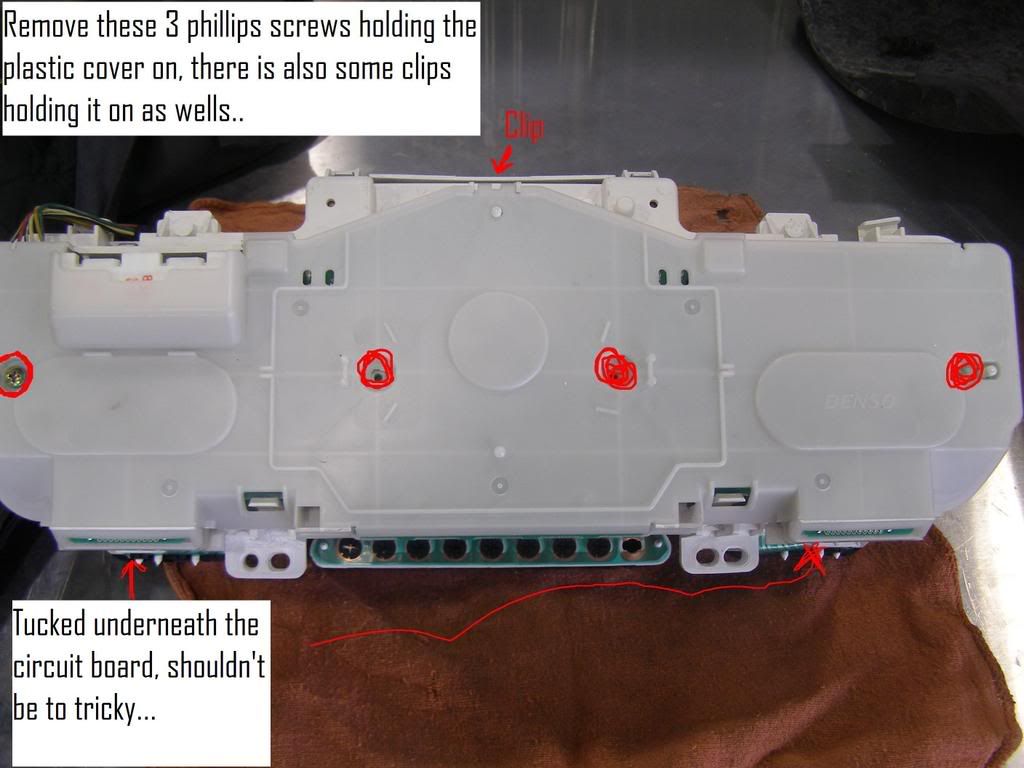
Unfasten this clip, then pull back on plastic cover.

Step 9
Remove these 3 screws
Step 10
Make sure back of cluster is protected from anything that could damage it..
Step 11
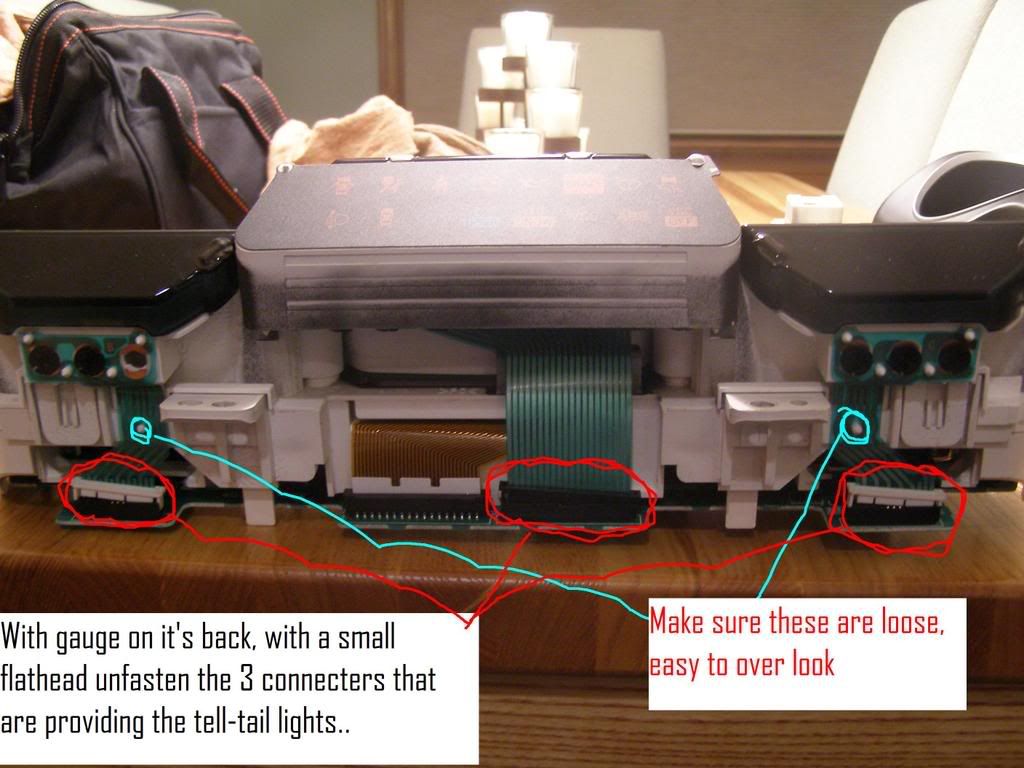
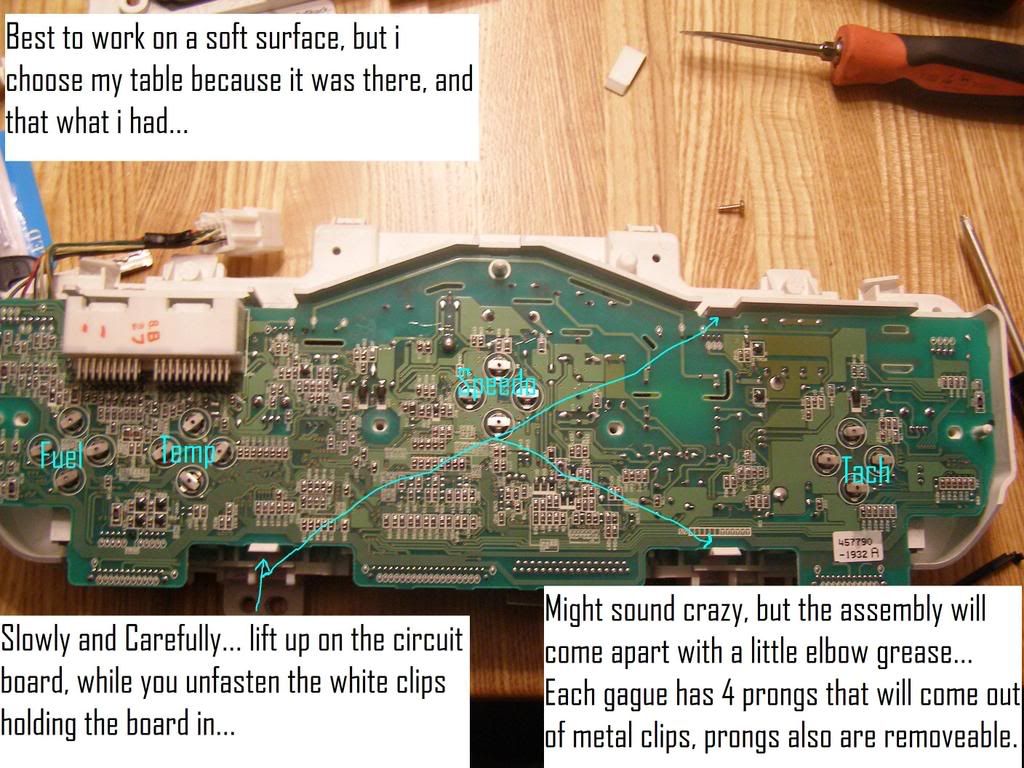
Make sure all 3 connections are loose, as well as free to seperate, then unfasten the 2 white clips on the bottom as shown..

Step 12
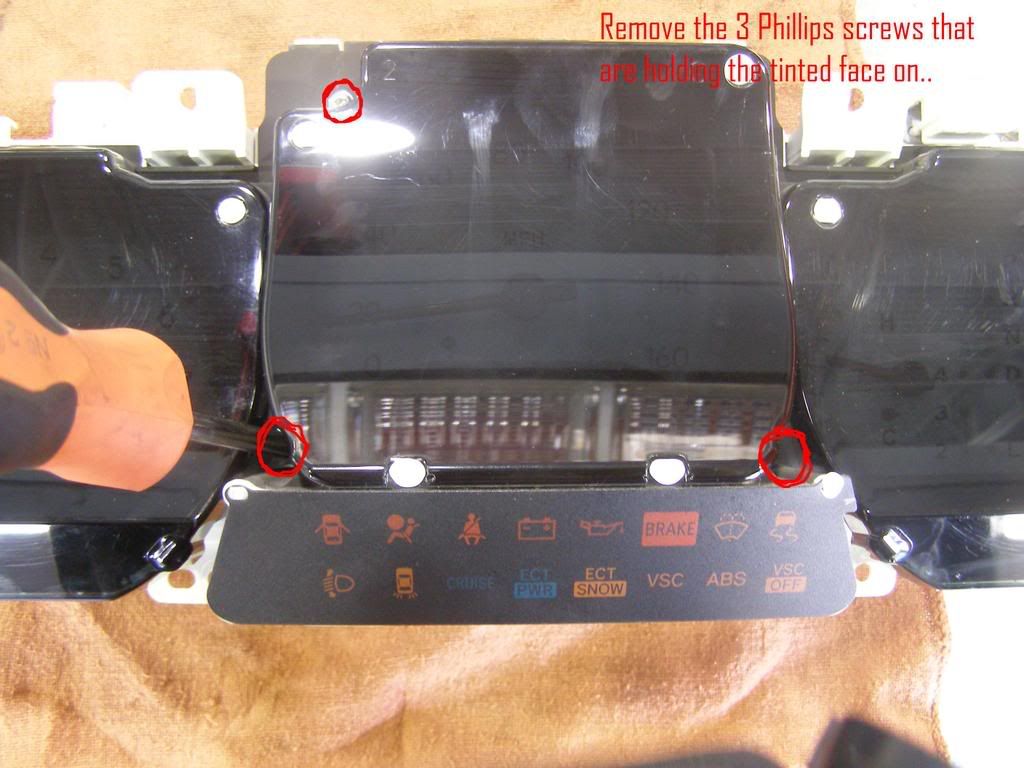
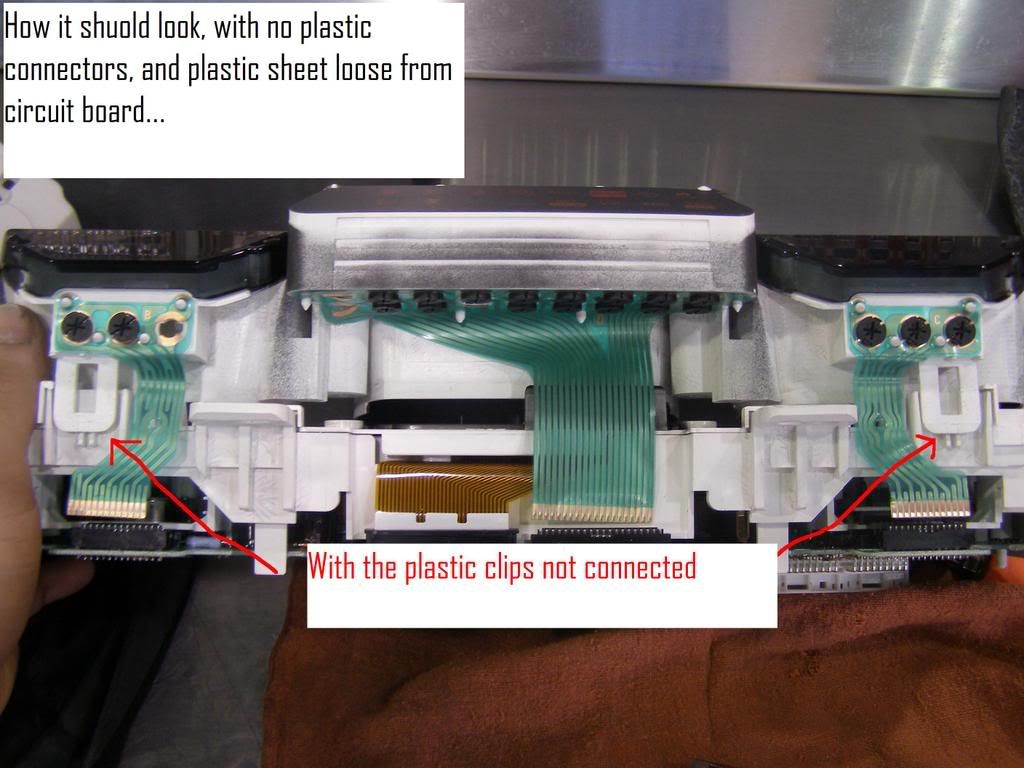
Remove the harness connector, and unfasten 4 clips on top, holding the peices together.
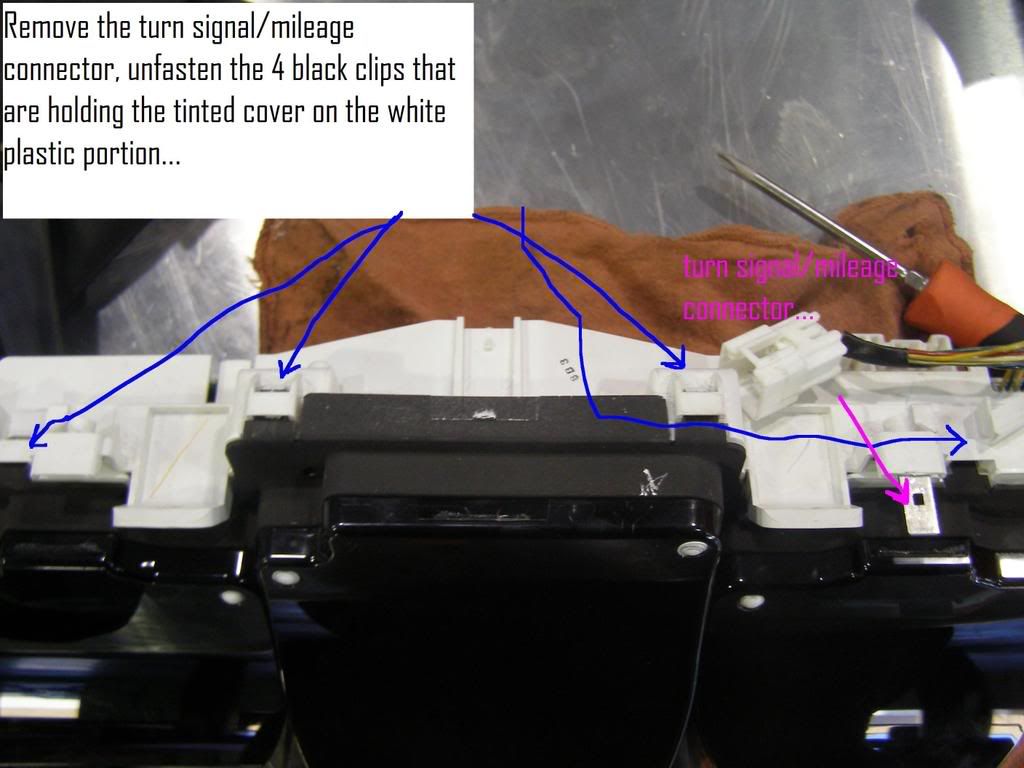
Step 13
With the tinted cover remove, carefully set aside and do not damage connectors
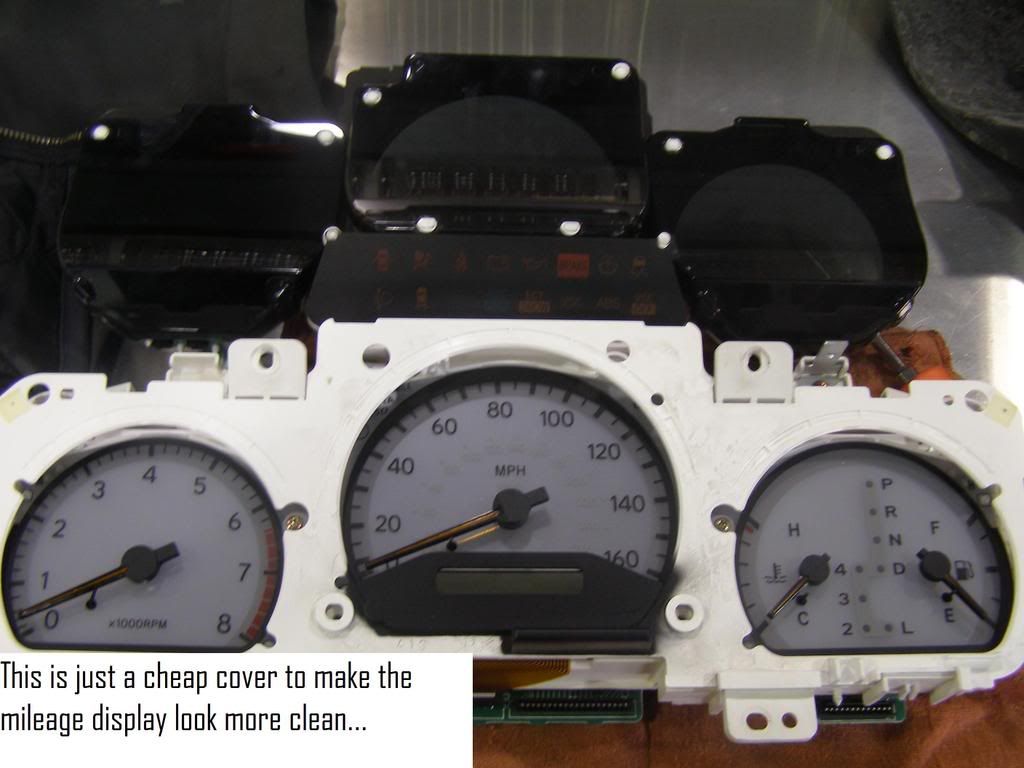
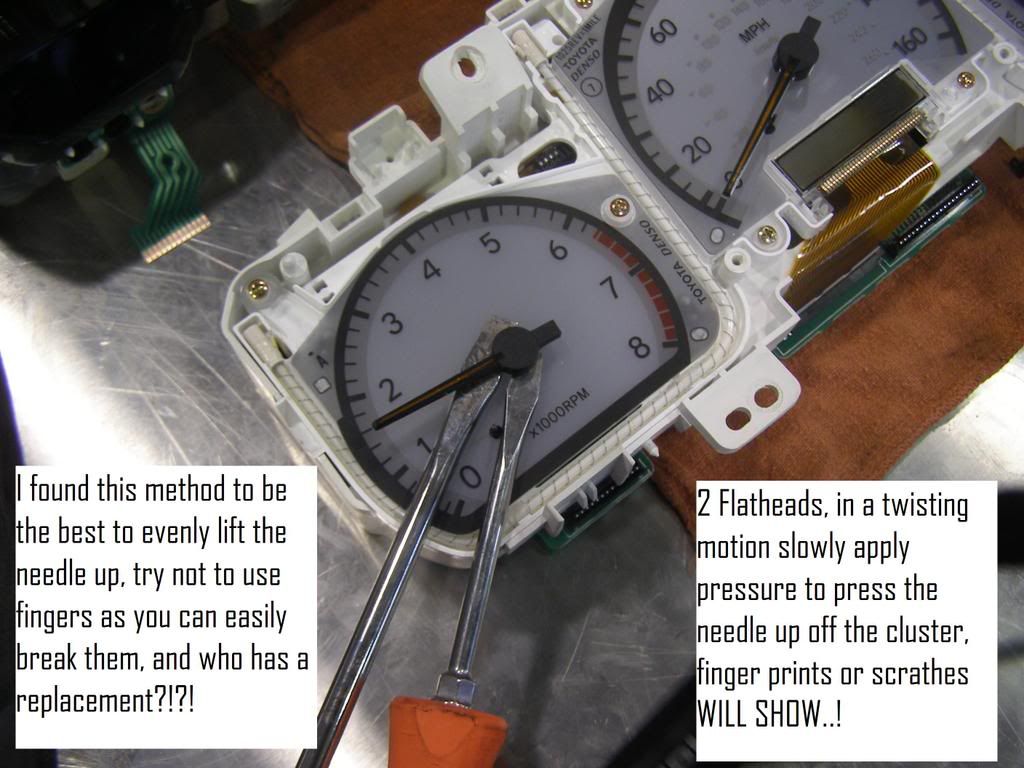
Step 14
After you remove white spacer/cover, use 2 flathead screwdrivers (A BETTER IDEA IS 2 SPOONS)... don't damage gauge sheet, and becareful not to break needles...
Step 14 a.
--- I had to drive around with the gauge cluster exposed to get the needles where i liked them before i put the gauge together..----
Step 7
Make sure not to scratch gauge assembly, keep track of screws, and where they go.
Step 8
Unfasten this clip, then pull back on plastic cover.
Step 9
Remove these 3 screws
Step 10
Make sure back of cluster is protected from anything that could damage it..
Step 11
Make sure all 3 connections are loose, as well as free to seperate, then unfasten the 2 white clips on the bottom as shown..
Step 12
Remove the harness connector, and unfasten 4 clips on top, holding the peices together.
Step 13
With the tinted cover remove, carefully set aside and do not damage connectors
Step 14
After you remove white spacer/cover, use 2 flathead screwdrivers (A BETTER IDEA IS 2 SPOONS)... don't damage gauge sheet, and becareful not to break needles...
Step 14 a.
Last edited by 3UZFTE; 05-10-10 at 08:35 AM.
03-04-08, 06:23 AM
#5
Instructor
Thread Starter
Going the Extra step.... Removing the gear selector LED display..
Extra Step 1.
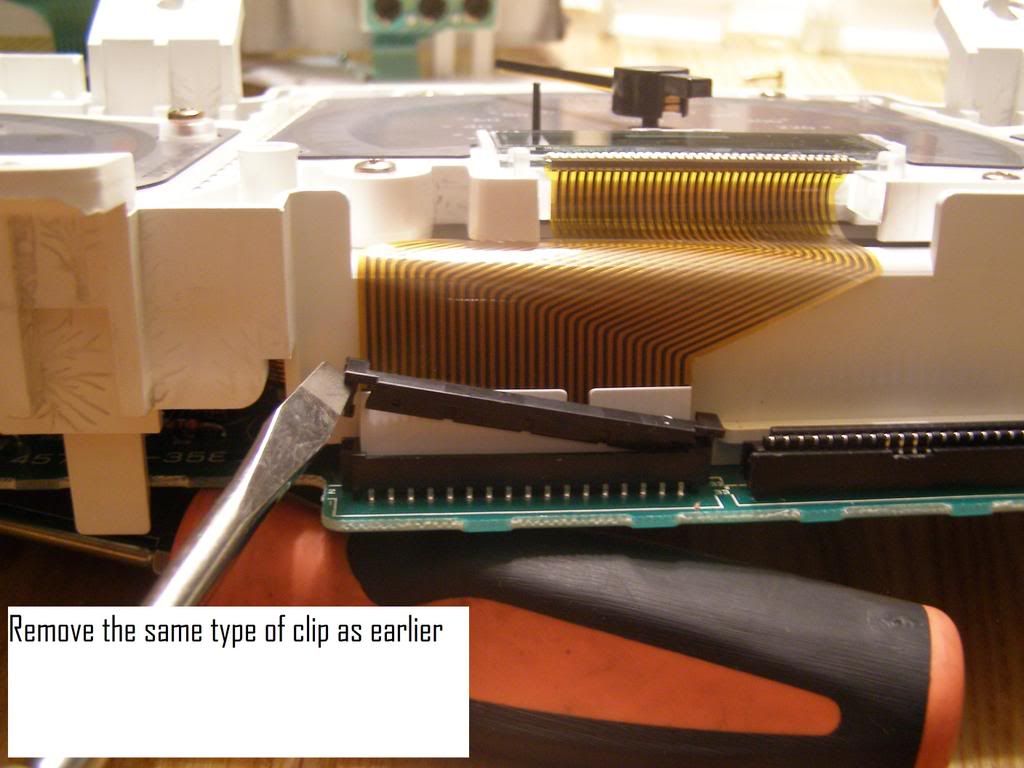
Remove the plastic retainer holding the mileage display feed in the circuit board.
Extra Step 2.
Be gentile, however there are alot of things holding the circuit board to the gauge assembly...
Extra Step 3.
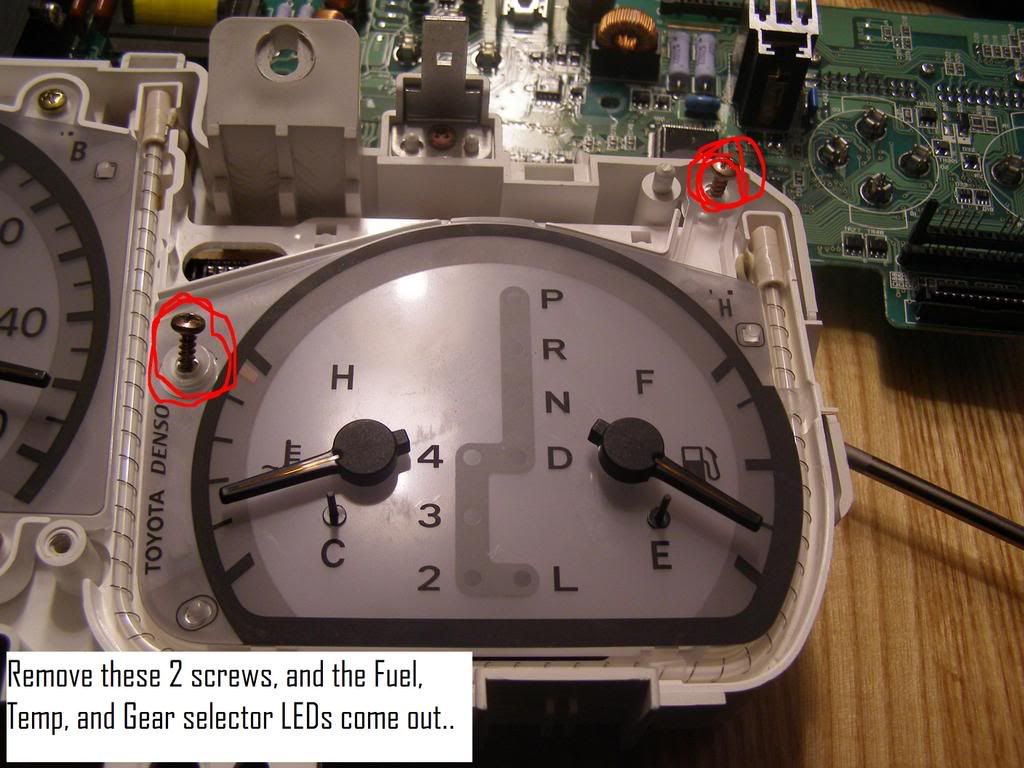
Remove 2 phillips screws, no need to remove needles, if not desired...
Extra Step 4.
Remove 2 more phillips screws on the back of the gauge, this will be underneath the circuit board if not removed yet..

Extra Step 5.
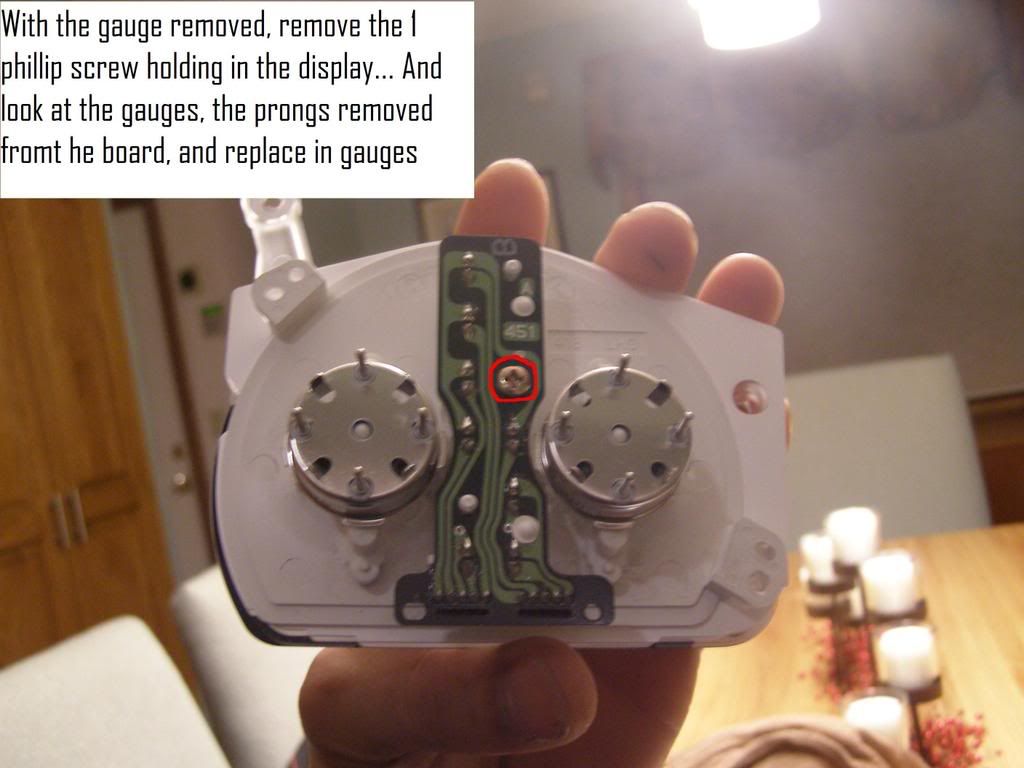
With removeable prongs back into gauge assembly, just to show you that is normal. Remove the phillips screw....
Exta Step 6.
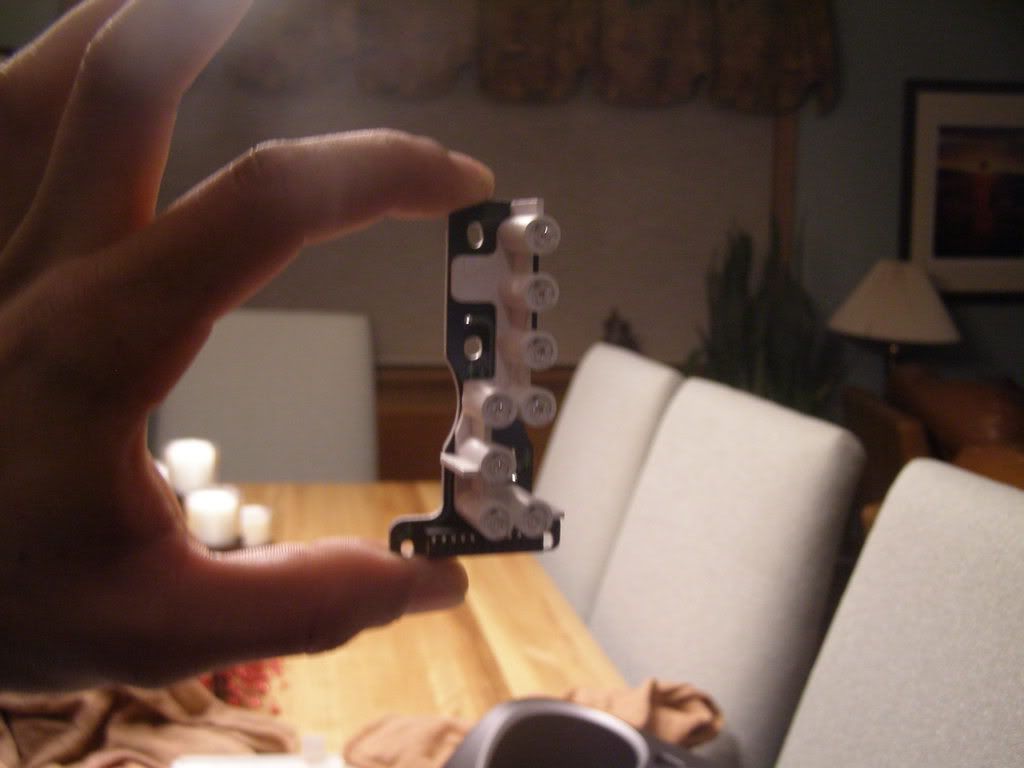
With LED display removed, solder in your LEDs... and Your done.... Almost..
Extra Step 1.
Remove the plastic retainer holding the mileage display feed in the circuit board.
Extra Step 2.
Be gentile, however there are alot of things holding the circuit board to the gauge assembly...
Extra Step 3.
Remove 2 phillips screws, no need to remove needles, if not desired...
Extra Step 4.
Remove 2 more phillips screws on the back of the gauge, this will be underneath the circuit board if not removed yet..
Extra Step 5.
With removeable prongs back into gauge assembly, just to show you that is normal. Remove the phillips screw....
Exta Step 6.
With LED display removed, solder in your LEDs... and Your done.... Almost..
03-04-08, 06:36 AM
#6
Instructor
Thread Starter
iNSTALLATION
With guage assembly back together somewhat like this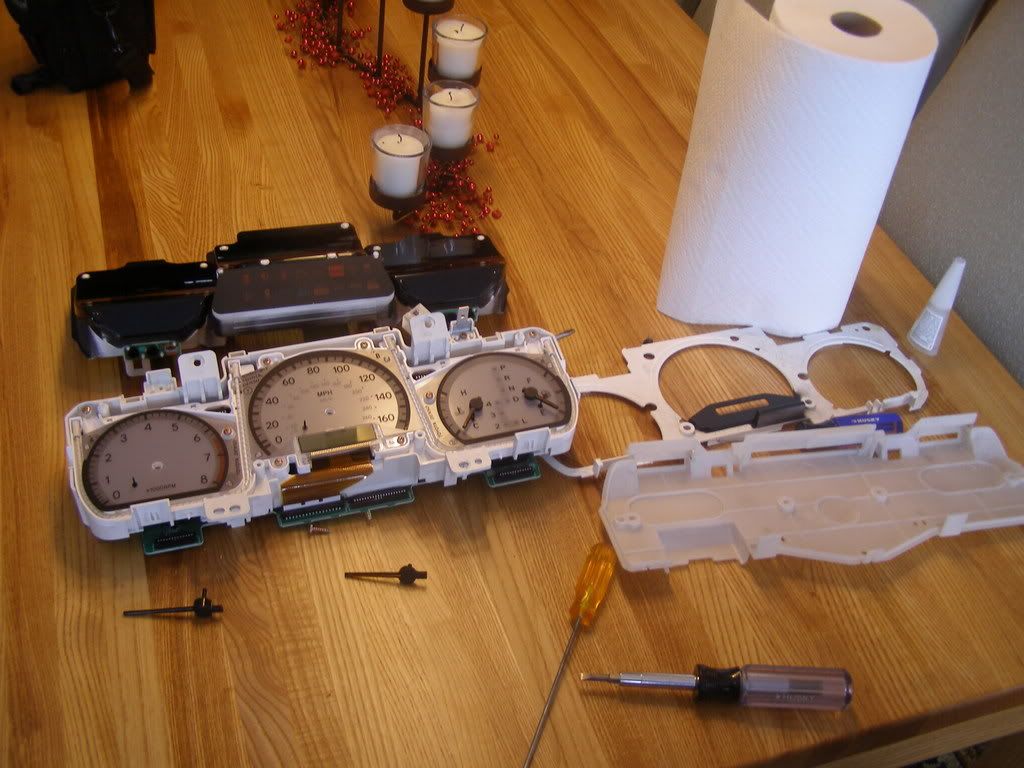
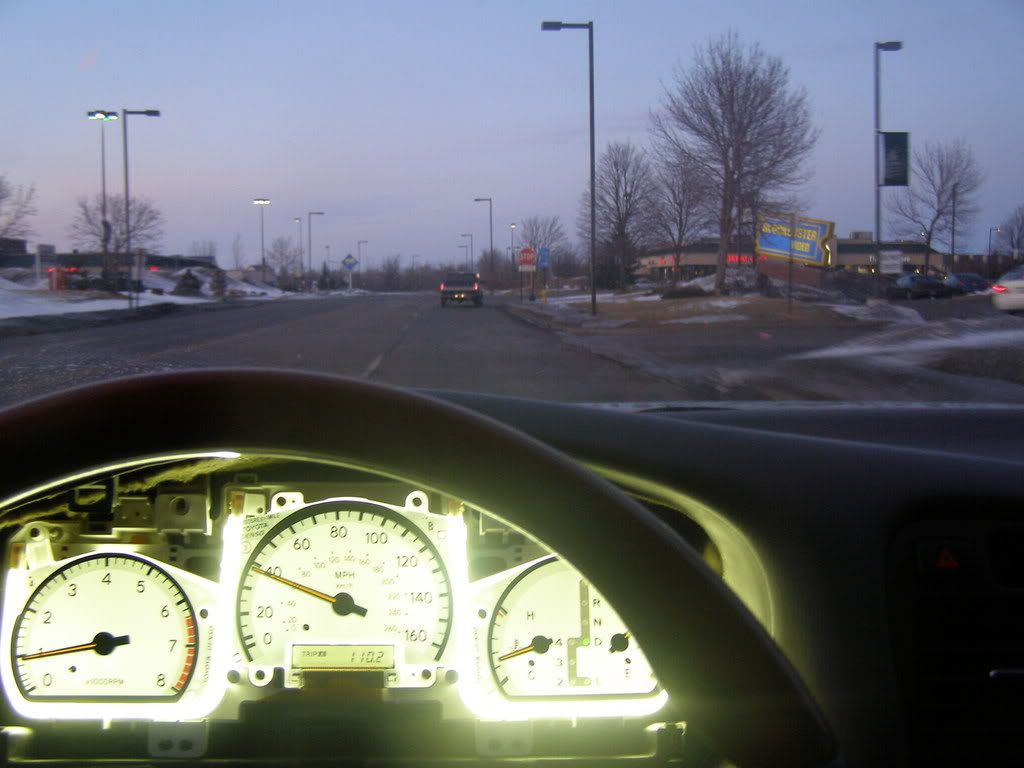
Place the gauge assembly in the vehicle with the key on, engine off to set gauges at a Zero mark, then apply the needles how they would appear with the engine not running with but all your accessories on...
0 Rpm
0 Mph
Full Tank of gas..
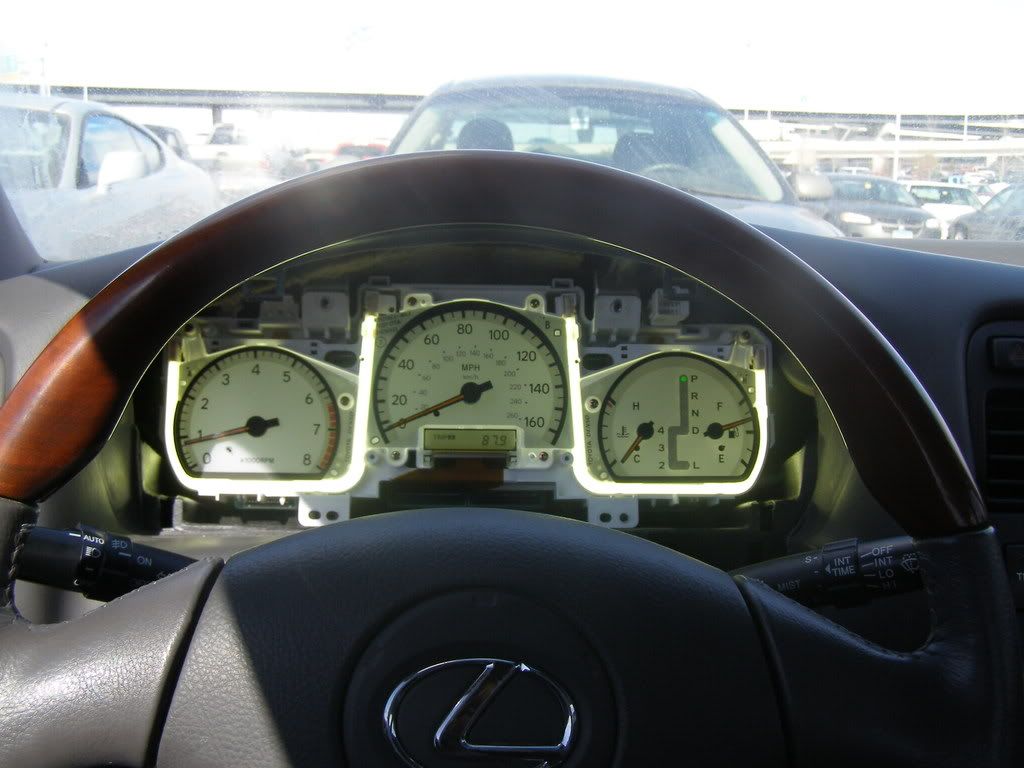
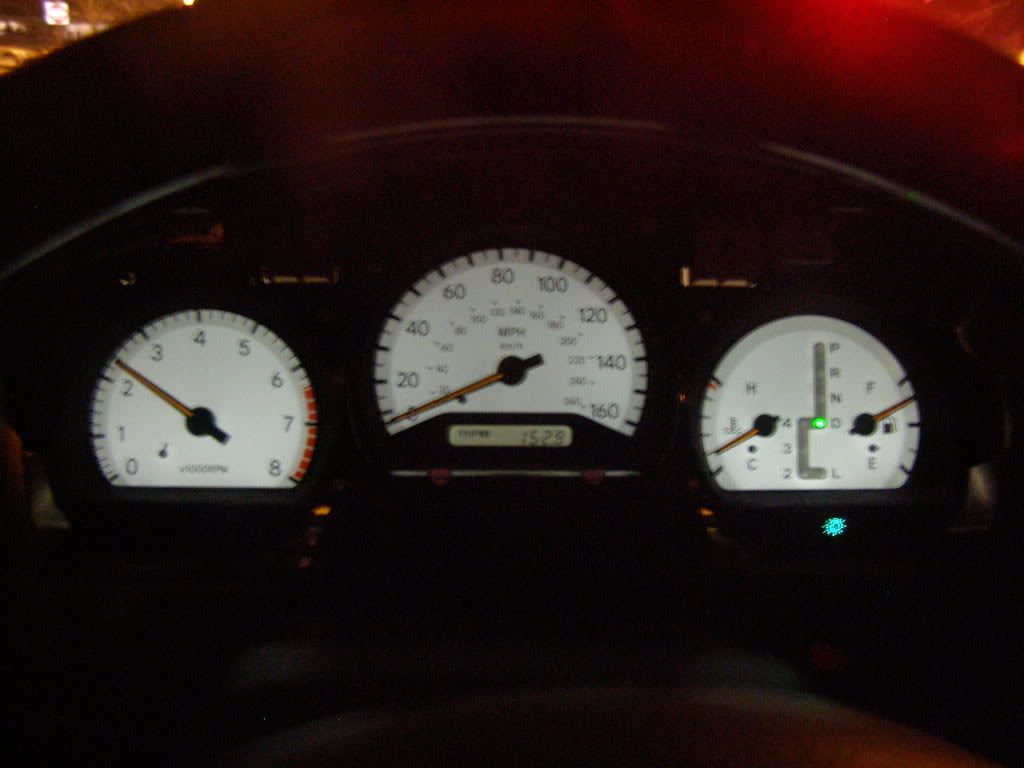
Coolant temp, tricky this one... I just plug in my gauges and drove around until they were good enough for me... Couldn't find a picture of Key on, engine off... but here is me check it at idle, driving around, after warm...
Example 1.
Example 2.
Example 3.
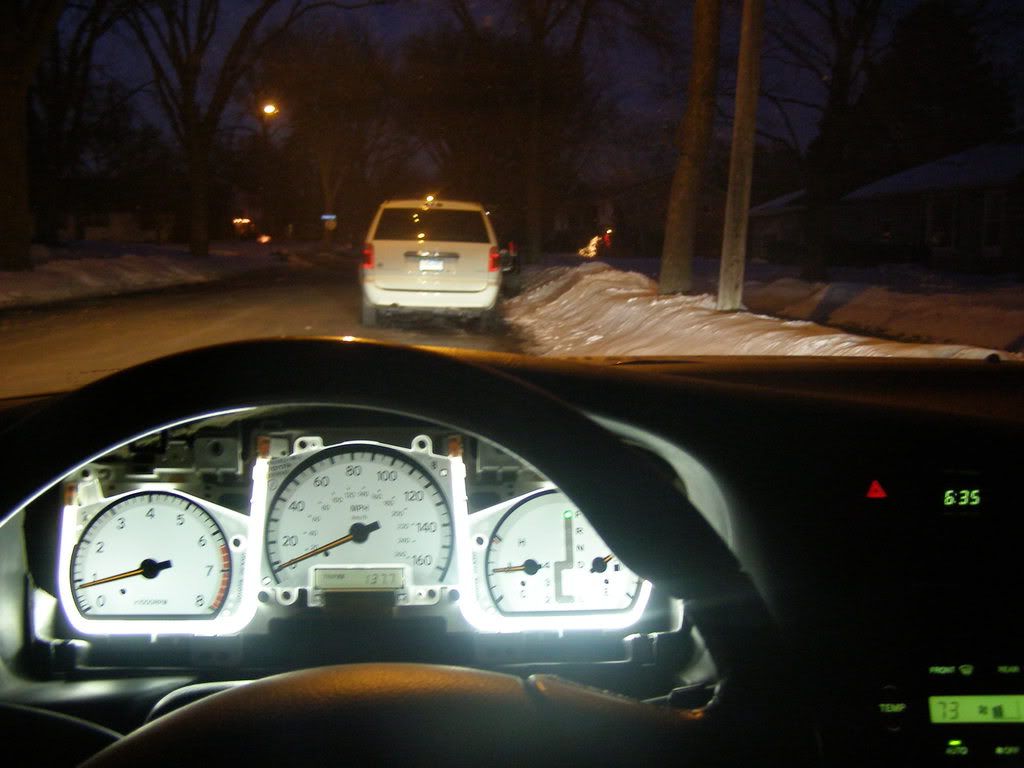
This is what happened when i rushed my first time, notice how i am IDLING at 2500 rpm, (not really, just stuck needle on when gauge was not in right position..)
So much for the redline....
With guage assembly back together somewhat like this
Place the gauge assembly in the vehicle with the key on, engine off to set gauges at a Zero mark, then apply the needles how they would appear with the engine not running with but all your accessories on...
0 Rpm
0 Mph
Full Tank of gas..
Coolant temp, tricky this one... I just plug in my gauges and drove around until they were good enough for me... Couldn't find a picture of Key on, engine off... but here is me check it at idle, driving around, after warm...
Example 1.
Example 2.
Example 3.
This is what happened when i rushed my first time, notice how i am IDLING at 2500 rpm, (not really, just stuck needle on when gauge was not in right position..)
So much for the redline....
03-04-08, 06:44 AM
#7
Instructor
Thread Starter
I just hope i can help you guys... I have taken my gauge assembly apart about 5 to 6 times, because..
1st time missing the spacer/cover
2nd time RPM and Speedo needle off
3rd Fuel gauge rotated 180 degrees
4th to see what LEDs to order
5th for the DIY
6th... Well i still have to change out my LEDS, but they won't be here for a few days.. Oh well...
I can have it out of the car, apart, and back in with all the covers, gauges, etc operating normally within about an hour or less... expect 2 the first time you tackle this easy but complicating work...
Thanks guys! Any comments, questions, clearing up, or any other Do-it-yourselfs you might be interested, i can do my best to do so...
Trending Topics

 03-04-08, 11:11 AM
#12
Instructor
Thread Starter
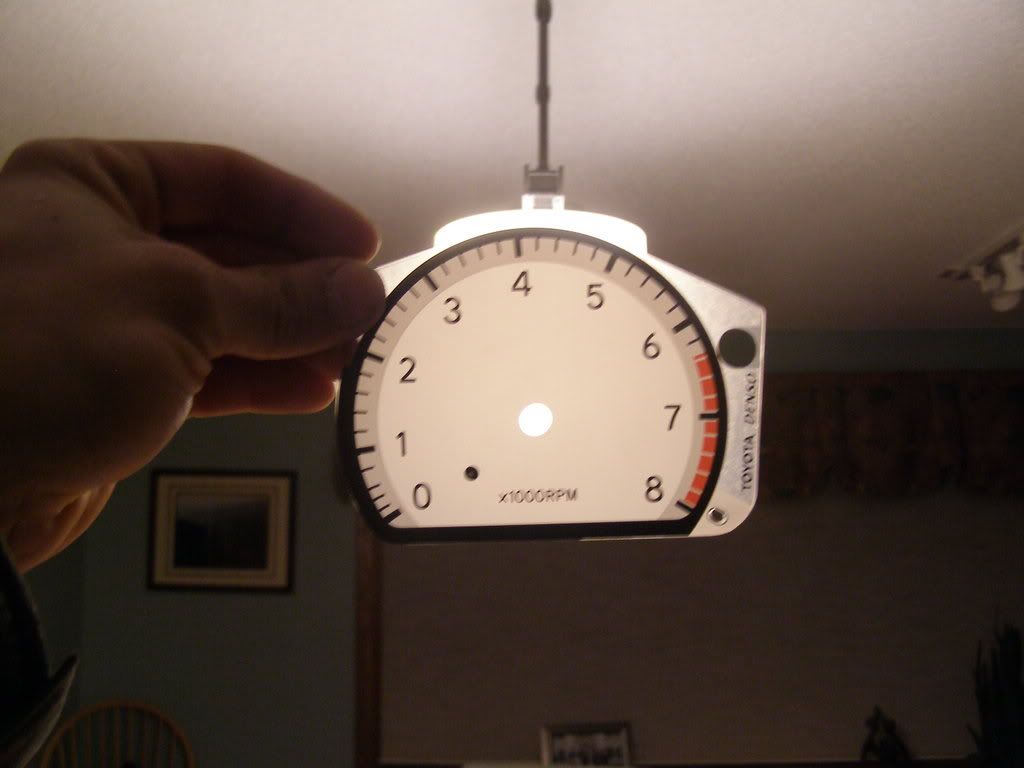
Well, since i love the white so much, i did not change the color... However... if you look carefully, you can see the gauge is actually 2 layers of plastic, one seems to be clear, and the other is a dull white that gives the gauges their color, if you were to seperate those 2 peices or possibly create you own gauge lay out...

03-04-08, 01:16 PM
#13
Pole Position

Join Date: Aug 2004
Location: Missouri
Posts: 322
Likes: 0
Received 0 Likes
on
0 Posts
so what exactly was this DIY for? are you changing the LED colors or gauges themselves or what? kinda confused... Either way it is a good write up to disassemble the gauge cluster.
03-06-08, 10:06 AM
#14
Instructor
Thread Starter
I made this so people could easily remove their dash to experiment, or fix problems. I just took it apart to understand how it works. Along the way i discovered a few things, so i thought i'd ask if people wanted it, and the response was enough so i did it. My goal was to make it more white, then cream, also i replaced my LEDs with different colors, i just wanted to be different i guess. I am a toyota lover thruogh and through, so i am trying to help other people. It is apparent to me that people do not want or need this.
03-06-08, 11:10 AM
#15
You are wrong about people not needing this If it makes you feel any better that you helped one DIY'er than you did. I really really wanted something like this and was much to scared to investigate myself when looking into this idea. This was one of the most valuable and helpful posts on my DIY list and for that I thank you. So, don't listen to anybody else haha, again, I thank you very much for putting so much time into this and it truly did help me... Thank you thank you!!!! -Joe
If it makes you feel any better that you helped one DIY'er than you did. I really really wanted something like this and was much to scared to investigate myself when looking into this idea. This was one of the most valuable and helpful posts on my DIY list and for that I thank you. So, don't listen to anybody else haha, again, I thank you very much for putting so much time into this and it truly did help me... Thank you thank you!!!! -JoeI made this so people could easily remove their dash to experiment, or fix problems. I just took it apart to understand how it works. Along the way i discovered a few things, so i thought i'd ask if people wanted it, and the response was enough so i did it. My goal was to make it more white, then cream, also i replaced my LEDs with different colors, i just wanted to be different i guess. I am a toyota lover thruogh and through, so i am trying to help other people. It is apparent to me that people do not want or need this.