Replacing Non-Nav Radio in a 2007
 09-17-11, 11:03 AM
#46
Lead Lap
Thread Starter

Join Date: Jan 2007
Location: MS
Posts: 799
Likes: 0
Received 0 Likes
on
0 Posts
I might to try to remove the Polk tweeter from it's silver casing.
I think I will create some some free male leads with extra schosche adapters and plug them into that plug.
 12-20-11, 11:00 AM
#47
Lead Lap
Thread Starter
Join Date: Jan 2007
Location: MS
Posts: 799
Likes: 0
Received 0 Likes
on
0 Posts
I've upgraded the sub and want to cover the process since it is a bit outside of the norm for most audio guys.
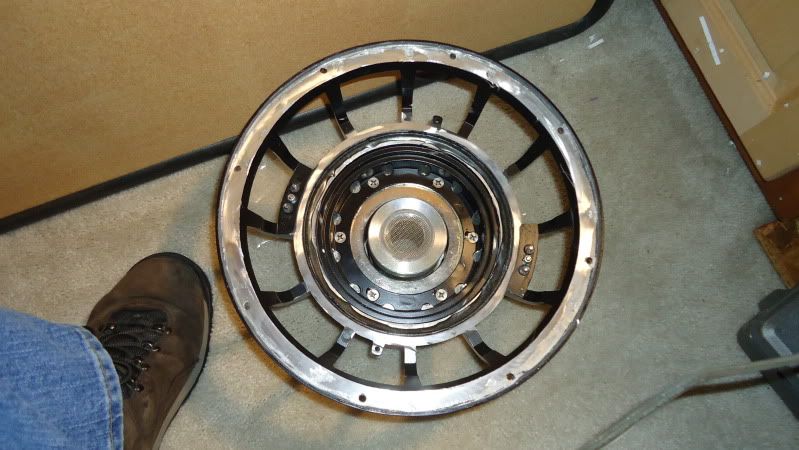
A friend was surfing Car Audio dot Com (ca.com) when he saw two motor / basket pairs for sale. At first we both thought they were TC 9 based subs. After buying and getting them in, we saw that they were much closer to the TC 7 based motor. Turns out they were originally from a Diamond Audio sub and sold through Ebay surplus seller Robot Underground.
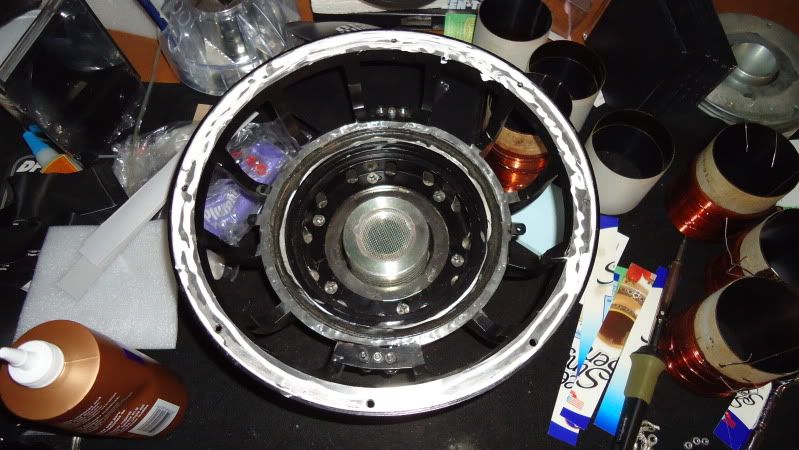
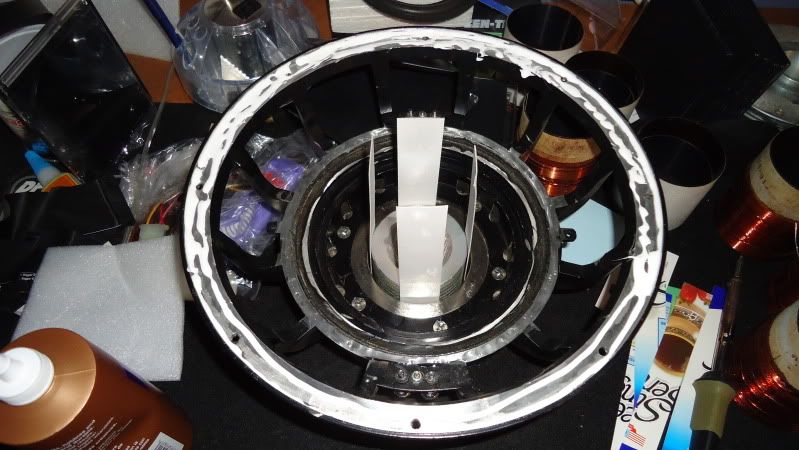
Basket / motor cleaned up and ready for recone.

A friend was surfing Car Audio dot Com (ca.com) when he saw two motor / basket pairs for sale. At first we both thought they were TC 9 based subs. After buying and getting them in, we saw that they were much closer to the TC 7 based motor. Turns out they were originally from a Diamond Audio sub and sold through Ebay surplus seller Robot Underground.
Basket / motor cleaned up and ready for recone.
12-20-11, 11:07 AM
#48
Lead Lap
Thread Starter
Join Date: Jan 2007
Location: MS
Posts: 799
Likes: 0
Received 0 Likes
on
0 Posts
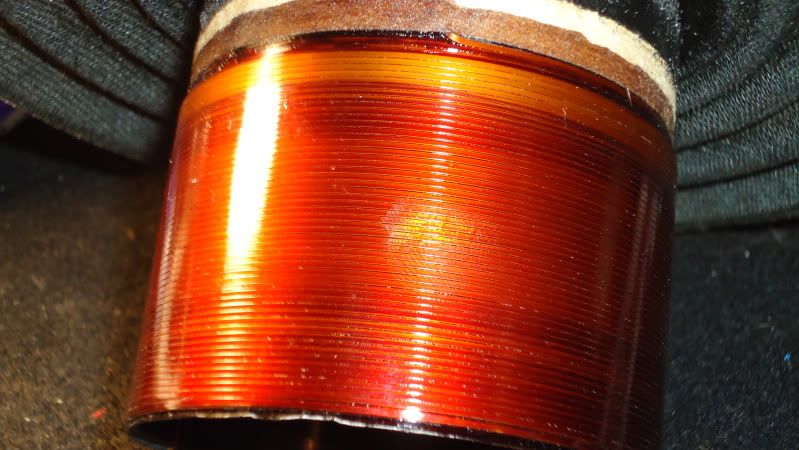
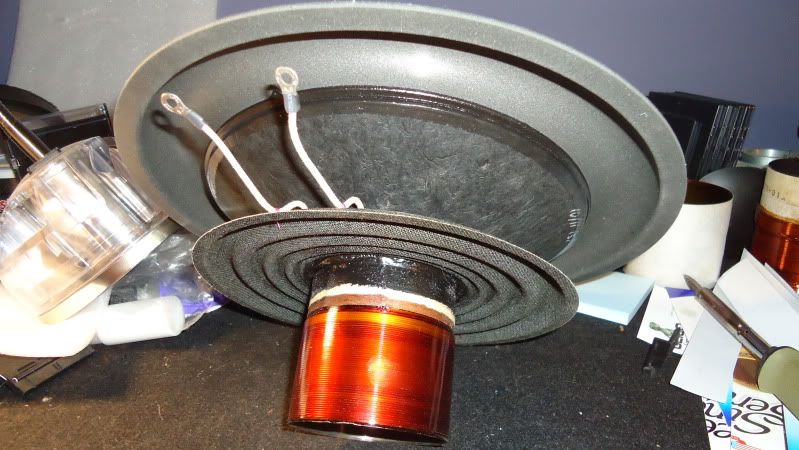
After getting motor measurements, I sent them along with my goals to David at Fix My Speaker dot Com. He came back with an idea of using a flat wire, copper, dual 2 ohm voice coil with an 8" soft spider. The extra weight of the coil coupled with the soft spider will give me a low resonant frequency as well as a very low inductance. This motor did have a narrow magnetic gap which still yields a strong motor force on the coil. The length of the winding gave me close to 24mm of excursion.
Here's how the recone kit looked as delivered.
Here's how the recone kit looked as delivered.
12-20-11, 11:28 AM
#49
Lead Lap
Thread Starter
Join Date: Jan 2007
Location: MS
Posts: 799
Likes: 0
Received 0 Likes
on
0 Posts
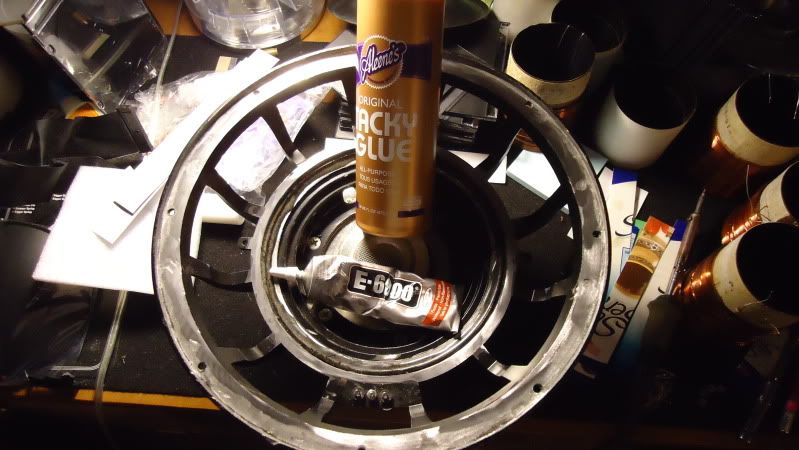
Since I don't have to build dozens of subs a day, I decided to skip using CA (super) glue. That is what FMS uses but since he builds 50+ speakers a day. I can afford to save a little money and wait 24 hours for the glue to dry. I used Alleen's Tacky Glue to connect the foam surround to the surround landing. It's the same glue that Parts Express sells for their refoam kits. I've used it when refoaming a lot of my subs from the early 90's and it has held great. To glue the spider to the spider landing, I used E6000. It like Goop (aka Plumber's Goop) but with a lower viscosity. It will soak into the fabric of the spider and make a permanent bond. Both glues are available at Wal-Mart in the craft section.
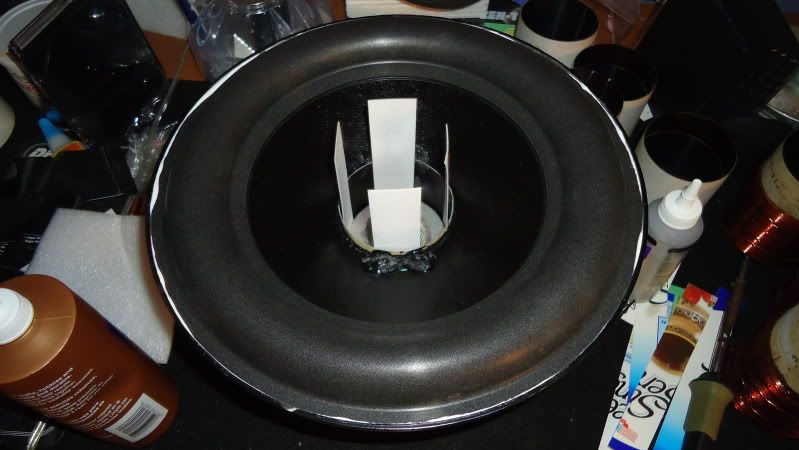
Testing the shims. Those strips of carboard keep the voice coil aligned. I used a shoebox as the material and a paper cutter to make sure each shim was the exact same width.
Glue put down on each landing surface.
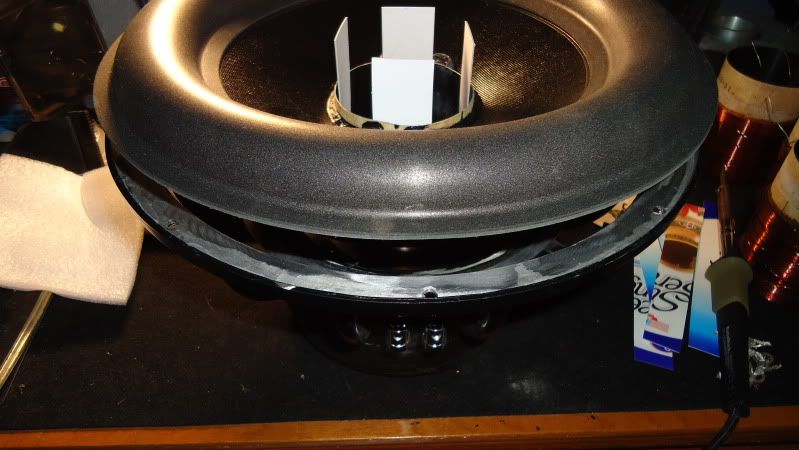
Shims inserted and evenly spaced.
Cone pressed down over the shims. Surround and spider pressed into the glue. Since the shims provide enough force I was able to push down a little extra and they hold the recone kit down so that there is a little pressure onto each landing so the glue joint is solid. I didn't touch it for 24 hours.
Testing the shims. Those strips of carboard keep the voice coil aligned. I used a shoebox as the material and a paper cutter to make sure each shim was the exact same width.
Glue put down on each landing surface.
Shims inserted and evenly spaced.
Cone pressed down over the shims. Surround and spider pressed into the glue. Since the shims provide enough force I was able to push down a little extra and they hold the recone kit down so that there is a little pressure onto each landing so the glue joint is solid. I didn't touch it for 24 hours.
12-20-11, 11:41 AM
#50
Lead Lap
Thread Starter
Join Date: Jan 2007
Location: MS
Posts: 799
Likes: 0
Received 0 Likes
on
0 Posts
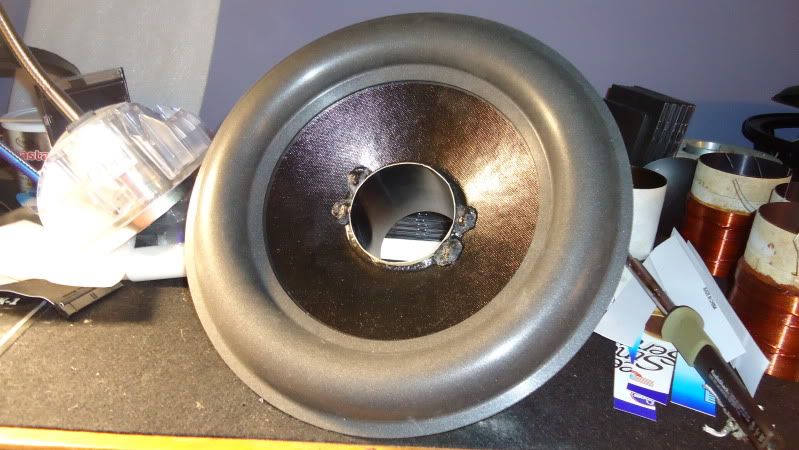
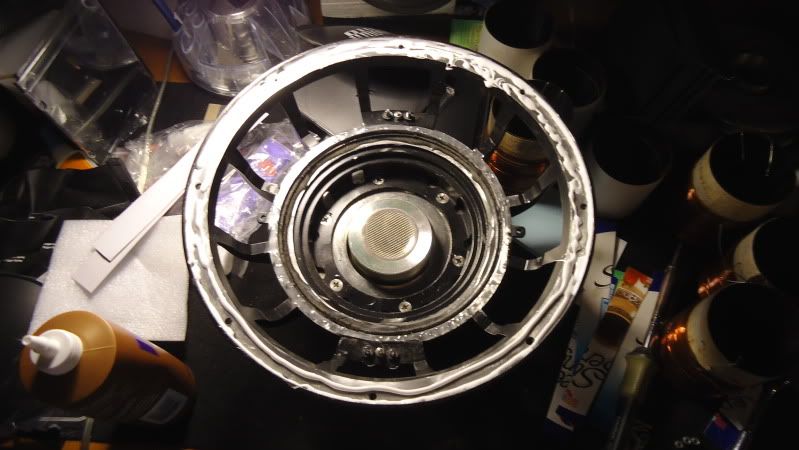
I skipped pictures where I connected the tinsel to the terminals. If you look at a picture of the recone kit, I added ring terminals to the tinsel. In earlier pictures of the basket, you can see bare bolts coming up through the frame. Those accept the ring terminals.
Shims removed. I could have tested now to make sure there is no voice coil rub. I just pressed gently and evenly down so that the cone would move without a scraping sound.
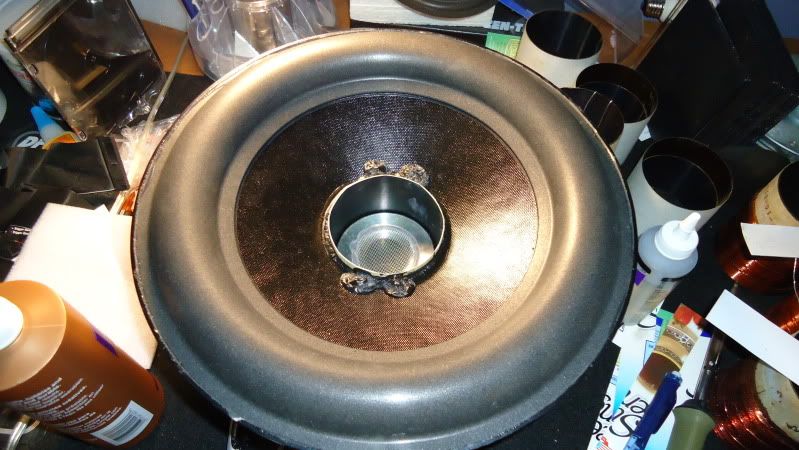
I centered the dust cap and held it in place. I used a .5mm pencil to draw a circle on the cone.
Using the pencil line, I put a bead of E6000 down just inside the line.

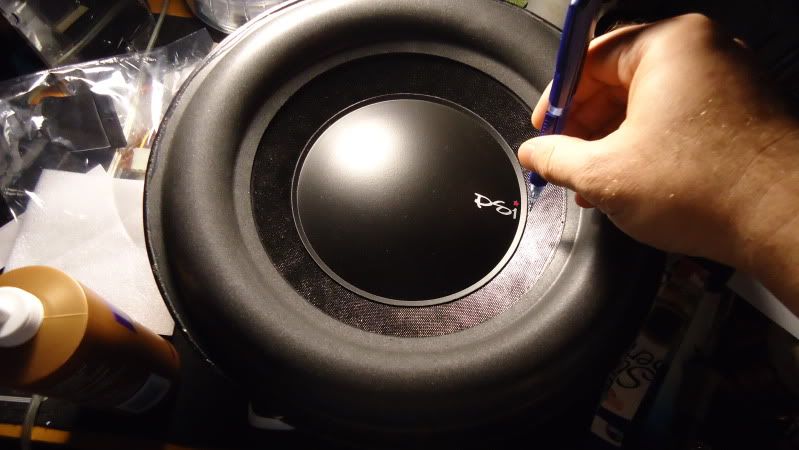
I used painter's tape to make a handle on the dust cap. It allows me to drop it onto the bead of glue without my fingers touching the glue and it pulls off without any residue.
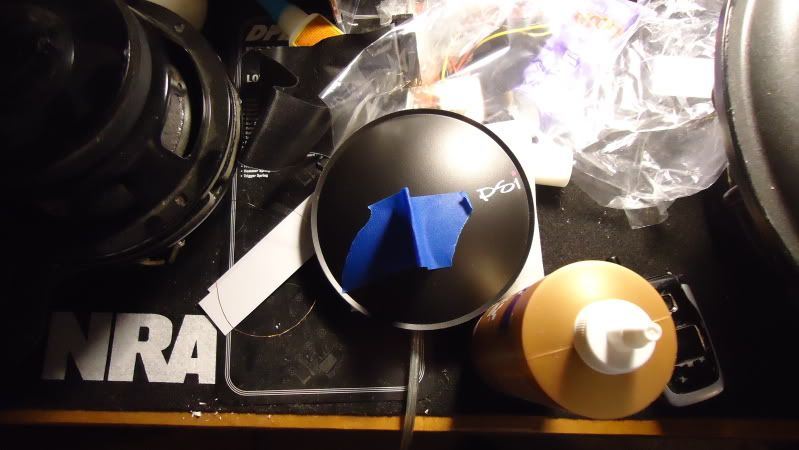
Cap placed into the glue bead and pressed in. I removed the tape 24 hours later.
Shims removed. I could have tested now to make sure there is no voice coil rub. I just pressed gently and evenly down so that the cone would move without a scraping sound.
I centered the dust cap and held it in place. I used a .5mm pencil to draw a circle on the cone.
Using the pencil line, I put a bead of E6000 down just inside the line.
I used painter's tape to make a handle on the dust cap. It allows me to drop it onto the bead of glue without my fingers touching the glue and it pulls off without any residue.
Cap placed into the glue bead and pressed in. I removed the tape 24 hours later.
12-20-11, 11:52 AM
#51
Lead Lap
Thread Starter
Join Date: Jan 2007
Location: MS
Posts: 799
Likes: 0
Received 0 Likes
on
0 Posts
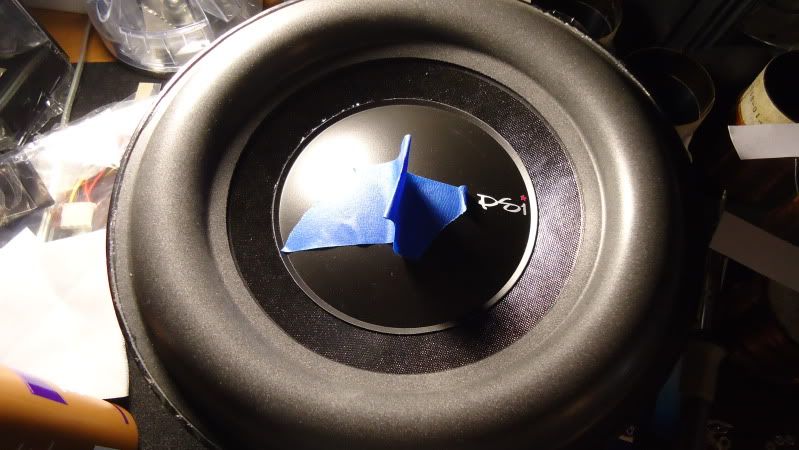
Earlier in this thread, I posted a picture of the Scosche enclosure for 10" subs. This went into the same type enclosure for 12" subs. It works great. I wired it in parallel for a final 1 ohm load to my Powerbass amp. The amp is now capable of putting out a full 1,000 watts.
With more cone area than the Blueprint 1001, more excursion and more power behind it; the bass can be overpowering at times. When setting the levels for good bass on mid 80's hair metal (Cinderella is a good example) it then overpowers the music on modern recordings (Linkin Park is a good example). Now my wife is asking me to install the remote gain **** for the sub amp. I'll document that when I get around to it.
With more cone area than the Blueprint 1001, more excursion and more power behind it; the bass can be overpowering at times. When setting the levels for good bass on mid 80's hair metal (Cinderella is a good example) it then overpowers the music on modern recordings (Linkin Park is a good example). Now my wife is asking me to install the remote gain **** for the sub amp. I'll document that when I get around to it.
12-20-11, 12:44 PM
#52
Lead Lap
Thread Starter
Join Date: Jan 2007
Location: MS
Posts: 799
Likes: 0
Received 0 Likes
on
0 Posts
I almost forgot to add video. I mentioned earlier having 2 recones. One went into the Lexus and the other was traded to my trusty sidekick, Spencer, for a 1,000w Memphis amp. Since he likes to post sub videos on You Tube, I helped him with this one. Yes, that's my foot and hand holding the sub. Camera work is all Spencer.
link
link
01-21-12, 05:11 AM
#53

Hi - I posted in another thread and wanted to know what kind of clearance is needed in the front doors to clear the window. I see you have spacers - and I've read a little about this; does anyone know what the max clear distance is behind the door metal?
I guess this could be measured using the original speakers as a guide - and if you still have yours it would be nice to have a point of reference from the mount point back on the original speakers. I've seen adapters that put about 1/2 to 1" - and I can measure the Infinity 6x9s that I currently have to get the proper spacer. Let me know if you can assist.
I guess this could be measured using the original speakers as a guide - and if you still have yours it would be nice to have a point of reference from the mount point back on the original speakers. I've seen adapters that put about 1/2 to 1" - and I can measure the Infinity 6x9s that I currently have to get the proper spacer. Let me know if you can assist.
01-23-12, 05:53 AM
#54
Lead Lap
Thread Starter
Join Date: Jan 2007
Location: MS
Posts: 799
Likes: 0
Received 0 Likes
on
0 Posts
It's not much. Those spacers are about 1/2" deep and they barely give my speakers enough clearance.
The original speakers go about 1 1/8" into the door. I checked my documentation and the PG speakers have a 73mm mounting depth. Here are my adapters - http://www.amazon.com/Scosche-SAT69-...7240923&sr=8-3 If you are going with 6x9 speakers, you will need something like this - http://www.car-speaker-adapters.com/items.php?id=SAK008 .
The original speakers go about 1 1/8" into the door. I checked my documentation and the PG speakers have a 73mm mounting depth. Here are my adapters - http://www.amazon.com/Scosche-SAT69-...7240923&sr=8-3 If you are going with 6x9 speakers, you will need something like this - http://www.car-speaker-adapters.com/items.php?id=SAK008 .
01-23-12, 08:28 AM
#55
Thanks. Some of the installs on the Camry on that site are awesome (car-speaker-adaptors) - however it looks like they're out of business. Oh well - I'll find something that gives me the 1/2" to an inch of space out there. If not, I've been looking at grabbing the Infinity 6032si for 50$ on Amazon along with the adapter you're using.
01-23-12, 11:30 AM
#56
Lead Lap
Thread Starter
Join Date: Jan 2007
Location: MS
Posts: 799
Likes: 0
Received 0 Likes
on
0 Posts
02-26-12, 05:15 AM
#57
Driver School Candidate

Join Date: Sep 2010
Location: MI
Posts: 2
Likes: 0
Received 0 Likes
on
0 Posts
what exactly did you do here for this issue? i had to leave the top two bolts on the rails unattached in order to get the radio to barely sit in the dash kit. Also, did your center console aux port in the armrest storage work after install?
02-27-12, 05:53 AM
#58
Lead Lap
Thread Starter
Join Date: Jan 2007
Location: MS
Posts: 799
Likes: 0
Received 0 Likes
on
0 Posts
I think I ended up with 1 bolt on the top and one on the bottom of each side. The Camry is much easier to install in the rails. I installed the same radio in my niece's '07 and it was extremely easy. The holes all matched and I could use 3 bolts per side.
I haven't checked on the console aux but I'll bet mine doesn't work. None of the wires I connected for the new radio were for an aux in. My wife uses the USB/3.5mm input for her iPhone.
I haven't checked on the console aux but I'll bet mine doesn't work. None of the wires I connected for the new radio were for an aux in. My wife uses the USB/3.5mm input for her iPhone.
04-04-12, 11:55 PM
#59
Driver School Candidate

Join Date: Apr 2012
Location: az
Posts: 1
Likes: 0
Received 0 Likes
on
0 Posts
Any one know where i can still get this dash kit all of my cars have had the premium sound this one doesn't and is severely lacking in every thing . i am gonna have to do a complete overhaul.
. i am gonna have to do a complete overhaul.
04-05-12, 04:06 AM
#60
Lead Lap
Thread Starter
Join Date: Jan 2007
Location: MS
Posts: 799
Likes: 0
Received 0 Likes
on
0 Posts
Contact the navtools guys directly. When I purchased, they had 100+ in stock. http://myworld.ebay.com/navtool_outl...id=p4340.l2559