
Spark Plugs - 3vz-fe manifold removal
 03-20-12, 11:30 AM
#1
Driver School Candidate
Thread Starter

Join Date: Apr 2011
Location: ky
Posts: 15
Likes: 0
Received 0 Likes
on
0 Posts
OK here are some pics of my adventure of changing the rear spark plugs on my '93 ES300 (3vz-fe). It really was not too bad. Having already changed the front 3 plugs and replacing the valve cover gasket a couple of weeks ago, my goal was to change the rear 3 plugs, replace the rear valve gasket, and replace the plenum manifold gasket while it was off. Additionally I thought I may be able to change the rear o2 sensor also. Here are some pics of my successes and fails along the way. Good luck and hope these help. I have much more than the 5 pic upload limit, but here are the highlights. (fyi - I am not mechanic, I probably fall into the novice/newbie category, did a little research on web, and a little reading at the library at gave it a shot).
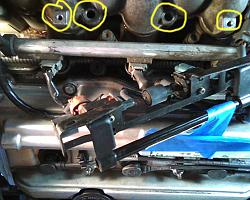
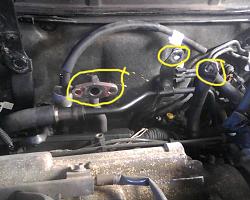
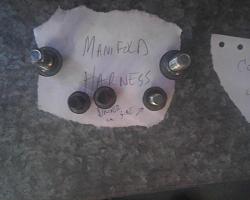
MANIFOLD REMOVAL - Basically there are 4 bolts on the front side of the manifold, 2 of which are Hex type. The back side against the firewall is a little tougher; there are a total of 5 back there. The locations are shown in the pics, a) left side harness bolt b) right side harness bolt c) another very close to the right side harness, and finally d) two bolts dead center attaching a hose to the back of the manifold.
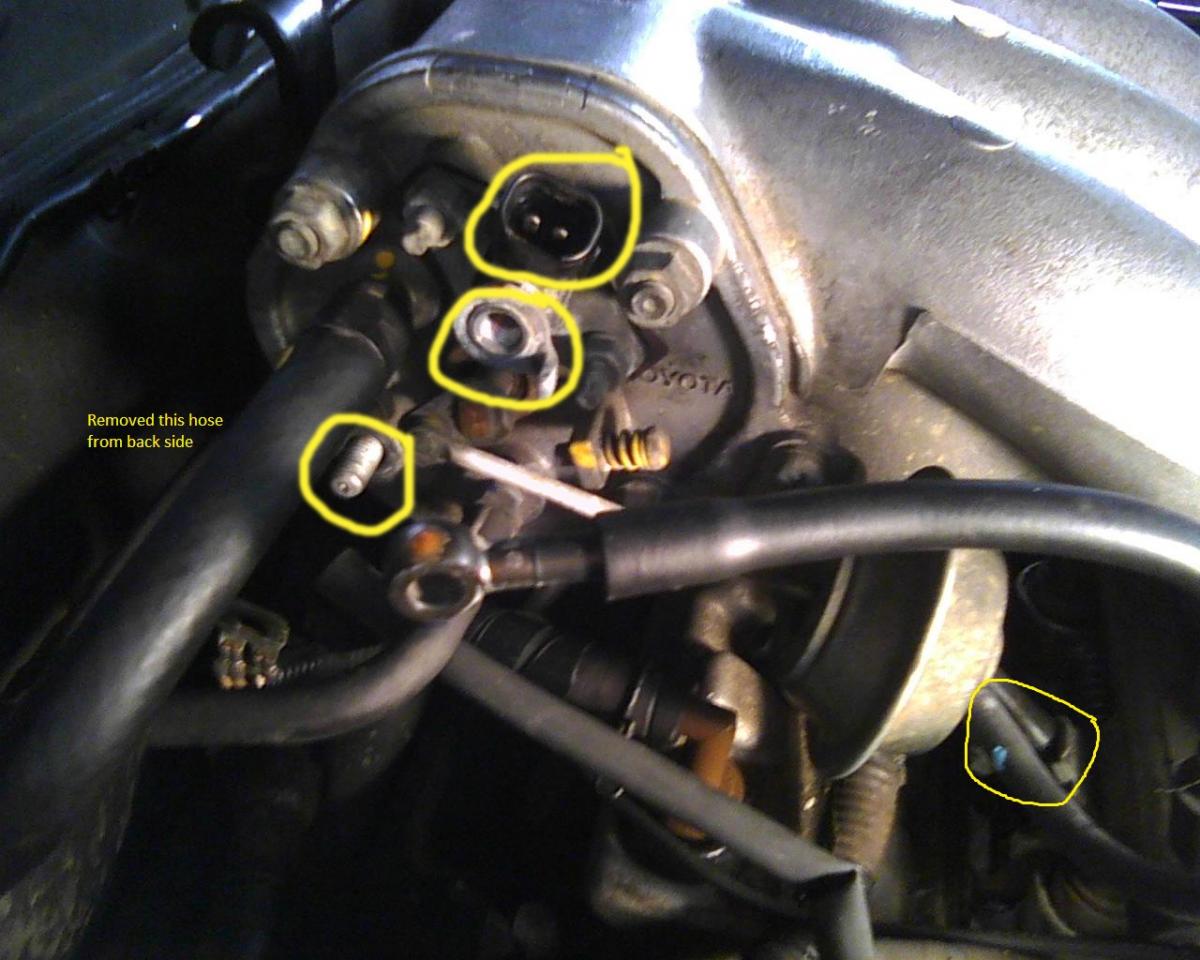
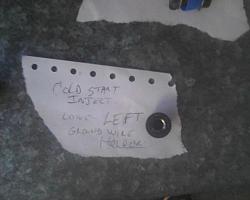
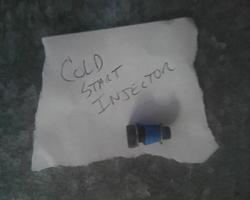
COLD START INJECTOR area- this in attached to the left side of the manifold. I did not remove it from the manifold, I just removed the hoses and ground wires that were attached to it. Pics are below.
AIR IN-TAKE HOSE - Remove it. (no pics, but see below).
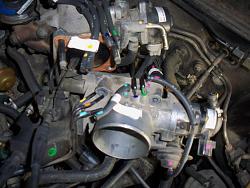
THROTTLE BODY ASSEMBLY REMOVAL - Two bolts and 2 nuts attached at each corner. Pics below.
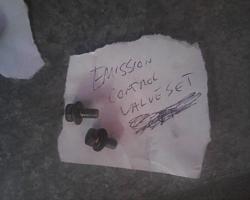
EMISSION CONTROL VALVE ASSEMBLY - Two bolts, easy.
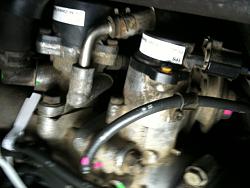
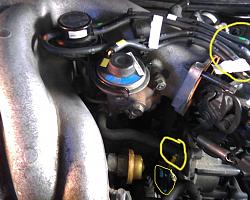
EGR VALVE - I just removed the hoses from it and left it attached to the manifold.
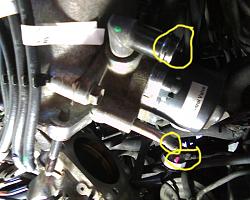
THROTTLE POSITION SENSOR - I just removed the hoses from it and left it attached to the back of the manifold.
IAC VALVE - I just removed the hoses from it and left it attached to the back of the manifold.
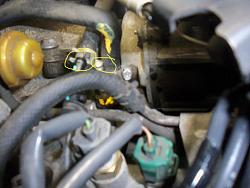
1. First off I bought some cheap $.89 cent paint from a hobby/craft store to color code all hoses and ports that I would be removing.
2. The Emision Control Valve assembly had to be take off. I left all things attached and just unbolted 2 bolts and pulled out of the way and taped it down toward the front of engine. Alos in this pic you can see the manifold bolts to remove. Four (4) in the front. 2 are hex type that were pretty tough getting off.
3. Throttle Body Assembly - Two bolts and 2 nuts attached at each corner. I left all cables attached and just set this unit off the side a little.
4. Air In-take Hose - Undo the hose clamps at each end, and unclamp the hoses, then remove it to get it out of your way.
5. Throttle Position Sensor - Back right of manifold. I left it attached
6. IAV valve - Back right of manifold. I left it attached
7. Hoses under EGR area.
MANIFOLD REMOVAL - Basically there are 4 bolts on the front side of the manifold, 2 of which are Hex type. The back side against the firewall is a little tougher; there are a total of 5 back there. The locations are shown in the pics, a) left side harness bolt b) right side harness bolt c) another very close to the right side harness, and finally d) two bolts dead center attaching a hose to the back of the manifold.
COLD START INJECTOR area- this in attached to the left side of the manifold. I did not remove it from the manifold, I just removed the hoses and ground wires that were attached to it. Pics are below.
AIR IN-TAKE HOSE - Remove it. (no pics, but see below).
THROTTLE BODY ASSEMBLY REMOVAL - Two bolts and 2 nuts attached at each corner. Pics below.
EMISSION CONTROL VALVE ASSEMBLY - Two bolts, easy.
EGR VALVE - I just removed the hoses from it and left it attached to the manifold.
THROTTLE POSITION SENSOR - I just removed the hoses from it and left it attached to the back of the manifold.
IAC VALVE - I just removed the hoses from it and left it attached to the back of the manifold.
1. First off I bought some cheap $.89 cent paint from a hobby/craft store to color code all hoses and ports that I would be removing.
2. The Emision Control Valve assembly had to be take off. I left all things attached and just unbolted 2 bolts and pulled out of the way and taped it down toward the front of engine. Alos in this pic you can see the manifold bolts to remove. Four (4) in the front. 2 are hex type that were pretty tough getting off.

3. Throttle Body Assembly - Two bolts and 2 nuts attached at each corner. I left all cables attached and just set this unit off the side a little.

4. Air In-take Hose - Undo the hose clamps at each end, and unclamp the hoses, then remove it to get it out of your way.
5. Throttle Position Sensor - Back right of manifold. I left it attached

6. IAV valve - Back right of manifold. I left it attached

7. Hoses under EGR area.

 03-20-12, 11:47 AM
#2
Driver School Candidate
Thread Starter
Join Date: Apr 2011
Location: ky
Posts: 15
Likes: 0
Received 0 Likes
on
0 Posts
-Continued-
8. Cold Start Injector area - left side of manifold. Unhooked hoses and ground wires.
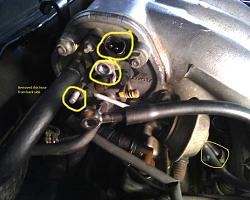
9. Manifold connctor harness - left side, 1 bolt.
10. Manifold center back connection - 2 bolts
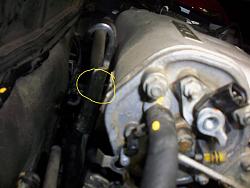
11. Manifold removed pic.
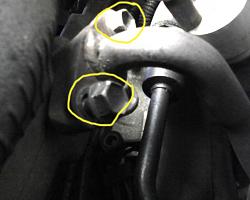
12. EGR valve area- just removed the hoses, left it attached to the manifold.
8. Cold Start Injector area - left side of manifold. Unhooked hoses and ground wires.
9. Manifold connctor harness - left side, 1 bolt.

10. Manifold center back connection - 2 bolts

11. Manifold removed pic.

12. EGR valve area- just removed the hoses, left it attached to the manifold.

Last edited by mabmab1993; 03-20-12 at 11:55 AM.
03-20-12, 11:51 AM
#3
Driver School Candidate
Thread Starter
Join Date: Apr 2011
Location: ky
Posts: 15
Likes: 0
Received 0 Likes
on
0 Posts
13. Pic of all removed bolts and locations

Here is what I accomplished.
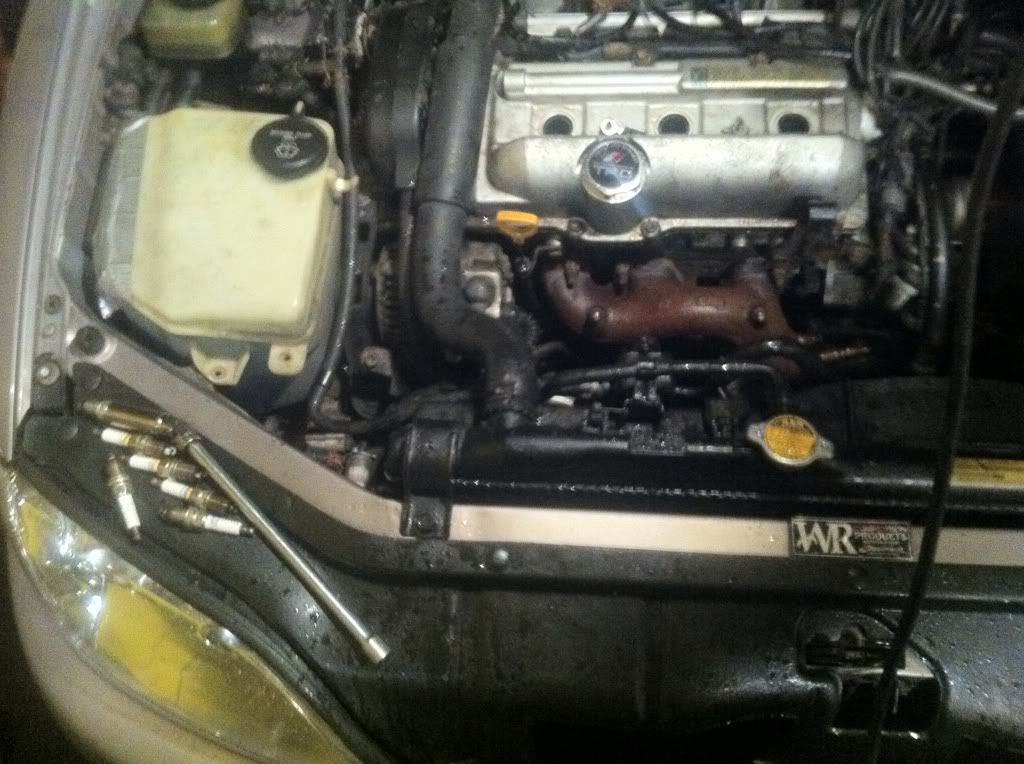
1. Got the back 3 spark pkugs and wires replaced.
2. Got the Plenum Manifold gasket replaced.
3. Cleaned it up a bit with Throttle Body spray.
4. Learned some things I just won't try at this point.
Here is what I could not do.
1. Could not get to the rear valve cover bolts at the firewall. There is a large cable assembly unit that runs the lenght of the cover, I could not get it off, it is related to the timing belt assembly I think. I did not even what to mess with that. Maybe it was easy to get off, maybe not??
2. Could not reach the o2 sensor, even with the manifold removed. I guess you have to get there from the bottom, (which it looks like you would be blocked by several things)?
All in all, not too bad of a project.


Here is what I accomplished.
1. Got the back 3 spark pkugs and wires replaced.
2. Got the Plenum Manifold gasket replaced.
3. Cleaned it up a bit with Throttle Body spray.
4. Learned some things I just won't try at this point.
Here is what I could not do.
1. Could not get to the rear valve cover bolts at the firewall. There is a large cable assembly unit that runs the lenght of the cover, I could not get it off, it is related to the timing belt assembly I think. I did not even what to mess with that. Maybe it was easy to get off, maybe not??
2. Could not reach the o2 sensor, even with the manifold removed. I guess you have to get there from the bottom, (which it looks like you would be blocked by several things)?
All in all, not too bad of a project.
Last edited by mabmab1993; 03-20-12 at 12:02 PM.
03-20-12, 12:09 PM
#4
Lexus Test Driver

lol, wow, you are very patient!
For the purpose for the plug changes, I didn't even bother taking off everything you listed.
I just removed enough stuff to move the manifold out of the way...not completely remove it.
http://www.facebook.com/photo.php?fb...2&l=40d69f5797
For the purpose for the plug changes, I didn't even bother taking off everything you listed.
I just removed enough stuff to move the manifold out of the way...not completely remove it.
http://www.facebook.com/photo.php?fb...2&l=40d69f5797
03-21-12, 06:01 PM
#6
Driver School Candidate
Thread Starter
Join Date: Apr 2011
Location: ky
Posts: 15
Likes: 0
Received 0 Likes
on
0 Posts
Bdub215 - not sure how you had enough room to even pull the plug wires up and off and replace them too on the 3vz-fe engine. But good for you if you could do it.
03-21-12, 06:19 PM
#7

Thread
Thread Starter
Forum
Replies
Last Post
hurrikane
RX - 2nd Gen (2004-2009)
7
02-28-17 08:51 PM