DIY: 2003 ES Brake and Rotor Replacement
 07-17-10, 10:40 PM
#1
Pole Position
Thread Starter
iTrader: (1)
Join Date: Jun 2004
Location: Georgia
Posts: 391
Likes: 0
Received 0 Likes
on
0 Posts
I will be demonstrating how to do a Brake Pad and Rotor replacement on an 03 ES 300. This DIY should be good for the 2002-2004 ES models.
Tools Needed:
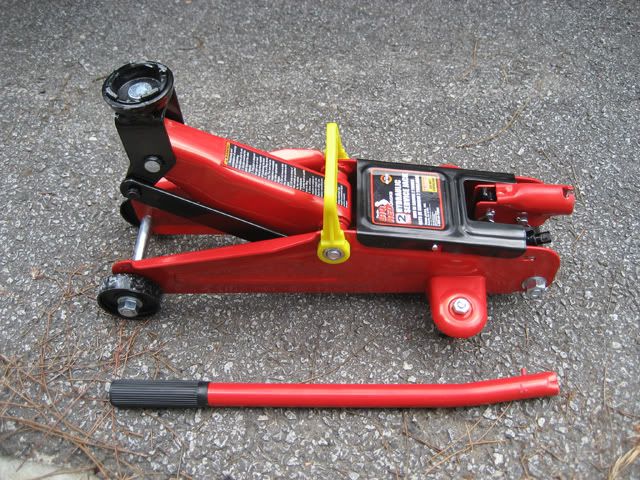
Jack Stands, Reliable Jack, Wheel Chucks, Torque Wrench, 17mm & 14mm sockets and ratchet, hammer(just in case of emergency), large pipe wrench, Braklean brake surface cleaner, Replacement rotors, and replacement pads.
First order of business is to park the car on a flat level surface and apply the emergency brake. Since we are going to change the front brakes first, wedge wheel chucks as best you can under the rear wheels.
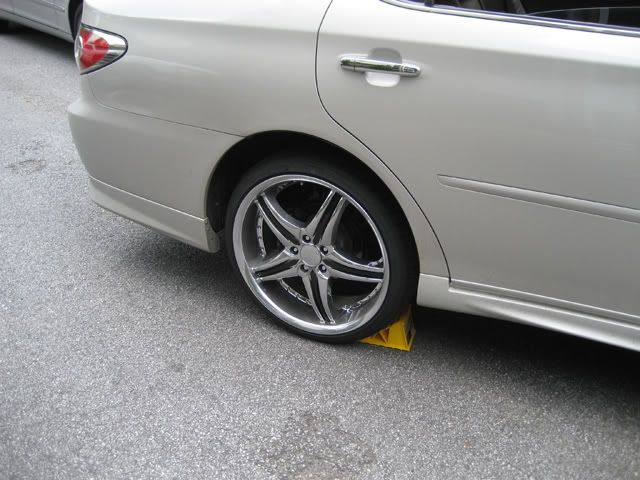
Next, begin by jacking one side of the car up. Make sure you jack the car up from the frame, not the body. If the location your jacking begins to bend drastically your probably not in the right spot.
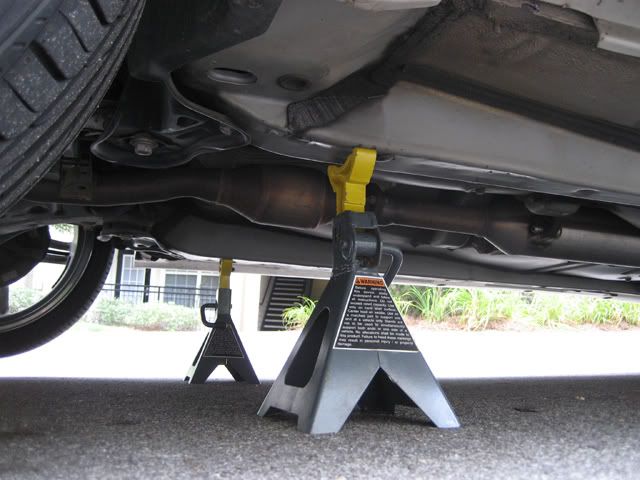
Once the car is jacked up, place jack stands under the frame to properly secure the car. ***note: once the car is on both stands, i always push the car to make sure it's secure and doesn't fall off while im underneath it.***
DO NOT BEGIN WORKING ON THE BRAKES AND ROTORS UNTIL THE CAR HAS HAD PROPER TIME TO COOL (Rotors can get up to 400 degrees if im not mistaken)
Remove wheels (its easier if you break the nuts loose while the car is on the ground.) I just removed one at a time to be safe.
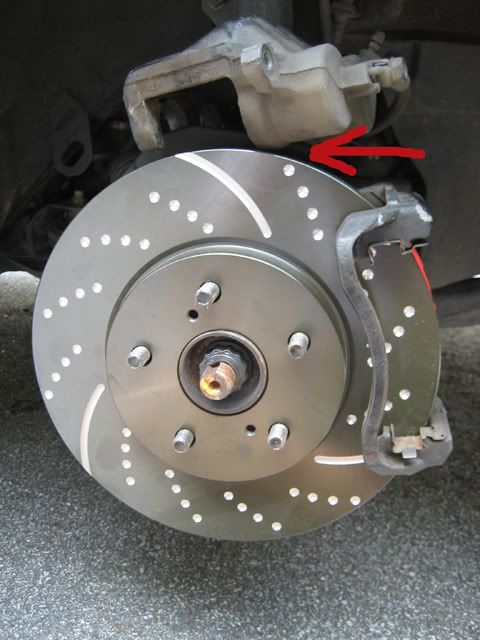
Next, Locate the bolts(two) that secure the caliper to the anchor plate and remove using 14mm ratchet. (it was hard to get leverage so i used the hammer in conjuction with the ratchet to help brake the bolts loose).
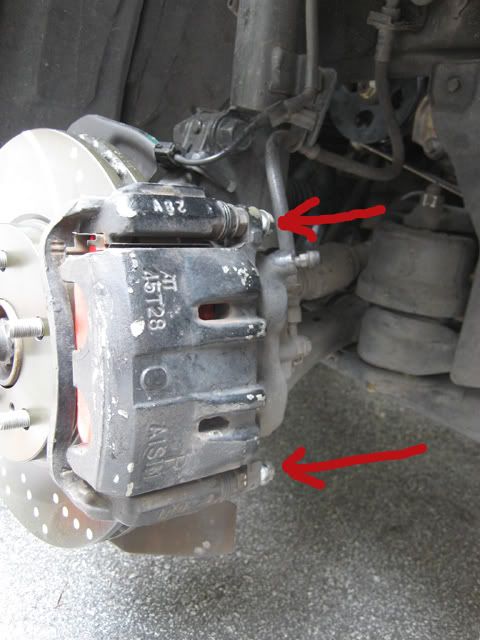
Once the bolts were removed, pull the caliper toward the front of the vehicle. gracefully place the caliper atop of the rotor and the plate behind it to get it out of the way. Make sure to be careful and not put too much stress on the brake lines.
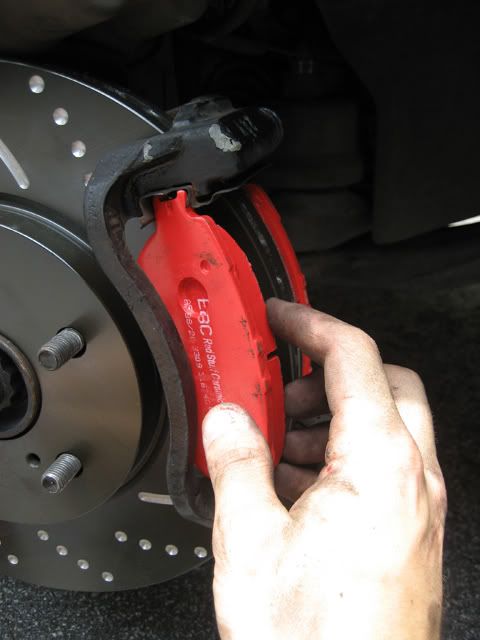
Next, grab the exposed end of the near pad and gently pull it toward you. It should come out easily. Repeat for the rear pad.
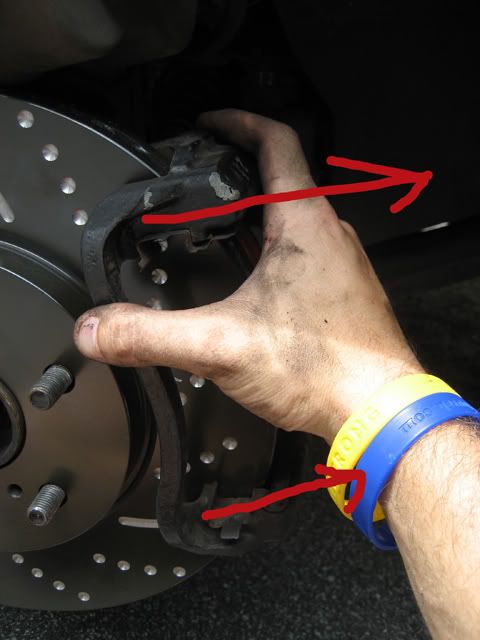
Now you need to remove the slider pins(two) holding on the anchor plate. They slide out by pulling them toward the opposing side of the car. ***note: they have a gromet that is attached to prevent dirt from getting into the grease coating, so i might take you two hand to remove without tearing the gromet****
(if there is very little grease, consider using a high-temp grease to lube).

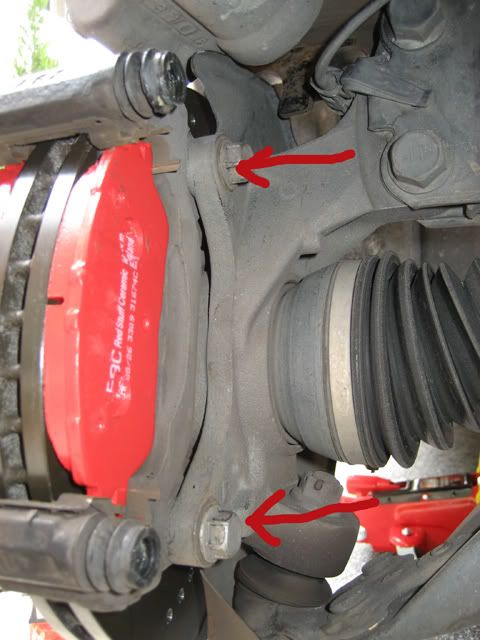
Next, locate the two bolts that hold the anchor plate to the suspension. Remove the two bolts using your 17mm socket and ratchet (once again i used the hammer method to break them loose).
Grab the anchor plate and remove it the same as the caliper. Should come off easily. Set it aside.
This next part depends on what kind of brakes you are removing:
If you have aftermarket rotors you should be able to grab the rotor and wiggle it off in a pulling toward you motion.
If you have OEM brakes, then there might be a screw or screw-like device on the face of the rotor that has to be removed to get the rotor off. If its a screw then simply just unscrew it. If it looks like a flat head bolt then the groove needs to be perpendicular to the lowest point of the rotor. (6 o'clock position).
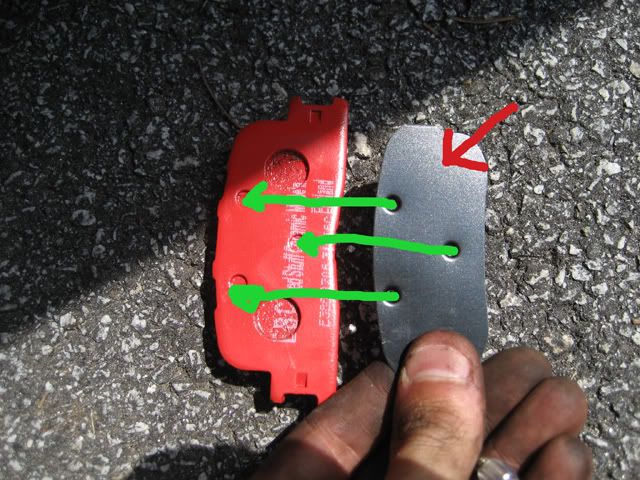
When putting the new pads on, i noticed that the EBC pads come with brake-in pads which needed to be stuck(using included adhesive) to the new pad
Next, you need to reset the position of the exposed caliper piston. I used a large pipe wrench to push the piston back in to place. Consult the image below for example.

***example is shown on the rear caliper but is one in the same for the front***
Once the pistons are reset, begin to go back through the steps in reverse to reassemble the entire system.
Once the braking system is completely bolted together be sure to spray with braklean to ensure no grease or residue is standing between you and your braking experience...
To be continued...
Stay tuned tomorrow for proper bolt torque specs and rear brake overhaul...
***Disclaimer, this is just a personal experience on how to change brakes on a 2003 ES300. If you are not competent enough to perform automotive maintenance then please seek the assistance or service of a certified automotive professional. Use proper precautions and digression when performing any type of auto maintenance. Service at your own risk.***
Tools Needed:
Jack Stands, Reliable Jack, Wheel Chucks, Torque Wrench, 17mm & 14mm sockets and ratchet, hammer(just in case of emergency), large pipe wrench, Braklean brake surface cleaner, Replacement rotors, and replacement pads.
First order of business is to park the car on a flat level surface and apply the emergency brake. Since we are going to change the front brakes first, wedge wheel chucks as best you can under the rear wheels.
Next, begin by jacking one side of the car up. Make sure you jack the car up from the frame, not the body. If the location your jacking begins to bend drastically your probably not in the right spot.
Once the car is jacked up, place jack stands under the frame to properly secure the car. ***note: once the car is on both stands, i always push the car to make sure it's secure and doesn't fall off while im underneath it.***
DO NOT BEGIN WORKING ON THE BRAKES AND ROTORS UNTIL THE CAR HAS HAD PROPER TIME TO COOL (Rotors can get up to 400 degrees if im not mistaken)
Remove wheels (its easier if you break the nuts loose while the car is on the ground.) I just removed one at a time to be safe.
Next, Locate the bolts(two) that secure the caliper to the anchor plate and remove using 14mm ratchet. (it was hard to get leverage so i used the hammer in conjuction with the ratchet to help brake the bolts loose).
Once the bolts were removed, pull the caliper toward the front of the vehicle. gracefully place the caliper atop of the rotor and the plate behind it to get it out of the way. Make sure to be careful and not put too much stress on the brake lines.
Next, grab the exposed end of the near pad and gently pull it toward you. It should come out easily. Repeat for the rear pad.
Now you need to remove the slider pins(two) holding on the anchor plate. They slide out by pulling them toward the opposing side of the car. ***note: they have a gromet that is attached to prevent dirt from getting into the grease coating, so i might take you two hand to remove without tearing the gromet****
(if there is very little grease, consider using a high-temp grease to lube).
Next, locate the two bolts that hold the anchor plate to the suspension. Remove the two bolts using your 17mm socket and ratchet (once again i used the hammer method to break them loose).
Grab the anchor plate and remove it the same as the caliper. Should come off easily. Set it aside.
This next part depends on what kind of brakes you are removing:
If you have aftermarket rotors you should be able to grab the rotor and wiggle it off in a pulling toward you motion.
If you have OEM brakes, then there might be a screw or screw-like device on the face of the rotor that has to be removed to get the rotor off. If its a screw then simply just unscrew it. If it looks like a flat head bolt then the groove needs to be perpendicular to the lowest point of the rotor. (6 o'clock position).
When putting the new pads on, i noticed that the EBC pads come with brake-in pads which needed to be stuck(using included adhesive) to the new pad
Next, you need to reset the position of the exposed caliper piston. I used a large pipe wrench to push the piston back in to place. Consult the image below for example.
***example is shown on the rear caliper but is one in the same for the front***
Once the pistons are reset, begin to go back through the steps in reverse to reassemble the entire system.
Once the braking system is completely bolted together be sure to spray with braklean to ensure no grease or residue is standing between you and your braking experience...
To be continued...
Stay tuned tomorrow for proper bolt torque specs and rear brake overhaul...
***Disclaimer, this is just a personal experience on how to change brakes on a 2003 ES300. If you are not competent enough to perform automotive maintenance then please seek the assistance or service of a certified automotive professional. Use proper precautions and digression when performing any type of auto maintenance. Service at your own risk.***
Last edited by MoreMGD32; 07-17-10 at 10:50 PM.

 07-18-10, 01:16 PM
#3
Pole Position
Thread Starter
iTrader: (1)
Join Date: Jun 2004
Location: Georgia
Posts: 391
Likes: 0
Received 0 Likes
on
0 Posts
I haven't yet ordered the springs. I am going backpacking in Europe for 21 days so i kinda had to shift some financial priorities around a little bit. But best believe the second i get back im placing the order and installing them!
10-05-12, 12:30 PM
#4
Driver School Candidate

Join Date: Dec 2011
Location: Wisconsin
Posts: 8
Likes: 0
Received 0 Likes
on
0 Posts
I have a 2003 ES300 but the rear caliper upper slider pin is just a capped pin and not a bolt. My understanding is that it should just push back off but it doesn't. In fact, although it rotates axially to lift the caliper up it will not move laterally to realign the caliper to the rotor after replacing the pads. What am I missing?

Thread
Thread Starter
Forum
Replies
Last Post
dwrichy
ES - 1st to 4th Gen (1990-2006)
10
09-17-13 12:51 AM