2ES Project Thread: Custom LED Lighting
 07-03-09, 10:06 PM
#46
Somewhat LAST Update before Hong Kong 
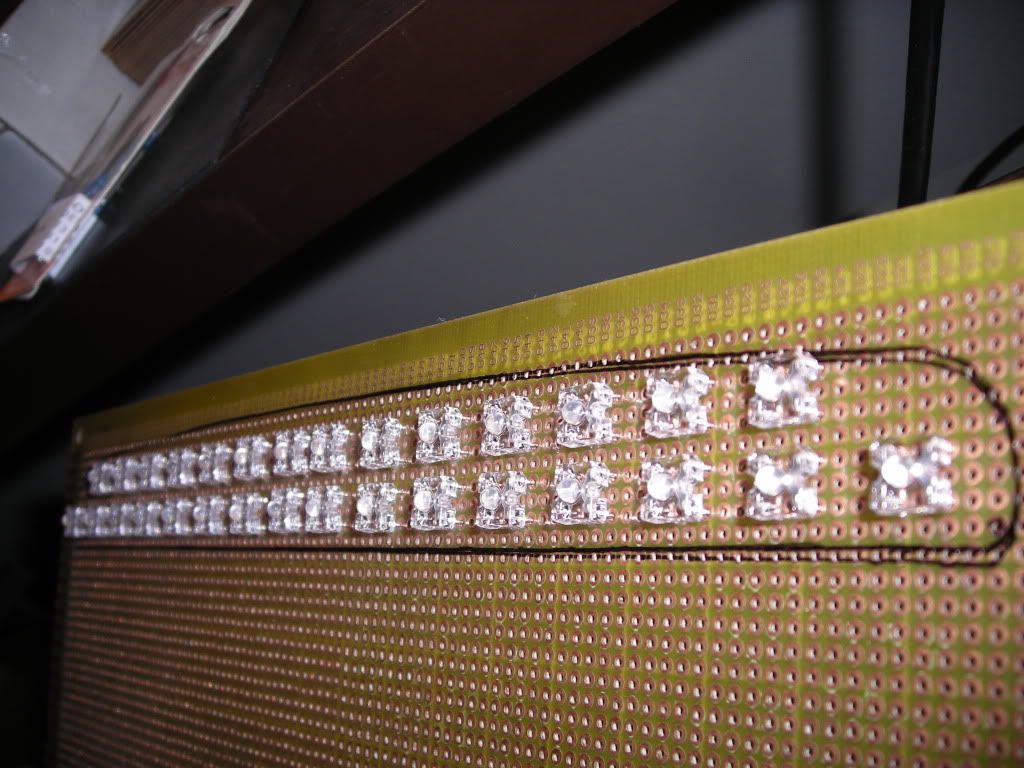
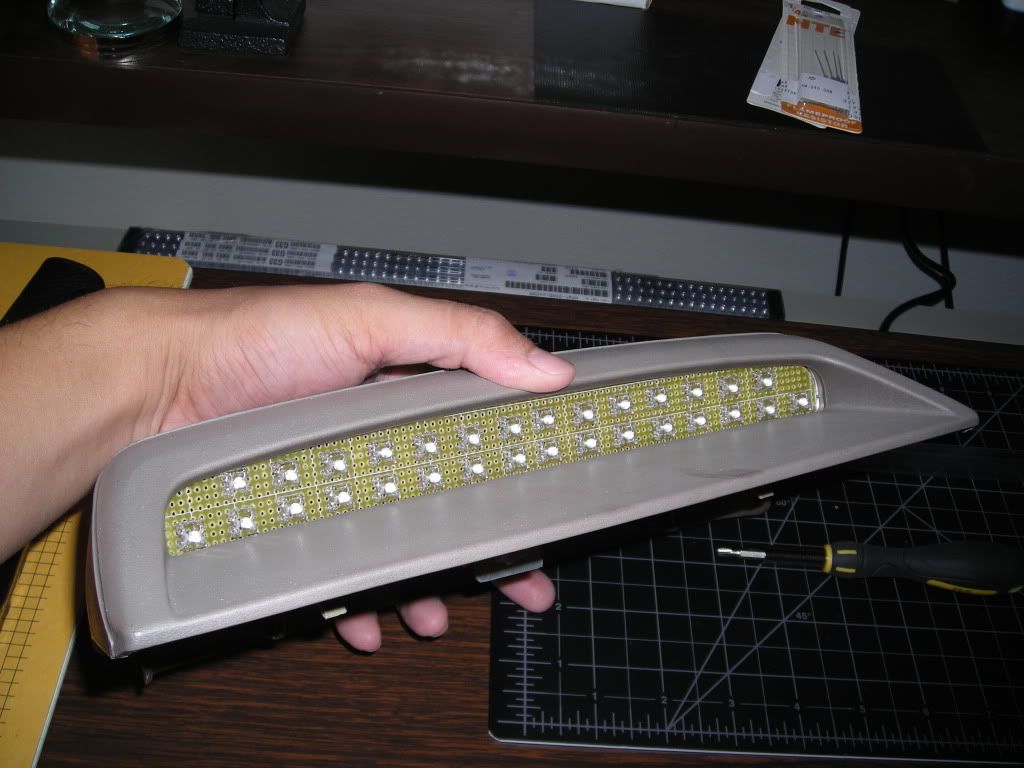
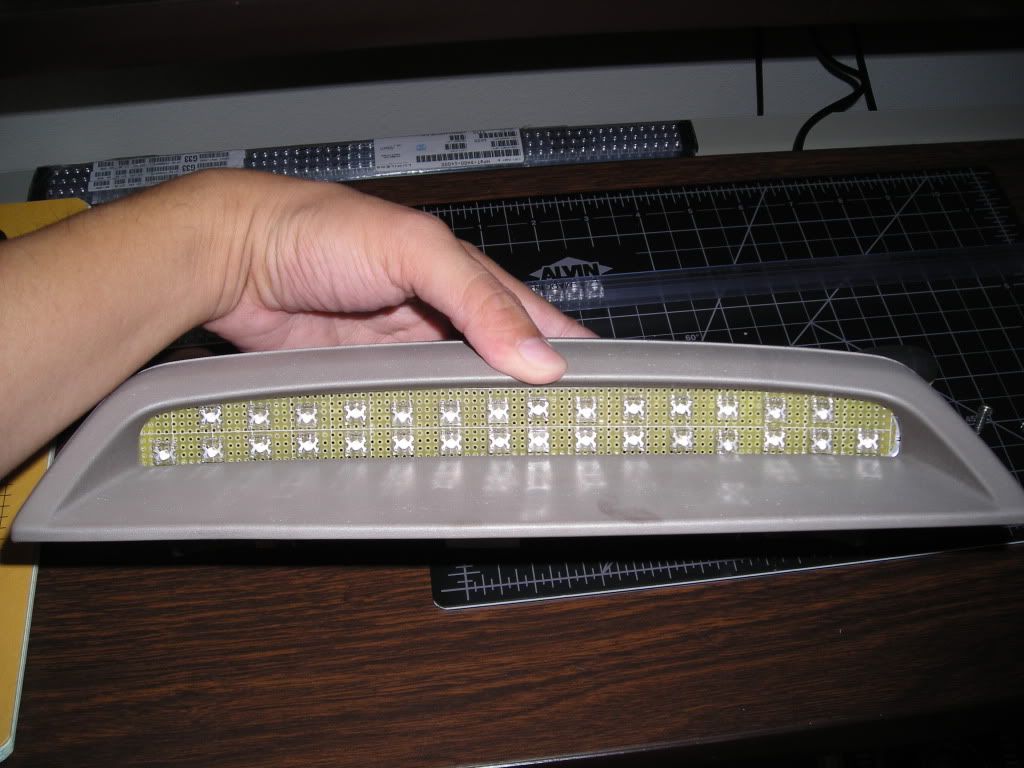
This time I mounted them for real with hot glue and stuff. Also trimmed the board down a bit to make it more evenly placed in the housing. I'll draw up a new schematic for you guys once I find the time. It sits almost dead even so the person behind will see them no problem.
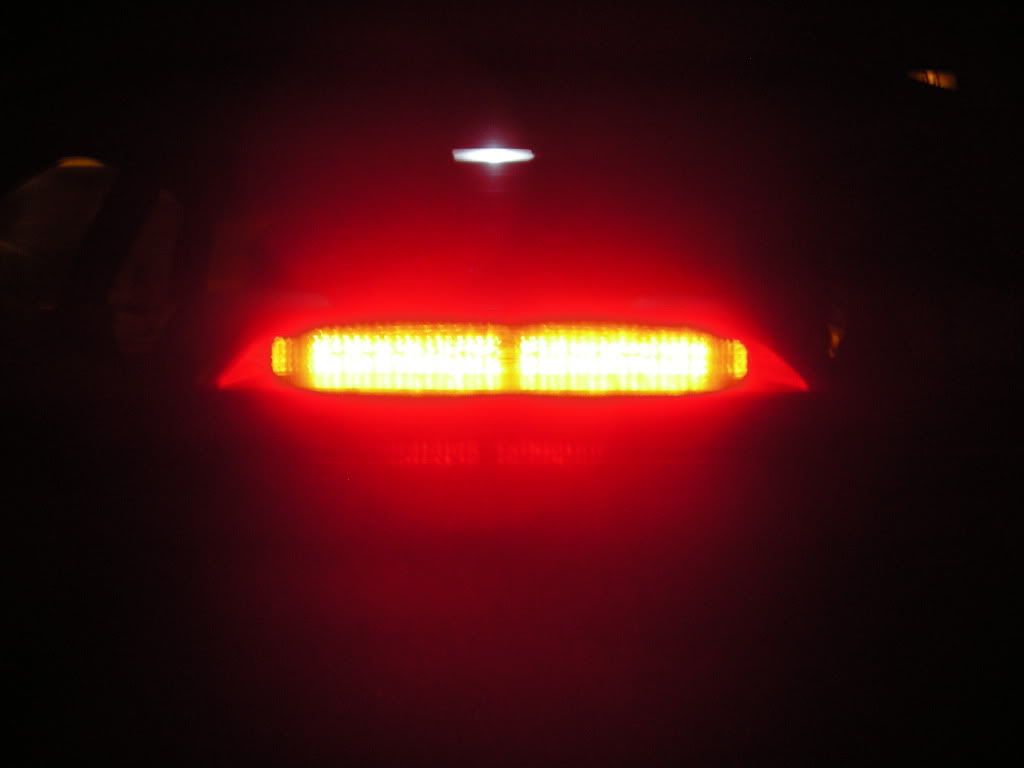
I do have to say though, with the LEDs in place, the red diffuser "sparkles" when I apply the lights. Its also super easy to see during the day (pics for that tomorrow since its dark right now). While you can barely see the tails, the 3rd brake light is easily visible when the sun is at its strongest
Here are some pics for now. They don't really show what it looks like due to my point and shoot camera but I'm sure once you see/make them you'll like them too.
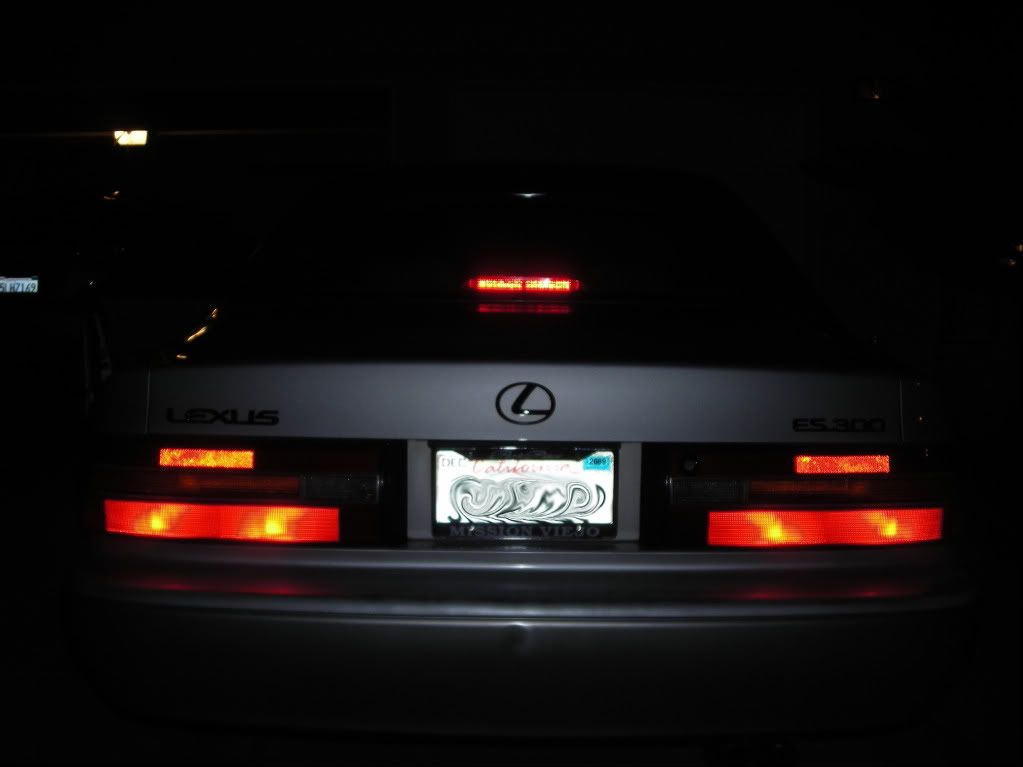
Night shots for you guys. Notice how the output is just as bright as the normal halogen tail lights
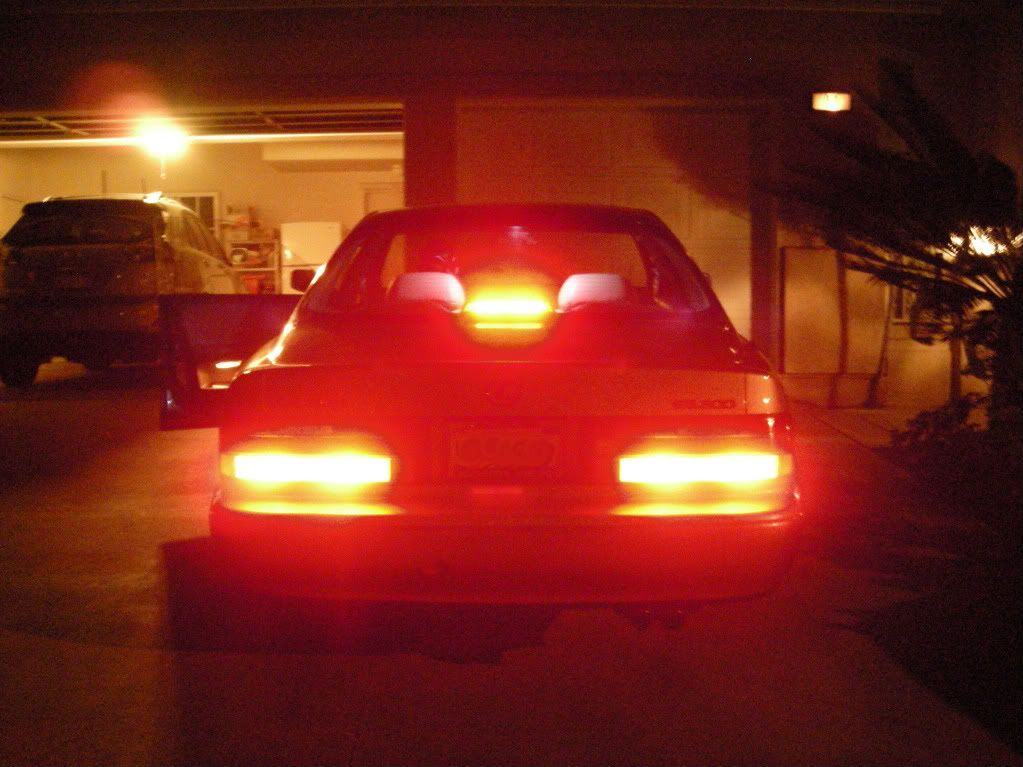
Heres a "real world" shot, meaning its very close to being this bright that I took with my camera...

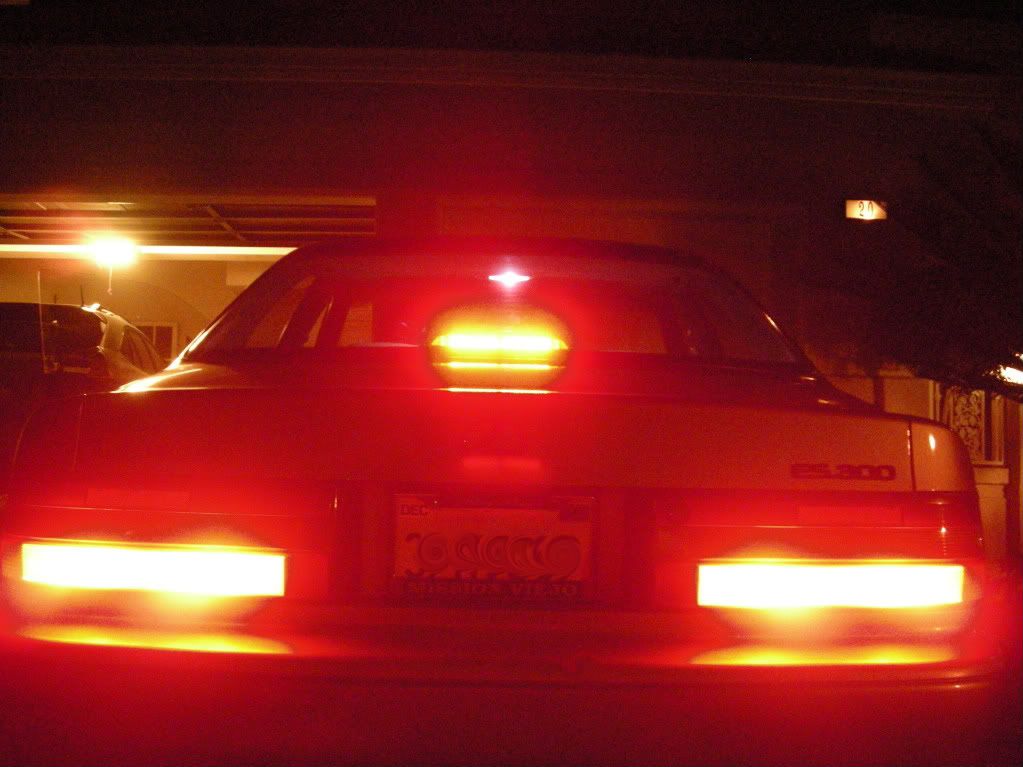
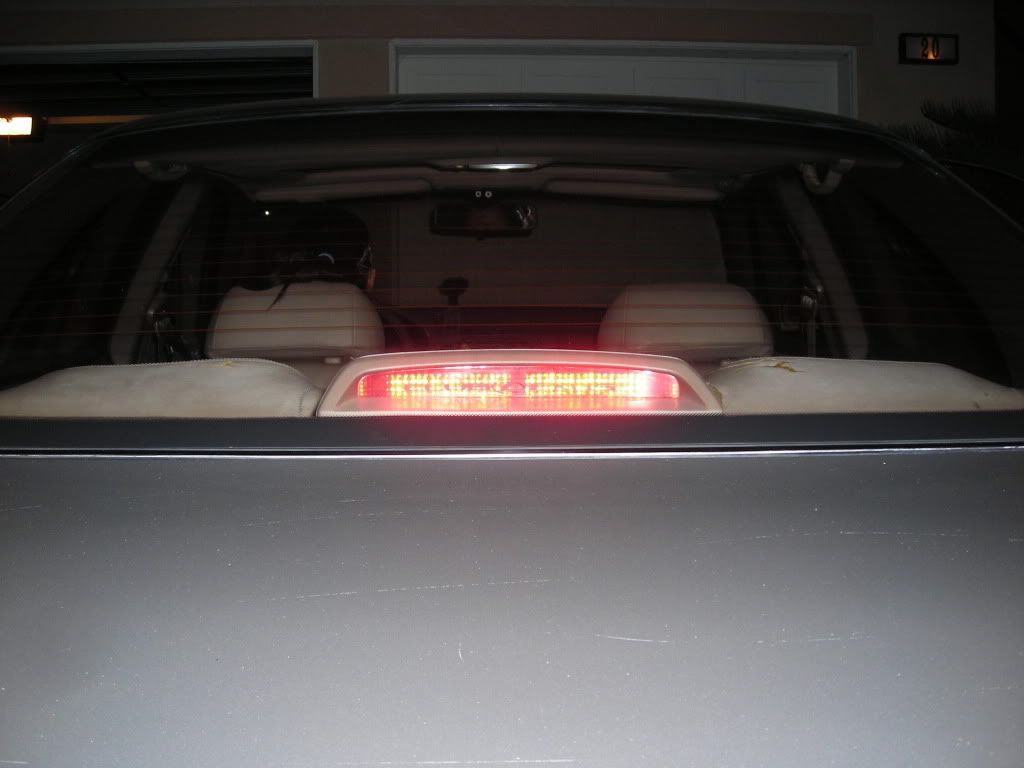
And one with flash, in which the picture sucked. BUT you can clearly see the double cyclops mode going on
I'll do some shots in the sun tomorrow or when I get a chance. I'll also try to put up the new schematic with what you would need resistor-wise as well
Thoughts:
-Fun project, will do it again later to my tails
-Somewhat full of headaches but I can deal with them
-Love doing Electronic Engineering again so I may swap majors from Chemical Engineering
-Overall impressed with what I did
-Did I mention fun? hehe
hehe
This time I mounted them for real with hot glue and stuff. Also trimmed the board down a bit to make it more evenly placed in the housing. I'll draw up a new schematic for you guys once I find the time. It sits almost dead even so the person behind will see them no problem.
I do have to say though, with the LEDs in place, the red diffuser "sparkles" when I apply the lights. Its also super easy to see during the day (pics for that tomorrow since its dark right now). While you can barely see the tails, the 3rd brake light is easily visible when the sun is at its strongest
Here are some pics for now. They don't really show what it looks like due to my point and shoot camera but I'm sure once you see/make them you'll like them too.
Night shots for you guys. Notice how the output is just as bright as the normal halogen tail lights
Heres a "real world" shot, meaning its very close to being this bright that I took with my camera...
And one with flash, in which the picture sucked. BUT you can clearly see the double cyclops mode going on
I'll do some shots in the sun tomorrow or when I get a chance. I'll also try to put up the new schematic with what you would need resistor-wise as well
Thoughts:
-Fun project, will do it again later to my tails
-Somewhat full of headaches but I can deal with them
-Love doing Electronic Engineering again so I may swap majors from Chemical Engineering
-Overall impressed with what I did
-Did I mention fun?
hehe

 07-10-09, 01:11 AM
#49
Sorry for missing the updates guys. I was swamped with activity on Monday and Tuesday. Greetings from HK though 
I'll update when I can as I don't have internet very often. Currently on the hunt for that 2ES lip. Hope they have it here
I'll update when I can as I don't have internet very often. Currently on the hunt for that 2ES lip. Hope they have it here
08-06-09, 01:10 AM
#51
I miss my car....
On other news, I'll be redoing my LED brake lights as soon as I come back from HK. I have not decided to put these up for sale or not so stay tuned I guess. I feel like working on this thing again. This and my LED strip that I just bought for the courtesy lights
On other news, I'll be redoing my LED brake lights as soon as I come back from HK. I have not decided to put these up for sale or not so stay tuned I guess. I feel like working on this thing again. This and my LED strip that I just bought for the courtesy lights
08-29-09, 05:44 PM
#52
So after about a month absence, I've returned to update my thread. Many things to talk to you guys about too
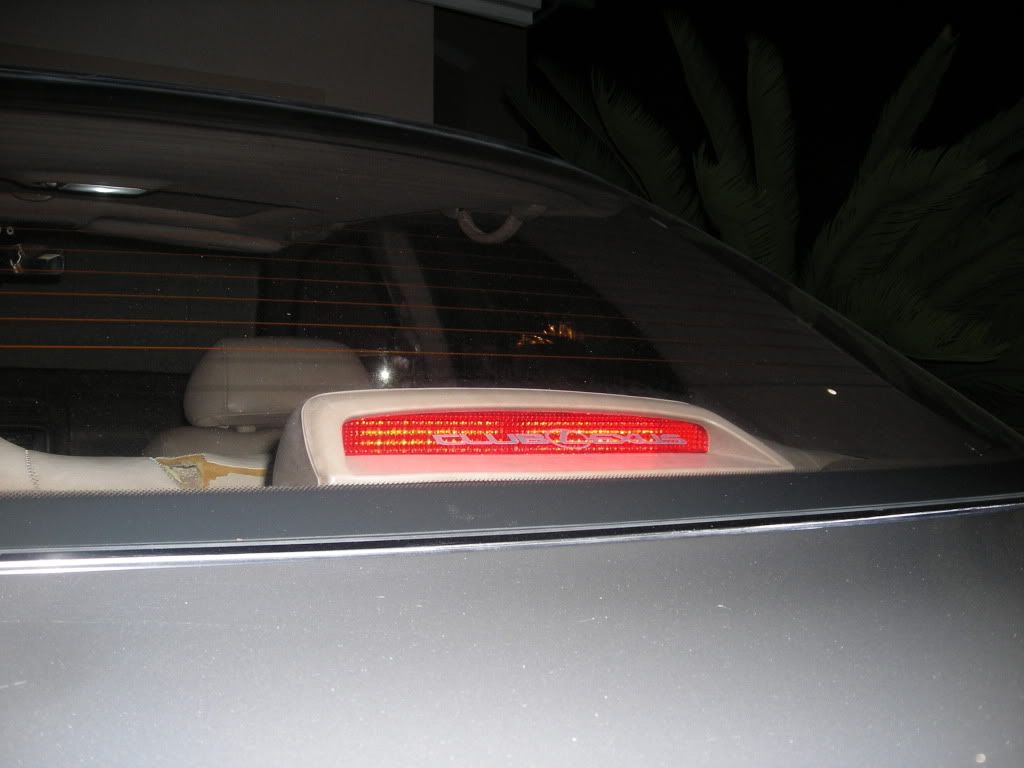
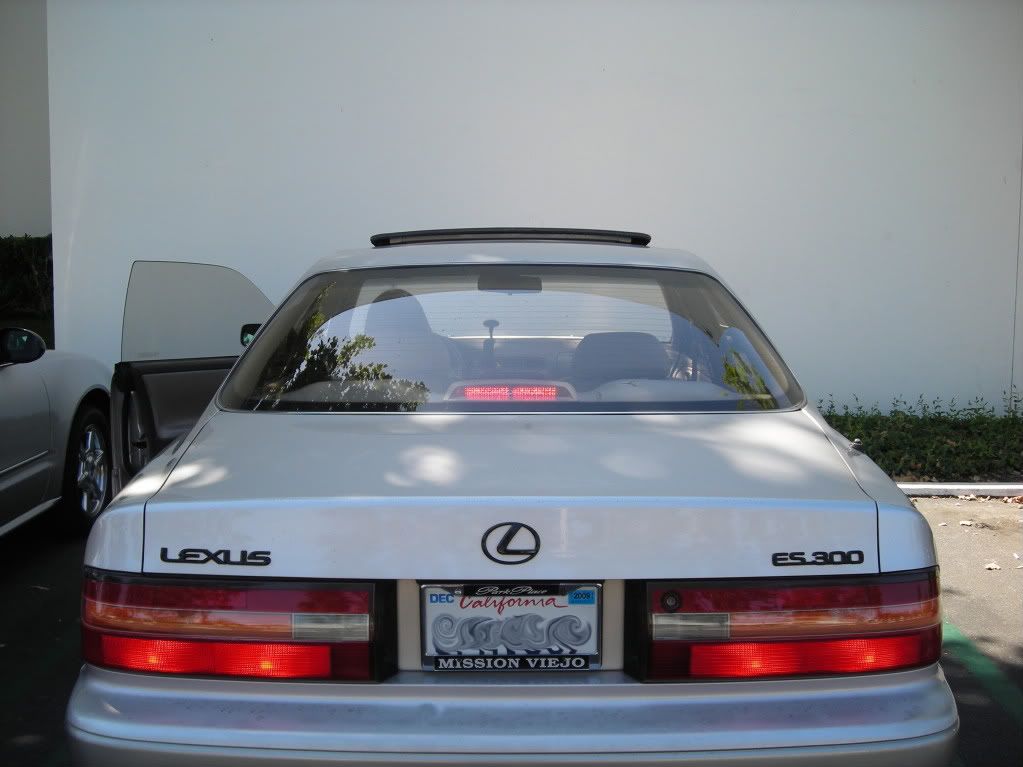
Here are the updated pics of the latest board in the light. Definitely more noticeable than my stock bulbs if you were wondering.
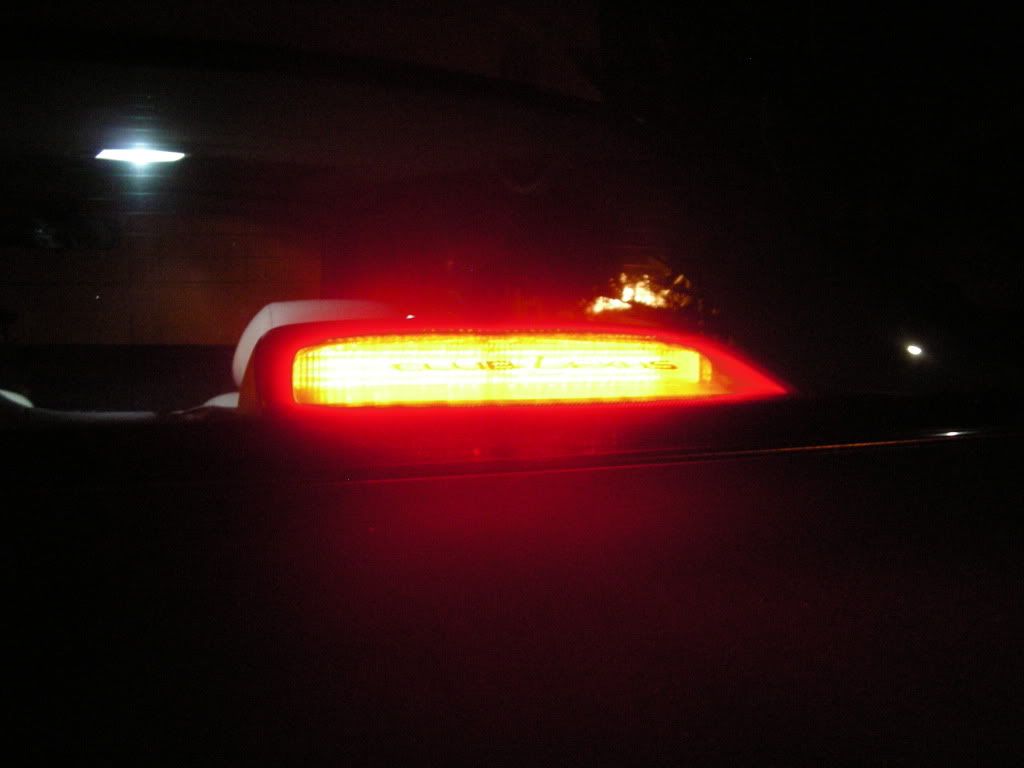
Just the 3rd Brake Light...

Entire back of the car...
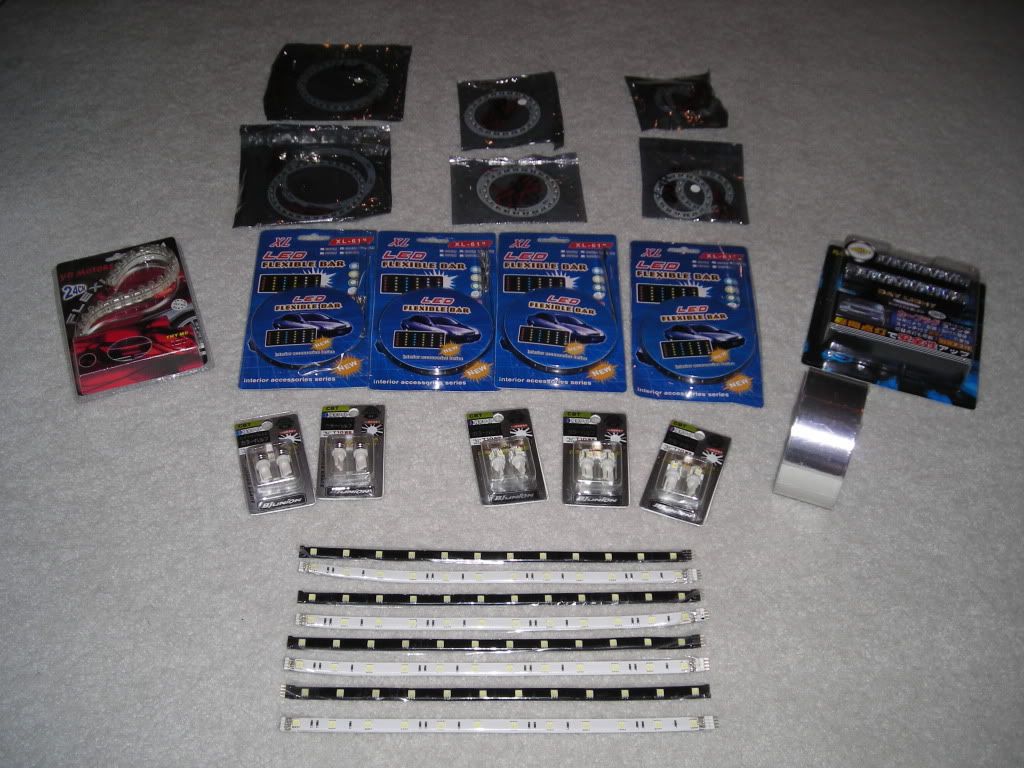
Now heres the Great news, I went LED happy in HK and bought a bunch of components and various stuff to enhance this project and maybe give me new ideas. Heres the majority of my spoils!
In the list are:
-6 smd Angel Eyes for a possible cluster retrofit (40cm, 60cm ,80cm)
-4 Waterproof white smd strips for a possible new door courtesy light retro
-5 194 LED bulbs for whatever use I can find for them (possibly for sale too)
-1 White LED strip, again, waterproof for maybe the cluster
-1 Waterproof white LED fog lights for a possible DRL
And my favorite,
-8 Waterproof White LED strips that would go perfect inside/outside the car as courtesy lights, trunk lights, etc. They're super bright
-Various PCB boards to make more stuff with, including possible kits for you guys

Now for the bad news. Coming back from HK and looking at all the LED lights of various models there, I've come to the conclusion that my current one is too Amateurish for my tastes. Therefore, in the event that I have not procured a second set of tails for my next retrofit, I've decided to remake them, using the LumiLEDs that I picked up prior to Hong Kong. This board will be more efficient and more professional looking in my eyes so hopefully all goes well.
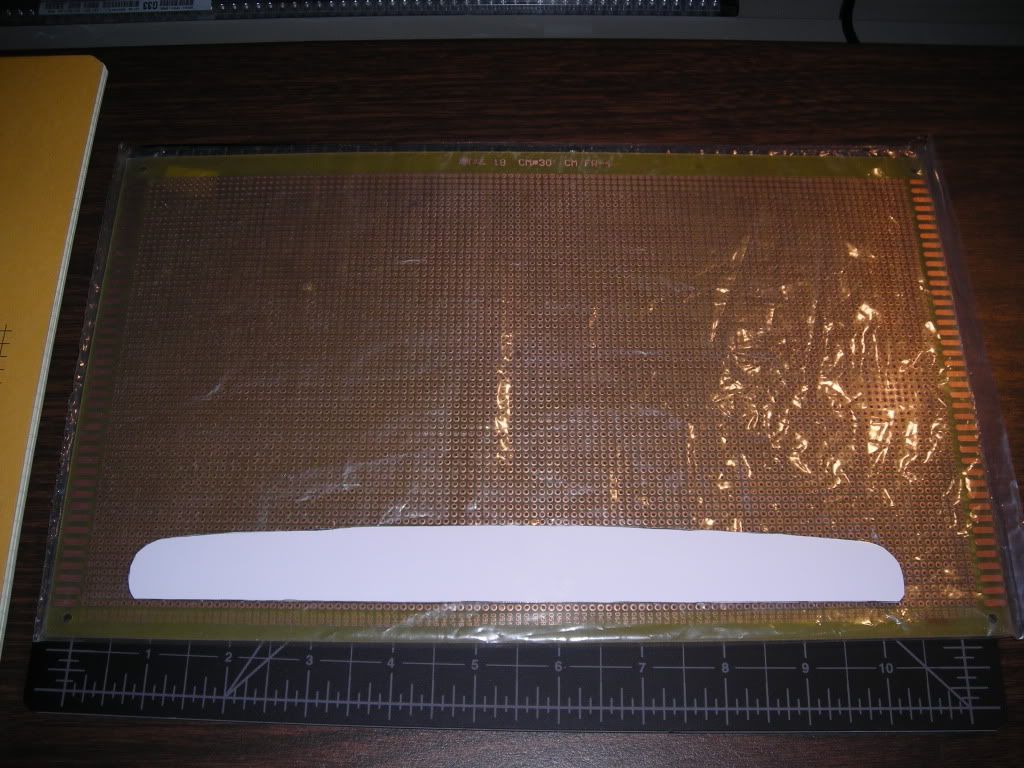
Test fitting/tracing the full outer lens of the brake light (removing the red diffuser all together this time)
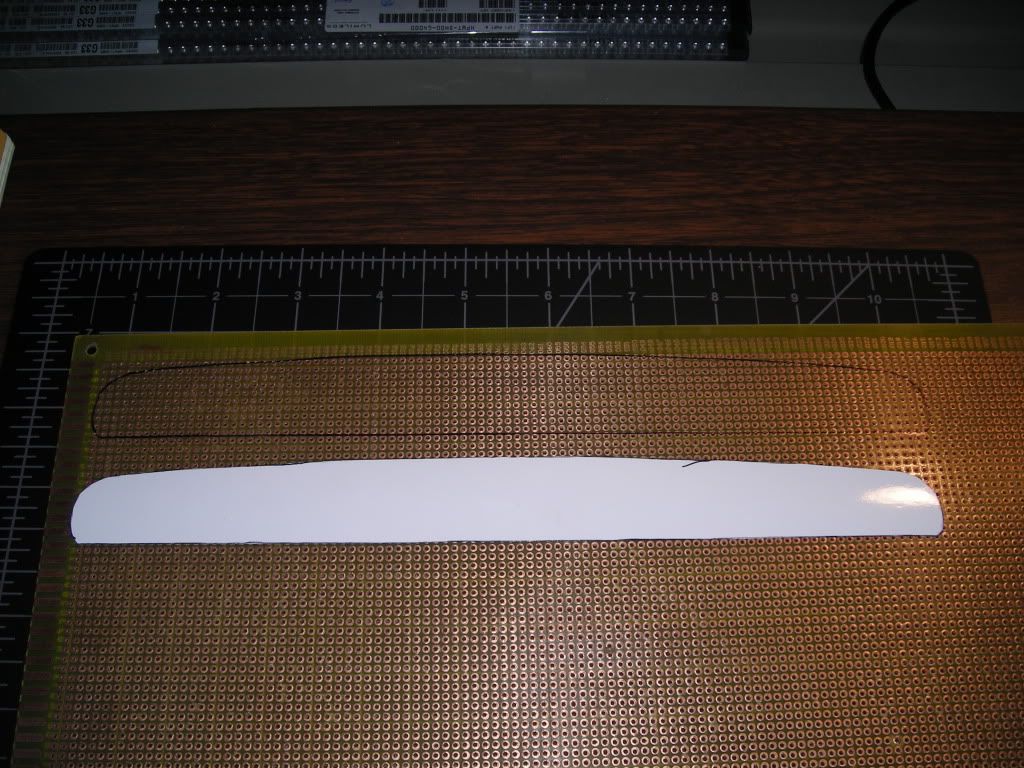
Board cut out and thrown into the housing to make it fit flush or whatever you call it...

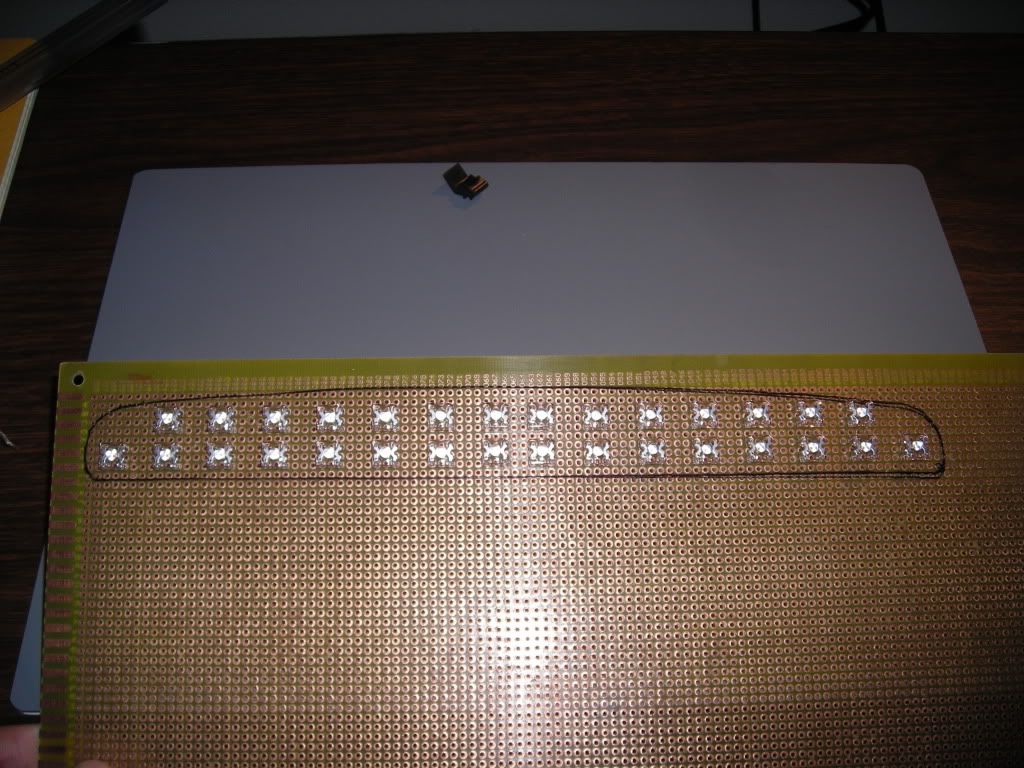
Then painted flat black and added 1 LumiLED to see how it looks. Might paint it red later depending on how it looks in the housing...any suggestions guys?
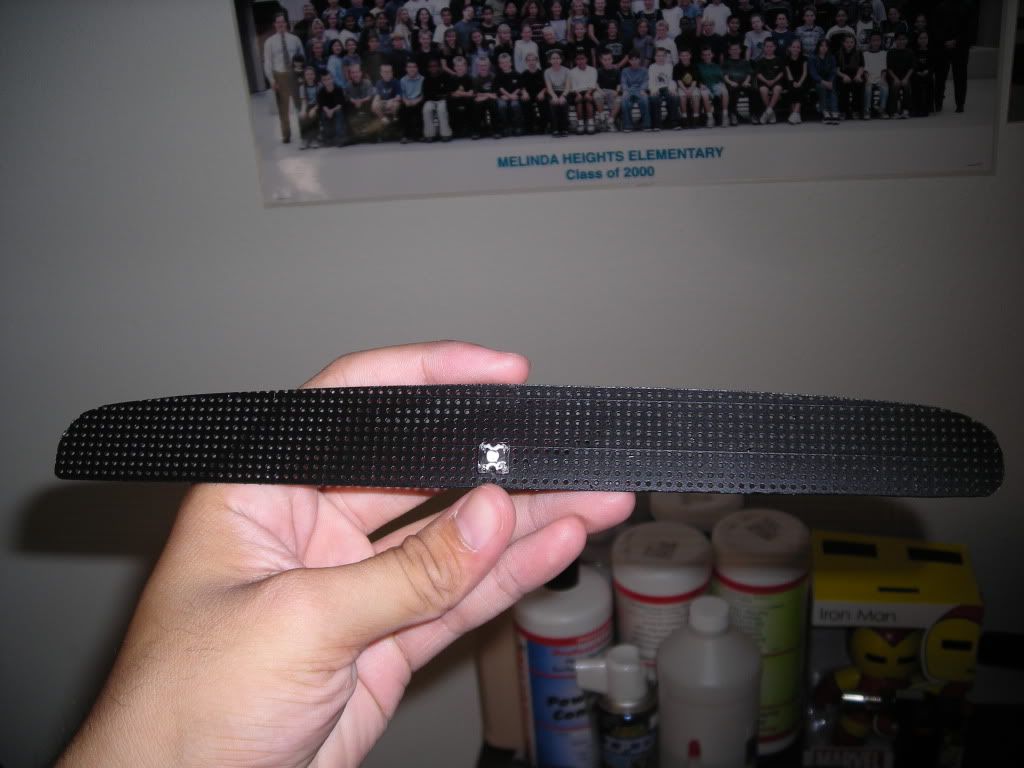
Anyway, thats it for now until I can see if I like black or red better. Please throw up suggestions if you can, I'd really appreciate it. Comments too
PS-the LumiLEDs are 10x brighter than the 5mm ones on my old board
Here are the updated pics of the latest board in the light. Definitely more noticeable than my stock bulbs if you were wondering.
Just the 3rd Brake Light...
Entire back of the car...
Now heres the Great news, I went LED happy in HK and bought a bunch of components and various stuff to enhance this project and maybe give me new ideas. Heres the majority of my spoils!
In the list are:
-6 smd Angel Eyes for a possible cluster retrofit (40cm, 60cm ,80cm)
-4 Waterproof white smd strips for a possible new door courtesy light retro
-5 194 LED bulbs for whatever use I can find for them (possibly for sale too)
-1 White LED strip, again, waterproof for maybe the cluster
-1 Waterproof white LED fog lights for a possible DRL
And my favorite,
-8 Waterproof White LED strips that would go perfect inside/outside the car as courtesy lights, trunk lights, etc. They're super bright
-Various PCB boards to make more stuff with, including possible kits for you guys
Now for the bad news. Coming back from HK and looking at all the LED lights of various models there, I've come to the conclusion that my current one is too Amateurish for my tastes. Therefore, in the event that I have not procured a second set of tails for my next retrofit, I've decided to remake them, using the LumiLEDs that I picked up prior to Hong Kong. This board will be more efficient and more professional looking in my eyes so hopefully all goes well.
Test fitting/tracing the full outer lens of the brake light (removing the red diffuser all together this time)
Board cut out and thrown into the housing to make it fit flush or whatever you call it...
Then painted flat black and added 1 LumiLED to see how it looks. Might paint it red later depending on how it looks in the housing...any suggestions guys?
Anyway, thats it for now until I can see if I like black or red better. Please throw up suggestions if you can, I'd really appreciate it. Comments too
PS-the LumiLEDs are 10x brighter than the 5mm ones on my old board
08-30-09, 05:59 PM
#54
Ahh, thats a valid point. Black it is! Luckily you made that reasoning for me, I got impatient last night and soldered all of the LEDs on  . Now all I'll need are the resistors and then it should be finished. Pics of the "final" look probably tonight
. Now all I'll need are the resistors and then it should be finished. Pics of the "final" look probably tonight
08-31-09, 11:05 PM
#55
Small update!
Finished soldering the LEDs in. I'm not liking the shorter prongs, harder to see on the board, especially when I painted it black . Looks pretty good though. Tomorrow, I'm planning on going to Fry's Electronics or Radio Shack to pick up the remaining parts (resistors). Hopefully it will be done by the end of this week as I only have 3 days (Tuesday, Saturday, Sunday) to work on this project since I'm so busy lately
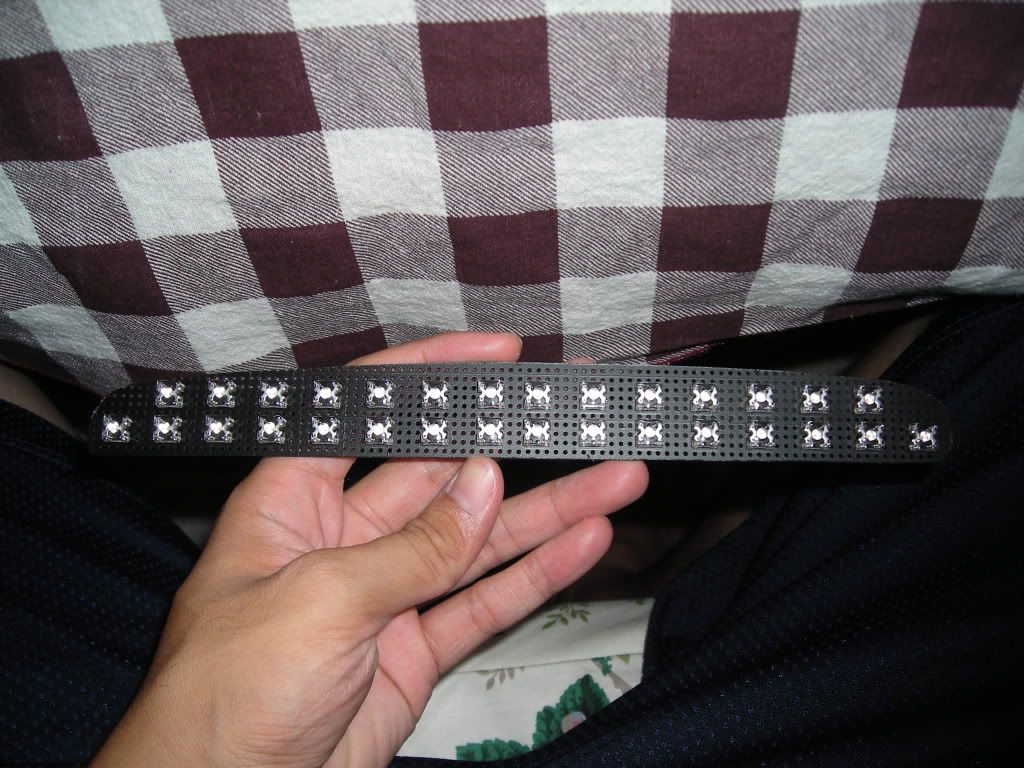
Finished soldering the LEDs in. I'm not liking the shorter prongs, harder to see on the board, especially when I painted it black
. Looks pretty good though. Tomorrow, I'm planning on going to Fry's Electronics or Radio Shack to pick up the remaining parts (resistors). Hopefully it will be done by the end of this week as I only have 3 days (Tuesday, Saturday, Sunday) to work on this project since I'm so busy lately 09-03-09, 08:04 AM
#57
Rookie

Join Date: Aug 2009
Location: New Jersey
Posts: 76
Likes: 0
Received 0 Likes
on
0 Posts
 Youre gonna blind people lol!
09-03-09, 09:38 PM
Youre gonna blind people lol!
09-03-09, 09:38 PM
#58
Yeah, I discovered that some parts in HK are significantly cheaper or somewhat cheaper than here in the States. Couldn't pass up on it sadly
To be honest, I figured I'd either keep it as a momentum or sell it to one of you guys as a premade thing you can just splice and play. I'll probably figure it out once I'm finished with this current board so yeah. Would you be interested? lol
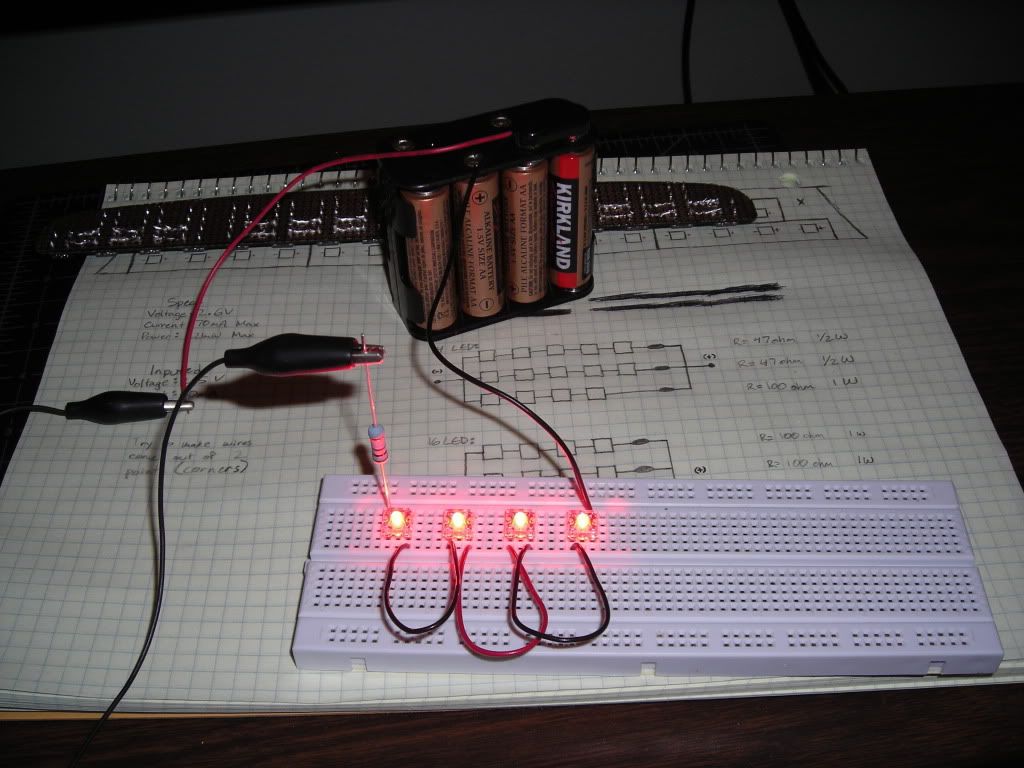
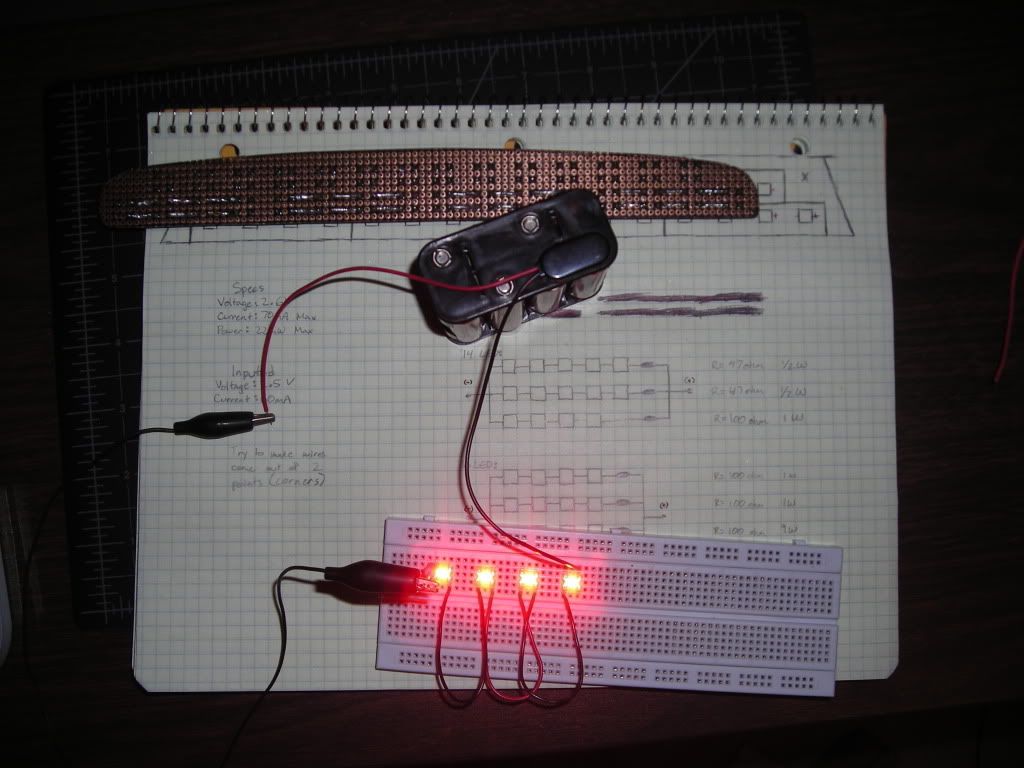
Smallish update since I was only able to work a further 1 hour yesterday (lots of hw). Hope you like. I completed connecting the bottom row of LEDs together so now they should light up well once I solder in the resistors. Resistors are prepped as well to their wires too so it should be relatively easy to do once I find a couple hours by myself again
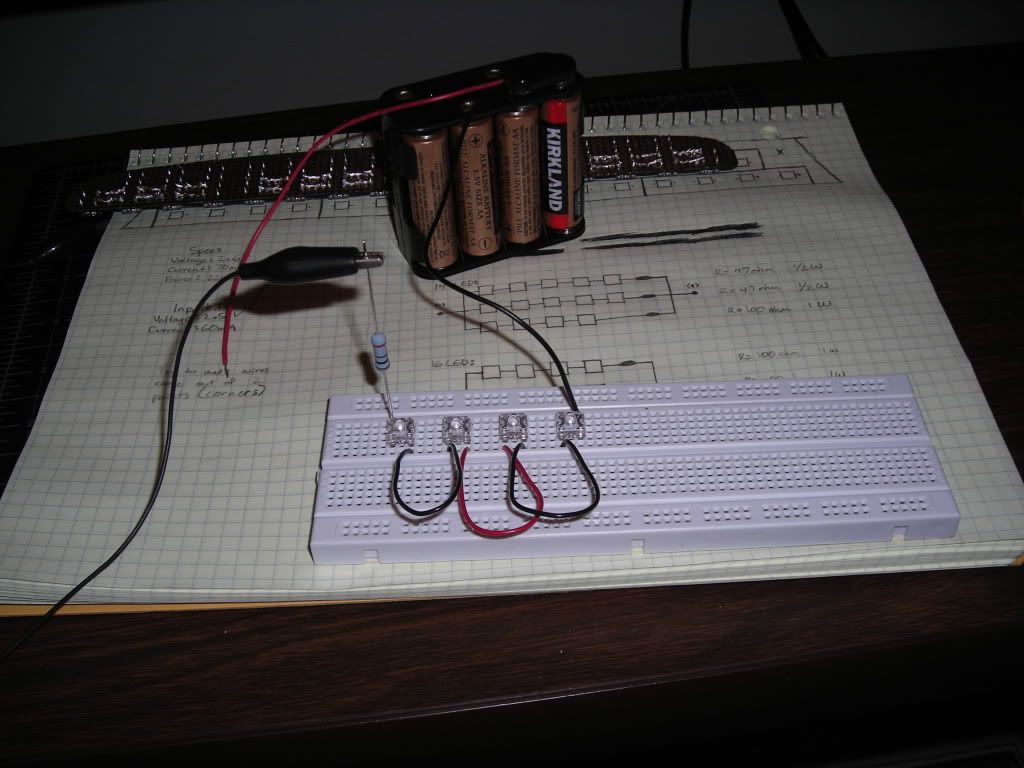
Then heres something I'm sure you're all interested in. Heres 4 LEDs on my breadboard for illustration purposes. My battery is currently at 8v so its not at its optimal power setting but you generally get the gist of it I guess. They fire 50 degrees and are brighter than the old set up by a lot. You might not be able to tell because my camera suddenly decided to be a great camera again so the ISO settings are spot on for taking those pics (point and shoot...grrr)
Flash/No Flash (side view)
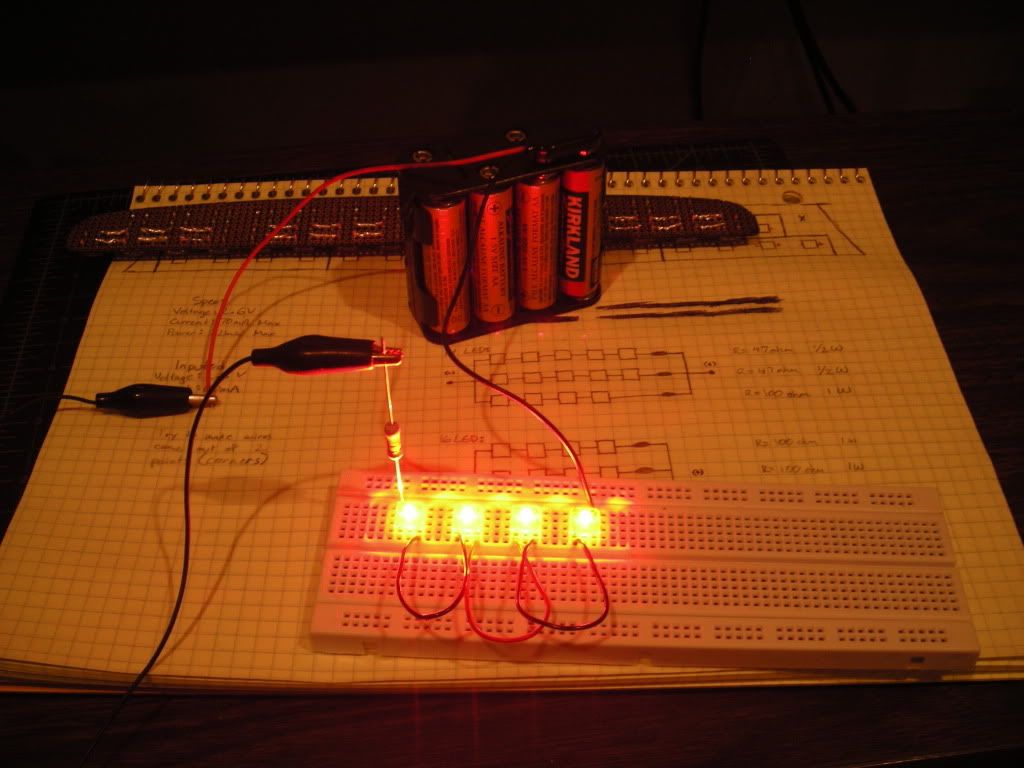
Flash/No Flash (top view)

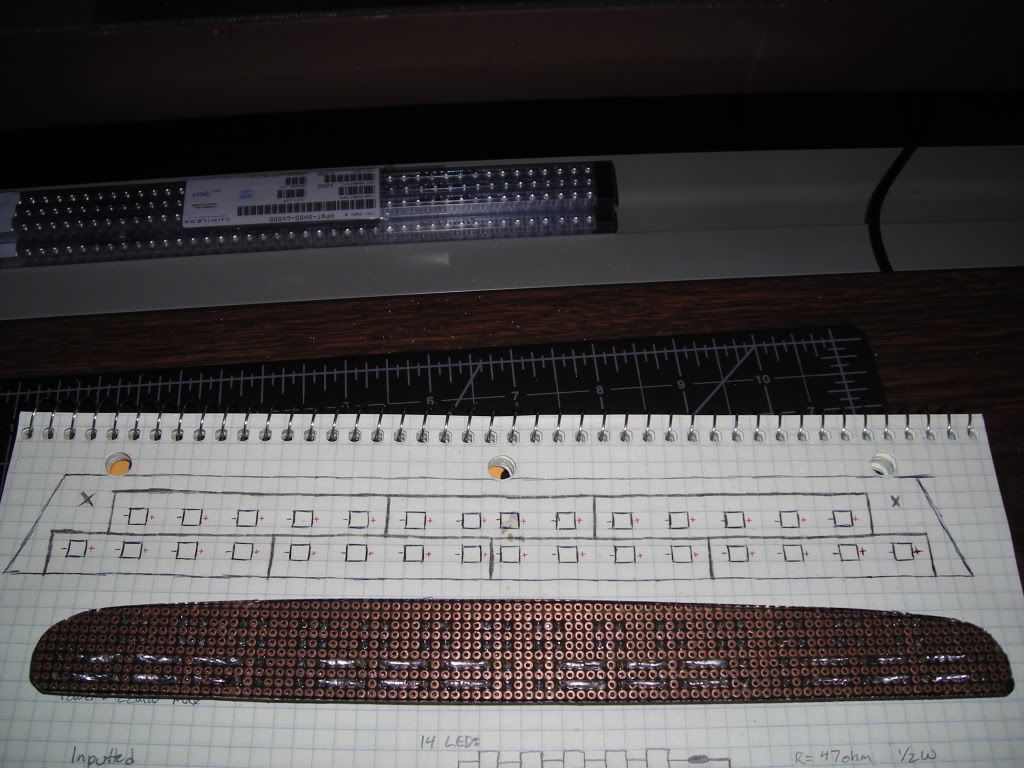
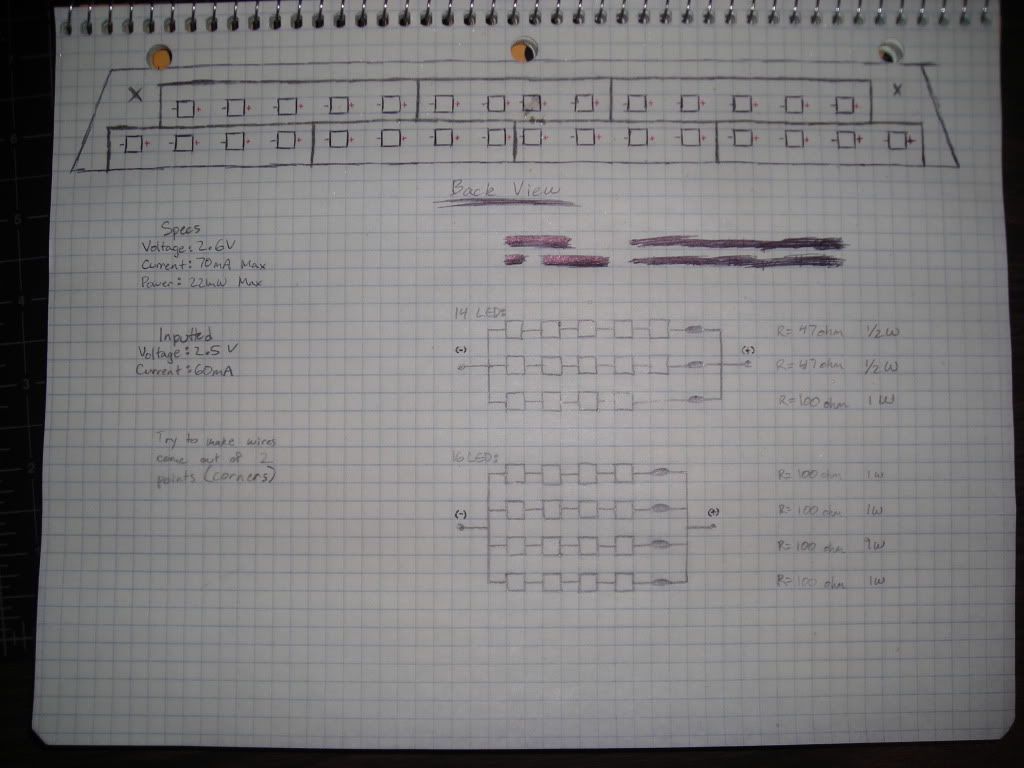
Then theres the topic of my schematic. I obviously learned last time through my mistakes so this is the FINAL VERSION of the 3rd brake light. Hope you guys like it. The parts definitely fit so its just a matter of wire placement. Speaking of which, I have to go out and buy some silicon
It should be finished by Labor Day
Smallish update since I was only able to work a further 1 hour yesterday (lots of hw). Hope you like. I completed connecting the bottom row of LEDs together so now they should light up well once I solder in the resistors. Resistors are prepped as well to their wires too so it should be relatively easy to do once I find a couple hours by myself again
Then heres something I'm sure you're all interested in. Heres 4 LEDs on my breadboard for illustration purposes. My battery is currently at 8v so its not at its optimal power setting but you generally get the gist of it I guess. They fire 50 degrees and are brighter than the old set up by a lot. You might not be able to tell because my camera suddenly decided to be a great camera again so the ISO settings are spot on for taking those pics (point and shoot...grrr)
Flash/No Flash (side view)
Flash/No Flash (top view)
Then theres the topic of my schematic. I obviously learned last time through my mistakes so this is the FINAL VERSION of the 3rd brake light. Hope you guys like it. The parts definitely fit so its just a matter of wire placement. Speaking of which, I have to go out and buy some silicon
It should be finished by Labor Day

