How to: Adjust windows to get proper fit and seal. With pics (cell phone pics)
 12-04-08, 06:36 PM
#1
Pole Position
Thread Starter

I decided to go ahead and adjust my window because it was just getting annoying... The only thing I had on me to take pics at the time was my cell phone so I apologize ahead of time that I didn't pack my tripod and DSLR. 
Anyway, this mainly applies to the removal of the door panel and adjustment of the window in a 1995 es300. It may or may not apply to other vehicles but I put it in this section.
First off, we need to remove the door panel.
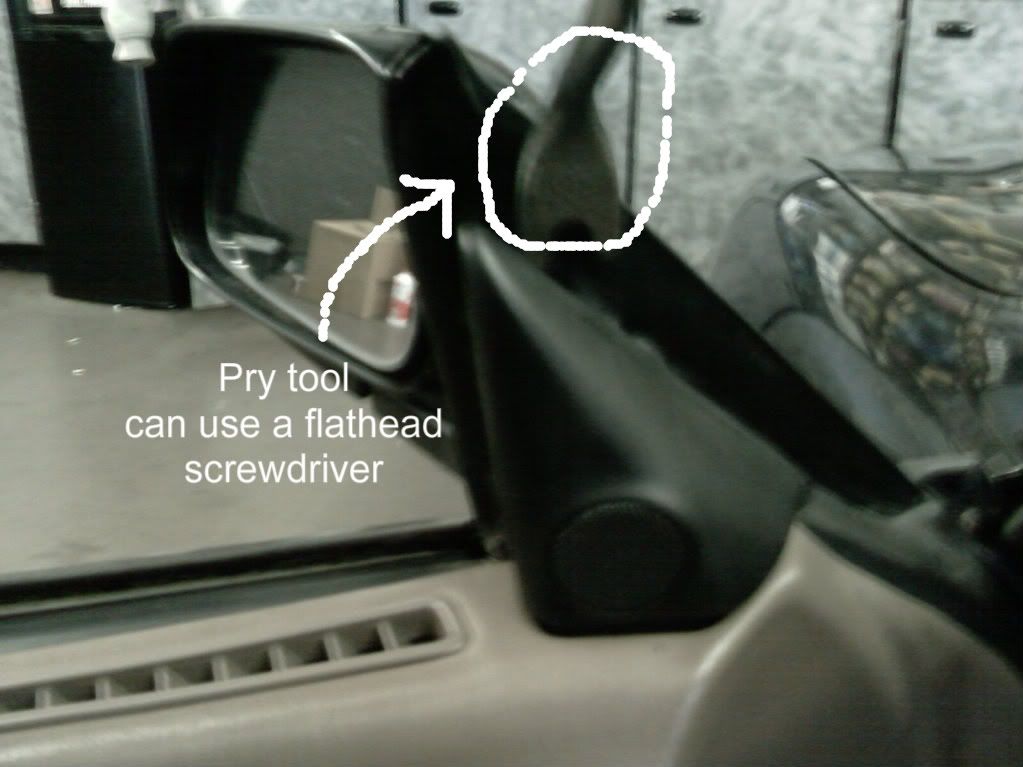
I started with the tweeter cover:
Just stick a tool (flathead screwdriver, etc) in the gap up top and pry until it comes off. Sometimes this will break the retaining tab on the cover but a little super glue will fix it in most cases. I didn't have this problem on mine. I have just heard that this happens alot.
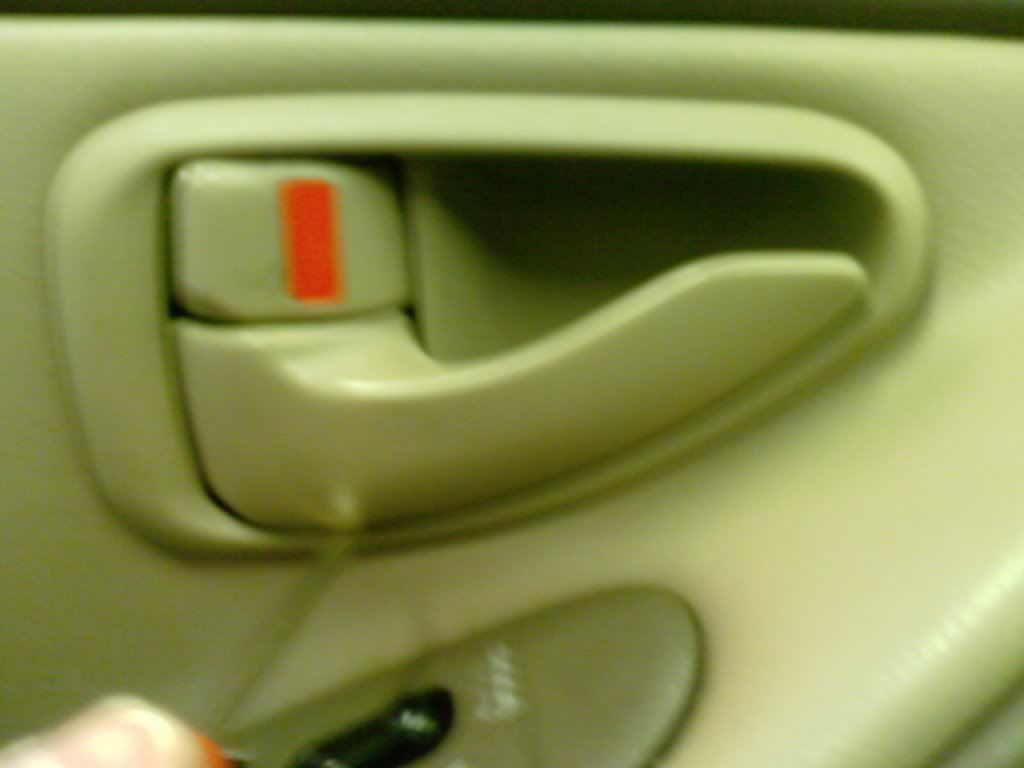
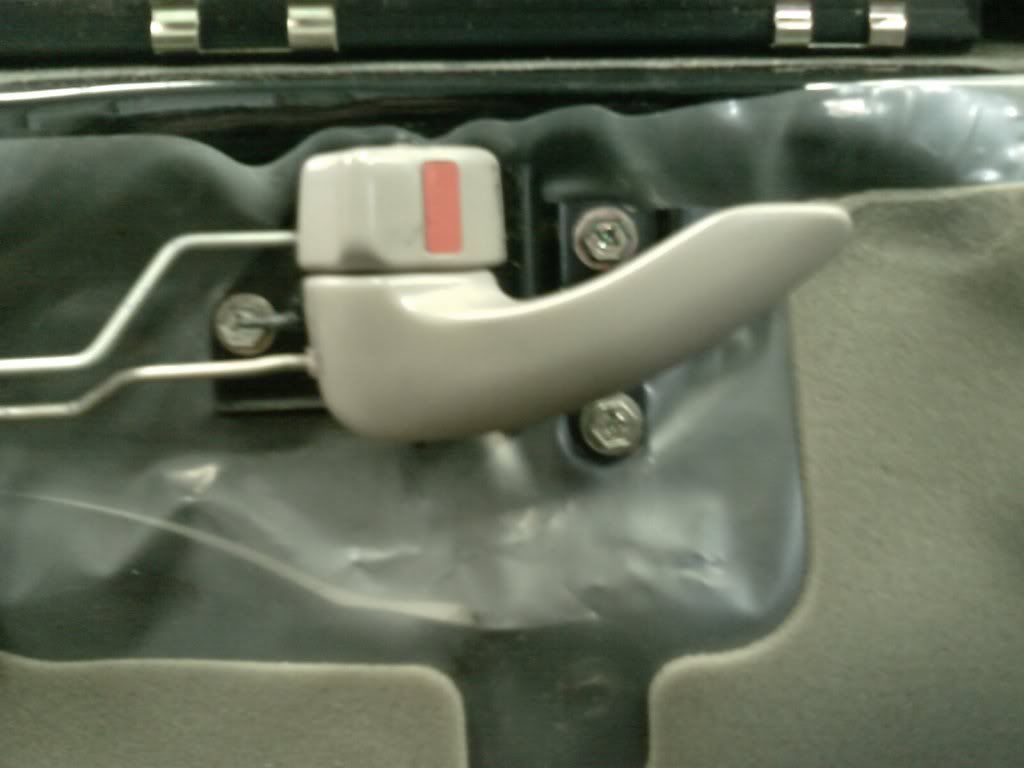
Next remove the door handle surrounding trim by using a small flathead screwdriver between the trim and the top part of the door handle. You want to pry up to separate the two. Do the same for the bottom of the trim. You will need to pry down this time to separate. After both are separated, pull the rear portion away from the door as you slide the trim back toward the rear of the door.

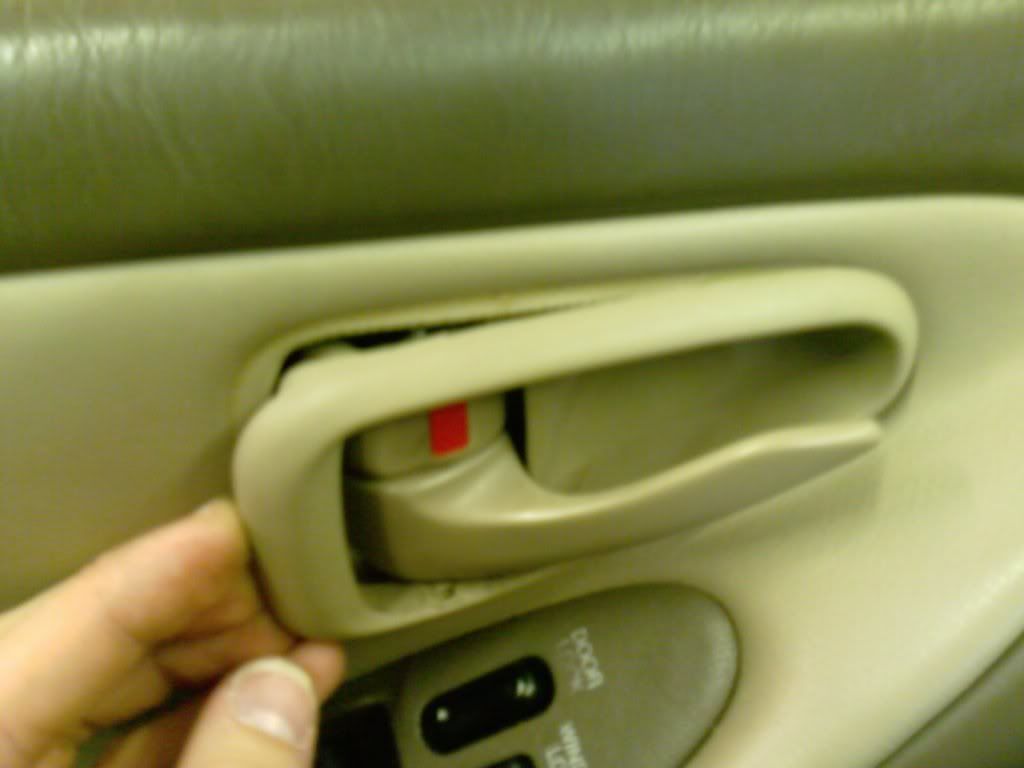
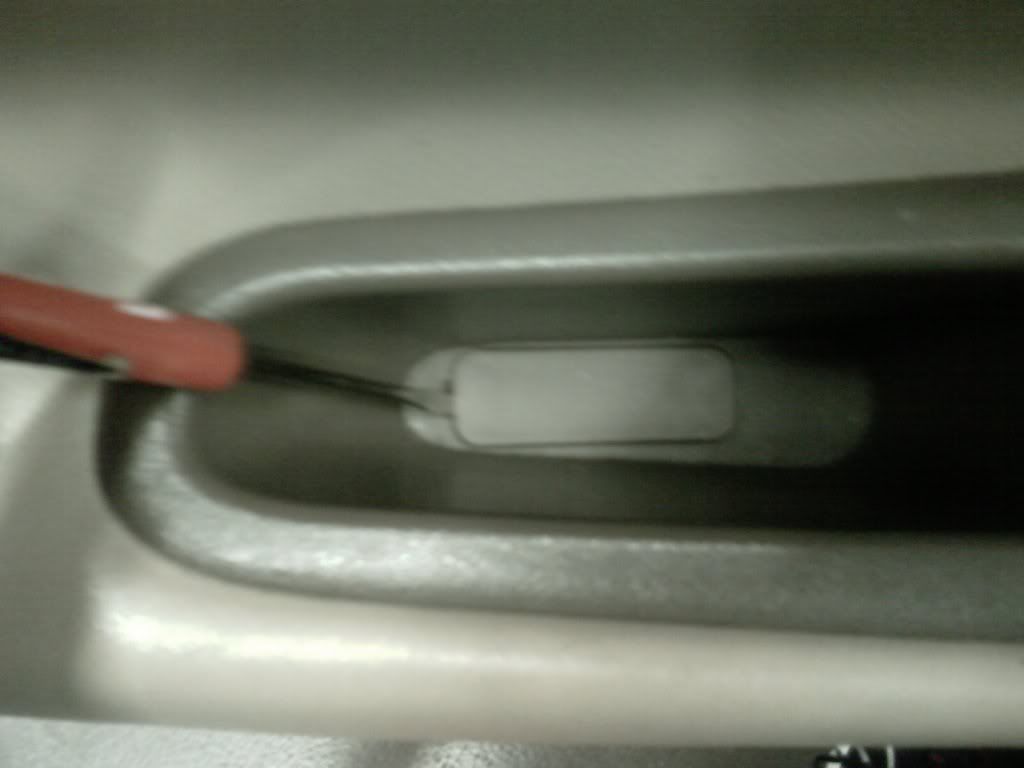
There is a screw in the door handle. Remove the plastic cover with a flathead and remove the screw with a phillips head.
Mine's a little dirty
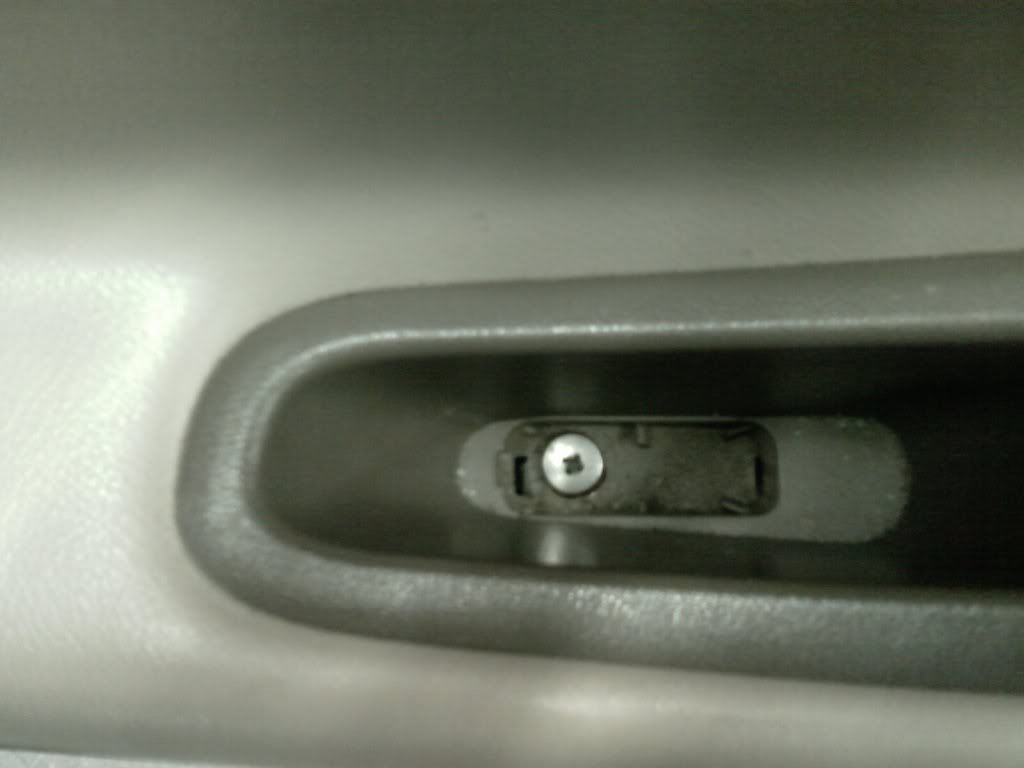
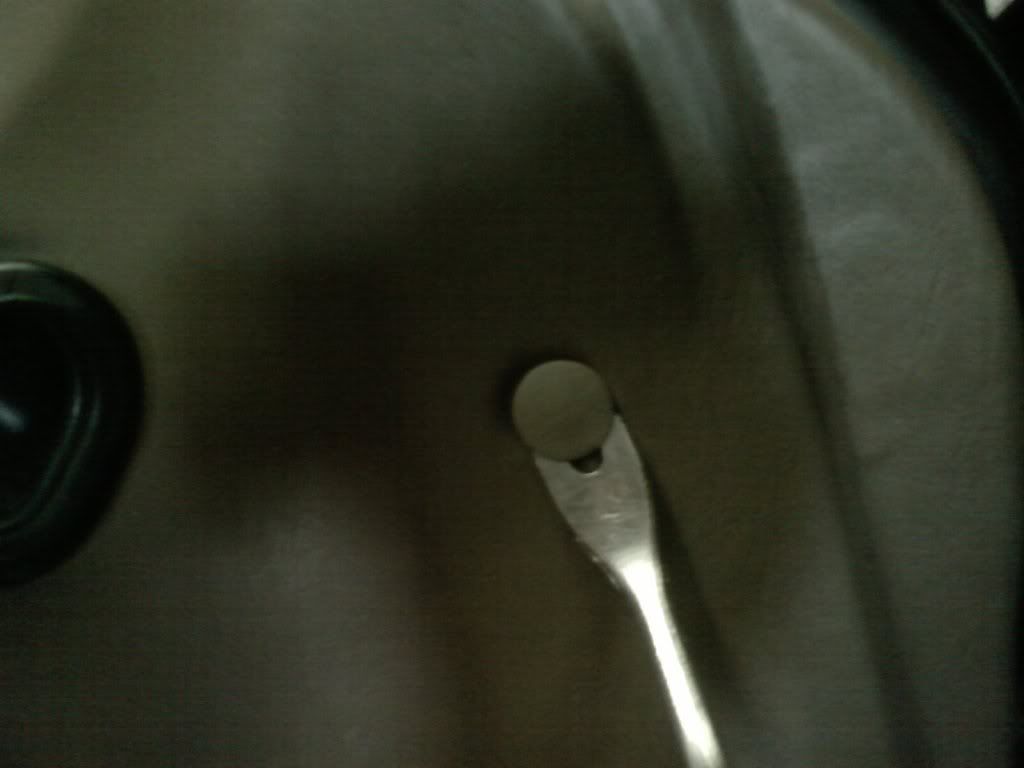
Remove the plastic cover toward the inside of the door to reveal a screw. Remove the screw.
Anyway, this mainly applies to the removal of the door panel and adjustment of the window in a 1995 es300. It may or may not apply to other vehicles but I put it in this section.
First off, we need to remove the door panel.
I started with the tweeter cover:
Just stick a tool (flathead screwdriver, etc) in the gap up top and pry until it comes off. Sometimes this will break the retaining tab on the cover but a little super glue will fix it in most cases. I didn't have this problem on mine. I have just heard that this happens alot.
Next remove the door handle surrounding trim by using a small flathead screwdriver between the trim and the top part of the door handle. You want to pry up to separate the two. Do the same for the bottom of the trim. You will need to pry down this time to separate. After both are separated, pull the rear portion away from the door as you slide the trim back toward the rear of the door.
There is a screw in the door handle. Remove the plastic cover with a flathead and remove the screw with a phillips head.
Mine's a little dirty
Remove the plastic cover toward the inside of the door to reveal a screw. Remove the screw.
 12-04-08, 06:37 PM
#2
Pole Position
Thread Starter
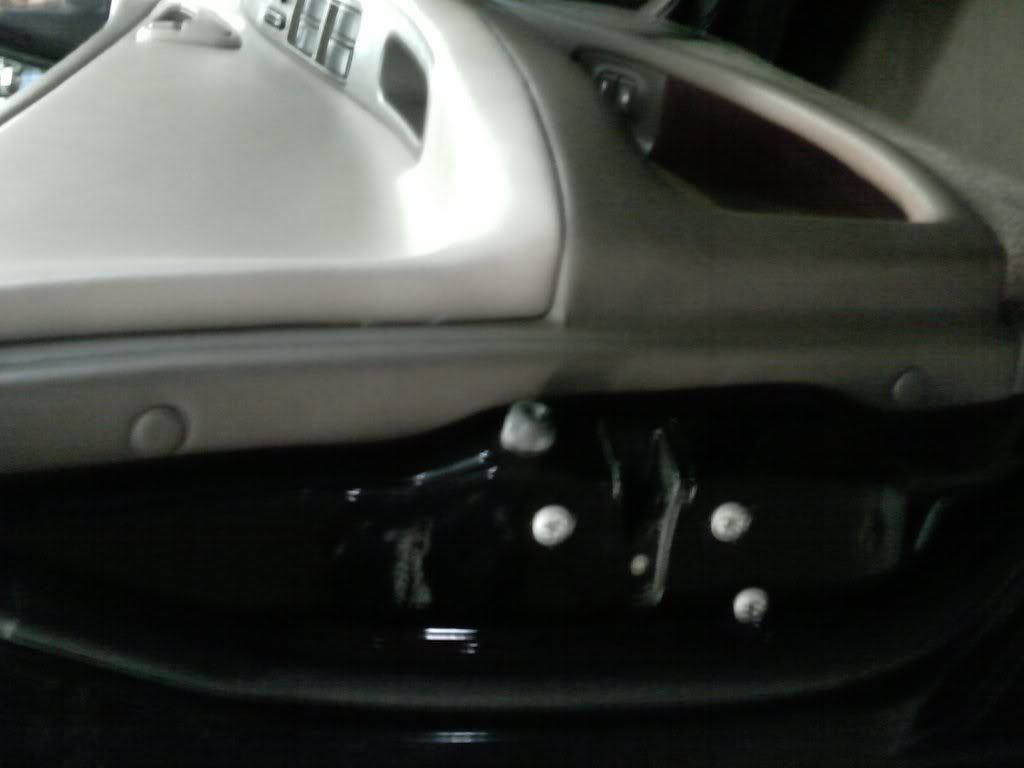
There are two tabs on the rear-facing end of the door that help hold it on. These can be removed with a flathead or a tool like pictured. To release it, you must stick your tool in between the two circles and separate them. Once the tab is popped out, remove the rest with your fingers or get the tool under it and pry the rest out.

Now that all of the fasteners are removed, it's time to pull out on the bottom part of the door. The only thing holding the panel on now are clips. Just give it a good pull and do this all the way around until it feels loose. The top will stay on until you slide it up and off. Once the clips are released just pull up on the panel and it will be free of the door. The only thing stopping you now are the wire connections between the door and the panel (ie switch wiring, light wiring, etc). I find it easier to unclip the light wiring first:

Then unclip the remaining two:
Once the panel is completely free, just set it to the side. It won't be needed for a bit.
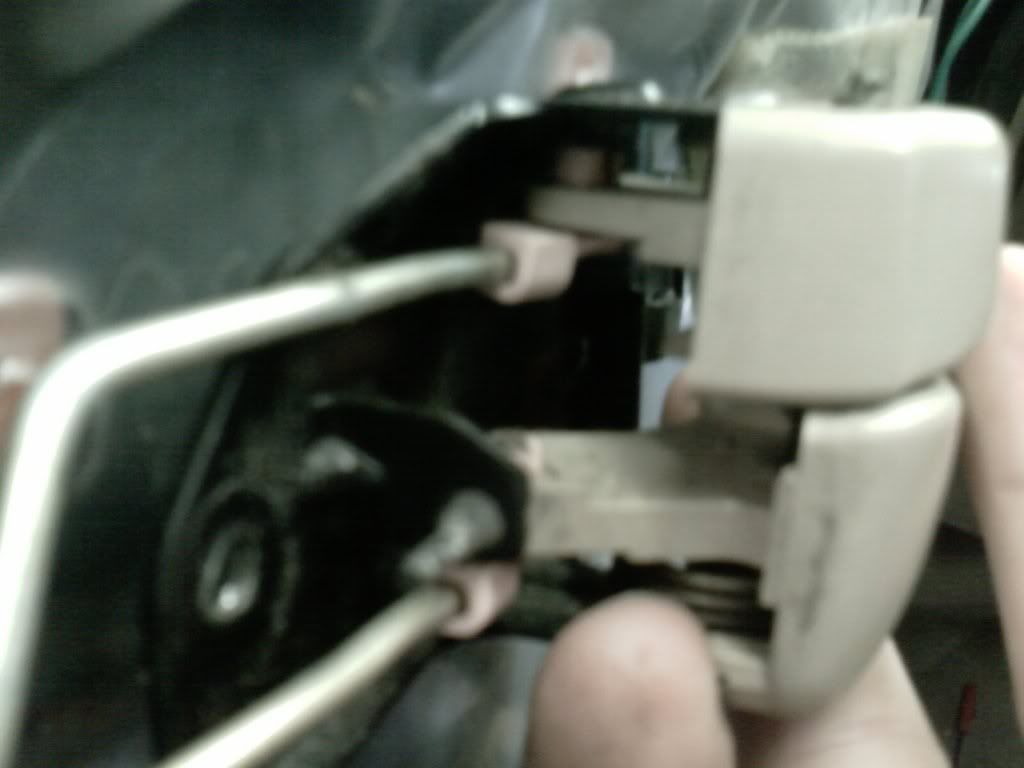
The door handle will need to be removed. Three bolts around the handle need to be removed and it will come right off. Once unbolted, slide the pink clips away from the metal bars that are in them. They rotate and clip on to the bars to hold them into place. Just unclip and remove the bars from the handle. Set the handle aside.
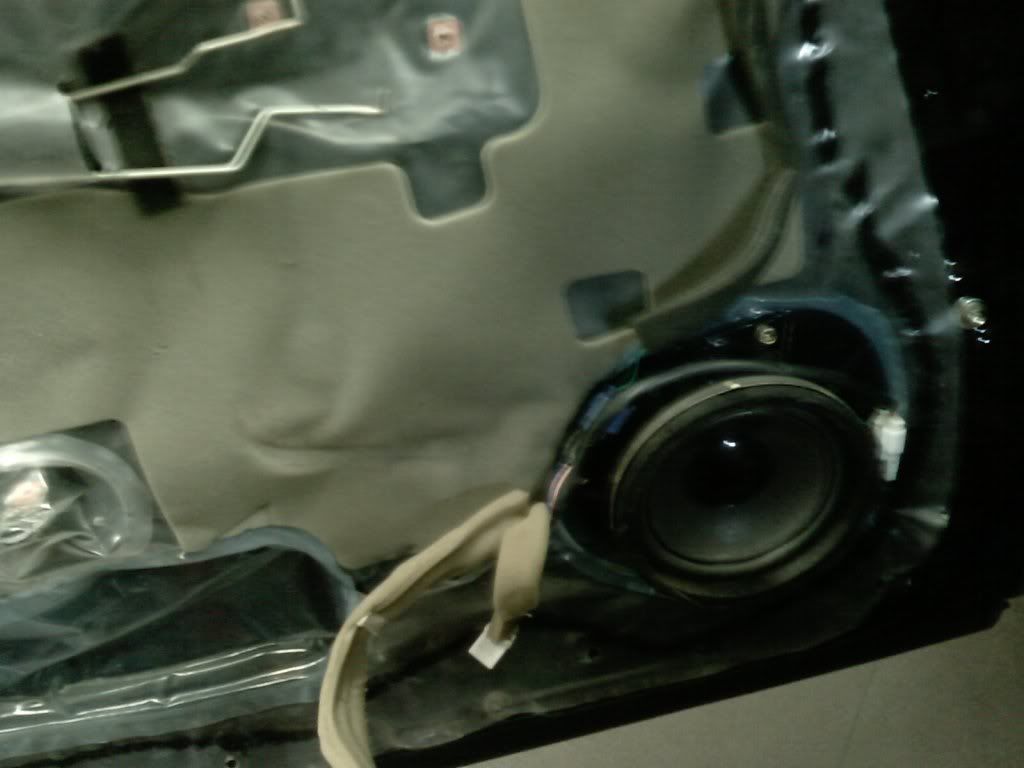
Next the wiring to the speaker needs to be unclipped. The wiring to the tweeter needs to be unhooked also. Remove the door speaker. The tweeter can stay. Just let the wire hang or throw it over the door hinge to get it out of the way.
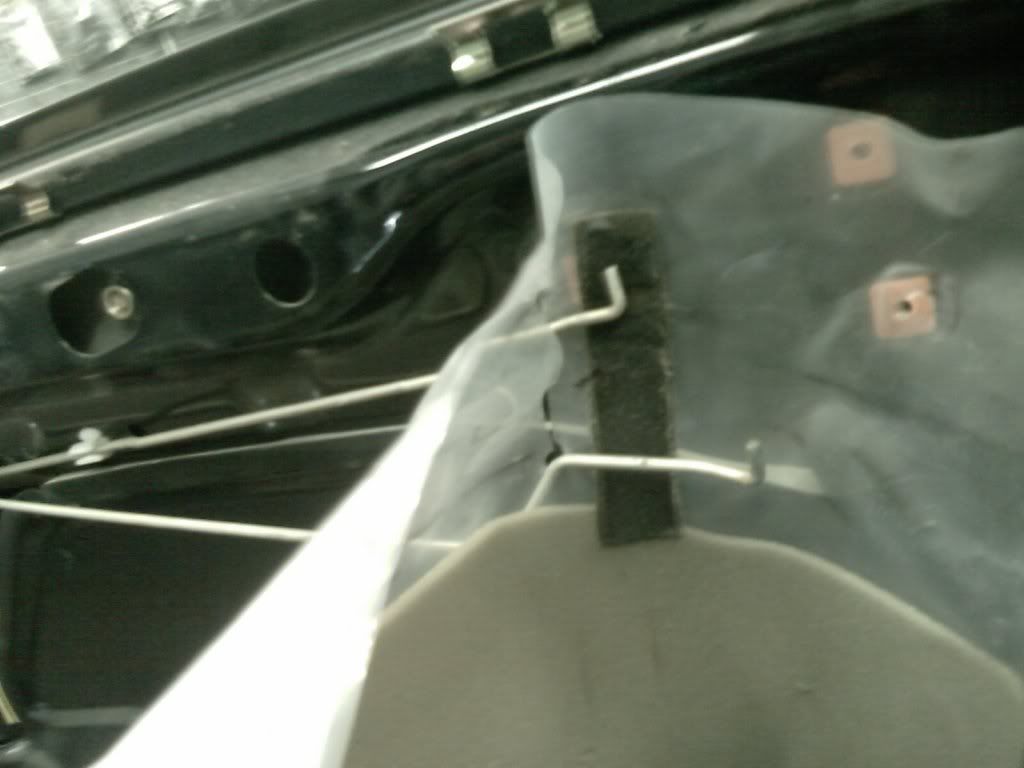
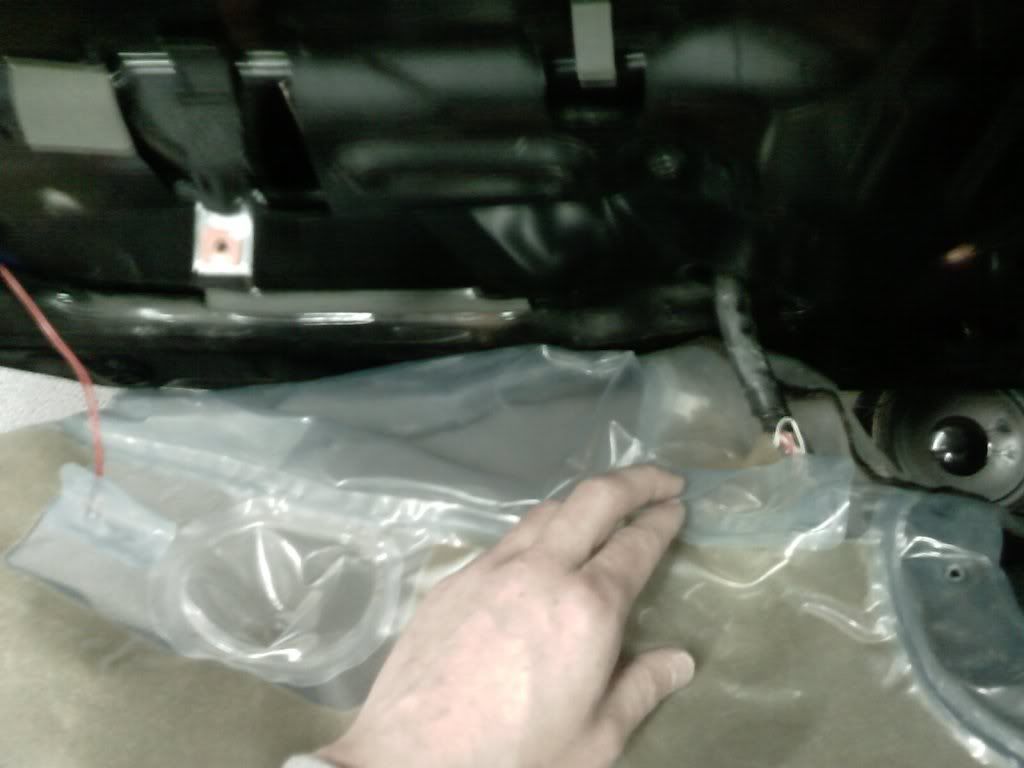
Now the plastic insulation/barrier needs to be removed. It is held on with a sticky-style material that is similar to "dum-dum". Probably closely resembles nothing you've ever seen before. It can get sticky, but it's nothing that a good hand washing won't handle. Just pull on it starting in one corner and work your way around until all of the black "goop" is pulled away. Do not pull it off the plastic. You will be reusing it. You are only trying to free the plastic from the door.
Slide the metal bars from the door handle out:
Slide the door harnesses out through their respective holes:
Now that all of the fasteners are removed, it's time to pull out on the bottom part of the door. The only thing holding the panel on now are clips. Just give it a good pull and do this all the way around until it feels loose. The top will stay on until you slide it up and off. Once the clips are released just pull up on the panel and it will be free of the door. The only thing stopping you now are the wire connections between the door and the panel (ie switch wiring, light wiring, etc). I find it easier to unclip the light wiring first:
Then unclip the remaining two:
Once the panel is completely free, just set it to the side. It won't be needed for a bit.
The door handle will need to be removed. Three bolts around the handle need to be removed and it will come right off. Once unbolted, slide the pink clips away from the metal bars that are in them. They rotate and clip on to the bars to hold them into place. Just unclip and remove the bars from the handle. Set the handle aside.
Next the wiring to the speaker needs to be unclipped. The wiring to the tweeter needs to be unhooked also. Remove the door speaker. The tweeter can stay. Just let the wire hang or throw it over the door hinge to get it out of the way.
Now the plastic insulation/barrier needs to be removed. It is held on with a sticky-style material that is similar to "dum-dum". Probably closely resembles nothing you've ever seen before. It can get sticky, but it's nothing that a good hand washing won't handle. Just pull on it starting in one corner and work your way around until all of the black "goop" is pulled away. Do not pull it off the plastic. You will be reusing it. You are only trying to free the plastic from the door.
Slide the metal bars from the door handle out:
Slide the door harnesses out through their respective holes:
12-04-08, 06:38 PM
#3
Pole Position
Thread Starter
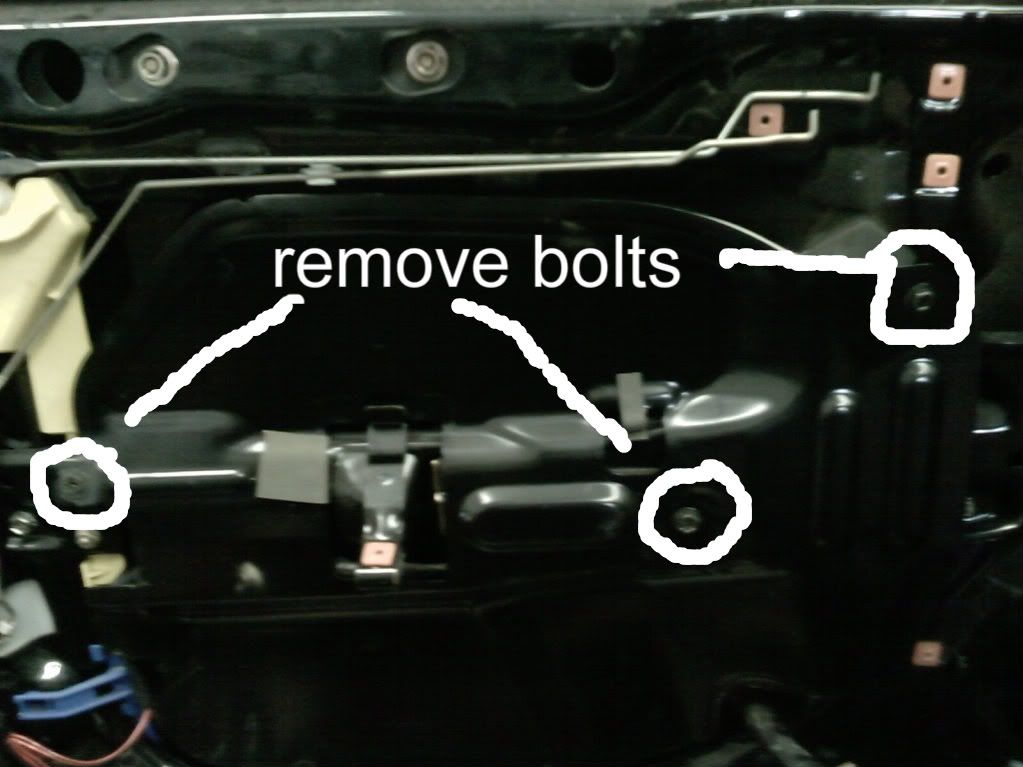
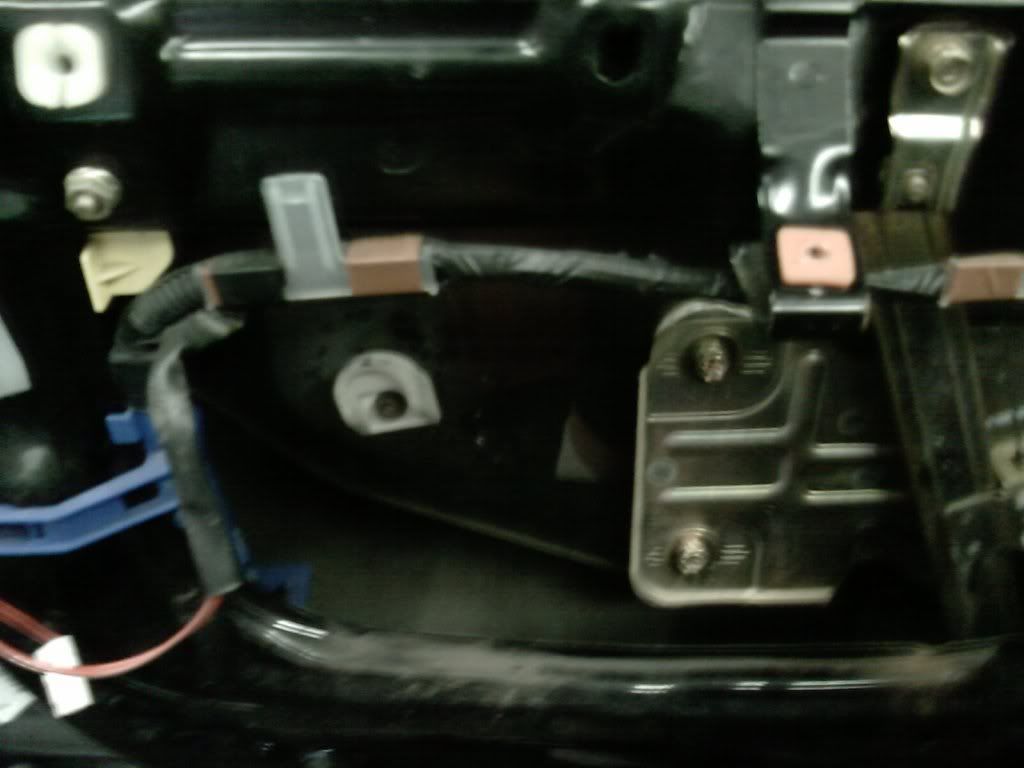
Now the black metal cover in the center of the door needs to be removed to provide full access to the window module. Remove the three bolts. Lift and remove the black cover:
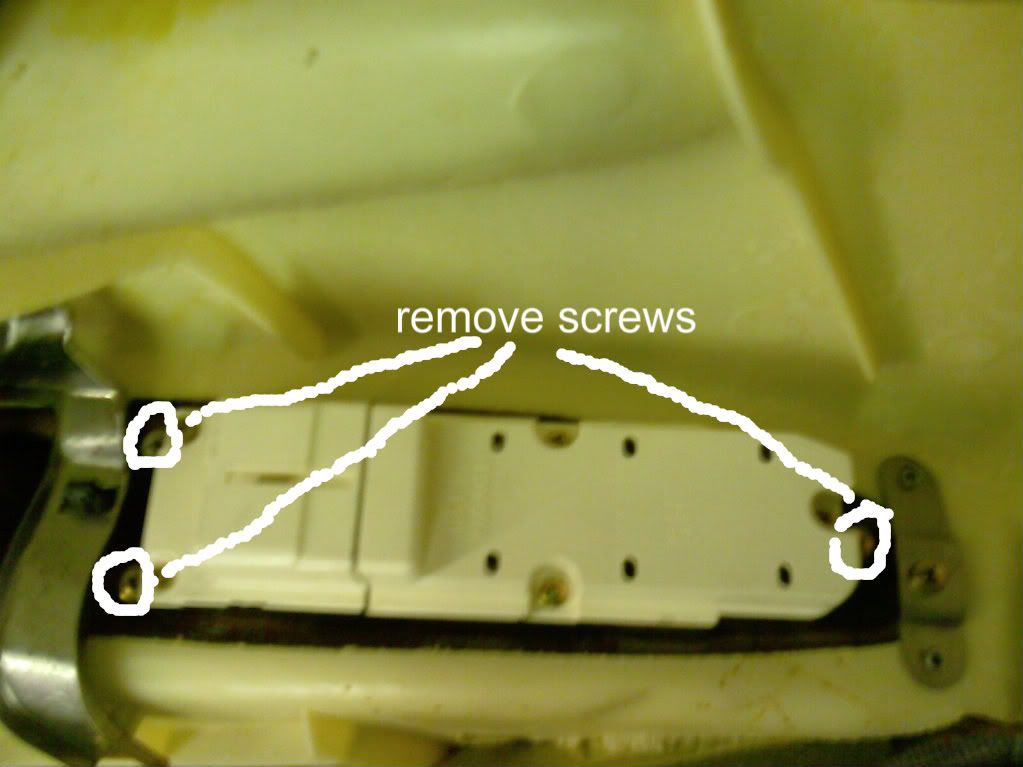
I removed my window switch from the door so that I could roll the window up and down while testing for fit. This is recommended to get the best fit. To do this remove the three screws that are holding the switch in place:
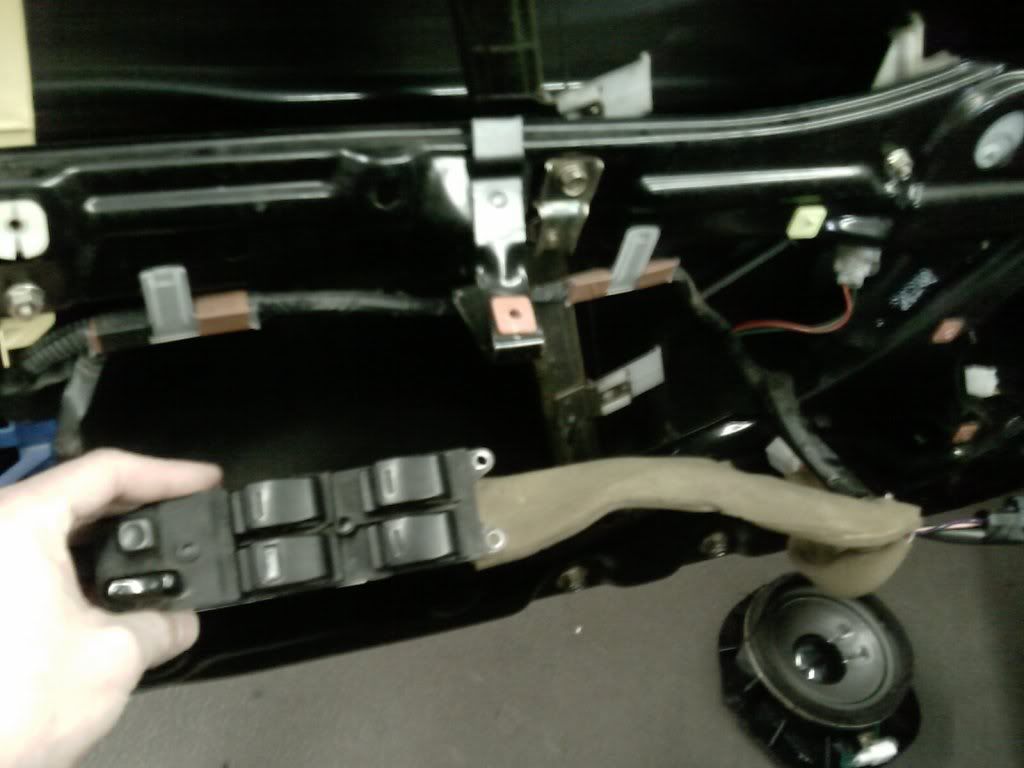
Reconnect the switch wires:
Once these steps are complete, turn the key to the 'on' position and roll the window all of the way up. Loosen the three bolts that hold the window in it's current adjustment:
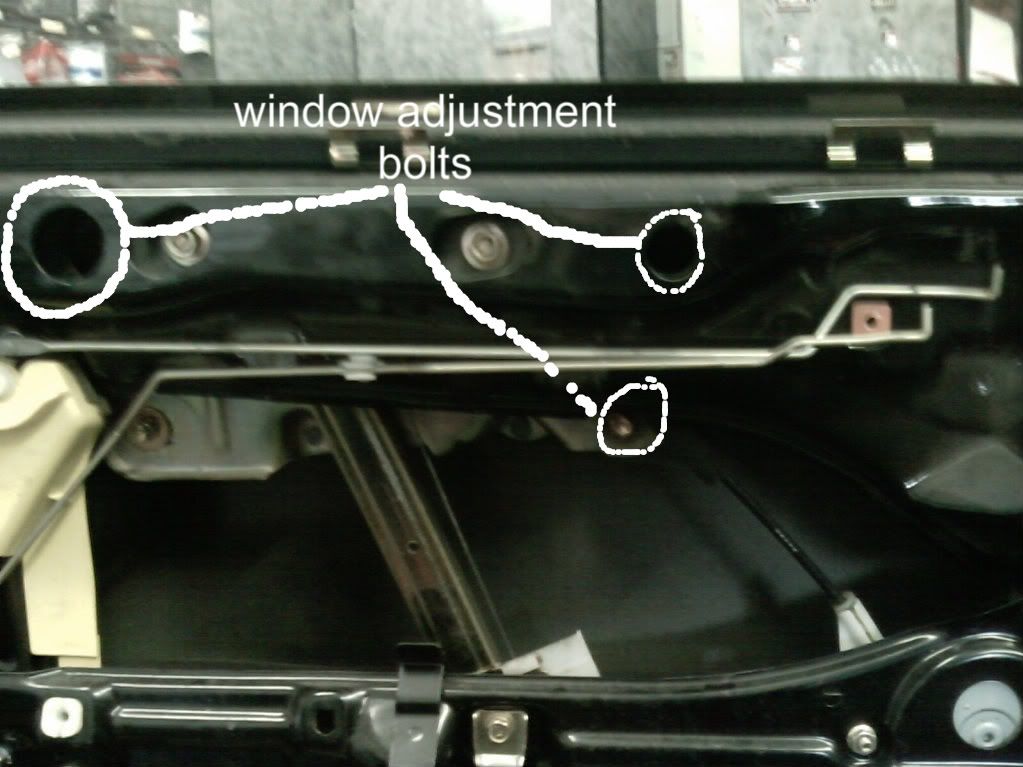
This and the forward stop can also be adjusted, but the window adjustment gave me the results I was looking for:
I wouldn't recommend messing with the stops (the white thing close to the center of the pic)
After loosening, roll the window down about 1/2-1 inch. It only needs to come down a touch. Align the window to where you believe it would fit correctly. Try rolling the window up again and see where it hits and what moves, etc. For my window to fit properly, I had to raise the rear/left side up and slide it toward the back of the vehicle about 1/4 in.
It may take a few tries of tightening and re-tightening. Mine eventually ended up being perfect and I couldn't be happier!
To get everything back together just follow the steps in reverse order.
I hope this helps everyone and if there are any questions on this, they can be addressed in this topic and I will try to answer all.
If anyone has anything to add, please feel free! GL!!
GL!!
I removed my window switch from the door so that I could roll the window up and down while testing for fit. This is recommended to get the best fit. To do this remove the three screws that are holding the switch in place:
Reconnect the switch wires:
Once these steps are complete, turn the key to the 'on' position and roll the window all of the way up. Loosen the three bolts that hold the window in it's current adjustment:
This and the forward stop can also be adjusted, but the window adjustment gave me the results I was looking for:
I wouldn't recommend messing with the stops (the white thing close to the center of the pic)
After loosening, roll the window down about 1/2-1 inch. It only needs to come down a touch. Align the window to where you believe it would fit correctly. Try rolling the window up again and see where it hits and what moves, etc. For my window to fit properly, I had to raise the rear/left side up and slide it toward the back of the vehicle about 1/4 in.
It may take a few tries of tightening and re-tightening. Mine eventually ended up being perfect and I couldn't be happier!
To get everything back together just follow the steps in reverse order.
I hope this helps everyone and if there are any questions on this, they can be addressed in this topic and I will try to answer all.
If anyone has anything to add, please feel free!
GL!!

 12-05-08, 10:54 PM
#7
Yep, thats the same directions as the factory service manual 
While ur in there, might as well add in some sound deadening and insulation, since theres really nothing blocking the noise/vibration, especially behind the speakers.
I tried to adjust the window, but didn't have any luck..it just wouldn't budge. I'll probably try next summer or something...
While ur in there, might as well add in some sound deadening and insulation, since theres really nothing blocking the noise/vibration, especially behind the speakers.
I tried to adjust the window, but didn't have any luck..it just wouldn't budge. I'll probably try next summer or something...
Trending Topics
12-06-08, 07:14 AM
#8
Pole Position
Thread Starter
Yep, thats the same directions as the factory service manual
While ur in there, might as well add in some sound deadening and insulation, since theres really nothing blocking the noise/vibration, especially behind the speakers.
I tried to adjust the window, but didn't have any luck..it just wouldn't budge. I'll probably try next summer or something...
While ur in there, might as well add in some sound deadening and insulation, since theres really nothing blocking the noise/vibration, especially behind the speakers.
I tried to adjust the window, but didn't have any luck..it just wouldn't budge. I'll probably try next summer or something...
I decided not to mess with insulation this time. The window was bugging me so much that I took off the door panel just for the window.
I couldn't get the window to budge at all in the up position. What worked for me was rolling it down a tad and adjusting it then rolling it back up. Took a few tries, but I ended up with the results that I wanted.
Hope that helps!

Thread
Thread Starter
Forum
Replies
Last Post
PetesLS400
ES - 1st to 4th Gen (1990-2006)
5
10-11-11 07:23 PM

