When you click on links to various merchants on this site and make a purchase, this can result in this site earning a commission. Affiliate programs and affiliations include, but are not limited to, the eBay Partner Network.
Whew, I just finished with the spark plug change. The fronts were dead simple, of course, and the rear plugs were only tedious because of the rear brackets. Otherwise, it's a time-consuming, yet simple, process. I did get extremely dirty, though. (Note: throughout the tutorial I have some photos that are used as references which are not in the same level of disassembly, so do not be alarmed that some hoses are connected in the photos)
The first thing is that you want to start this project with a cool engine. You'll burn yourself and you don't want to pull hot plugs out of a hot block and try to put ambient temperature plugs into said hot engine. No bueno.
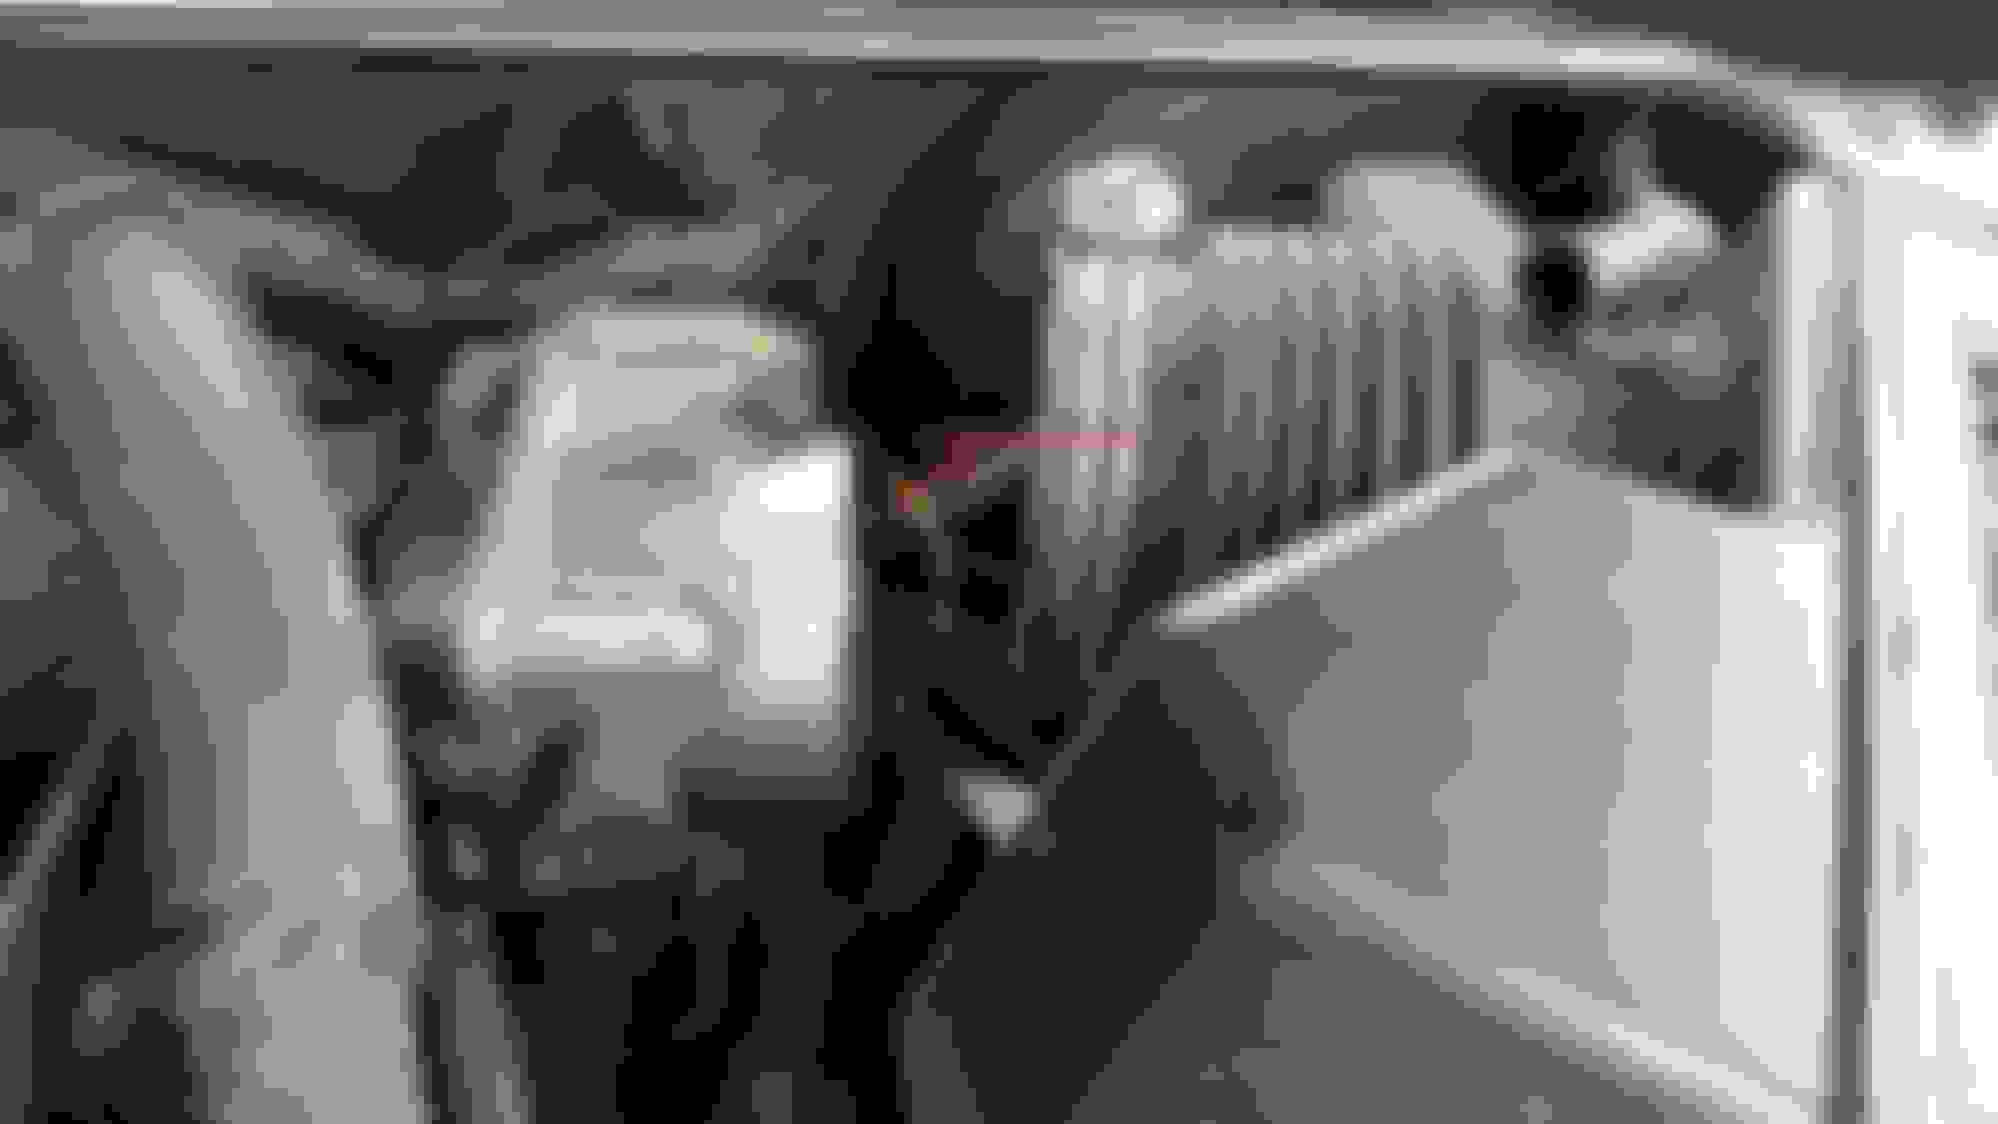
First step is to open the hood and remove the driver side plastic cover and the engine cover. To remove the driver's side cover, simply push the pins in the middle of the retaining fasteners and pull them out. Set them somewhere where you will not step on them. Pull off the cover and set it to the side. The engine cover is even more simple, you just gently pull it up and set it aside. With that done, you're presented with the mechanical beauty of the 2GR-FE engine:
The front spark plugs are dead simple to change. Simply remove the 10mm bolts that secure the coils to the covers and use a small screwdriver to disconnect the wire to each coil. Pull the coil and use a 5/8" spark plug socket and a 12-18" extension to remove each spark plug. Then place the new spark plug(check the gap, first) in the socket and slowly lower it into the hole and tighten it(13 ft-lb of torque). Place the coil back on, tighten the bolt(7 ft-lbs), move to the next one. (Note: I only remove one bolt and one coil at a time. This ensures that I do not have three deep holes for anything to fall into, because fishing something out would be very difficult. It is even more of a no-no, if you decide to remove all three coils simultaneously, to remove all three spark plugs at the same time, because you are SOL if something falls into the cylinder bore itself.)
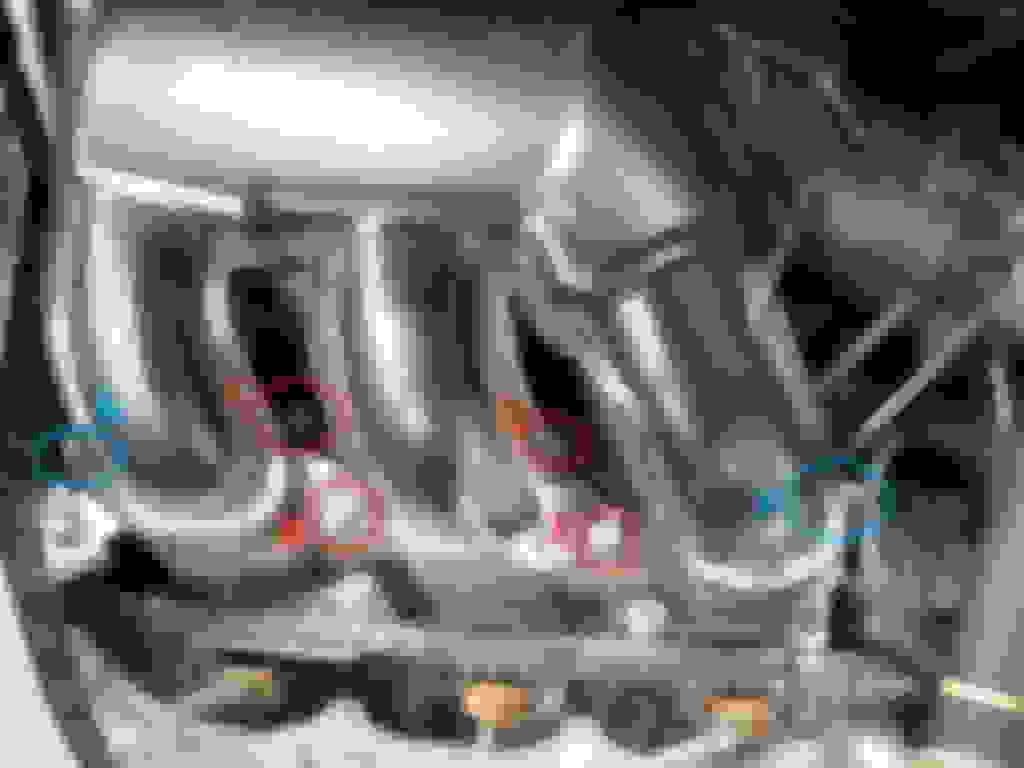
Next up is the rear plugs. This is where things get really fun. If you're tired from the front plug change, take a break because this one is going to really kill you. Break out the whiskey, too(Don't drink and drive after this, though). Start off by disconnecting all the vacuum lines, connectors, and bolts indicated with arrows. There is also the brake booster vacuum line behind the intake, I just couldn't get a good shot of it. Also, disconnect the three air filter latches and pull the air filter cover off. This will ensure that removing the throttle body bolts is easier. (Note: the reason we must remove the TB[throttle body] is because there is a coolant line that connects to it. That would make a mess and possibly add air to the system. It's much easier to remove four bolts.)
Remove the faster that secures the air filter hose and slide it off, which exposes the four bolts. Remove them:
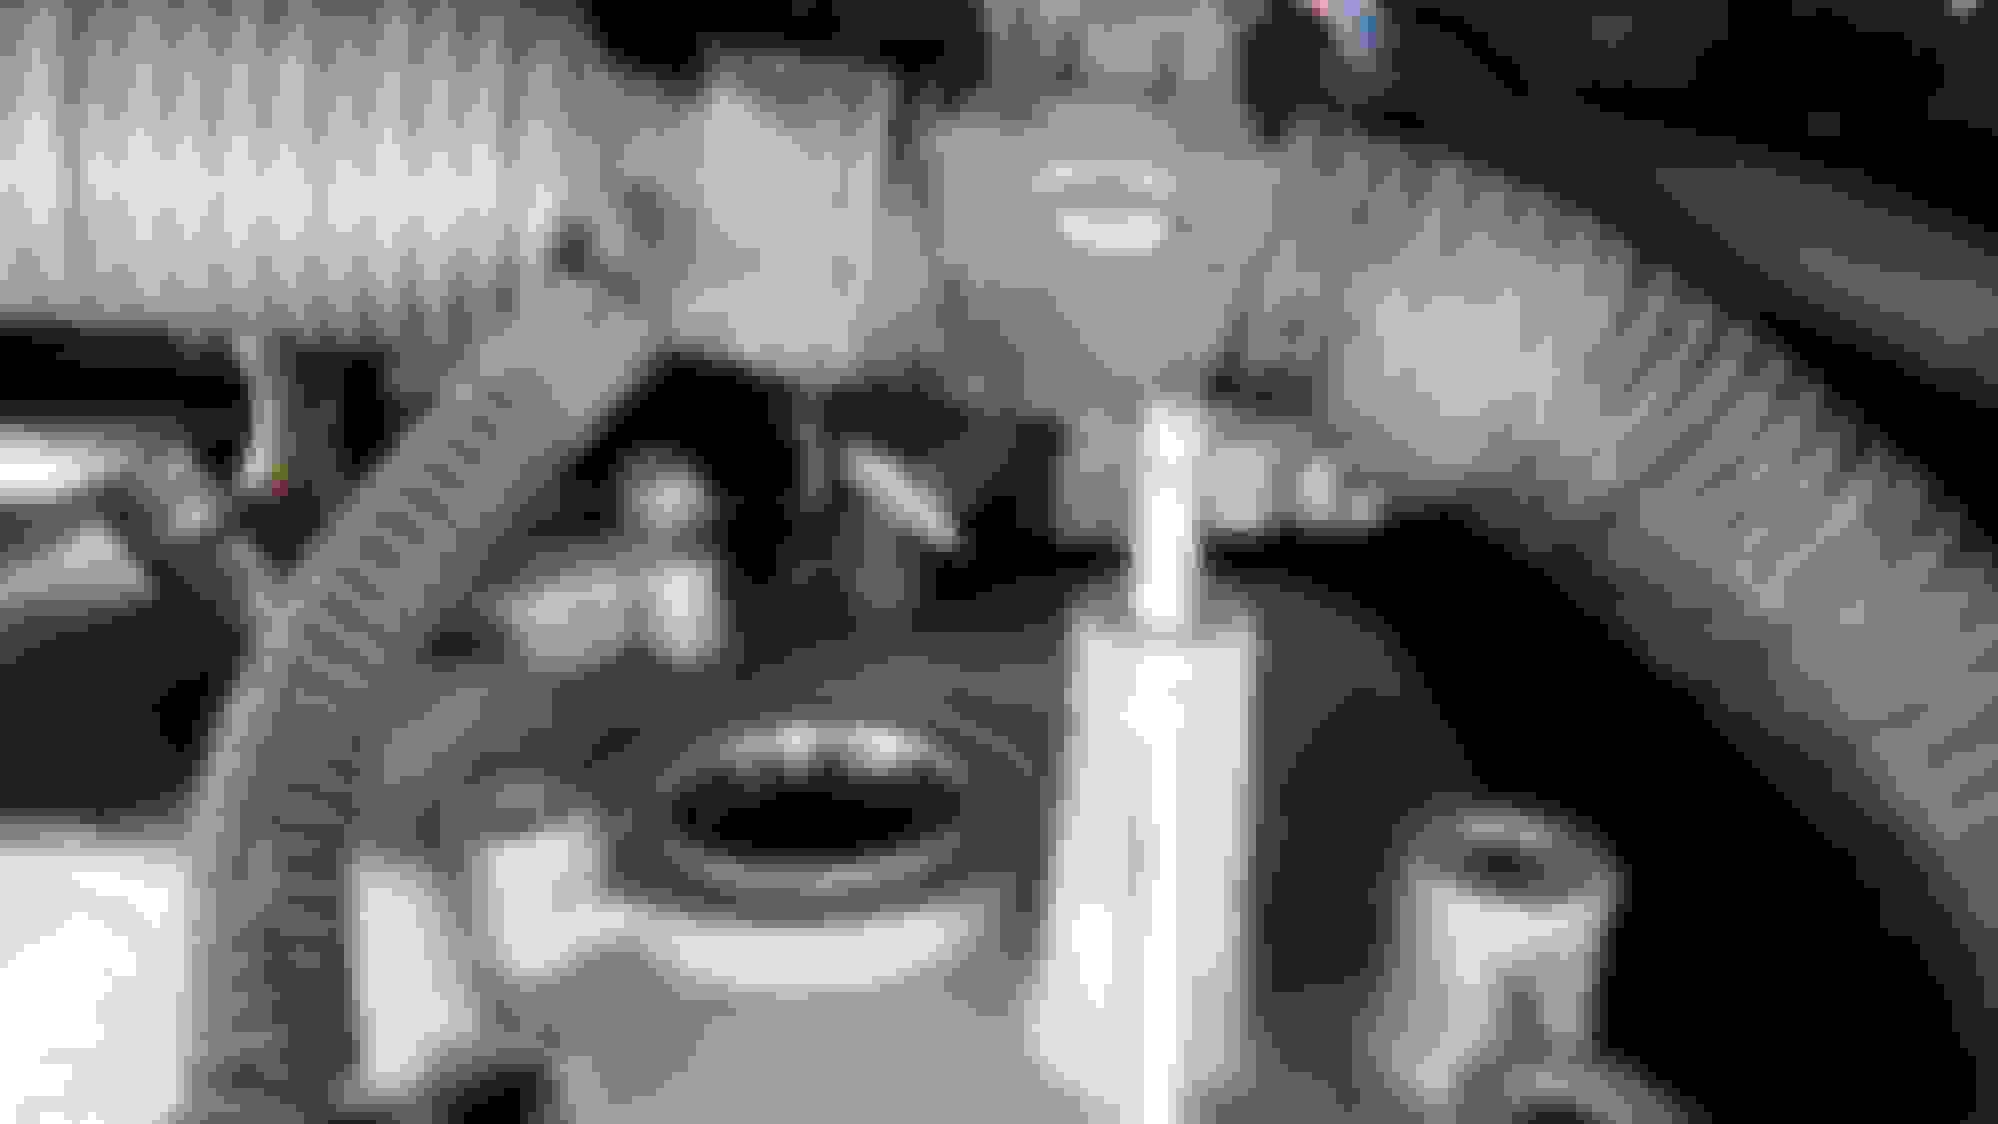
Now that they're out, set them aside and let the throttle body hang. Make sure to clean out the throttle body if there is any dirt on the inside:
After this, remove the cross-brace. It's secured on each side with two 14mm nuts. Removing this makes accessing the rear manifold brackets so much easier.
Now it's time to take off the intake manifold. There are four 5mm allen head in the center, two 10mm nuts on the ends, and behind the manifold are two brackets that are 12mm bolts.(These rear brackets secure to the block and to the manifold itself. I recommend removing the bolts that hold the manifold to the block, as I removed the ones on the manifold itself and ended up having the remove the bracket off the block, anyway.) Remove the four allen bolts and two nuts in this order after removing the rear brackets: F -> A -> E -> D -> C -> B(picture from Toyota Nation)
Here's what the rear brackets look like:
Pull off the manifold and you will see the intake holes. You may also notice that there is quite a bit of dirt. DO NOT become OCD and start wiping. You need to make sure that you seal the holes first, then you can wipe that up. I used painter's tape because it doesn't leave any residue. You can also stuff a shop rag in the hole, but that can possibly fall in.
Taped up:
Remove the seals and use mineral spirits with a shop rag to wipe out the seal crevice, then install the new seals. Part number is: 171760P021
Now that the manifold is off, it's time to remove the rear plugs. It's the same concept as the front plugs, just more tedious due to the tight space and the firewall. Removing center brace makes this easier. You can see the coils under the wire harness:
Using the screwdriver, disconnect the plugs from the coils. Then loosen the 10mm bolts that secure the coils. I also loosened the wire harness by unhooking the middle one and removing the 10mm nut that secures the right one(closest to the driver's side):
The first two(the two closest to the passenger side) were simple, they just required finesse. Use the same technique of removing one coil at a time. The third one was a pain due to the fact that the wire harness goes straight over the coil. In order to be able to remove the wire harness enough to pull the coil, I had two choices: there is a sensor behind the wire harness and the one that plugs into the injector. The back one was too difficult to access, so I pulled the plug for the injector:
With the injector unplugged, it was simple to move the harness out of the way and remove the coil and plug. Remember, 13 ft-lb of torque to tighten.:
With that done, you've officially changed all of your spark plugs. YES! (Note: the spark plugs are the same length. The new plug is slightly closer to the camera, giving the illusion that it is longer.)
Here's a comparison of the new versus the old spark plugs. These are the original plugs with 119,xxx miles on:
Reassembly is simply the opposite. Make sure that all your coil bolts are secure(tighten to 7 ft-lbs) and do not forget to plug in all of the coils and the injector plug.
When tightening the bolts of the manifold, tighten in this order: B -> C -> D -> E -> A -> F. The allen head bolts should be torqued to 13 ft-lb and the 10mm nuts should be 12 ft-lb(picture stolen from Toyota Nation for reference):
After you've tightened those, then tighten the rear brackets. It is IMPERATIVE that you completely tighten these four bolts and two nuts to spec prior to tightening the rear brackets. This is because you need the manifold to be sitting flush on the block. If you tighten the rear brackets first, it could slightly angle or restrict the manifold and not allow it to sit flush. This is bad and could cause an air leak. When you tighten the rear brackets, they are 15 ft-lbs.
Also, as an FYI, the repair manual calls for the throttle body and the intake gaskets to be replaced and are non-reuseable.
When you re-install the throttle body, the torque spec is 7 ft-lbs. Make sure to replace the gasket and clean the mating surface and the gasket crevice.
Thanks for the great write up. You obviously put a great deal of effort in the photos and inserted captions. I/m not sure when I'll be undertaking this project, but I really appreciate knowing This thread will be available for reference. Thanks Again... With your post I have the confidence needed to tackle this. Just curious, how many miles were on the old plug in the photo. My 2010 has about 75K currently.
Thanks Nick, for posting these pictures/DIY.
A while back I had replace one bad rear coil due an error P0351, The garage friend of mine suggested to replace all new (6) plugs, 3 rear coils and new gaskets as it is labor intensive job to remove the rear part. Looking at your pictures I am glad I did what he suggested. So, now I have 2 spare coils just incase one of the front goes bad and like you mention they are easy to replace.
Super job Nick! Did you happen to check to see if there was an increase in the gap? If so how much?
I haven't measured them, but I kept a couple to measure. I'll post about it whenever I get around to it.
Originally Posted by rx300mm
Thanks Nick, for posting these pictures/DIY.
A while back I had replace one bad rear coil due an error P0351, The garage friend of mine suggested to replace all new (6) plugs, 3 rear coils and new gaskets as it is labor intensive job to remove the rear part. Looking at your pictures I am glad I did what he suggested. So, now I have 2 spare coils just incase one of the front goes bad and like you mention they are easy to replace.
If you're not mechanically-inclined, this can be a daunting task. There is plenty of stuff that you can majorly damage by doing this, including cross-threading spark plugs, dropping things into the cylinder bores, dropping parts and having to pull the manifold off to retrieve them(it's not easy to place the 12mm bolt of the rear manifold bracket.
Awesome tutorial for DIY lovers. I'm curious if you know what an independent mechanic would typically charge for this? This isn't something that requires a Lexus or Toyota dealer is it?
Awesome tutorial for DIY lovers. I'm curious if you know what an independent mechanic would typically charge for this? This isn't something that requires a Lexus or Toyota dealer is it?
Firestone had a spark plug change quote of $324. The spark plugs can be had on eBay for $50 or you can get them at Advance Auto with their 35% off coupon for about $51 after tax. The gaskets are $7.50 each for the throttle body and intake gaskets. They're $9.xx at the dealership, so make sure to order them online to save $8 and a drive. So parts are about $80.
I have updated the post with torque specs for the intake manifold and the throttle body.
Just has the plugs changed at my local Toyota dealership. Total cost came to $237 plus HST. I provided the Iridium plugs.
Do these cars require that type of plug?
on a side note I was able to change the plugs without taking off the intake. you just need a couple of extensions and a swivel adapter... I think it too me about 30-45 minutes to change them out.
It is a bit of work though.
Yec Flamma - they do have a plant in China but they strive to make "made in Japan" quality parts. The Yec Flamma IGC112F coils I bought where made in Japan. I would recommend them over any Chinese made coil. I had previously installed AA Ignition coils and they went bad within a year and the manufacturer did not honor their one-year warranty. The Yecs are going on two years without any issues. (Only bought two) http://flamma.jp/about/
I just did mine, those rear plugs were a pain, almost as bad as changing the CCV valve on my old BMW. I forgot to reattach the center bracket for the wiring harness, so it's just hanging in the back of the engine The engine run's better now though, glad I got it done.
Here's some tips I thought of for anyone else attempting this job:
Spray the electrical connectors with silicone spray before disconnecting and reconnecting. Also spray the intake boot when removing and reinstalling. Of course disconnect your battery.
Spray the hex bolts on the intake with penetrating oil before you start the job. Tap on them lightly with a hammer and dowel to loosen them up a little. These things can strip really easily. If you do strip one, don't panic, there are ways of getting them off:
 05-28-15, 02:39 PM


 I forgot to reattach the center bracket for the wiring harness, so it's just hanging in the back of the engine
  The engine run's better now though, glad I got it done.